Week02

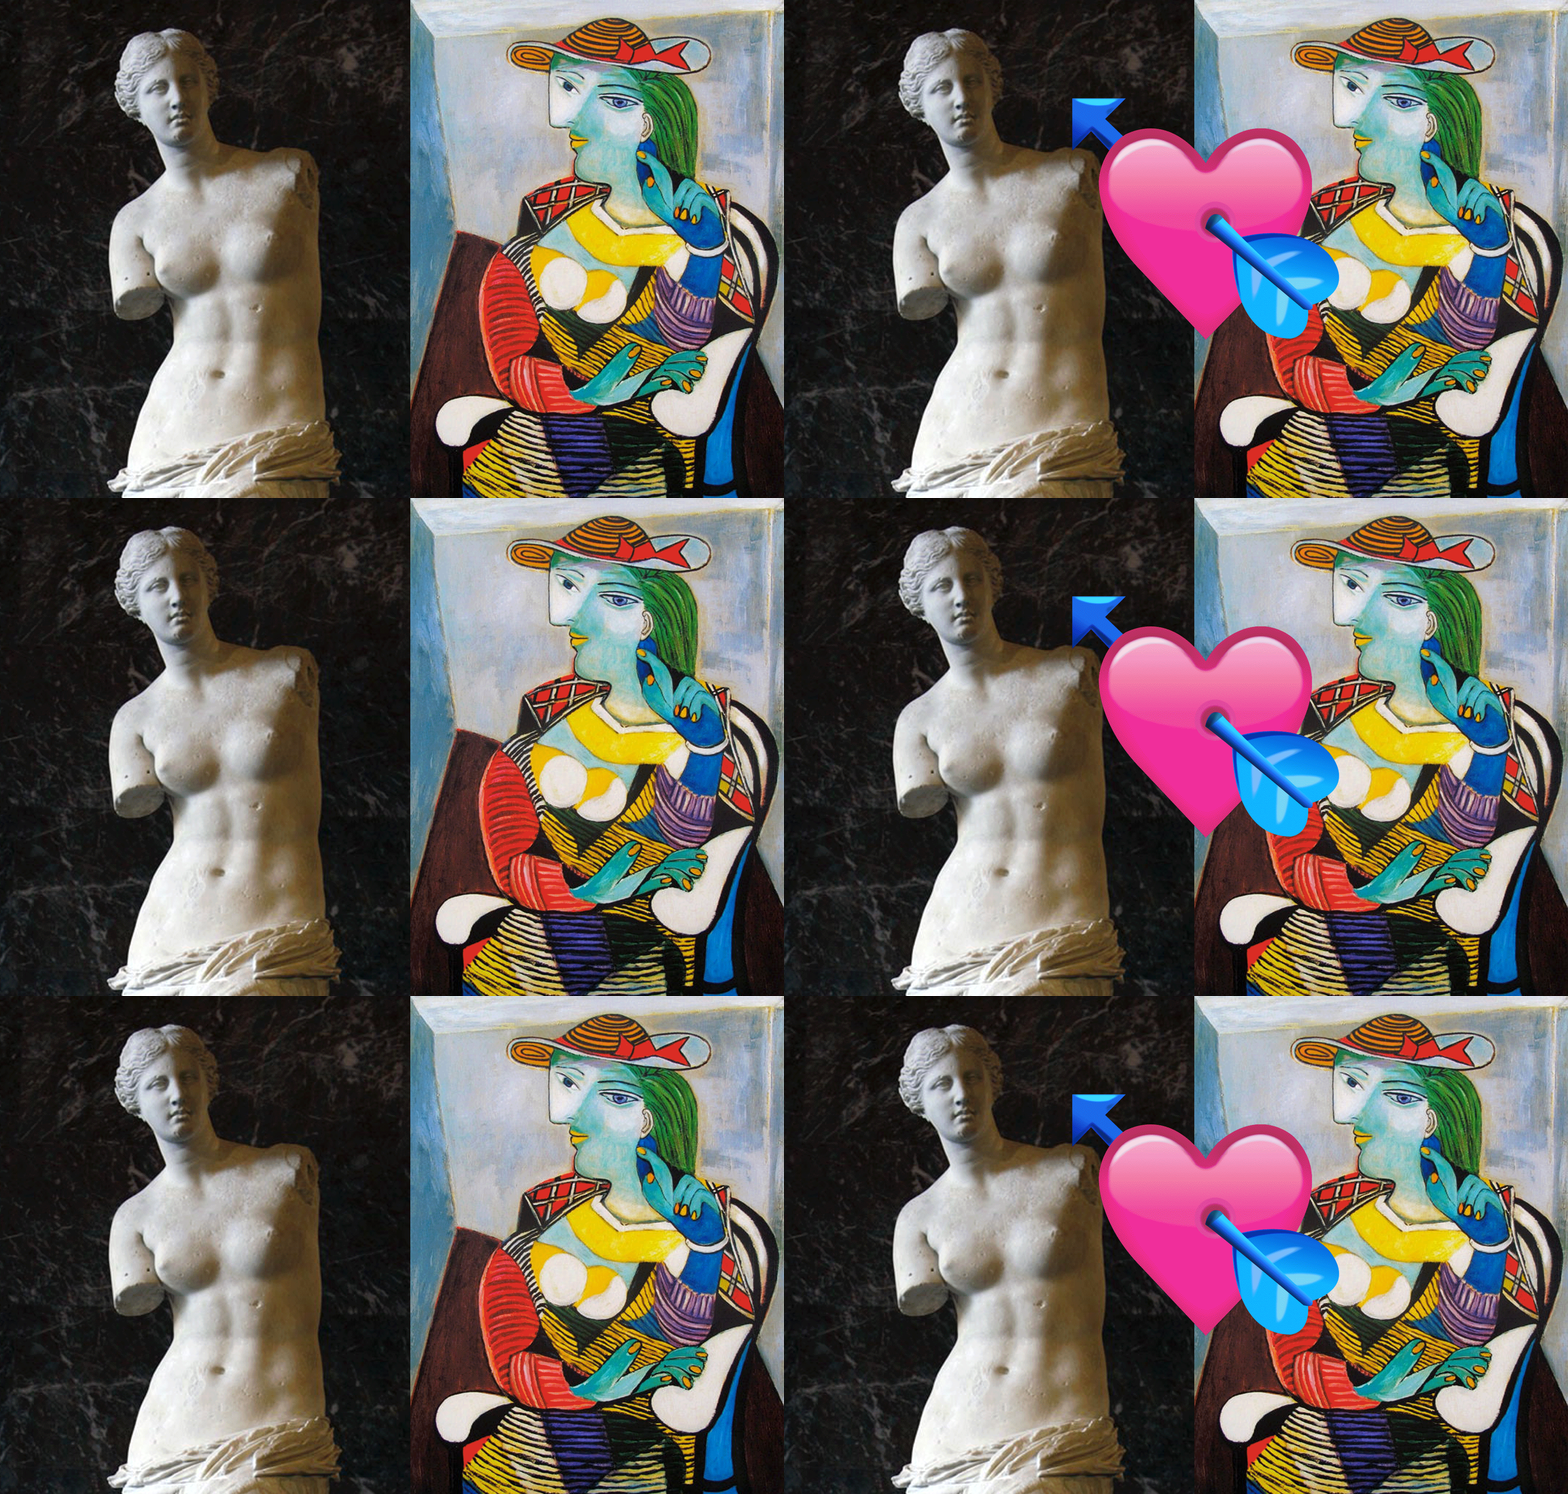
Related to this week's theme 'Digital Bodies' I, having a background in Art History, had to think of classical bodies right away. I remembered some sculptures I've always been fascinated by because of their beauty, dynamics and their background stories and how they managed to become these popular icons of our collective art history (or: memory), even after all of these centuries of making art. Bringing them together into one image, I realised quickly that I was mostly drawn to Greek mythical and hellenistic sculptures, which are indeed a manifestation of beauty, dynamics and mythical stories.

Source images left to right:
Venus de Milo - Laocoön and his Sons - Nike of Samothrace - Pluto and Proserpina
2.1.1 Venus de Milo
I knew very quickly that the Venus de Milo would become my canvas for this week's assignment. For the final body that I desired to make, I wanted need a figure/body that is so iconic, so embedded into our collective minds that even when it would be produced completely different, you are able to recognise its original.


Source images: medium.com
Since I did not have the time to visit the Louvre and make a 3D scan of the Venus, I had to find a pre-fab 3D model. Luckily, it was very easy to find on Sketchfab and free to use:
2.1.2 Picasso
Taking a trip down Art History lane and practicing in Slicer with all of these different kind of patterns and shapes really made me think of Picasso's surrealism influenced cubist portraits; a deconstructed image realised by the use of different viewpoints/angles in one image, nevertheless still recognisable as women and always accompanied by the famous Picasso feature and anchor: their nose.

Source images from left to right:
Marie-Therese - Portrait de Femme, 1938 - Buste de Femme, 1932 - Femme assise, 1939
I started to wonder: what if the Venus could marry a Picasso painting? What would that be like? Thanks to Sketchfab and with the use of Rhino and Slicer I could actually make this happen; the plot for my very own digital body was born.

2.2.1 Rhino
Since I was aiming to only use the Venus' torso and head, I had to remove her legs and the best way to that is in Rhino. Working with other people's 3D files certainly broadens your Rhino knowledge with rapid speed. Soon after I opened the file in Rhino, I discovered that cutting of her legs was not just a simple case of 'Mesh-to NURB' & 'Boolean Difference'. First of all, Rhino prompted that the mesh of the Venus consisted out of > 20000 Polygon's. After searching on the web, I found out I could reduce this number with the command 'ReduceMesh' and I had to reduce it quite a bit, eventually got it down to 3214 Polygons. After this, I was able to use the 'MeshToNURB'command and this made me find out that my Venus had two shells: a closed solid polysurface and a closed mesh. Just by trying and searching on the web I found out that I could cut of the legs of the closed solid polysurface by using the 'MeshBooleanDifference' command.

After this, I only had to delete all of the pieces I did not want to use and export the torso as an obj file so I would be able to import the file in Slicer

2.2.2 Slicer

Import file in Slicer, credit: Patty Jansen 2021
After importing the file in Slicer and checking and adjusting original size and measurements of the material, I started to play around with the construction techniques and slice distributions. Here are some of the stages my Venus went through:


Designs in Slicer, credit: Patty Jansen 2021
After playing around for a while, I found the settings that gave me a 'Picasso' kind of feeling, here is the final design as seen from different angles:

Final design, credit: Patty Jansen 2021
Slicer has a very handy function where you can watch the assembling of your design as a motion video or just step by step.
Assemble video:
Assemble video in Slicer, credit: Patty Jansen 2021
2.2.3 Illustrator
After this, I exported the files as .esp and imported them into Illustrator to refine the pattern sheets and bring them from 5 sheets back to 3 sheets, which was just a matter of puzzling, reducing the numbers of the patterns and removing the small numbers next to the notches in order to spare the laser cutter some time
Short manual:
1. Import export from Slicer
2. Adjust patterns to fit and delete certain numbers (if needed)
3. Export .dxf file, choose AutoCAD Version R14/LT98/LT97
4. Alternative: save as .ai, Illustrator CS 2, 'Create PDF compatible file' & 'Use Compression' unchecked
5. Save the file on a usb stick and proceed to the lasercutter

Slicer patterns in Illustrator, credit: Patty Jansen 2021
2.3.1 Lasercutting
During the week we were introduced to the lasercutter which we will use to cut out our digital bodies. The material we are going to use is cardboard, which can be easily cut with the lasercutter.
Short manual lasercutter:
1. Open the software on the computer
2. Import your file (file > import)
3. It's important to check whether your file is imported at the right size. When sizes are off, double-check if your unit measurements in Illustrator/Rhino are set up as millimeters. It's also possible to adjust the size in the software itself
4. Check if your design fits within the software grid
5. On the right, you can see a window with layers which the computer has assigned to your document. Here, you can adjust the settings of power and speed, assign different settings to different layers which each have their own color. It's also possible to lasercut only parts by disabling layers
6. When satisfied, press 'download', press 'delete all', press 'download current', your file is send to the lasercutter
7. Place your desired material on the lasercutter bed. If needed, use tape or weights to keep your material tight to the bed
8. On the top left of your design in the software, there is a blue dot indicated. This is called the 'anchor' and indicated where the lasercutter will start. By clicking 'test' the lasercutter will show the outline of the lasercut job, making it easy to check whether the material is placed correctly and adjust the material if needed or adjust the position of the laser head
9. Press 'escape' on the laser panel, press 'anchor and press 'enter', the starting point of the lasercut job is now set
10. Calibrate the distance between the laser head and the laser bed. Calibrating is done best with the wooden calibration tool to be found on top of the laser cutter. Place it between the laser head and bed (on top of your material), it should fit tightly. You can either move the bed with the laser control panel or adjust the laser head by hand. After this, everything is set
11. Turn on the ventilator with the green button below the computer, wait for it to light up
12. Turn on the lasercutter with the black switch on the laser control panel
13. Press 'start'
The settings I used for lasercutting cardboard:
Cut: speed 100, power 50
Engraving: speed 400, power 20

Instructions at the lab: setting up and testing, credit images: Patty Jansen, 2021

Lasercutter in action, credit images: Patty Jansen, 2021

Assembling the design, credit images: Patty Jansen, 2021
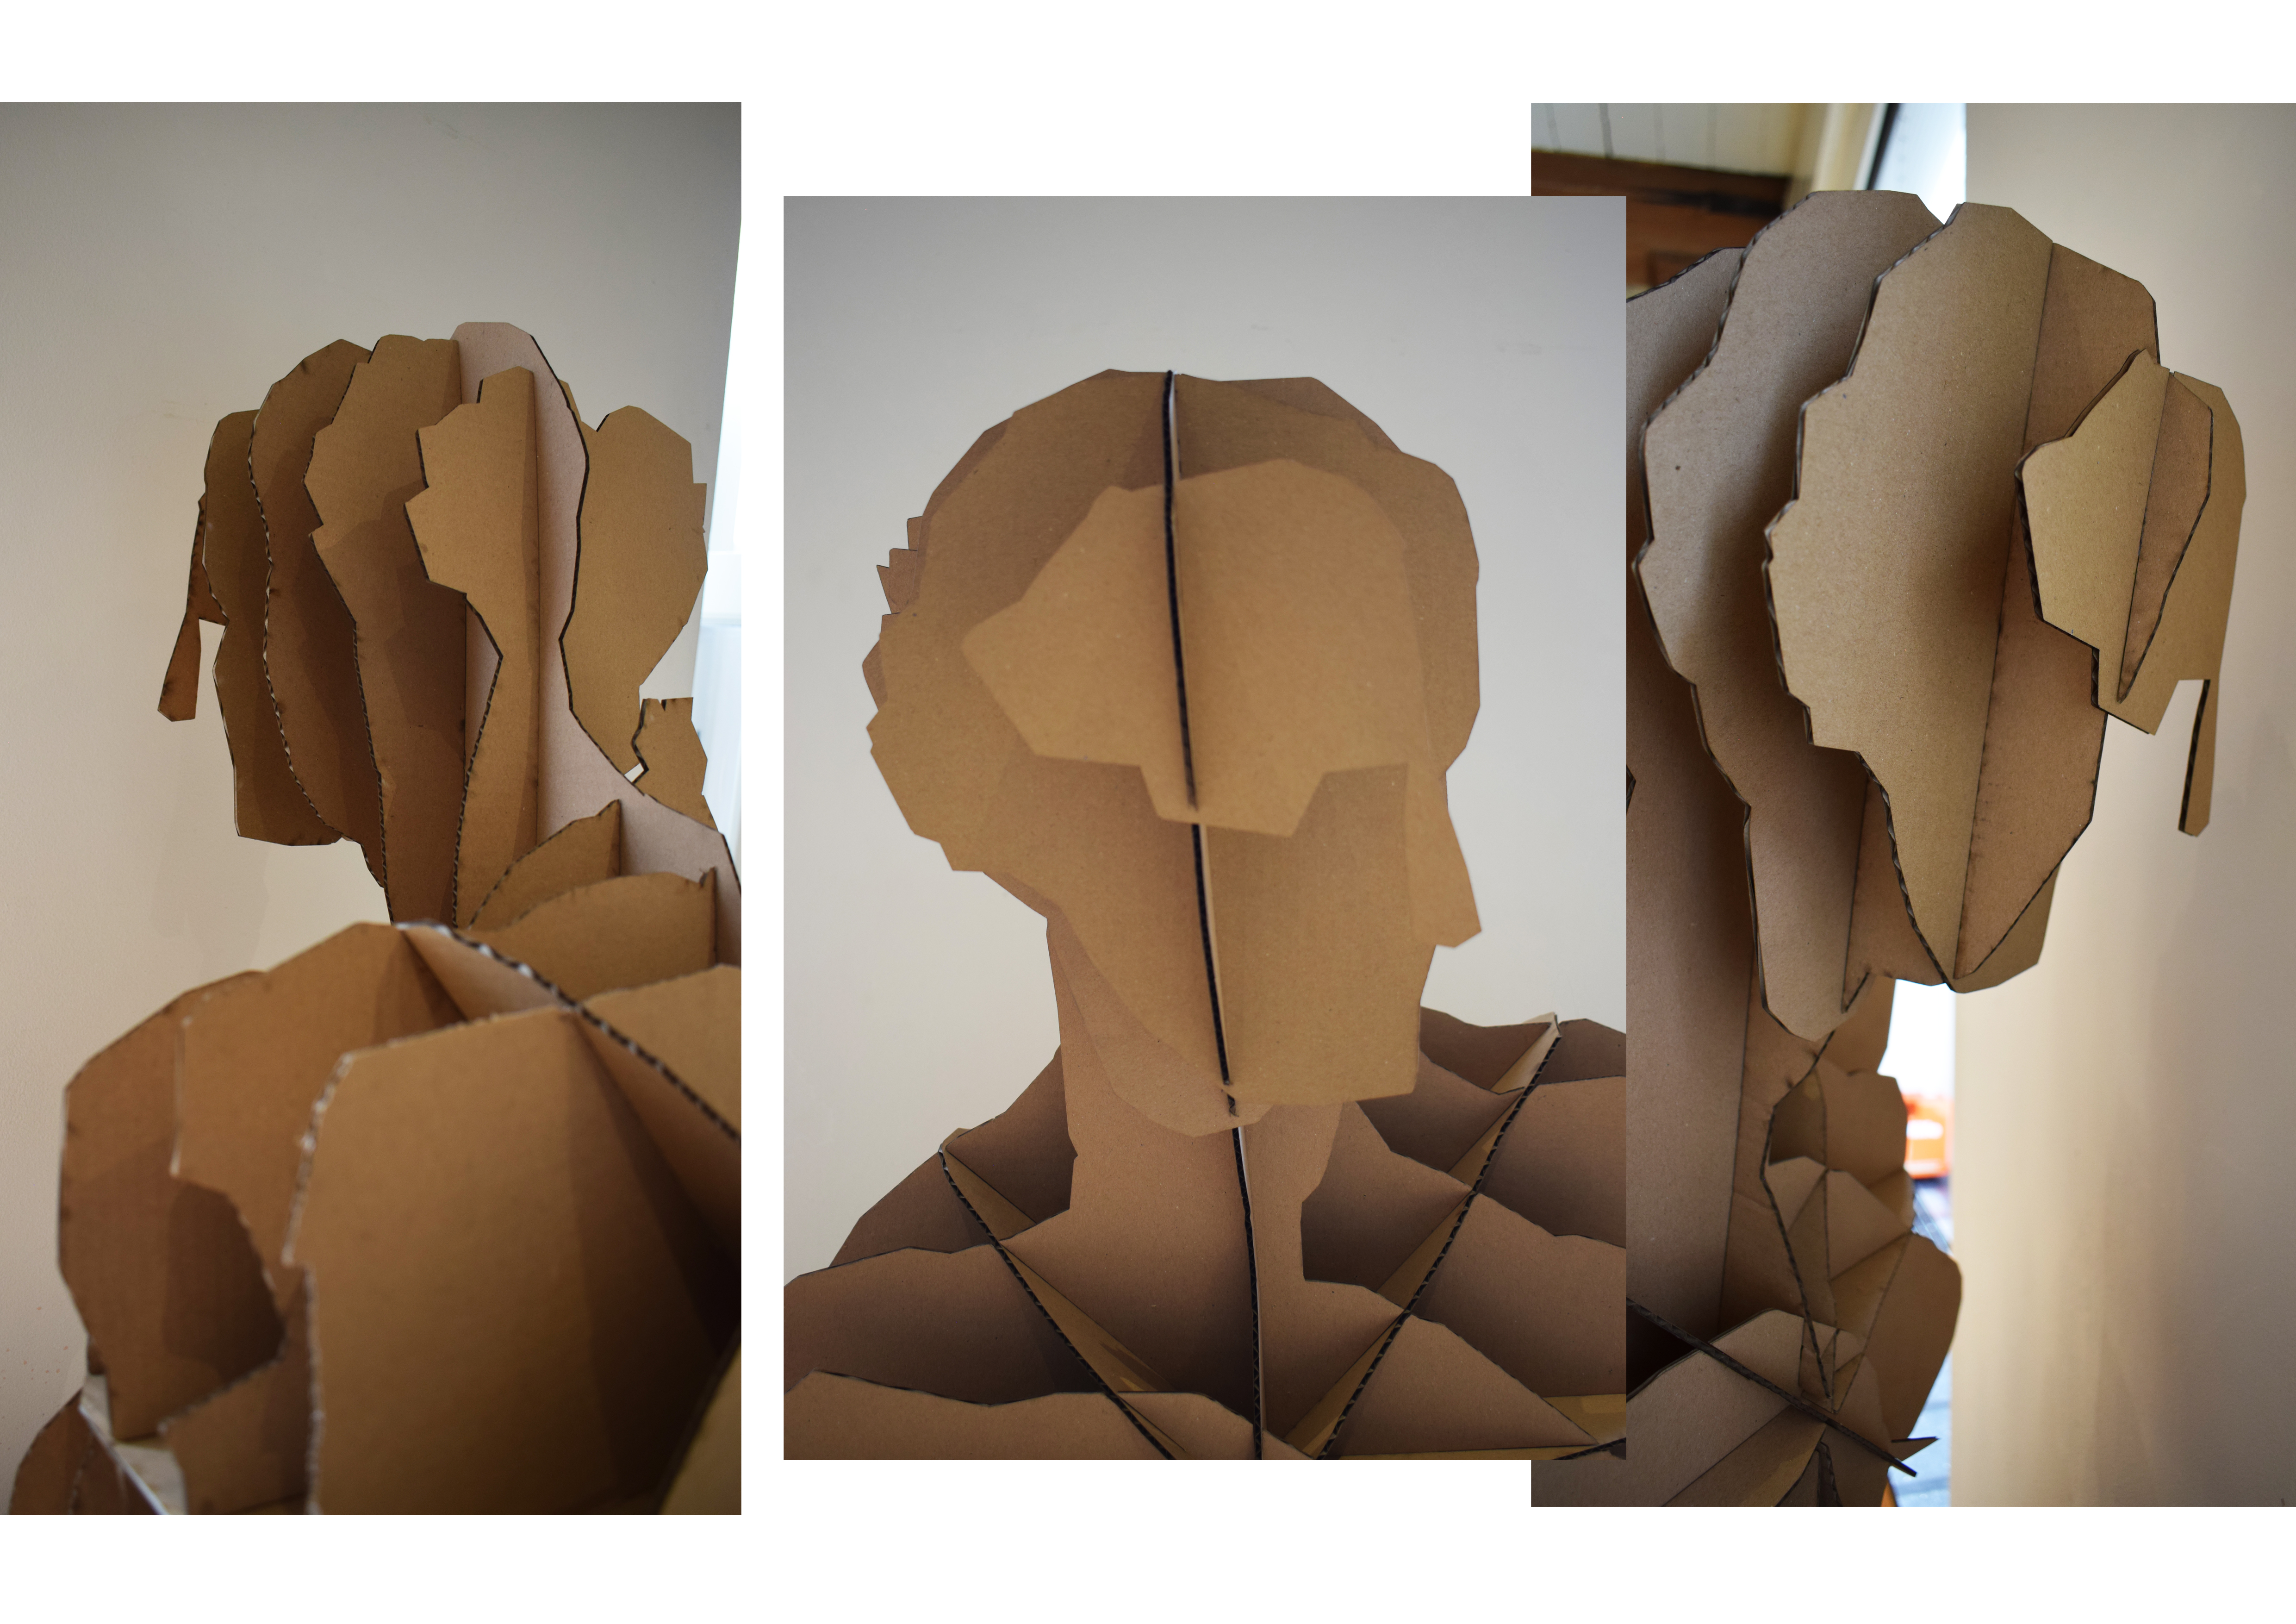
The final result:


Lasercut Venus, final result, credit: Patty Jansen 2021