5| Final Large Format
After making several samples I decided to explore one specific in a larger format
Process
0. Material
- 100% coton eco-responsable - blue (note to self)
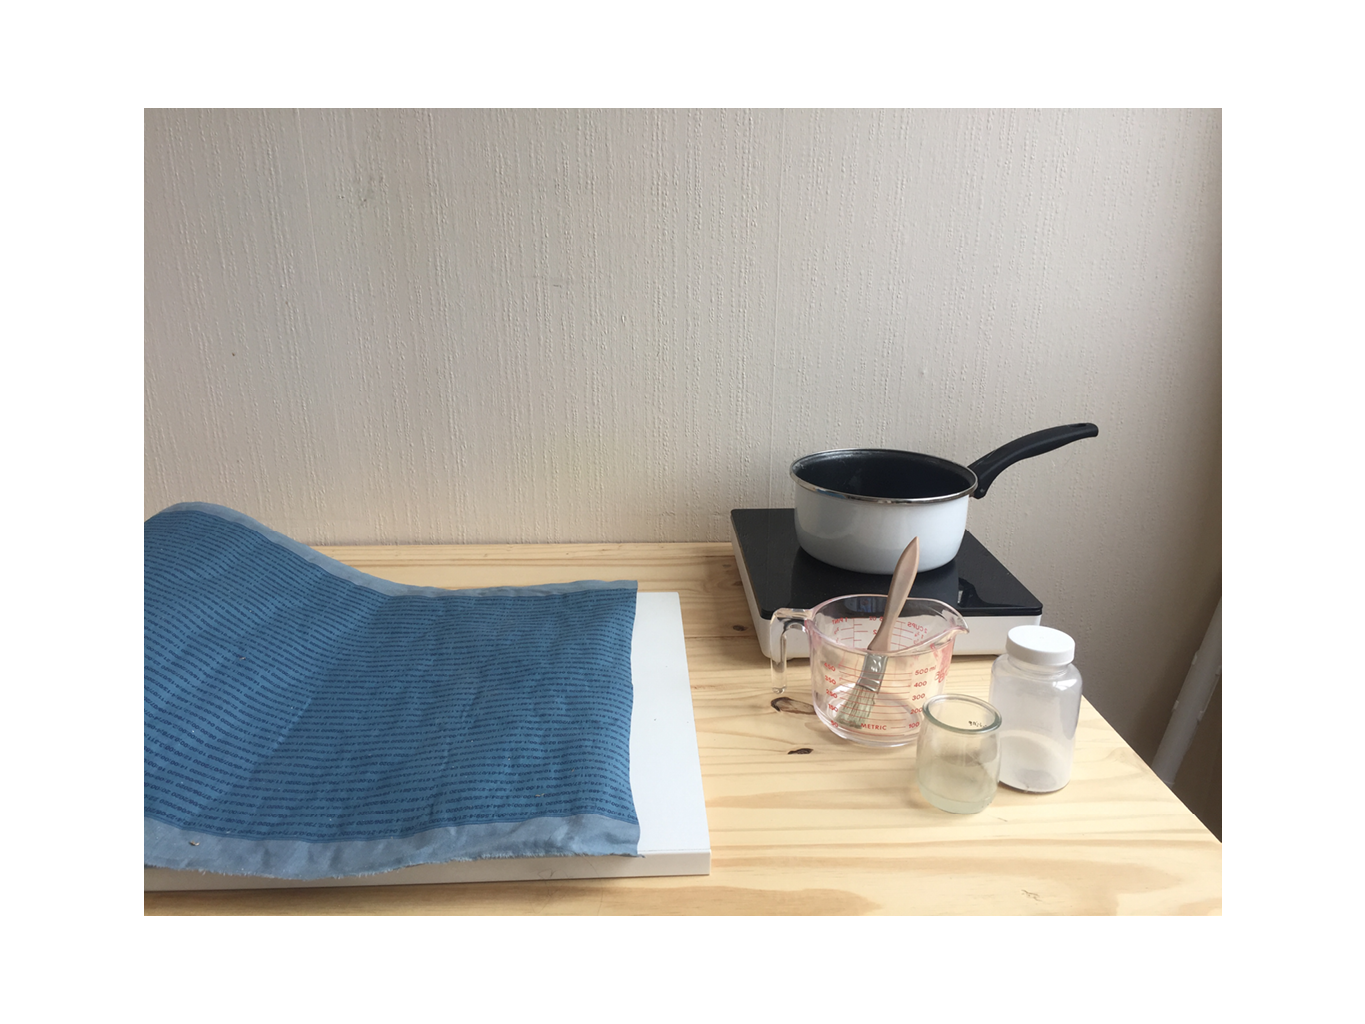
- Biomaterial: Methylcellulose + Glycerin
- Metal-leafs
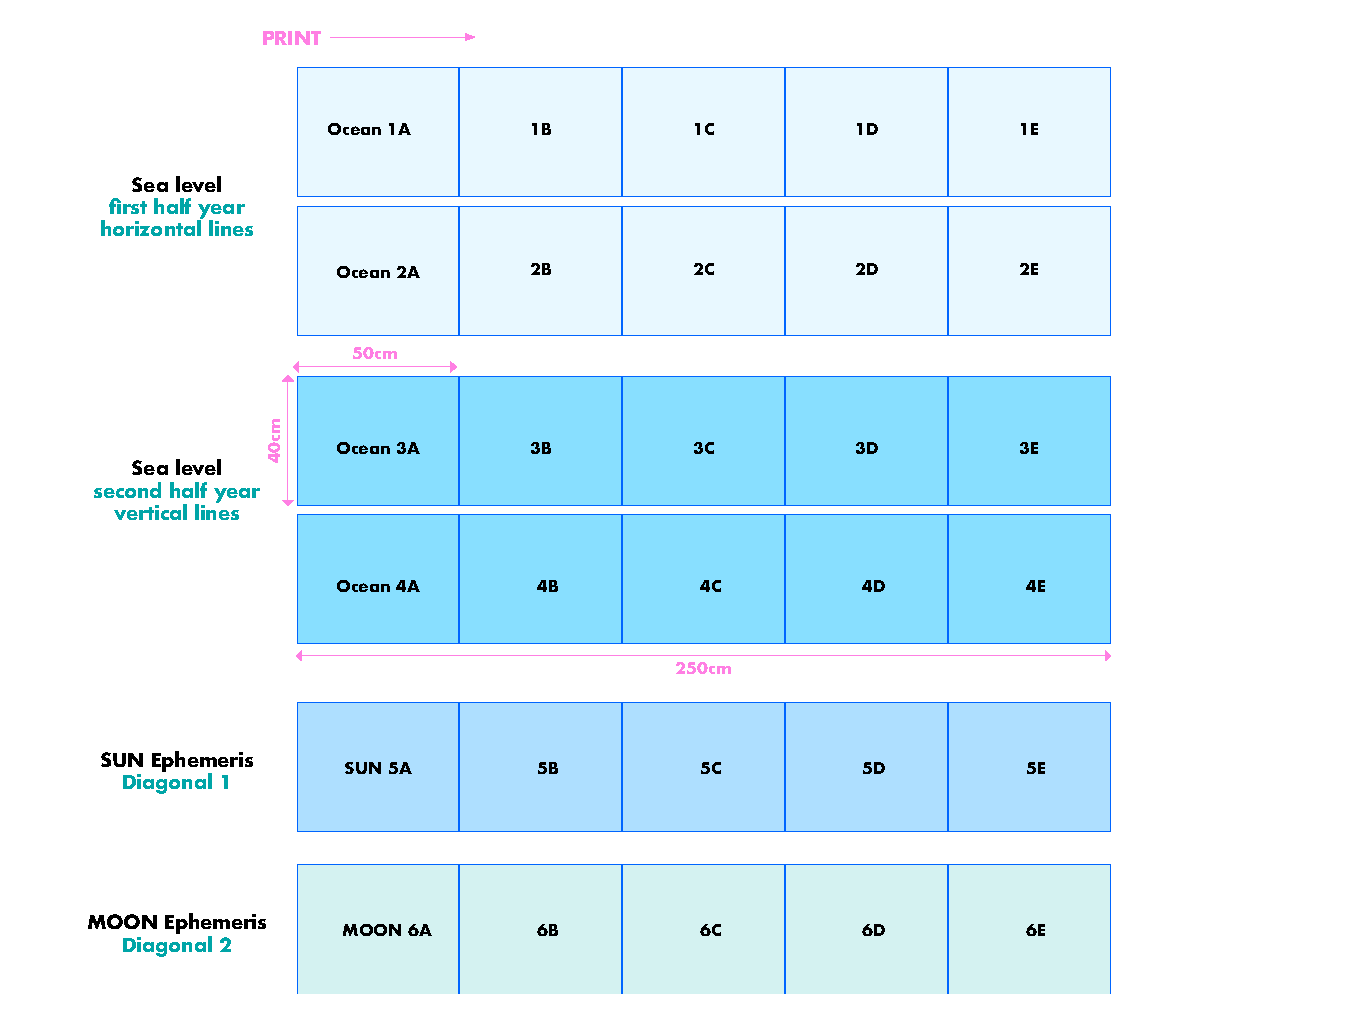
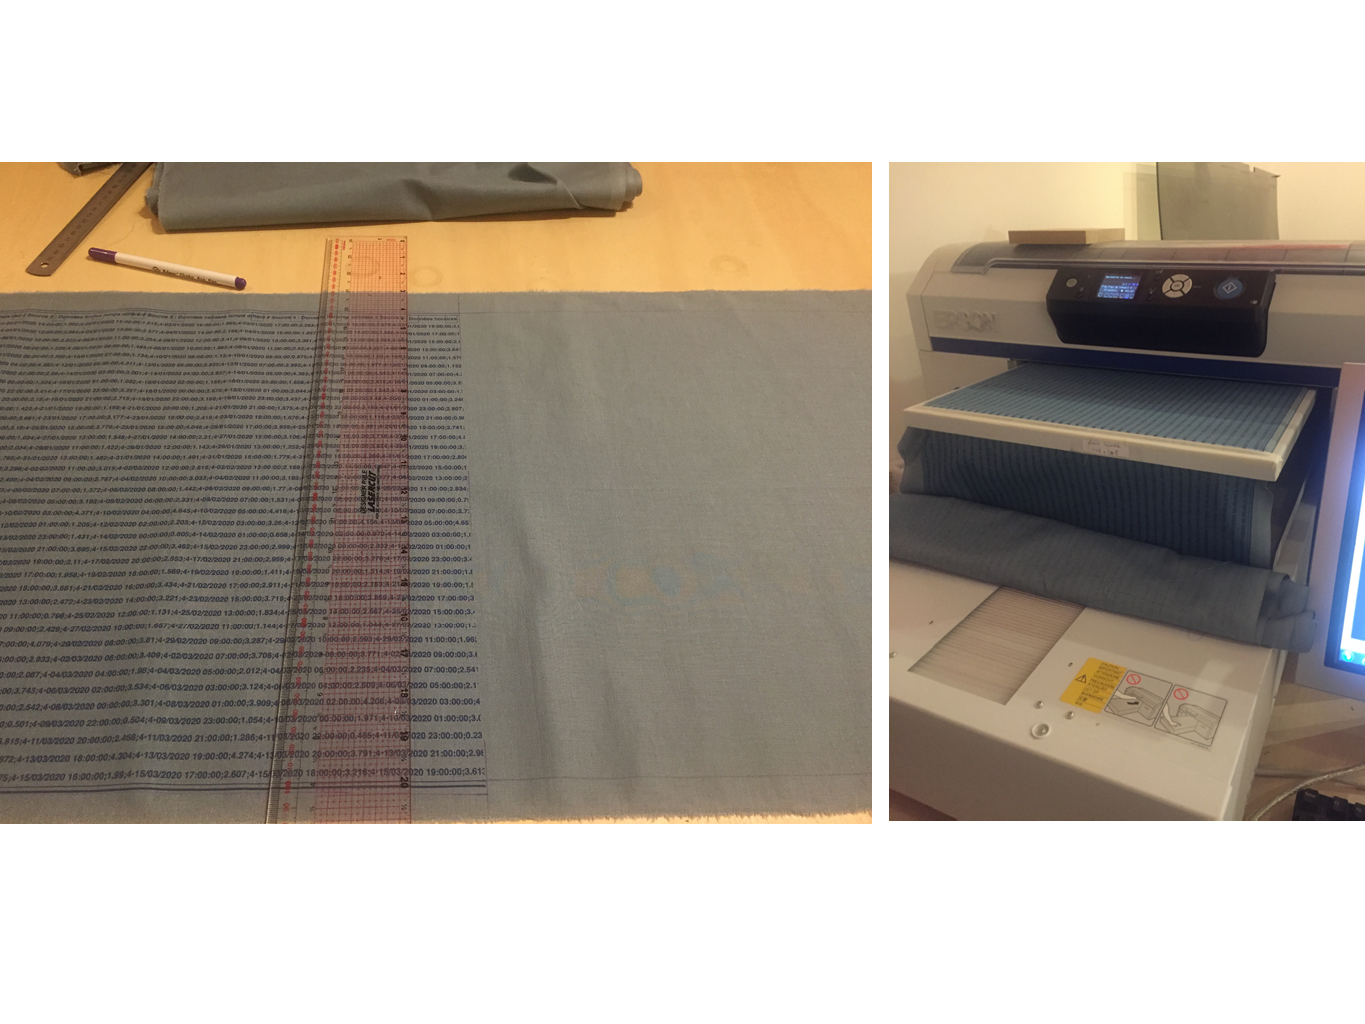
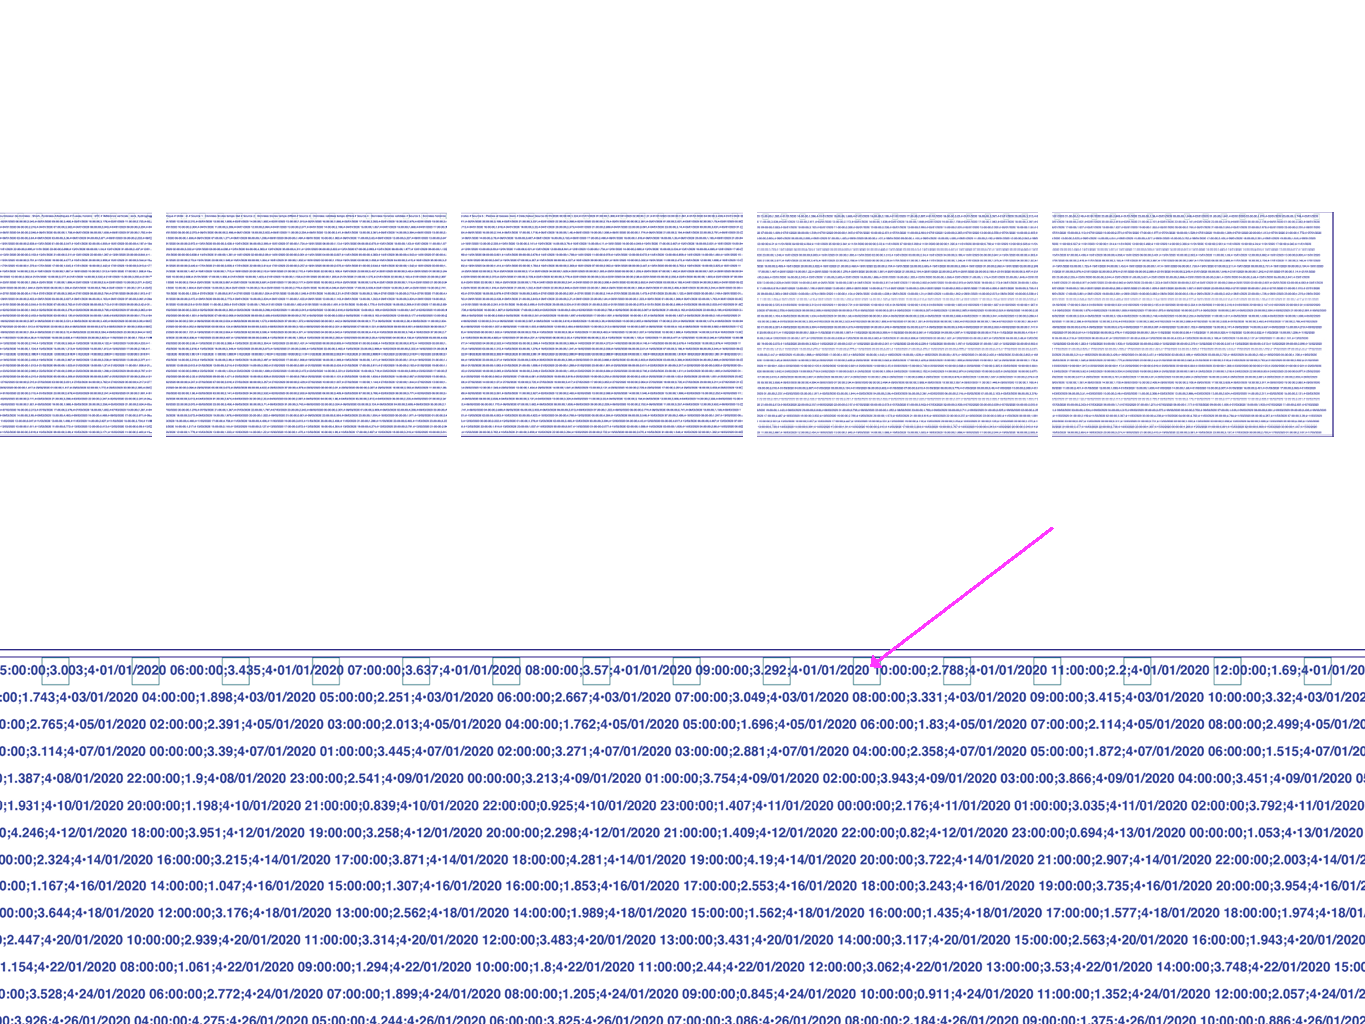
1. Digital Files and planning size
Previsualisation 2D step
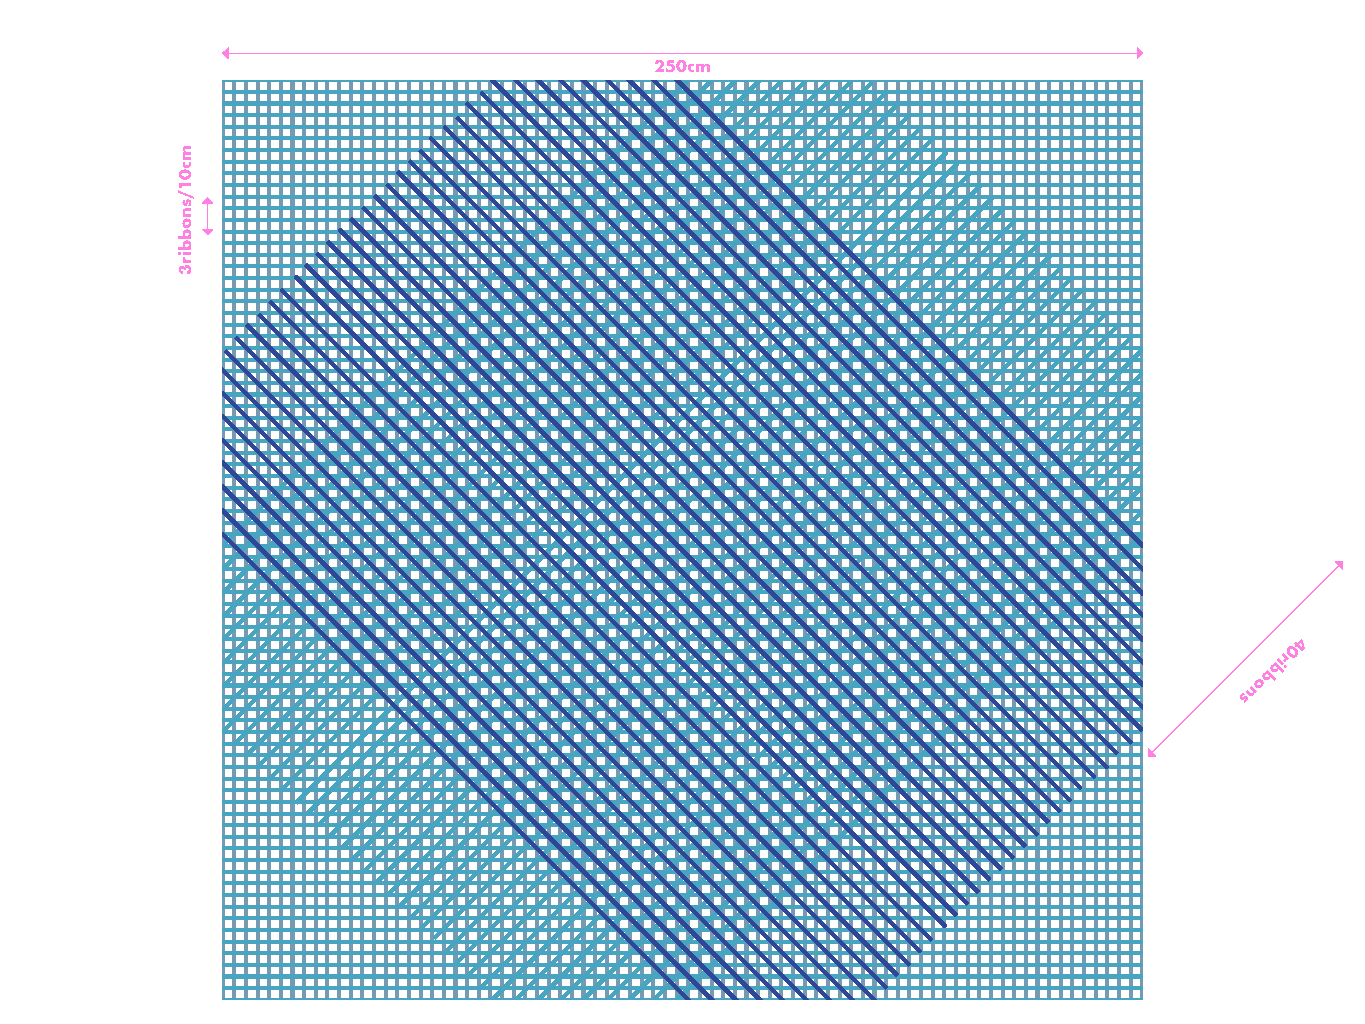
Ribbons of 1cm wide
3 ribbons each 10 cm
80 ribbons large and long so 2,60 meters approximately
The larger printing plates in the lab are 40 by 50 cm
So the files size are 40x260cm
How many lays printed:
-
Horizontal: 2X40X250
-
Vertical 2x40x250
-
Diagonal Moon 1x40x250
-
Diagonal Sun: 1X 40X250

2. Printing
How to print/ Test of overlap colors: Test of colors:
Color test Font size test Overlap test
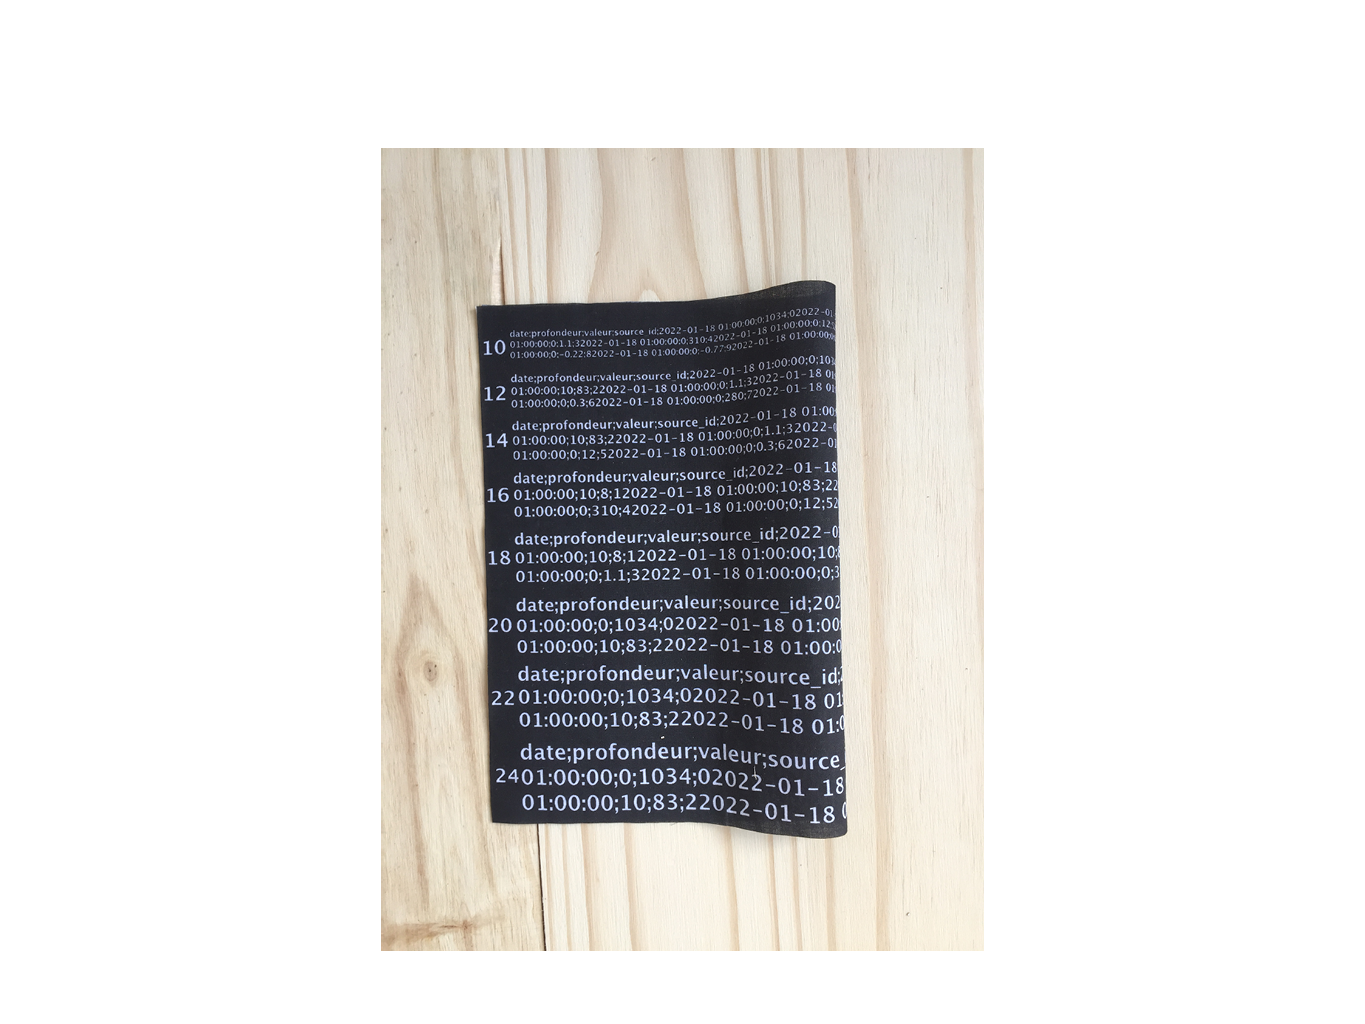
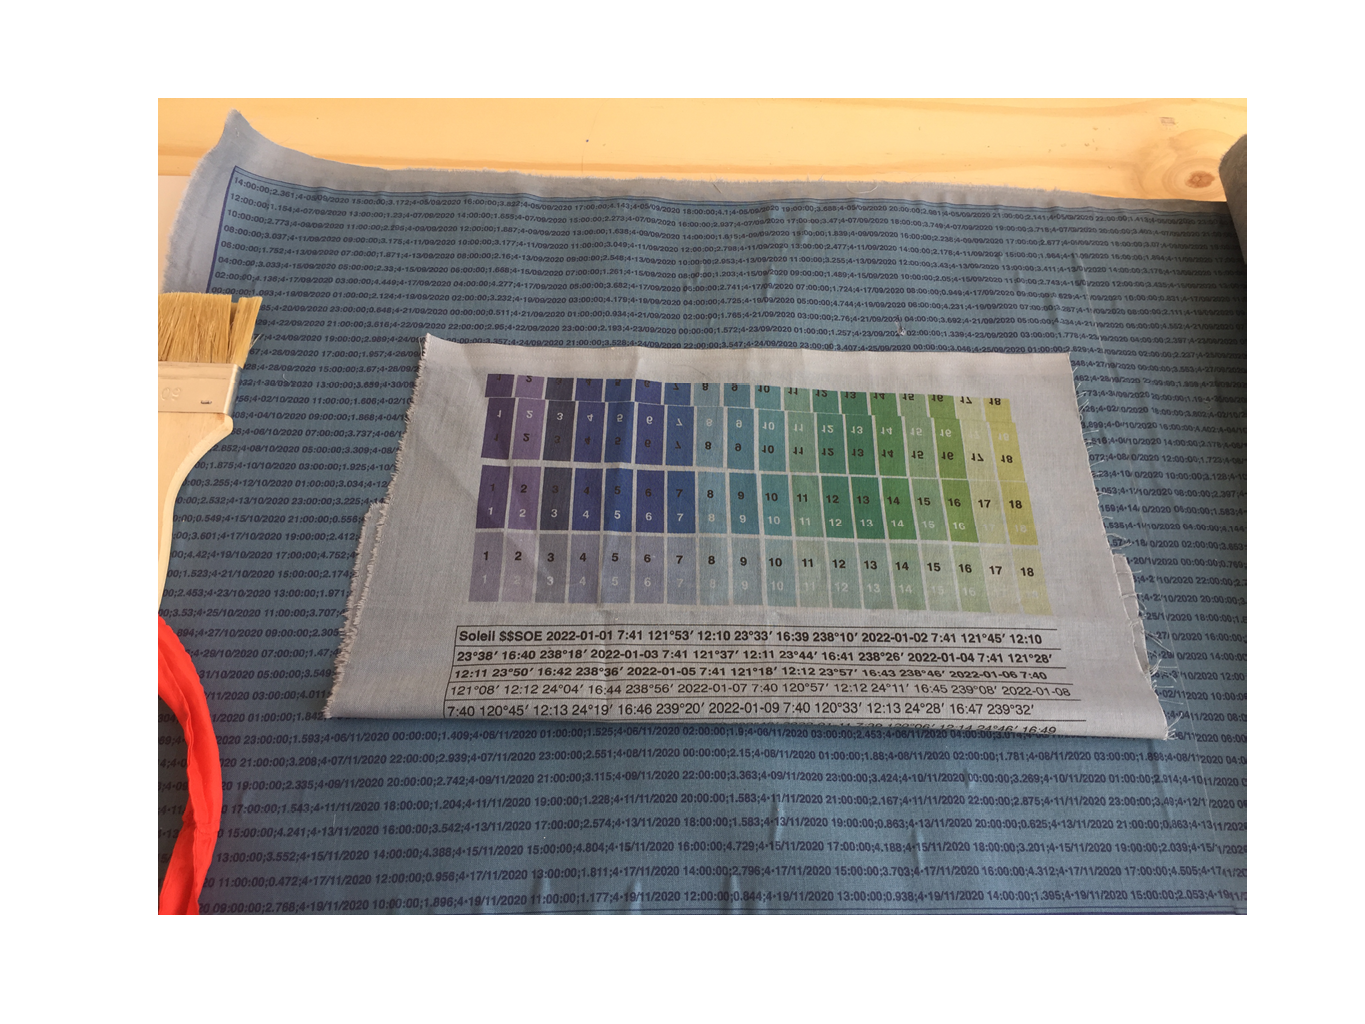
3 color text choosen
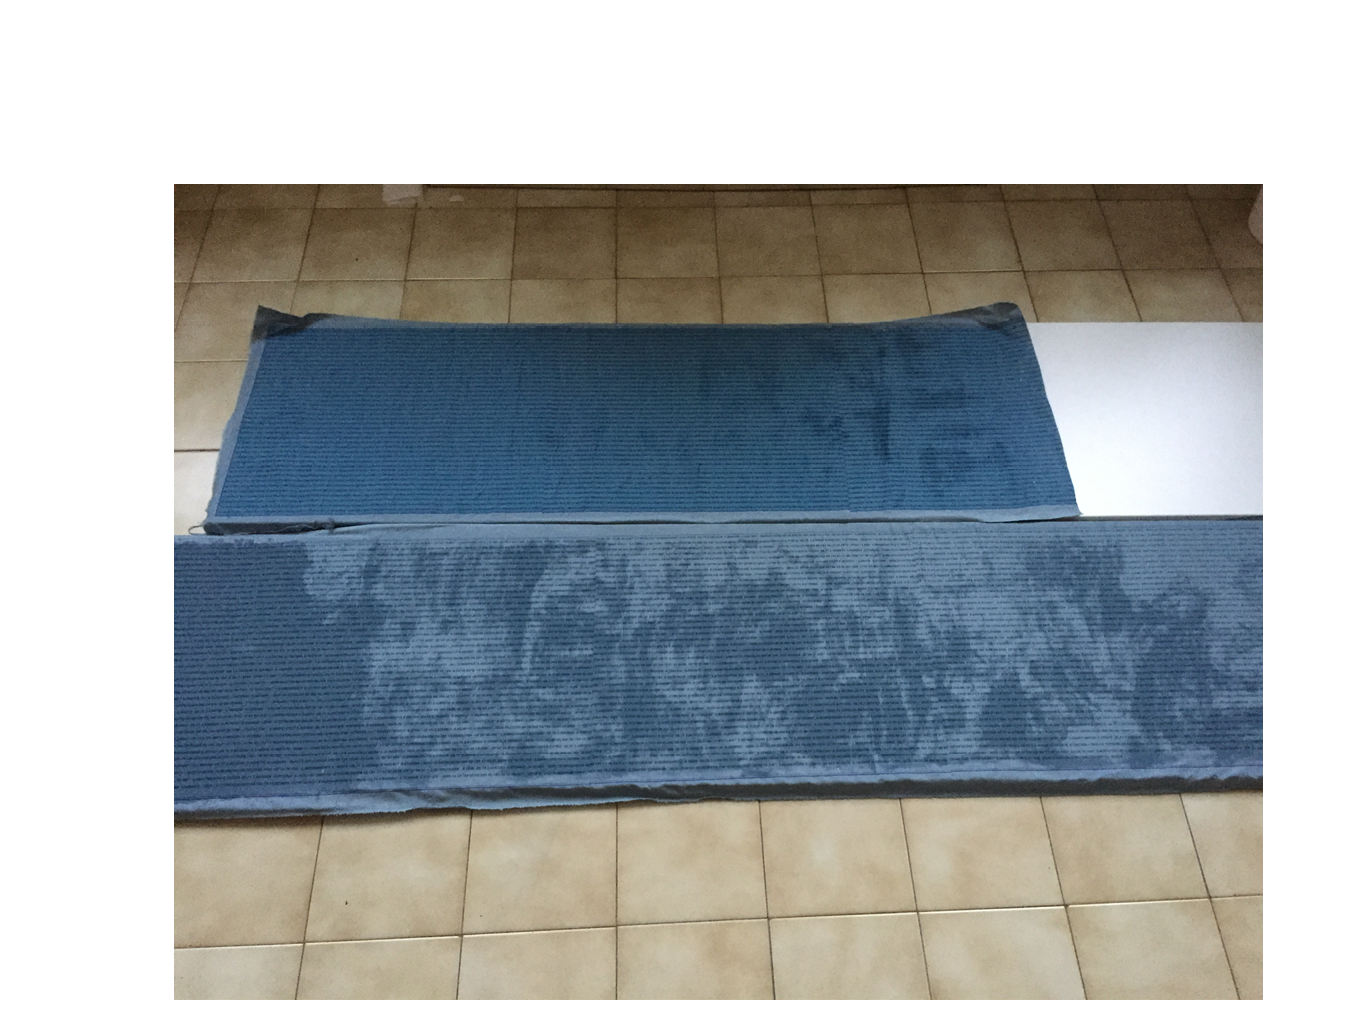
How I printed my text I printed section of 40x50cm (larger printing plate size) onto textile lays of appr. 45/50x250m so I could have a weaved structure that will be the size of 250 by 250
I used two 1,40x2,50m lays so in total 1,40x5m of textile
I made a mark in the corners of the printing frame to be able to align my text through the 250cm long so repeated the printe process 5 times
The ink used:
3. Bio-coat
Gold fail I had prevoious try to apply a goldleaf onto the fabric just after applying my biorecipe to the fabric. And in my sample it worked quite well.
So I desided I will try to apply the golden leaf to the back of my printed textile. But in the larger format the golden leaf didnt'no stick to the fabric and some parts of the golden leaf just went off.
I decided to brush the gold leaf that was not attached and the result was having the back of my textile with some gold scattered like little golden slivers.
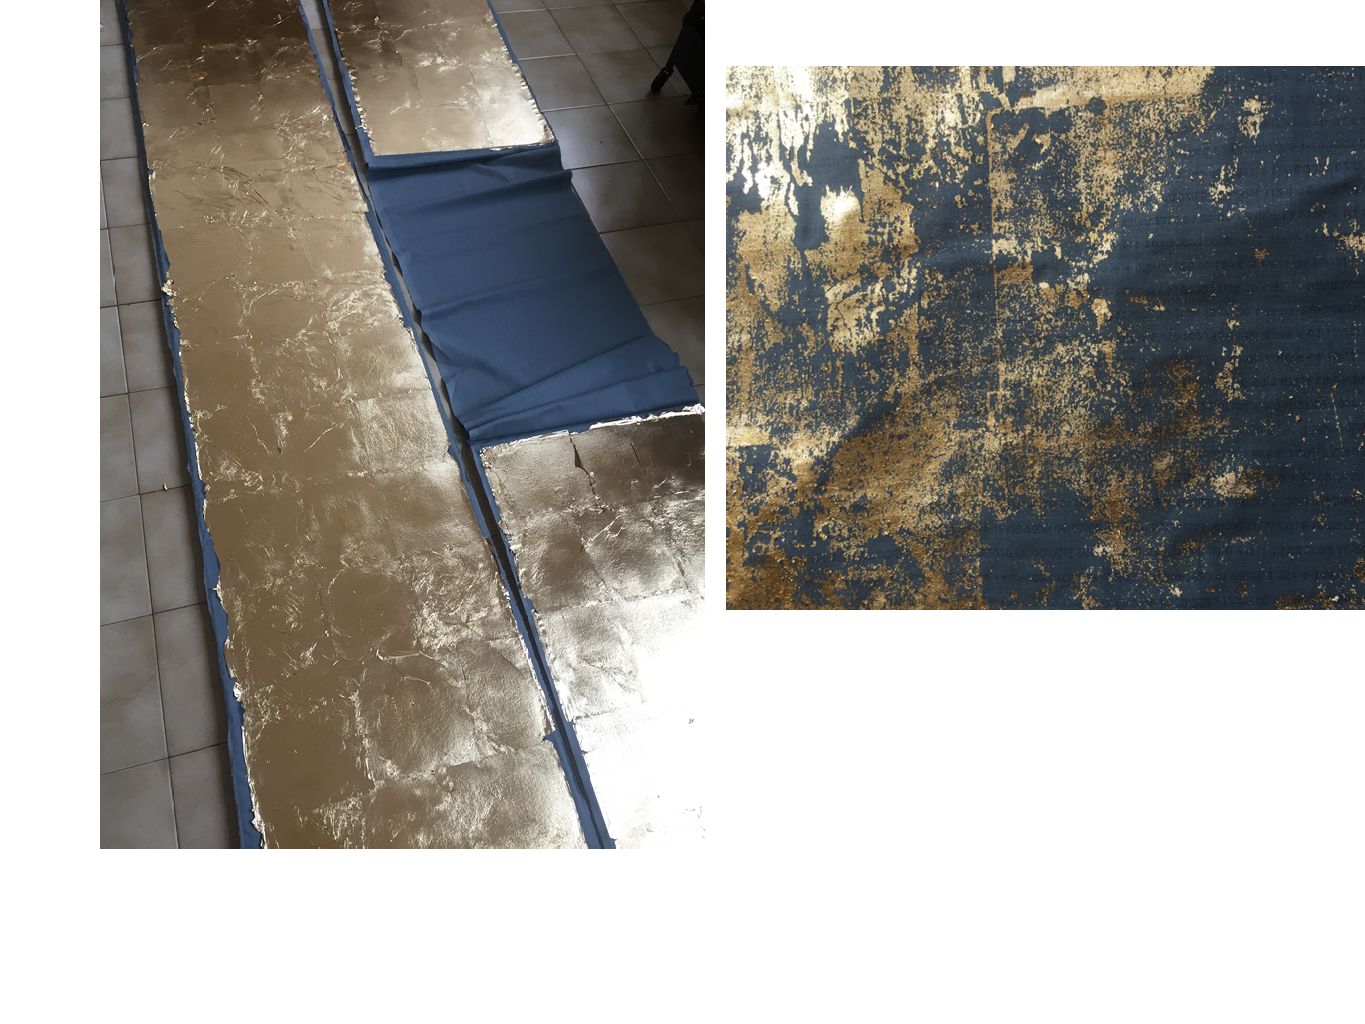
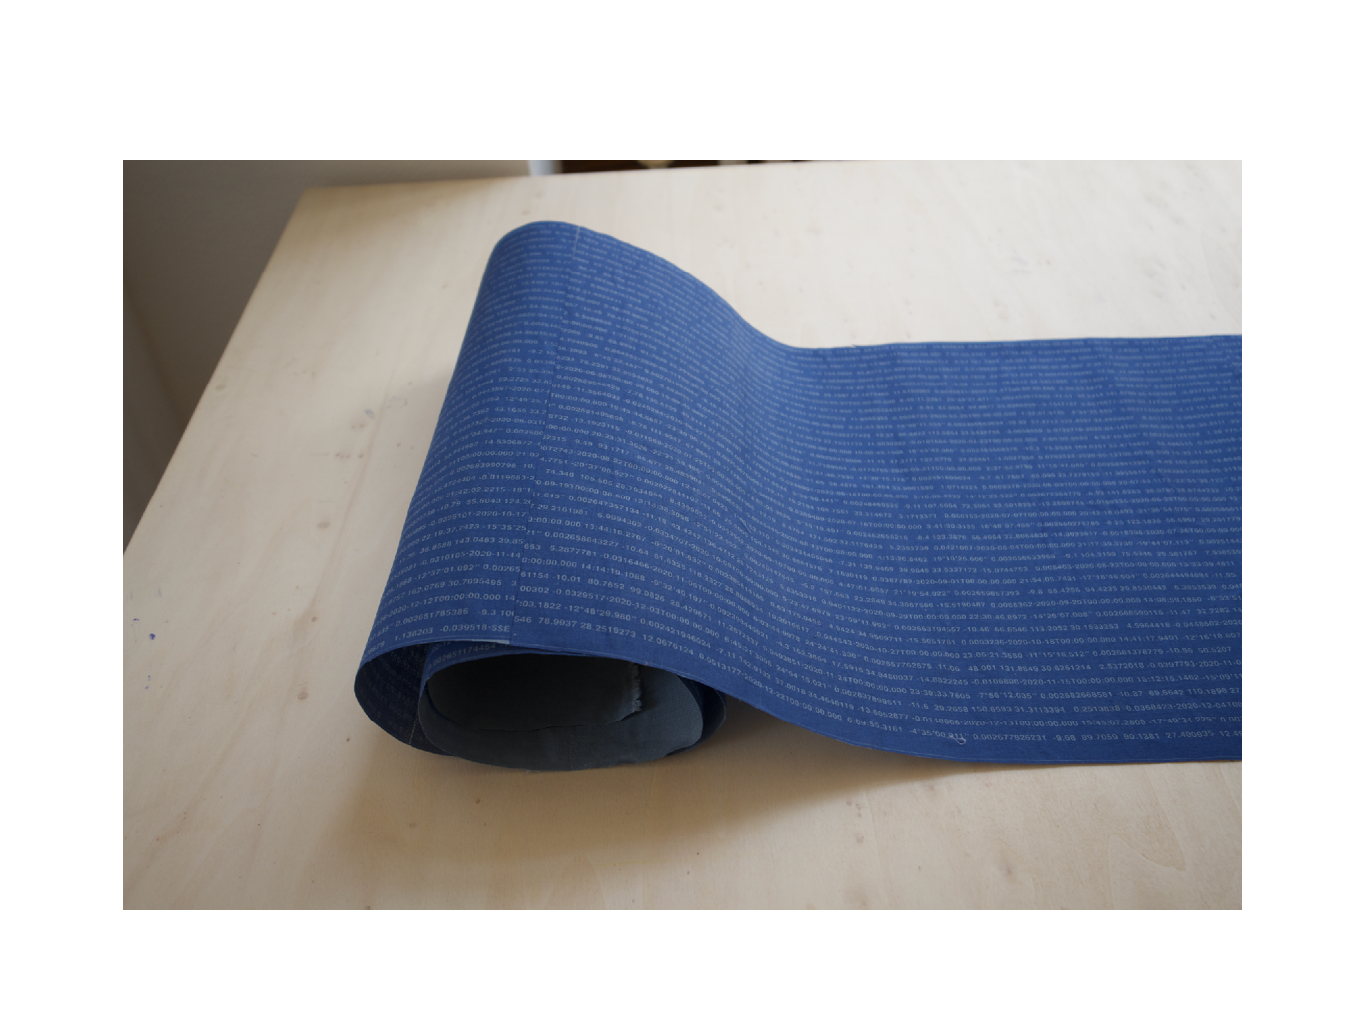
I then continued just with the biorecipe (withouht gold:) And cnce coated and dry, the textile feels almost like paper.
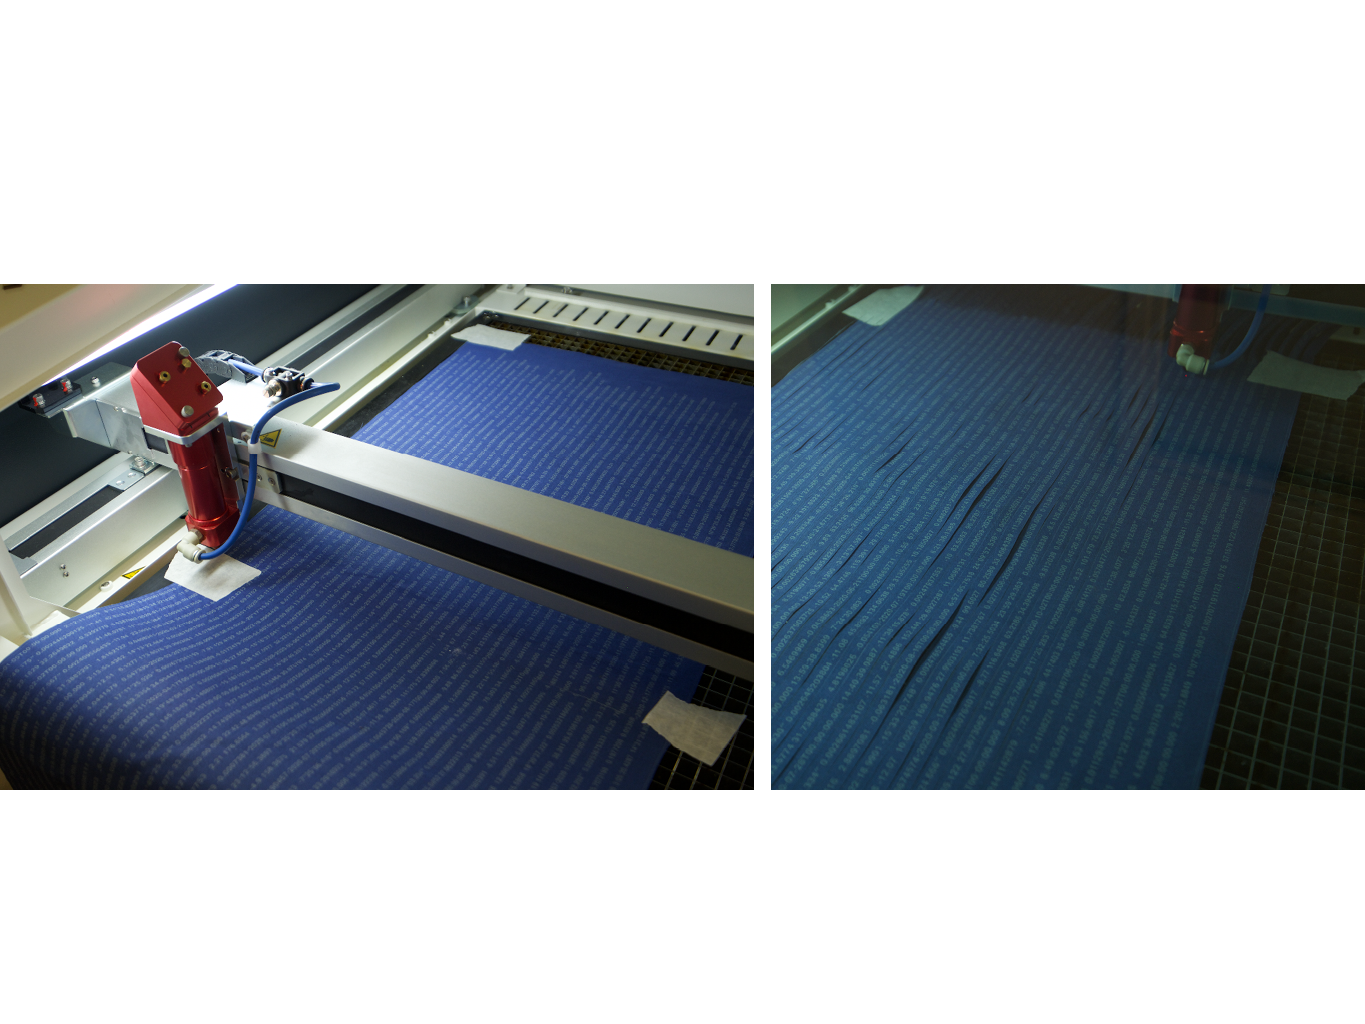
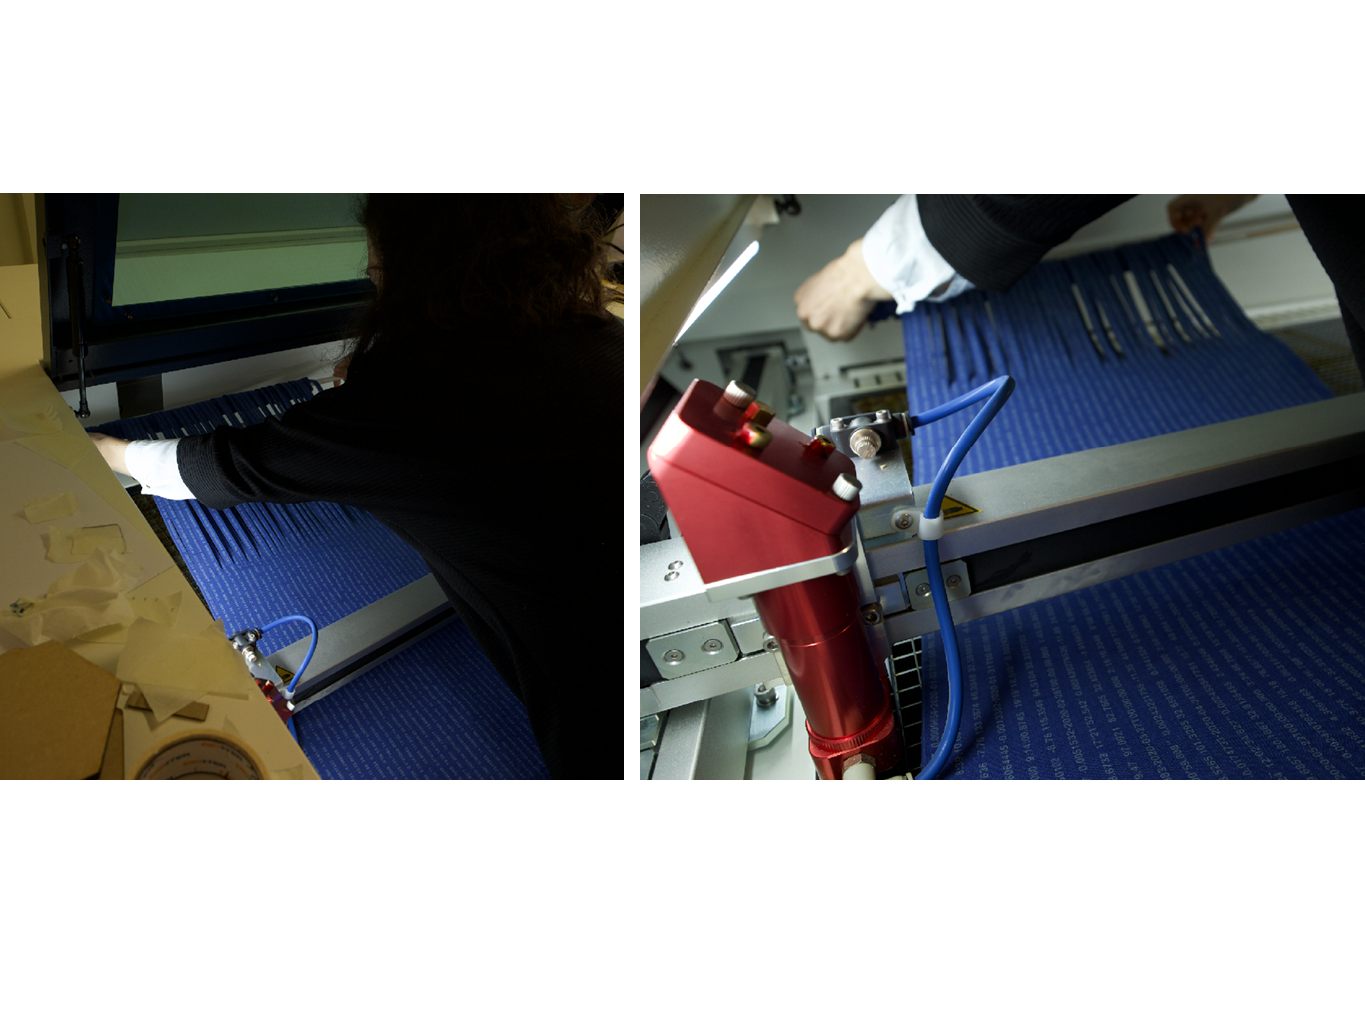
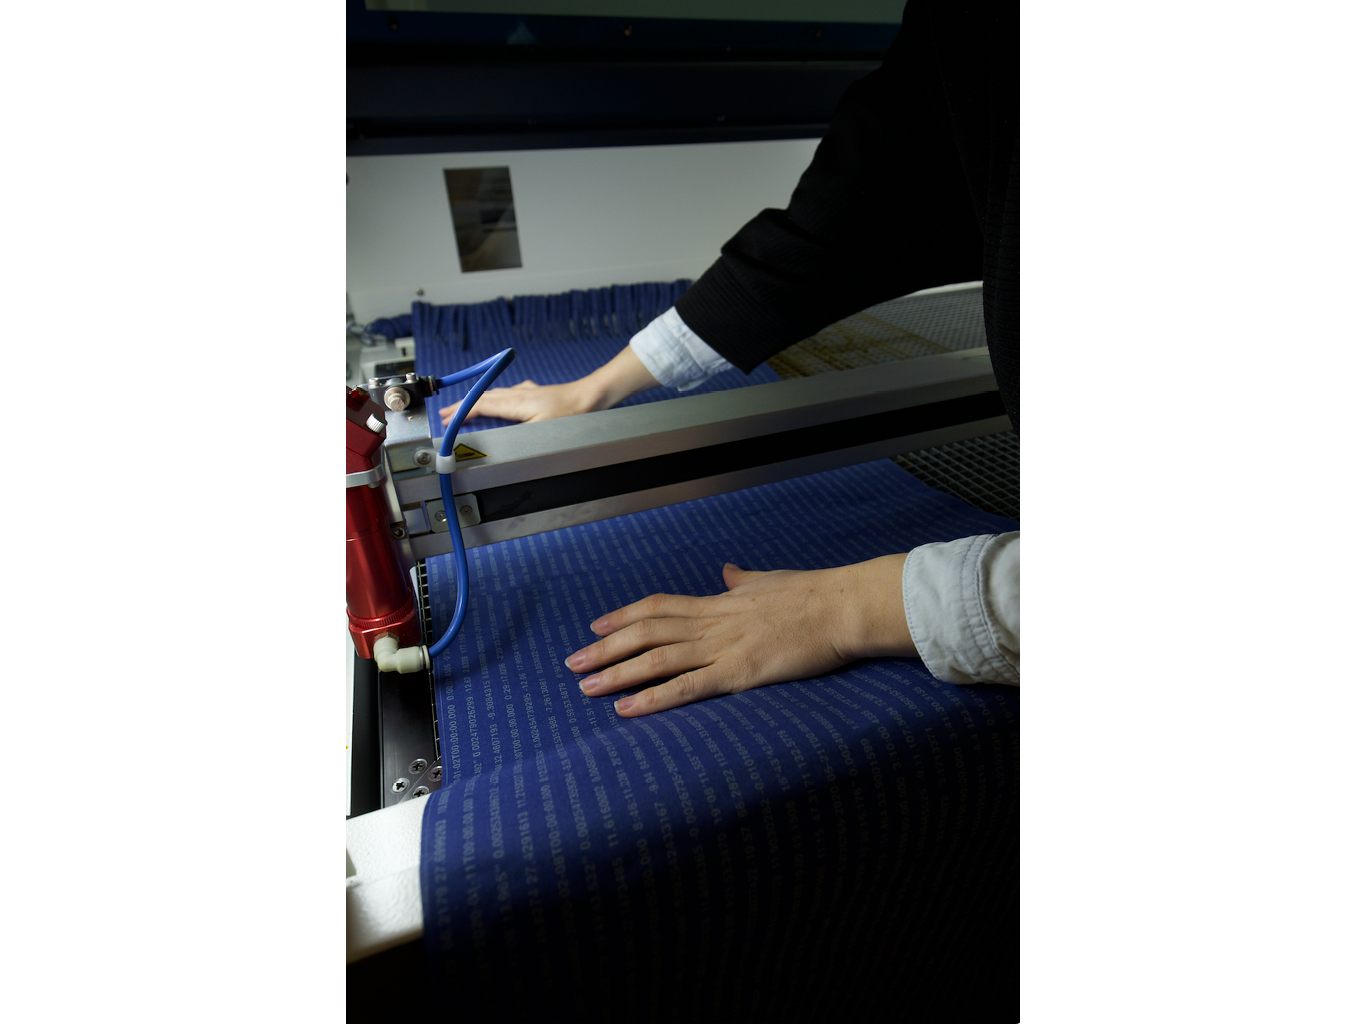
4.Laser Cut
Made a digital file with lines every 1cm with 41 lines for 40 ribbons.
Placed the laser point on the line top that was printed as a marker. Then adjust by seeing if the laser went all the way down, by pushing the Y arrow, and so following the line.
Placed the file in the horizontal and place the lay of fabric the same way Cuted the first 50 cm, adjusting if necessary by stopping the cut and restarting on the wright spot. Once the first 50cm are cutted, roll up the textile around a woddenrod and placed it into the top where the ventilation is. repeat the process for the next 50cm.
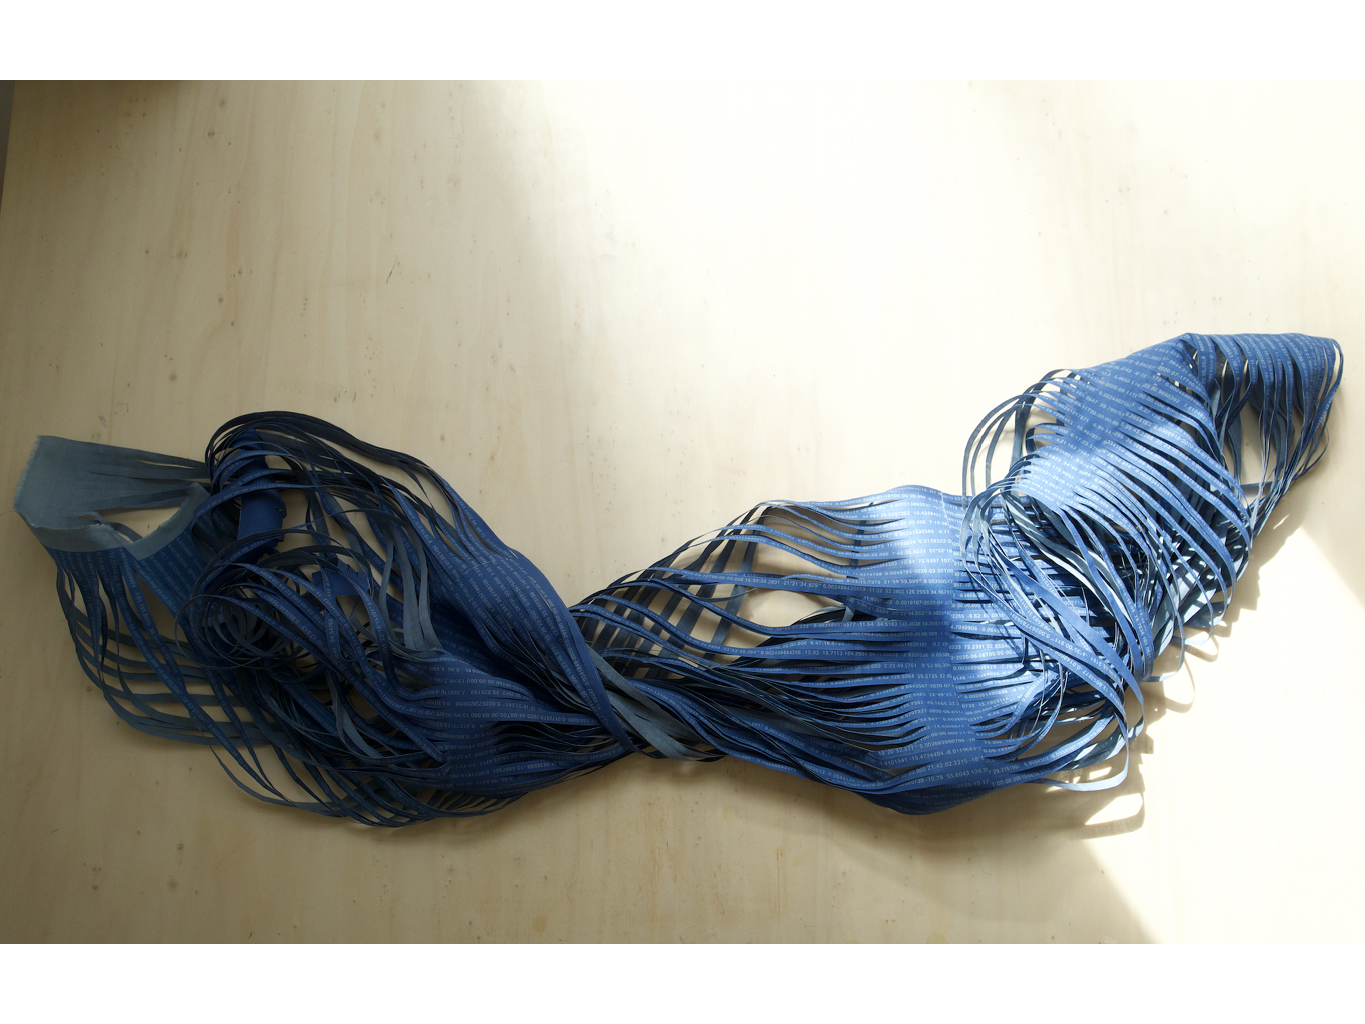
Note to Self: did not cut the top and bottom edges, nor I left a small uncutted textile in between the 50cm. So I could work with each ribbons when weaving later. So they do not tangle with each other and do not make knots.
5. Sewing edges
In my digital file I prevously planned the space and placement of each ribbon
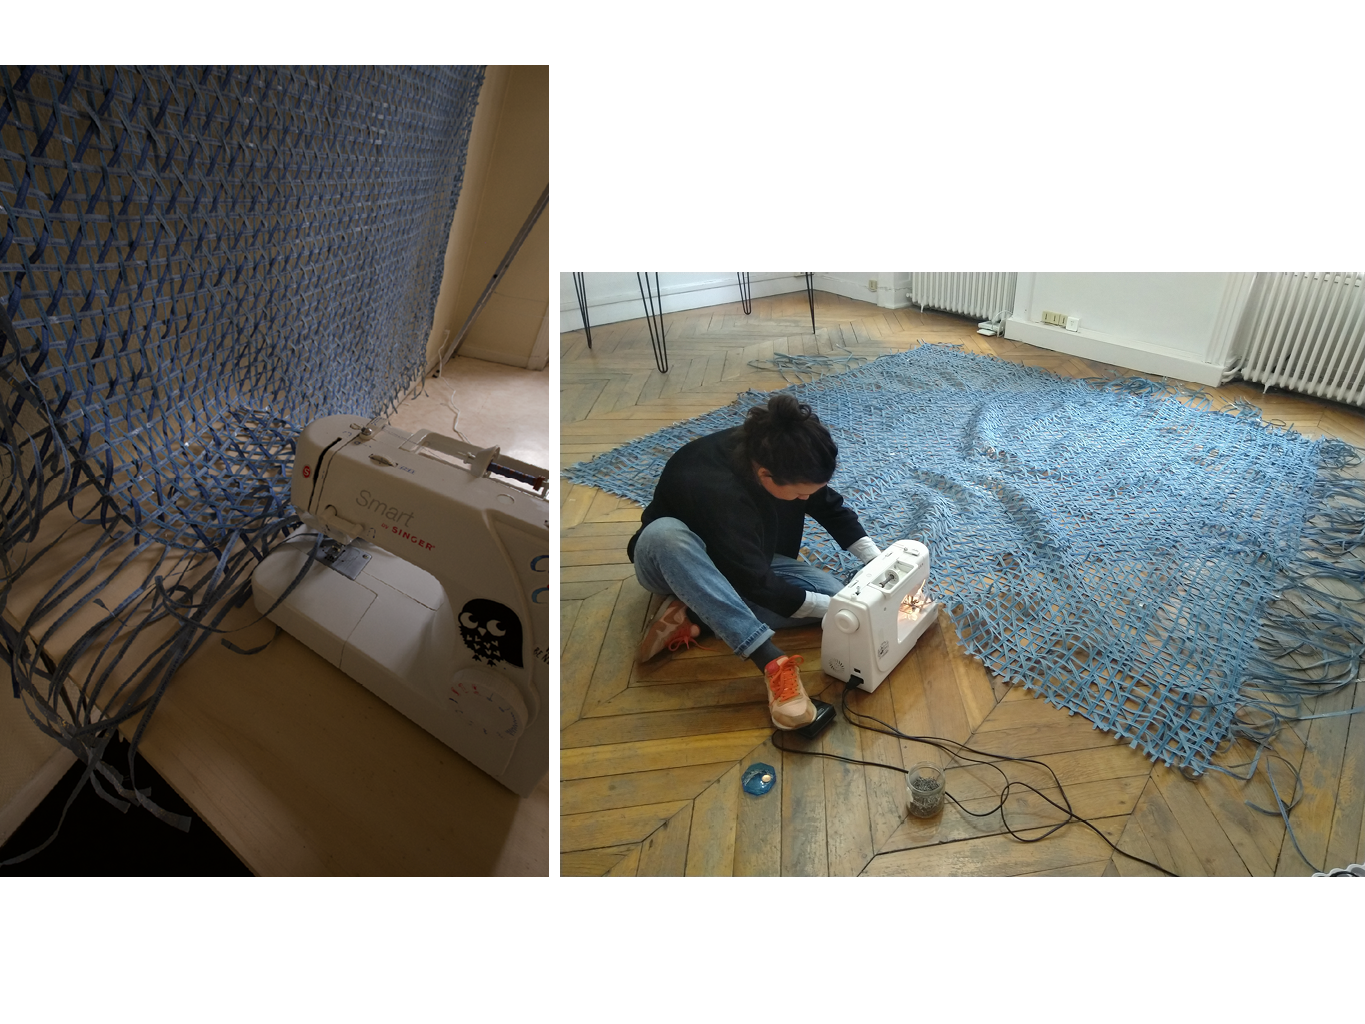
6. Weaving
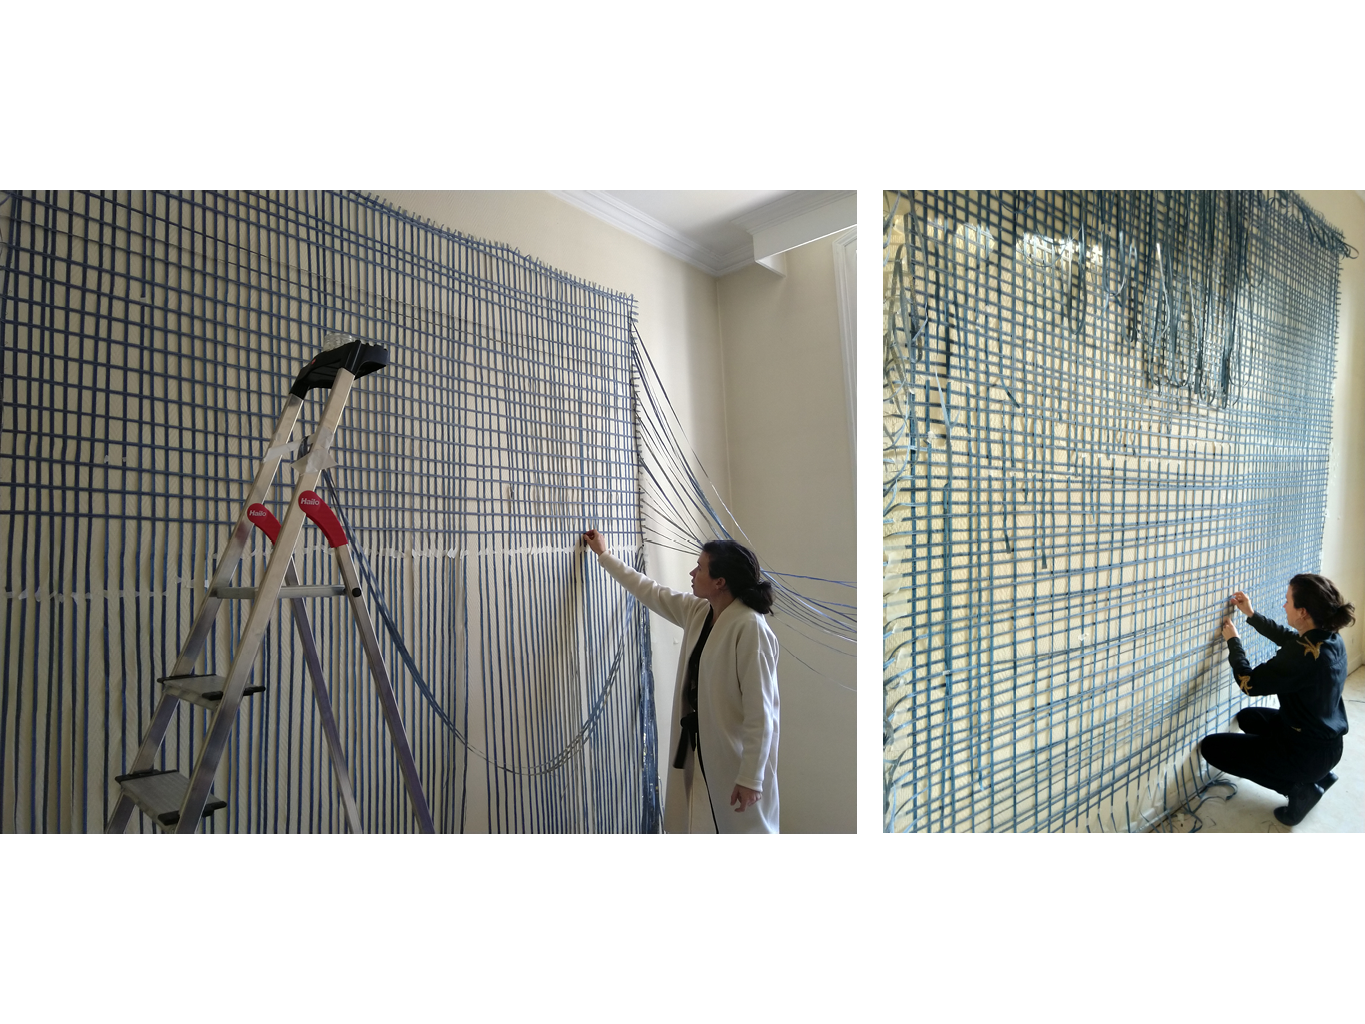

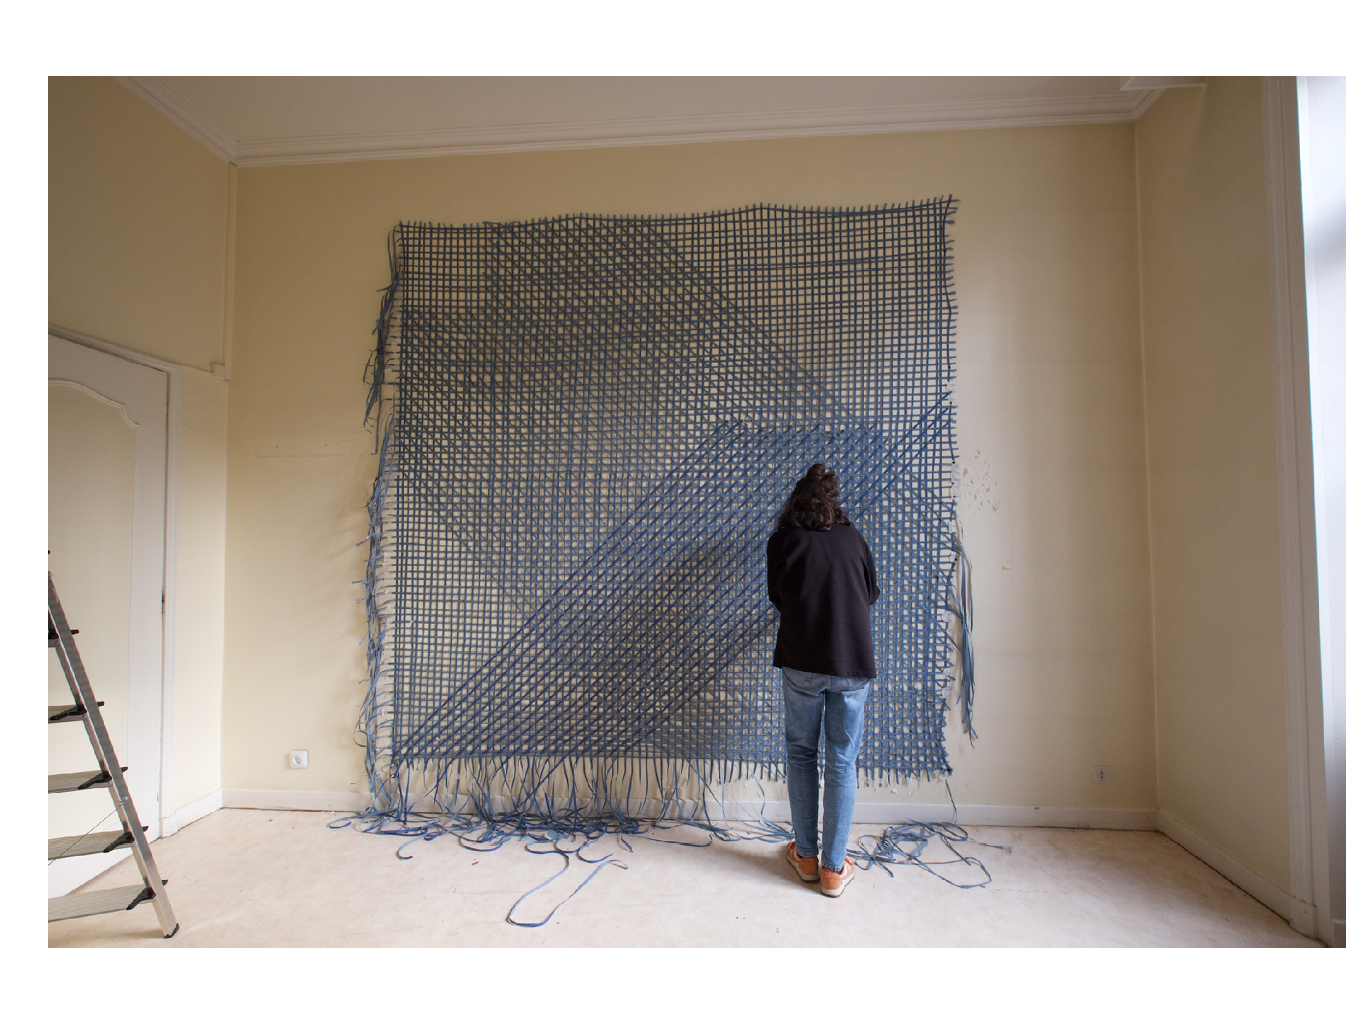
Weaving Timelapse
7. Final sewing and installation