7| Computational Couture
Research/Inspirations
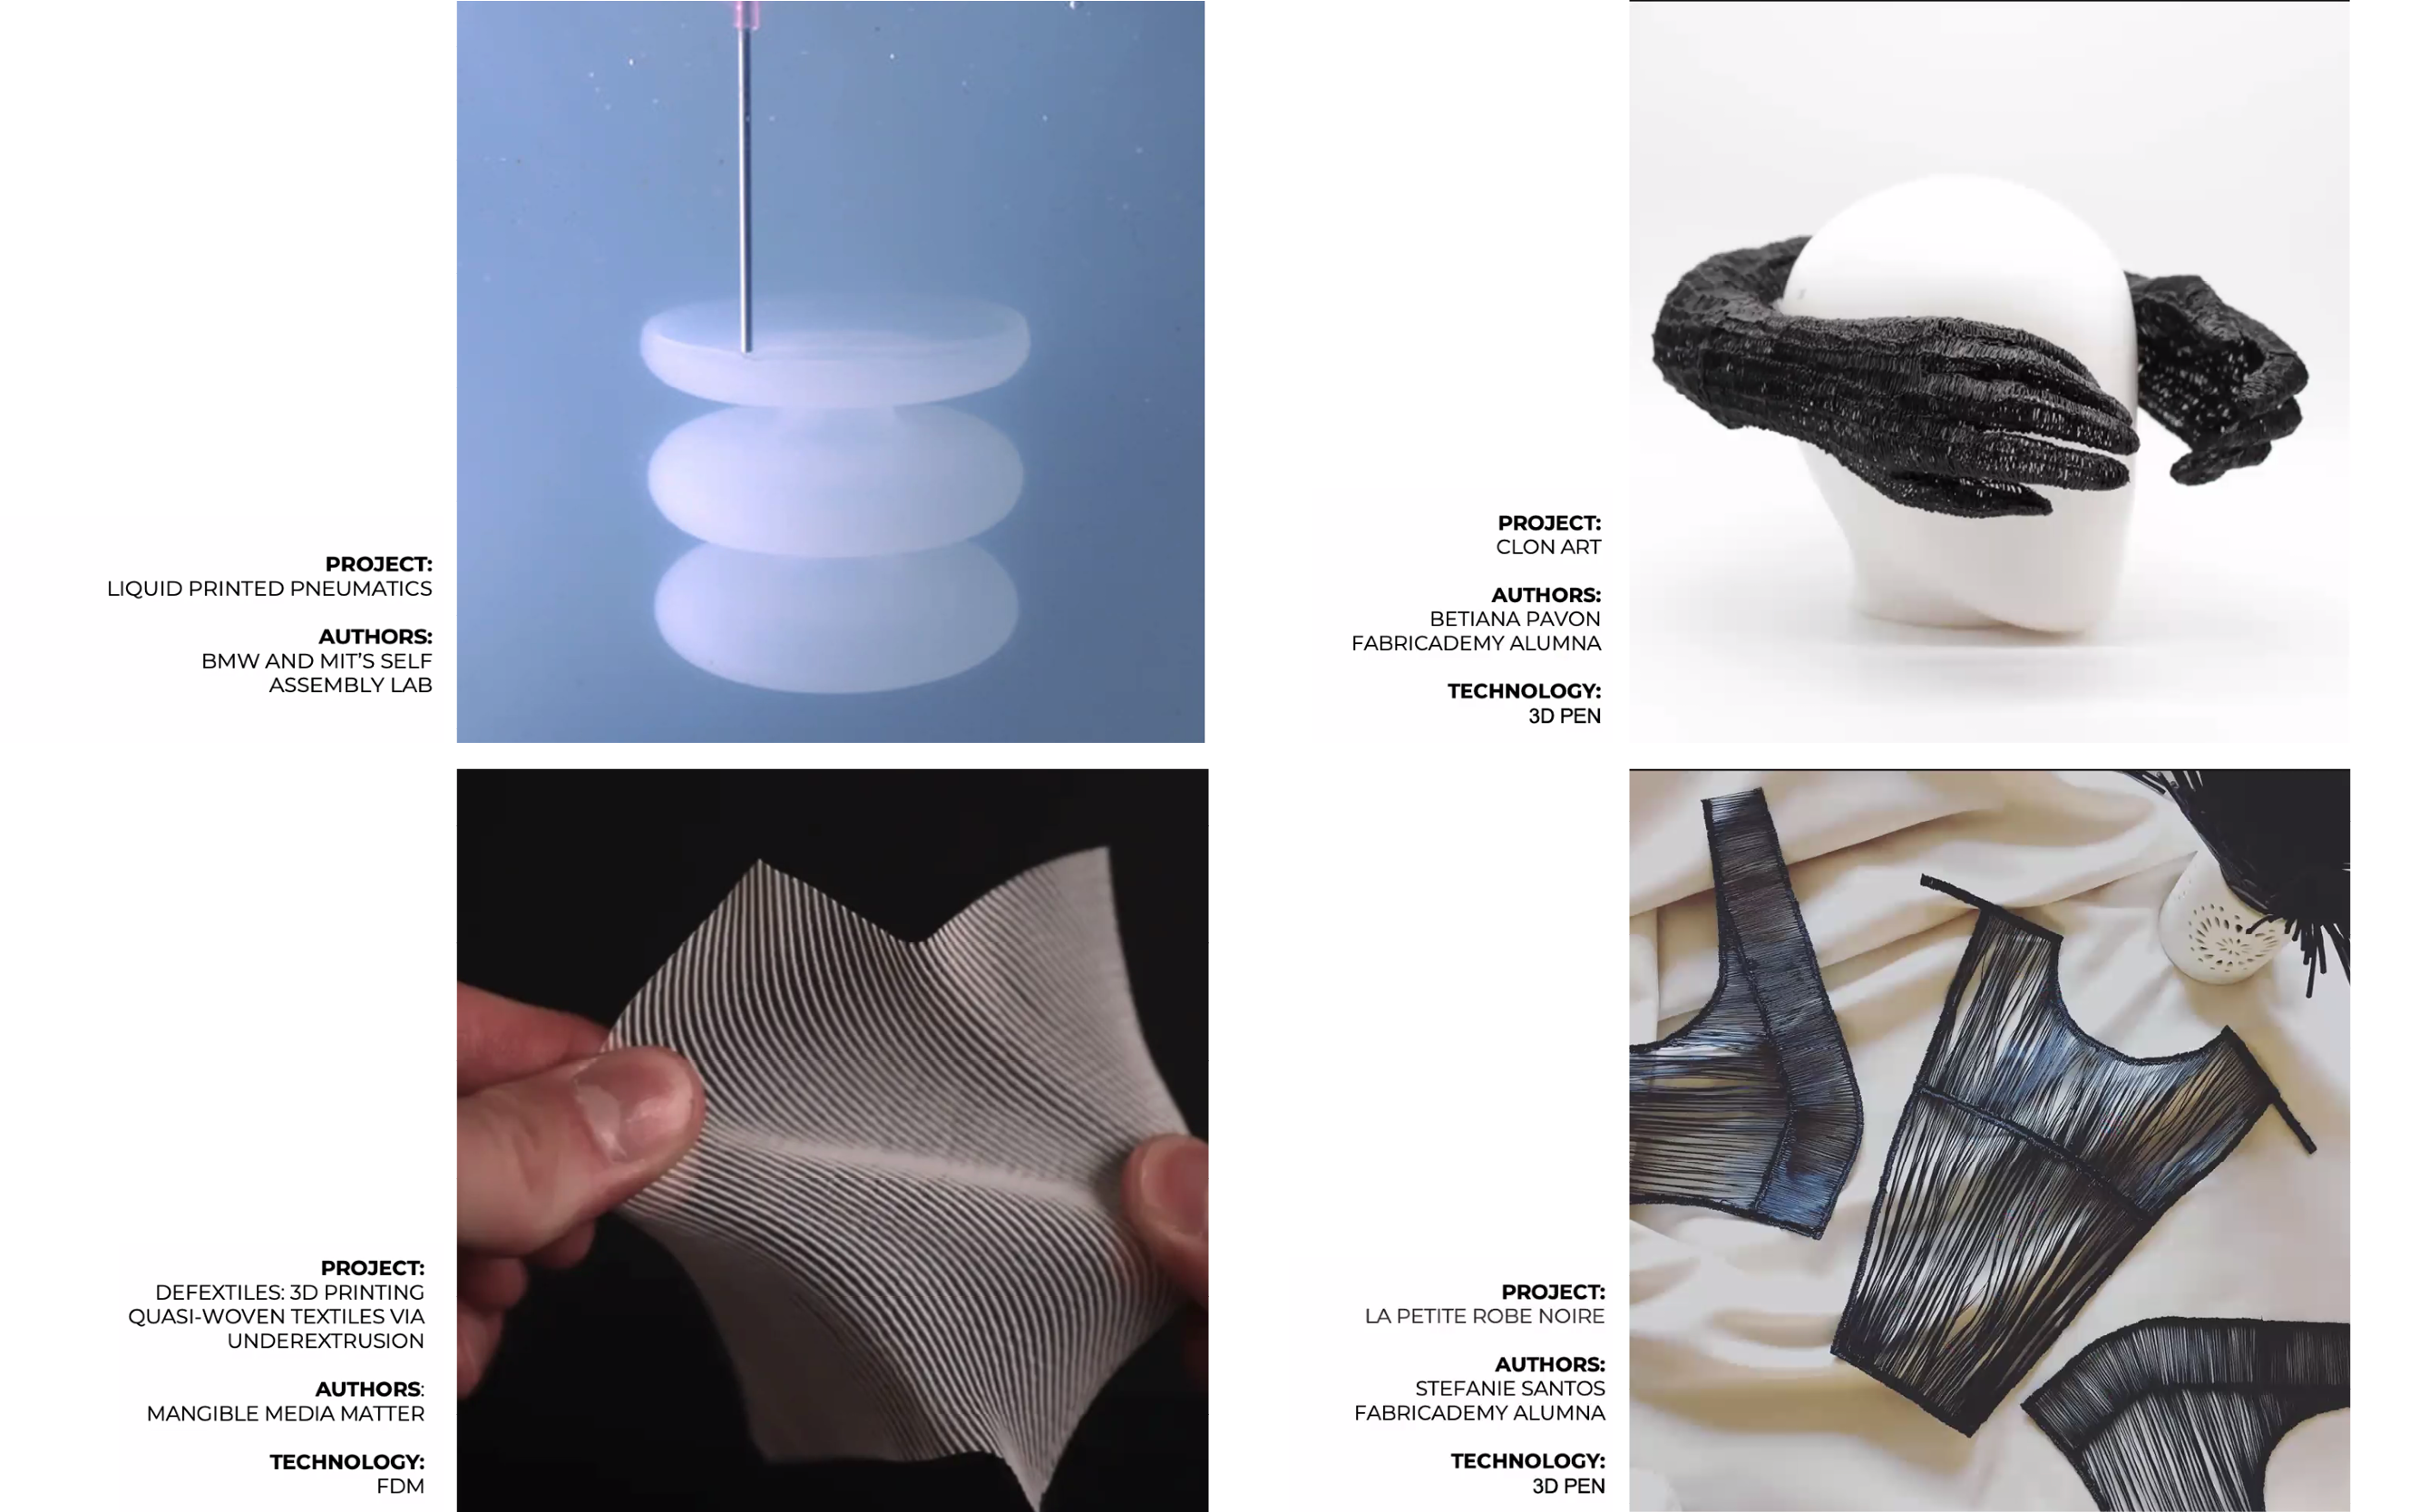
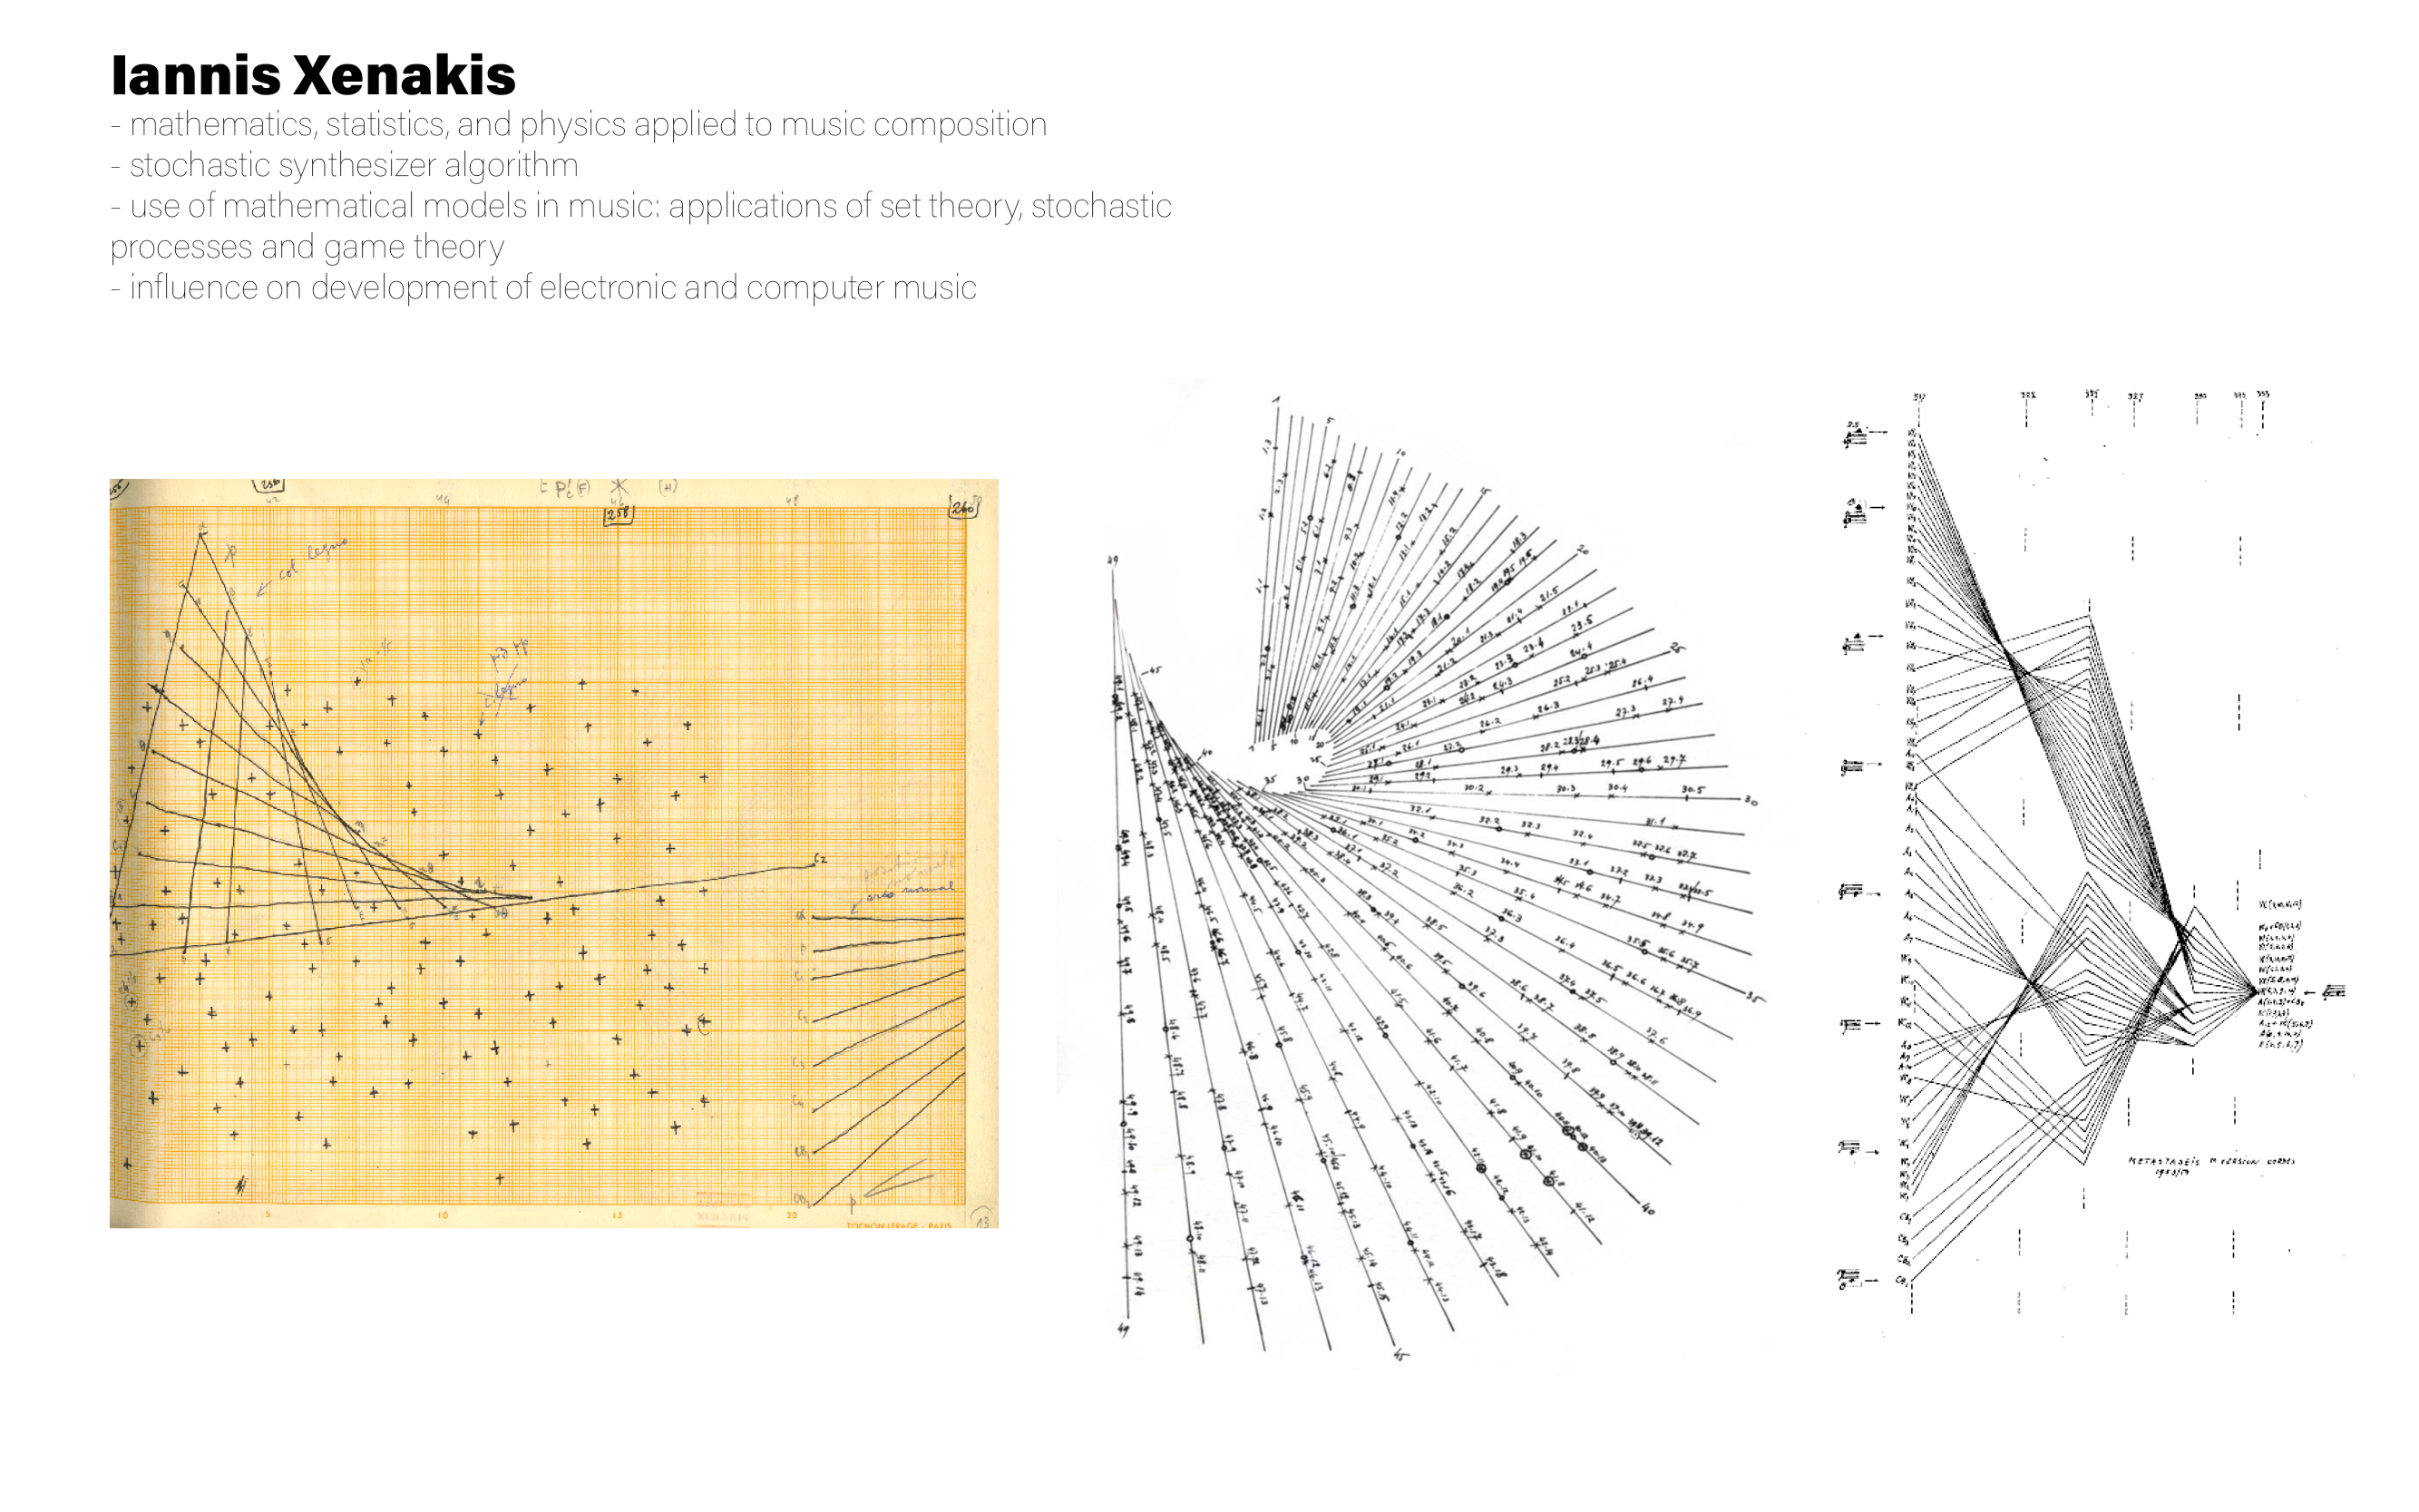
All the examples given during the lecture where very inspiring:
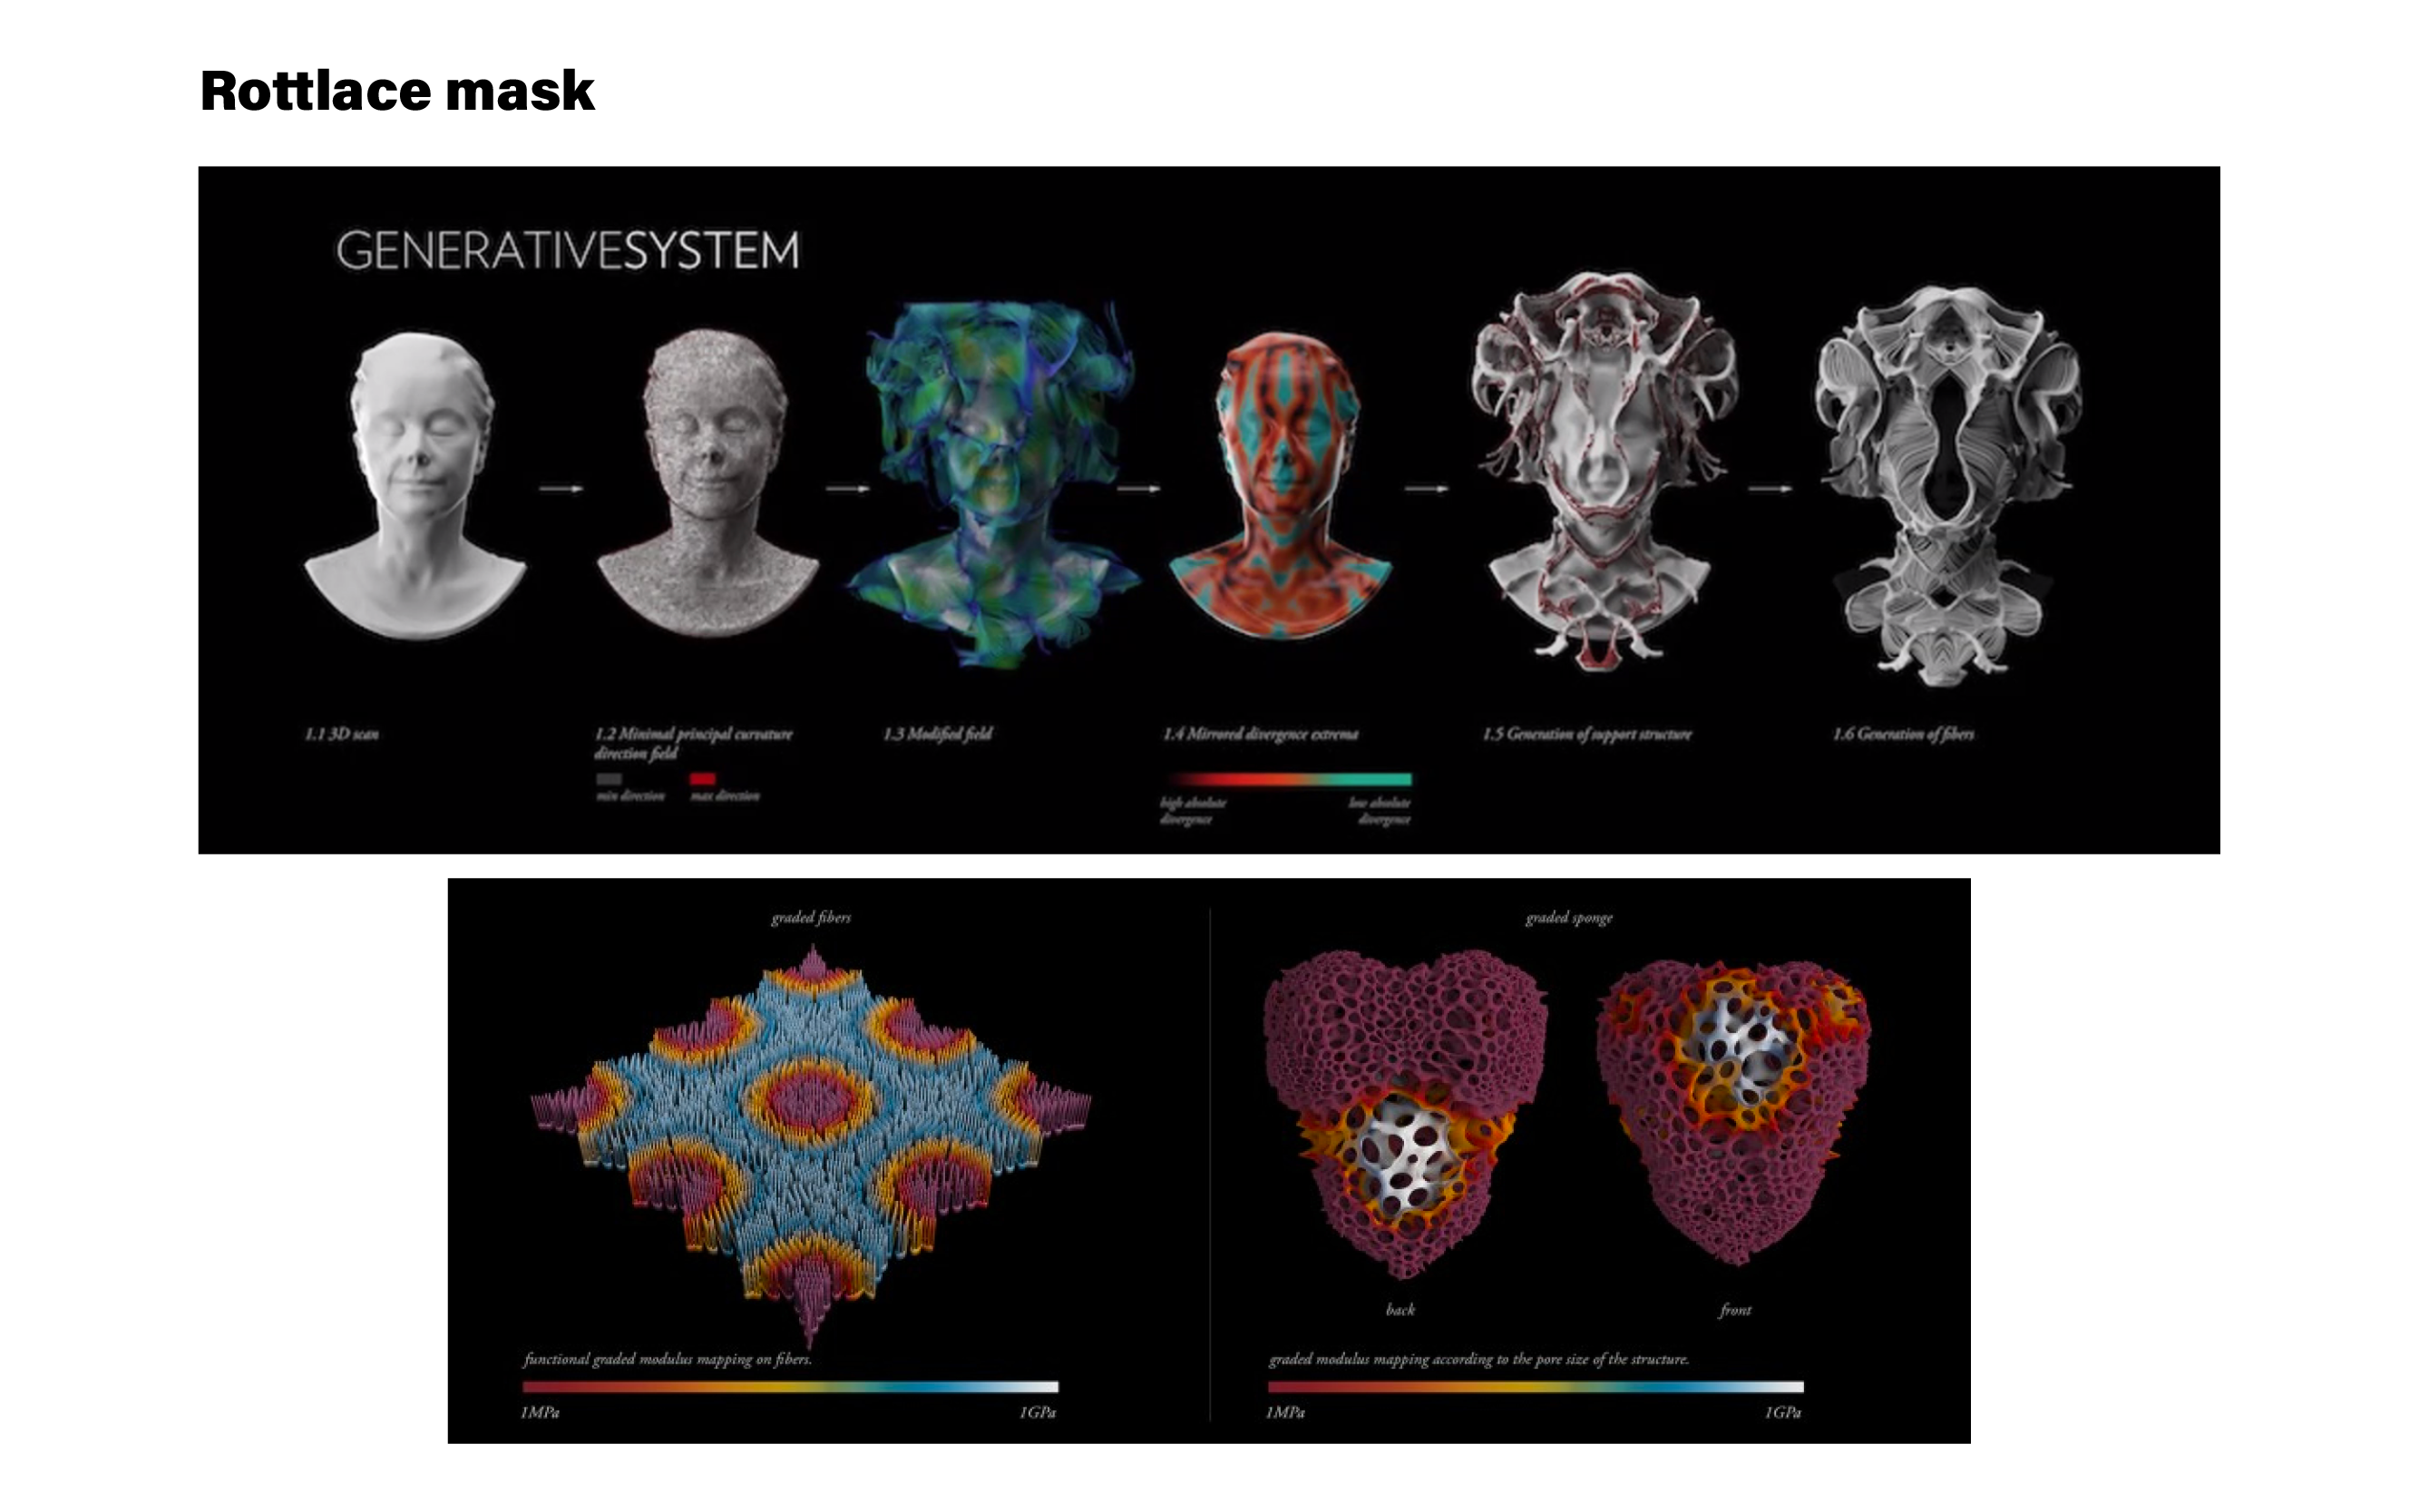
Rottlace Mask for Björk-
Producing visual 3D complex landscapes
 Link about the Rottlace Mask for Björk
Parametric Design
Grasshopper (GH) is a plugin for Rhinoceros 3D. A plugin (extension module or external module) is a program that supplements the functionality of software. The GH plugin allows to create parametric models on Rhinoceros through visual programming. A parametric model defines a dynamic geometry where the modification of parameter values affects all of it.
Algorithm: an algorithm is simply a series of instructions allowing to do something. A cooking recipe, for example, is an algorithm: a series of simple operations to go from ingredients to a prepared dish.
On grasshoper we definde the parameters as in a recipe. Then "BAKE" it to make it visually tangible in Rhino. And the produce a Mesh object to be printed on a 3D Machine.
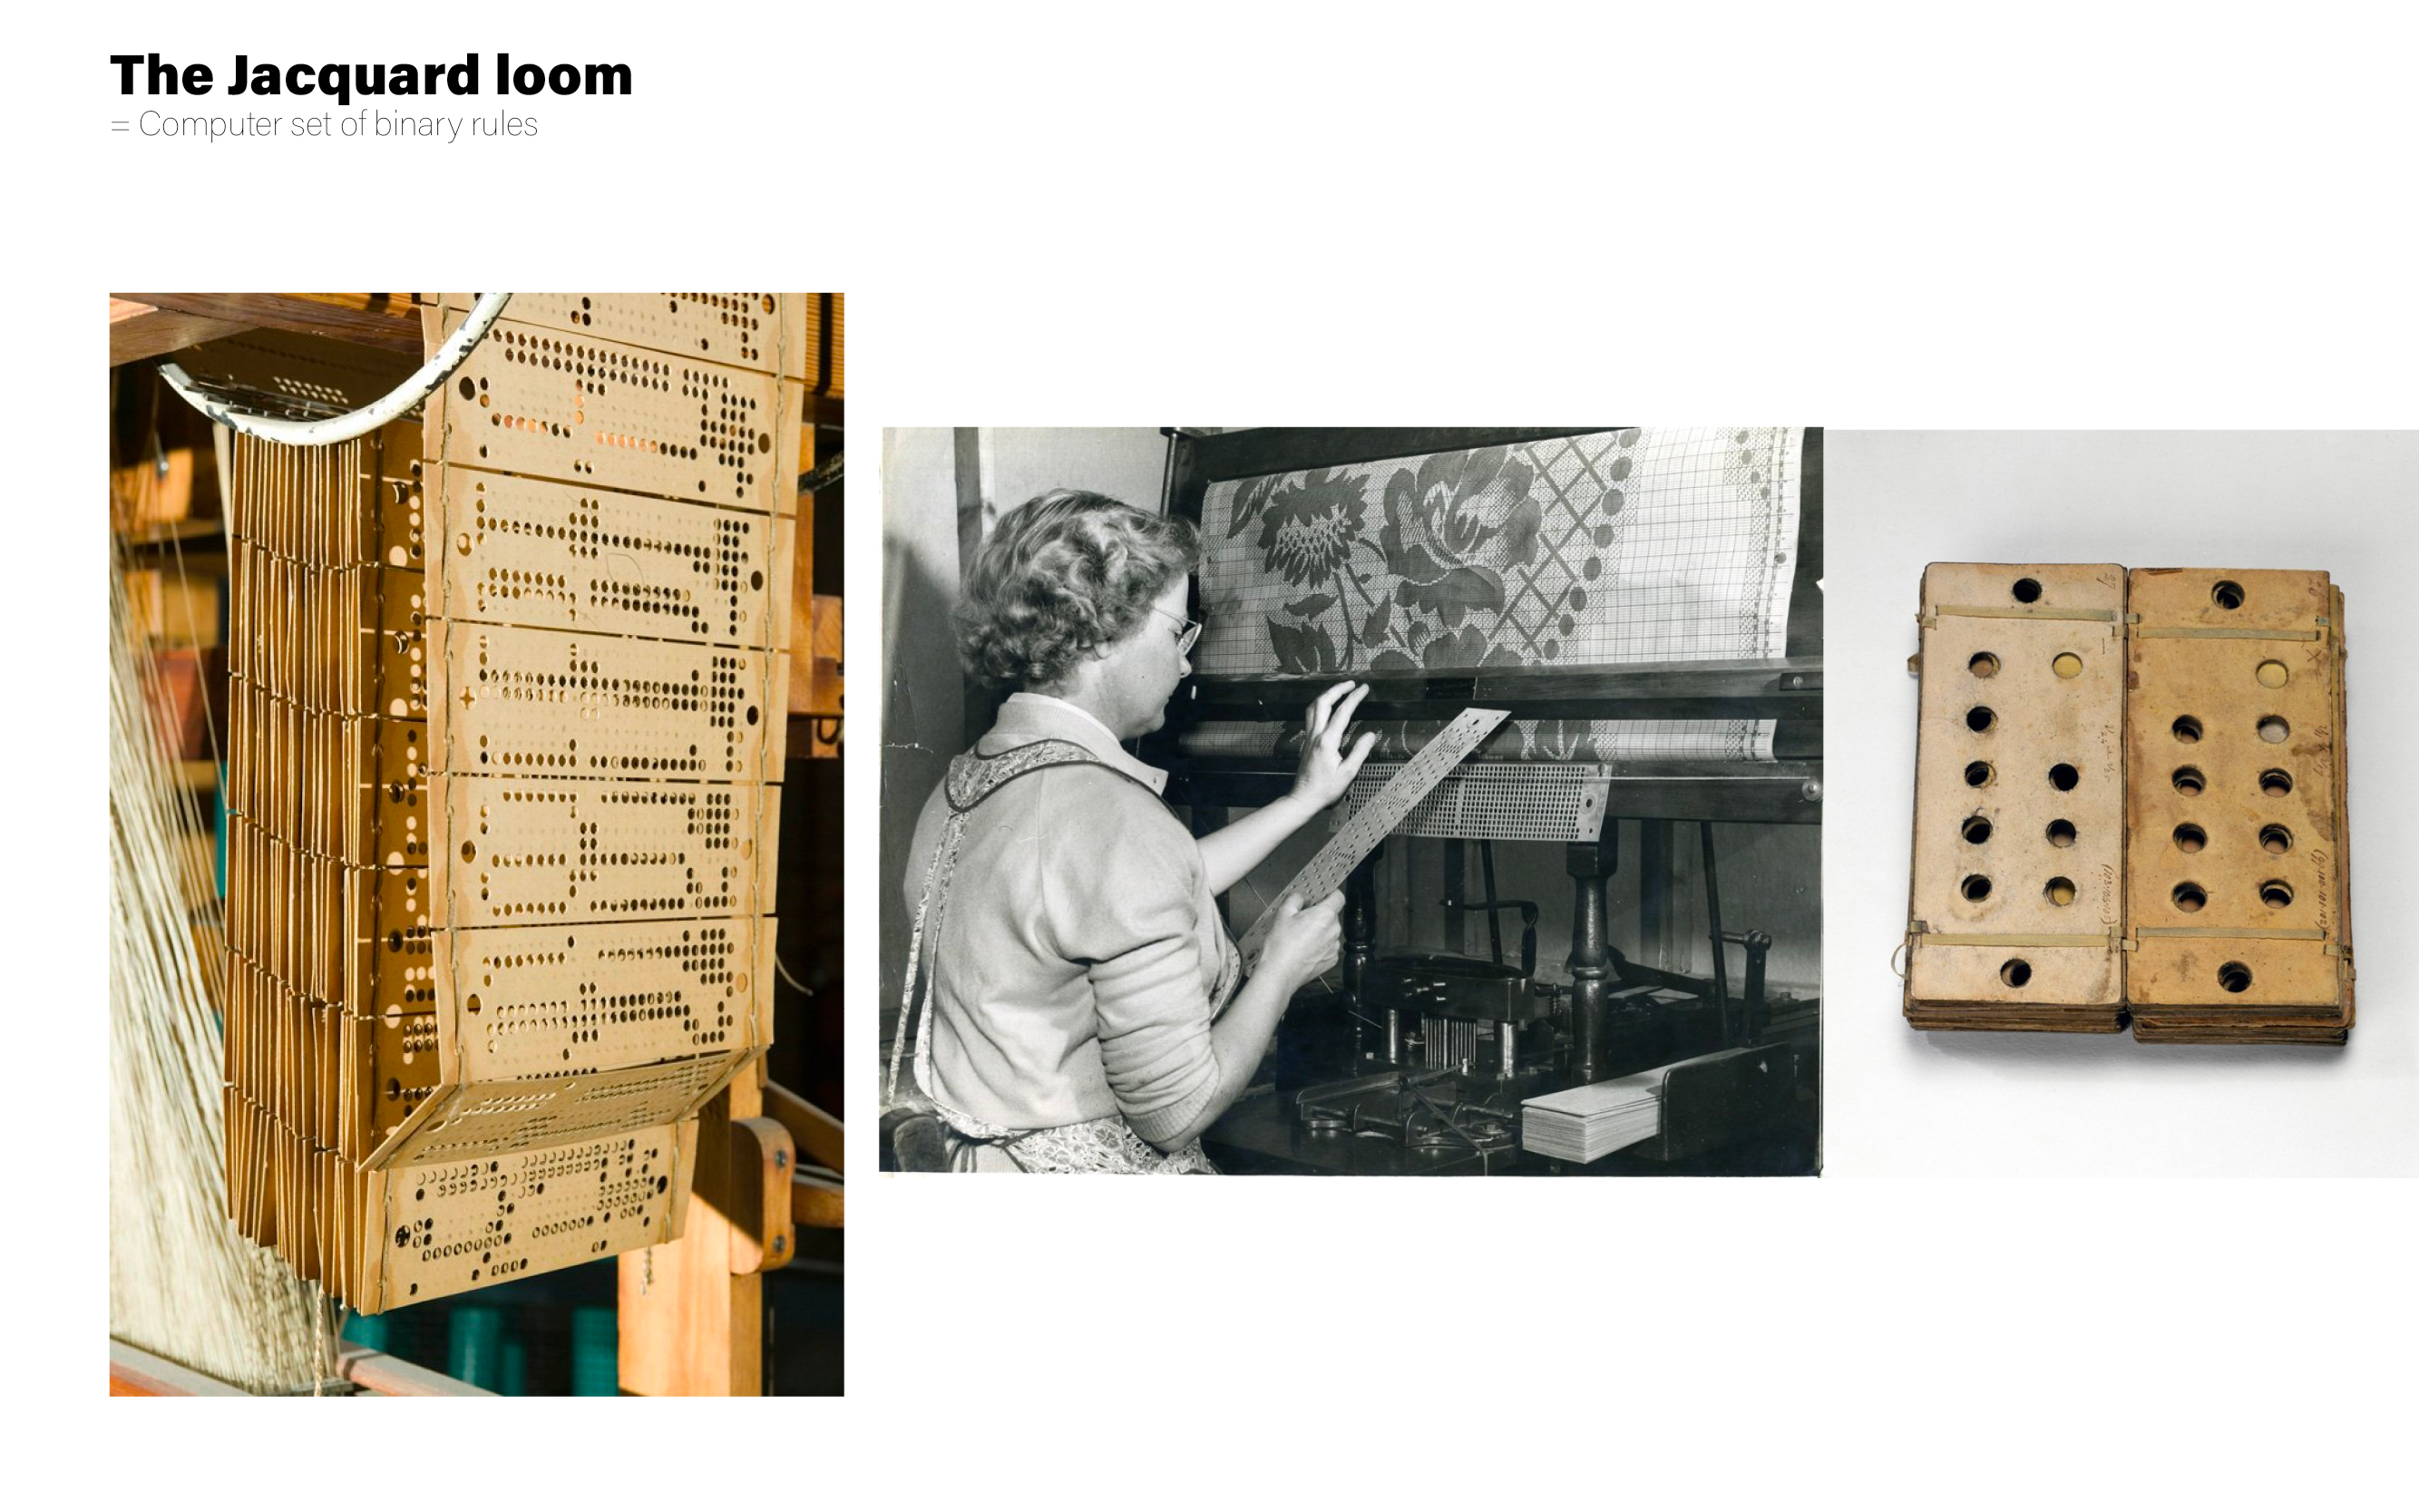
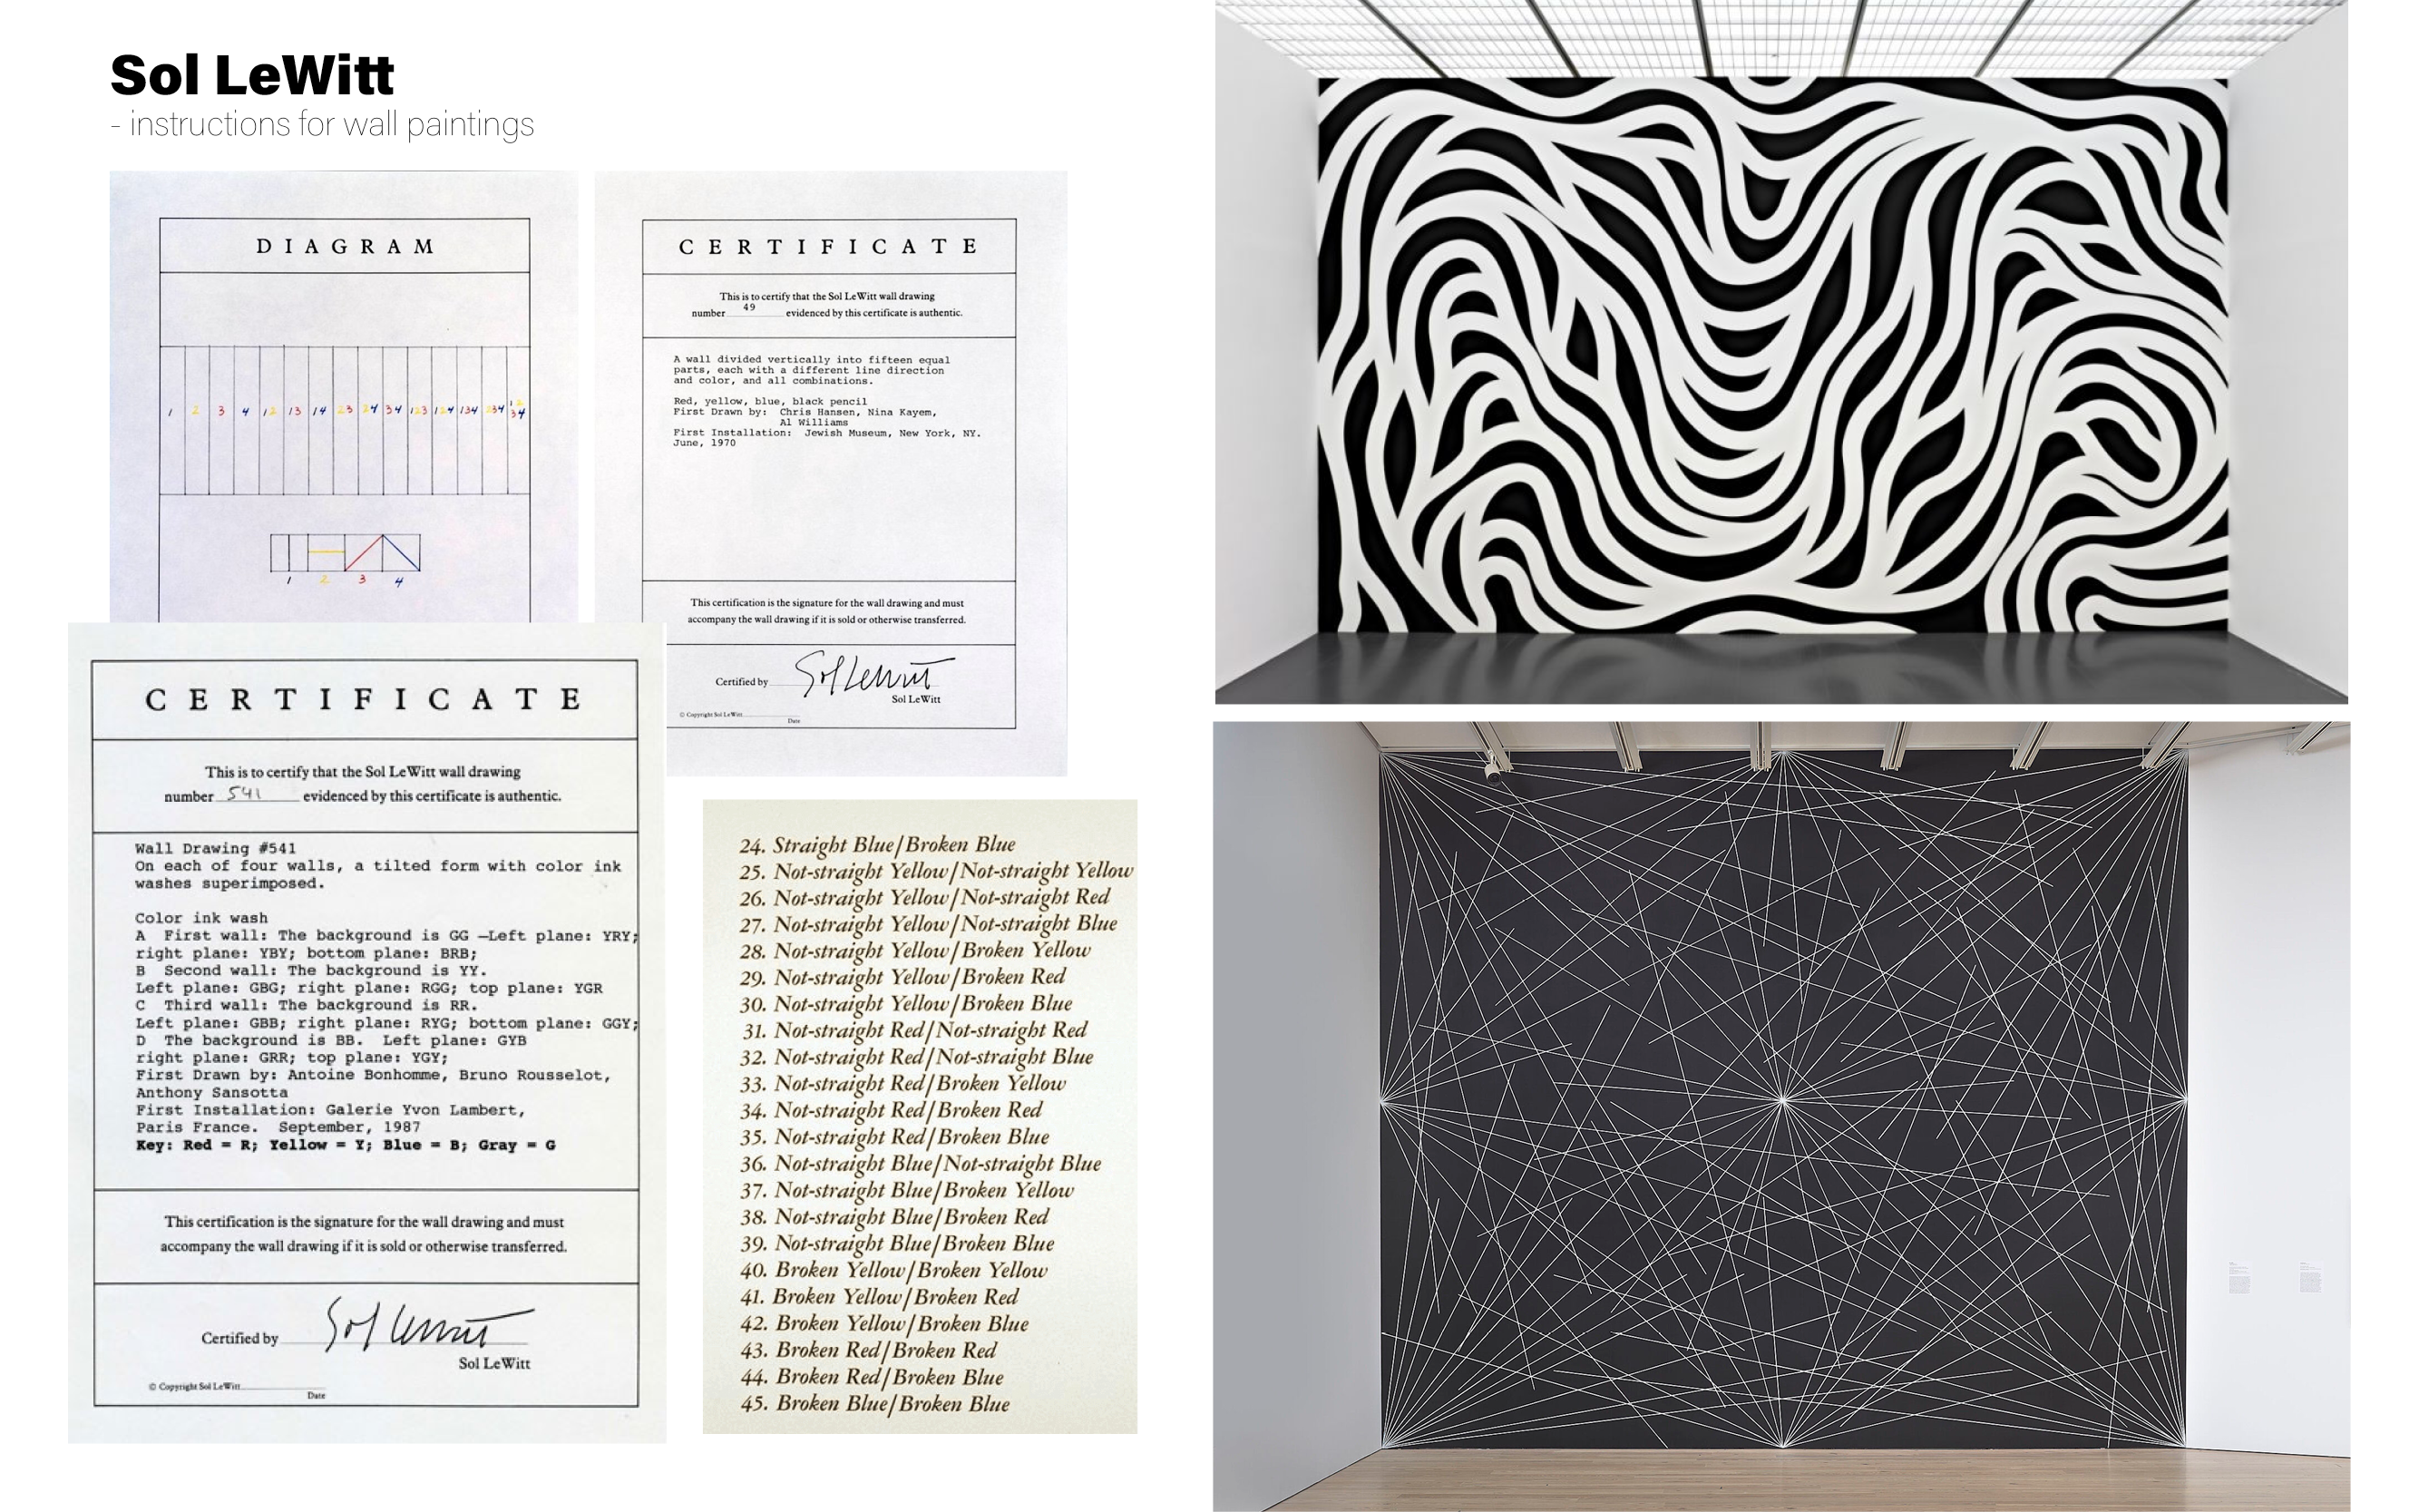
Understanging the principle behind Grasshopper and parametric design Giving a series of instructions/parameters/ a set of rules that the computaer calculates to create create a visual complex result.
Here are some inspirations based on this principal of visuals produced by a set of rules, algorithms, binary code, parameters:
PREVIOUS WORKS


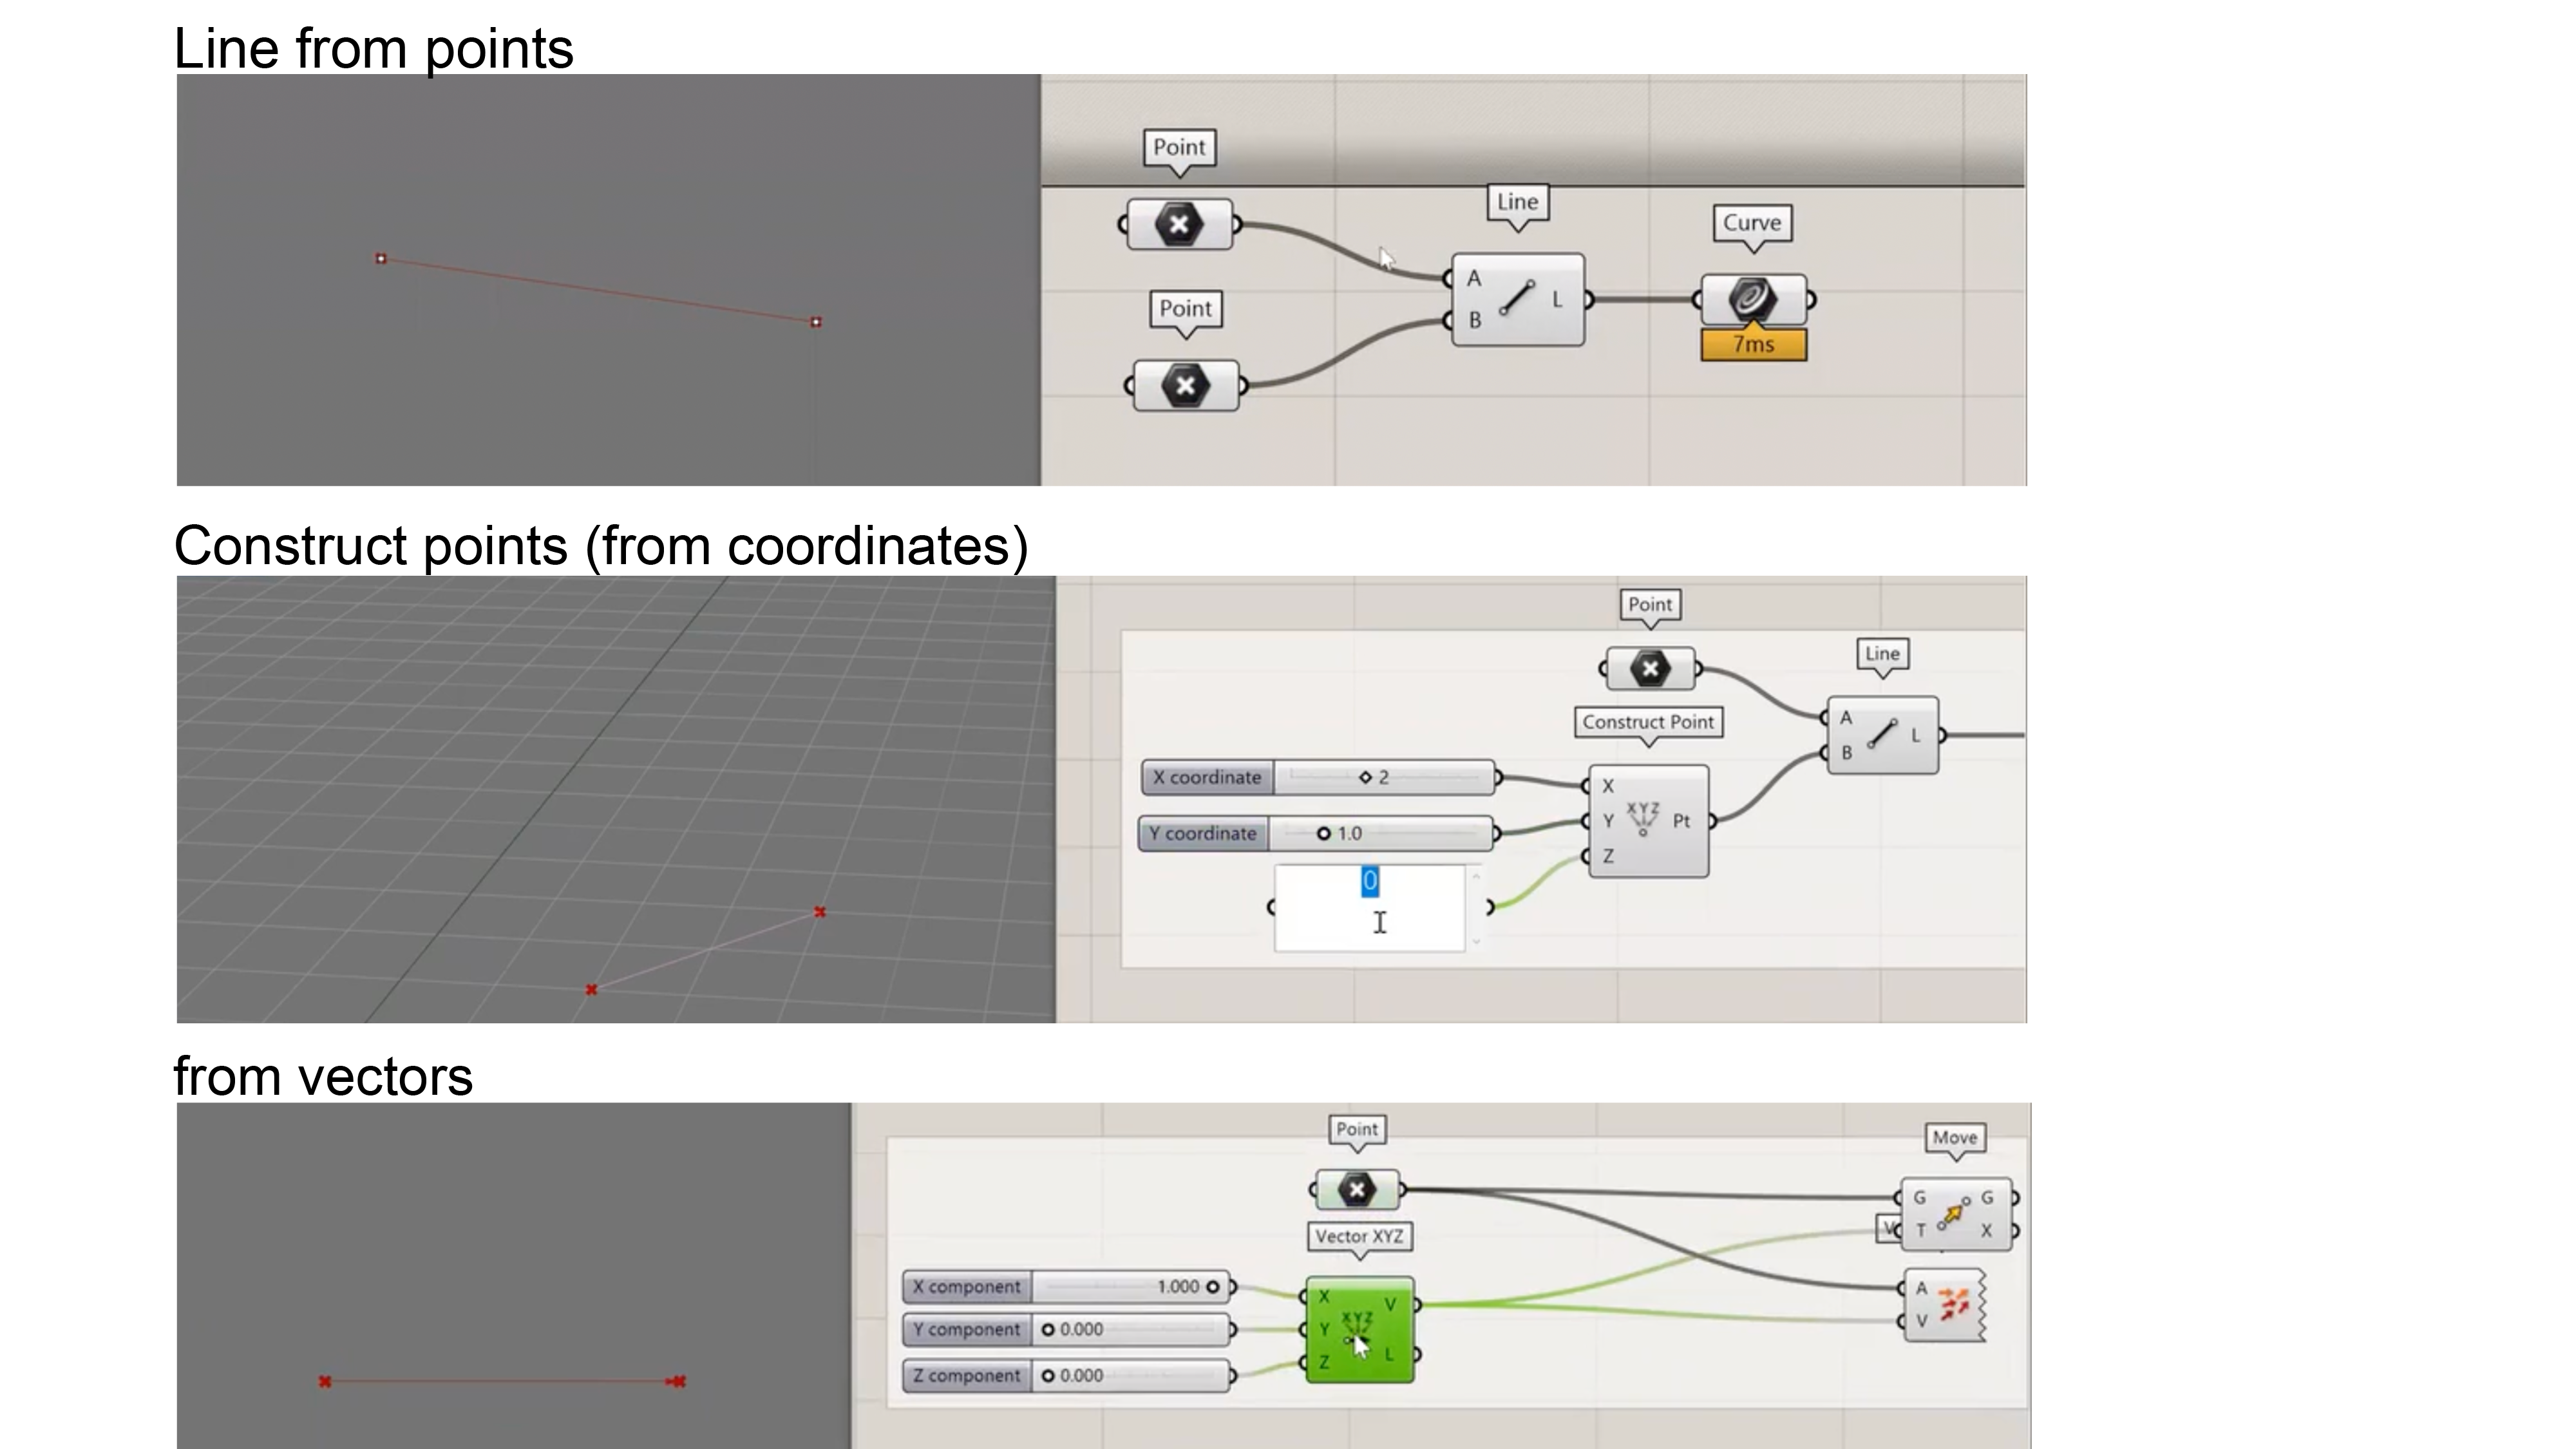
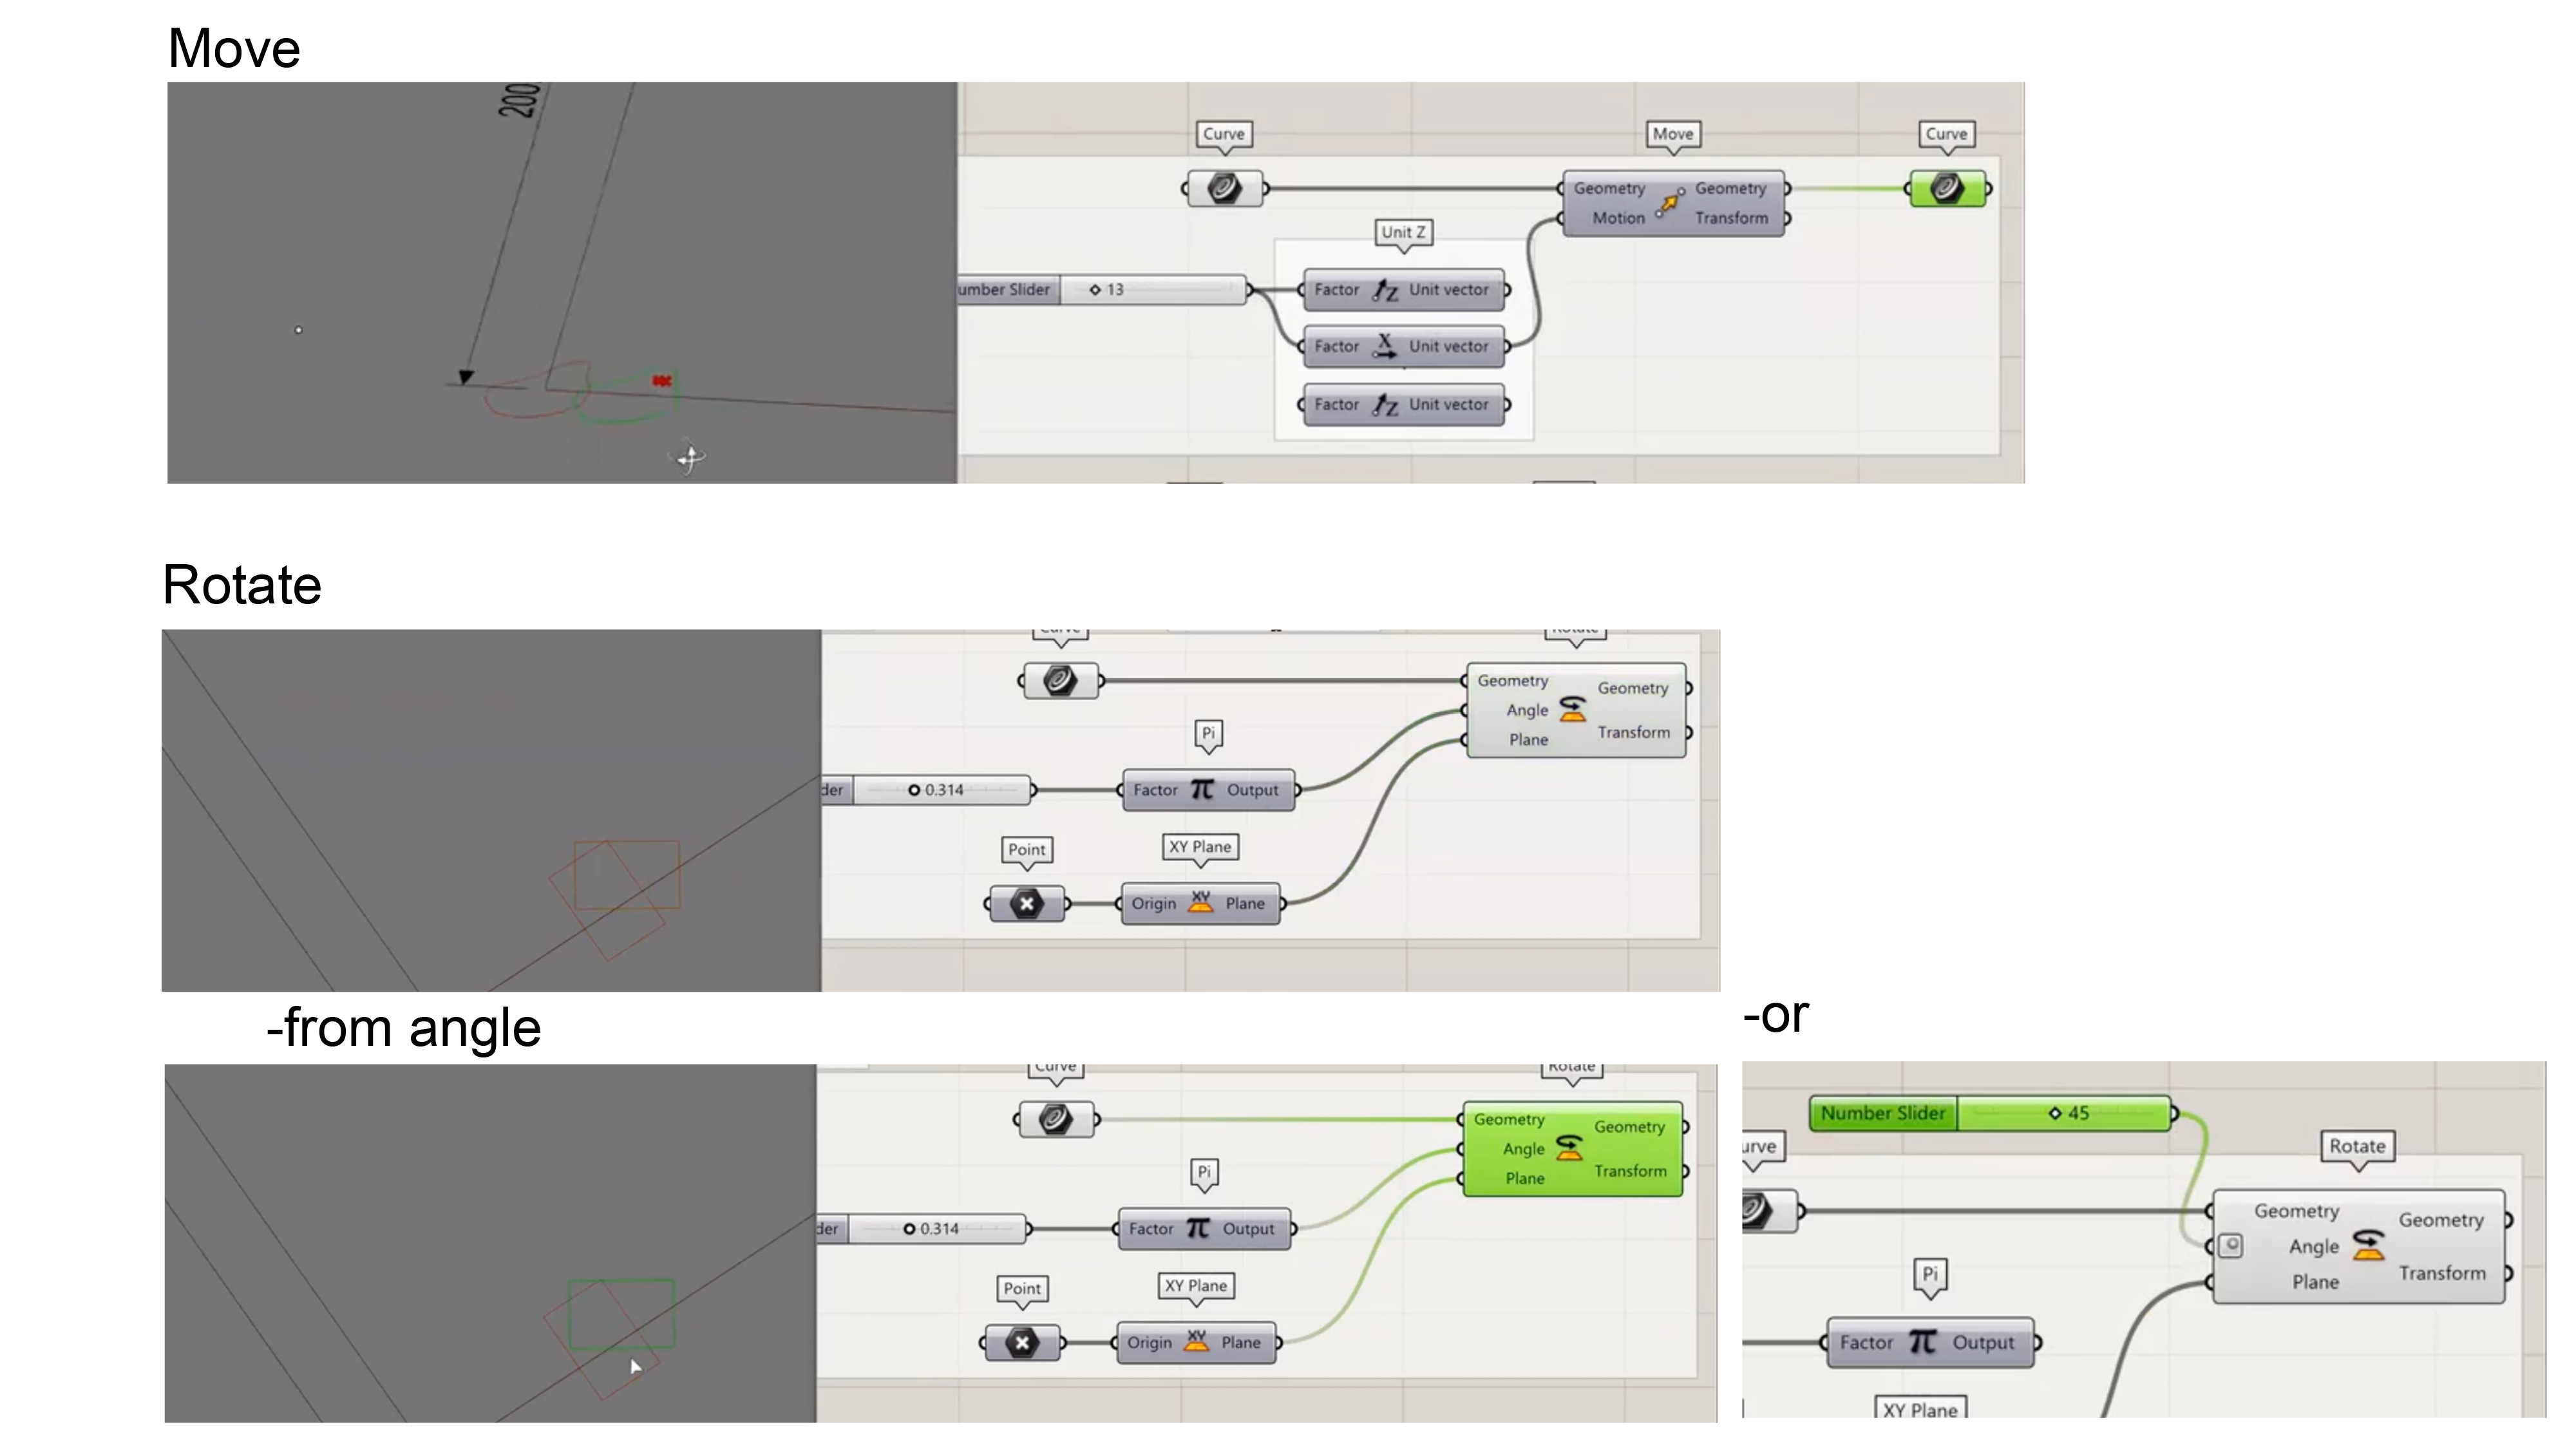
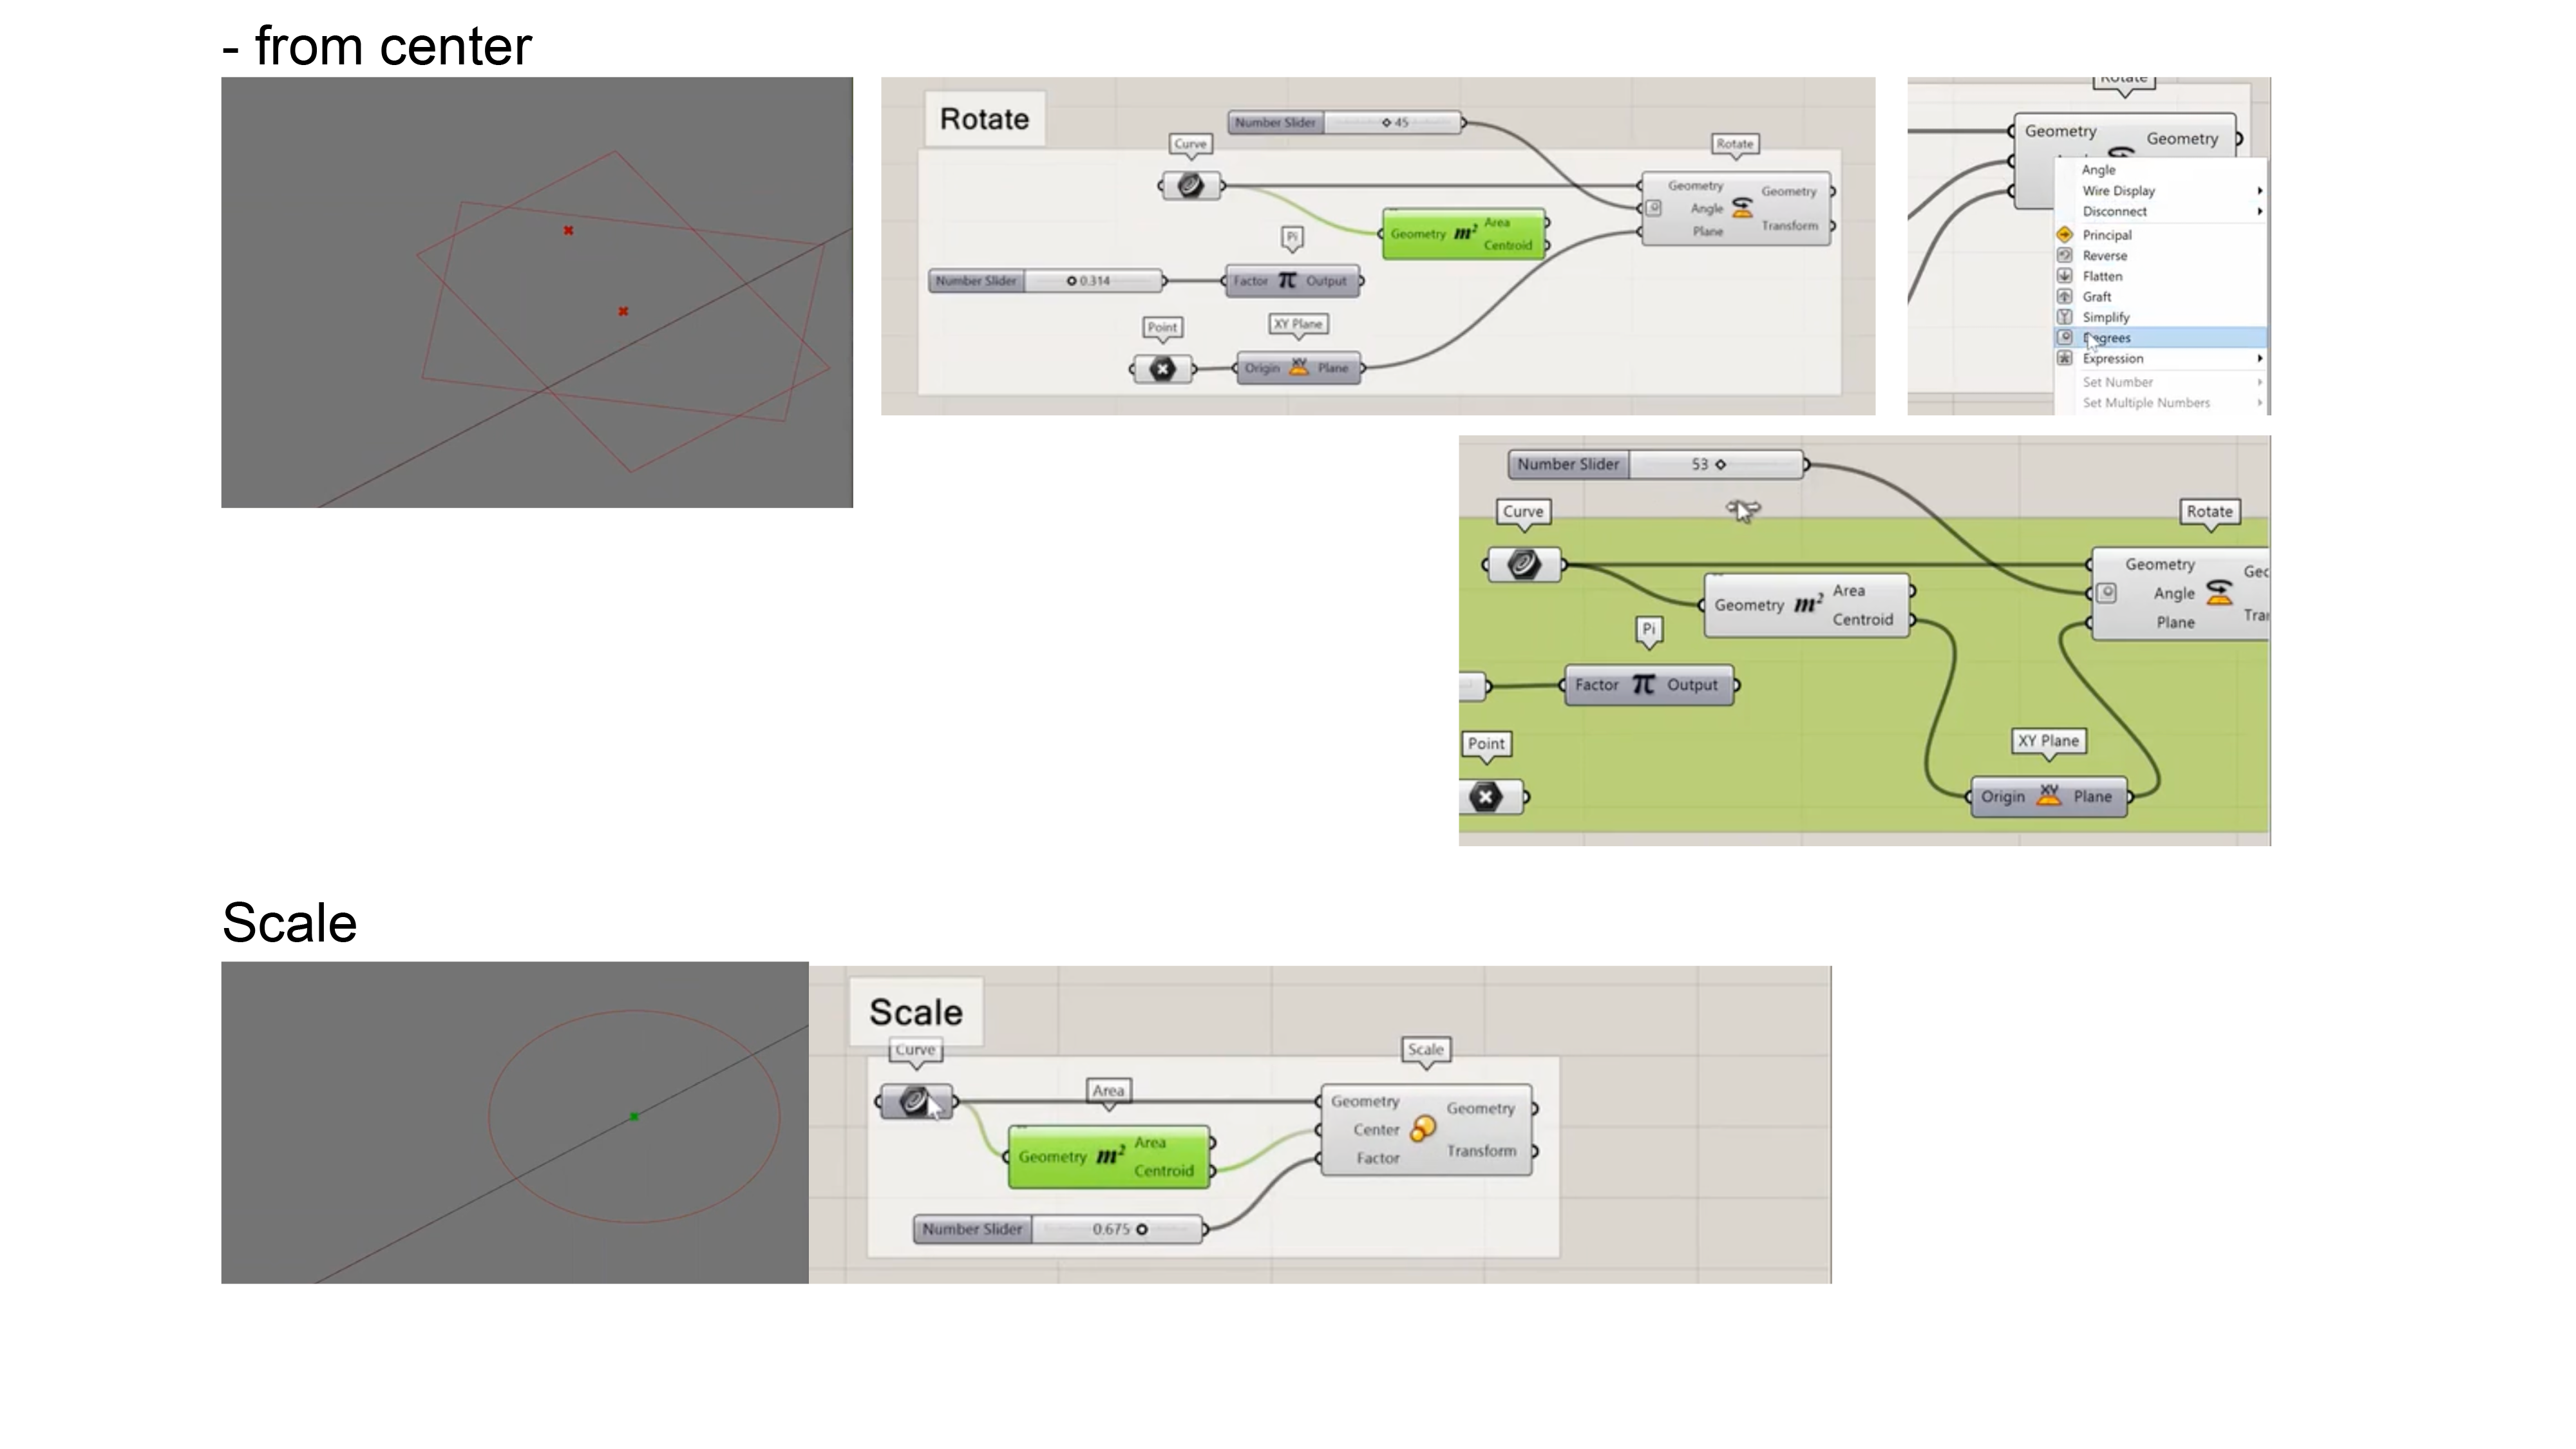
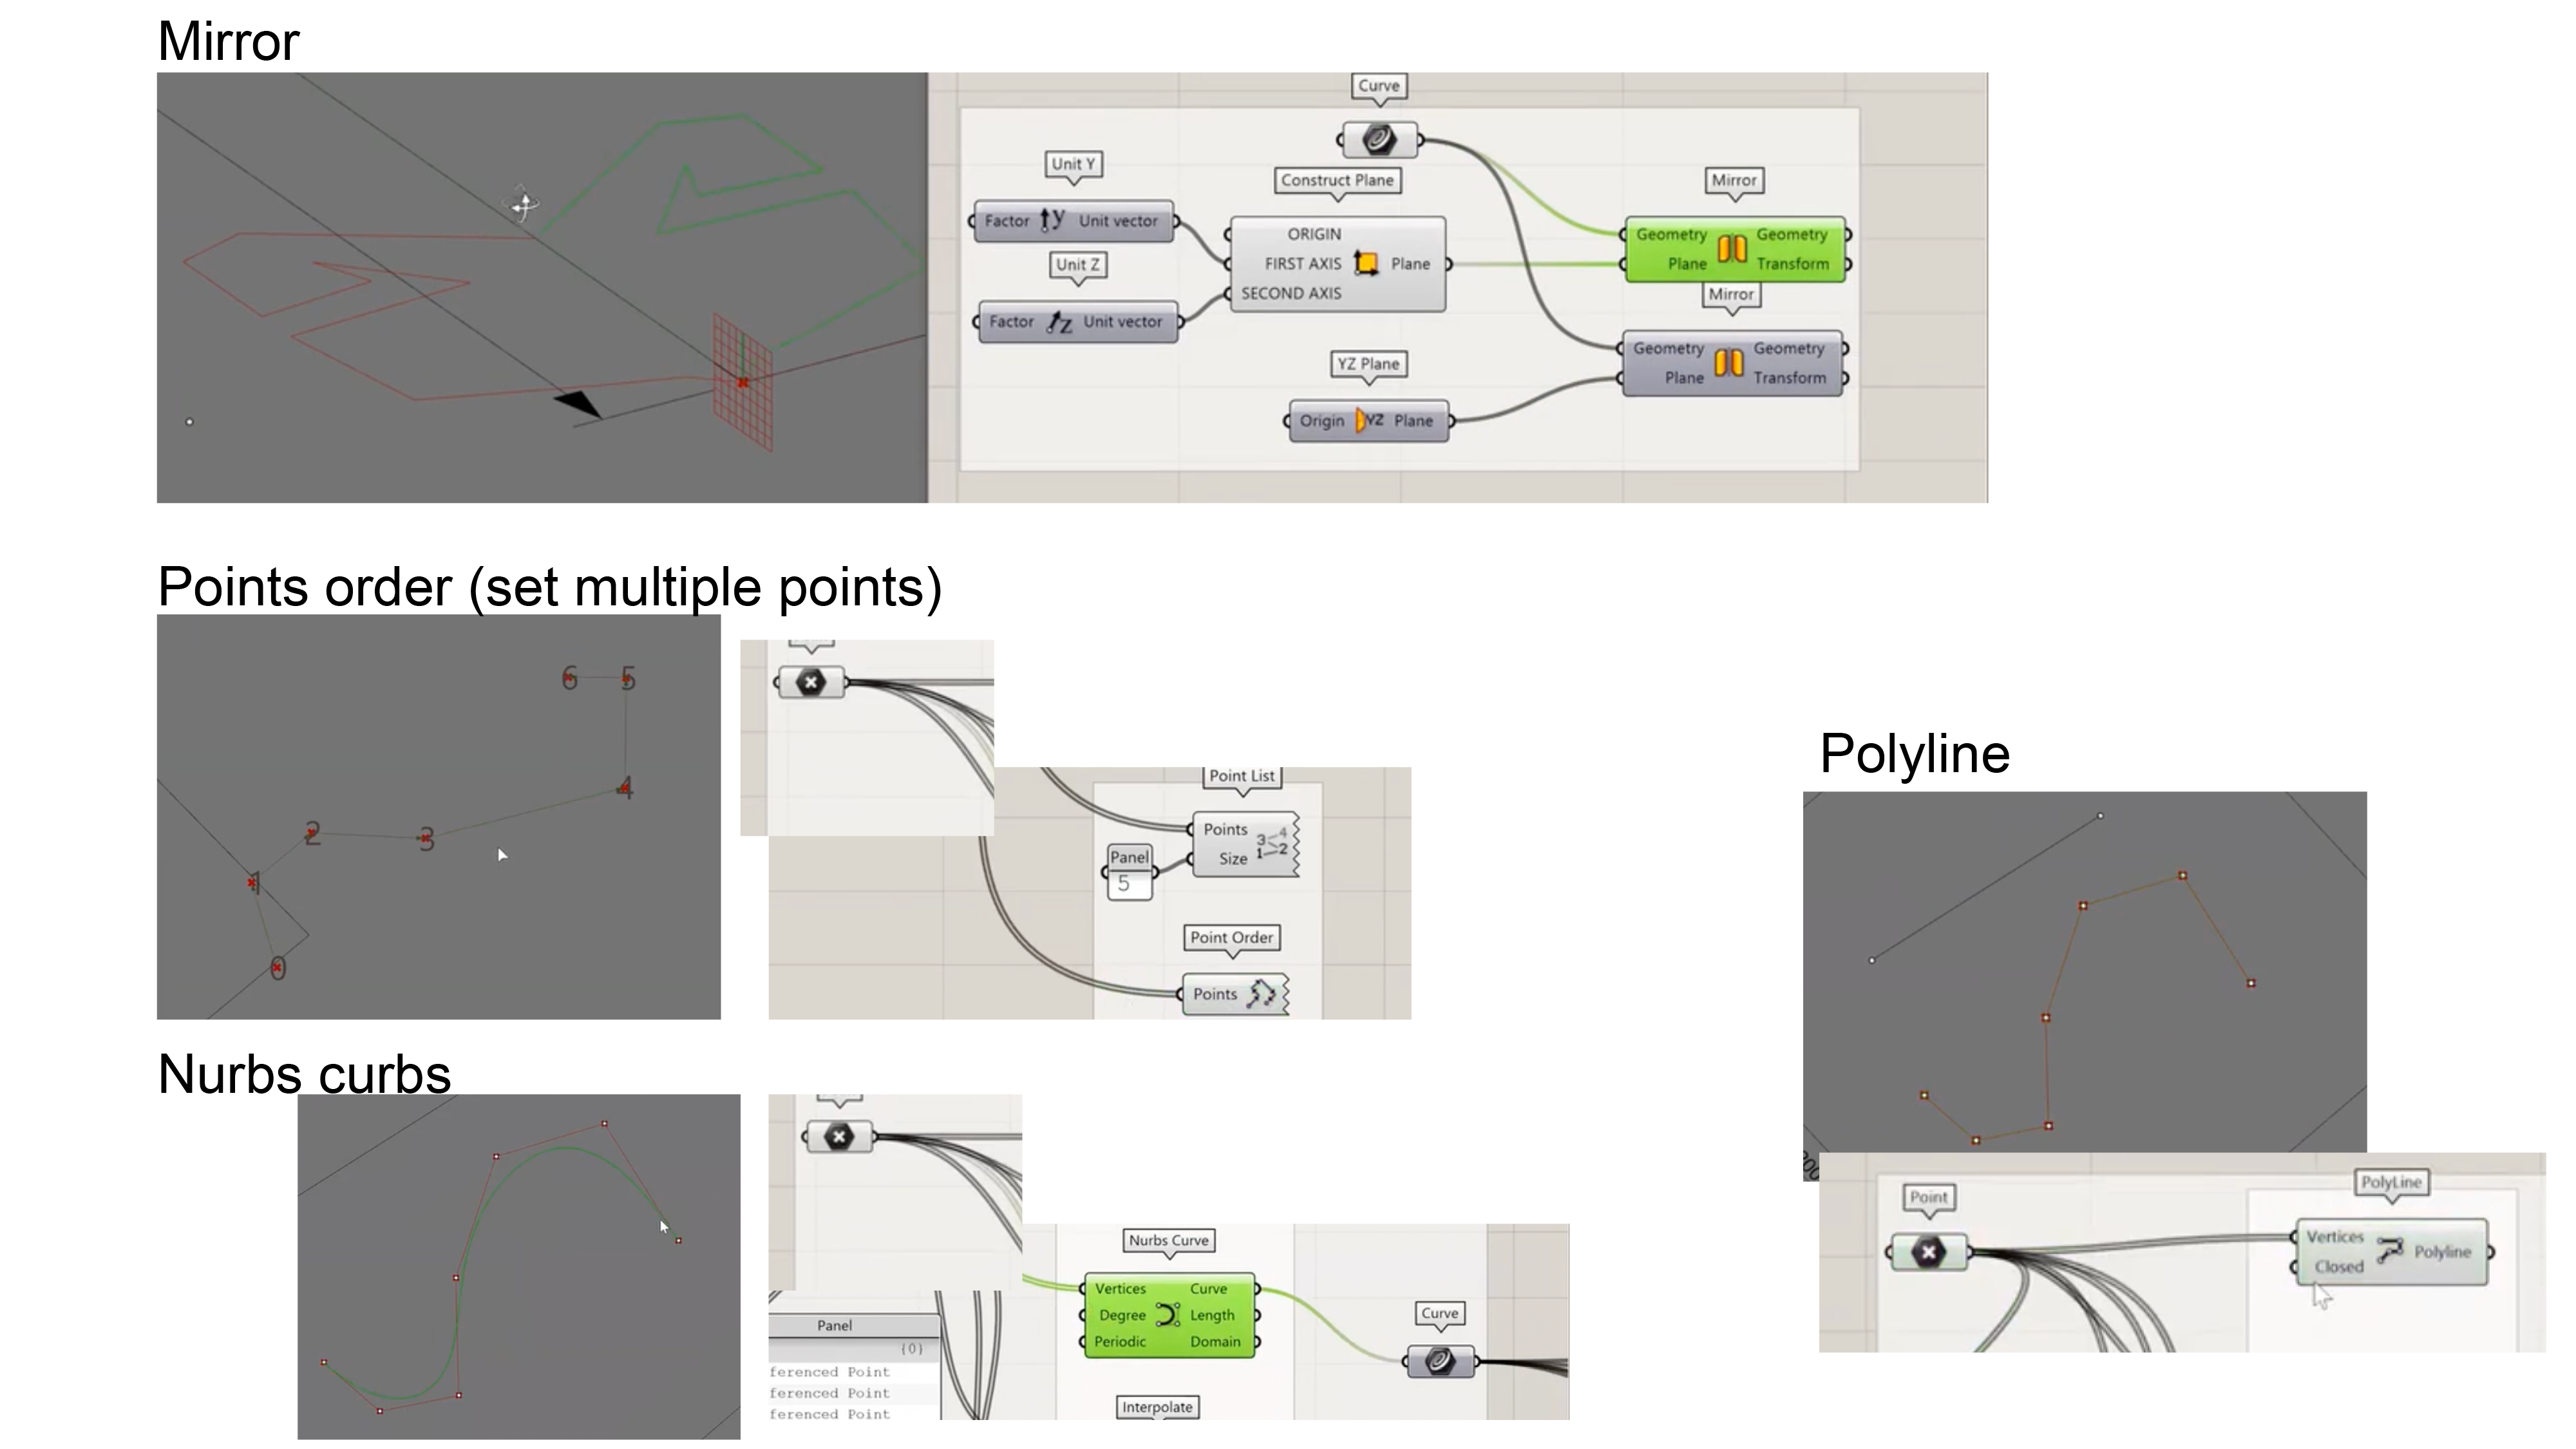
Grasshopper Basics
SHORTCUTS
- Research = Double click = Research
- Slicer = Double click + writing number
- Panel = -research- "
- Search/magnifying glass = Click scroll wheel
- To disconnect (or right click disconnect on the symbol) = Cmd+Maj and removing a cable
- Connect the Grasshoper icon to the element on rhino= right click Set one " ... " to ...
-
Switch between différents files - window icon on top
-
right click depends on the part you click the symbol the icon or the connection)
-
right click outside - bake OR right click on the outside and then choose if we want to group and bake
-
View: Bifocal - draw full names
- View more complete info.: display>draw icons, full names, fancy wires
- to get the information of the content= EXTRACT PARAMETERS
- Component White= visible
- Component Dark grey= not visible
- Make a component Visible = right click preview on (or off for not visible)
To load a new file:
- right click lock solver
- put the file into the grasshoper workplace/board
- unlock solver of the new document
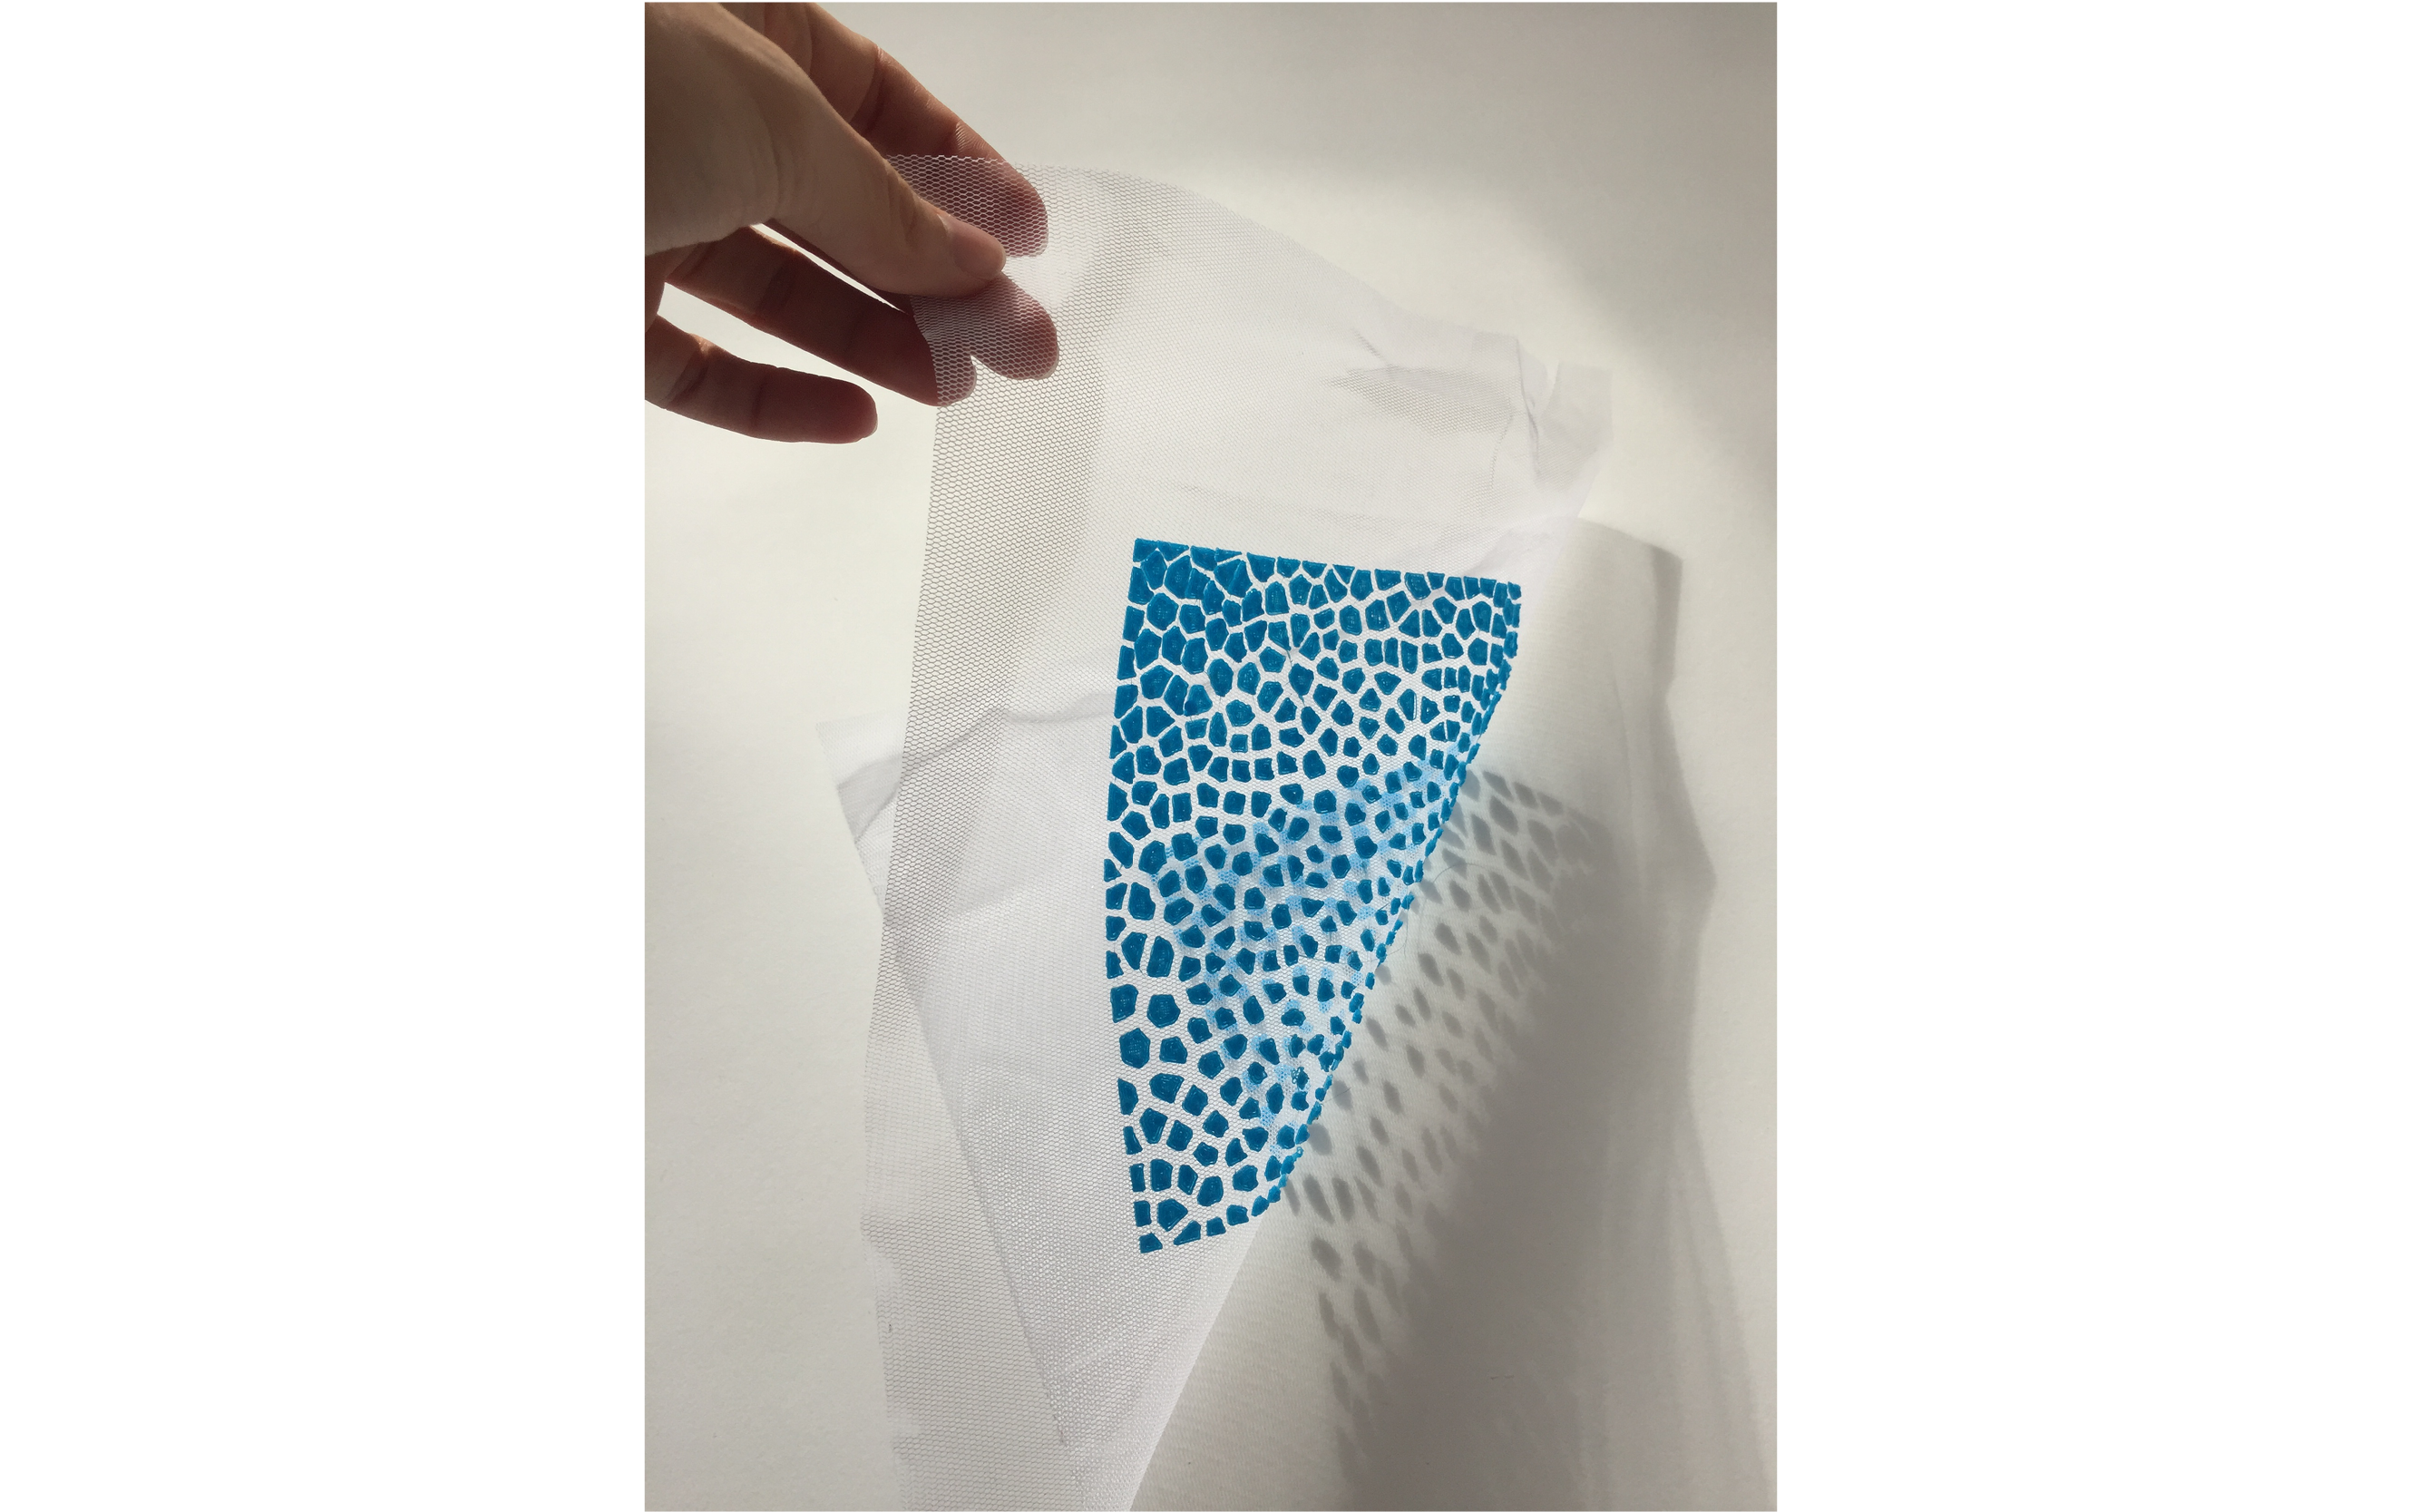
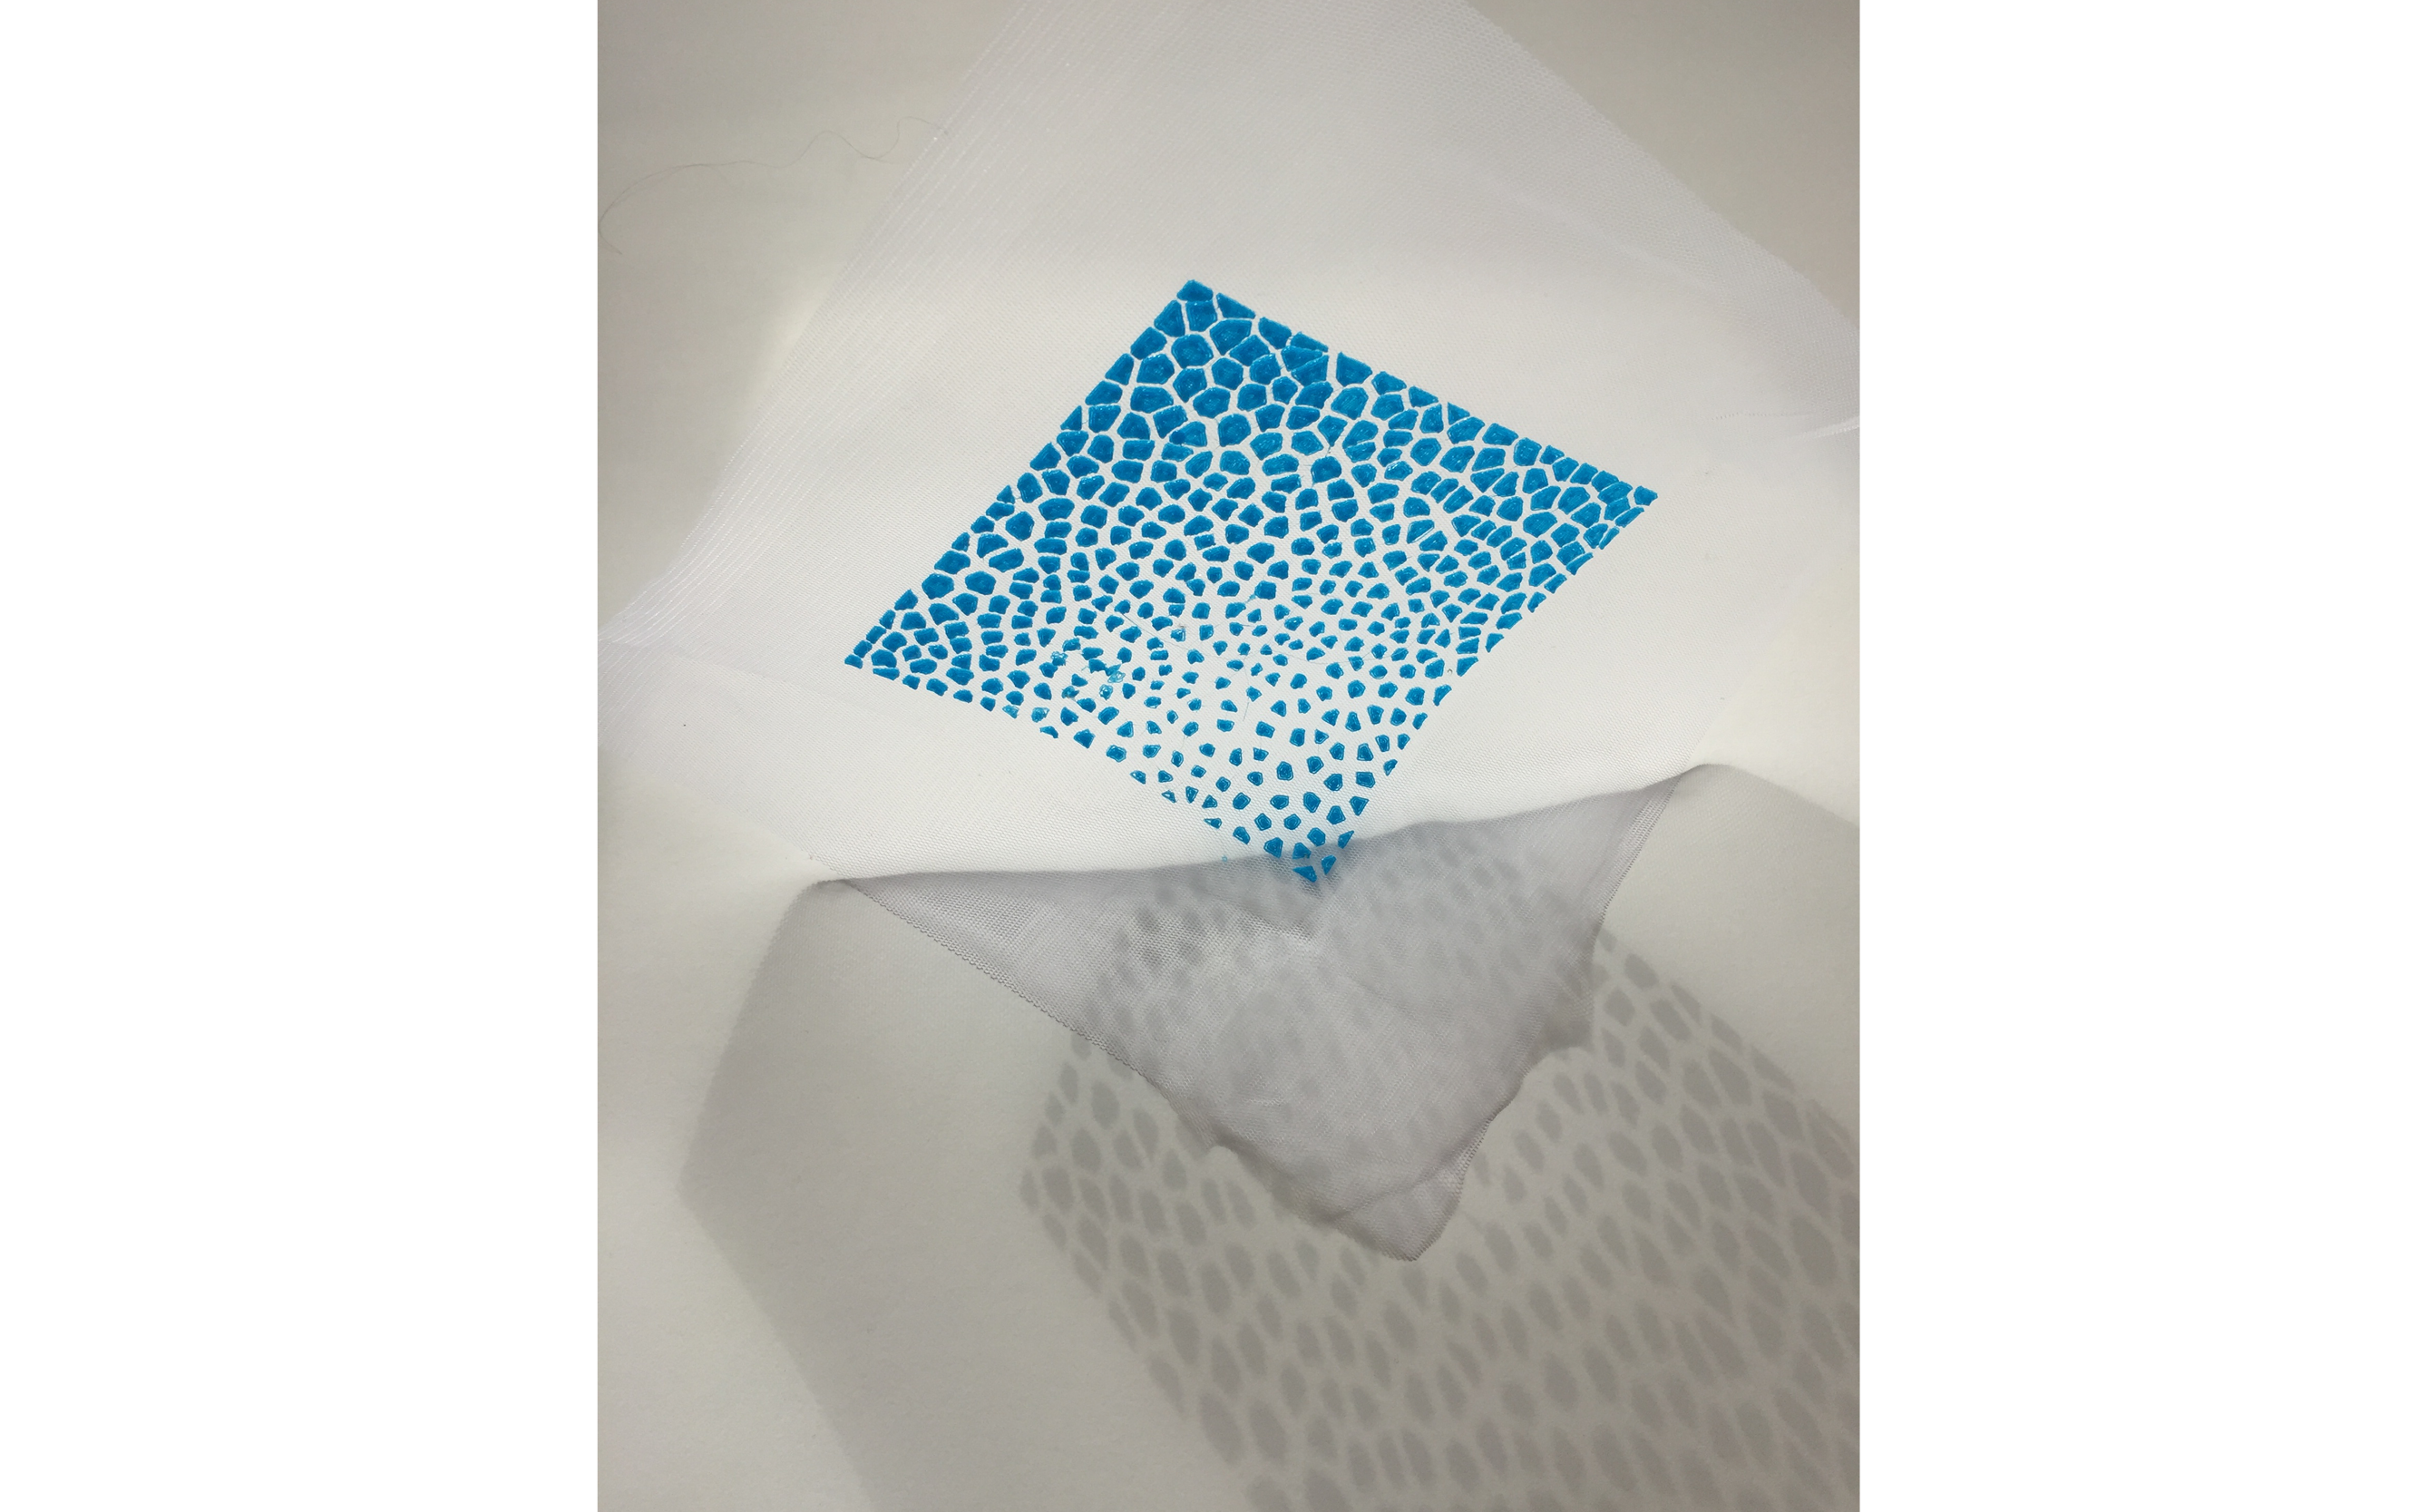
Patterns for 3D print - VORONOI
On Grasshopper it look's like that:
Video for making a Voronoi pattern
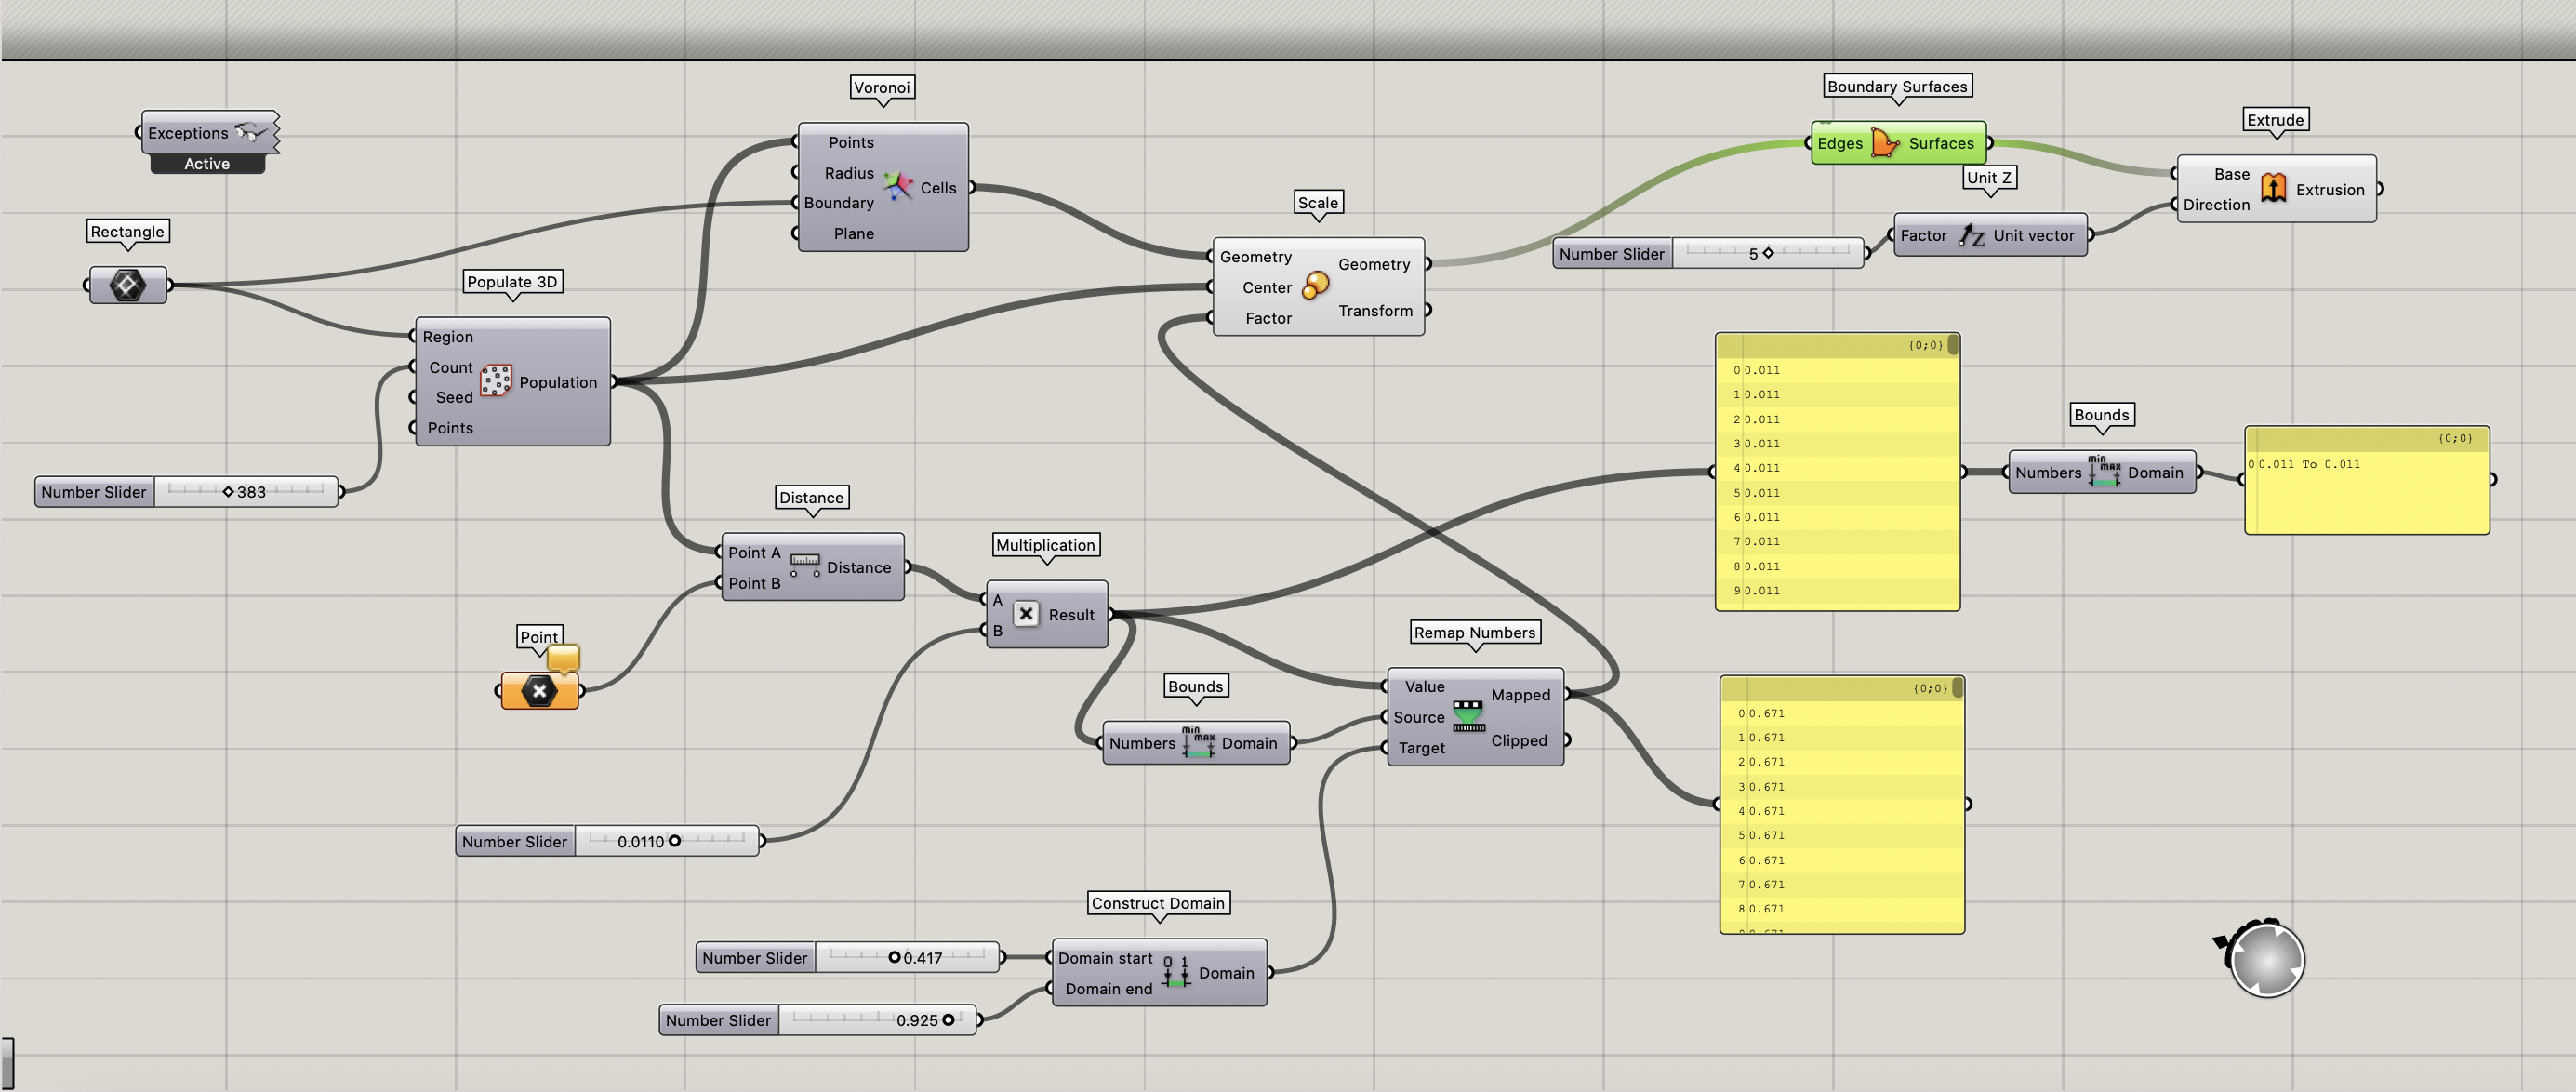
How to make it:
PART 1
PART2 remap Numebr for adjusting the size of the cells
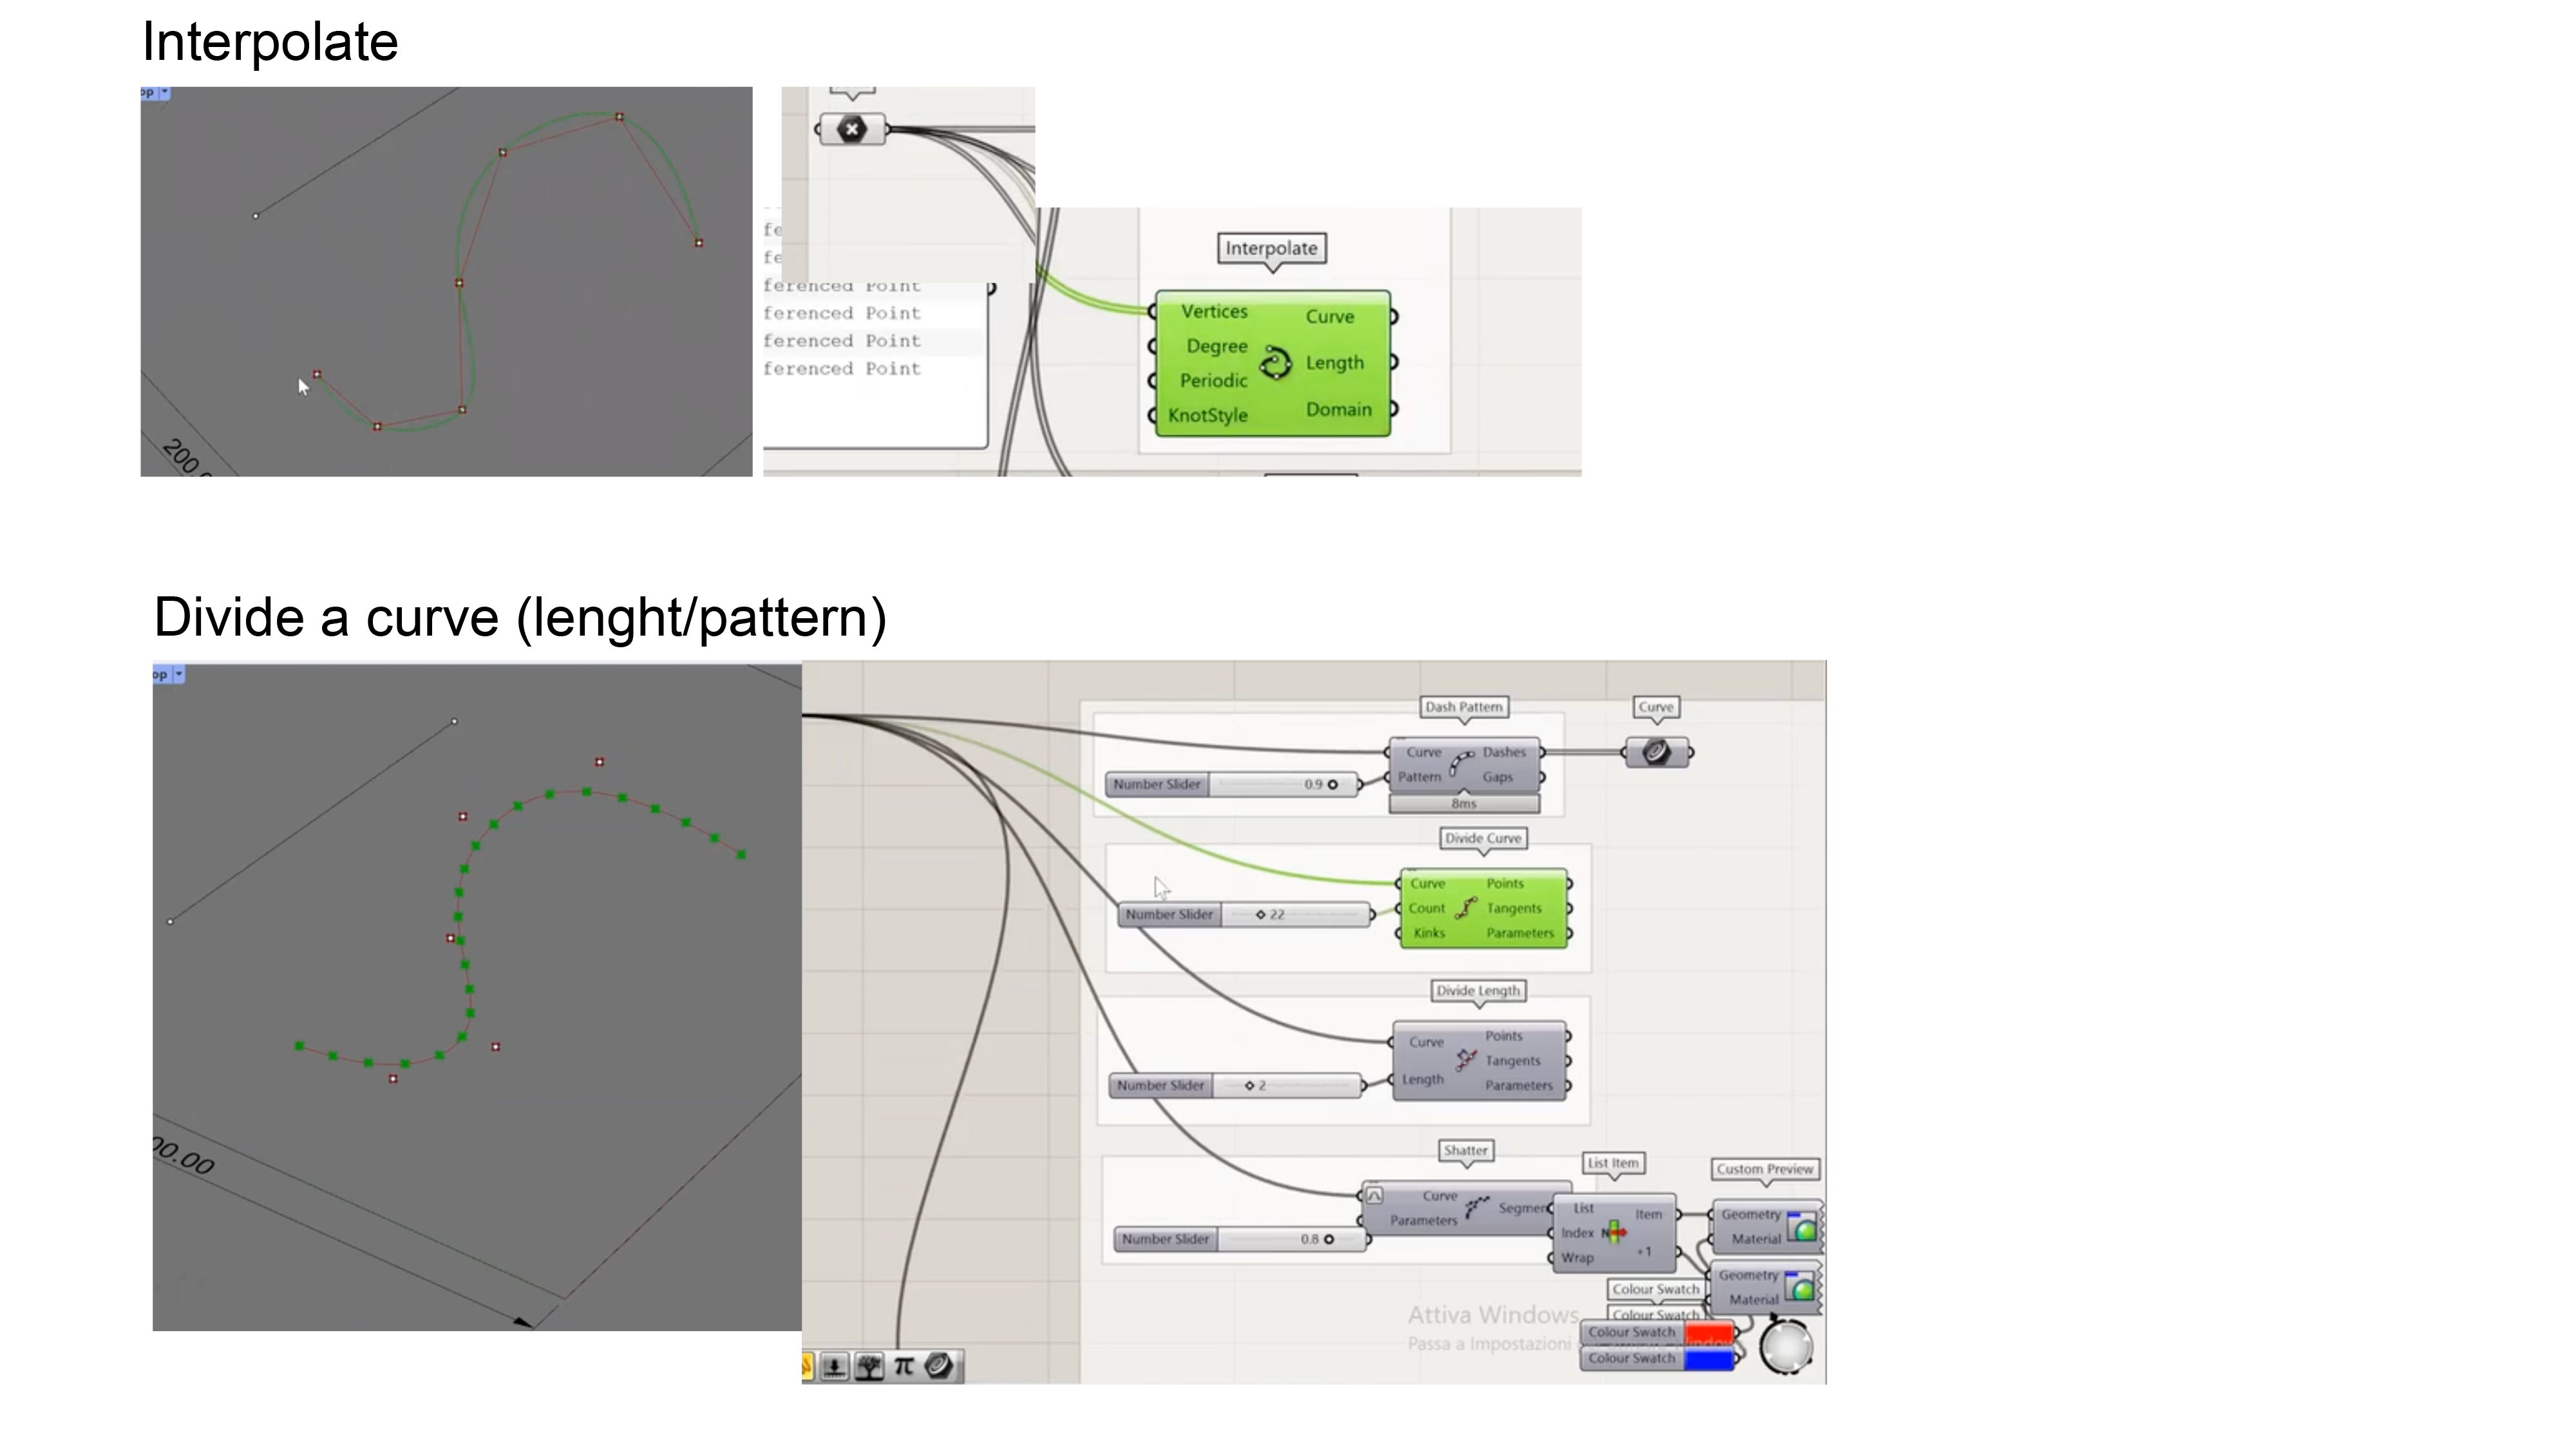
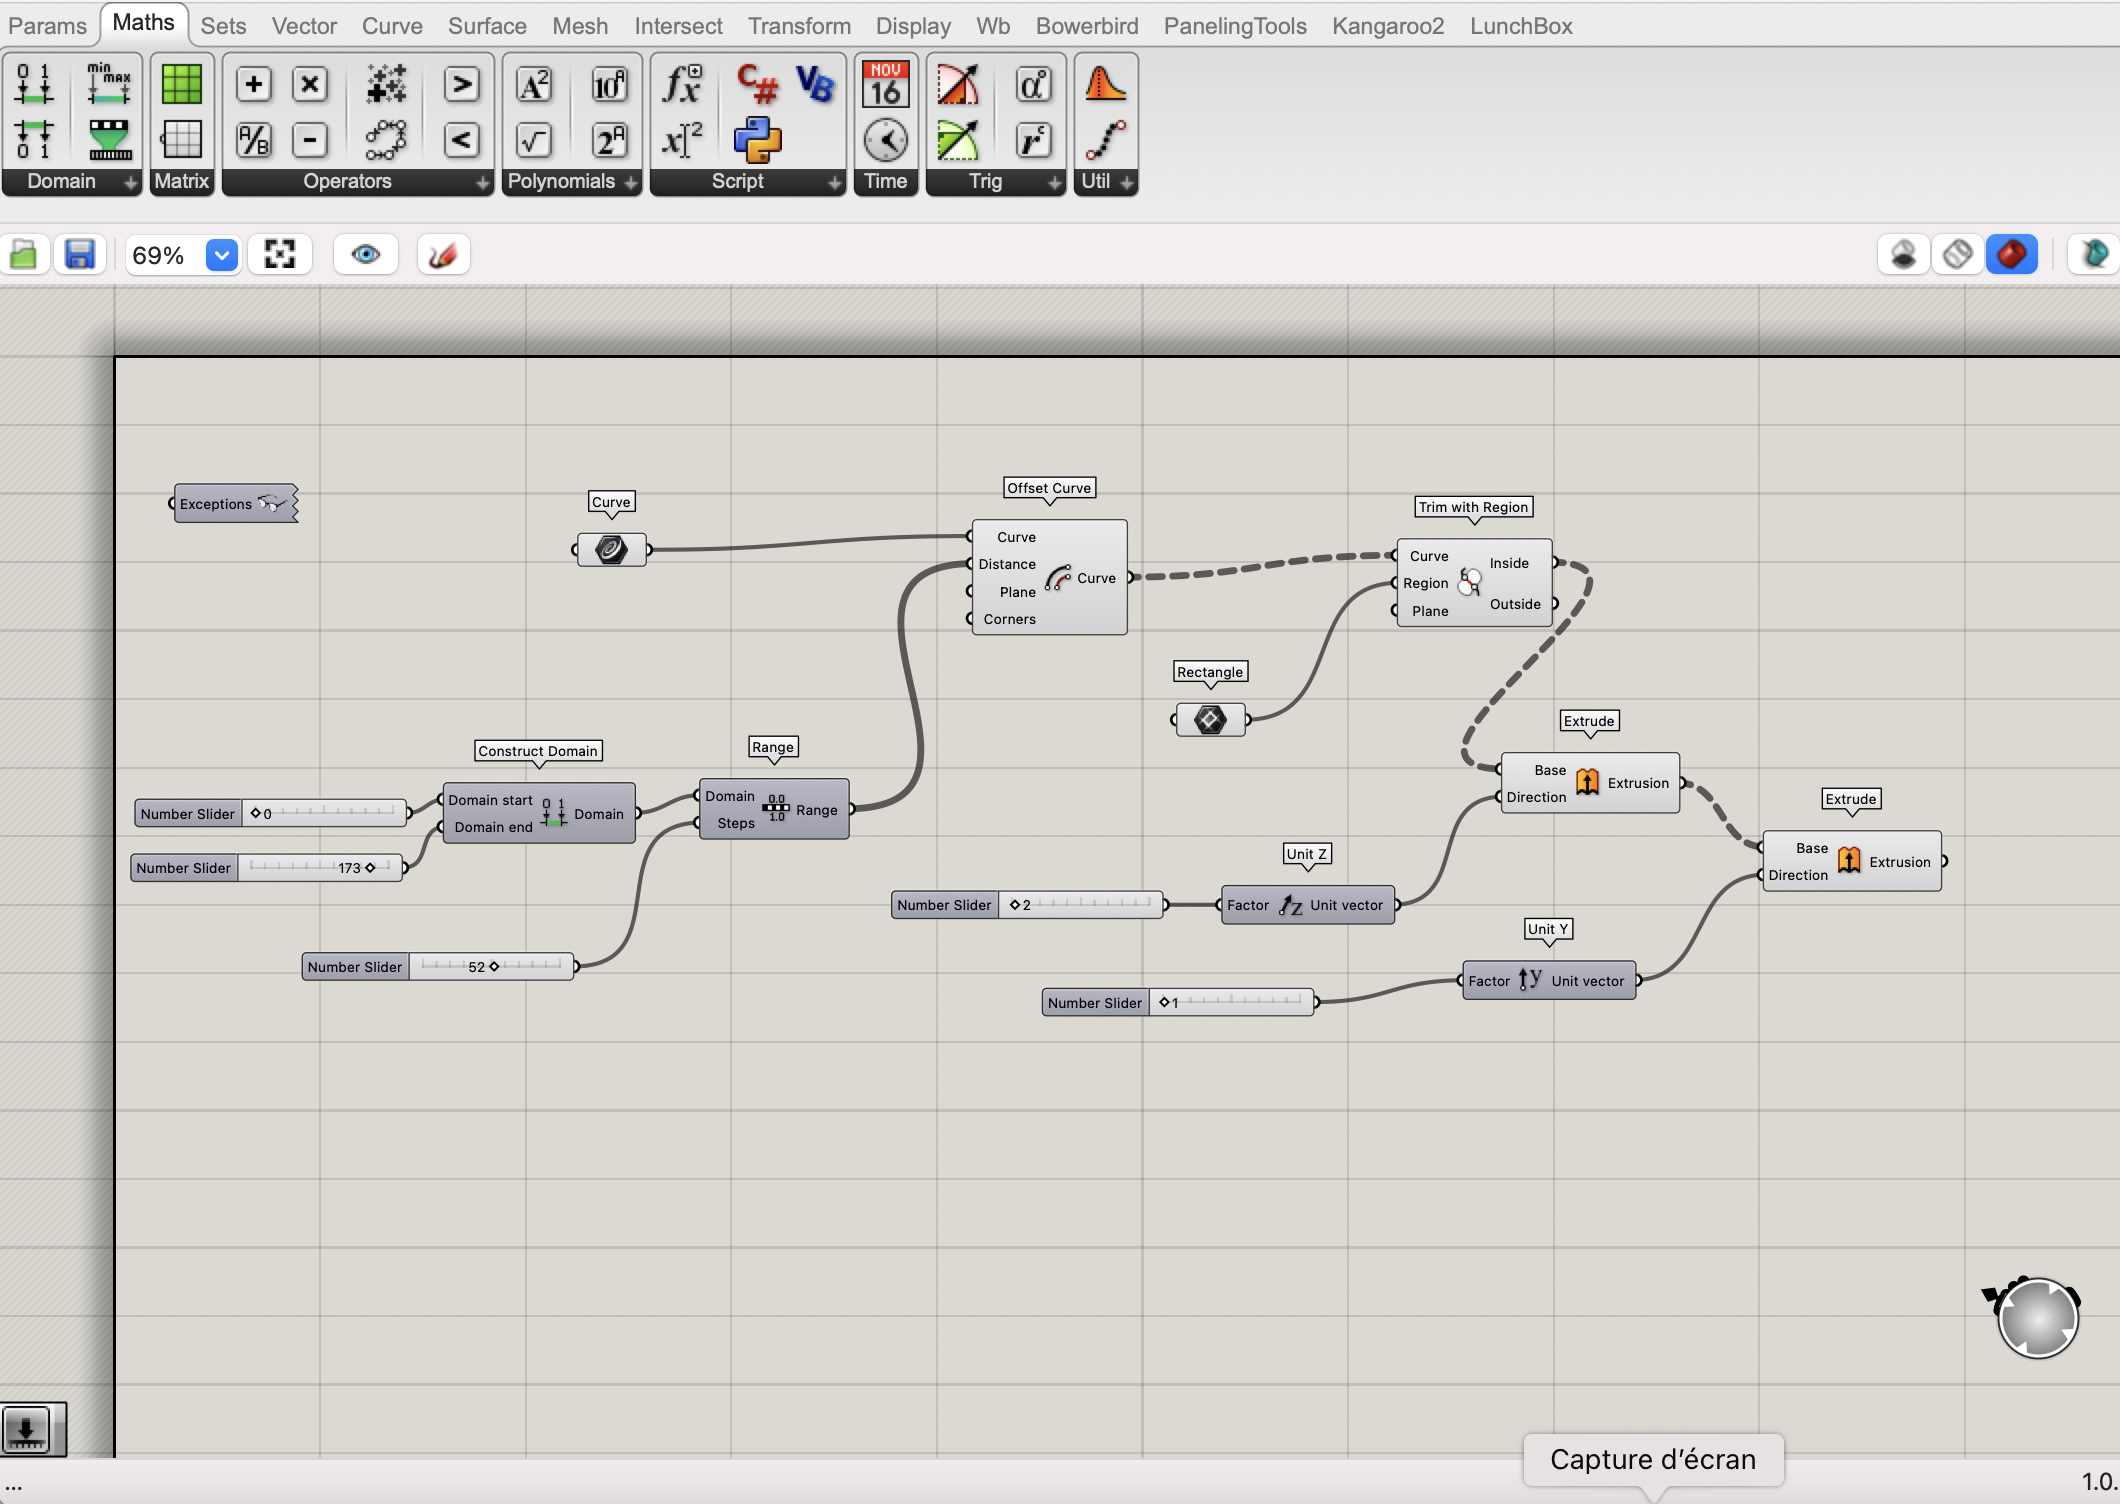
Patterns for 3D print - LINES
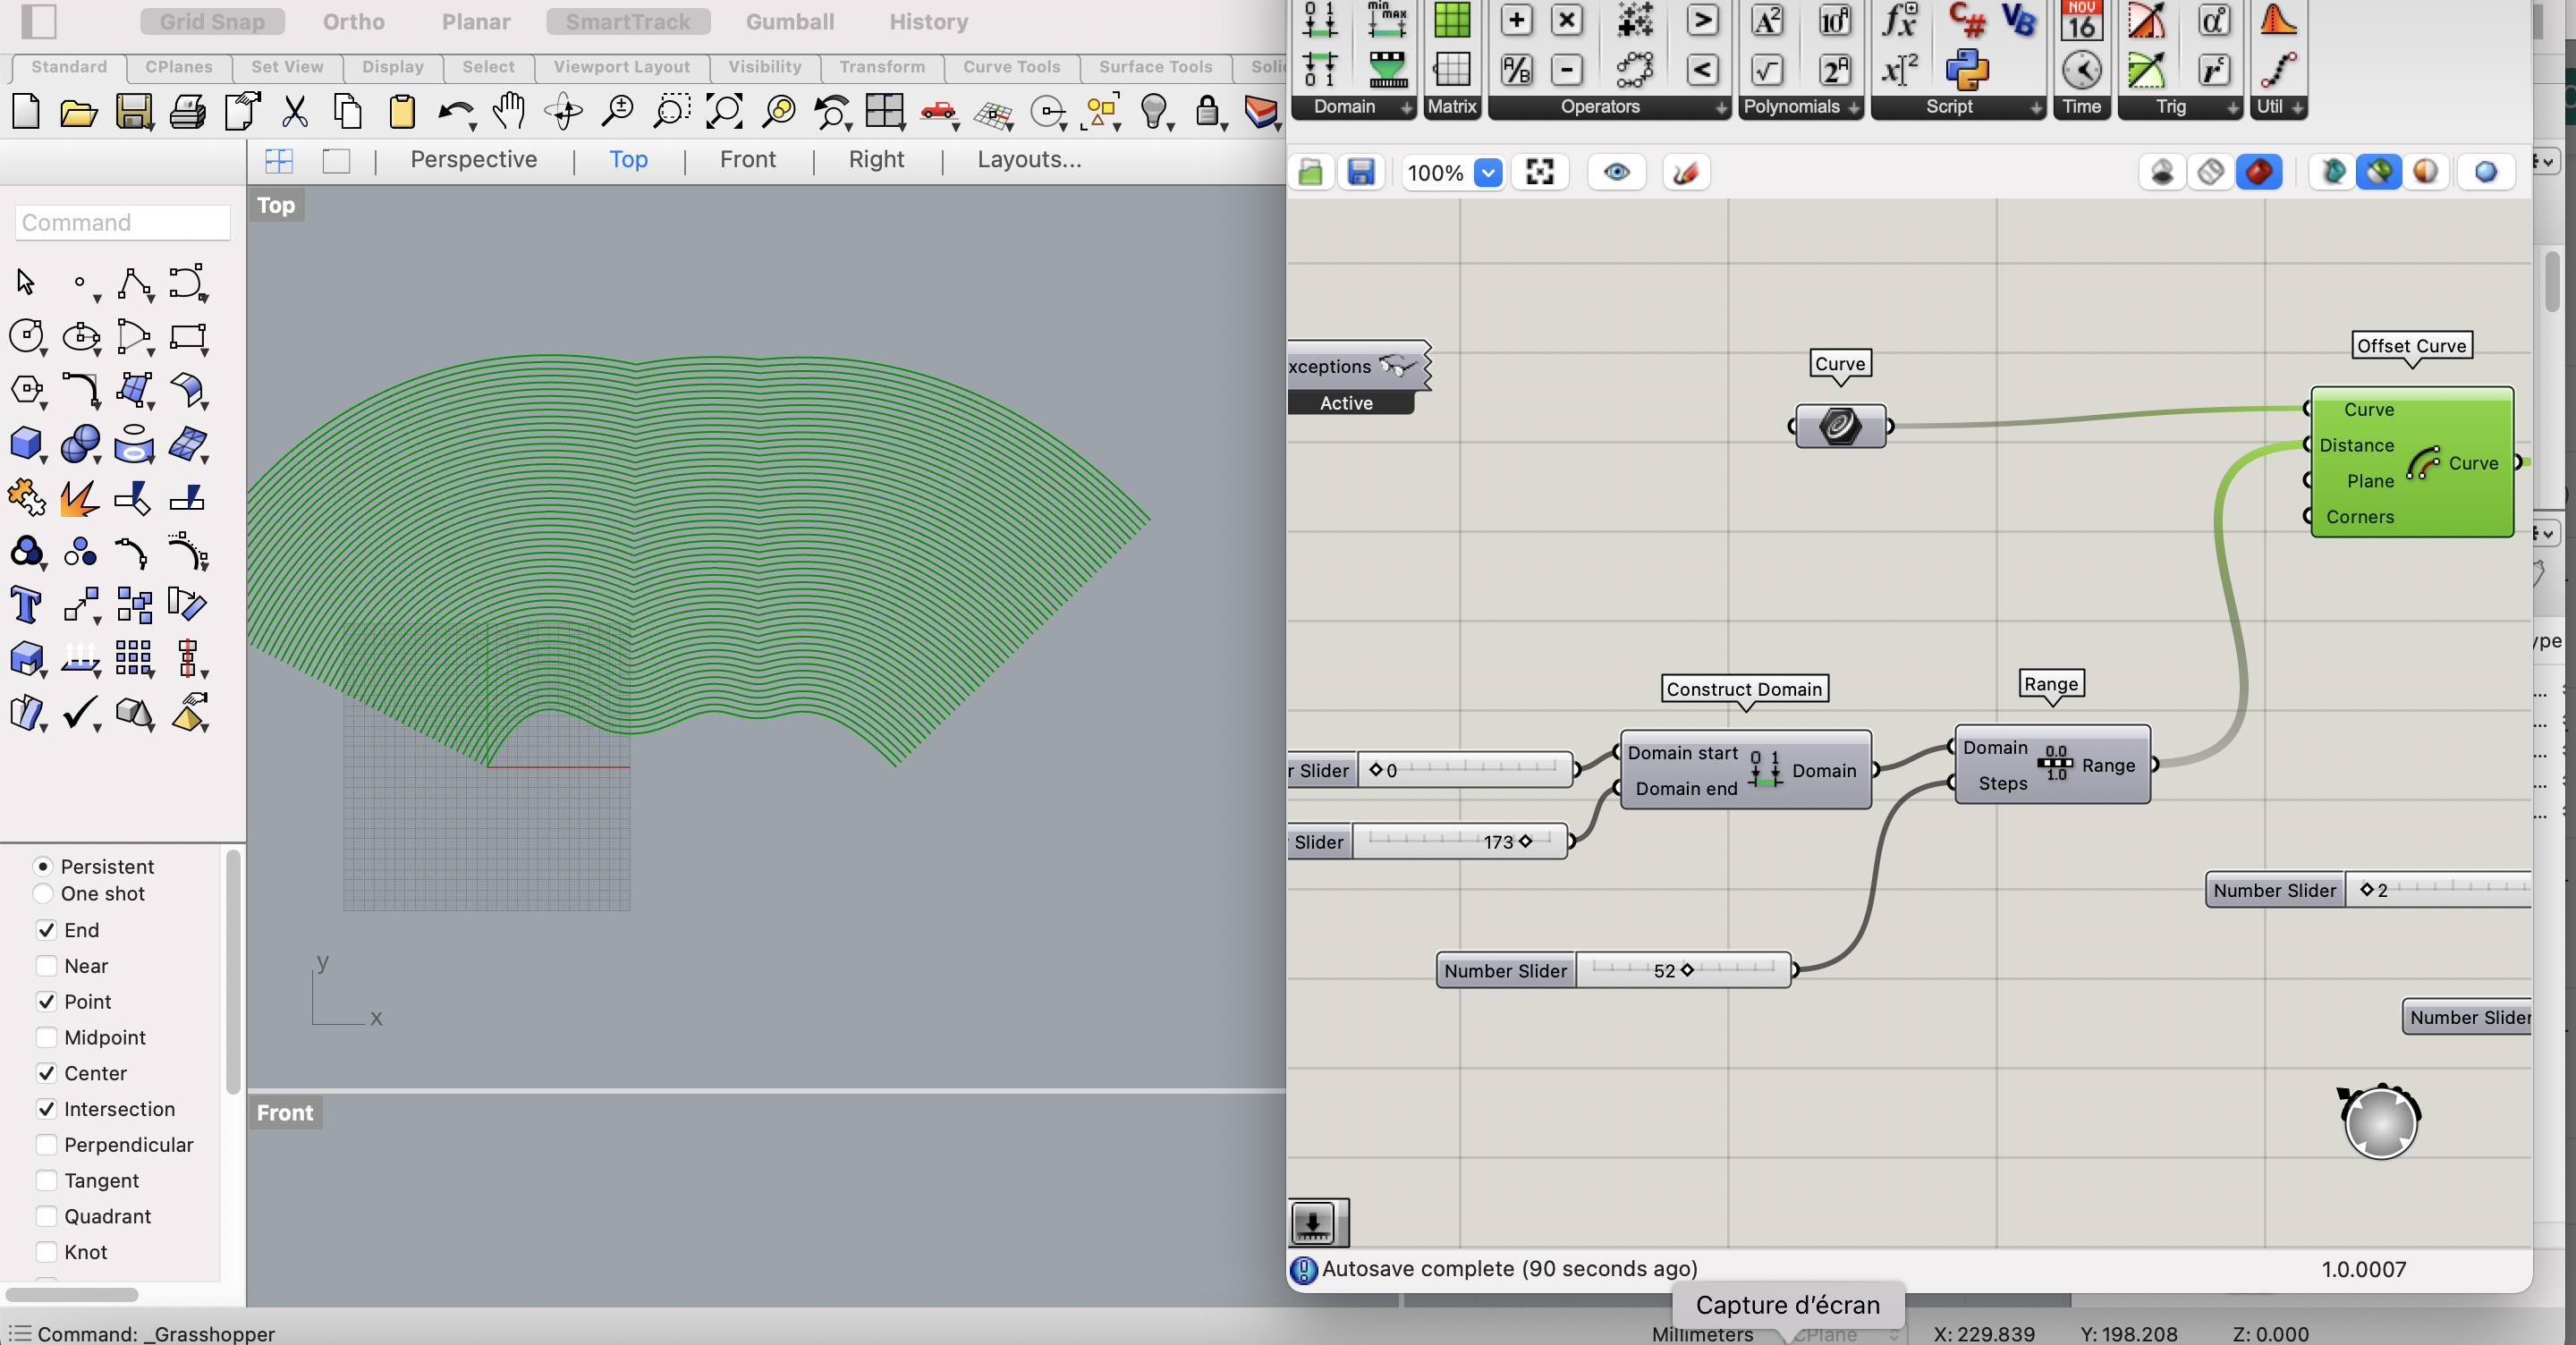

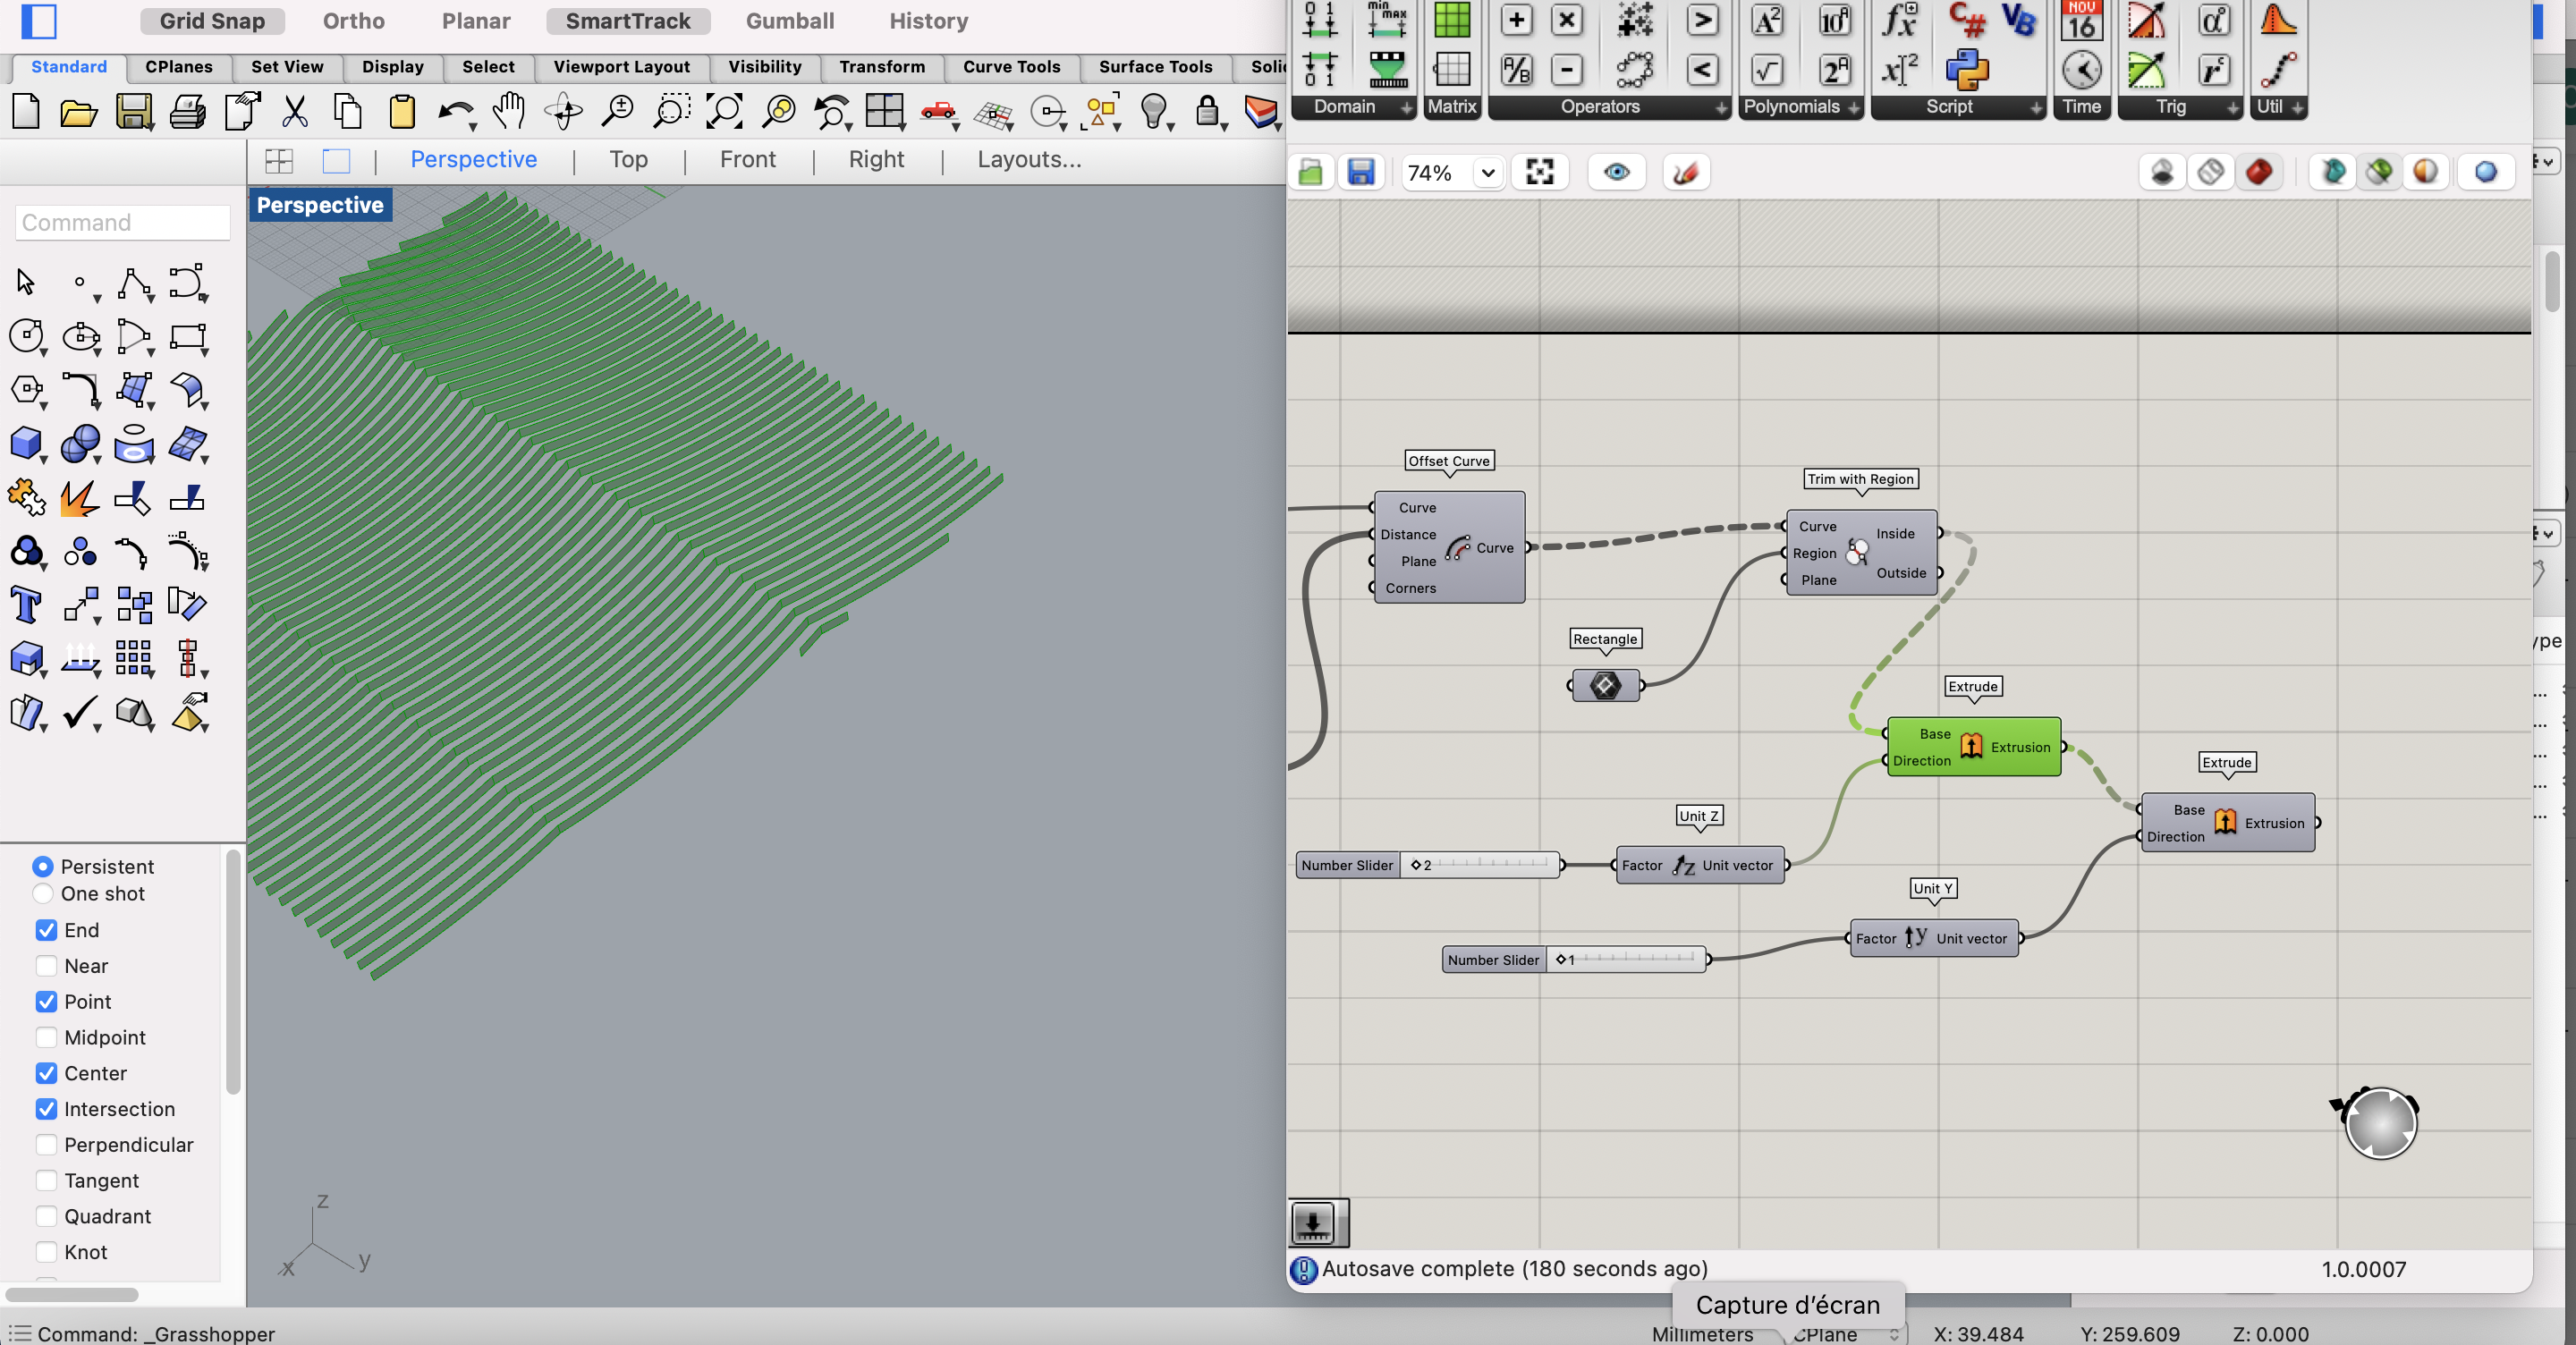
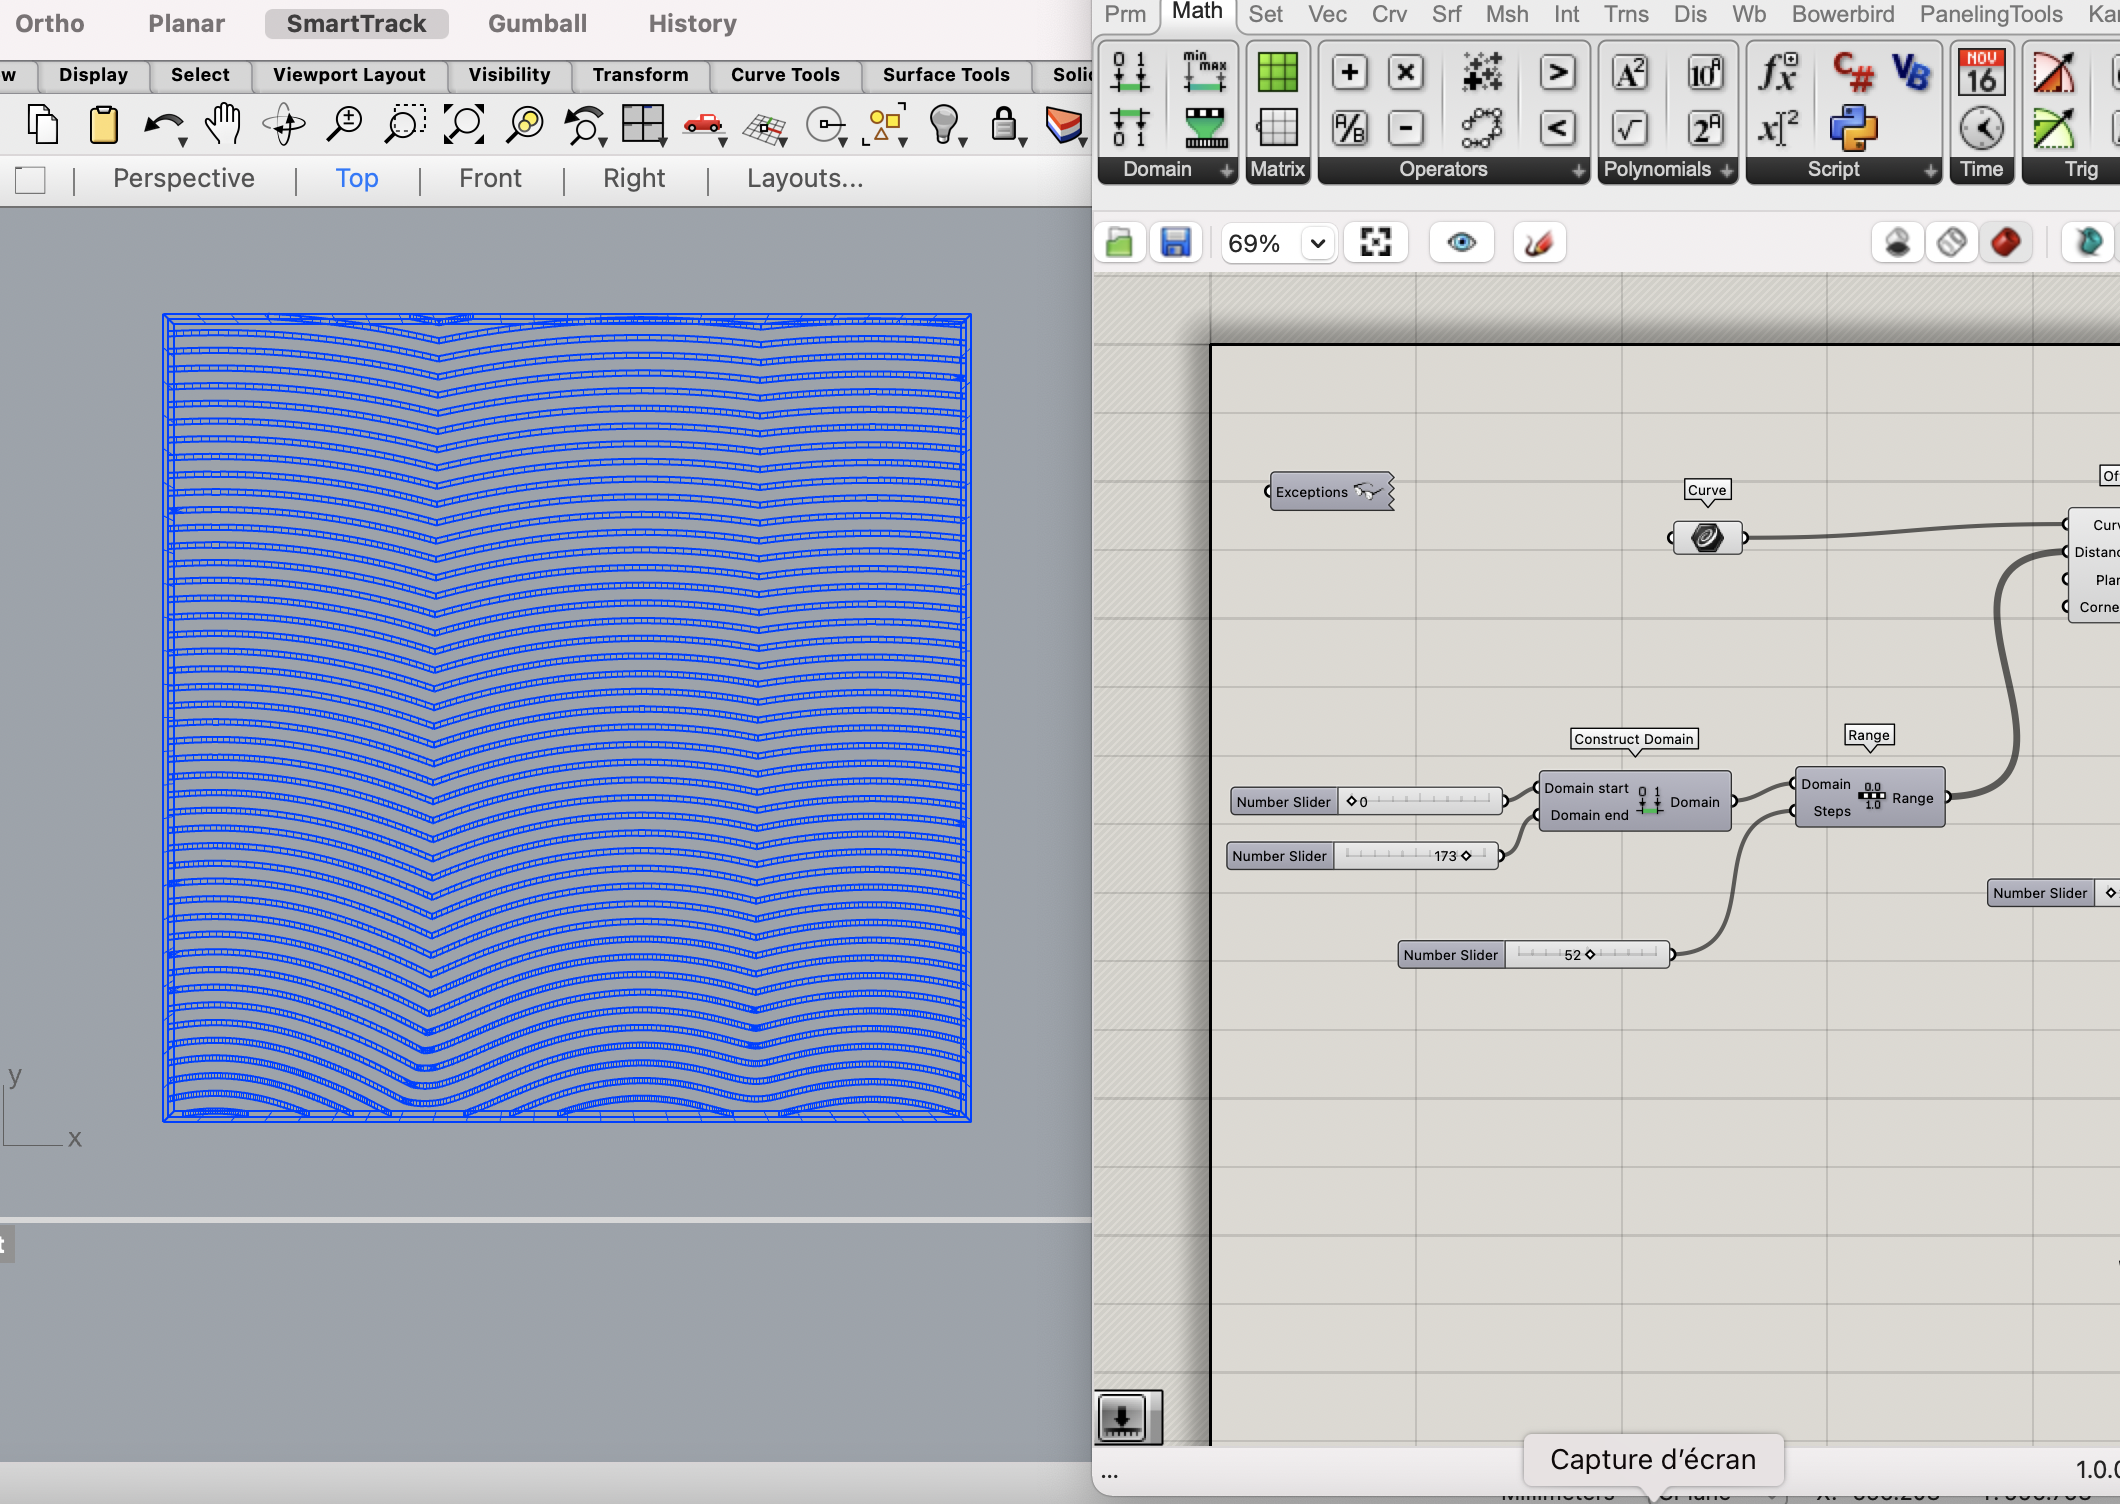
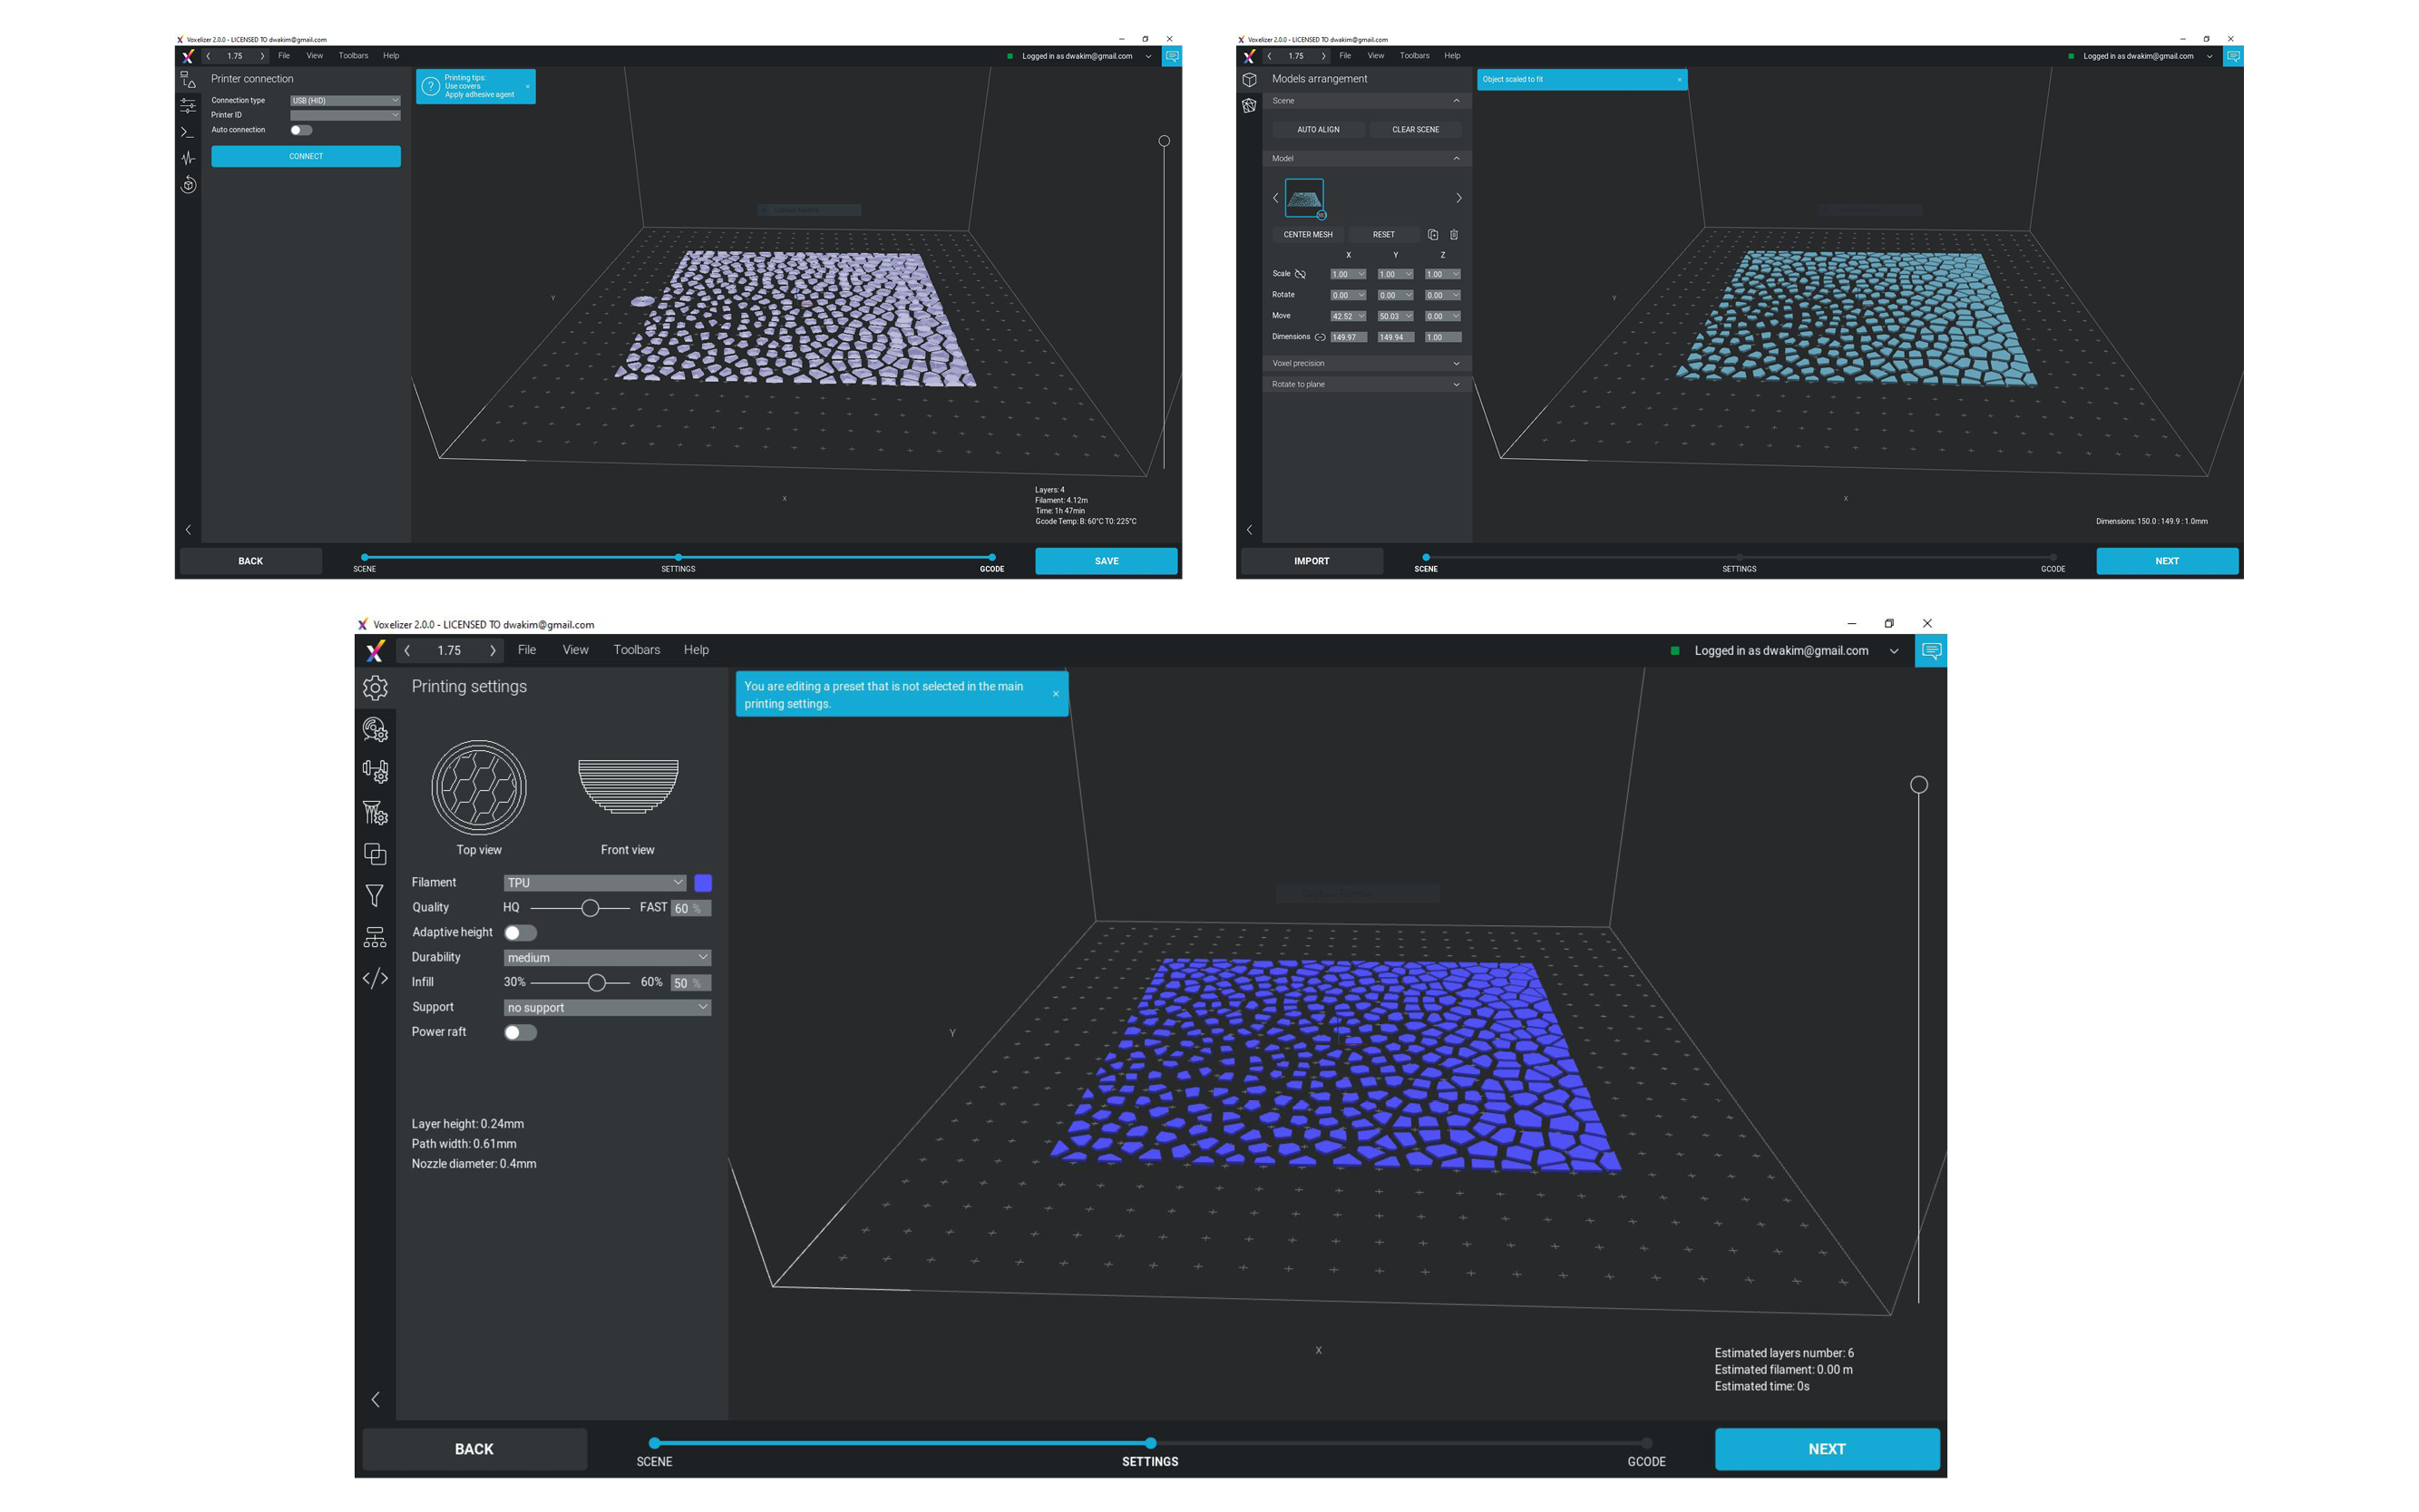
3D printing Process
SOFTWARE
document in .obj or . Stl
Software Voxelizer
Choose the head for 3D print
Import the 3d object
Rotate and scale if becessar
Next
Power raft =support under it (Desqctivate it)
Quality Faster =less qualitative Lower =more qualitative
Durability If strong its super dense inside If light is more hollow Or completely hollow
Printer > then arrow Then> change filament
Add support if necessary exemple tree
Next Save it on the sd card As a Gcode file (.gcode) The Gcode file is a series of coordinates that tells the laser to go here then here
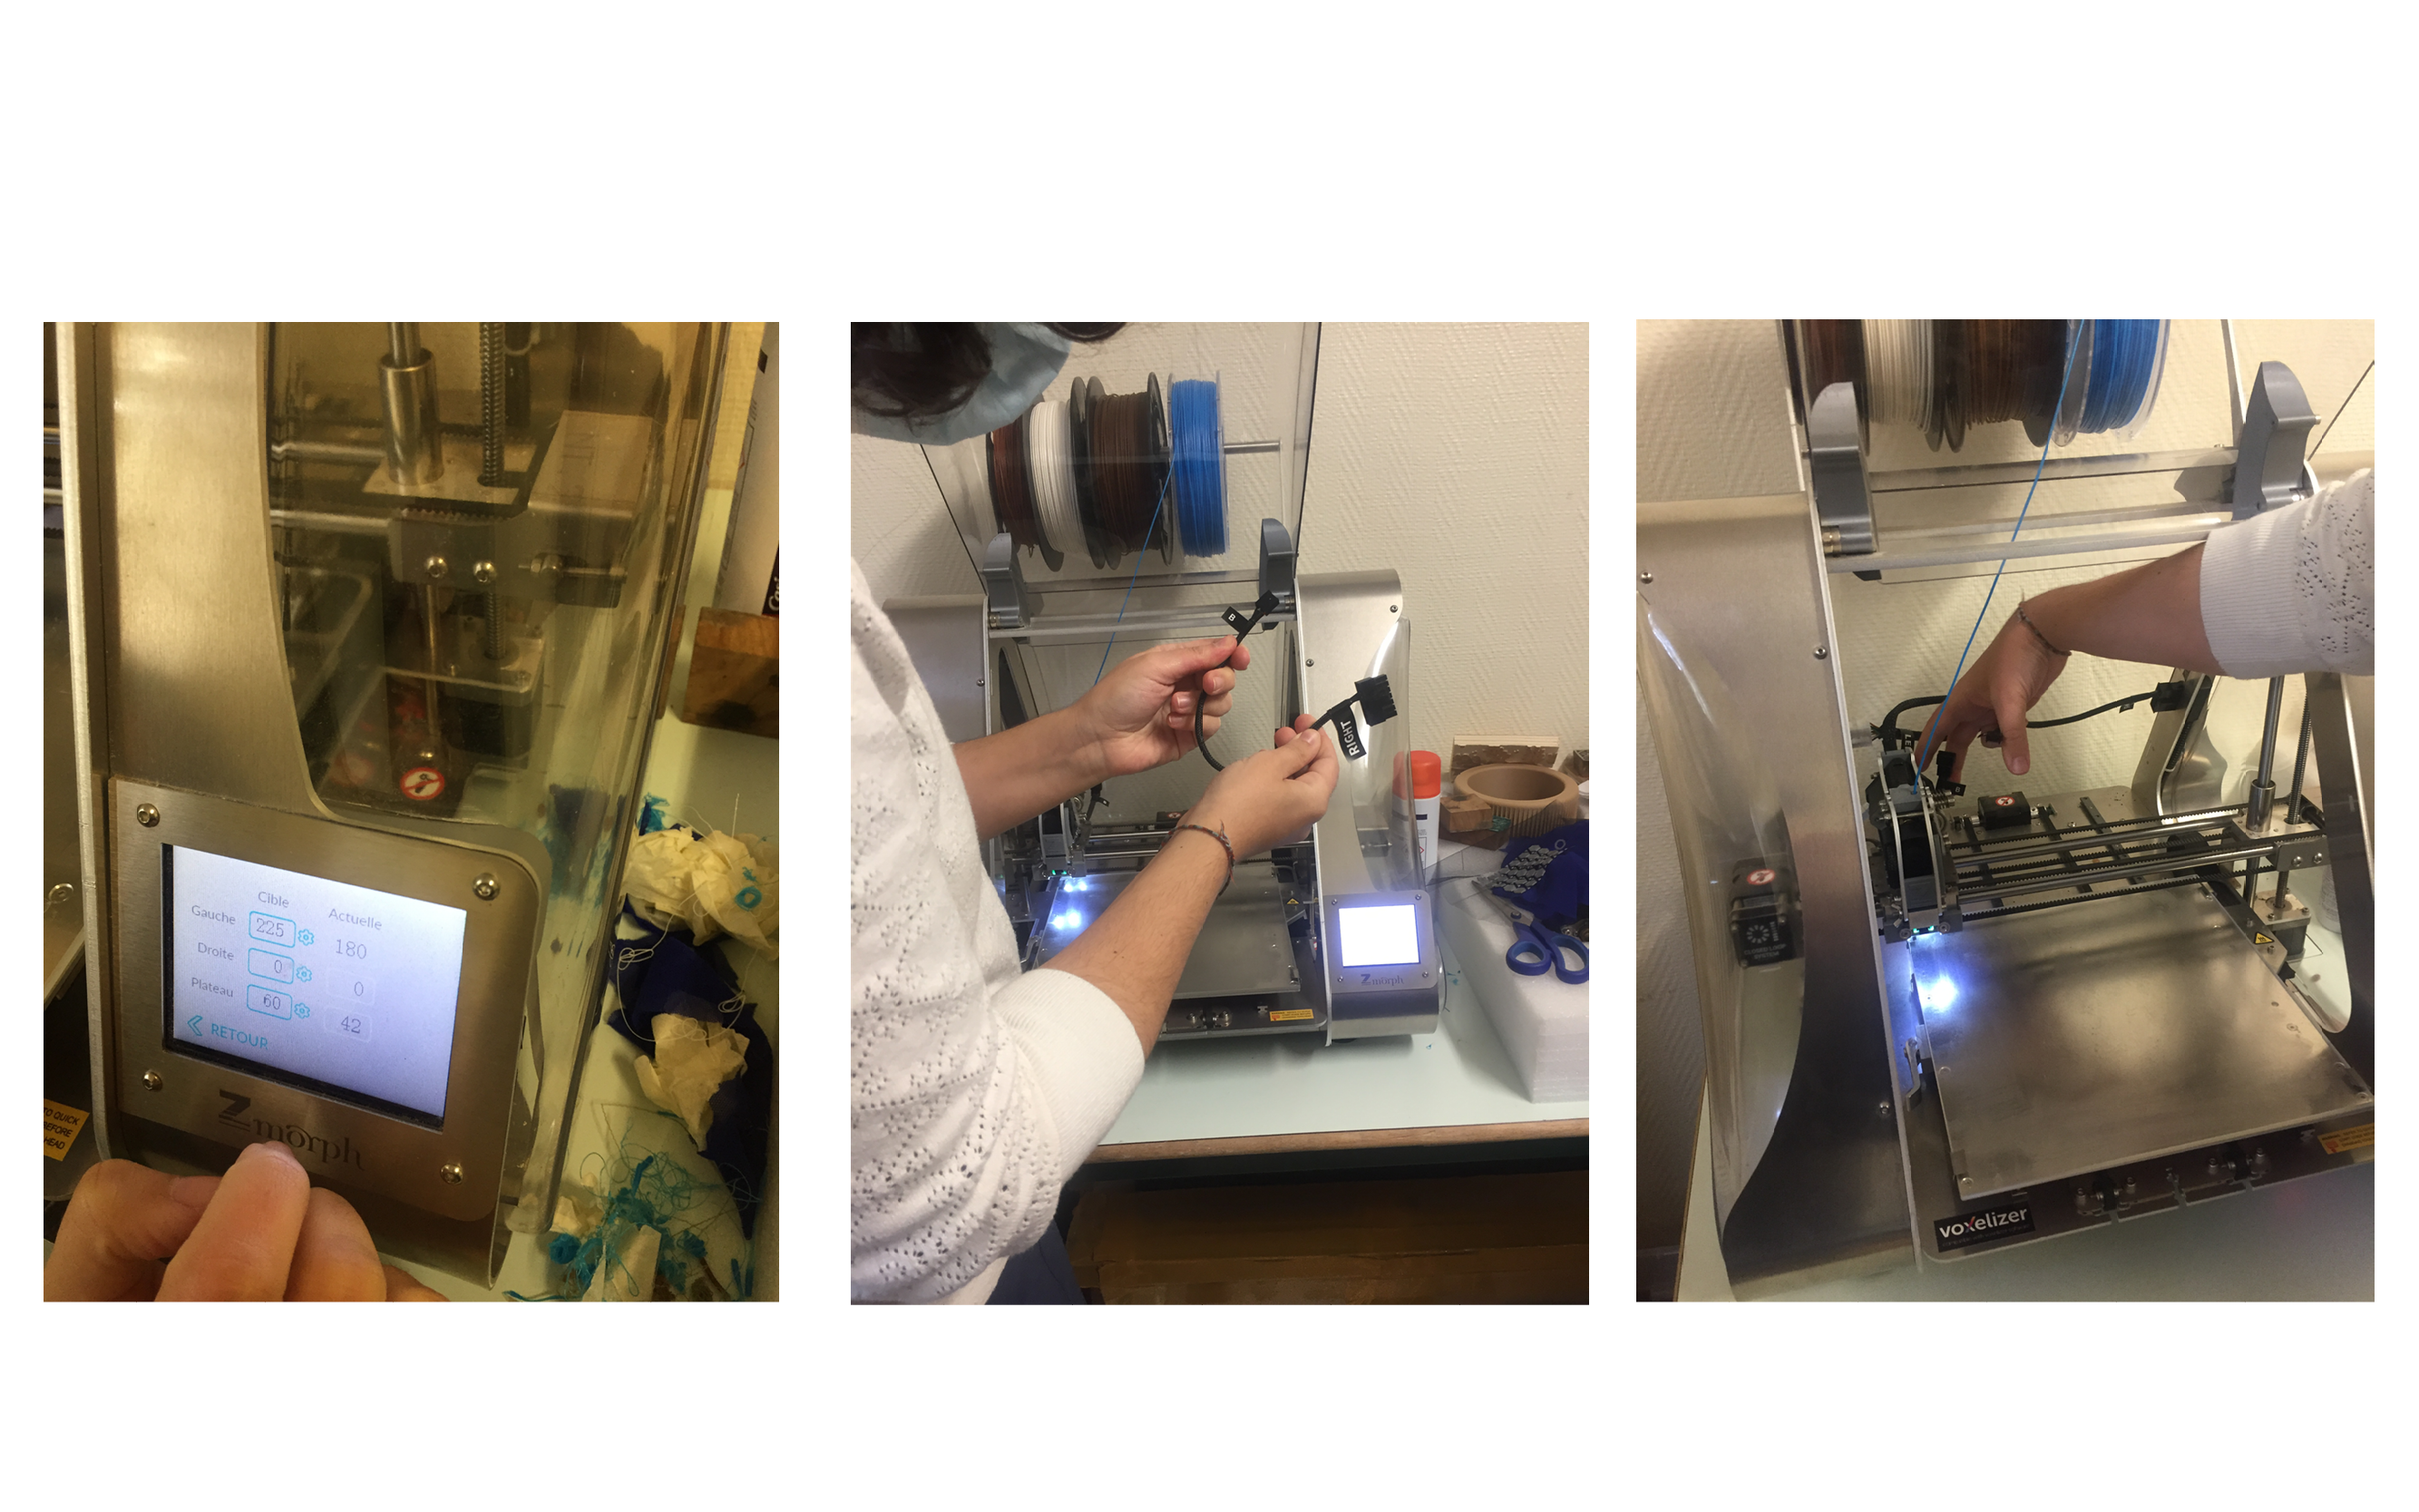
3D printer
Change/Charge filament
Load the filament Temperature Hot Decharger 1.5mm Litlle by little top arrow to unload Cut the bit of filament
Load in place in the hole then in between the weels Arrow bottom to load When you print you can change Temperature
Materials First PLA Second with hemp Third TPU blue Light brown soft PLA
Laser Heating bed Control 2 temperatures Written on each material(if not search on internet) Ex between 210 and 230 Pla210bkue220 40and60degree heating bed
First calibrate In the screen Then plug connect cable Calibration auto
Test lines after Start Define temperature For buse and bed
Never touch the head
Choose the line better tested
Remove cable Remove test lines
Stick to the bed spray lawue in the bed
Choose the file Then define temperature Custom trmperature We dont care about right
Put the bed closer
Put plug the fan
Start
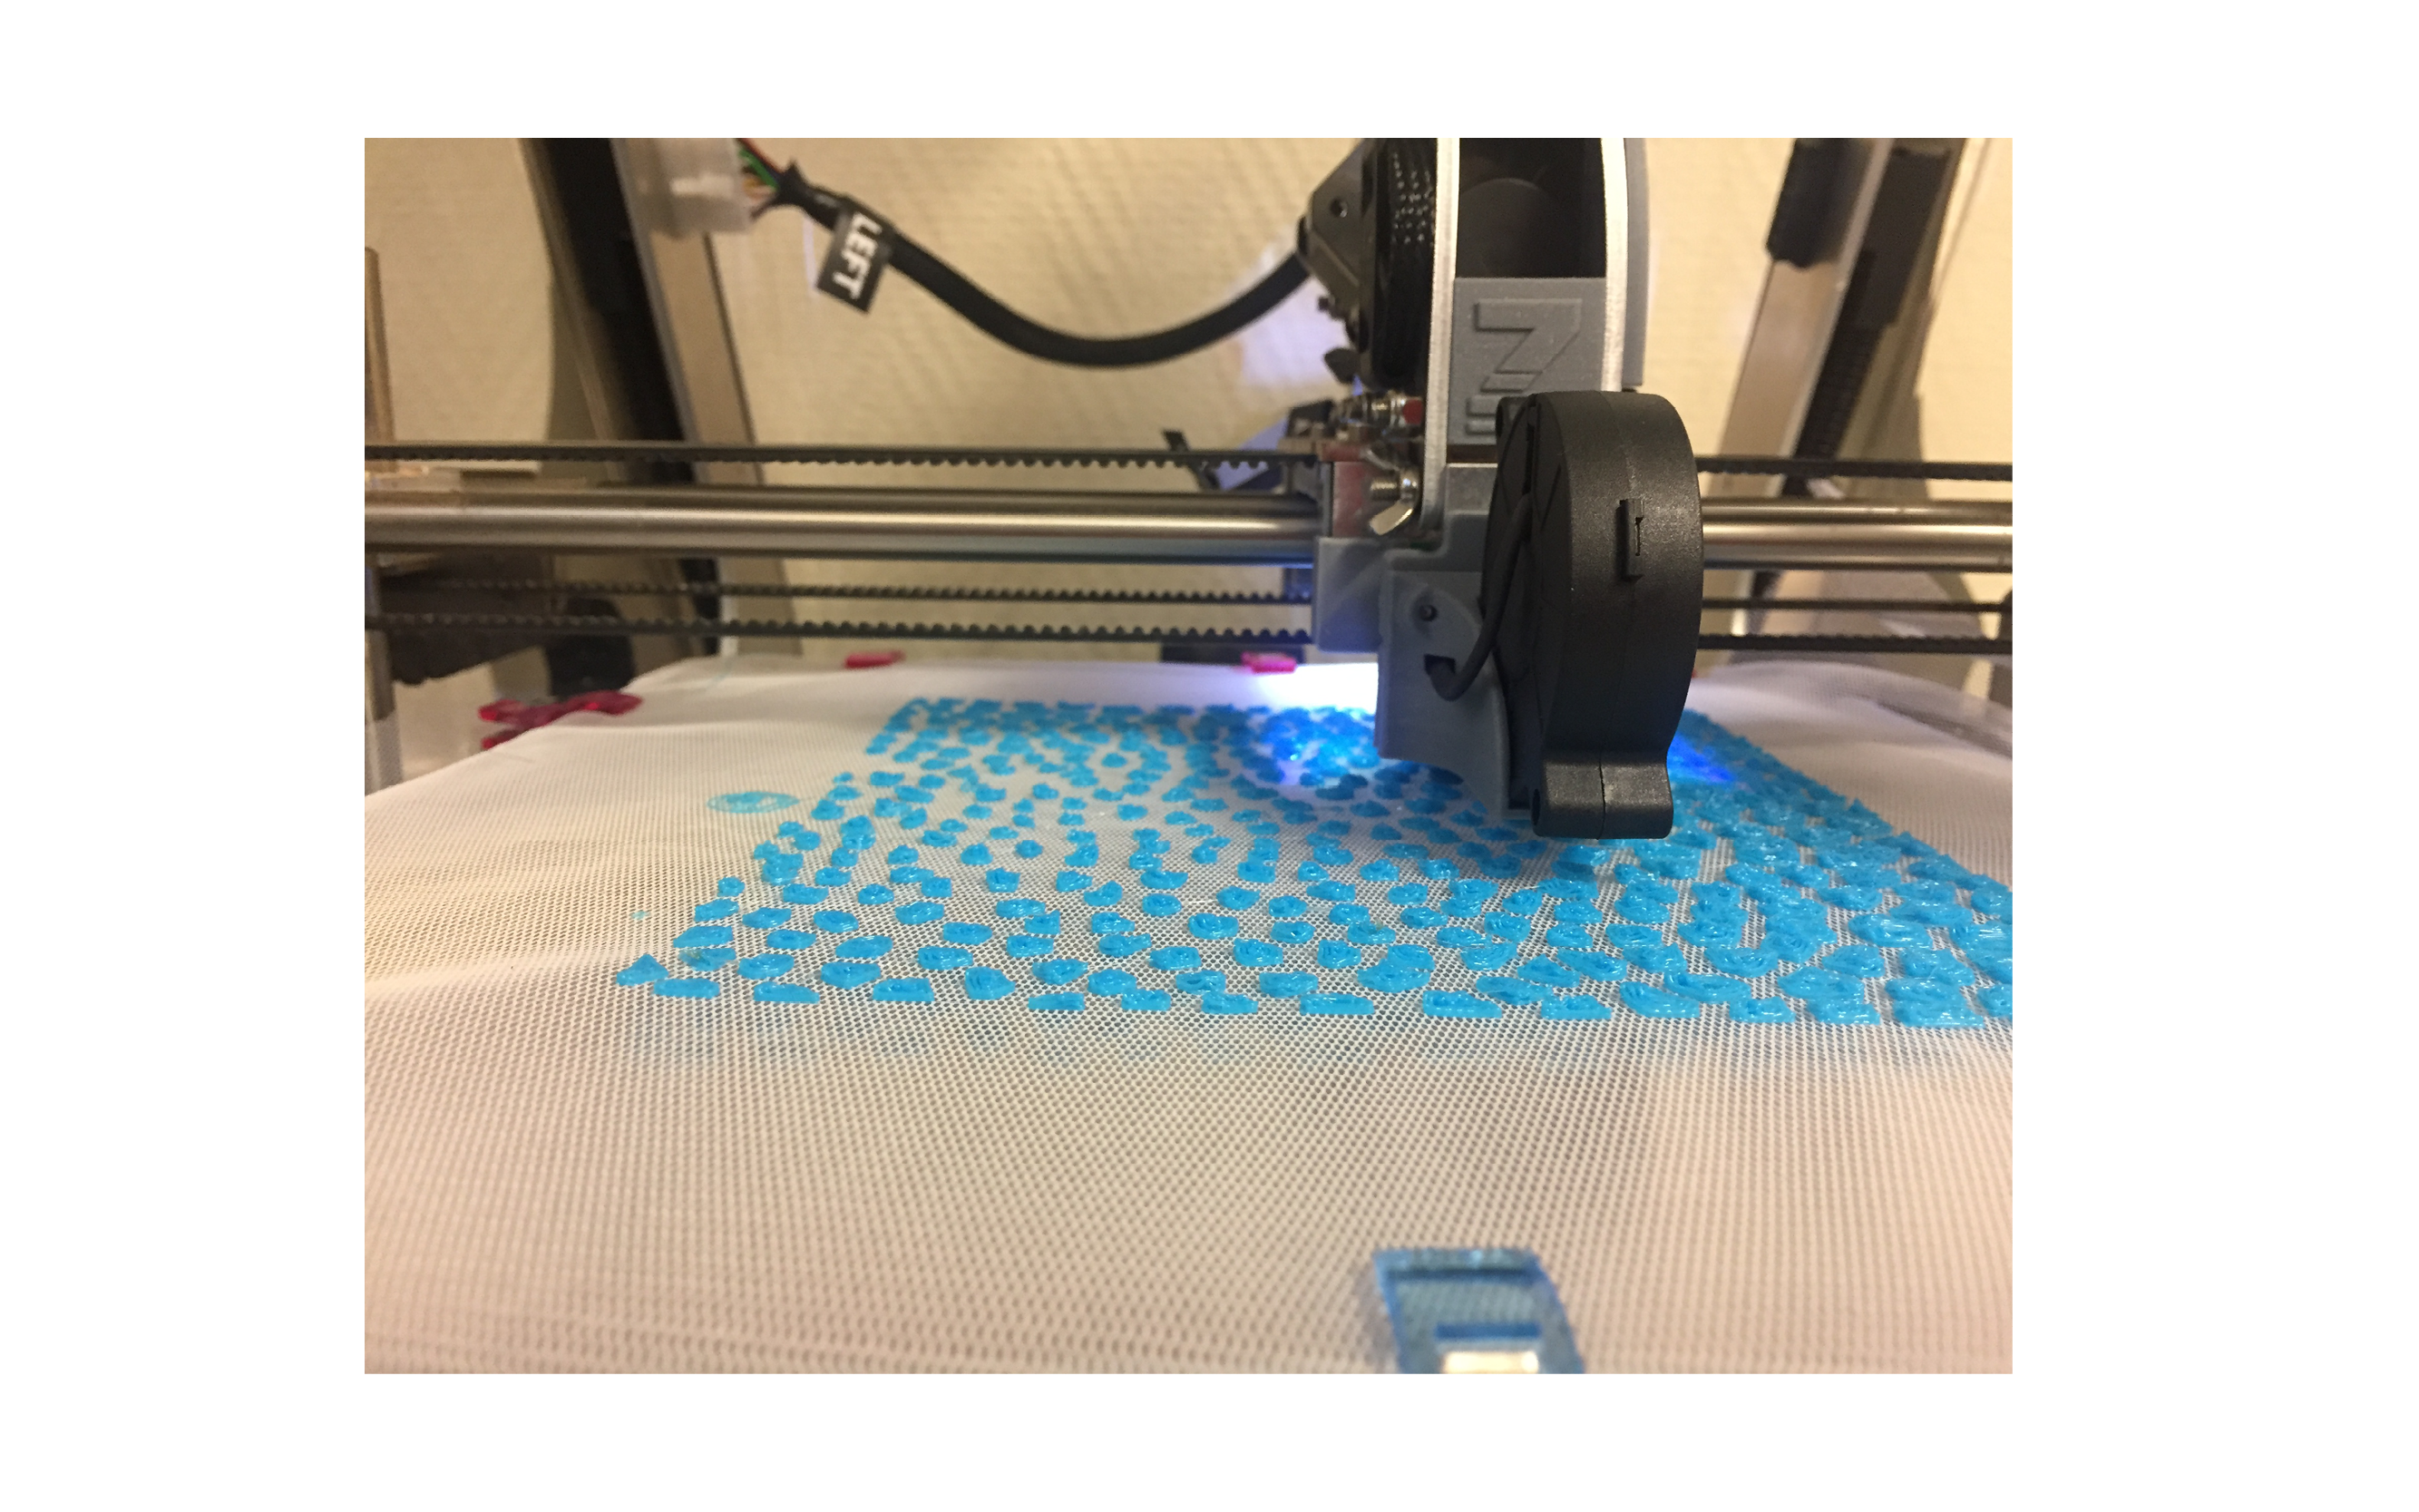
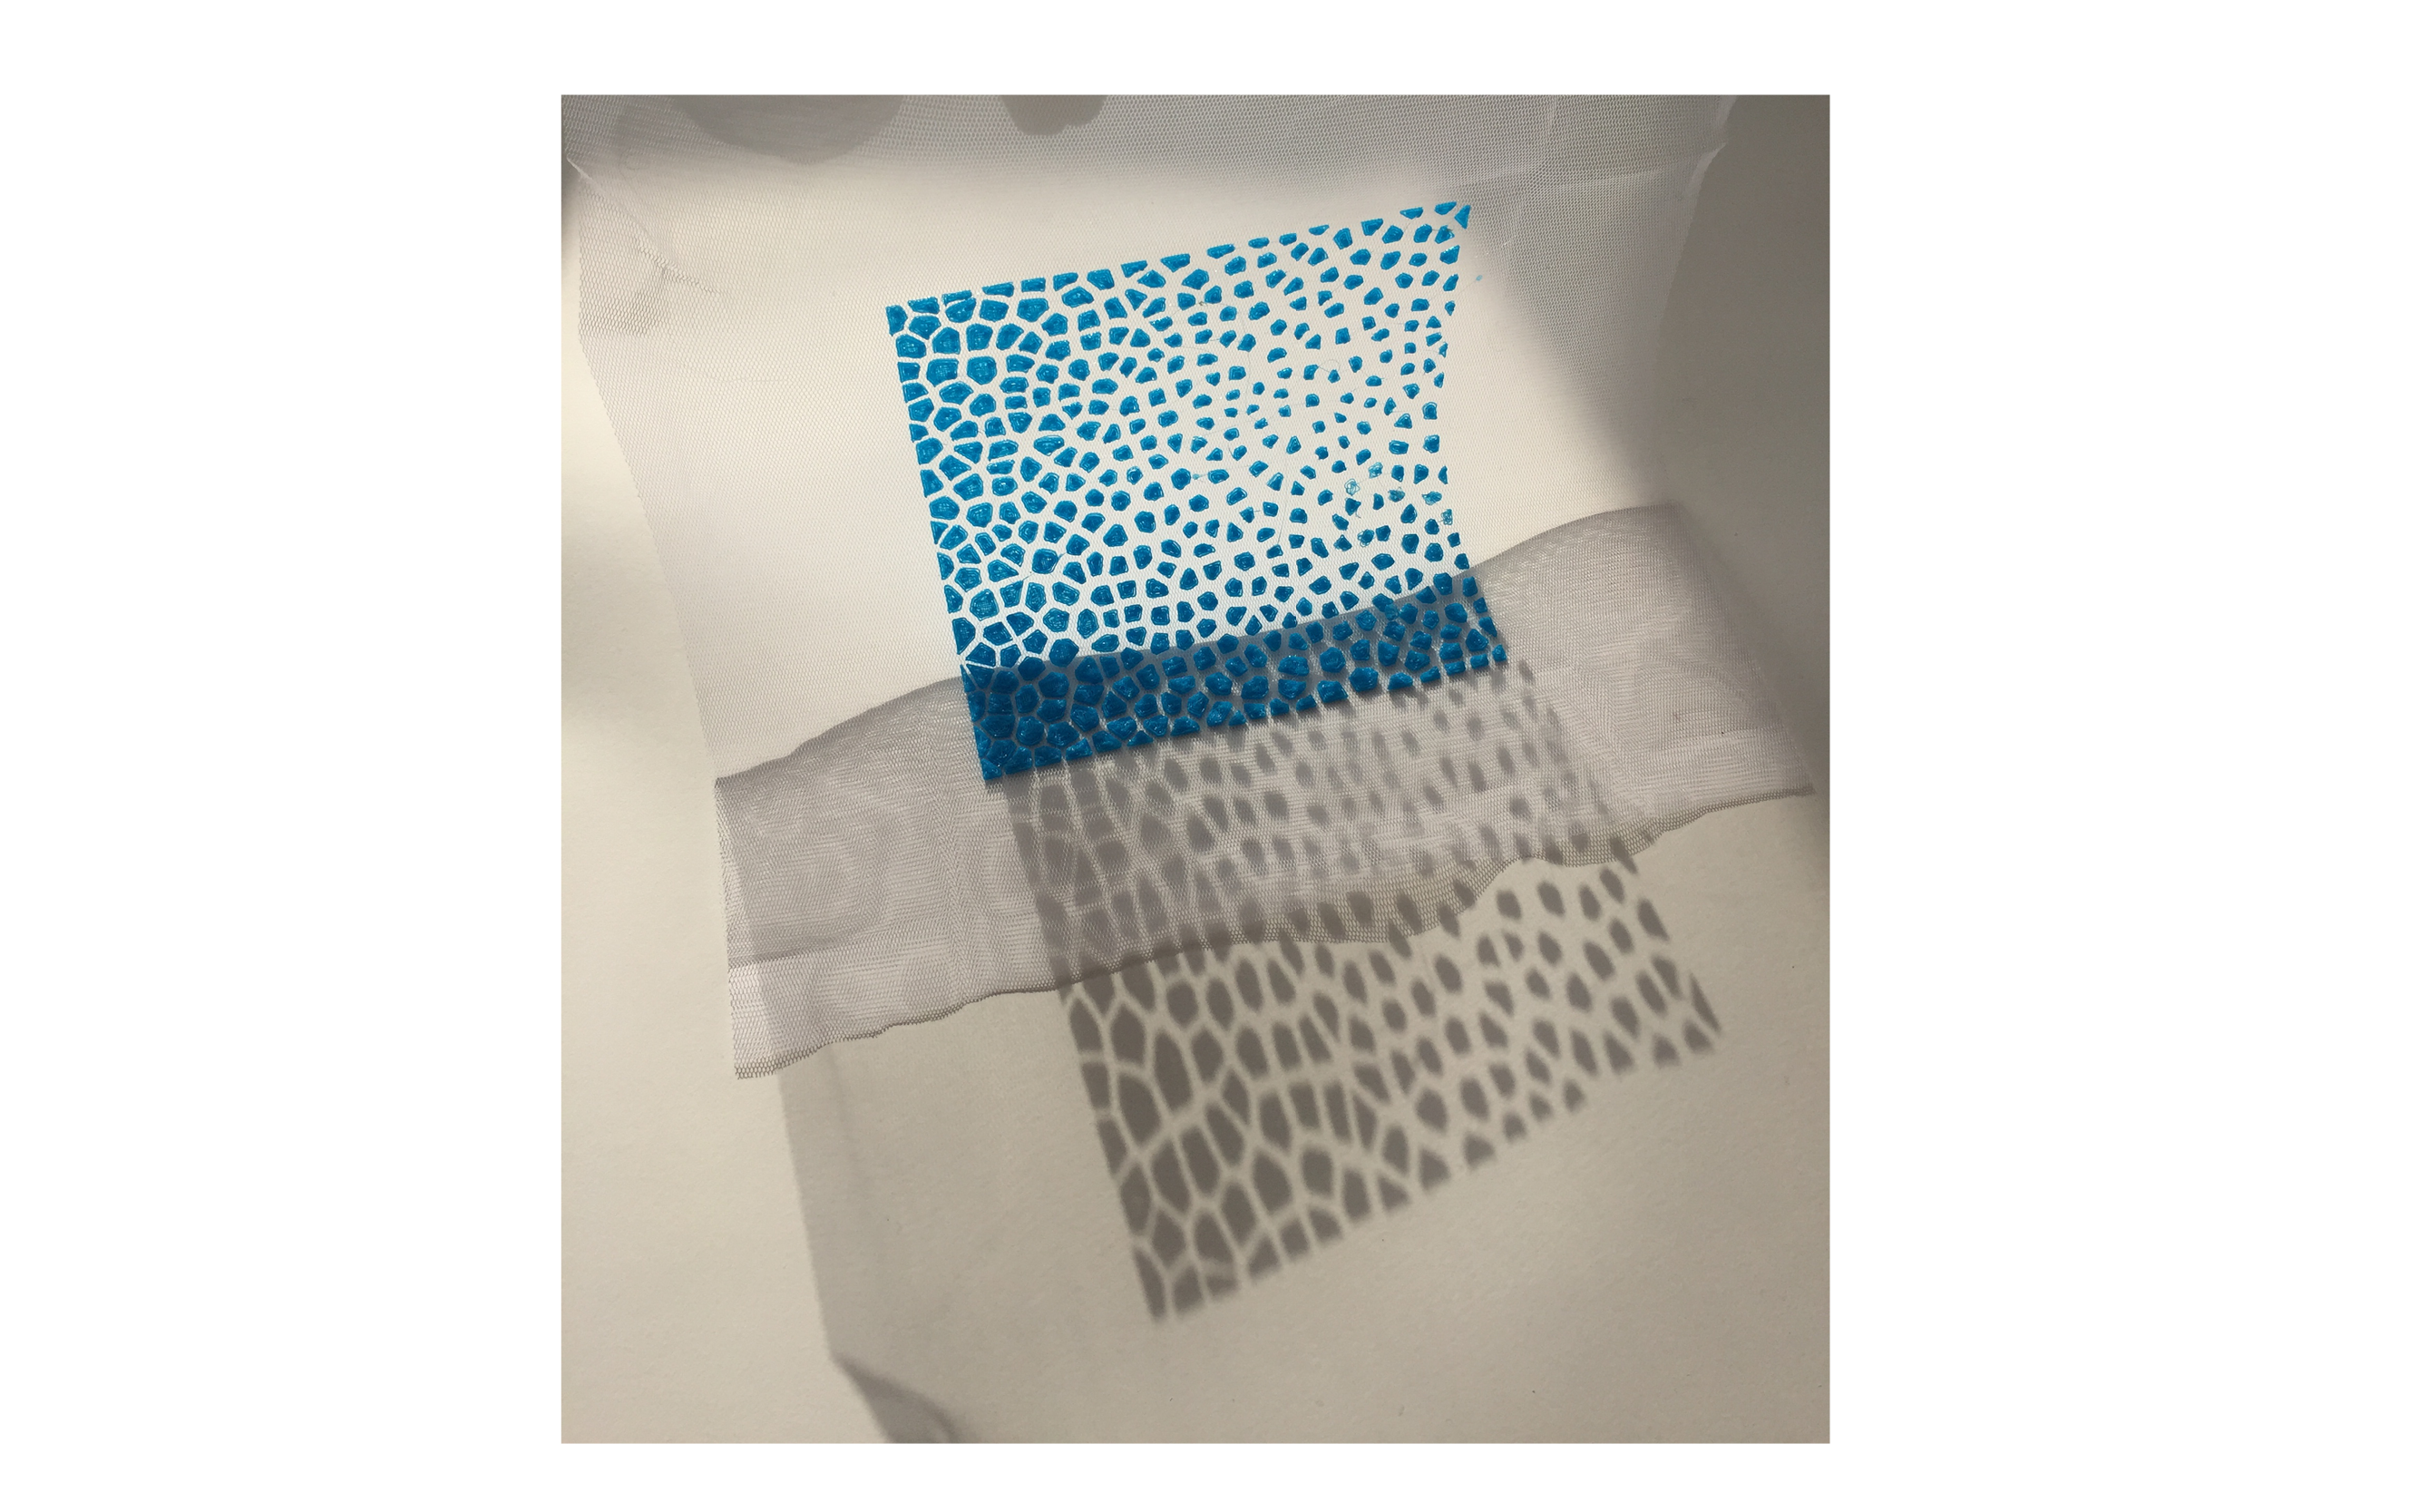
3D PRINTED PATTERN
Files
You can download my file :
Voronoi Pattern - here
Lines Pattern - here
Useful links
Lecture
Tutorials
- Tutorials 1 Part 1 – Eugenio Bettucchi
- Tutorials 1 Part 2 – Eugenio Bettucchi
- Tutorials 2 Part 1 – Eugenio Bettucchi
- Tutorials 3 Part 1 – Eugenio Bettucchi
Other useful resources: