11. OPEN SOURCE HARDWARE: FROM FIBERS 2 FABRIC
RESEARCH
¶OPEN-SOURCE HARDWARE
Open-source hardware (OSH) represents a decentralized and collaborative approach to hardware development, inspired by the principles of open-source software. While still in its early stages, OSH leverages contributions from a wide network of individuals to design and improve physical tools and systems. Unlike software, OSH faces unique challenges, including limited tooling support and a lack of established best practices for collaboration.
GrabCAD is the largest online community of professional engineers, designers, manufacturers, and STEM students on the planet.
IINITIAL IDEA: BIOMATERIALS SPRAY GUN
At the beginning of this week’s project, we got inspired by spray-on dress, by Manel Torres, who developed a liquid-fibre during his PhD research at RCA. While Torres’ project focused on spraying liquid to build soft, flowing forms, we drew from its ethos of merging technology with creativity to approach our spray gun.
SHIFTING TO: FELTING GUN
The shift from developing a biomaterial spray gun to a felting gun occurred due a combination of several reasons. TIME CONSTRAINTS Developing a working biomaterial spray gun required significant time to test the flow dynamics of biomaterials, calibrate nozzles, and optimize pressurization. Given the project timeline, these complexities made it challenging to deliver a functional prototype.
FEASIBILITY Biomaterial spray guns require advanced components, including air compressors, precision nozzles, and pressurized systems, all of which needed extensive sourcing and testing. This complexity made the design impractical within the given constraints.
CREATIVITY A felting gun offered a simpler, yet equally innovative, tool that aligned with our goals of hands-on manipulation of materials. It required fewer technical components, making it faster to prototype, while opening up opportunities for textile experimentation.
INSPIRATION We were inspired by Barbara Rakovska’s felting gun, a practical tool for fusing fibers together to create felt. Unlike the RCA spray gun, which primarily applies liquid biomaterials, a felting gun allows for deeper material integration, creating textural and structural effects. This pivot gave us a new playground for design and innovation.

WHAT IS FELTING?
Felting is a versatile textile technique that involves binding fibers together to create dense, non-woven fabrics. Traditionally made using wool, felting can be achieved through wet or dry methods, with the latter utilizing needles to interlock fibers mechanically. This process allows for intricate textures, shapes, and layers, making it popular in art, fashion, and industrial design.
EXISTING FABRICATION METHODS
| TYPE OF FABRICATION | DESCRIPTION | INDUSTRIES | APPLICATIONS |
|---|---|---|---|
| Hand Felting | Manual use of barbed needles to interlock fibers. Time-intensive but ideal for detailed, small-scale projects. | Arts and Crafts, Textile Design | Custom textile designs, sculptures, and intricate felt art. |
| Manual Felting Gun | A portable tool with multiple needles to accelerate manual felting. Compact and easy to use. | Textile Prototyping, Crafts | Creating textured textiles, experimental prototyping, and small-scale fashion projects. |
| Industrial Needle Felting Machine | High-speed machines with thousands of needles that interlock fibers continuously. | Automotive, Construction, Medical | Producing non-woven fabrics, insulation, medical composites, and acoustic panels. |
| DIY Felting Adapters | Adapt sewing machines with felting attachments for hybrid manual-machine operations. | Hobbyists, Textile Design | Enabling felting with existing machines for creative experimentation and small-scale production. |
| Motorized Felting Gun | A motorized tool with adjustable speeds, capable of continuous operation. Compact and efficient. | Textile Design, Arts | Producing detailed felting patterns on textiles with minimal manual effort. |
| Hybrid Felting Machines | Combines manual and motorized systems for enhanced control and efficiency. | Makerspaces, Design Prototyping | Experimental textiles and biomaterial integration for innovative applications. |
| 3D-Printed Felting Tools | Custom felting tools fabricated using additive manufacturing. | Makerspaces, Prototyping | Customized designs for felting needles, ergonomic handles, and experimental tools for prototyping new methods. |
| Industrial Felt Looms | Specialized looms with controlled rollers and needle felting for uniform large-scale production. | Industrial Production | Non-woven textiles, reinforcement fabrics for automotive interiors, and technical felts for construction. |
INSPIRATION
¶TUTORIALS
DIANA NAGORNA: FELT COUTURE
DAGMAR BINDER: FELT ART

FIONA DUTHIE: FELT ART + FASHION

PAOLO PUCK: FELT SCULPTURES

MARIA SZAKATS: WOOLEN PAINTINGS

BIO SPRAY GUN
¶As mentioned before, we planned to create a pressure based gun where one has sodium alginate and one has calcium chloride. We encountered some problems:
- Alginate mixture turns into a gel so may have trouble spraying through the nozzle
- Have to spray many layers to create a structure
Using the 3D model from GrabCAD HVLP Spray Gun 3D file we started to visualise how we wanted our biospray gun to work. We first separated the 3D parts in Rhino to prepare them for 3D printing.
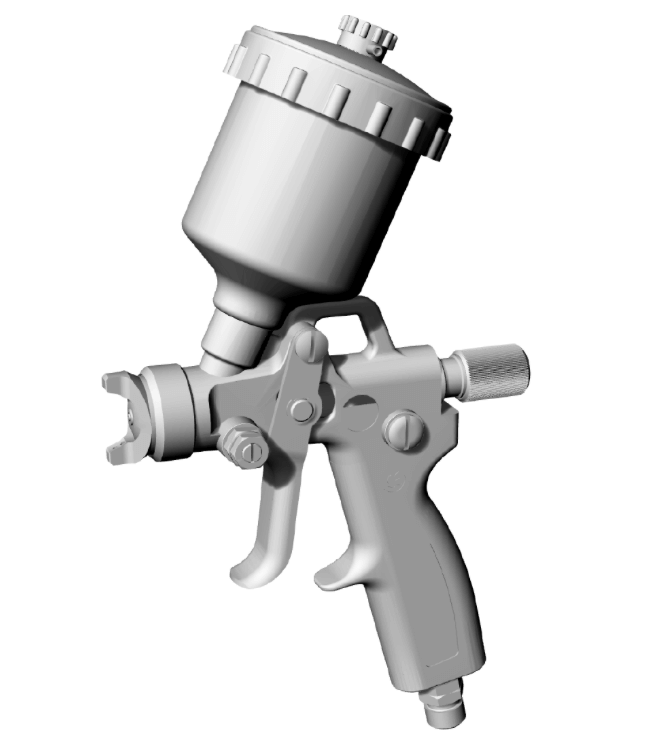
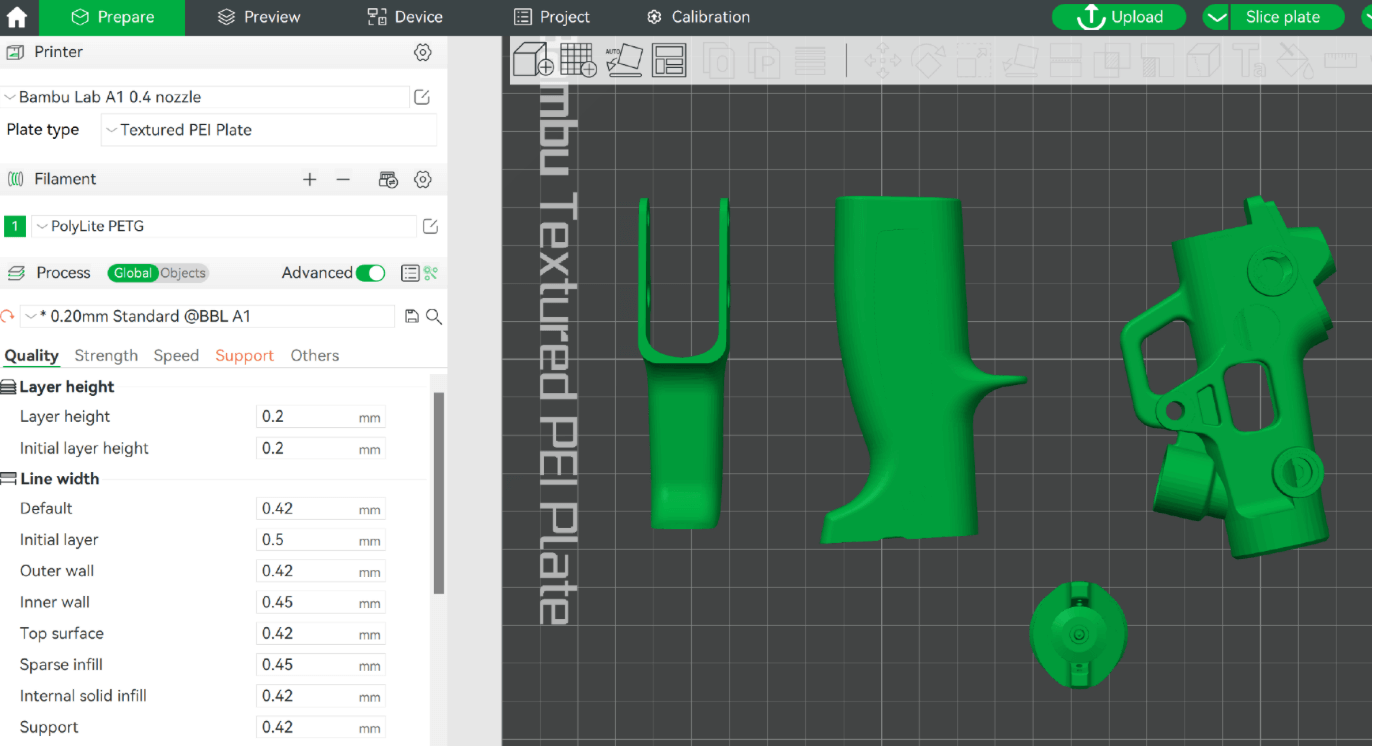
When we printed a trial piece on the Bambu printer the quality of the part was still very poor and had many air gaps - so we decided to move away from the spray gun and try something else.
BIOMATERIALS TESTING
While we were still thinking of creating the spray gun we created an alginate mixture to test.
* 8g Sodium Alginate
* 1500ml Water
* Calcium Chloride solution
* Spray bottle
* Measuring cylinder
* Cast mould
* Fabric
* Hand Blender
* Digital weighing scale
* Measure the sodium alginate and water, blend them together until combined. Try and not make too many air bubbles - ideally leave the mixture over night.

* Pour the mixture into a spray bottle and test that the mixture is thin enough to be able to be sprayed. If it is not then water it down.

* Prepare the calcium chloride solution

* Place the mould onto a flat surface with the fabric laying over it.

* Spray the first layer of sodium alginate.

* Spray the calcium chloride solution straight away onto the sodium alginate.

* Repeat these layers at least 3 times.

* Leave to dry for a couple of days.
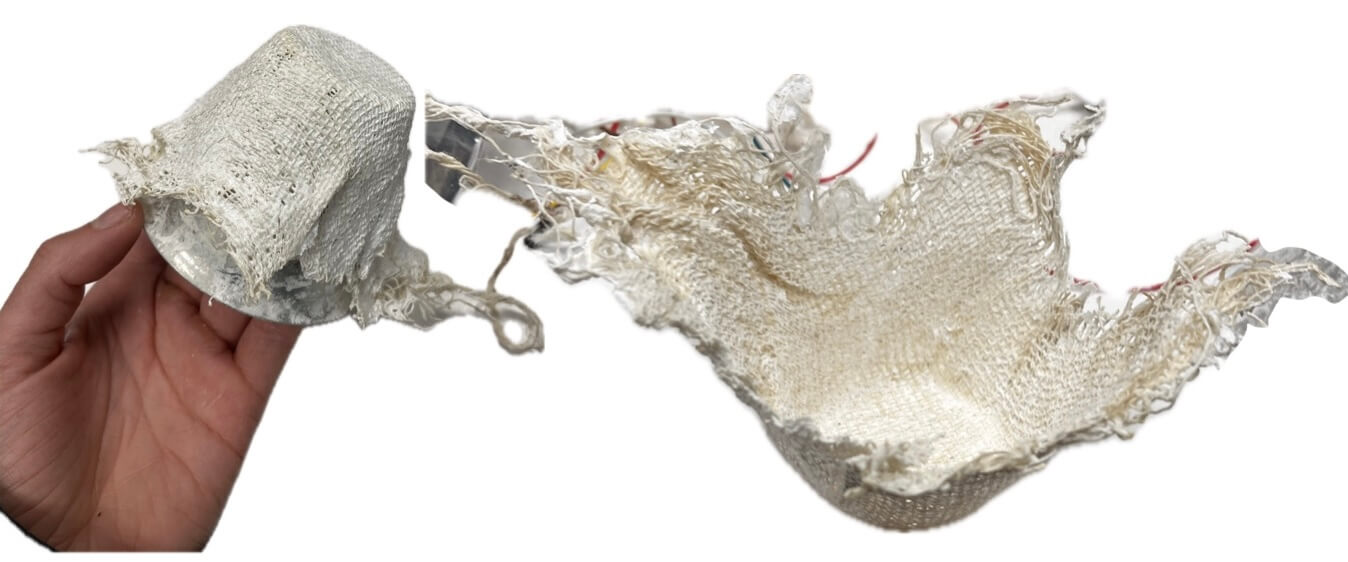
The resulting prototype worked quite well and held its shape nicely, however lots of calcium chloride dust particles would come off onto your hands after touching it.
FELTING GUN
¶We decided that it would be best with the limited time we had to try and improve the attempts at creating a felting gun that previous students had tried. Using Barbara's page as inspiration we started the process.
ELECTRONICS
We followed the same electrical circuit steps and created the following circuit:
Components:
-
1N22AB MOSFET
-
10K Ohm Rotary Potentiometer
-
4.5 - 15V D.C. Motor
Using TinkerCAD I created the circuit diagram and schematic as shown below.


We created the circuit and when connected to a power supply of 10V, the circuit pulled a maximum of 0.6A.
CAD MODELS
Germarilis was the queen of CAD and worked on our 3D model, taking inspiration from Barbara's documentation again.
She first reveiewed the previous documentation and attempted to rescale the model as some of the parts did not fit correctly. Her design sketch below were created to visualise the functioning of the parts.
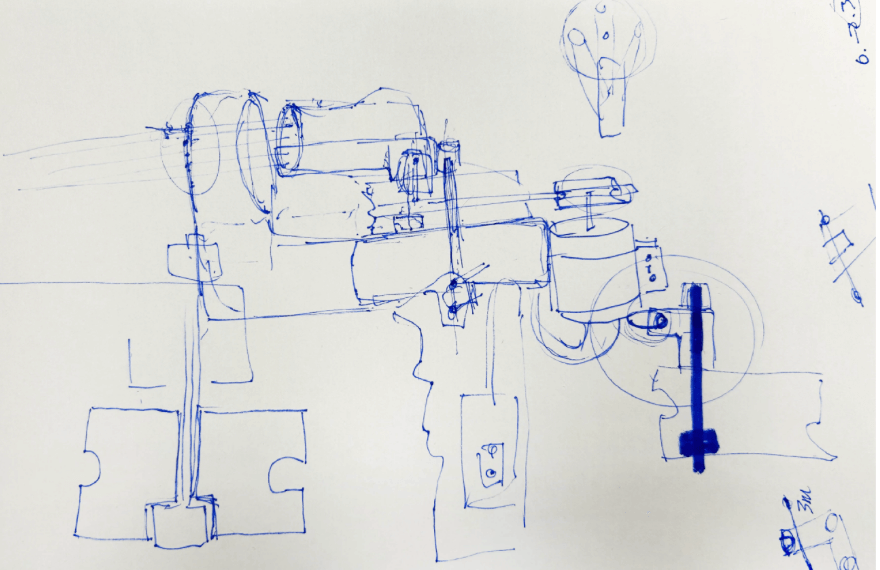
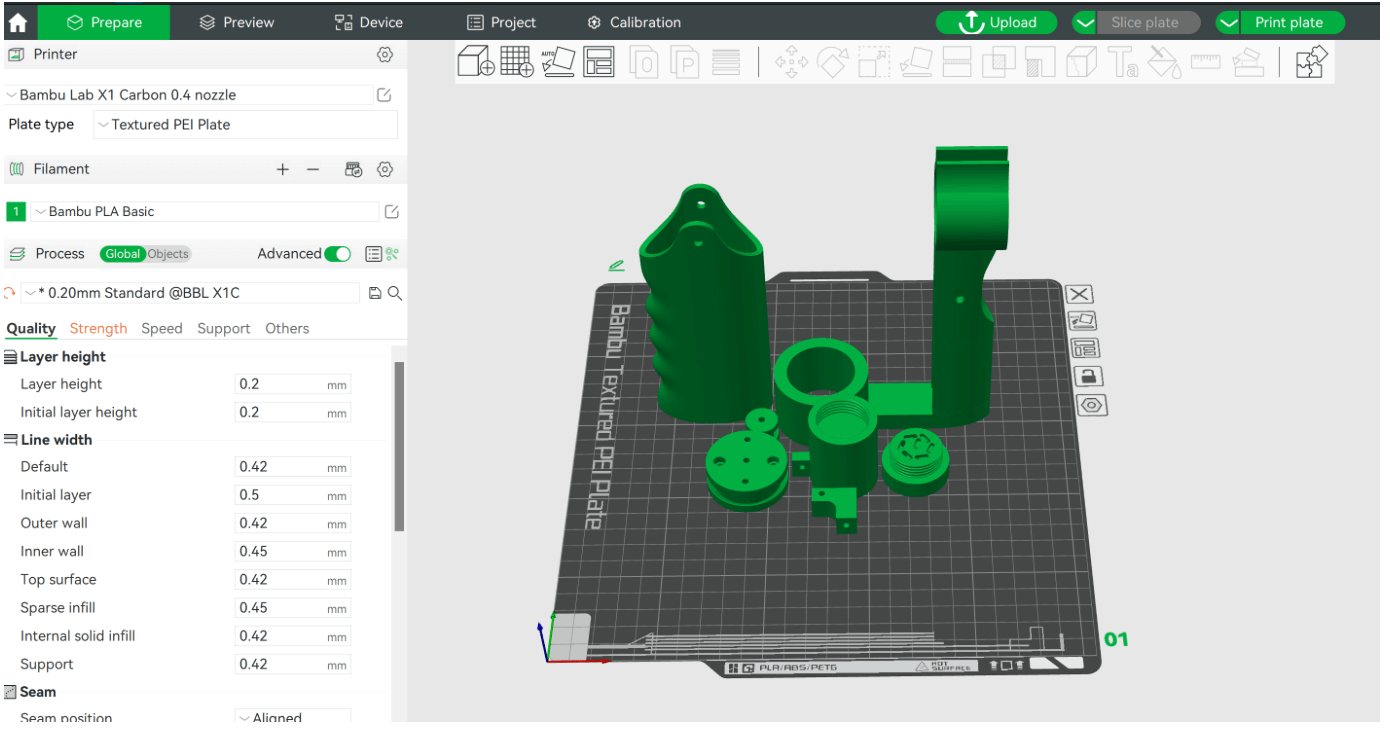
Using Rhino 3D, Germarilis created the model to be printed using the Bambu Studio 3D printer as the quality of the print is much better and it is produced much faster than the Ender Creality printer.

The .stl file was sent to the Bambu Studio workspace to be finished off before printing.
We printed using:
-
PolyLite PETG
Printing Speed: 30 - 50mm/s
Printing Temp: 230-240°C
Bed Temp: 70-80°C
Fan: OFF
ASSEMBLY
| Qty | Description | Price | Price x Qty | Link |
|---|---|---|---|---|
| 2 | M3 x 12mm screw | $0.39 | $0.78 | https://es.rs-online.com/web/p/tornillos-allen/0281007 |
| 1 | Felting needles | $9.77 | $9.77 | https://www.mercerlob.com/material/254671/agujas-de-repuesto-gruesas |
| 2 | M3 x 35mm | $0.39 | $0.78 | https://es.rs-online.com/web/p/tornillos-allen/8229066 |
| 3 | M3 x 16mm | $0.13 | $0.39 | https://es.rs-online.com/web/p/tornillos-allen/4679818 |
| 6 | 5.5mm x 2.4mm | $0.41 | $2.46 | https://es.rs-online.com/web/p/tuercas-hexagonales/0524281 |
| 1 | M3, A4 316 | $0.72 | $0.72 | https://es.rs-online.com/web/p/arandelas/0189620 |
| 1 | Motor | $12.66 | $12.66 | https://es.rs-online.com/web/p/motores-dc/2389759 |
| 1 | MOSFET | $3.00 | $3.00 | https://es.rs-online.com/web/p/mosfet/8076692 |
| 1 | Potentiometer | $3.18 | $3.18 | https://es.rs-online.com/web/p/potenciometros/7703056P |
| Total: | $33.74 |
Having a quick search on google the prices for a felting gun you can buy are:
-
Electric Wool Felting Gun - $129
-
Felting Gun Etsy - $54
So our hacked machine saves alot of money although you do need access to a 3D printer.
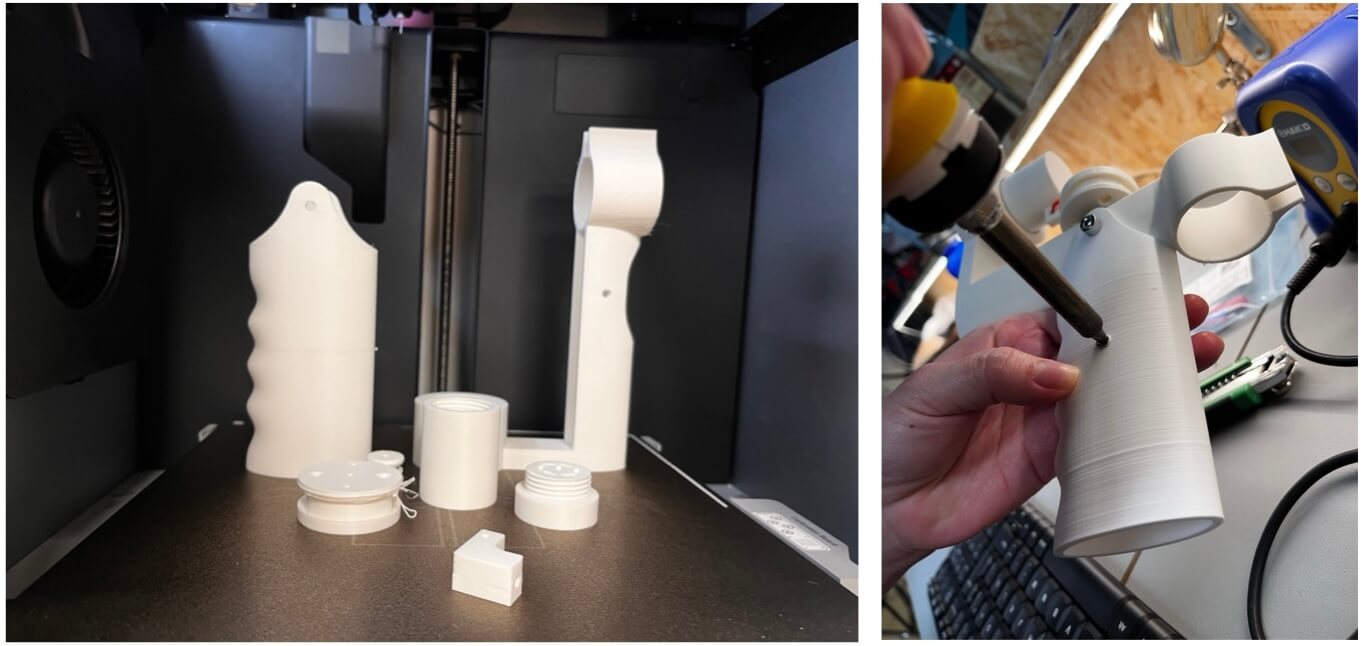
Left: Bambu 3D printed parts, Right: Soldering a hole for the potentiometer to fit through
-
Attach the crank mechanism to the gun body. Use an M3 screw, two washers, and a hex nut to firmly secure the mechanism to the base of the gun body Ensure the screw is tightened securely, but avoid over-tightening.
-
Insert the remaining part of the crank into the motor. This will provide the power needed to drive the firing mechanism.
-
Use three short M3 screws to attach the motor to the gun body.
-
Insert a longer M3 screw into the front part of the crank. This will help stabilize the crank and ensure smooth operation.
-
Install the Needle Base. Slide the needle base into the hole located at the front of the gun base.
-
Connect the needle base to the crank mechanism.
-
Carefully insert the needles and attach them to the base. Double check that the needles are aligned correctly and securely fastened.
-
Place the rubber band onto the cranks.
-
Insert the potentiometer and connect it to the motor. The potentiometer will allow you to adjust the power output of your gun.

FINAL MACHINE
-
File: Felting Gun 3D Model ↩