08. Soft Robotics
Week 08 | Continuing on from E-textiles week, this was a more advanced coverage on soft sensors and actuators

• • •
Introduction
Assignment
- Document the concept, sketches, references (also to artistic and scientific articles)
- Make a soft robotic sample, develop the pattern for the Inflatable and draw a sketch of the air flow:
- Experiment with different materials, such as silicone, 3d printing, parchment paper, thermoadesive vynil, TPU fabrics, bioplastic, document your achievements and unexpected outcomes
- Make a small video of your inflatable/soft robot working
- Upload your digital design files
- Build the electronic circuit to control your inflatable/soft robot (extra credit)
I enjoyed combining different skills that we had learnt in previous weeks here, like the modelling in Rhino and 3D printing. For now my inflatable was made using Silicon but I hope to create an Agar biomaterial to replace it.
Inspiration
★࿐࿔The Wider World!: ★࿐࿔
Here is my Pinterest board with many ideas that continue to circle around organic bacterial inspired shapes and movements. I decided to try and continue with the shapes I was creating in Computational Couture week for the inflatable.

1Photo by i.Materialise on "Anouk Wipprecht - 3D Printed Smoke Dress" | 2Photo by IAAC Blog on "Water Driven Breathing Skin" | 3Photo by Technology Review on "Octobot"
A semi-passive material system for outdoor spaces in hot climates to facilitate ventilation and cooling effects
The world's first completely soft robot with no hard electronic components. It is powered through chemical reactions and pressure tubes.
• • •
Tools
- Arduino IDE
- Rhino 3D and Grasshopper
- Ultimaker Cura
• • •
Prototyping Inflatables with Vinyl
The first process we learnt was to create a prototype of our soft robots using vinyl and a heat press. Carrying on with the organic shapes and bacterial themes I chose to draw the shape below which I cut out of baking paper.
* Baking paper
* Scissors
* Heat press
* Vinyl
* Plastic tubing
* Cut the shape out of baking paper. Remember to create an entrance for the plastic tubing for air to come through!

* Turn the heat press on to the advised temperature which is written on the vinyl packaging.

* Place a large sheet of baking paper on the bottom tray of the heat press.

* Place the vinyl on the baking paper and insert the cut baking paper shape in between the two sides of vinyl.

* Place another large sheet of baking paper on top of the vinyl

* Press the heat press down for the advised time, the heat press should automatically release when done.

* Check that all the sides of the vinyl has been sealed - if not put back in the heat press for a few seconds. You should be able to see the lines of the baking paper through the vinyl!

* Cut the shape out and insert the plastic tubing into the entrance. Blow into it and see the shape inflate!


Electronics with MOSFETS
We had another electronics lesson with Cit where we learnt about the use of MOSFETs, motors and got to use the Adafruit Flora again. It is common in soft robotics to use electric air pumps.
DC Motors/Airpumps:
- A DC motor can transform electricity into movements which helps us control direction and speed
In the case of soft robotics we want to control the intensity of the air or the state (i.e if it is turned ON/OFF)
MOSFETs:
-
A transistor that can send and regulate different amounts of voltage in a circuit.
-
The gate receives the signal as a small voltage. The drain and source allow electrict to flow.
Adafruit Flora:
The technical specifications of the Flora are:

They can be found on this link
We created circuits using Liza Stark's thermochromic ink circuit example to power an electric air pump using the Flora board.

Arduino Code
Cit showed us the Arduino code we needed for our Adafruit Flora board to power our circuit and the motor. As you can see the potentiometer is connected to PIN 10 and the MOSFETs gate is connected to PIN 9 on the Flora.
int poten=10;
int gate=9;
int mapPot;
int valuePot;

void setup() {
  pinMode(poten, INPUT); // assigning the potentiometer to input
  pinMode(gate, OUTPUT);  //assigning the mosfet to the output
  Serial.begin(9600);

}

void loop() {
  valuePot=analogRead(poten); // analogRead is a function that sends the order to read information
  Serial.println(valuePot); // prints the information
  mapPot=map(valuePot, 0, 1023, 0, 255); // allows you to map the information to another range i.e. change 0-1023 range to 0-255
  analogWrite(gate, mapPot);
}
Using the circuits we made we connected our protoypes to the motor to inflate the shapes.
I noticed that some of my channels were too narrow for all the air to get through, so I kept this in mind for my 3D modelling.
Rhino Model
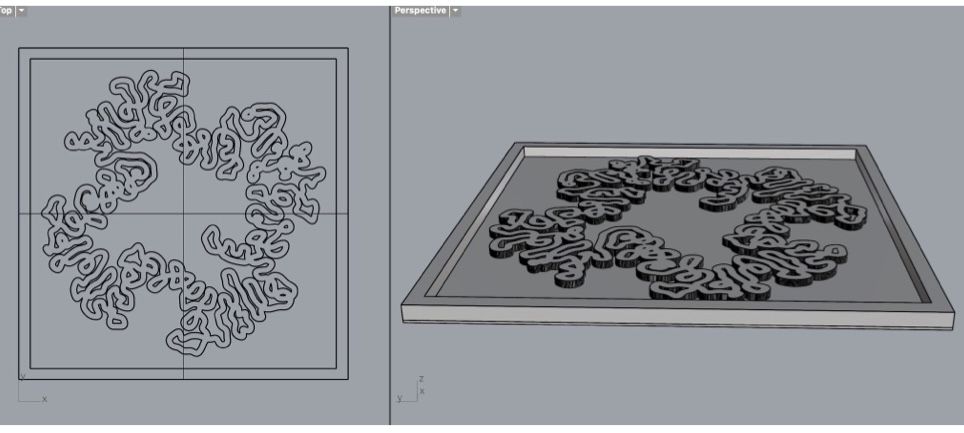
Using the same bacteria model that I created for Computational Couture week I created the 3D printed mold that I needed for soft robotics.
With help from Anna and Petra I added these lines of grasshopper code to my model to turn the bacteria shape into a surface which allowed me to extrude the model for 3D printing.

After 'baking' the grasshopper code, in Rhino I created a base and edges for the mold. I extruded the edges so that they would be higher than the bacteria model to hold the silicon/biomaterial liquid for setting.
I planned on using a syringe with a needle to insert liquid into the model instead of inserting a tube to blow air.The channels of my model were too complicated to try and adjust to create a gap wide enough for plastic tubing to be attached to.

I used the Bambu 3D printer to print my model which took about 4 hours.
Mold Making
After printing the 3D model I created the Dragon Skin silicon mixture.
-
The pot life was 12 minutes
-
The cure time is 40 minutes
-
The external temperature should be 23°C
* Dragon Skin Silicon
* 2 Plastic measuring cups
* Wooden spoon
* Plastic sheet
* Mold
* Measure 50 ml of Part A and Part B separately in measuring cups.

* Mix the parts together stirring slowly to not produce bubbles

* Slowly pour the silicon mixture into the centre of the mold and push it into corners using the wooden spoon.

* Pour the remaining mixture onto the plastic sheet making sure that it is a similar shape to the mold - this is going to be the bottom of the whole piece.

* Leave to set for the recommended time, ~1 hour.

* Once set, peel the silicon molds away from the plastic sheet and 3D printed model.

* Using some freshly mixed silicon bind the edges of the bottom and top sheets of silicon together - make sure not to bind the air gaps.

* Leave to set again.

Results
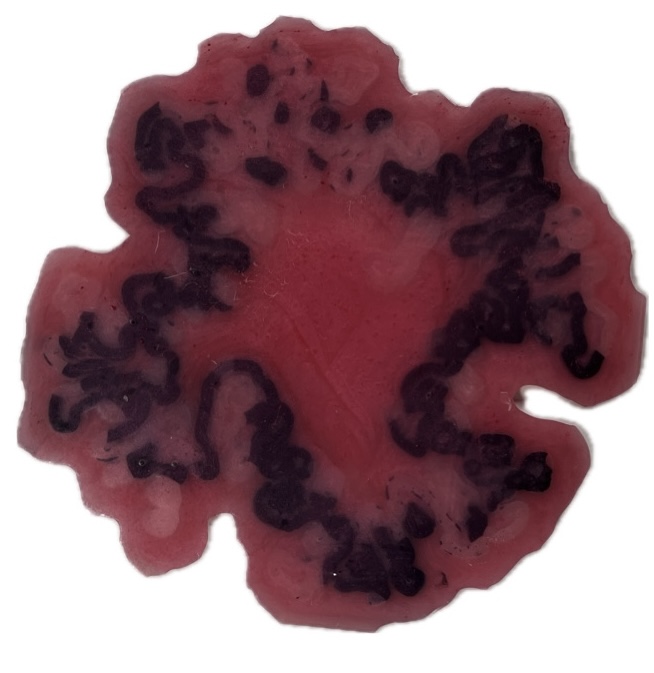
I mixed black food colouring with water and using a needle syringe I inserted the liquid into the channels. As you can see some of the edges were not sealed properly so liquid ran out. Some channels also seemed like they had been blocked maybe in the glueing process.

I mixed a small amount of dragon skin and fixed the edges of the inflatable to cover any holes - I then filled the channels with the liquid again. Ideally in the future I would create an exit channel for the liquid to drain out of so that the movement can continue to be seen.
