11. Open Source Hardware
Week 11 | This week was all about learning to hack machines to create a more accessible, maybe higher performing device with more capabilities.

• • •
Introduction
Assignment
- Research and document existing fabrication methods, machines and industries, add references, tutorials and sketches of the hardware you will make
- Document the process of designing the files for your machine/machine-hack/tool and its fabrication including the assembly process
- Document the schematic and the software source code
- Document the parts and how to make your tool or machine
- Document your BOM (Bill of materials): electronics, materials, their amount, etcetera (with references of the components)
- Upload your 3D model and CAM files
- Design, create and document a final outcome, a sample project of your process
- Make a small video of the machine
- Create an interface for controling your machine (extra credit)
We were first put into groups to create our machines and we all instantly got obsessed over the idea of a "biospray" gun that could be sprayed over a mould and set instantly to create a personal shaped garment. We quickly started to realise that this idea wasn't feasible in our time frame as we would have had to recreate a 3D model. We opted to create a felting gun based off of previous alumni's designs instead.
In Collaboration With:
Germarilis Ruiz - 3D modelling and Biomaterial Exploration | Holly Adams - Electronics and Biomaterial Exploration | Dhrishya Ramadass | Aleksandra Piotrowska
Inspiration
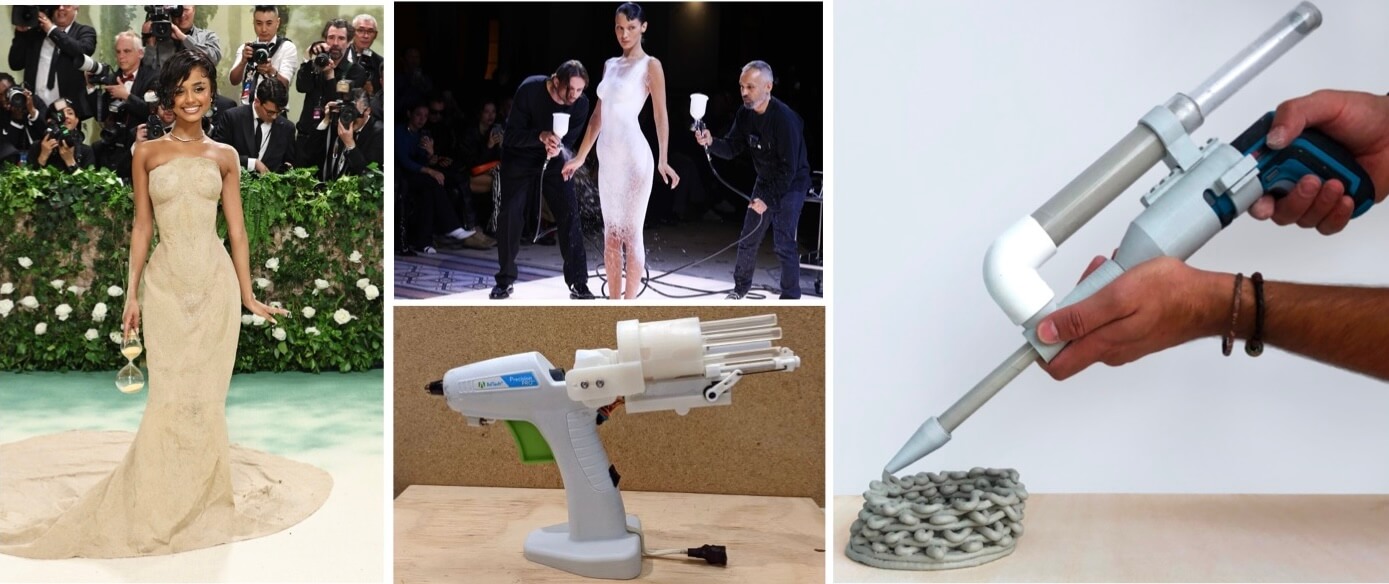
1Photo by Vogue on "Tyla's Sand Dress - MET Gala" | 2Photo by Apparel Talks by Apurva on "Fabrican Spray on Fabric" | 3Photo by "Hackaday" on "Glue Gun" | 4Photo by "Mark OS Designs" on "BioGun"
★࿐࿔The Wider World!: ★࿐࿔
Makers of the viral 'Bella Hadid spray on dress', Fabrican forms instant non-woven fibres from a liquid suspension held in a spray gun or aerosol can. Has many applications including creating sprayable conductive materials with electrical resistance similar to copper wire.
A distributed handheld extruder that enables the fabrication of bio/waste materials into useful objects. It was created by hacking the function of an existing screwdriver drill, using digital fabrication tools and accessible materials.
Hardware:
A glue gun that is more like an extruder from a 3D printer.
A hacked glue gun with six chambers allowing for different filaments to be used.
Comes with all the parts too.
• • •
Tools
-
Rhino 3D
• • •
Bio Spray Gun
Our first idea was to create a spray gun which extruded a liquid-based biomaterial that when sprayed it solidified onto the model/object to create a personalised and moulded structure. We originally were debating whether to create a spray gun that was driven by an air compressor so that the biomaterial was sprayed or to create a heated 'hacked glue gun' which melted a biomaterial into a filament which could be bioprinted.
Option 1: 2x pressure based guns where one has sodium alginate and one has calcium chloride
Problems:
- alginate mixture turns into a gel so may have trouble spraying through the nozzle
- have to spray many layers to create a structure
Option 2: 1x heat based "glue" gun pushing gelatin rods
Problems:
- heating the gelatin to the right temperature
- weight of the heating system
- gelatin dripping before it dries
We decided to opt for the air compressor based bio spray gun as it would be less complicated to achieve in our time limit and would also be much lighter than the heat based gun - we also found a great 3D CAD file for a spray gun to start our project off.
Components
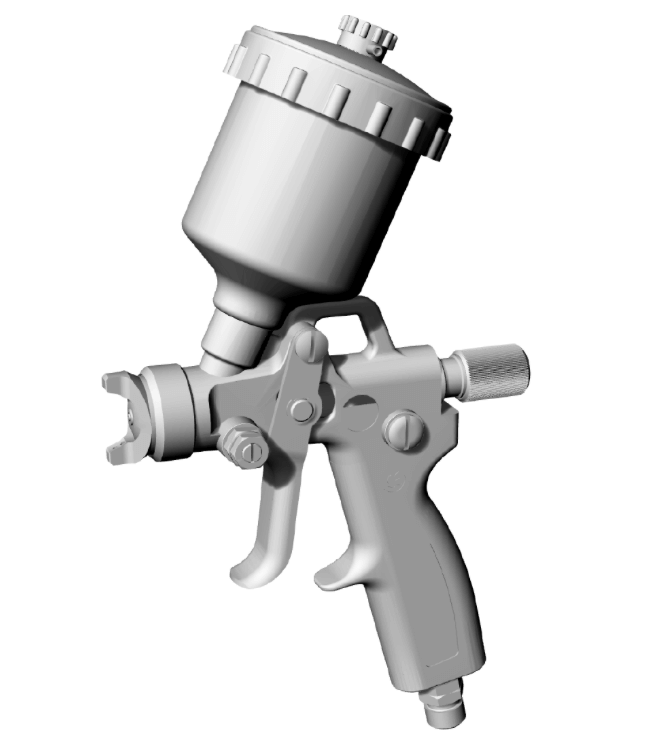
Using the 3D model from GrabCAD HVLP Spray Gun 3D file we started to visualise how we wanted our biospray gun to work. We first separated the 3D parts in Rhino to prepare them for 3D printing.
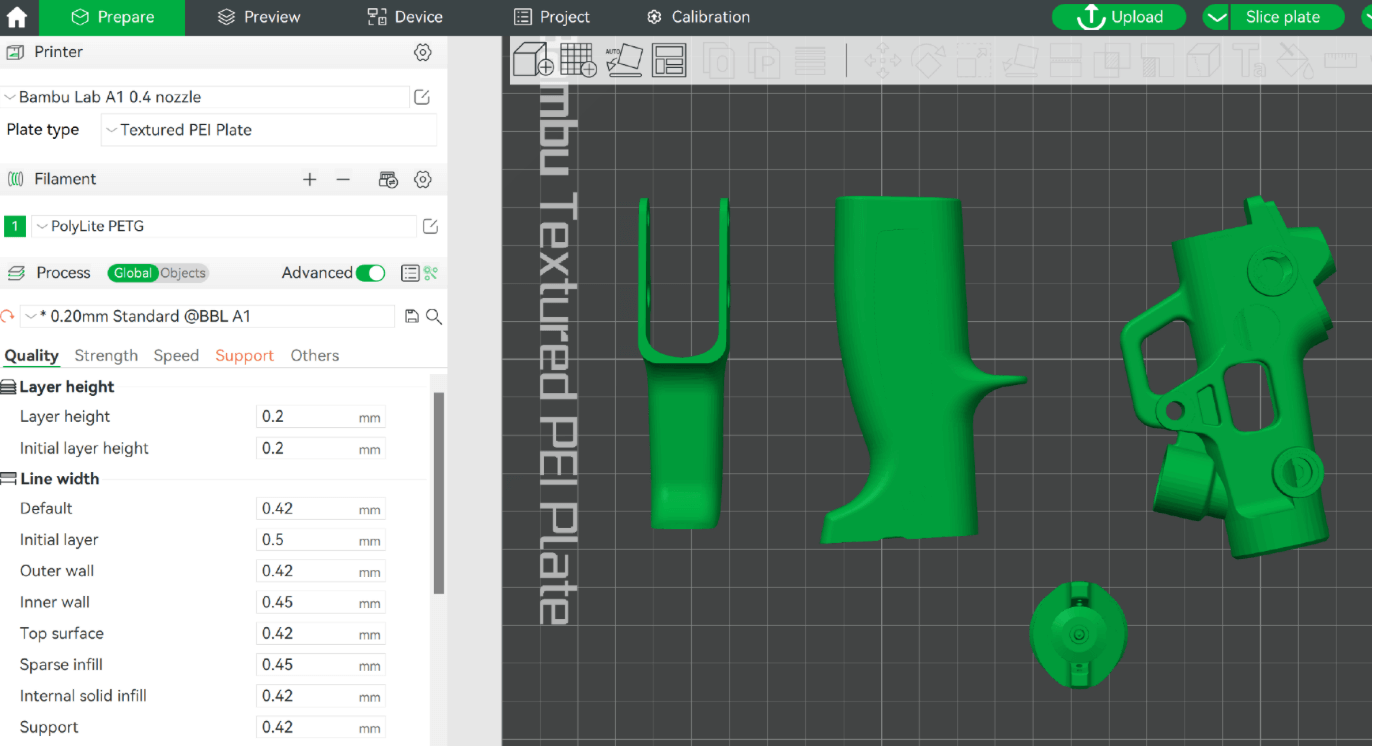
However, when we printed a trial piece on the Bambu printer the quality of the part was still very poor and had many air gaps - so we decided to ditch the spray gun and try something else :(
Biomaterial Testing
Whilst we were still thinking of creating the spray gun we created an alginate mixture to test.
* 8g Sodium Alginate
* 1500ml Water
* Calcium Chloride solution
* Spray bottle
* Measuring cylinder
* Cast mould
* Fabric
* Hand Blender
* Digital weighing scale
* Measure the sodium alginate and water, blend them together until combined. Try and not make too many air bubbles - ideally leave the mixture over night.

* Pour the mixture into a spray bottle and test that the mixture is thin enough to be able to be sprayed. If it is not then water it down.

* Prepare the calcium chloride solution

* Place the mould onto a flat surface with the fabric laying over it.

* Spray the first layer of sodium alginate.

* Spray the calcium chloride solution straight away onto the sodium alginate.

* Repeat these layers at least 3 times.

* Leave to dry for a couple of days.
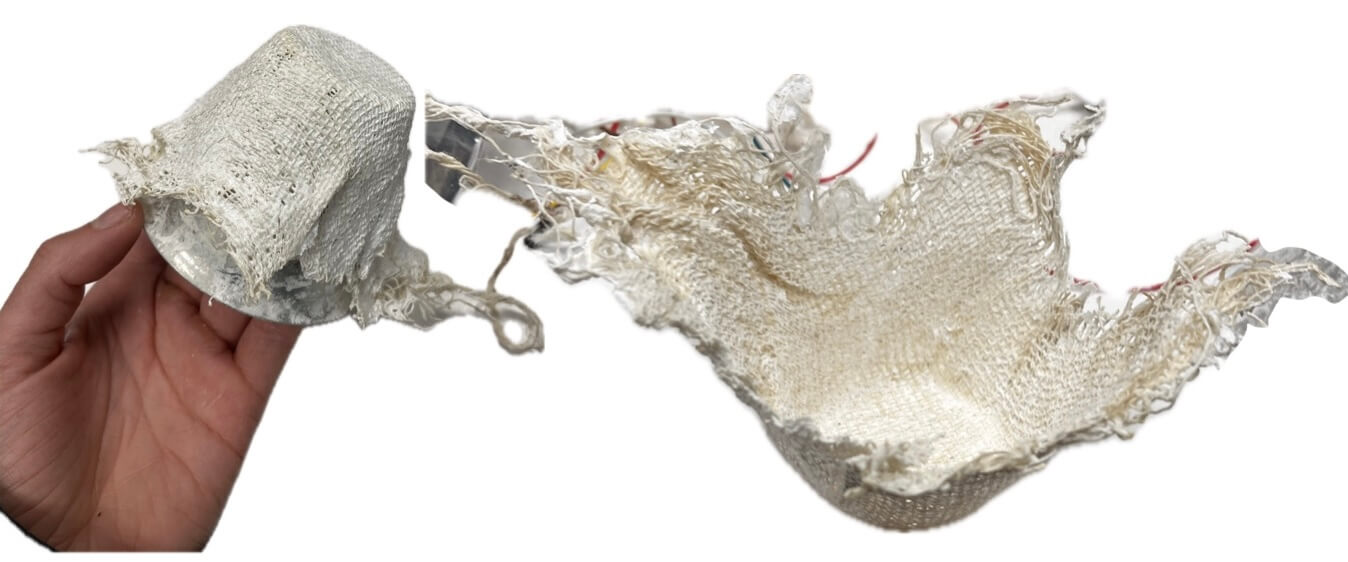
Sodium Alginate and Calcium Chloride BioSpray - 4 layers
The resulting prototype worked quite well and held its shape nicely, however lots of calcium chloride dust particles would come off onto your hands after touching it.
• • •
Felting Gun
We decided that it would be best with the limited time we had to try and improve the attempts at creating a felting gun that previous students had tried. Using Barbara's page as inspiration we started the process.
The shift from developing a biomaterial spray gun to a felting gun occurred due a combination of several reasons:
TIME CONSTRAINTS Developing a working biomaterial spray gun required significant time to test the flow dynamics of biomaterials, calibrate nozzles, and optimize pressurization. Given the project timeline, these complexities made it challenging to deliver a functional prototype.
FEASIBILITY Biomaterial spray guns require advanced components, including air compressors, precision nozzles, and pressurized systems, all of which needed extensive sourcing and testing. This complexity made the design impractical within the given constraints.
CREATIVITY A felting gun offered a simpler, yet equally innovative, tool that aligned with our goals of hands-on manipulation of materials. It required fewer technical components, making it faster to prototype, while opening up opportunities for textile experimentation.
Electronics
We followed the same electrical circuit steps and created the following circuit:
Components:
-
1N22AB MOSFET
-
10KΩ Rotary Potentiometer
-
4.5 - 15V D.C. Motor
Using TinkerCAD I created the circuit diagram and schematic as shown below.


We created the circuit and when connected to a power supply of 10V, the circuit pulled a maximum of 0.6A.
CAD Model
Germarilis was the queen of CAD and worked on our 3D model, taking inspiration from Barbara's documentation again.
She first reveiewed the previous documentation and attempted to rescale the model as some of the parts did not fit correctly. Her design sketch below were created to visualise the functioning of the parts.
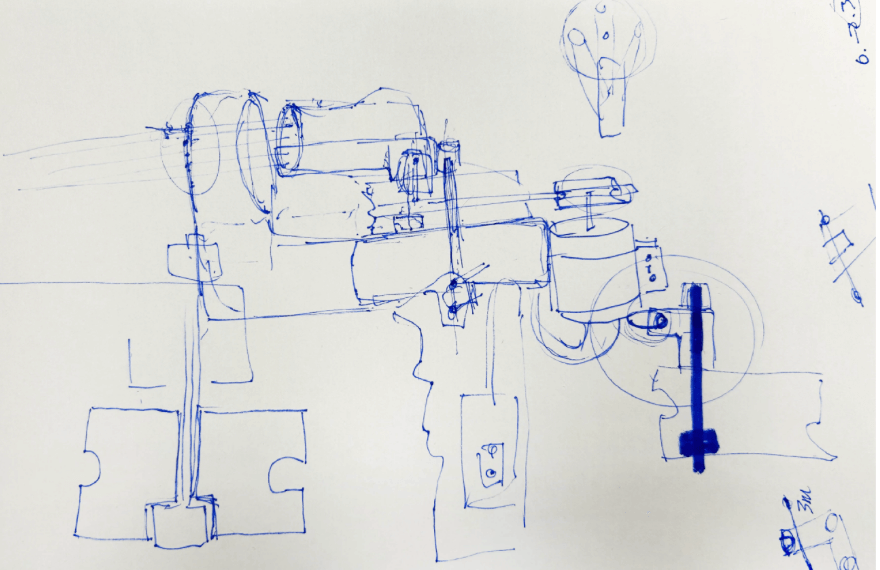
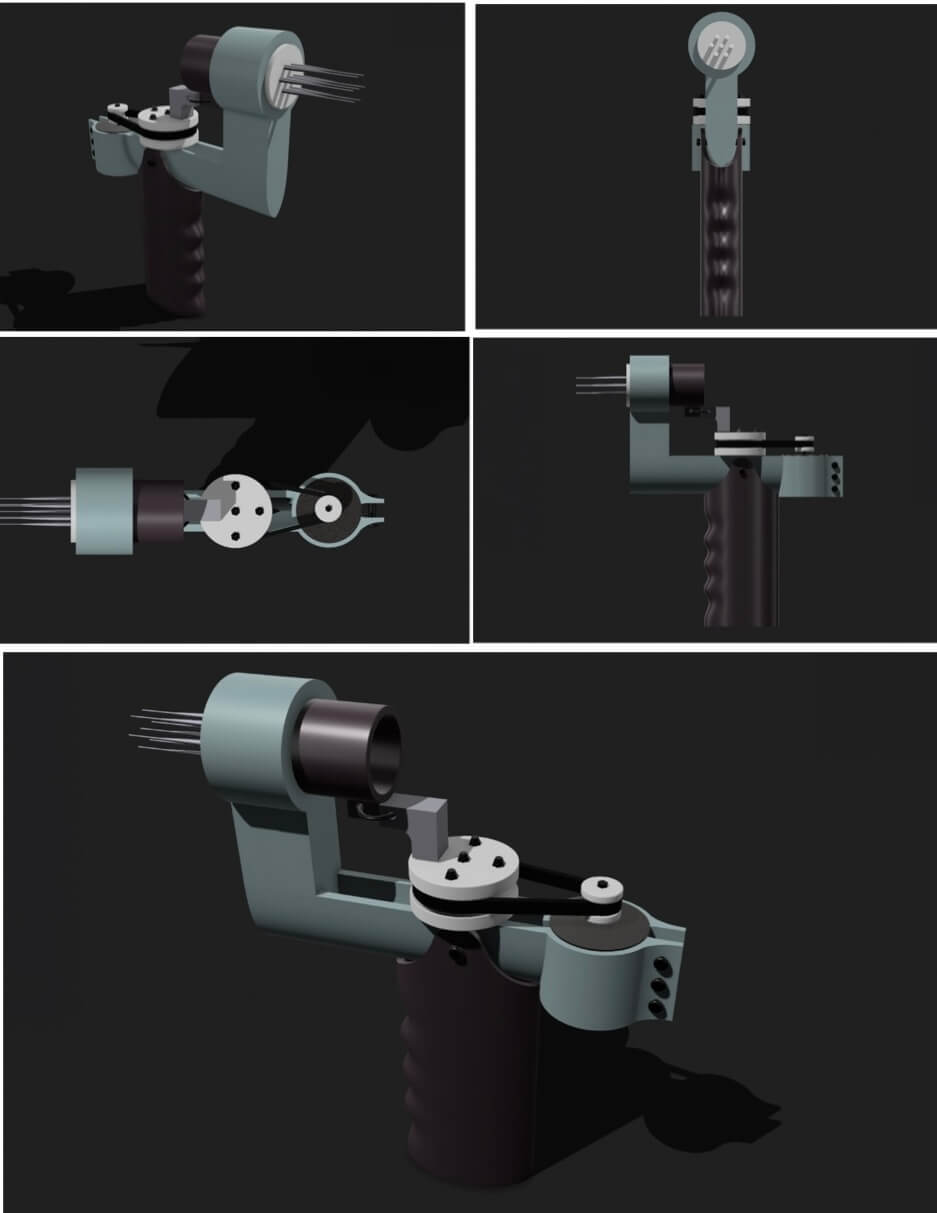
Using Rhino 3D, Germarilis created the model to be printed using the Bambu Studio 3D printer as the quality of the print is much better and it is produced much faster than the Ender Creality printer.
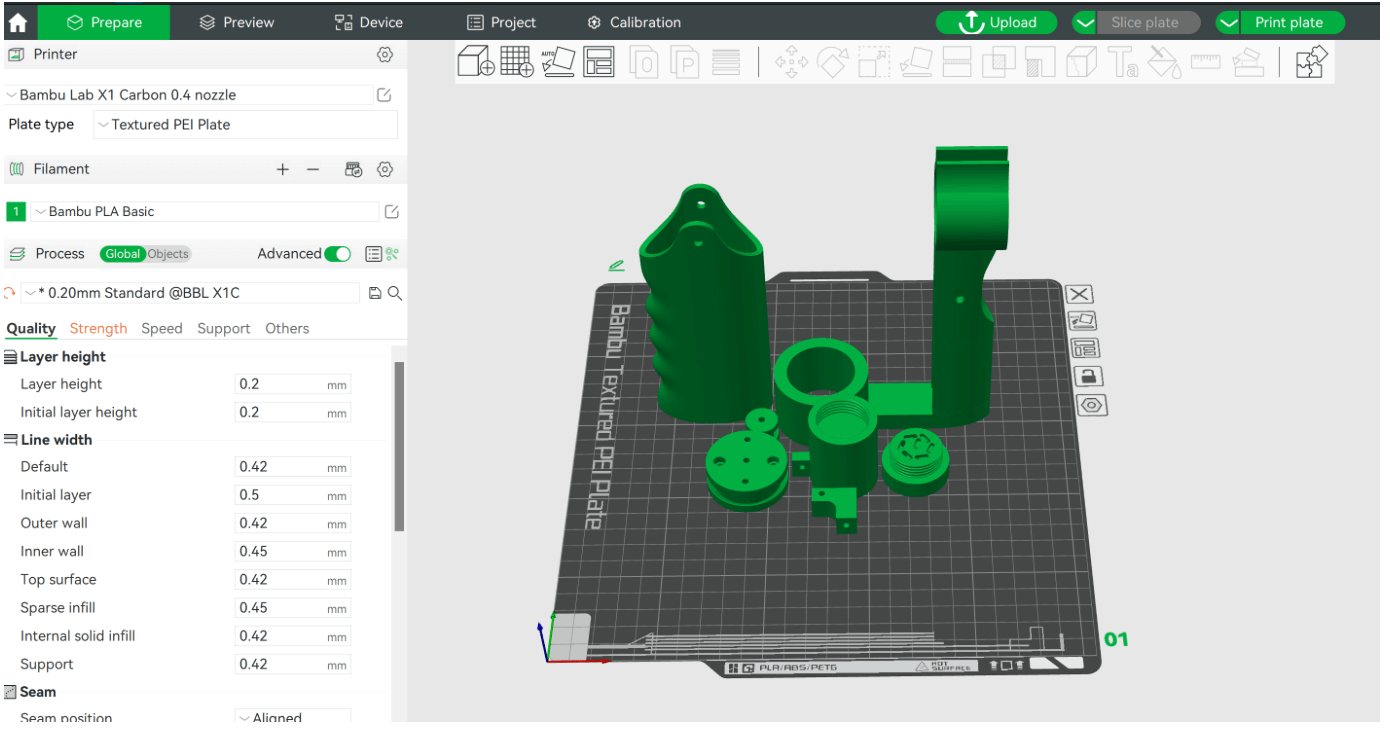
The .stl file was sent to the Bambu Studio workspace to be finished off before printing.
We printed using:
-
PolyLite PETG
Printing Speed: 30 - 50mm/s
Printing Temp: 230-240°C
Bed Temp: 70-80°C
Fan: OFF
Assembly
| Qty | Description | Price | Price x Qty | Link |
|---|---|---|---|---|
| 2 | M3 x 12mm screw | $0.39 | $0.78 | https://es.rs-online.com/web/p/tornillos-allen/0281007 |
| 1 | Felting needles | $9.77 | $9.77 | https://www.mercerlob.com/material/254671/agujas-de-repuesto-gruesas |
| 2 | M3 x 35mm | $0.39 | $0.78 | https://es.rs-online.com/web/p/tornillos-allen/8229066 |
| 3 | M3 x 16mm | $0.13 | $0.39 | https://es.rs-online.com/web/p/tornillos-allen/4679818 |
| 6 | 5.5mm x 2.4mm | $0.41 | $2.46 | https://es.rs-online.com/web/p/tuercas-hexagonales/0524281 |
| 1 | M3, A4 316 | $0.72 | $0.72 | https://es.rs-online.com/web/p/arandelas/0189620 |
| 1 | Motor | $12.66 | $12.66 | https://es.rs-online.com/web/p/motores-dc/2389759 |
| 1 | MOSFET | $3.00 | $3.00 | https://es.rs-online.com/web/p/mosfet/8076692 |
| 1 | Potentiometer | $3.18 | $3.18 | https://es.rs-online.com/web/p/potenciometros/7703056P |
| 1 | Rubber Band | $1.39 | $1.39 | https://www.amazon.es/cart?ref_=ewc_gtc |
| Total: | $35.13 |
Having a quick search on google the prices for a felting gun you can buy are:
-
Electric Wool Felting Gun - $129
-
Felting Gun Etsy - $54
So our hacked machine saves alot of money although you do need access to a 3D printer.
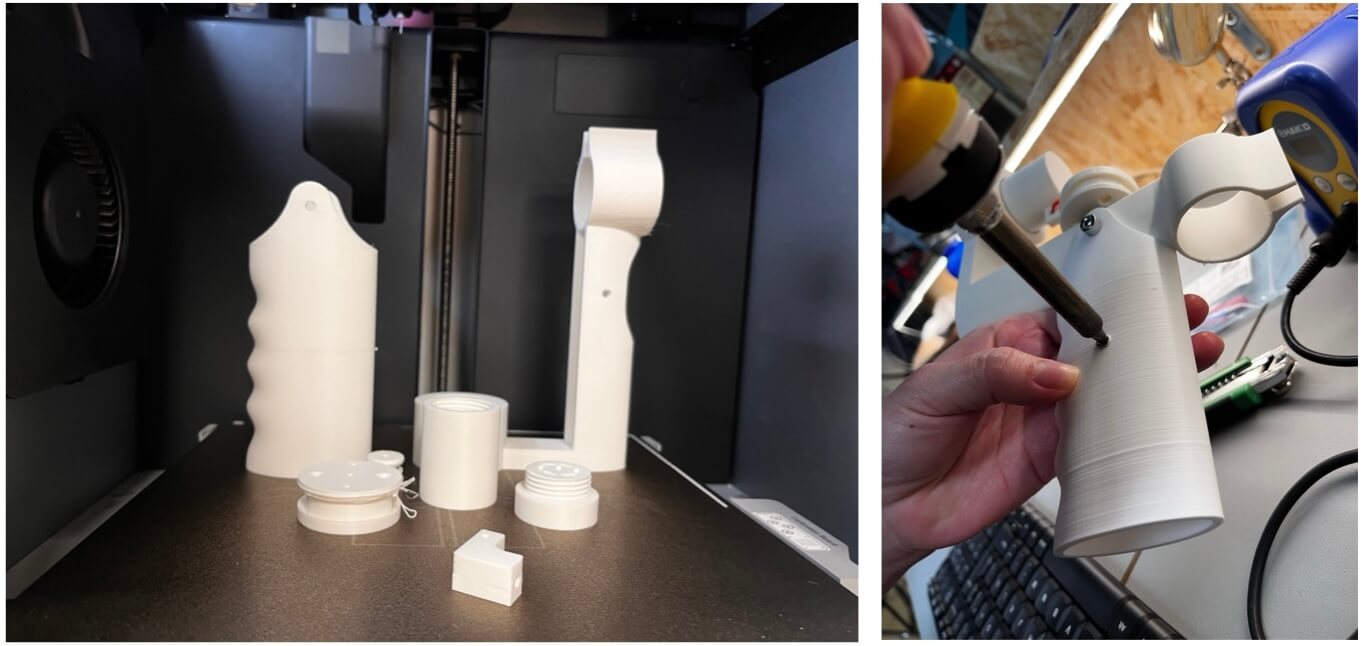
Left: Bambu 3D printed parts, Right: Soldering a hole for the potentiometer to fit through
Assembly Steps
-
Attach the crank mechanism to the gun body. Use an M3 screw, two washers, and a hex nut to firmly secure the mechanism to the base of the gun body Ensure the screw is tightened securely, but avoid over-tightening.
-
Insert the remaining part of the crank into the motor. This will provide the power needed to drive the firing mechanism.
-
Use three short M3 screws to attach the motor to the gun body.
-
Insert a longer M3 screw into the front part of the crank. This will help stabilize the crank and ensure smooth operation.
-
Install the Needle Base. Slide the needle base into the hole located at the front of the gun base.
-
Connect the needle base to the crank mechanism.
-
Carefully insert the needles and attach them to the base. Double check that the needles are aligned correctly and securely fastened.
-
Place the rubber band onto the cranks.
-
Insert the potentiometer and connect it to the motor. The potentiometer will allow you to adjust the power output of your gun.

Diagram of separated parts and order of assembly
Results
We created a deadly machine! It functioned great and was very sturdy with a good weight to it. Germarilis was amazing with all the 3D design and it was great working together. Since we only had one needle though, the next step would be to purchase more and review it's proper function whilst felting.

Final machine assembly
• • •
Fabrication Files
-
File: Felting Gun Files .stl ↩