11. Open Source Hardware - From Fibers to Fabric
Lecture on November 24th, 2025, Global Instructors: Sara Diaz Rodriguez,
Global Tutorial: Stephanie Vilayphiou
Local Instructors: Carolina Delgado, Carlos Roque; Support: Guilherme Martins, Rafael Calado
Biolab team: Carlotta Premazzi, Ndeyfatou Ceesay, Berrak Zeynep Okyar
Research & Ideation

After Tuesday’s tutorial, we discussed with our local instructor Carolina Delgado which ideas could be suitable for our project. At the same time, we evaluated our concepts with Guglielme, our tutor for electronics, and realized that some projects would require more than a week of work. Because of this, we tried to define a more realistic framework for what we can actually achieve within such a short timeframe.
Afterwards, with the guidance of Carolina Delgado, we created a comprehensive mind map. We reviewed the ideas written on the board one by one and began deciding which ones aligned best with our goals. During the brainstorming session, we also made sketches to visualize potential mechanisms and concepts, which helped us evaluate our options more concretely. This entire process allowed us to move beyond a superficial look at the ideas and instead carry out a detailed analysis, leading to a more focused and productive meeting as a team.
Tools
- [Arduino UNO]
- [Arduino IDE]
- [2D/3D modelling Rhino3D]
- [2D modelling Autodesk Fusion]
Machines
Laser cutter Electronics setup
Brainstorming

Mindmap, Biolab Lisbon team, illustration by Berrak Zeynep Okyar

Illustrations -Biolab Lisbon team by Berrak Zeynep Okyar
Later, we decided that we wanted to create a crystal using this mind map. Each of us drew illustrations to think about how we could design it, and step by step, we determined what we would need.

Technical Drawing by Berrak Zeynep Okyar
Based on the ideas captured on the whiteboard, developing a crystallizer emerges as the most coherent choice in terms of both needs and desires. The note “Grow crystals / chamber (structure)” directly points toward a crystal-growing chamber, while the mentions of “incubator?” and “chamber” highlight the requirement for a closed system with controlled temperature, humidity, and solution conditions.
Since crystal-growth processes operate with low energy, are biocompatible, and allow experimentation with sustainable biomaterials, the concept aligns strongly with the themes of #biomaterials and #sustainability. The objective, therefore, is to design a modular and flexible crystallizer capable of enabling crystal formation in a controlled environment using salt-based solutions or biomaterials.
The fundamental functions of the device include temperature control, stable humidity or a sealed chamber, modular solution containers, and a transparent observation window. Additionally, interchangeable modules for testing different crystal geometries as well as hybrid features that support mixing, resting, or cooling—transform the machine into a versatile production platform.
References & Inspiration


Inspiration Board by Berrak Zeynep Okyar
Process

OPEN SOURCE CRYSTAL-GROWTH MACHINE
[Analogic / Manual Version]
1. Project Overview / README
Project Name: The Crystalizator — Crystal-Growth Machine
Description: The Crystalizator is an open‑source device for preparing, filtering, and crystallizing saturated salt solutions directly onto fabrics or textile scaffolds. It integrates controlled heating, magnetic stirring, gravity‑based filtration, and a pulley-based immersion system to create consistent, repeatable, and well-documented crystallization workflows. The system provides a protected, stable environment where crystals can form reliably, improving upon inconsistent open‑air manual methods. Version: V1.0 (Analog Prototype)
Author(s): Carlotta Premazzi, Ndeyfatou Ceesay, Berrak Zeynep Okyar, Carolina Delgado, Carlos Roque, Guilherme Martins
Lab: Biolab, Lisbon License: CC BY-SA
2. License
This project is released under Creative Commons Attribution-ShareAlike (CC BY-SA).
You must credit the original creators.
You may adapt, modify, and redistribute.
Derivative works must use the same CC BY-SA license.
BoM example
BoM example -Materials
| COMPONENT | IMAGES | LINK | PRICE |
|---|---|---|---|
| Structure | |||
| Laser-cut Plywood Board (70×100 cm) |  |
leroymerlin.pt | €26,12 |
| Components | |||
| 1× Thermomagnetic stirrer with hot plate | AliExpress | €59,95 | |
| 1× Magnetic stir-bar (5×40 mm, chosen via Stir-Bar Data Sheet) | Amazon.es | €14,22 | |
| 1× pack Magnetic stir-bars (5 different sizes) |  |
Amazon.es | €13,10 |
| 2× Borosilicate glass jars (1 L) |  |
Amazon.es | €73,96 |
| 1× pack 200 filtration units | Amazon.es | €19,04 | |
| 3× Dark fabric curtains (light-shielding system) |  |
feiradostecidos.com | €13 |
| Chemicals | |||
| Salt / Copper sulfate | Amazon.es | €17,25 | |
| Salt / Alum | Amazon.es | €17,18 | |
| Distilled water | Amazon.es | €28,45 | |
| 96% alcohol |  |
Amazon.es | €5,97 |
| Textile / Scaffold | |||
| Cotton, linen, biotextile, or other scaffolds | 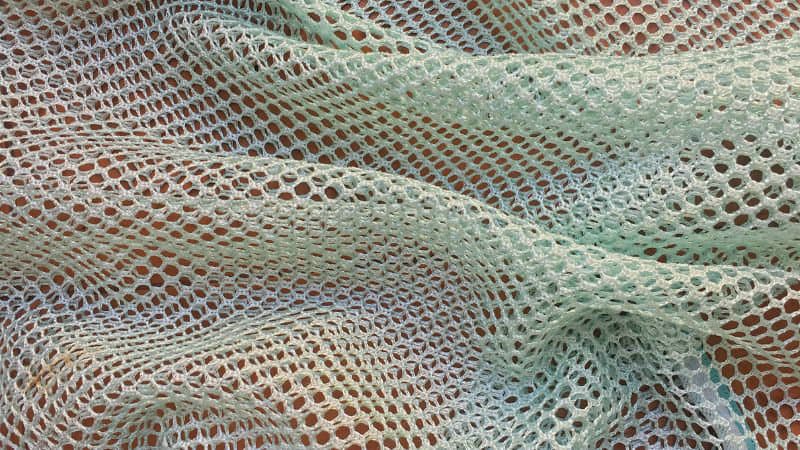 |
||
| TOTAL | €288,24 |
4.Purchased Parts

Borosilicate jars
Mini pulley + cord + hooks
Filter mesh (nylon, metal, or lab filter)
Curtain or shading fabric
5. Custom / Unique Parts
Laser-cut structure
Filter/lid solution
Pulley-mounted textile holder
Light-shading curtain system
6. Assembly Instructions
1.Build Structure
Laser‑cut plywood frame.
Assemble two compartments: left = Jar 1, right = Jar 2.
Clean the jars with 76% alcohol and distilled water.
2.Heating & Mixing Unit (Jar 1)
Place thermomagnetic stirrer under Jar 1.
Insert stir-bar.
Fill jar with distilled water, heat, and dissolve salt until saturation.
3.Filtration System
Mount the filter above Jar 2.
Tilt Jar 1 to pour hot solution through filter.
4.Textile Immersion System (Jar 2)
Mount pulley above Jar 2.
Attach textile to holder.
Lower fabric into filtered solution.
Cover with lid + shading curtain.
7. Design files [Source Files & Export Files] - 3D MODEL
CAD source (.fusion, )
Schematics
Drawings
Frame laser‑cut files: SVG / DXF
Include folder structure:
/design-files
/cad

/schematics

/drawing

/laser-cut
Analog Version
No software. Manual operation.
Digital Version
Microcontroller firmware (temperature control, timed cycles, sensor logging)
Material‑specific crystallization profiles
8.Software / Firmware
Analog Version
No software (manual operation)
Digital Version
Microcontroller firmware (temperature control, timed cycles, sensor logging)
Material-specific crystallization profiles
9.Review & Rebuild Notes
Verify jar sizes and frame spacing
Confirm filtration flow speed
Adjust pulley height for textile length
Add shading curtains for consistent crystal formation
For large batches: upgrade structure to acrylic panels
10.Stir-Bar Selection Data Sheet
(Based on Fisher Scientific, 2025)
Jar Volume Recommended Stir-Bar Length 250 ml 20–30 mm 500 ml 30–40 mm 1 L 40–50 mm 2 L 50–70 mm Avoid bars that are: - too long → scraping - too short → weak mixing - mismatched to plate magnet
11.Additional Features
Light-Shading Curtain: prevents light-induced uneven crystallization
Multi-Fiber Cap: allows parallel crystallization of multiple fibers
12.Safety & Risk Assessment
Hazards: hot surfaces, glass breakage, dense solutions
PPE: gloves, goggles, apron
Safe Use:
- stable surface
- ventilation
- no open flames
- never leave heating unattended
Risks: thermal burns, cuts, splashes
Disposal: dilute residues before draining; follow lab rules
Standards: general makerspace / lab safety guidelines
13.Maintenance & Repair
Routine: rinse jars, remove crystal buildup, clean frame
Replace: jars, filters, cords, supports
Repair: cracked jars, loose joints, misaligned pulley
Longevity: avoid thermal shock, store dry, keep components clean
14.Changelog / Version History
v1.0 — Initial release / Analog prototype
v1.1 — Digital prototype (in process)
15.Contributing Guidelines
For collaborators: - Fork → modify → submit pull request - Use templates for issues (bugs, features, questions) - Maintain respectful, inclusive communication - Use clear file-naming conventions - Include photos, diagrams, and measurements in hardware documentation
2D Model

2d Model in Inkcape by Berrak Zeynep Okyar
2d model in Sketchfab by Berrak Zeynep Okyar
🔥 Laser Cutting Settings
| Parameter | Value |
|---|---|
| Machine | Dholetec DT 1000 CO₂ Laser Cutter |
| Control Software | LightBurn |
| Material | Plywood |
| Material Thickness | 3 mm |
| Laser Power | 90 % (3 mm) |
| Cutting Speed | 35 % (3 mm) |
| Frequency (PPI / Hz) | |
| Number of Passes | 1 pass |
| Focus Height | 0 mm (focused on material surface) |
| Air Assist | ON |
| Lens | 2" focal length |
| Nozzle | Standard cutting nozzle |
| Kerf Compensation | ~0.15–0.20 mm |
| Cutting Order | Inner cuts first, outer contours last |
| Pre-cut Test | Yes (mandatory test cuts before final cutting) |
3D Model Screenshoot and Laser Cut Screenshoot

In Fusion 360, the workflow for modelling the frame of the device begins with defining the overall dimensions and structural logic of the frame based on the design requirements.
The process starts by creating accurate 2D sketches on the primary reference planes. Constraints and dimensions are applied to ensure correct alignment, proportion, and symmetry. Once the base sketches are complete, Extrude, Cut, and Fillet operations are used to build the solid geometry of the frame, including slots, mounting holes, and connection features.
The model is organized using Components and Assemblies, allowing each part of the frame to be managed independently. This structure makes later modifications easier and ensures that design changes propagate consistently throughout the model.
Export for Fabrication
Before exporting the design for fabrication, technical drawings or 2D projections are generated in Fusion 360’s Drawing workspace to verify critical dimensions.
For laser cutting, the Manufacture workspace is used to export flat profiles for each component:
Export format: DXF or SVG All sketches are fully constrained Profiles are projected correctly onto the XY plane Closed vectors are checked before export
Demo Testing
Fabricademy/ Open Source Hardware/Version: V1.0 (Analog Prototype)
Author(s): Carlotta Premazzi, Ndeyfatou Ceesay, Berrak Zeynep Okyar, Carolina Delgado, Carlos Roque, Guilherme Martins
Lab: Biolab, Lisbon
License: CC BY-SA
Results
Fabricademy/ Open Source Hardware/Version: V1.0 (Analog Prototype)
Author(s): Carlotta Premazzi, Ndeyfatou Ceesay, Berrak Zeynep Okyar, Carolina Delgado, Carlos Roque, Guilherme Martins
Lab: Biolab, Lisbon
License: CC BY-SA


Documents
References
Assignment
[ ] Research and document existing fabrication methods, machines and industries, add references, tutorials and sketches of the hardware you will make
[ ] Document the process of designing the files for your machine/machine-hack/tool and its fabrication including the assembly process
[ ] Document the schematic and the software source code (if any)
[ ] Document the parts and how to make your tool or machine
[ ] Document your BOM (Bill of materials): electronics, materials, their amount, etcetera (with references of the components)
[ ] Upload your 3D model and CAM files (if any)
[ ] Design, create and document a final outcome, a sample project of your process
[ ] Make a small video of the machine
[ ] Create an interface for controling your machine (extra credit)