7. BioFabricating Materials
Research and Inspiration
Loop Biotech - Mycelium Coffins

Image Credits : Loop Biotech
I first heard of Loop biotech many years ago because a friend worked there for a while. Back then, and even now, I am struck by both the uniqueness as well as simplicity of the concept, and the approach to a concept as difficult and yet as inevitable as death.
MaterialDistrict — Platform, Blog, Conference
Image Credits : Material District
MaterialDistrict — Exploring biobased creativity with marvelous materials
MaterialDistrict Conference — Utrecht
The Material District website, especially their blog, is a great source of knowledge, full of articles dealing with biomaterials, biocomposites, and aimed towards circularity and sustainability. The annual Material District conference in Utrecht, as well as Antwerp, are stellar events bringing together people working in these areas.
Materiom

Image Credits : Materiom
Materiom has been known to me since my FabAcademy days, but I never truly appreciated what it encompasses until now. It's a brilliant, comprehensive and beautiful guide to so many materials that you can make, alongwith details on their properties and other parameters.
Sugacrete

Image Credits : UEL
Sugacrete — University of East London
I recently came across Sugacrete as part of some discussions on Circularity at my university, and it sounds like a great material. Bagasse waste from sugarcane as the fiber filler to cement as the matrix/binder, it seems to have great potential.
Golden Feather
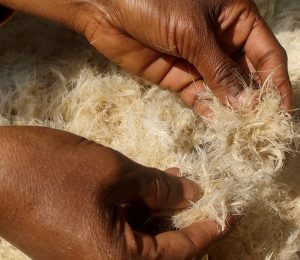
Image Credits : Golden Feathers
Golden Feathers is a creating textiles out of chicken feather waste collected from local butcheries.
I heard about them from the Serendipity Arts Festival in Goa, very late in the 2025.
About the Craft
About the Founder
I also have some water hyacinth paper products made by them.

Image credits : Jesal Mehta
Ideation
While I wanted to try multiple things, including
- biosilicones
- thin films and textures
- behaviour with light, optical and transmissive properties
- fruit leathers
- mycelium based materials
and so much more, I decided to narrow myself to
- gelatine + glycerine based biomaterials for the Crafted section
- kombucha based bioleathers for the Grown section
- a few interesting fillers with the crafted materials
The gelatin base would make my ingredient list more streamlined while the fillers allowed me to play and explore various physical and optical properties.
The fillers I finally used were


- rice husk, an agro waste from rice cultivation, commonly used either as fuel to burn, or as soil enhancer for nutrition and porosity. I had access to this because of my parents' plan nursery where they use it in the soil mix.
- terracotta clay; I wanted to try clay of multiple types - we have kaolin as well as grey "shadu" clay in the studios, but Gunjan suggested to stick to terracotta since the red colour would be a great standout. I had old terracotta sitting around from a past client, so I decided to hydrate that and put it to use.
- expired plaster; I had some opened bags of Plaster of Paris that were many monsoons old, again from an old project, that were most likely never going to work since they had absorbed moisture from the humid Mumbai air, so I decided to repurpose that to a filler material
- tea leaves from the Kombucha preparation were right there, so it was a no-brainer to use them
Tools and Prep
The tools were simple enough
- Induction cooktop for controlled heating (as compared to a gas stovetop)
- Vessels for mixing or using as double boiler water bath
- Silicone spatulae for easy scraping and stirring
- Egg beater or whisk for foaming
- Molds
- Papercups
- Icecream sticks
- Weighing scale
The prep was mainly the space
- area to spread molds for quick pours
- area to let molds rest when curing
- dust-proofing the zone/cabinet/tray where molds are sitting
- fly- and bug-proofing to prevent maggots
- temperature control, if needed, for the kombucha
- identifiers for the different recipes - in my case, the added colour itself helped
Process and Workflow
I referred to Loes Boger's absolutely amazing 24 Core recipes
Weather Notes

It is November in Mumbai and the weather is supposed to be turning from the September monsoon through October heat to the first touches of winter (in as much of a winter we can possibly have at this latitude - no, seriously, Mumbai breaks out the jackets at 22 C while Delhi sniggers through their smog) However, it has been RAINING ALL WEEK this week, as well as intermittently all October. We have had very weird weather and all weather metrics, growth, drying, and other such timelines have gone sideways.
Crafted - Gelatin based
I decided to try out gelatin based materials :
Polymer : Gelatin
Plasticizer : Glycerin
Solvent : Water
Colour : Food colours, Biochrome dyes
Fillers : Terracotta clay, expired POP powder, rice husk, post-brew tea leaves
Materials created :
- Bioresin
- Biosilicone
- Biofoam
- Biofoil - planned but not executed
Proportions of ingredients vary for each material, given in the recipes below.
Recipes
Based on the recipes from Loes Bogers' 24 core recipes, I have scaled up the yield to 800 ml of each material, before cooking and reduction.
| Recipe | Ingredients | Basic Instructions | Drying & Shrinkage |
|---|---|---|---|
| Bioresin Rigid, glass-like translucent material |
• 128 g gelatine • 21 g glycerine • 640 ml water • Coffee filter (optional) |
→ Heat water + glycerine (do not boil). → Sprinkle in gelatine while stirring until clear and viscous. → Skim foam with coffee filter. → Pour slowly into molds; air-dry. |
Drying: 5–7 days Shrinkage: 5–15 % |
| Biosilicone Flexible, rubber-like sheet with soft gloss |
• 154 g gelatine • 154 g glycerine • 770 ml water |
→ Heat water to 75–80 °C. → Add glycerine, then gelatine gradually; stir 20–25 min until syrupy. → Pour into molds; alternate pressing overnight / air-drying by day. |
Drying: 5–10 days Shrinkage: 20–30 % thickness / 10–20 % width-length |
| Biofoam Soft, spongy, open-cell foam |
• 48 g gelatine • 48 g glycerine • 600 ml water • 4 tsp (≈ 20 ml) dish soap |
→ Heat water (not boiling). → Dissolve gelatine + glycerine. → Remove from heat; add soap and whip until airy. → Pour into shallow trays. |
Drying: 2–3 days Shrinkage: 30–50 % thickness / 5–10 % width-length |
| Biofoil (Extra Flexible) Thin, flexible, translucent film |
• 64 g gelatine • 48 g glycerine • 530 ml water |
→ Bring water near boil (< 80 °C). → Add glycerine, then sprinkle gelatine; stir until smooth and syrupy. → Pour thinly on non-stick sheet. |
Drying: 2–4 days Shrinkage: 30–50 % thickness / 5–10 % width-length |
BioResin
I calculated the number of samples and variants I was going to create and decided 800 ml of starting mixture would suffice. It reduced to about 600 ml before pour, and I was left with some excess as well. Therefore, for the later recipes, I have aimed at 500-600 ml starting mix.
Bioresin – 800 ml
Ingredients
- 128 g Gelatine
- 21 g Glycerine
- 640 ml Water
- Coffee filter (optional)
Process
- Heat water + glycerine.
- Gradually add gelatine while stirring until clear and viscous.
- Skim foam with a coffee filter.
- Pour slowly into molds; dry 5–7 days.
Expected Result
Rigid, glass-like translucent resin.
Expected Shrinkage
5–15 % overall.
Adapted from Loes Bogers, Fabricademy 2020 – Bioresin.
Fillers :
- Natural/no filler
- Terracotta clay,
- expired POP powder,
- rice husk
Colour : Red food colour
Process
Cooking the recipe


Pouring into molds


- I cooked the recipe as per the measurements
- I put the various fillers into the molds directly
- Then added the liquid and mixed in the fillers
- Once the natural batch was done, added 1 drop of red food colour to the mix
- Repeated the filler and mix process for the coloured version as well
- I let everything sit for a few days before demolding
Observations
24 hours later
- The next day, the pieces had set enough to be touched, but were still tacky when touched, leaving fingerprints although barely so
- The Rice Husk variant had thickened in the lower layers but the upper layers were actually very liquid still. All other variants had set as describe above. Something about the rice husk may be preventing the gelatin to set ?


48 hours later

- everything had MOLD growing !!! I suspect that, since I put all the trays under clingwrap to avoid dust and particles falling in to the setting gels, air circulation was cut off. The resin did not dry at the expected rate, and the warmth and moisture provided a ripe environment for mold to grow
- I wiped it off as best as I could, but the surface has definitely suffered, more from the wipe than the mold, actually.
Results

The resin mix seeped under the texture film in the plate and hardened. It bonded extremely well with the ceramic plate and had to be soaked for a few days before it could be scrubbed off.


Several weeks later

Physical Properties
All the samples have dried hard. At a few weeks in, they were stiff. As more water was lost, they have shrunk further and are brittle to the point of crumbling, if thin enough.


Clear resin, no filler, red colour


Plaster powder, Terracotta fillers


Husk filler and unfilled


Unfilled and Plaster with red colour

L-R from top : Clear red, PoP red, Terracotta red, terrcotta uncoloured, PoP uncoloured, No fill uncoloured
Deformations
Plastic and Elastic properties
Hard, rigid, brittle
Optical properties
A good translucency is shown, in both the natural and the coloured samples.


BioSilicone
Biosilicone – 600 ml
Ingredients
- 116 g Gelatine
- 116 g Glycerine
- 580 ml Water
Process
- Heat water to 75–80 °C.
- Add glycerine first, then sprinkle in gelatine while stirring.
- Stir 20–25 min until smooth and syrup-like.
- Pour into molds; alternate pressing overnight / air-drying by day for 5–10 days.
Expected Result
Flexible, rubber-like sheet with soft gloss.
Expected Shrinkage
20–30 % thickness / 10–20 % width-length.
Adapted from Loes Bogers, Fabricademy 2020 – Biosilicone.
Fillers :
- Natural/no filler,
- Terracotta clay,
- expired POP powder,
- rice husk,
- used tea leaves from kombucha brewing
Colour : Blue pea dye from the Biochrome week in some samples, blue food colour in others
Process


- I cooked the recipe as per the measurements
- I put the various fillers into paper cups
- Then added the liquid to paper cups mixed in the fillers
- Poured the natural colour samples into the molds, leavimg enough to make coloured versions
- Added 1 tsp of Blue Pea to each papercup and mixed
-
Poured the coloured filler mixes into the molds
-
For the remaining leftover material, added a drop of food colouring and poured it into various other molds, voluminous as well as flat
-
I let everything sit for a few days before demolding
Observations
0 hours
-
The mix began to set almost immediately, the natural version was setting by the time I finished mixing and pouring the coloured version
-
Mold growth !


-
The samples were wiped down when demoulded. Further growth did not expand in the open air, or not as rapidly, but it left impressions.
-
The unfilled clear samples did not catch mold, only samples with filler material.
Results
Physical Properties


Beautiful, clear and flexible, Blue Pea dye and Blue food colour


Clear silicone with, from top, L-R, Husk, Tea, PoP, Terracotta, Unfilled


Husk and Tea, in clear silicone

L-R from Top, Blue BioSilicone with Husk, PoP, Terracotta, no-filler blue molded Bishop, uncoloured Terracotta, uncoloured PoP, no-filler blue, no-filler blue from Blue Pea dye, no-filler blue molded Pawn


Clear Biosilicone with Terracotta, Rice Husk and Tea, with close ups


Clear Biosilicone with Terracotta, PoP, Rice Husk, no-filler, PoP in textured mold, Tea. With backsides of Terracotta and PoP samples.


PoP sample in textured mold and clear biosilicone no fillers, after more drying time
Deformations
Plastic and Elastic properties
Extremely flexible and bendy, somewhat elastic
Optical properties


Biofoam
Biofoam – 600 ml
Ingredients
- 36 g Gelatine
- 36 g Glycerine
- 450 ml Water
- 3 tsp Dish soap (≈ 15 ml)
Process
- Heat 450 ml water (not boiling).
- Add gelatine + glycerine; stir until fully dissolved.
- Remove from heat, add dish soap, and whip until airy foam forms.
- Pour into shallow molds or trays; dry 2–3 days at room temperature.
Expected Result
Soft, spongy, open-cell foam.
Expected Shrinkage
30–50 % thickness / 5–10 % width-length.
Adapted from Loes Bogers, Fabricademy 2020 – Biofoam.
Fillers :
- Natural/no filler
- Terracotta clay,
- expired POP powder,
- rice husk
- brewed tea leaves
Colour : Yellow food colour
Process


- I cooked the recipe as per the measurements
- Foamed it with the electric whisk/eggbeater
- Initially used detergent, but then used dishwasher liquid
- I put the various fillers into paper cups
- Then added the liquid mix to paper cups and gently folded in the fillers, like for cake batter, to better preserve the bubbles entrained into the mix
- Poured the natural colour samples into the molds, leavimg enough to make coloured versions
- Added 1 tsp of Yellow food colouring and mixed
- Poured the coloured filler mixes into the molds
- I let everything sit for a few days before demolding
Observations
- Liquid laundry detergent does not give the requisite foam, it has to be dish soap
- Fold the fillers in gently or you will damage the air entrapment
- The foam started to set almost immediately
- Fillers with large particle size - tea leaves and rice husk - ended up collapsing more, destroying their larger bubbles faster

48 hours later

The samples have started to set well, but also shrunk considerably.
Results
Physical Properties

L-R from top : Coloured foam samples with Tea leaves x2, biofoam with PoP x2, biofoam with terracotta x2


Left, Top to Bottom : Coloured Biofoam with Tea leaves, PoP and Terracotta;
Right, Top to Bottom : Non-coloured Biofoam with Terracotta, PoP, Tea leaves, and Rice Husk filler sample that has not set


Coloured bio foam from cube mold, partially filled


PoP as filler, in textured mold, front and back


Terracotta as filler, in textured mold, front and back

Tea as filler, in textured mold

Top to Bottom - Bio foam, no colour - PoP, Terracotta, Tea - in textured molds
Deformations
Plastic and Elastic properties
Extremely flexible and bendy, somewhat elastic
Optical properties


Grown - Kombucha bacterial leather
Recipes
Kombucha / Bacterial Leather
Ingredients
For 1 liter / 1 kg brew mix
Sweet tea
- 750 g (or ml) Water
- 50 g Jaggery (or cane sugar)
- 6 g Organic black tea (loose or 3–4 tea bags)
- 200 g Starter culture (Kombucha liquid + cellulose)
Proportions
- Sweet Tea: ≈ 900 g (90 %)
- Starter Culture: ≈ 100 g (10 %)
Process
- Boil 750 g (or ml) water.
- Add 50 g jaggery and stir until fully dissolved.
- Add 6 g organic black tea; steep for 10–15 minutes to extract color and tannins for stronger microbial activity.
- Strain out tea leaves and allow the sweet tea to cool to below 30 °C.
- Gently add 200 g starter culture (do not stir vigorously).
- Pour into a wide, shallow, sterilized glass or plastic container.
- Cover with breathable muslin or cotton cloth secured with an elastic band.
- Incubate at 25–30 °C in indirect light for 10–21 days until a cellulose mat (SCOBY) forms.
- Harvest when 3–5 mm thick.
Post-Processing
- Rinse the SCOBY thoroughly in clean water.
- Soak in a mild vinegar bath (pH ≈ 3–4) to neutralize.
- Dry flat on a non-stick sheet at room temperature or at 35–40 °C until leathery.
- Optionally condition with glycerine or beeswax for flexibility and waterproofing.
Notes
- Black tea provides tannins that enhance microbial activity and strengthen cellulose fibers.
- Avoid metal vessels; use glass, plastic, or glazed ceramic.
- Expected yield: roughly A4-sized sheet, ~2–3 mm thick when wet.
For the Kombucha based bacterial leather, I took refuge in my sister's fermentarium. She is a pastry chef with a huge interest in ferments - she regularly makes and sells kombucha, kvass, and a variety of lacto-ferment based pickled veggies, kimchi, and so on.
I borrowed the SCOBY from her hotel for starting the culture. She oversaw me during this whole process and guided me.
- We followed the recipe above, which is based off her working recipe, but the culture has been doubled to speed up the growth
- First we made the sweet tea using jaggery (instead of the usual sugar), and looseleaf black tea
- We let that cool to 30-35 C since higher temperatures would kill off the culture
- Once cooled, we mixed in the culture
- I had picked up rectangular plastic cupcake box covers that I though would make good rectangular sheets of Kombucha paper and leather, so we filled those up
- Since we had excess liquid left, we filled up other containers as well
- I filled up some molds, hoping that the leather pieces come out in the shape of the silhouette of the mold
- Added some to paper cups and added food colour to 2 of them, hoping the leather may acquire a coloured tint due to that
Preparation :


Poured and resting :


- Since there is a SCOBY hotel here and my sister tosses away the pellicles regularly, I also wanted to use the existing pellicle to set it to dry and turn into leather. However, due to the misfiring weather, I have decided not to do that. The pellicle is quite thick even after separating the layers, suffused with water, and will very likely catch mold long before it manages to dry out.
- We do have a dehydrator here as well in the fermentarium, but that is energy intensive and I'll choose that option if the weather continues to misbehave, or atleast stabilises
Observations
- 24 hours : streaky growth is forming
- While it typically is faster, the weather has cooled down due to absolutely unseasonal rains, and all metrics are off
Several days later


The pellicle has grown thick. Most of the water - it wasn't much to begin with - is gone.
The top surface has grown moldy.
However, there are no flies or maggots, so I am told this is a good acheivement for a beginner. The mold obviously would make it unfit for consumption as kombucha, but as far as the leather is concerned, it can just be washed off.
The food-coloured pellicles in the 3 glasses have taken up the colour well, infact, with the water gone, it's quite concentrated.

Setting the leather to dry on silicone mats
Results
Physical Properties
The sheets have a super smooth surface on the underside that dried on the silicone, and a slightly textured on on the upper face that dried open to air.

They are bendable but not elastic, and do not stretch. If moistened, can be stretched or coaxed into shape for about 5-10% but this is plastic deformation, not elastic. It does not spring back.
Optical Properties

Applications
Embossing
I wanted to see if I could stamp and emboss some logos on the material.
I had some doodles that I converted to a graphic symbol, and 3d printed that as a stamp. I also printed some other patterns and a mirror-image text of my name.

I cut out pieces of the wet leather and placed the stamps on top. Clamping them would have been too much pressure and would have crushed the leather. I partially filled glass bottles with water to give a good weight but not too much, and placed them over a plastic scale that I had set over the individual stamps. This would be a controlled and evenly distributed pressure.


Results : The doodle worked well, as did the text. The other two, not so much.


Weaving :
I cut one of the sheets into strips and wove them.
I alternated the smooth underside for the warp and the textured upper face for the weft to see what kind of effect it would give.


Die-Punch cuts :
I used a small square of bioleather that had dried very thin to punch out some shapes. The results were crisp confetti shapes.


Origami folds :
This one will need a whole lot more sheets of bioleather to explore thoroughly, but I folded some of the material using the V-fold technique to see how it would behave under complex folding. The results are promising.

Braid :
Some last bits I braided into a 3-ply braid. Not the best since it has become very sheet-like, flat cross section, rather than a thicker corss section like a cord. It did work, just not great.

Reflections on Moisture Content in Bioleather
Moisture content in the bioleather is a critical factor that determines it's properties, which in turn determine the application.
Here is my scale based on the above trials.

The scale is slightly arbitrary and meant to go by feel. 100% moisture is 100% of the original moisture, not that the material is 100% water, and 0% may never actually occur, since some moisture will always be held in the material.
- Embossing needs higher thickness and then it shrinks in place as it dries, so it can be started at 100% and stop at 40% or so. My samples are drier, and there is loss of the effect because it has dried too much and lost too much thickness.
- Braiding, knotting, folding, weaving all need a certain amount of water to be lost so the material is easy to handle, but also enough moisture needs to be retained that the material can be manipulated without being brittle.
- All of these techniques also start at higher moisture levels, and will self-adhere and interlock as the water dries up.
- Die-cuts need the firmest material, very little flexibility, so these happen best at the dry end of the scale
- If the material is too dry, you can always spray some water and let it rest for 30 mins, and it will improve workability
- Once the material is dried to the required level, it can be finished with a coat of beeswax, soywax or, most easily, linseed oil to prevent further drying and brittleness
Reflections on Biomaterials
Overall, the recipes achieved what they set out to do.
Bioresin
- Hard, rigid material
- Brittle if too dry, or too thin in section
- Optically translucent
Potential applications :
- Rigid plastics replacement with limited load bearing capacity
- Stained glass work
Biosilicone
- Flexible material
- Tough, takes twisting and torsion forces well
- Optically generally clear
Potential applications :
- Flexible plastics replacement, most packaging and filler material
- Mold making
- Stamps and gel beds for print making
Biofoam
- Interesting texture, but wasn't as resilient to compression as expected
- Optically translucent with good scattering effect
- Properties similar to biosilicone otherwise
Potential applications :
- Replacement for plastic foams in all kinds of mechanical or acoustic cushioning, if the recipe can be tweaked to work better
- Interesting optical shade effects
Fillers and colours
- Terracotta and Plaster of Paris resulted in beautifully matte textured materials
- Rice husk seems to prevent most of the materials from setting, except for the Biosilicone recipe. This is an interesting find, as well as a material to avoid.
- Tea leaves work well for visual interest as well a a pale amber colour
- All the materials take food colouring very well
- Blue Pea dye also worked well, but water proportions needed to be adjusted
Bacterial Leather
- Good texture
- Fair amount of strength
- Optically mostly opaque except thin sections
- Resilient
- Pliable
- Takes food colour well
Applications :
- Replacement leather for small leather goods
- Converted to weaves or braids and made into "fabric"
- Small objects can be grown and dried in shape, zero waste
Reflections on the module :
I had been curious about growing kombucha pellicles in shape since 2020, when my sister setup the fermentarium and we 'survived' the lockdown with no outside beverages, only about 100 liters of homebrew Kombucha.
I learnt how easy as well as how difficult it is to work with biomaterials.
On the one hand, it is so accessible - simple everyday materials and processes - that there is very little barrier to making your own.
On the other hand, there are so many variables and factors - so many you can't track or can't control, and even when you can, there's enough that you can't compute every possible combination.
I learnt from the Biochrome week and limited my variables for this module. I am currently of the opinion that, when the scientific method has too many parameters and cannot be justly exercised, it is best to go back to your instincts. I learnt to cook by smell and taste and texture, not by measurement, and it seems Biomaterials require that intuition far more than obsessive measurement. I will be using a combination of both, following my intuition, but also recording the proportions, process and observations.
In the future, I'd like to try more of the following, which I could not attempt at the time being.
- Beyond gelatin - agar agar, starch, and other material bases
- Fruit leathers
- Composites, although some of this will overlap with the Textile Scaffolding week
- Finding more agro-waste fillers
- Working with bagasse, and bagasse based cellulose
- Examine the rice husk preventing setting in some recipes while setting ok in others
- What if the rice husk was charred/powdered/boiled and washed/other processes ?
- Use coal powder as a filler to get black material
- Use other fillers for conductivity, magnetic properties, etc
Credits
Once again, I could not have done this without my sister and her kitchen. Having a running fermentarium and a fermentation expert on hand in the middle of the night when you are working on some process is absolutely priceless.
And as she is also a food photographer, she has been an immense support for all the plating and photography of the samples as well.
All image credits to me, Jesal Mehta, unless specified otherwise.