2. Digital bodies

“However understandable and self-contained everything seems, that is accompanied by an obscure feeling that it is only half the story. Something is not quite in balance (...)." - Robert Musil, The Man without Qualities
Research & Ideation
The study of the human body and its anatomy have been relevant for people of all societies, parts of the world and different minds trough out the history. For an artist it is relevant for conveying realism, expressing emotions, depicting the body in various poses and actions. It helps to express feelings, rebellion, credibility, dynamism, movement and experiences that can last forever.
Thinking about it and trying to make something that expresses flexibility, resilience, courage and different ways on which a person can move, change and adapt, I began research of different artists that in one or another, try to express the same feeling I was looking for.
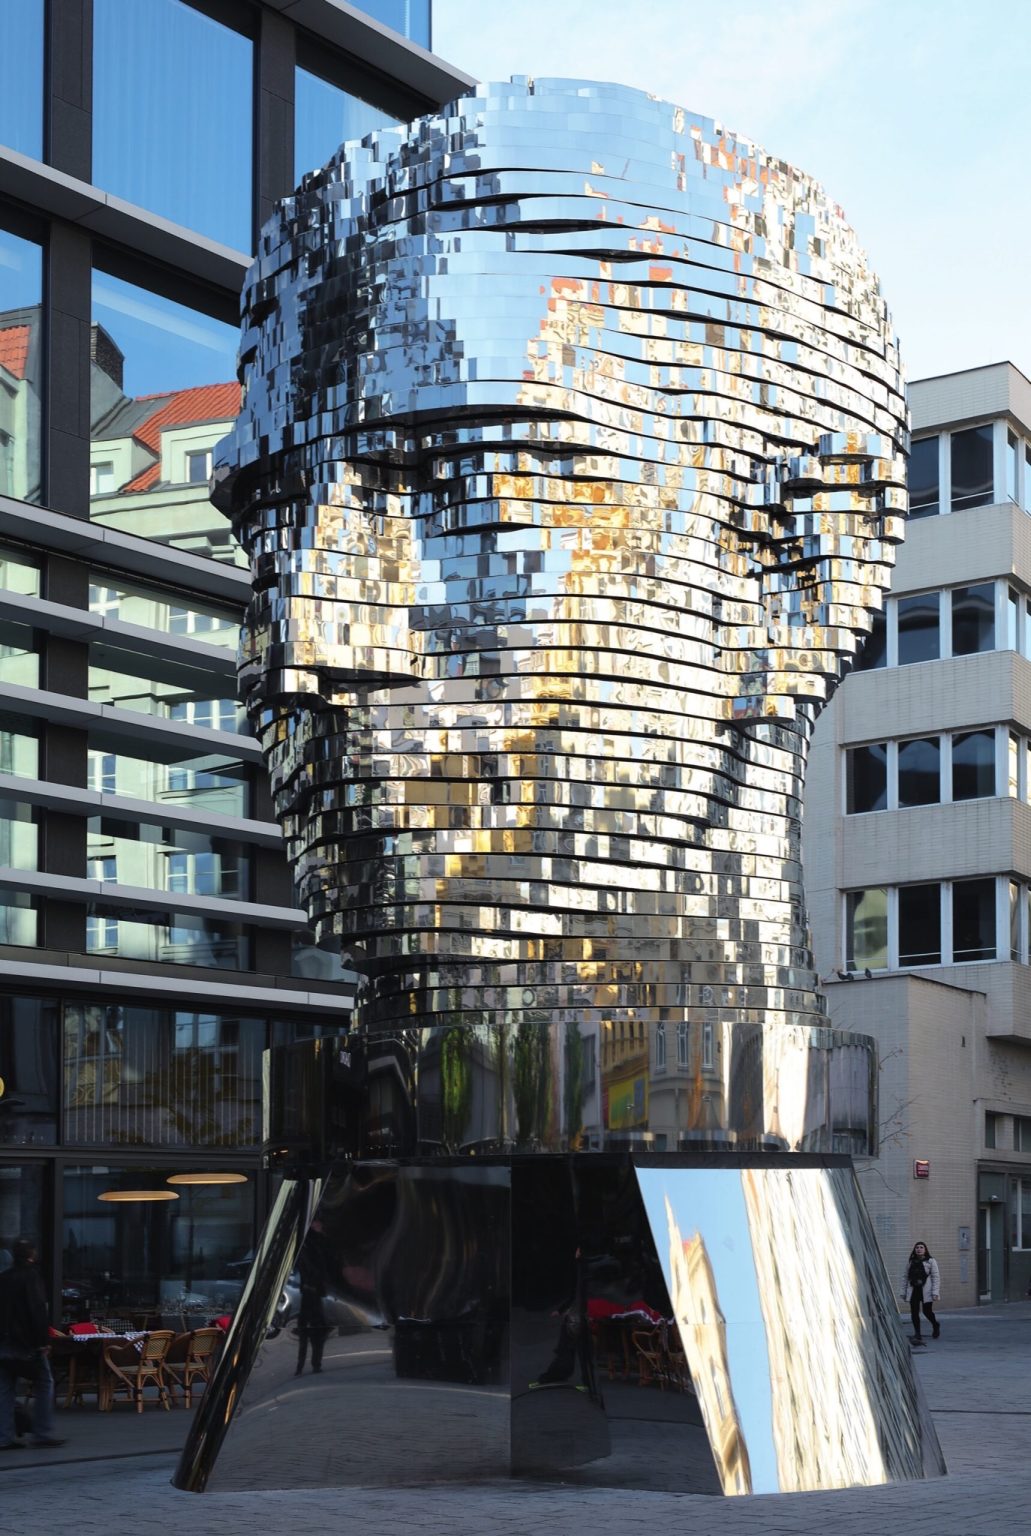
I found two artists that help me develop sketches of a body that express some of the things mentioned above. One of them is, David Černý. David is a Czech artist and sculptor beyond measurement, known for his provocative and satirical art. His artistic acts of civil disobedience, grand scale installations, and exhibitions continued to incite strong reactions worldwide. He has studied the metamorphosis of the human body in such a way that he can transform its art into new levels of understanding the nature of a human being.
 with credits David Černý
If you what to know more click on the link: David Černý
My other inspiration is Li Hongbro. Li Hongbo, is a Chinese artist best known for his works of paper designed after a technique inspired by so-called honeycomb lanterns, which are traditionally seen during Chinese festivities and have been used since the Han Dynasty (206 BC-AD 220). This kind of ornaments can be found in Mexico as well, especially during the Christmas festivities like the “Posadas”. Li loves playing with ambiguity, change and transformation, taking your imagination to another level.
 with credits Danysz Gallery
If you what to know more of Li Hongbro link below: Hongbo
The center of human body in the vertebral column, it regulates all the movements, the flexibility, the connections with all the extremities. This connections are the same that you can find in a honeycombs, they are aline, connected and geometrically perfect. The mistery behind the human body and the honeycombs, every part that forms them, marvels me.
Sketches and thoughts
"When I stretch a sculpture, the public is surprised by the new possibilities allowed to the human body, and this opens a vacuum in our perception of our own body." - Li Hongbo

I believe that in life we must learn to adapt, grow and transform with the circumstances that we must deal with, good or bad. We are on a journey, an adventure fool of new discoveries, new challenges and failures that make us who we were yesterday, who we are today and who we will be tomorrow. The human body changes every day and develops depending on the circumstances we live on, but there is always beauty around us.

Tools
- 3d scan with Scan FARO Freestyle 2
- 3d scan with Skanect
- 3d scan with Realityscan
- 3d Model with MakeHuman
- 3d Model with Blender
- 3d Model with Rhino
- Laser cutter
Process and workflow
3d Scanning
In the Fablab of the Anahuac University of Querétaro, we have two Scanner: an Sckanect X-Box and a FARO Freestyle 2. I tried them both, but as well I tried an app called Reality Scan, that you can used with your phone without having trouble with cables,lack of WIFI or computers. Here is a comparative table of the three of them:

A will show you how does it look an object with each of them so you can make your own conclusions.
Skanect X-Box
I scan a bottle of scale plane and a bottle of water so I could get use to it.

Small Video of me scanning the plane
Scan FARO Freestyle 2
This I found it more difficult because of its weight, the affect of the light and the surroundings.

Reality Scan
It is much easier, practical and free.

Modelling
Makehuman
After the tutorial of this week, I decided to give it a try with the Makehuman and Blender. I found Makehuman very amusing, I couldn’t design my avatar as I wanted. For me it was difficult to get both sides of the body with the same proportions. That made me feel stressed. I notice I needed much more time to learn and take out the best of this software. Hope to find time for it.

Blender
This software was new for me. I decided to look at it and use it if I was able to do the modelling. Since the tutorial class, I thought it was going to be easy, or at least it seemed easier than Rhino. When I first open the software, I realice I was wrong. I started using it and could not do it properly, I got confused and started comparing it with Rhino. I was able though, to scale some objects, play with the commands, but I was losing time figuring out, so I decided to go to Rhino and do the modelling there, because I know it a little better.

Rhino
1st Attempt
After I used the different scanners, my first best scan of an object was with the Skanect of X-box, so I exported it and imported it into Rhino. Once I had it on the software I started modelling it. I knew I had to divide it to cut it, so I started measuring the object, and scale it about 20% bigger. Once I had it, I established the distance between each piece of 16mm usinf the command Contour. Then I separated each piece and made a hole un the middle because I wanted a wire to go through as a vertebral column. I also model smaller circles with a hole in the middle as well, to sustain the object better, give it structure and more mobility.

Preparing the 2D laser cutter
• You must export the archive with the “.dxf” termination. • Review that the archive is correct and that all the pieces to cut are together. • Turn on the laser cutter. • Put the material on the machine and calibrate the laser pointer. • In the computer, open the archive, select the pieces to cut and program the laser pointer to overview the surface of the material to guarantee all the pieces fit. • If its correct, press Enter, and the machine will start cutting. • When it finishes you must press enter again and take all the material out in order to leave the space clear for the next work in line.
Video of the laser cutter working


As my model did not resist standing in a vertical position, I decided to try with a flat jewerly metal, very flexible. I twist it with 3 pieces, but it didn't work either.

Last Assembly
Materials:
- 3 5mm Cardboard sheet
- Transparent hose
- Curvigraph
- Cutter
- Cutting Board
- Bond paper for patternmaking
- Glue
- Scissors
Rhino
- I exported my file of the mannequin from RealityScan to Rhino as an obj. document.
- Opened Rhino and I needed to Reduce the mesh by 70% twice from 479,000 polygons and then 43,000 polygons.
- Dup Border to open the geometry spaces.
- Mesh Polyline to make a new mesh from the curve that I had.
- Select all the meches separately in order to unite them.
- Join to close the curves
- Scale 1.7%
- Contour to divide the curve every 10 mm
- Separate each piece.
- Make a 2D to flatten all the pieces
- Separate each piece
- Arrange them in a surface of 100 mm *100 mm with an offset of 5 mm


Preparing the 2D laser cutter
• You must export the archive with the “.dfx” termination. • Review that the archive is correct and that all the pieces to cut are together. • Turn on the laser cutter. • Put the material on the machine and calibrate the laser pointer. • In the computer, open the archive, select the pieces to cut and program a laser pointer to overview the surface of the material to guarantee all the pieces fit. • If its correct, press Enter, and the machine will start cutting. • When it finishes you must take all the material out in order to leave the space clear for the next work in line.

With all the pieces cut, I started cutting the paper for the honeycombs. - In a cutboard, I made some color marks as guides for the honeycombs. - You have to put glue first on the even numbers, put a paper over and then glue the uneven numbers. - You do the layers you want. i did 8 layers - After you glue them to each piece of the cardboard pieces - Finish the assembly


