02.Digital Bodies a Reconection
DIGITAL BODIES, A RECONECTION?
INSPIRATION. The body as our connection with life, but maybe we are too disconnected from it that we need to approach to it in different ways.

LEARNING PROCESS
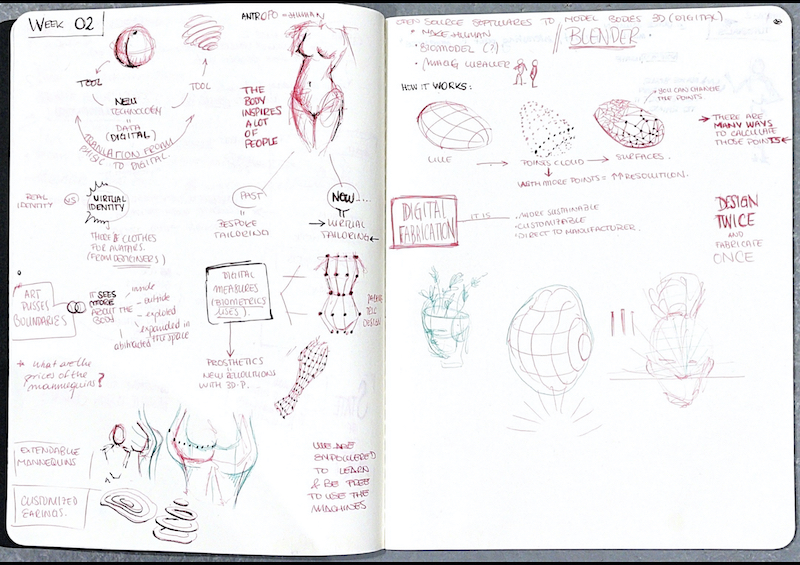
TUESDAY'S LECTURE
WEDNESDAY SCANNING RESEACH
Wednesday morning was used to do some initial scanning training. We learnt different requirements to start:
- As smaller the object to scan the better: we will achieve more quality of the nurbs and easier to scan it.
- Stay still if you’re scanning and more if you’re being scanned.
- Tips to make it easier and quicker: rotatory base for the object, tripod.
-
Fotos / video: new (specify what type of object you’re scanning)
- Start = play
- Press play in the scan. Scan carefully and have a lot of patience. Move around everywhere until it is complete.
- The two good areas to scan are: perfect and good
- If you stop the scan and move the object it “breaks”
- We pressed all the time the play botton from the tool and it overlaid different bodies.
- After a correct scan, we need to export the file. We first did it in "obj" directly but Rhino wasn’t able to read it. So we tried to export it in the default option that the program gave us and Rhino read it. So after that we need to export the selection in "obj" so we have polysurfaces. If the file is not closed you cannot export it in "obj".
We had several problems scanning the hand and head and as we were a lot of time the program started doing crazy things as this: (photo muchas manos). So later on out tutor told us that we need to check the “AUTO FUNCTION” to make the scanning better.
THURSDAY'S FAILS AND PROJECT CONCEPT
We started scanning early in the morning so we could try different objects such as persons or steady objects. For my assignment i already new that I wanted to scan my friend Arantza as her hair was perfect for my objective. I wanted a head with a bun so I could use the mannequin for my future project of accessories for the hair. Here is a little video of my concept sketching:
The sketch video is made with Procreate, where you can draw and it automatically creates a TimeLapse video.
My main objective was to scan a real head to have those organic shapes of the hair. Nevertheless, the hair is a really difficult texture and the scan usually starts to make random things and misses track the object.
Our scan is a XXX and the software associated is Handy Scan. Through it we can see three different windows, one that shows us the real picture, below there’s another one for XXX (infrarrojos?); and the bigger one shows the quantity of the object that has been scanned and the actual NURB scanning. So we started making space in the classroom so we could turn around Arantza. Eventually we realized it wasn’t necessary because we used a rotatory chair making easier the scan. As it’s been said before, the hair is a difficult area to scan, so our first scanning files were unusable and incomplete.
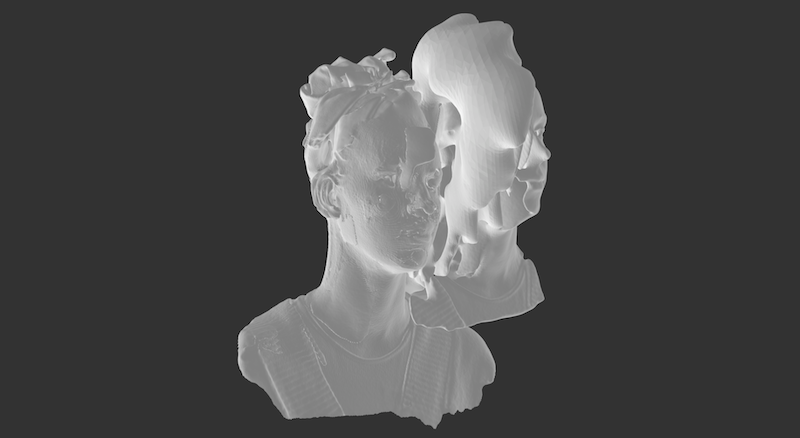
Later on, we realized that complication that the hair has, so we covered it with a scarf. This was a really good solutions as the scan detected it much better. The surfaces were more clear and easier to detect. However, the hair wasn’t totally covered so there was a part that the software could’t complete. After a lot of time and faith for the program finishing that mesh correctly, it collapsed and made this:
So after a whole morning trying to scan Arantza I decided to used the scanned head from the day before and modify it in Rhino.
FRIDAY'S ACHIVEMENTS
On Friday I added the “digital bun” to the "stl" file of the head opened it in Rhino. At the beginning I struggled joining the the two parts, as the sphere I added wasn’t a mesh: it was a poly surface. Meshes and polysurfaces can’t be joined. Afterwards I added a mesh sphere and it worked successfully. Because of the already laser cutter head that my tutor fabricated, I also added a base as that prototype wasn’t stable. To join the different meshes I used “MeshBooleanUnion”. Having the closed object allowed me to visualize how the slicer would look like by projecting some lines on the head. After that I created the surfaces around those lines with “Create polysurfaces from planar curves”.
The file must be saved in “stl” or “obj” so that Slicer can open it. The use of this software is really intuitive and easy to experiment with. Following the requirements of material (size, length, width and offset), I started testing how the different types of staking(?) would look like. I wanted to give a lot more relevance to the bun, so after choosing the radial style, I moved the horizontal layers to the top.
The chosen material was acrylic and we needed a sample of the assembly with the given dimensions at the beginning. Exporting the Slicer file to “dxf”, I opened it again in Rhino by selecting “Ignore thickness” (if you not select this, you’ll have polysurfaces and the laser cut would read them as two lines). In Rhino, I created the sample and again saved it in “dxf” to export it to the LaserCut software.
LASER CUT INSTRUCTIONS
- Open the “dxf” files in the XXX software, make sure the lines are joined. If not you have two options: go back to Rhino and “Join” them; or in the same software you have the option in XXX of joining those lines.
- Select an order of cutting by colors. If there are holes make sure to collect them in another layer. This way you can separate them in order to cut them first. This is the same for engrave. >- In my case I divide the lines in 3 layers, all of them “cut”. First the holes, second the numeration and third the outline.
- To change the category of cutting or engraving just click two times in the color of the layer. The panel that appears is where you can change all the information: cut or engrave; power, speed and much more. In my case >- In my case I change the power to 35 and the speed 68-72. This information changes depending on the material.
- Optimize de space of the drawings so the material is not wasted.
- Once you’ve finish, send the file or connect the computer to the laser cut and upload your file to the machine in the botón “download”.
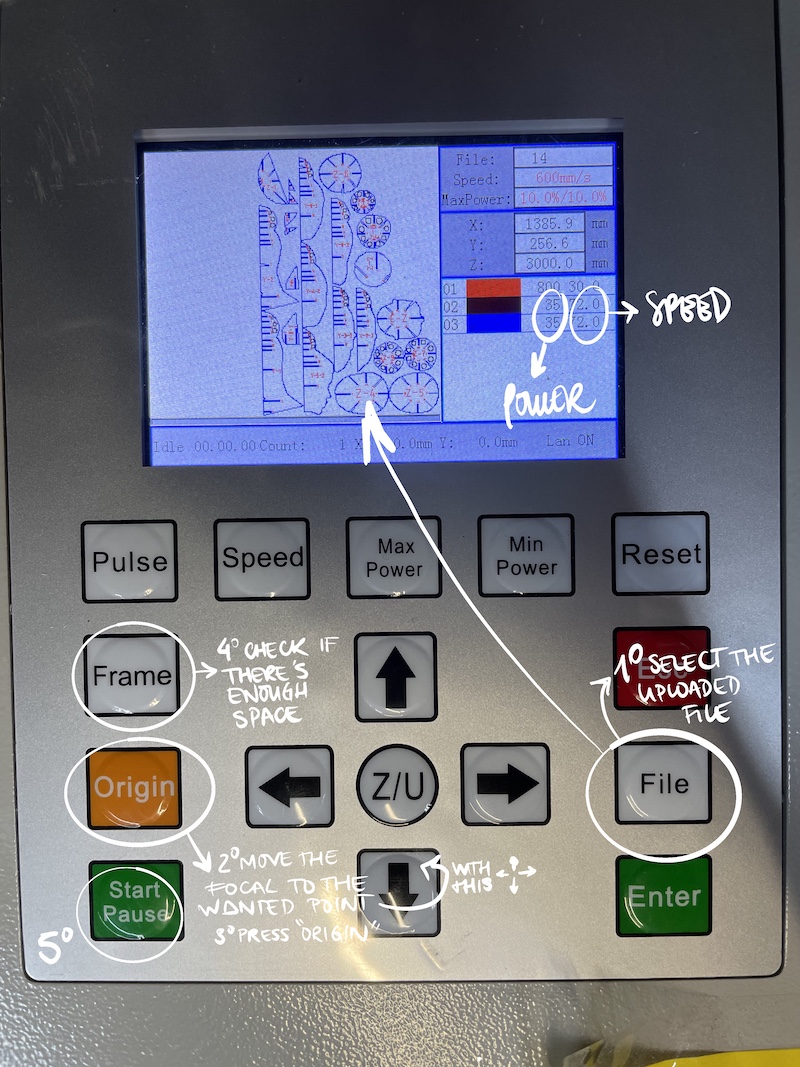
- Then you start modifying the information file, frame, origin and height by the manual control of the laser cut. (foto de la pantalla)
- Press start and wait :)
The first assembly sample went wrong as it was smaller than the material. Making sure of the assembly by selecting just little pieces instead of cutting the whole project is very important as if it fails we don’t waste that much energy and material.
We didn’t understand why the selected offset didn’t work: the measured distance (exporting every time to Rhino ir order to measure it) in the gaps were 1,5 instead of 3. So we tried different things as putting a negative number that changed the distance to 3. Nevertheless it wasn’t enough and we didn’t achieve by this method to raise it to 3,1-3,15. We looked online and found that the negative offset doesn’t work properly in radial.
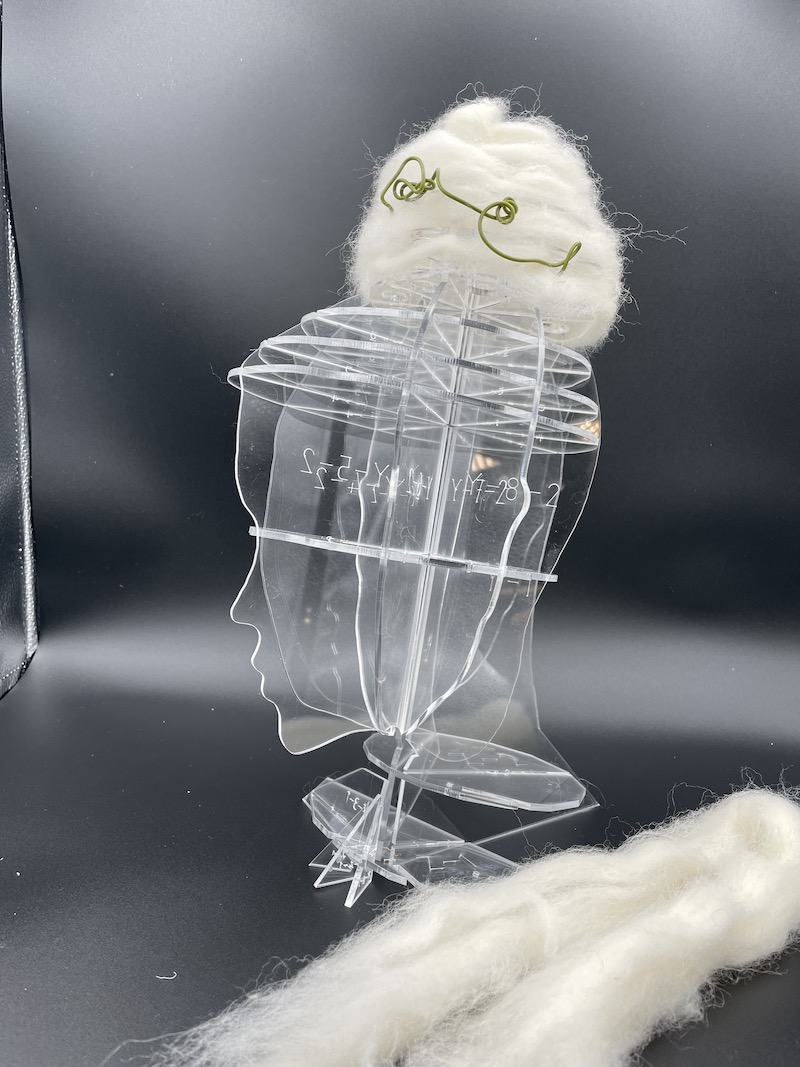
At the end we tried making thicker the material in slicer: instead of 3 we put 3,2. This change worked!! However we made another assembly sample in order to make sure that it wasn’t to big…and it was. So again, we changed the thickness to 3,15 and send the whole file (finally) to the laser cut. It took about 6 minutes to cut all the pieces.
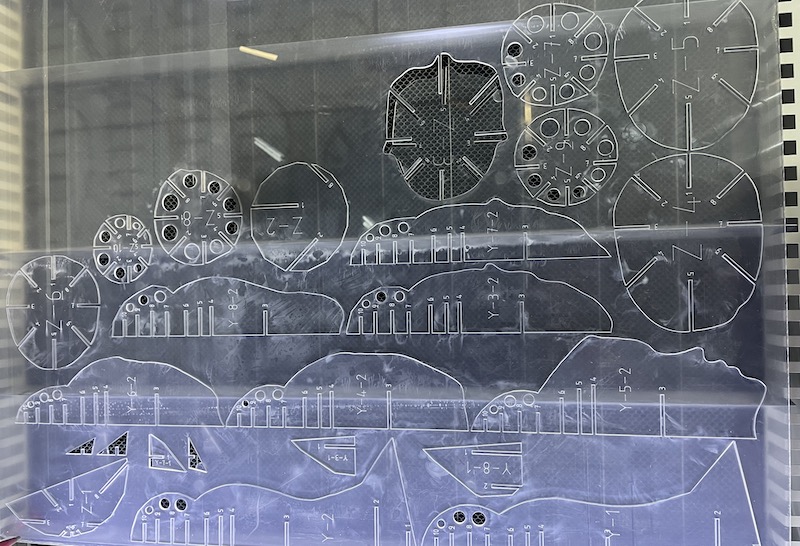
The numbers that Slicer attach are very useful to distinguish the pieces, as when they’re cut it can be a chaos. Following the animation from Slicer step by step I assembled the head (two times because I forgot to take off the plastic attached :3 ).
Here is a little video of the process. Enjoy!
TUTORIALS SUM UP
MakeHuman: an open source program that allows you to create your own avatar so you can edit it in Rhino afterwards. To do that you need to export the human two times: una stl y otro en obj. It is just available in WINDOWS
Rhino: coming from a Product Design degree I already knew the information from the first tutorial. Nevertheless there were some unknown tools such as: - Useful and unknown tool: showedges - For making the human: Project lines, contour (select direction of the lines and spaces between the lines.
Slicer: a programm connected to Fusion360. It allows you to divide a digital objetc in layers so it can be laser cutted and fabricated. There are many fabrication options.
DOWNLOADABLE FILES
Here you can find a 3dm file if you want to modidy something; and the dxf file if you want to cut it directly:
Digital Bodies' Drive folder :)