10. Open Source Hardware - From Fibers to Fabric
Learning outcomes
- Research skills: the participant has acquired knowledge through references and Concept development
- Design skills: the participant has learnt through sketches, 3D modeling, use of electronics, etc
- Fabrication skills: the participant is capable of executing from file to production workflow, from 3D modelling to digital fabrication, electronics, materials
- Process skills: Anyone can go through the process, understand it and reproduce it
- Final outcome: The assignment is assembled and either complete or tested
- Originality: Has the design been thought through and elaborated?
Student checklist
- Research and document existing fabrication methods, machines and industries, add references, tutorials and sketches of the hardware you will make
- Document the process of designing the files for your machine/machine-hack/tool and its fabrication including the assembly process
- Document the schematic and the software source code (if any)
- Document the parts and how to make your tool or machine
- Document your BOM (Bill of materials): electronics, materials, their amount, etcetera (with references of the components)
- Upload your 3D model and CAM files (if any)
- Design, create and document a final outcome, a sample project of your process
- Make a small video of the machine
- Create an interface for controling your machine (extra credit)
Research & Ideation
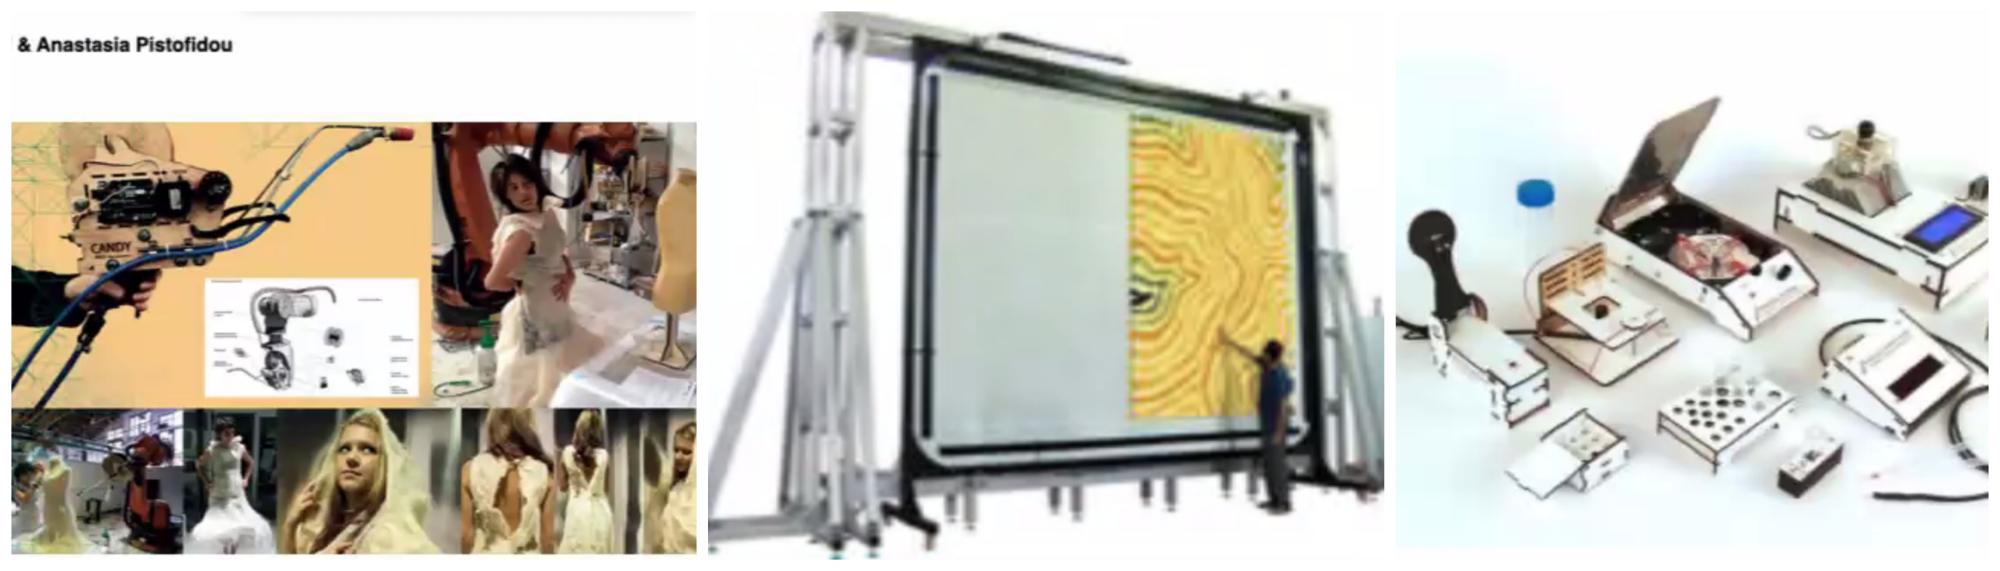
This is a highly complete microcomputer controlled loom. I can't create this in one week, but it was helpful.
I like Jacquard's system of punch card control. It reminded me of a hand-cranked music box. I was thinking about incorporating a system like this, and created a Modular system for this week's assignment.
References & Inspiration
I used the structure of this loom as a reference. This is a mechanism that has been used in Japan since BC.
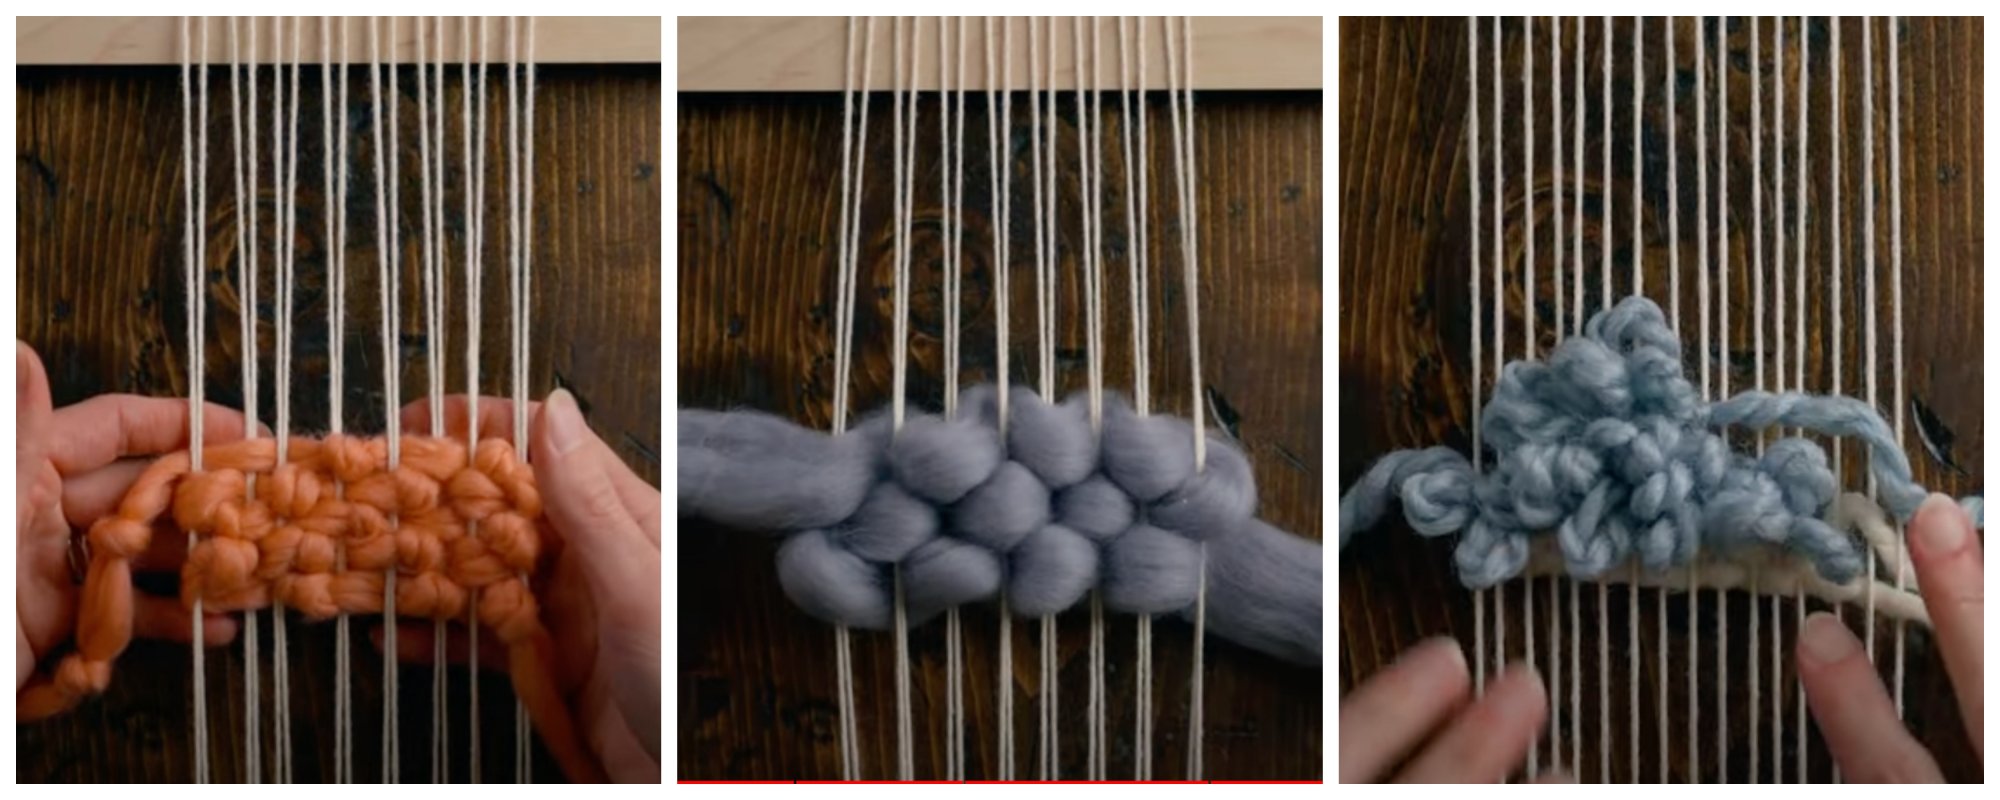
The techniquesfor creating various organic weaves using a simple loom were very helpful.
Concept of my HW
-
Human - Hardware interaction
Manual work is fun, but it can be lonely. This is a companion HW that allows humans and HWs to have fun communicating like playing catch.
-
Modular loom
Weave various patterns by replacing the teeth of the loom.
Tools
BoM
Materials
| Qty | Description | Price | Link | Notes |
|---|---|---|---|---|
| 1 | Arduino UNO | ¥3630 | https://akizukidenshi.com/catalog/g/gM-07385/ | order now |
| 1 | DFPlayer | ¥1050 | https://akizukidenshi.com/catalog/g/gM-12544/ | |
| 1 | Stepping Motor | ¥250 | https://akizukidenshi.com/catalog/g/gP-13256/ | |
| 1 | Motor Driver | ¥350 | https://www.aitendo.com/product/14589 | |
| 1 | Speaker | ¥100 | https://akizukidenshi.com/catalog/g/gP-03285/ | |
| 1 | Microphone | ¥220 | https://akizukidenshi.com/catalog/g/gM-08940/ | |
| 1 | Micro SD card | ¥600 | ||
| 2 | Resistor 100k | ¥2 | https://akizukidenshi.com/catalog/g/gR-16104/ | |
| 1 | AC Adapter 6v | ¥600 | https://akizukidenshi.com/catalog/g/gM-03680/ | |
| 1 | MDF |
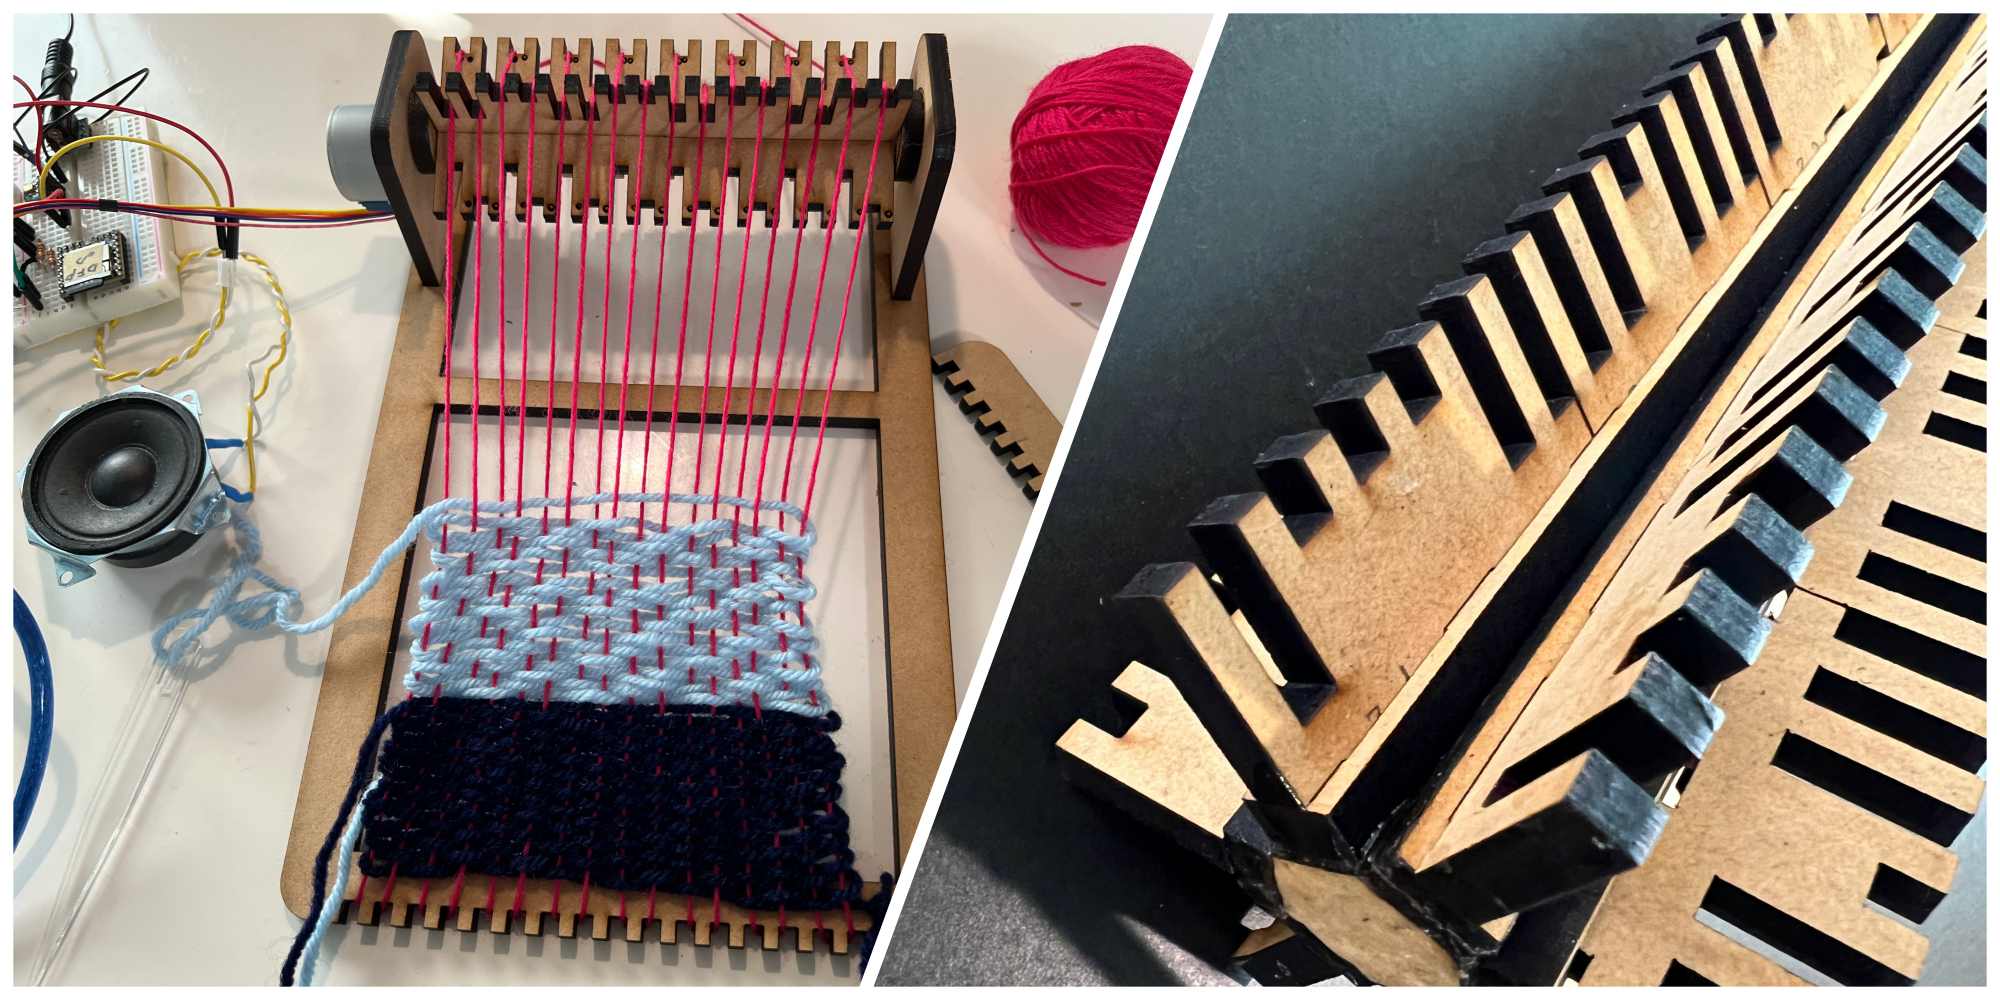
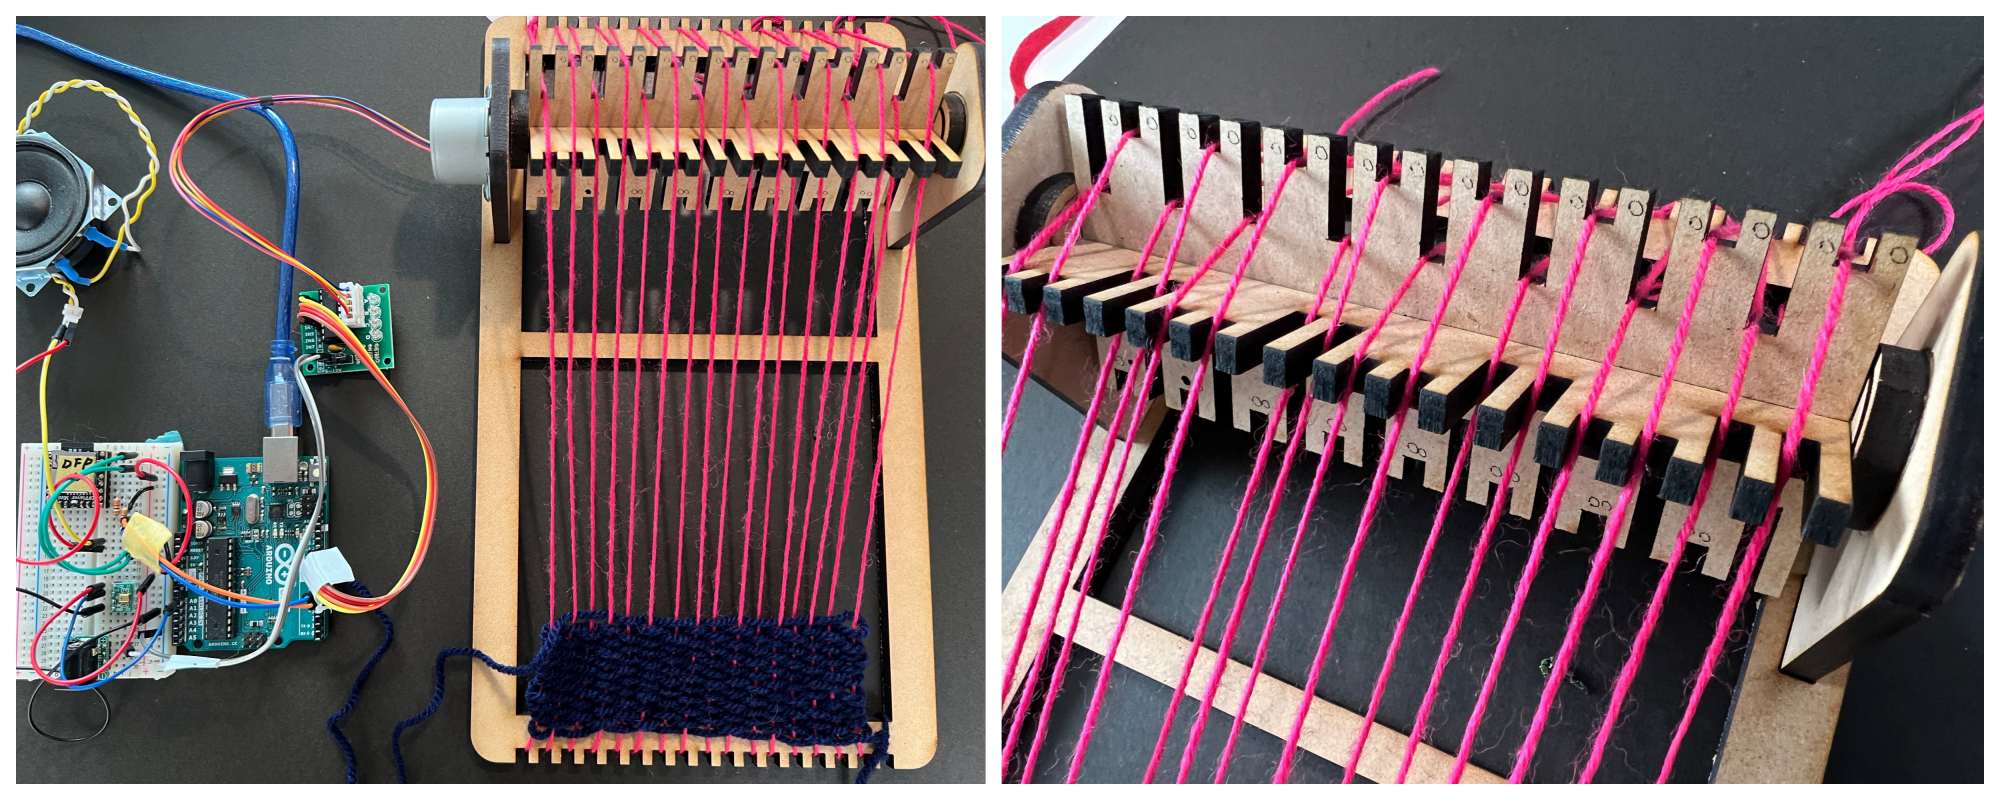
Process
Design
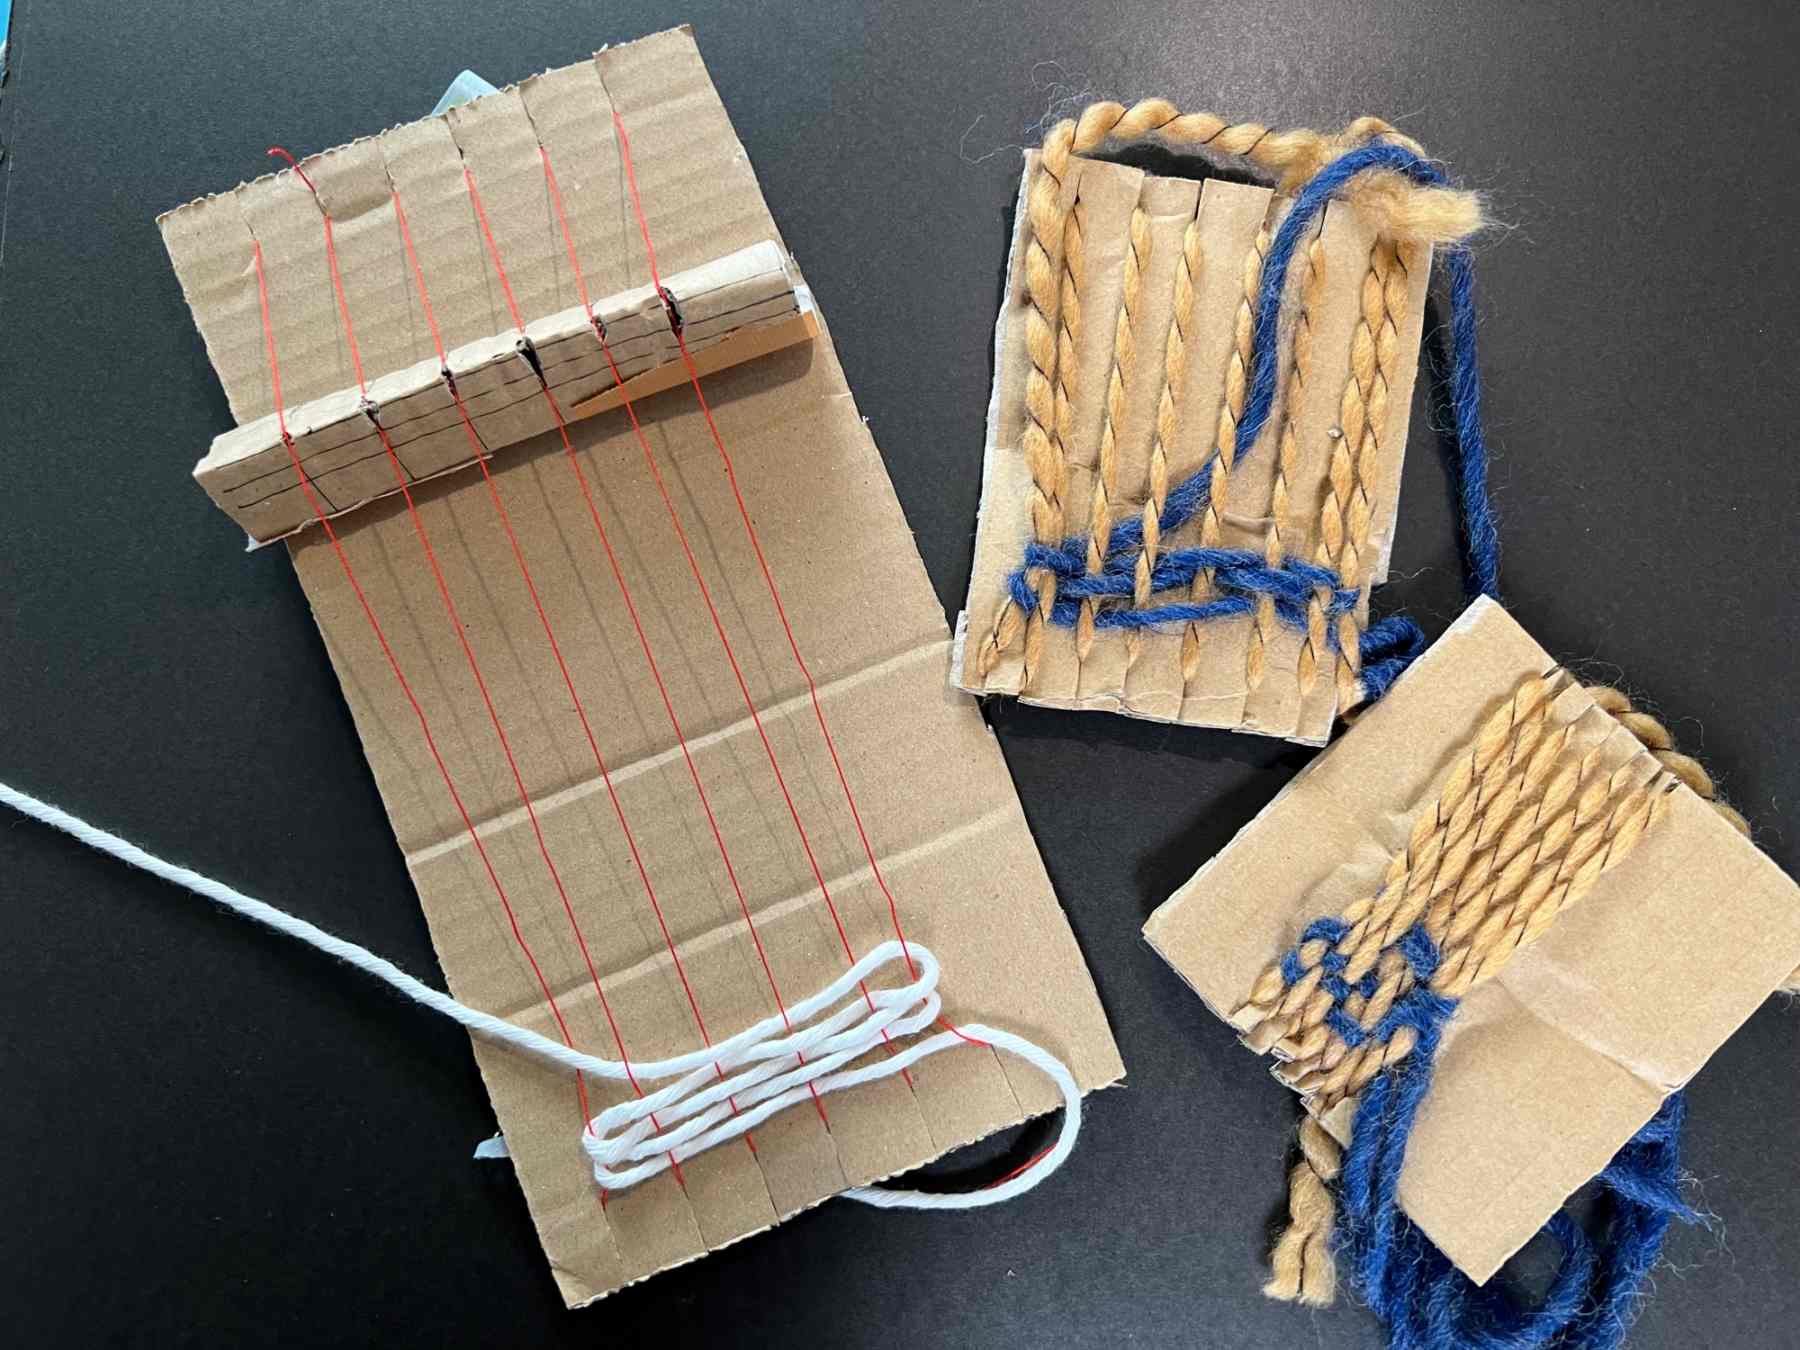
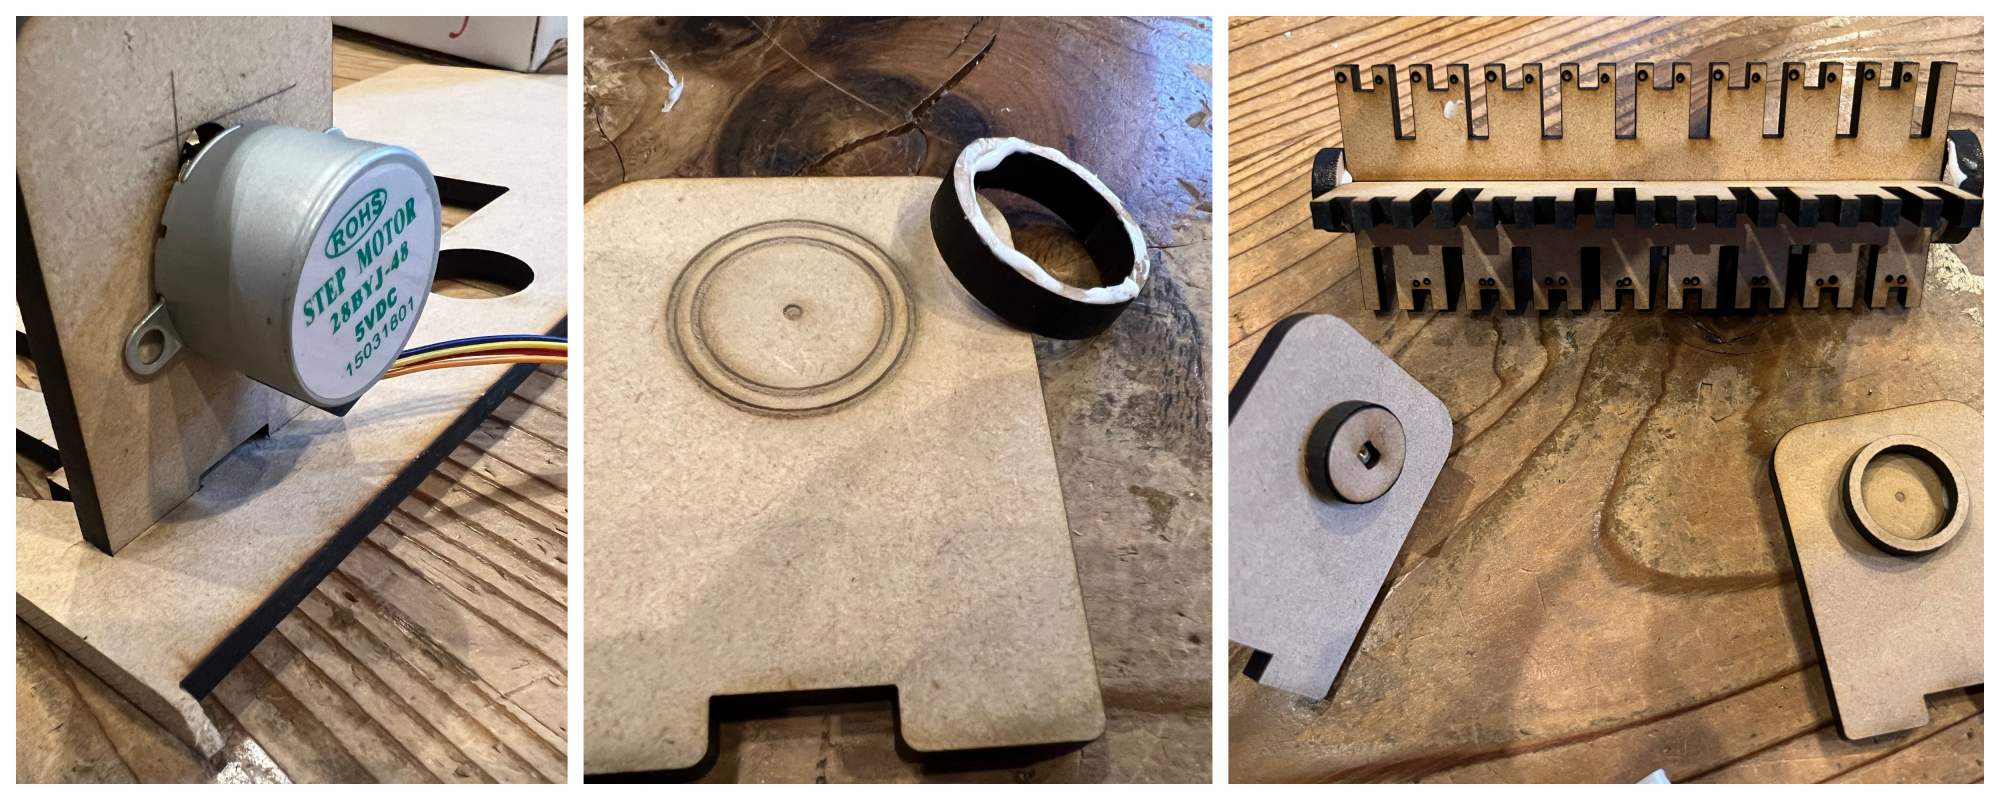
At first, I confirmed the mechanism using cardboard.
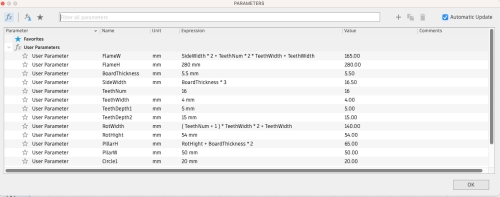
The design was done with Fusion360.
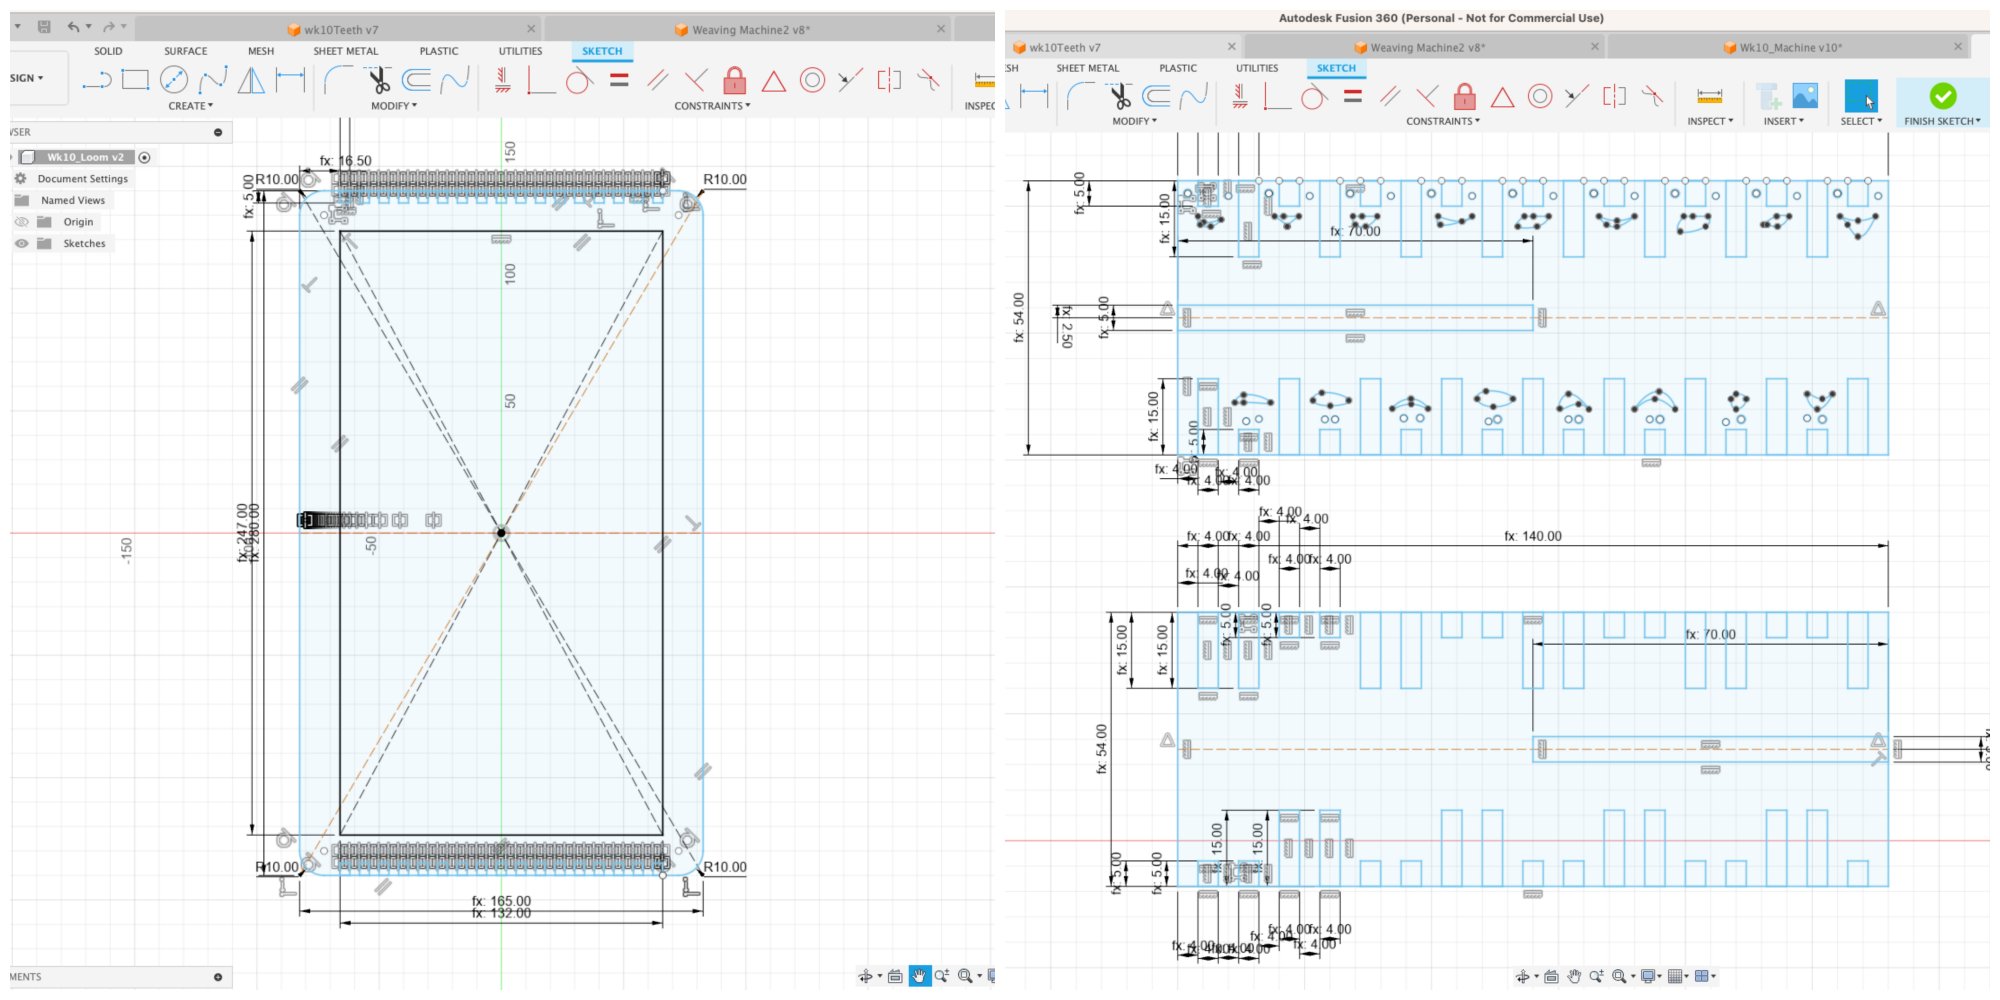
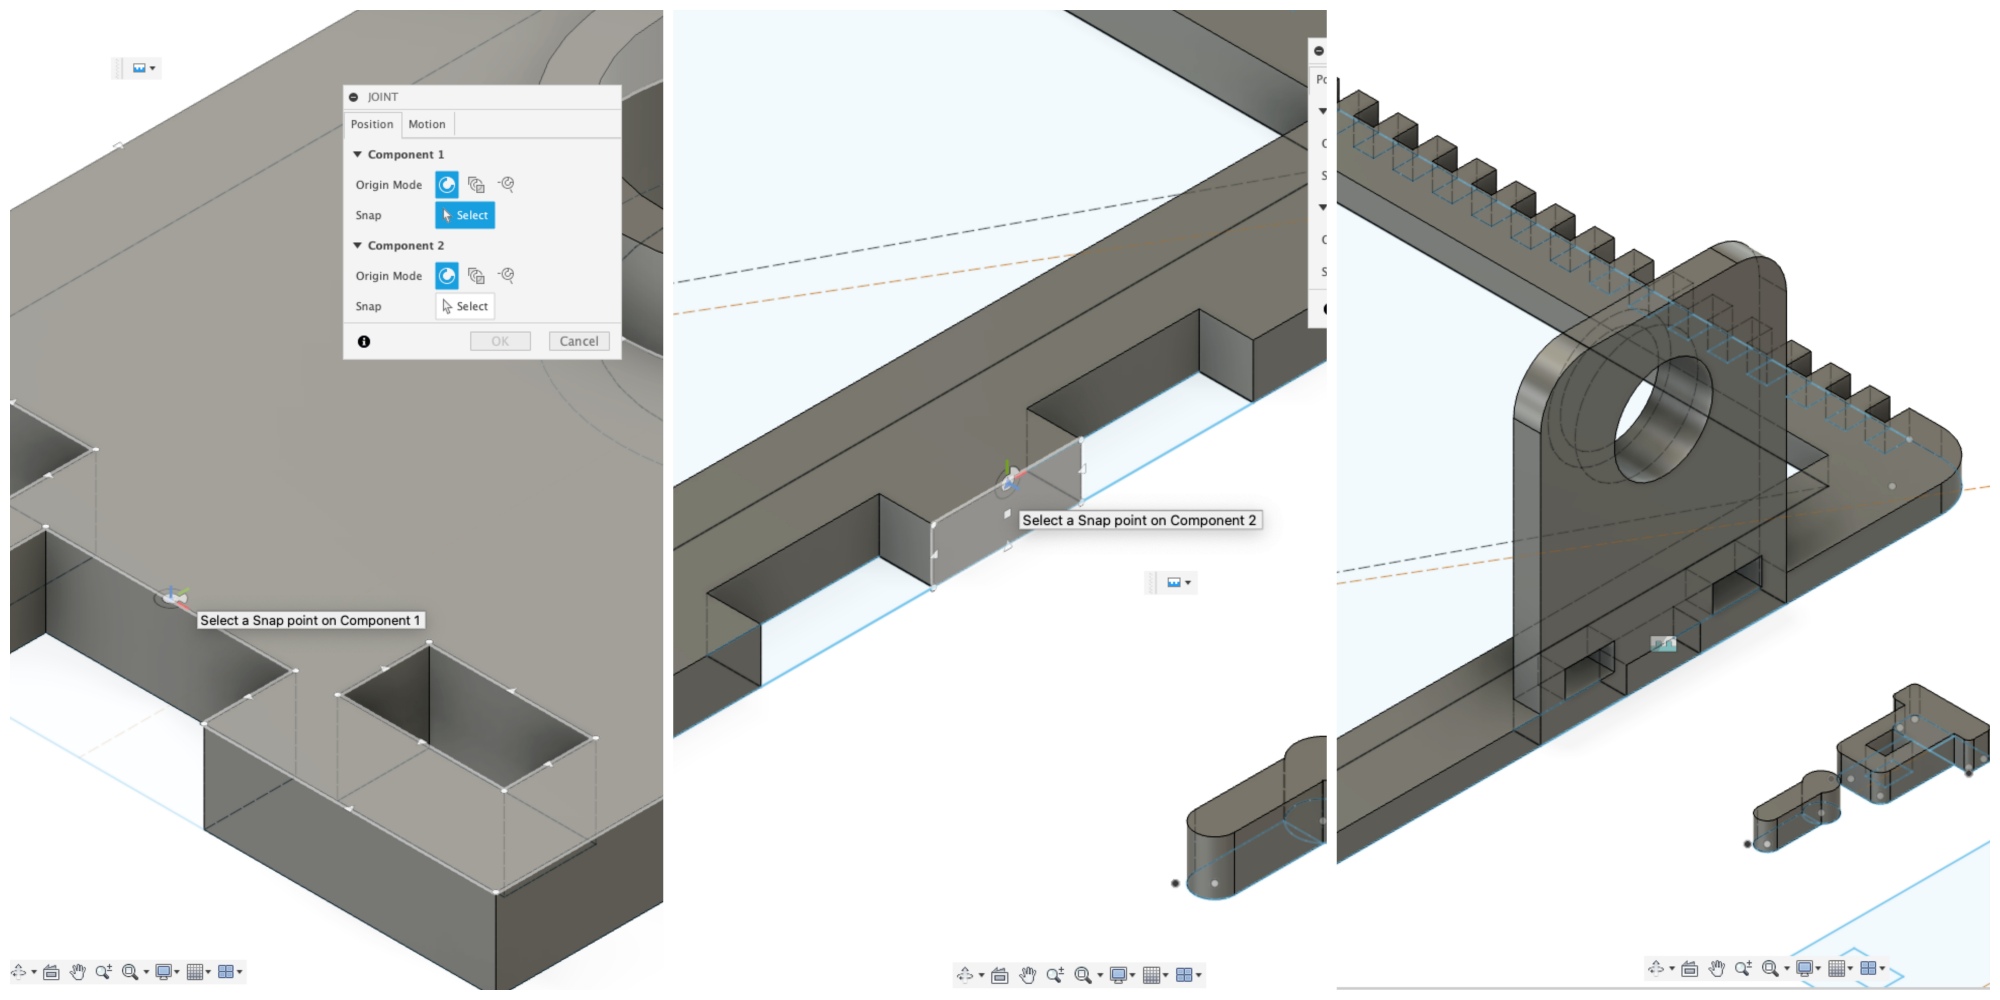
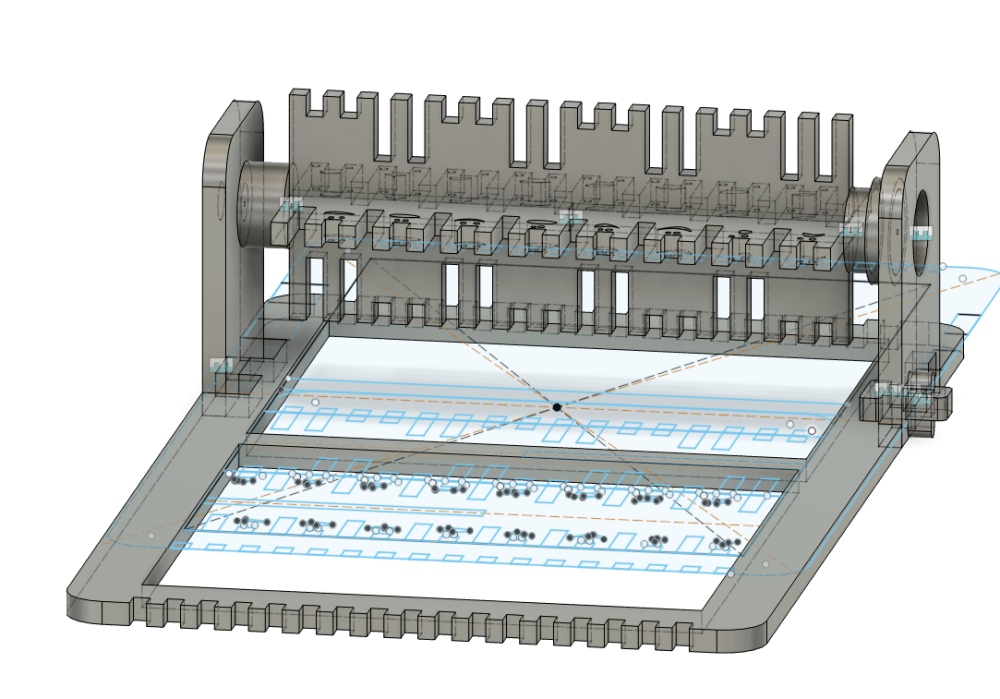
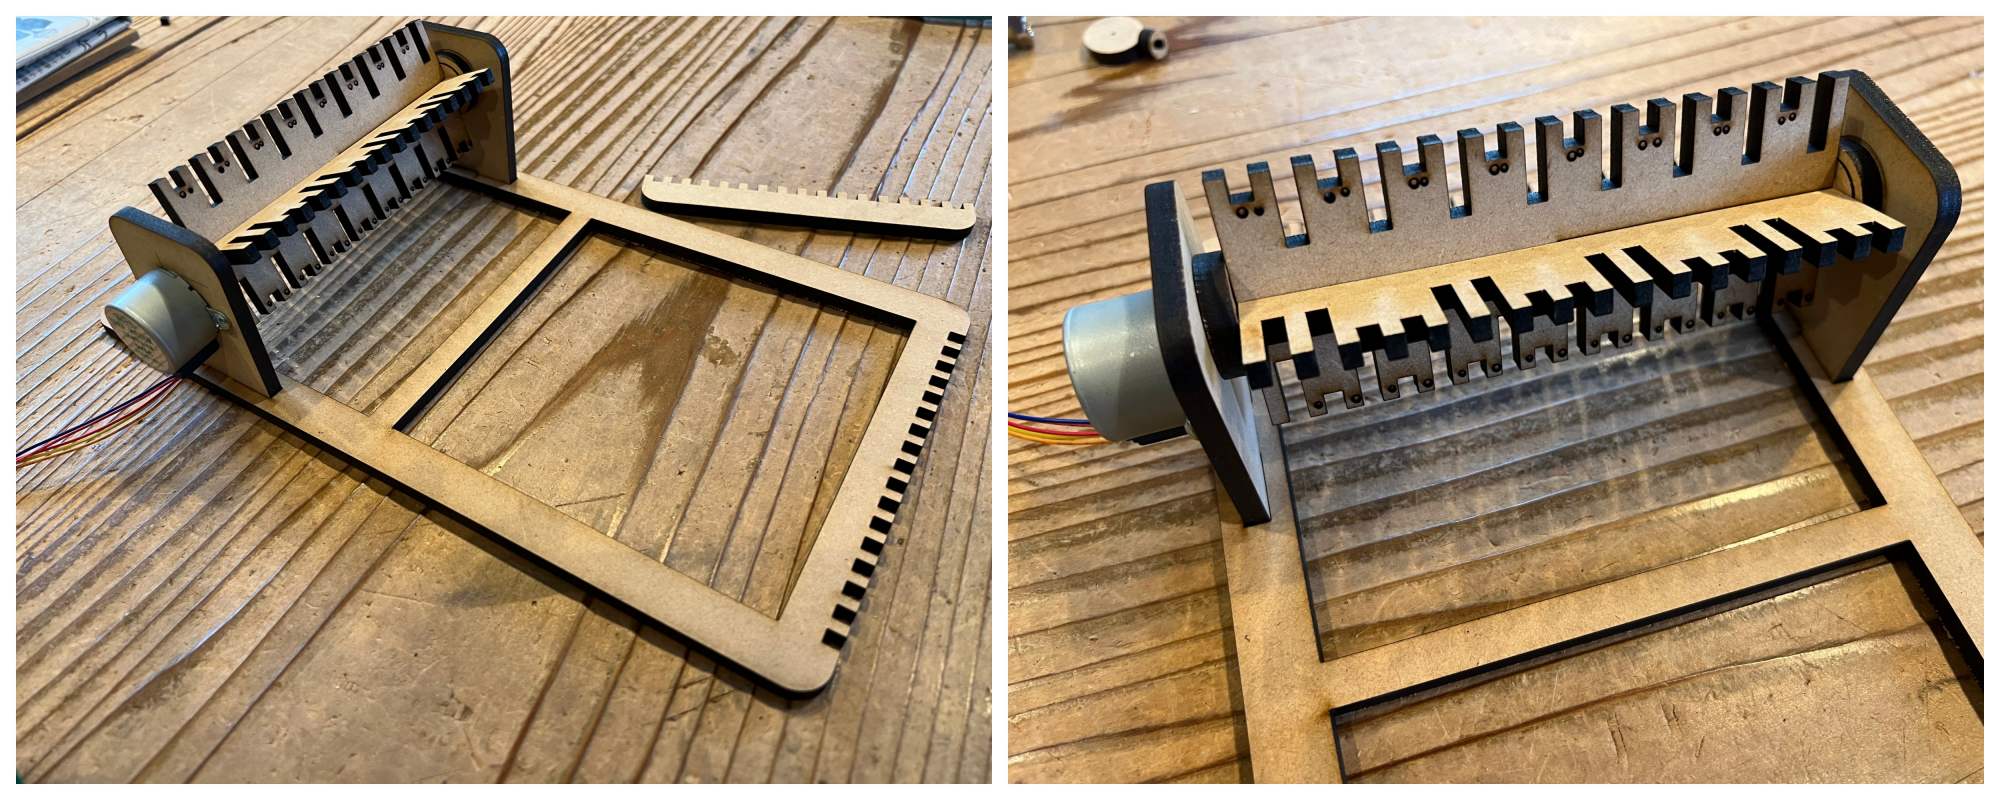
Final design with improved connection of rotating parts.
Assembly

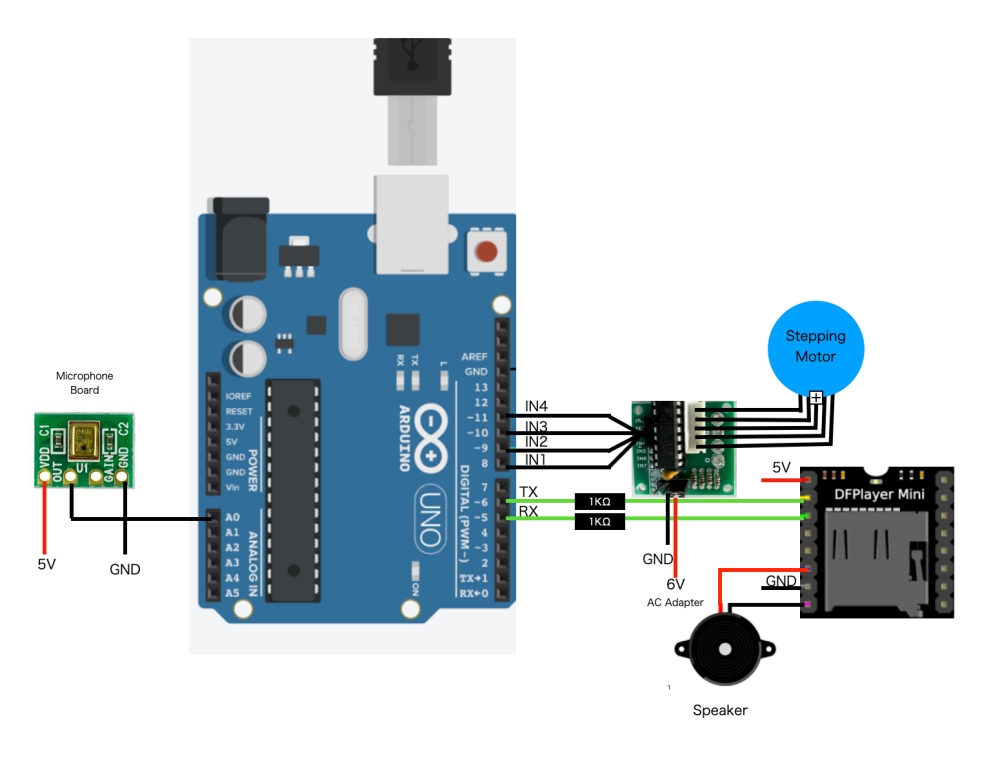
Circuit
Program
Stepping Motor
This time, I used the smallest unipolar stepping motor I had on hand. In general, the torque is lower than the bipolar type, but it is sufficient for this purpose and is inexpensive. First, I tried rotating the stepping motor 90 degrees.
#include <Stepper.h>

// Create Object
Stepper stepper1( 2048, 8, 10, 9, 11 );

void setup() {

  // Rotations per minute setting
  stepper1.setSpeed( 5 );
}

void loop() {

  // 90 degrees counterclockwise
   stepper1.step( 512 ); //90

  // Stop
  digitalWrite(8,  LOW);
  digitalWrite(10,  LOW);
  digitalWrite(9, LOW);
  digitalWrite(11, LOW);
  delay(5000);    // 5000ms

  // 90 degrees clockwise
  stepper1.step( -512 );
  // Stop
  digitalWrite(8,  LOW);
  digitalWrite(10,  LOW);
  digitalWrite(9, LOW);
  digitalWrite(11, LOW);
  delay(5000);    // 5000ms
}
DFPlayer
I used DFPlayer to play MP3 voice files. Download the Library from here. Unzip the zip file and place it under the Arduino library folder.
Create a folder "mp3" on the SD card. Then put the MP3 files in it. Prefix the file name with a 4-digit number 0001.mp3
I downloaded voice files from here.
//  DPPlayer Trial

#include "SoftwareSerial.h"
#include "DFPlayer_Mini_Mp3.h"

SoftwareSerial mySerial(10, 11); // RX, TX

void setup () {
delay(2000); // Module startup wait time
mySerial.begin (9600);
mp3_set_serial (mySerial); //set softwareSerial for DFPlayer-mini mp3 module
mp3_set_volume (60);
}

void loop () {
mp3_play (1);   //Play(0001.mp3)
delay (2000);
mp3_play (2);   // Play(0002.mp3)
delay (2000);
mp3_play (3);   // Play(0003.mp3)
delay (2000);
}
Integration
/******************************************
 *  Fabricademy  Open Source Hardware
 *  Loom
 ******************************************/

#include <Stepper.h>
#include "SoftwareSerial.h"
#include "DFPlayer_Mini_Mp3.h"

Stepper stepper1( 2048, 8, 10, 9, 11 );
SoftwareSerial mySerial(5,6); // RX, TX
#define MIC_PIN 0

bool isRot = false;
int waitTime=0;
int baseVal=0;

void setup() {
  delay(2000); //Module startup wait time

  // Rotations per minute setting
  stepper1.setSpeed( 5 );

  Serial.begin(9600);
  long sum=0;
  for(int i=0; i<100; i++) {
    sum += analogRead(MIC_PIN);
  }

  baseVal=sum/100;
  Serial.println(baseVal);

  mySerial.begin(9600);
  mp3_set_serial(mySerial);
  mp3_set_volume(20);
}

void loop() {

 //  Serial.println(analogRead(MIC_PIN));
  chkMic();
  if(isRot){
    rotate(512);  //90 degrees
  }

  delay(50);
}

void chkMic(){
  int i = abs(analogRead(MIC_PIN)-baseVal);
  if (!isRot && (i>8) && (waitTime==0)){
      isRot=true;
      waitTime=3;
  }

  if( waitTime>0){
    waitTime -=1;
  }

   Serial.print(baseVal);
   Serial.print(",");
   Serial.print(i);
   Serial.print(",");
   Serial.println(isRot);

}

void rotate(int r){
  delay(300);
  mp3_play (random(1,7));    // 7 mp3 files
  stepper1.step( r );   //degree


  // Stop
  digitalWrite(8,  LOW);
  digitalWrite(10,  LOW);
  digitalWrite(9, LOW);
  digitalWrite(11, LOW);
  isRot=false;

}
Result
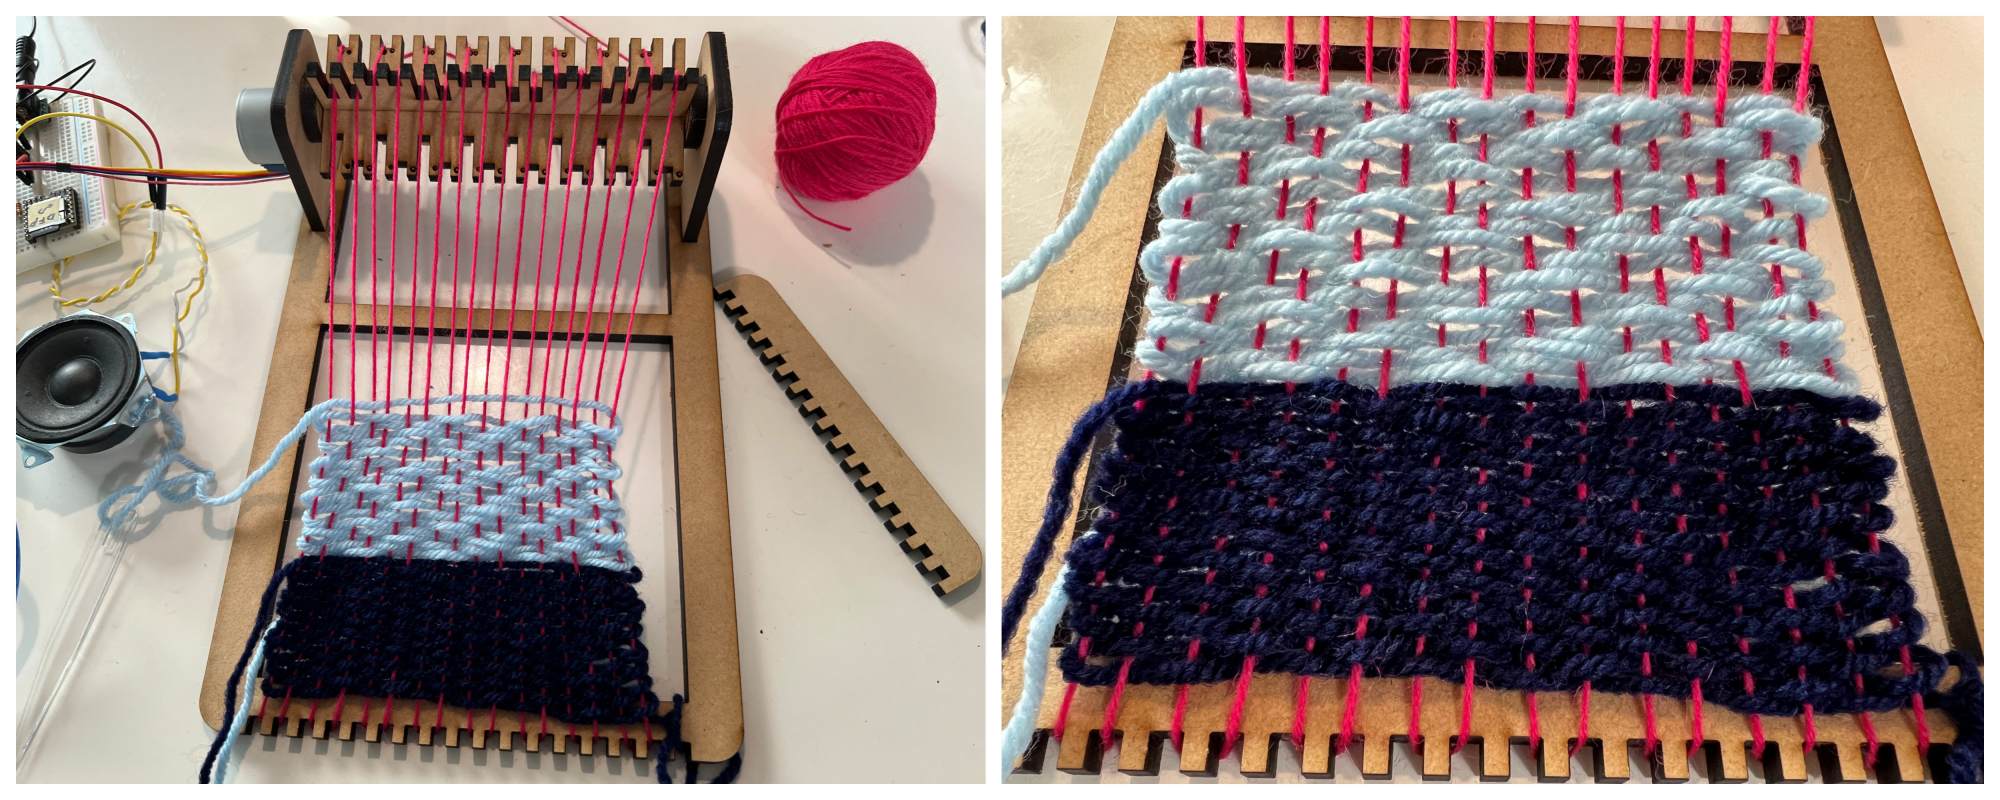
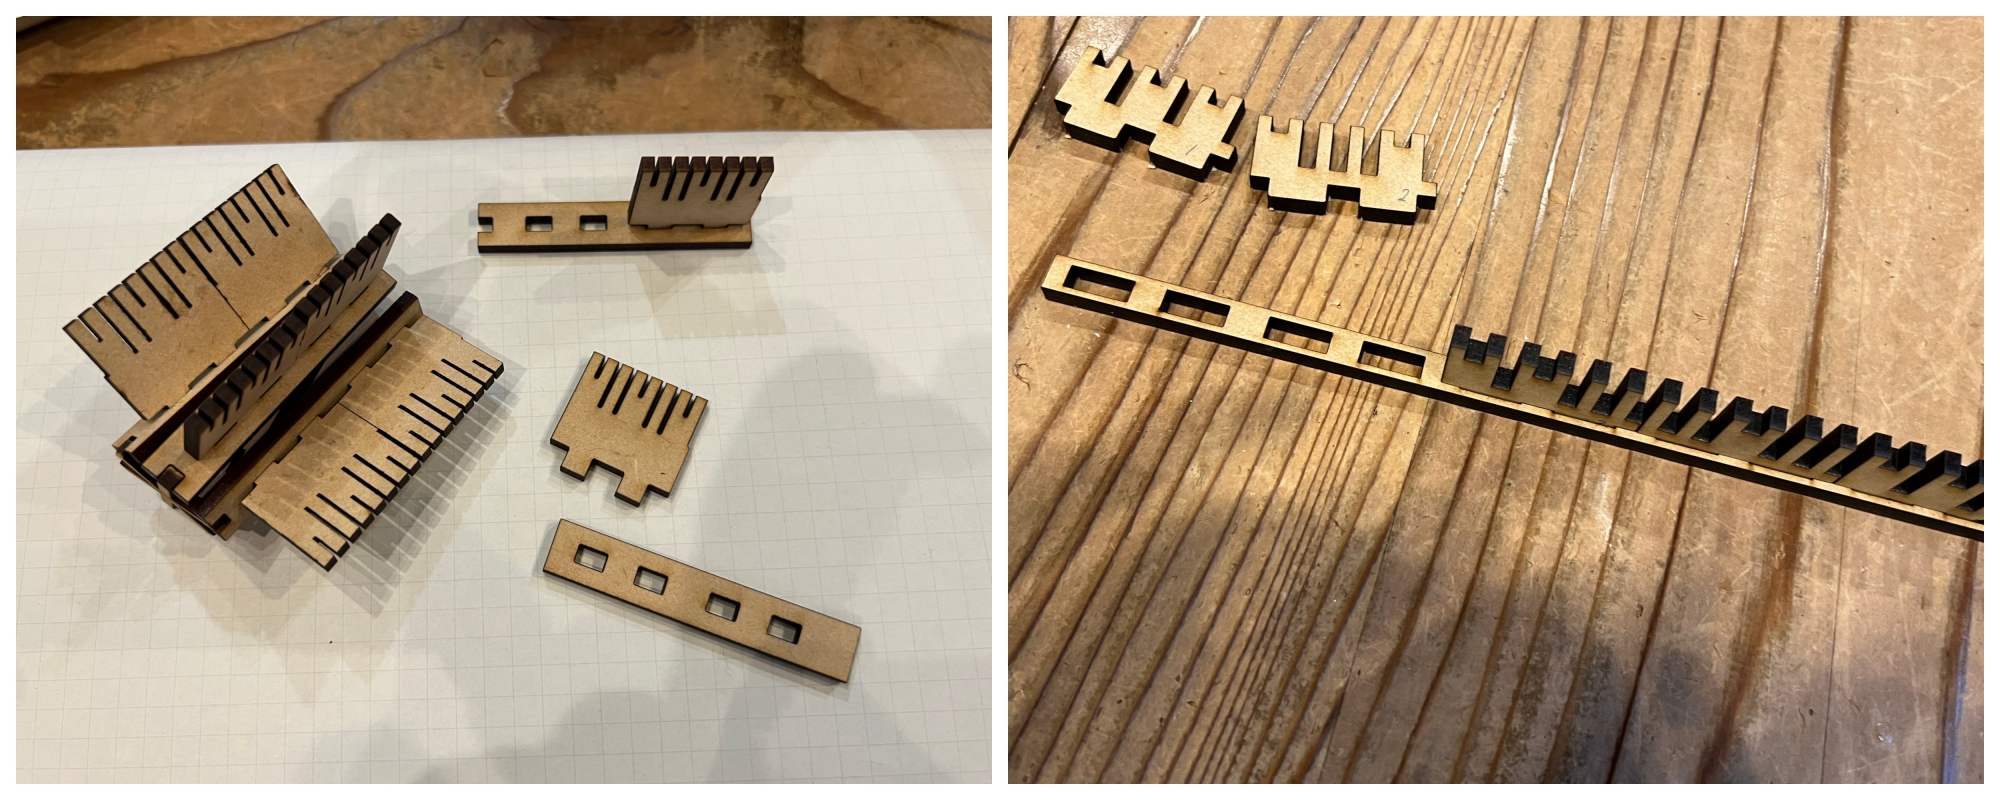
Modular type
Inspired by the Jacquard Loom, I designed modular type loom based on the first one.
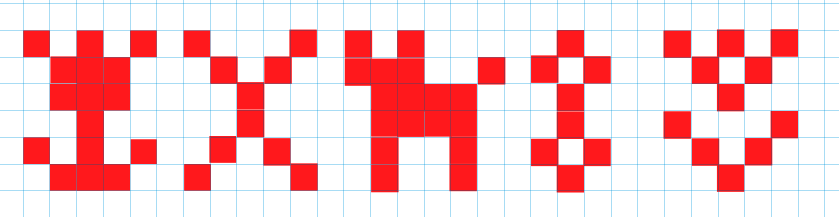
One rotation consists of 6 pieces, and the module allows you to replace every 6 teeth, so you can design 6x6 pixel art based on the height of the teeth.
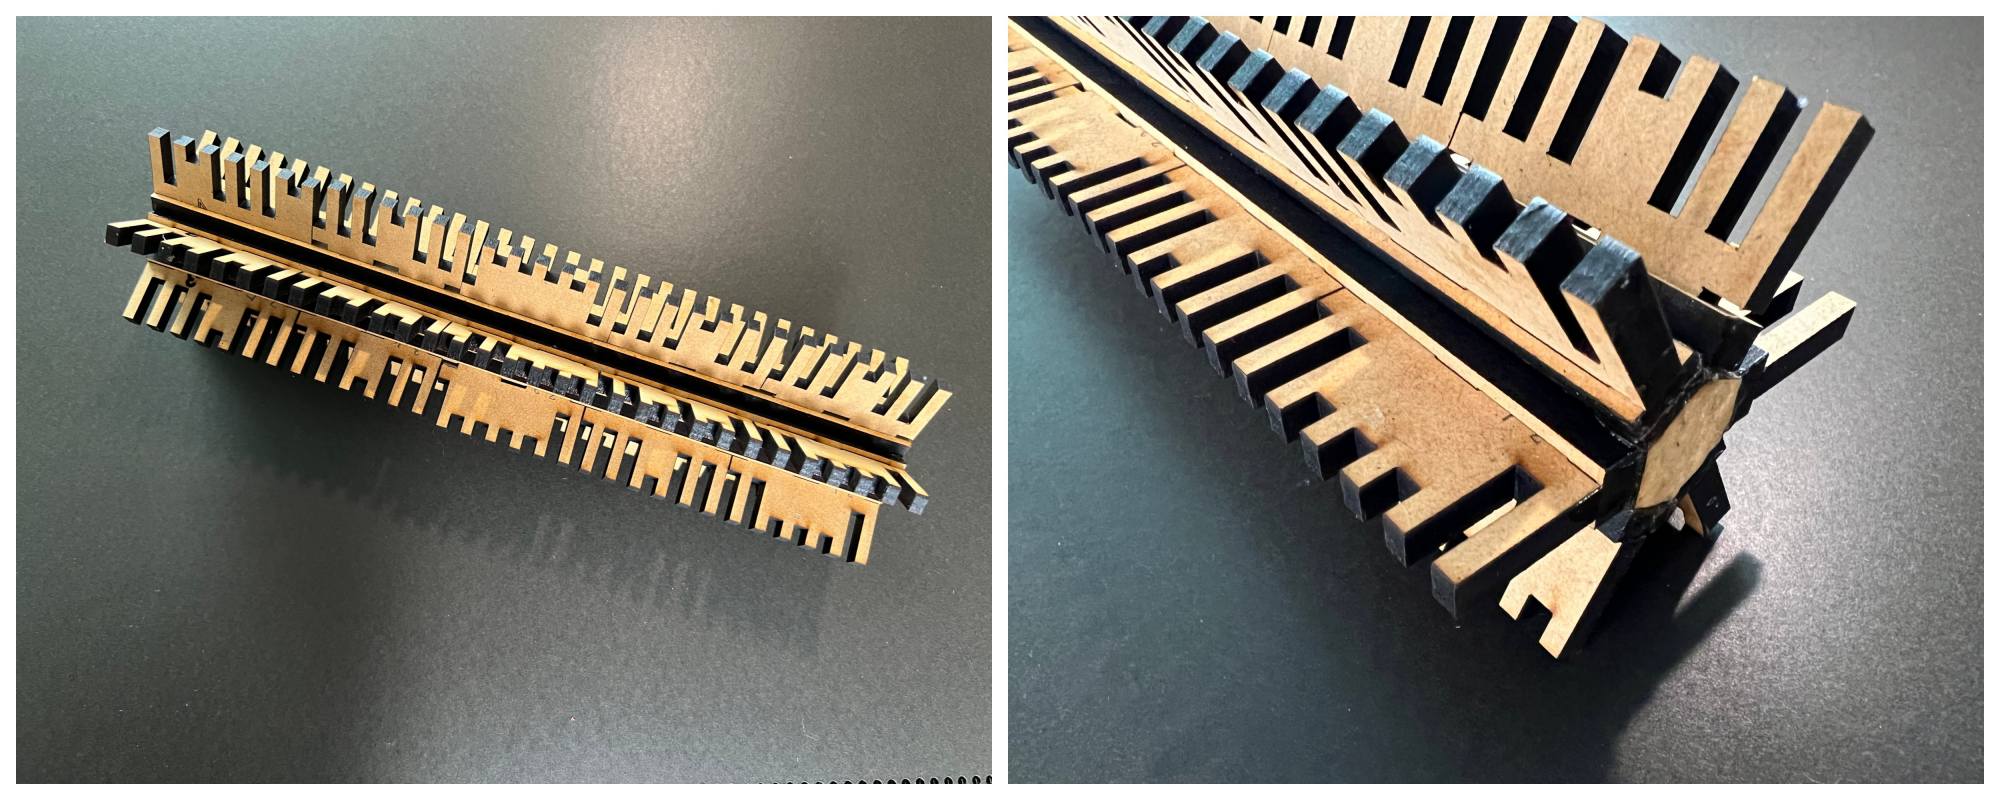
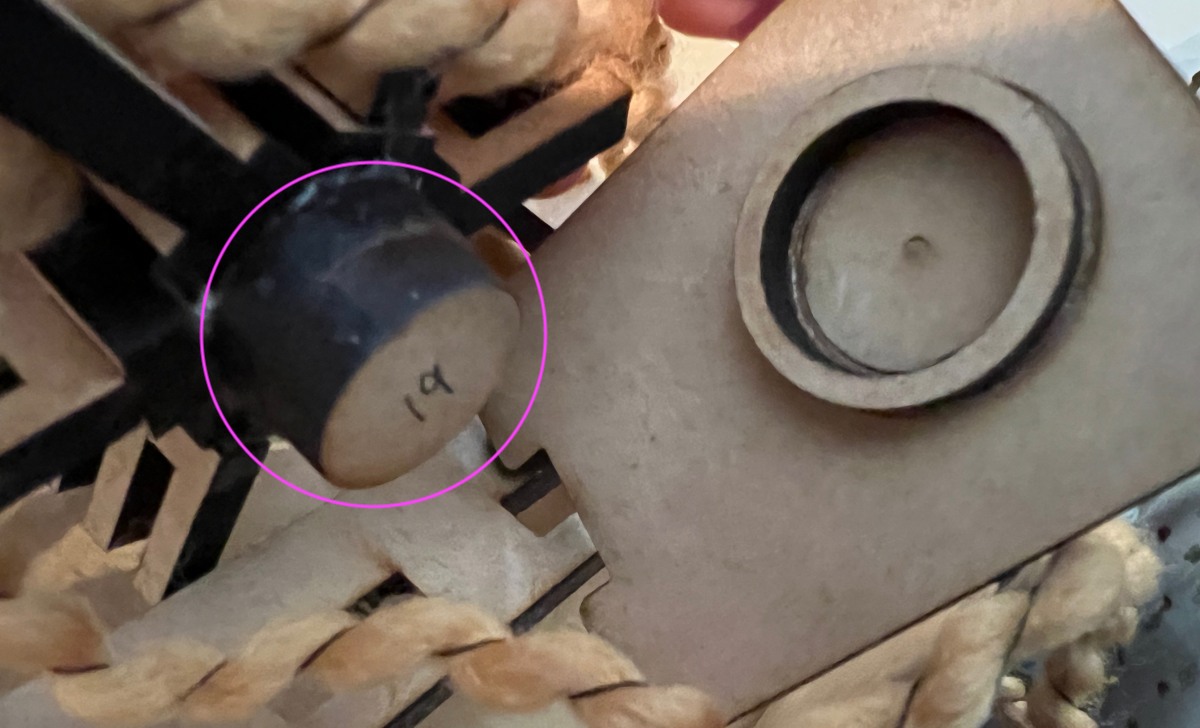
I assembled a larger loom using the motor parts from the first loom. The distance from the rotating body to the vertical plate is one plate longer than in the Loom1 design, so two round parts are stacked.
I changed the rotation angle per rotation to 60 degrees and it worked without any problems.
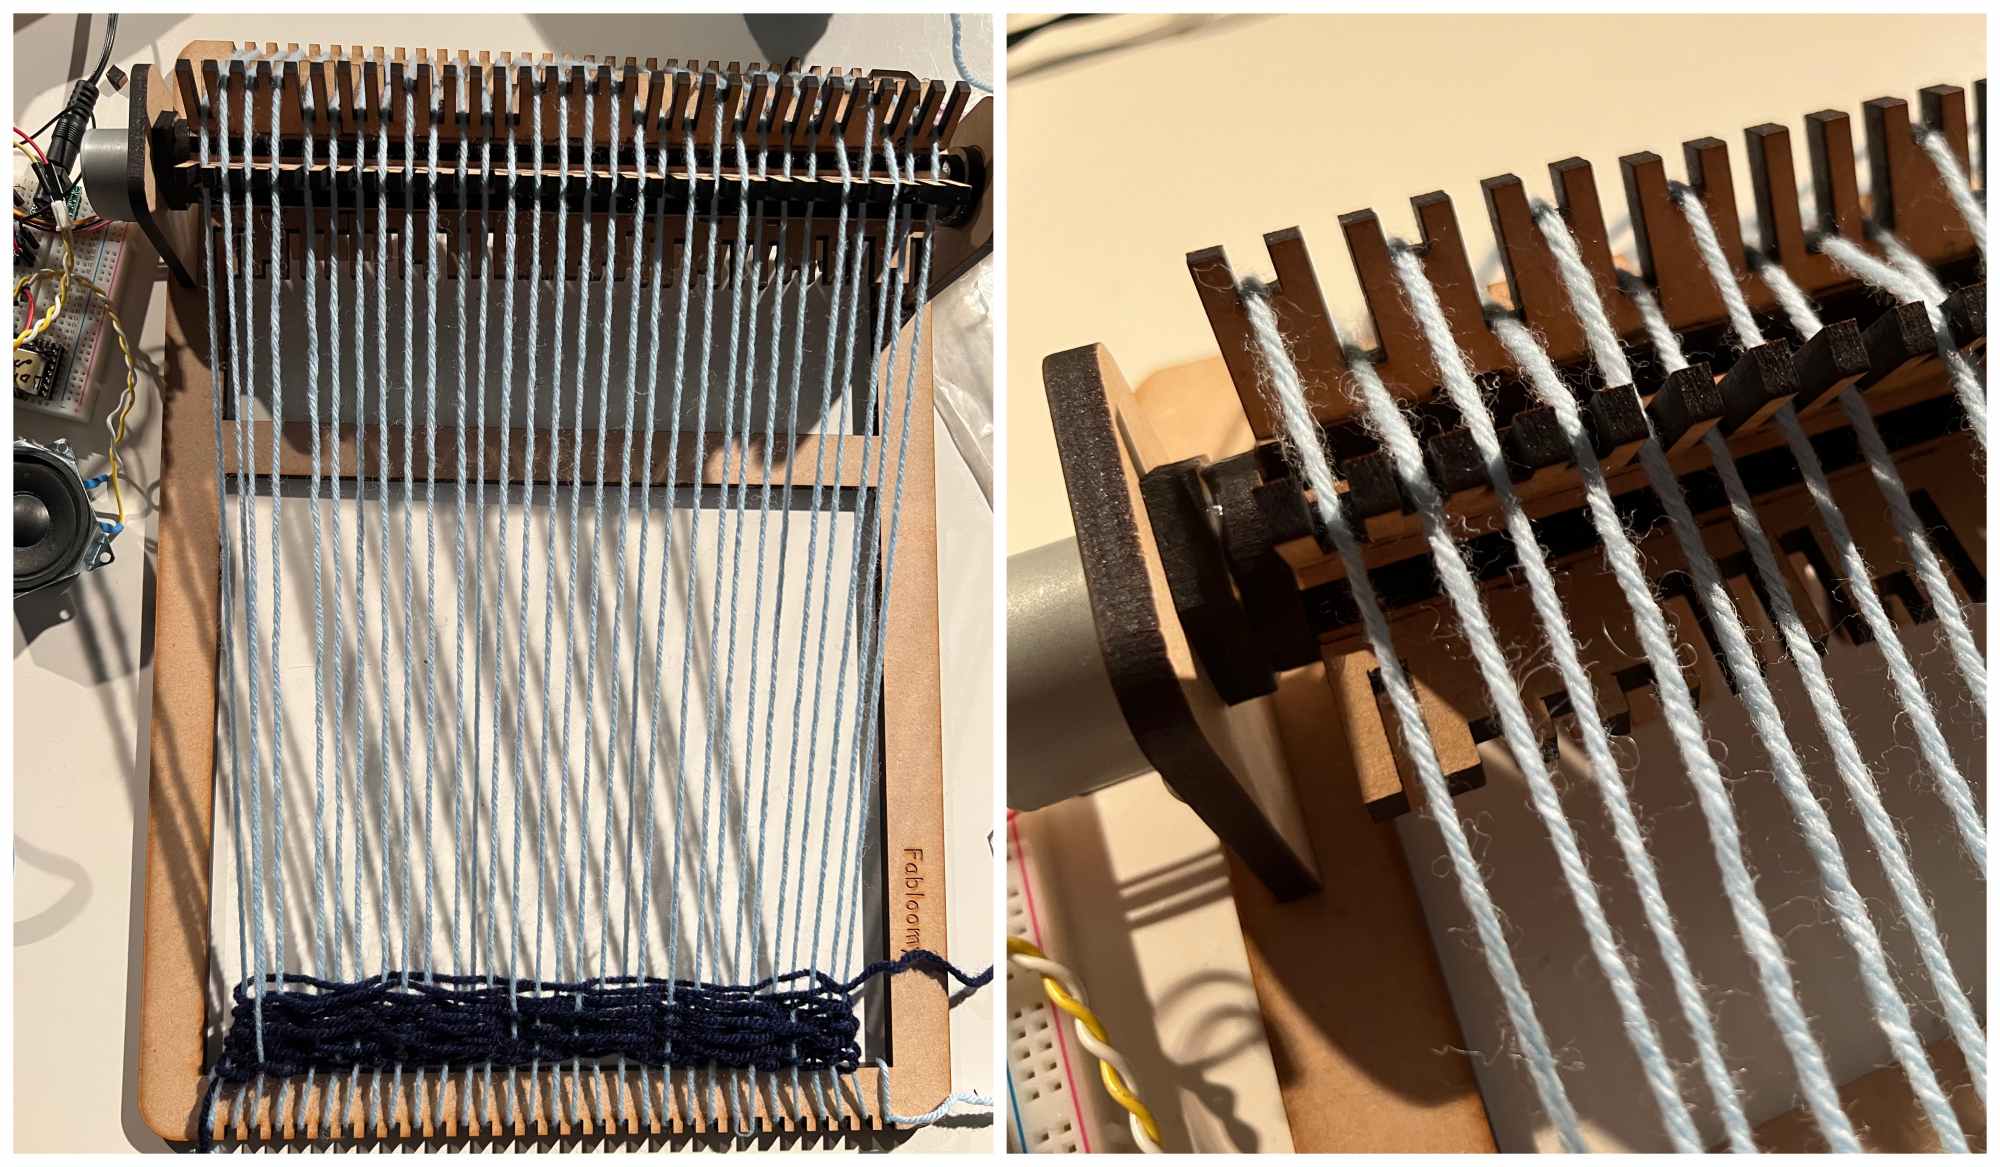
In this first trial, the thread was too thin. To make beautiful pixel art, I need to optimize the thickness of the thread, so keep trying.
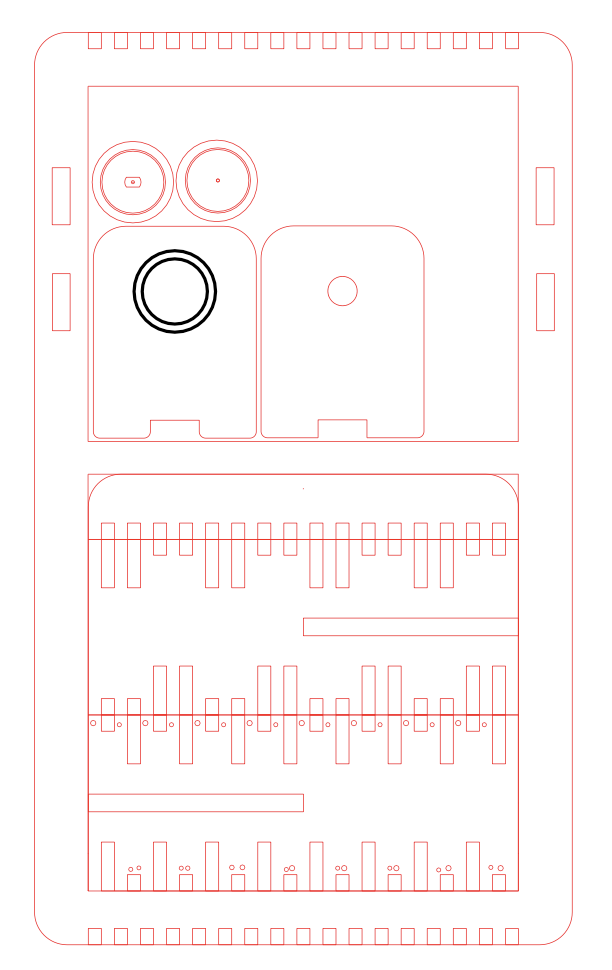
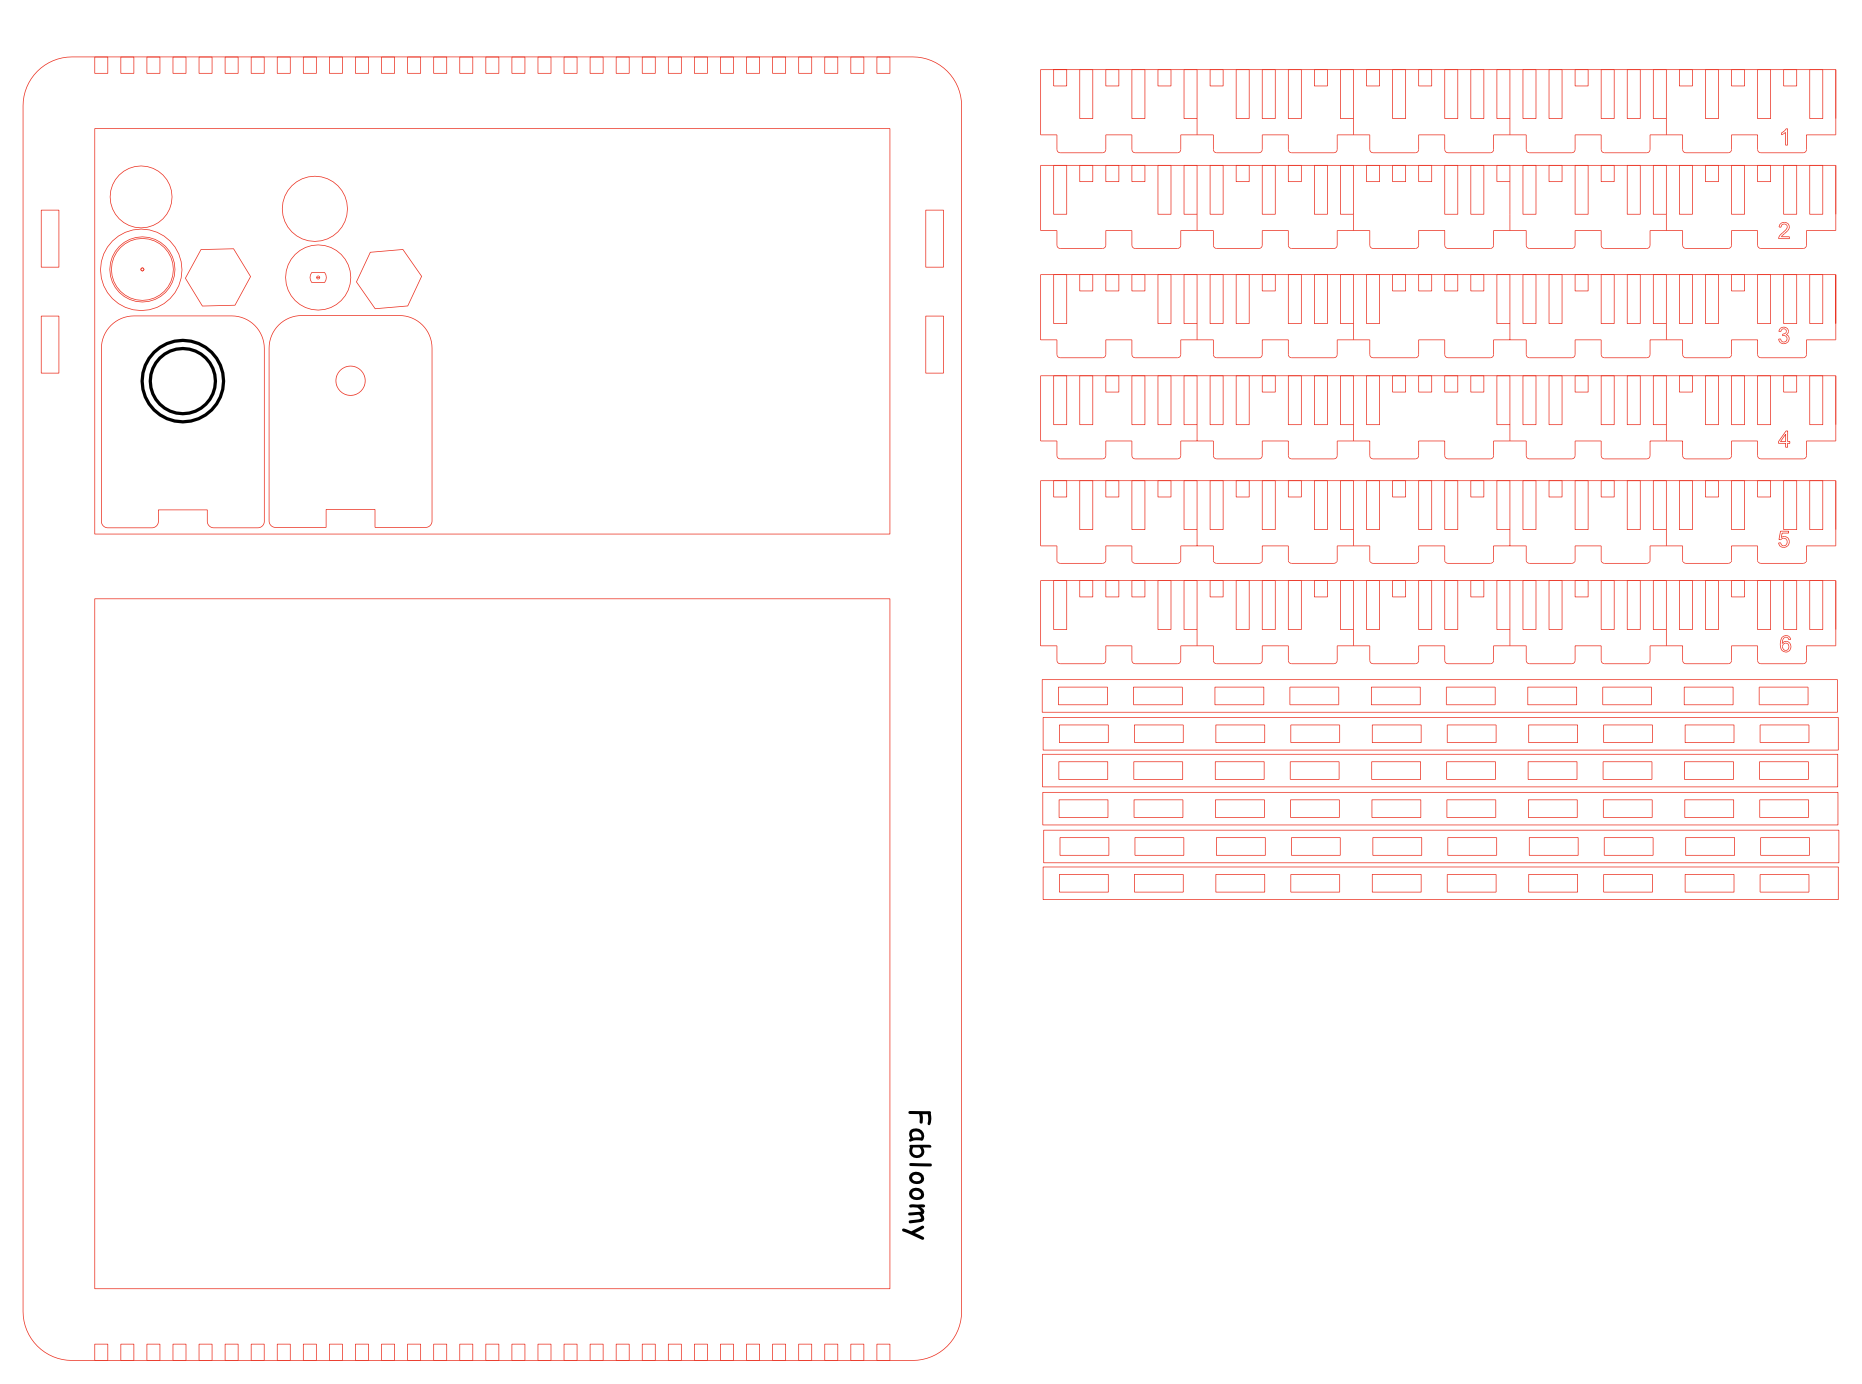
Fabrication files
-Loom1 : Red=Cut line, Black=Engrave line