##### 2. Digital bodies
FABRICADEMY WEEK2 EXPECTED LEARNING OUTCOMES
FABRICADEMY WEEK2 ASSIGNMENT

-Include some inspiration: research on artists or projects that work with the human body
-Document the use of 3D scanner and softwares to acquire a 3D model
-Document the process of repairing and/or manipulating a 3D mesh and slicing it.
-Create my ready to cut file for laser cutting, learn how to use the laser cutter and document the workflow and upload your 3D and 2D files
-Learn about the fab lab processes, booking system, usage, machine demos, tools and safety rules
-Build and/or assemble my mannequin, create a stop motion assembling it or stepped process
-EXTRA POINT Send one picture (HIGH RES) of my mannequin to enter the competition for the annual exhibition
---
| Files to download |
| - |
| Romainequin in one piece |
| [1](http://class.textile-academy.org/2019/romaindivozzo/images/ro-fabrica-week2-pix/ro-files-to-download/romainequin.stl) |
| Romainequin in slices |
| [2](http://class.textile-academy.org/2019/romaindivozzo/images/ro-fabrica-week2-pix/ro-files-to-download/ro_3dscan-sliced_complete-compressed.pdf) |
---
##### | Comments |
none
---
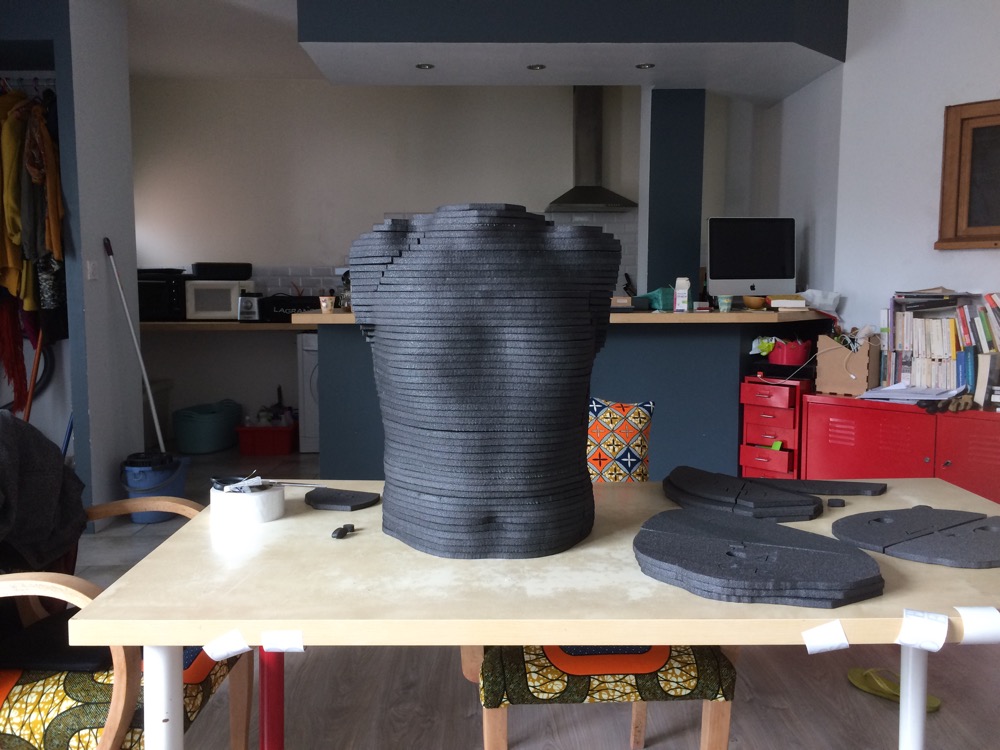
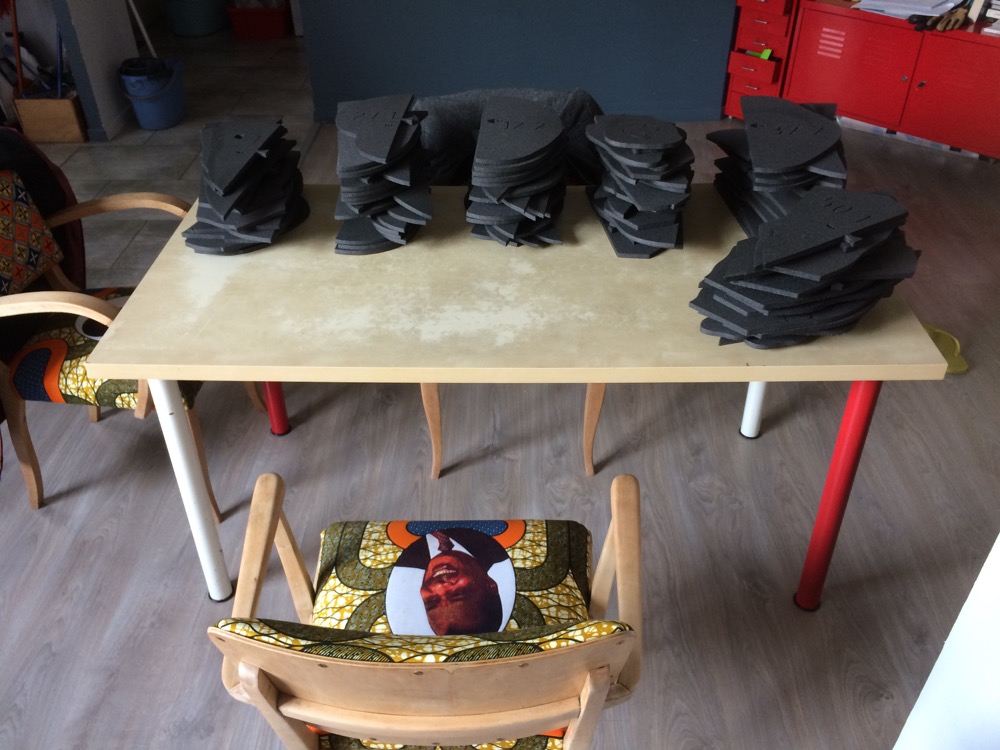
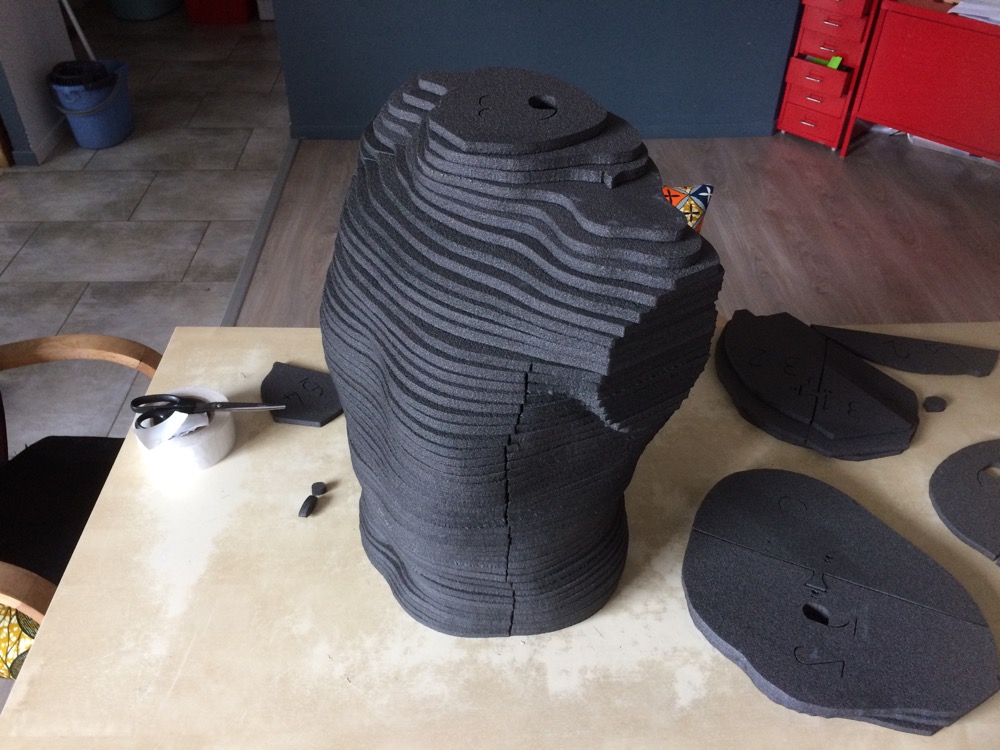
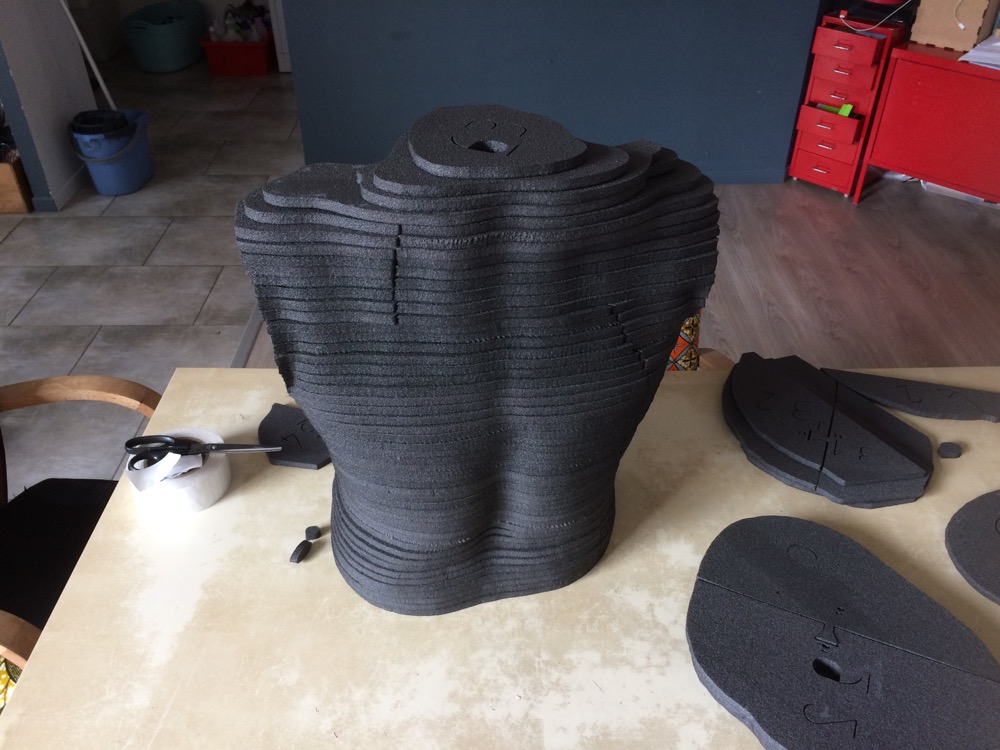
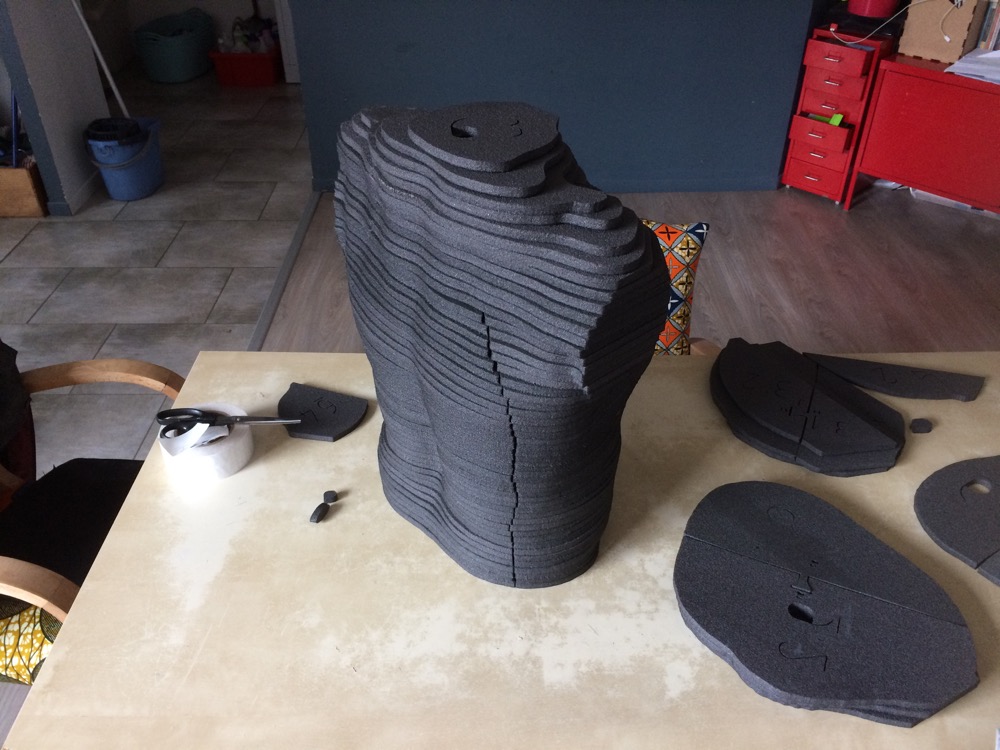
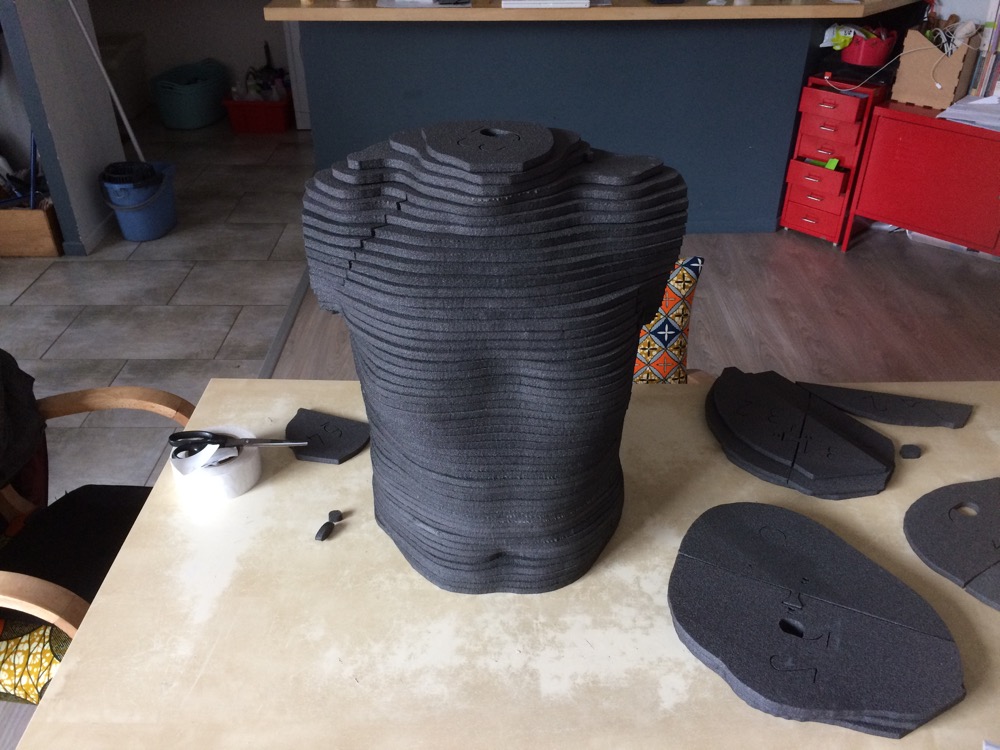
##### 1 | Romainequin Assembly Process |
Romainequin | Romainequin
- | -

|
Romainequin | Romainequin
- | -
|
Romainequin | Romainequin
- | -
|
Romainequin | Romainequin
- | -
|
Romainequin | Romainequin
- | -
|
##### 2 | Getting prepared to 3D-scan myself to make my Mannequin |
My interest for 3D Scanning went down along the years mainly because good 3D scanning solutions were and remain expensive, and a lot of software cleaning was necessary to obtain a file that you would actually be able to use in the physical world. Limitations due to proprietary softwares were common and frustrating, and still are.
There are and were some alternative ways to 3D scan something or someone. A few apps arrived on the market that you can use with your phone or tablet with the help of the camera that's embbeded inside. In 2012 when I was a Fab Academy student, we used a Kinect to scan and 3D print ourselves. This time it makes a lot more sens to me to investigate the field more in depth, as the reasons to get such an output is clearer. I need a scale 1 copy of my upper-body to assemble fabric parts to make clothes.
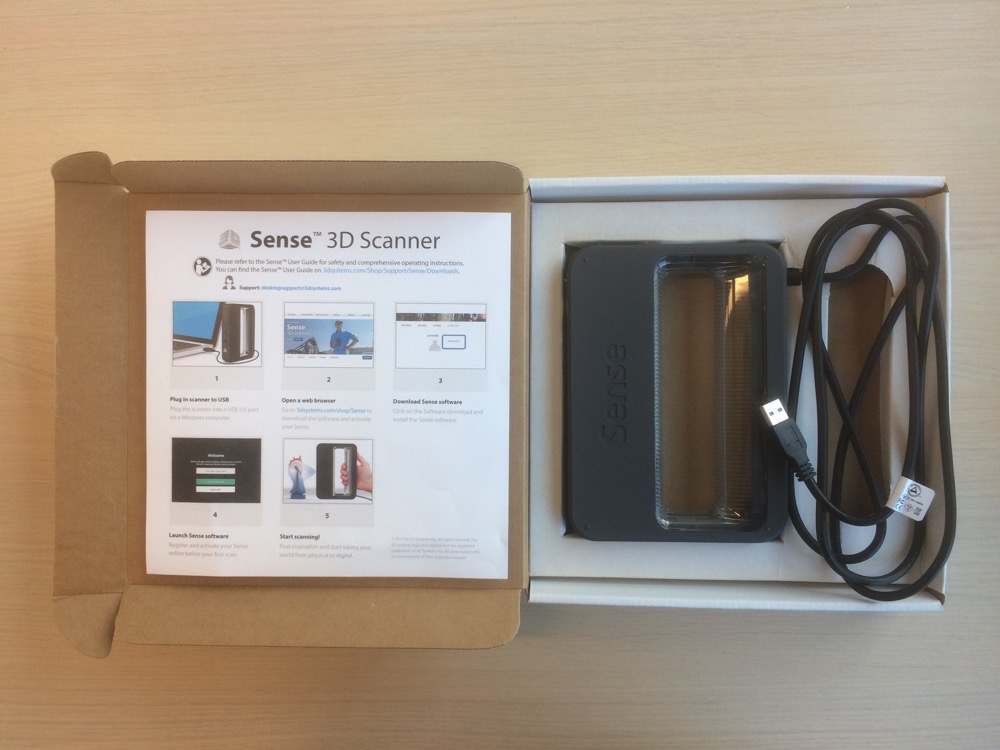
For this assignment I have ordered "3D Sense Cubify V2" from 3DSystem. In the past, I sent my students to colleagues who have decent 3D scanners in their research labs but the machines were not available for experimenting further.
##### 3 | Foam-Mannequin from recycled materials is random |
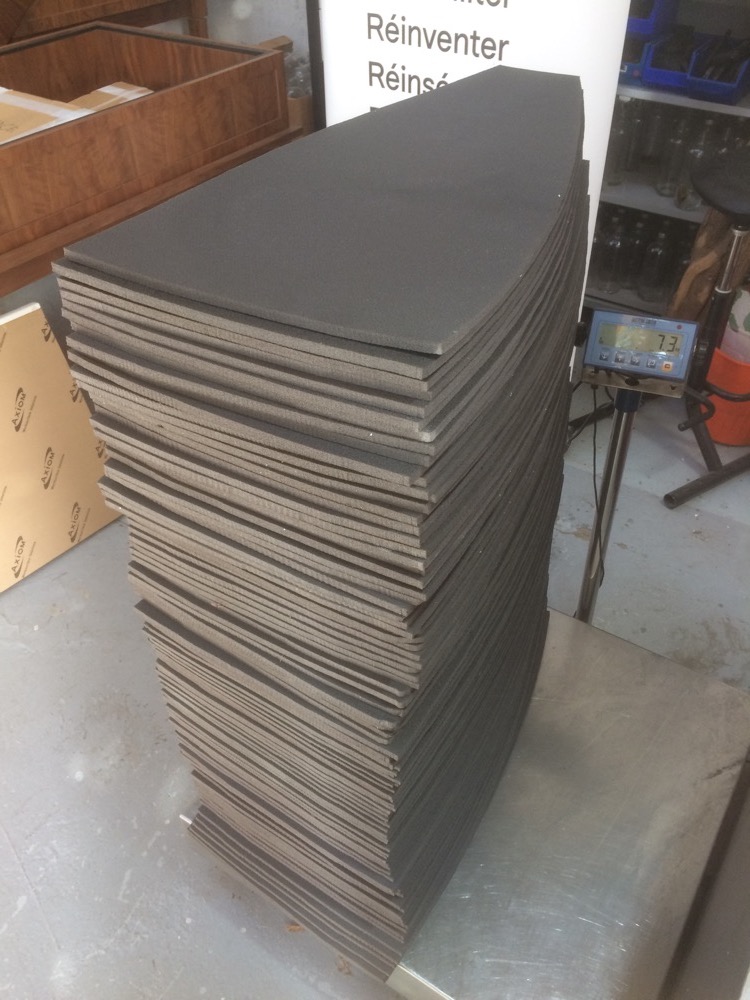
I went to La Réserve des Arts (again) with Zola (my daughter, 3.5 years-old) and found a stock of very clean - second-hand - foam.
Second-hand Foam in bulk (4€/kg)| Me wearing a mask as protection against fumes
- | -
|
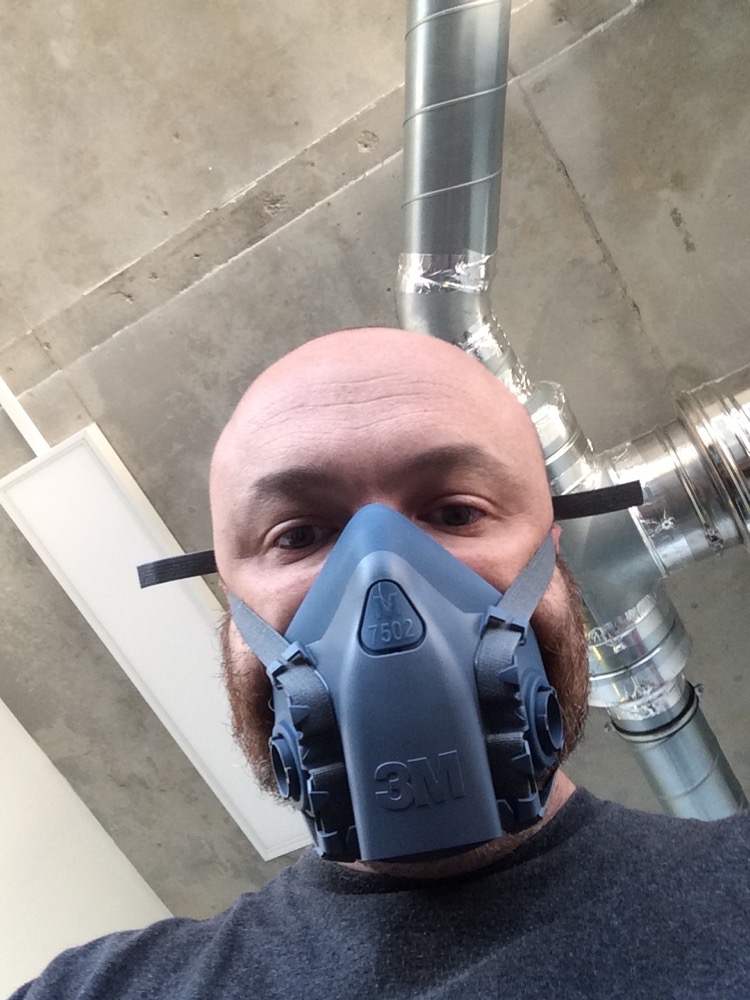
This is something I never do: buying a material to laser-cut that I can't trace-back the chemical composition. I told this to the seller of La Réserve des Arts who replied that someone came to buy a sample to make a test on his laser-cutter and "it worked"...I don't know what "it worked" meant in this context, buy I have a very very powerful gaz-extraction-system at Fablab Digiscope, so I took the risk and bought 7.3kg (1m high pile of foam) for 30€ (4€/kg). The bill says **polyethylene foam**, so it should work.
##### 4 | Constraints of working with waste materials |
The dimensions of the polyethylene foils I have are stable from one to another but doesn't geometrically corresponds to a primitive shape (rectangle, triangle, etc). I am a reasonably massive male, 100kg/1.88m, but I have a doubt: Will the flat 2.5D slices I'll get from Slicer (.STL slicing software) fit into the polyethylene foam stock I just bought ? In other words: Is my body too wide or too thick to fit into the non-primitive surface offered by the second-hand polyethylene foam sheets as they are ? If the 3D scan of my body doesn't fit, Camille's 3D scan will surely fit into it.
In any case, at the end of this assignment, I'll know how recycling waste-products makes the task more complicated or not.
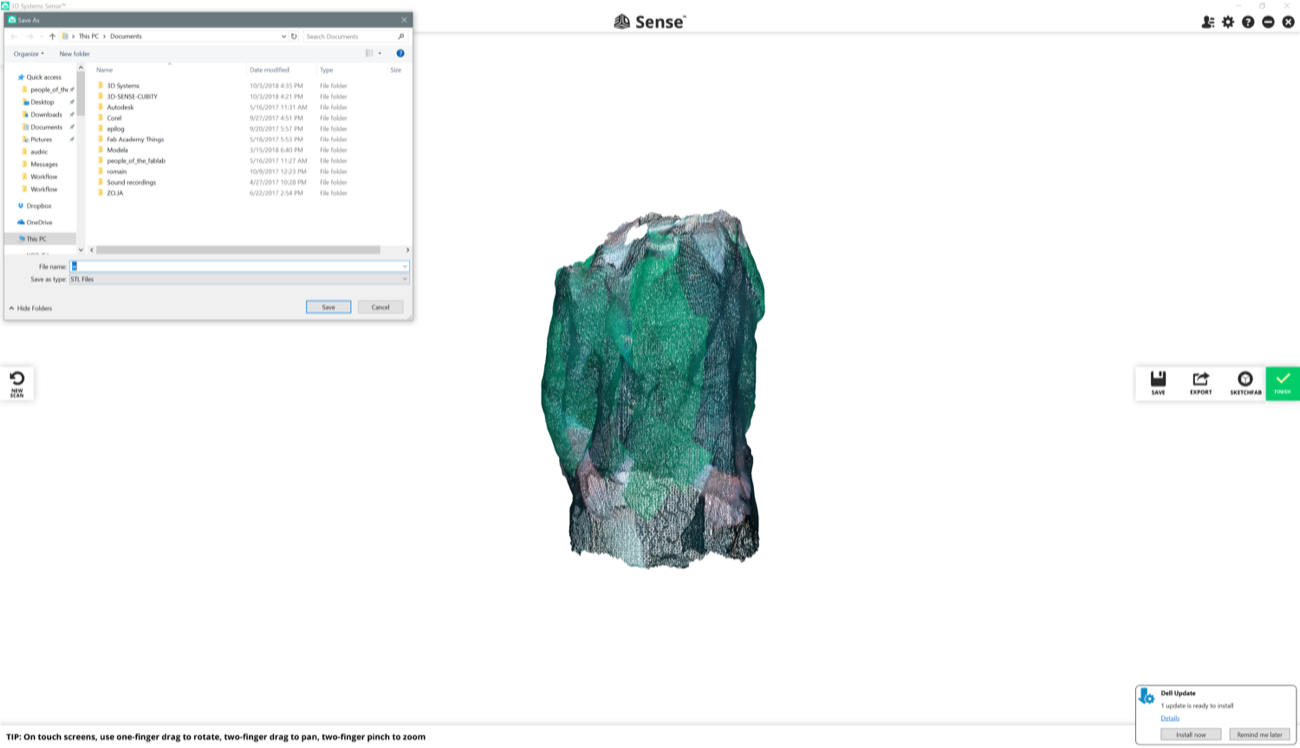
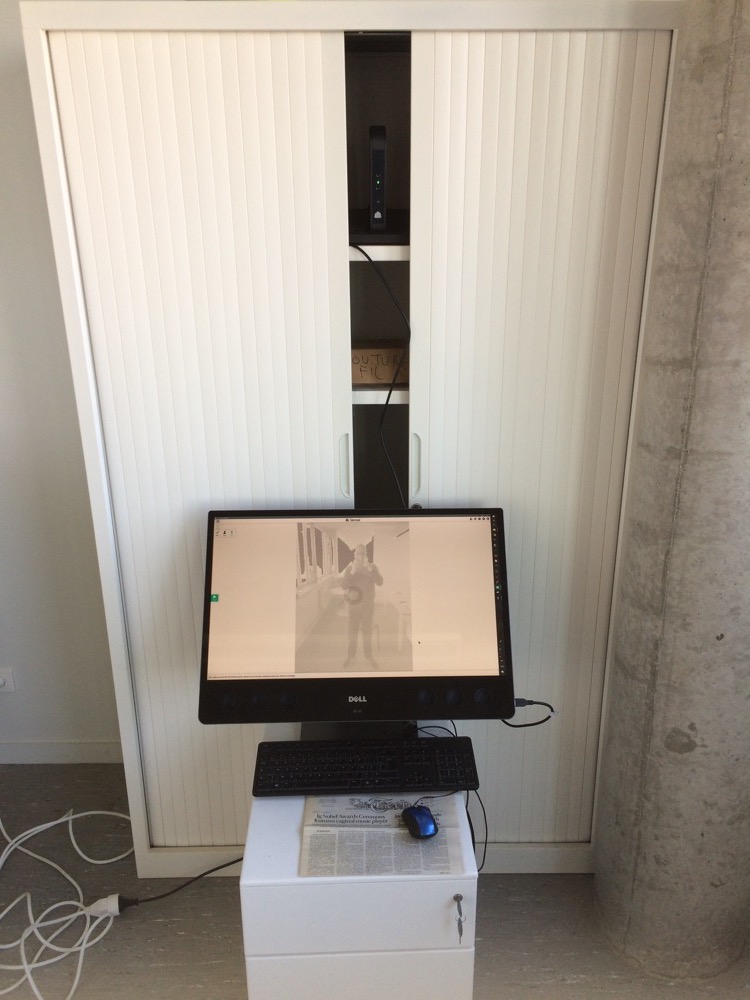
##### 5 | Starting with 3D Sense 3D scanner and the Sense App (Windows only) |
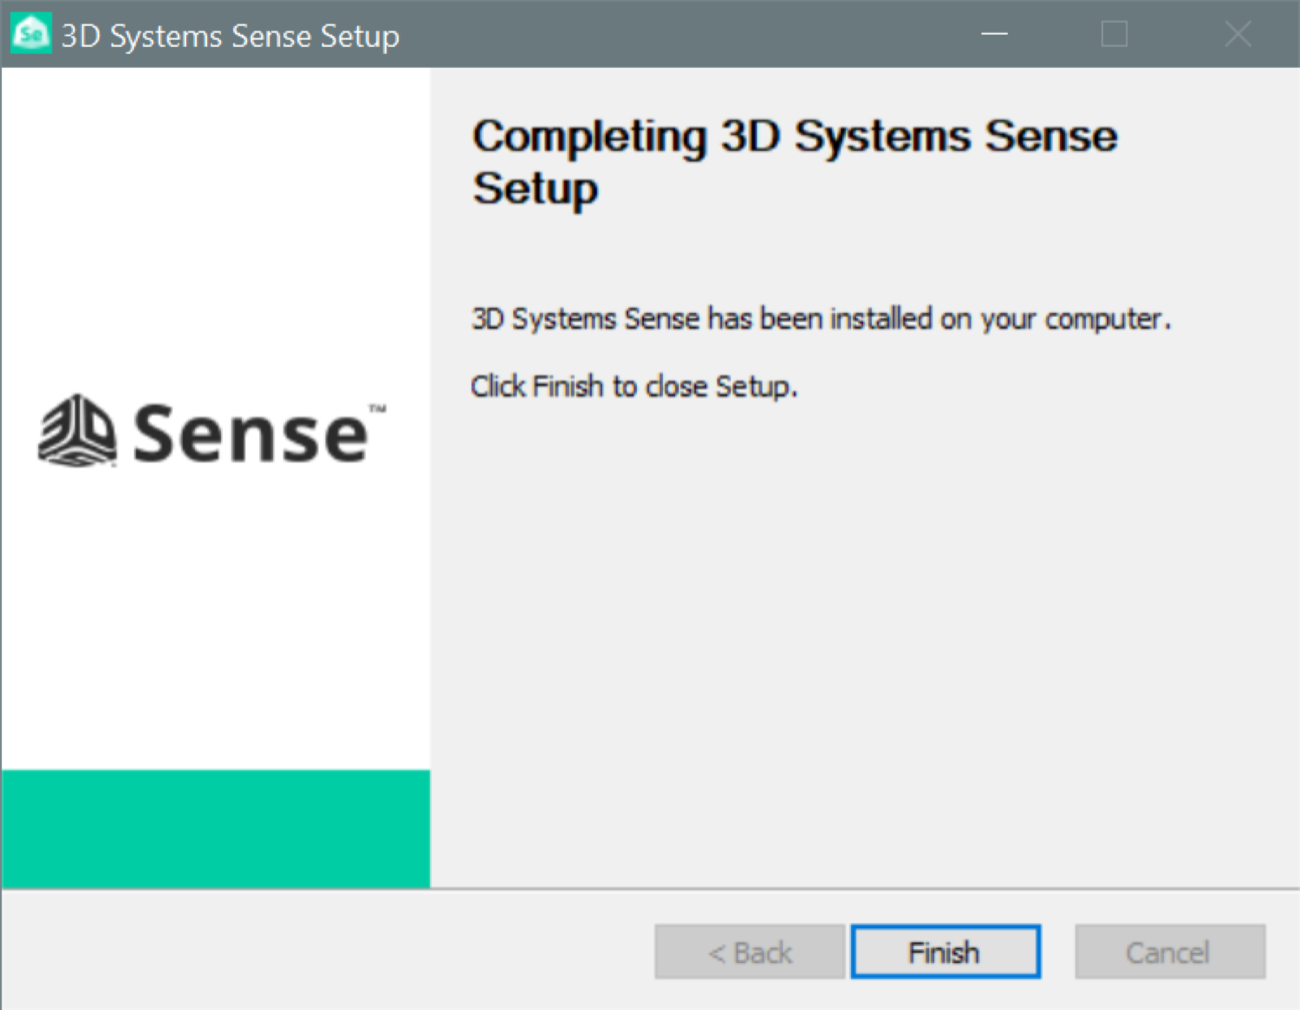
First thing is that the Sense App works on Windows only. Which I don't like at all, especially because I want to document the set-up of the software and how to use it. Taking Screenshots under Windows is a nightmare compared to how easy it is on Mac. Anyways...here we go with Sense, right after its installation. The good point is that it works instantly.
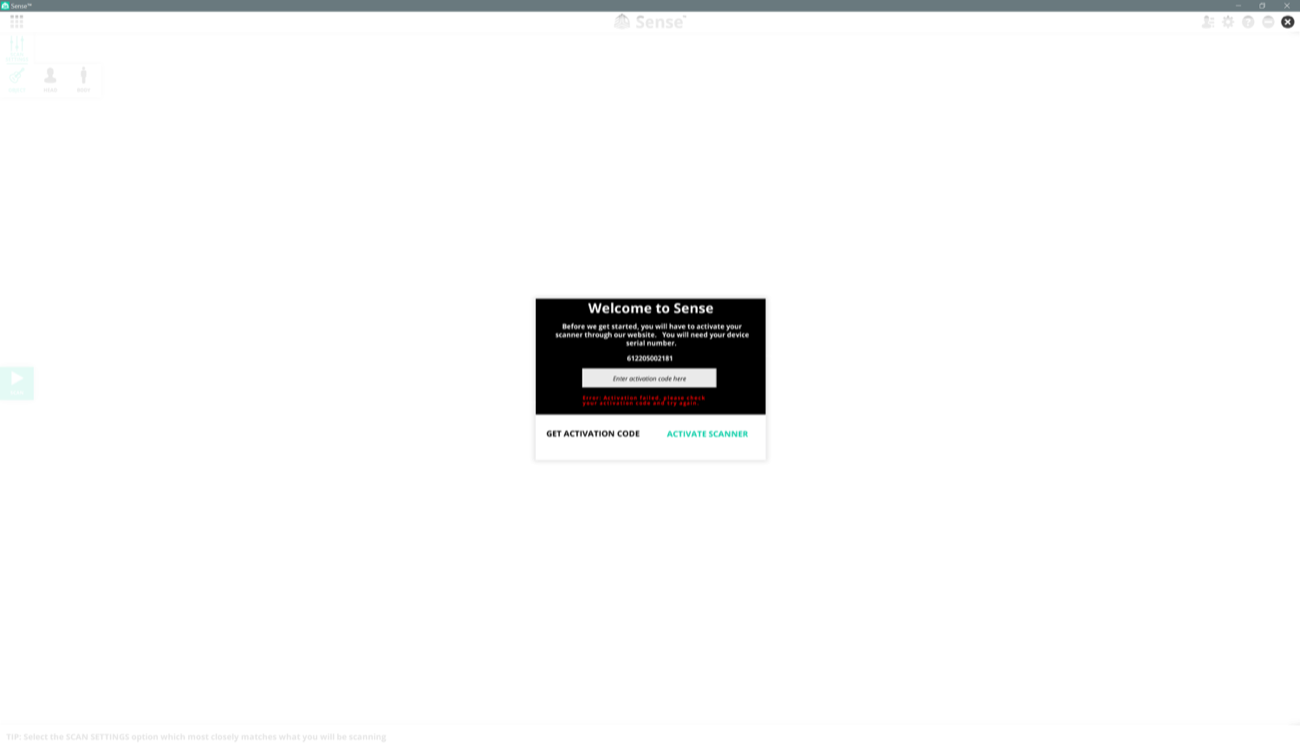
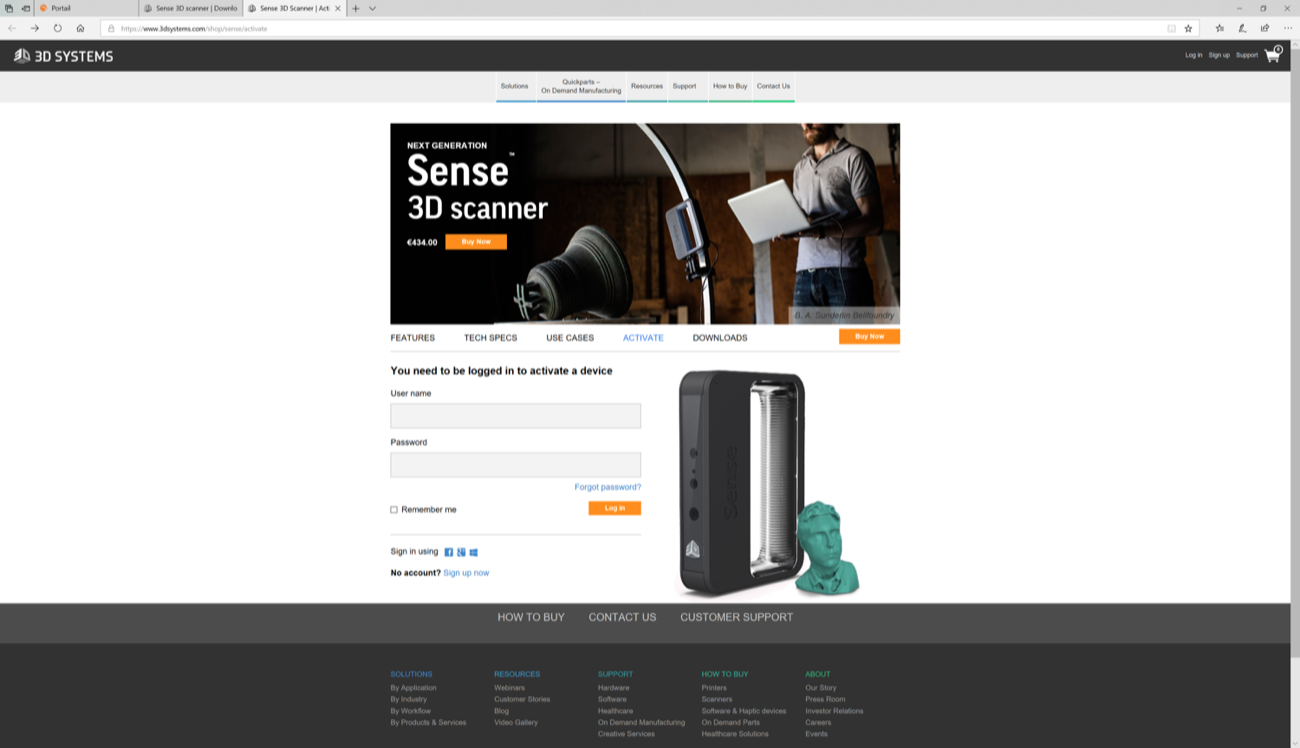
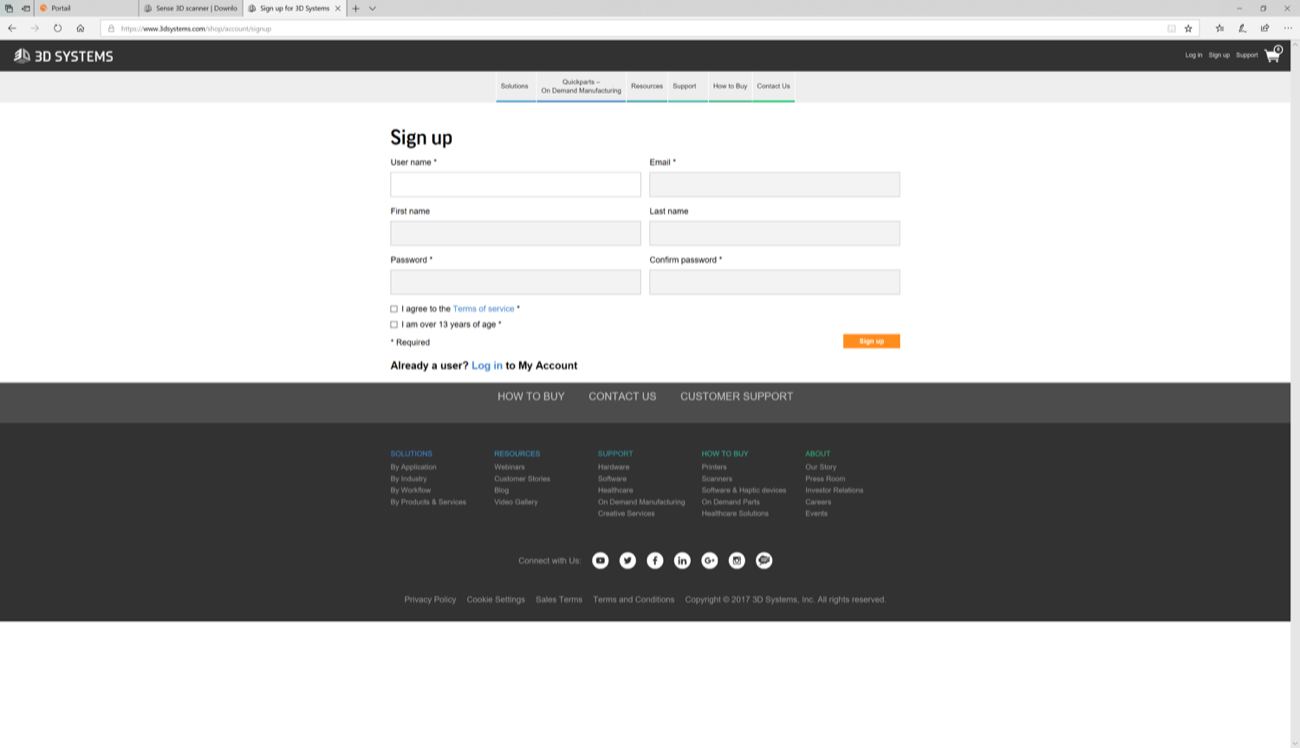
Right after you finished installing the app, you are invited to activate your scanner. To activate your device you have to create an account. You click "sign up" to create your account if you don't have one already. You create your account.
a | a
- | -
|
a | a
- | -
|
After signing up you obtain an "Activation Code" in your email-box.
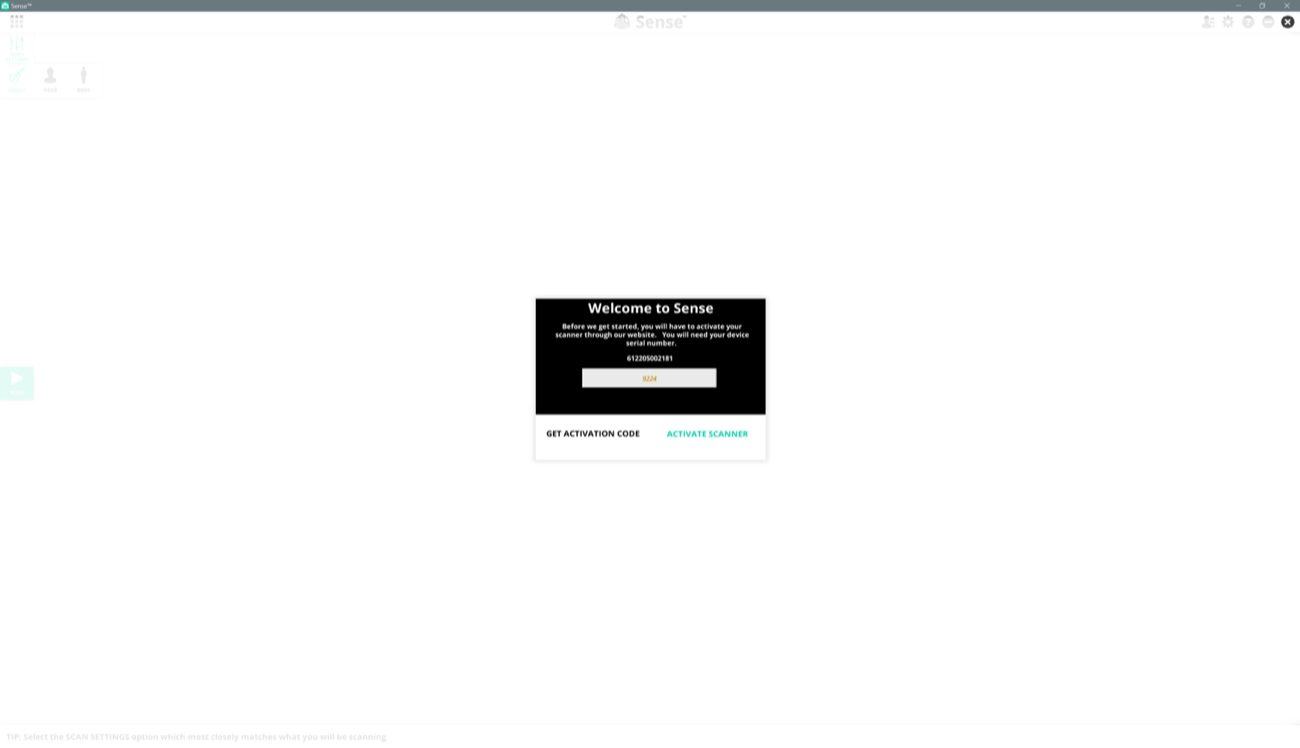
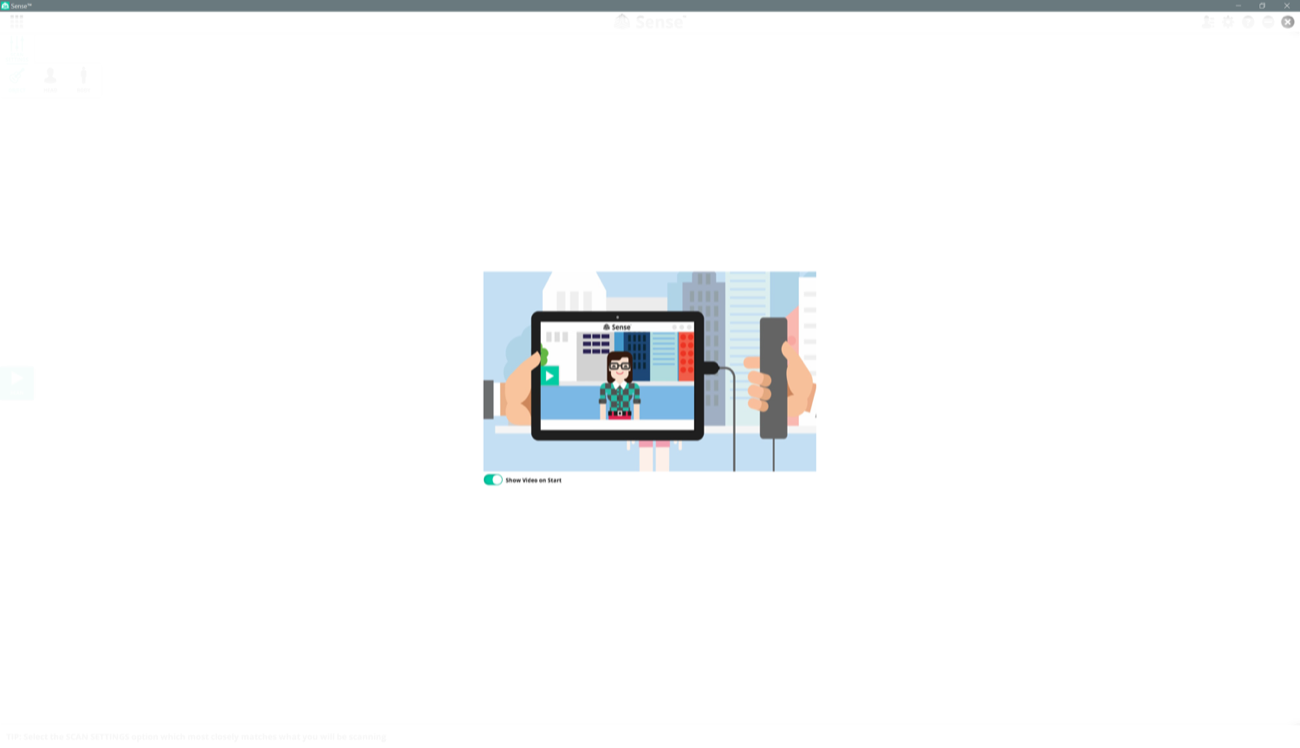
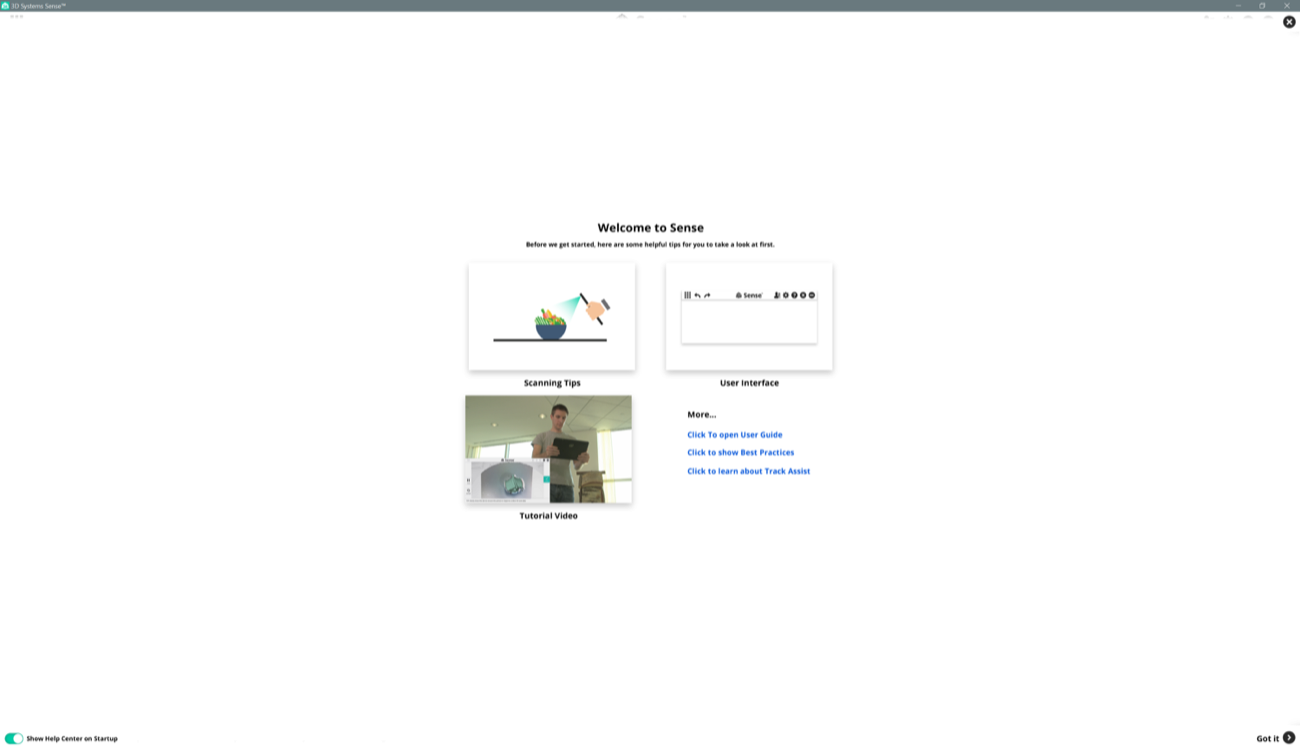
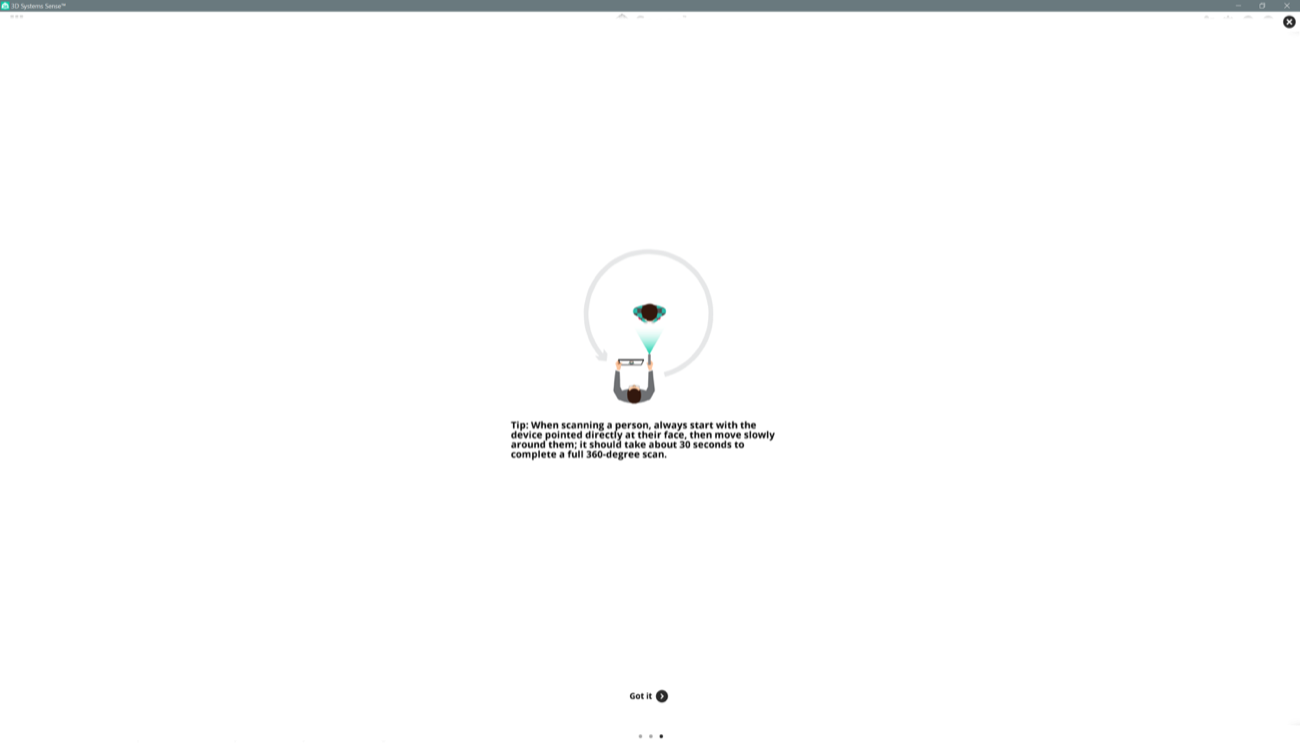
Once activated (it takes a few seconds), you can start the Sense App. And you find yourself in front of a demo video where you receive a few tips on how to use your scanner porperly to get good results. You can also click on tutorials, etc.
tips | tips
- | -
|
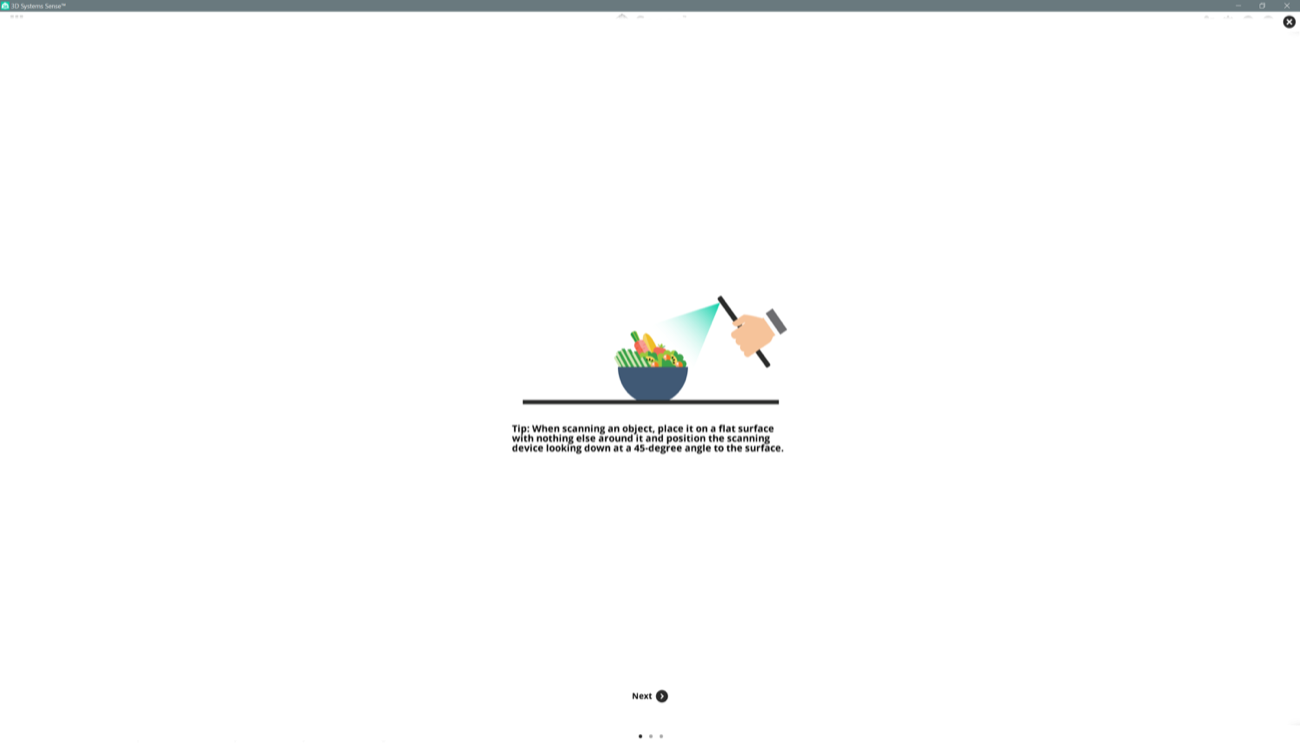
tips | tips
- | -

|
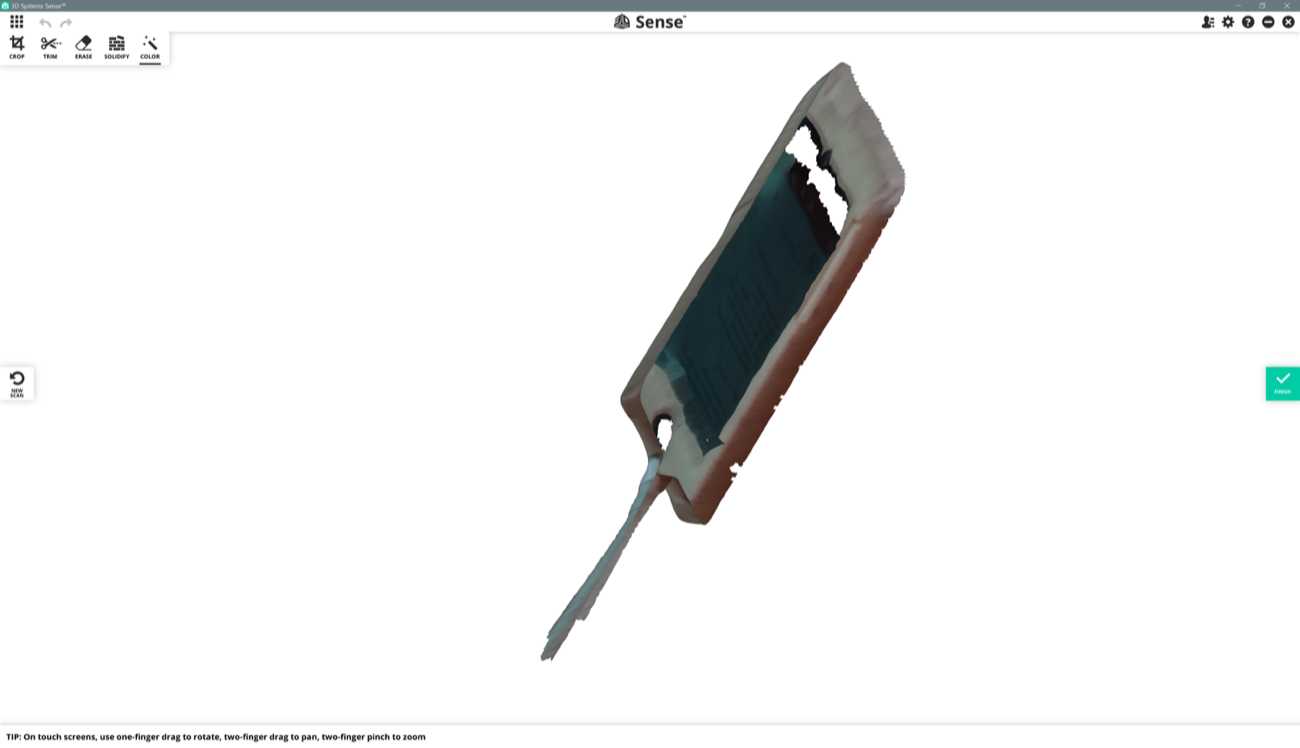
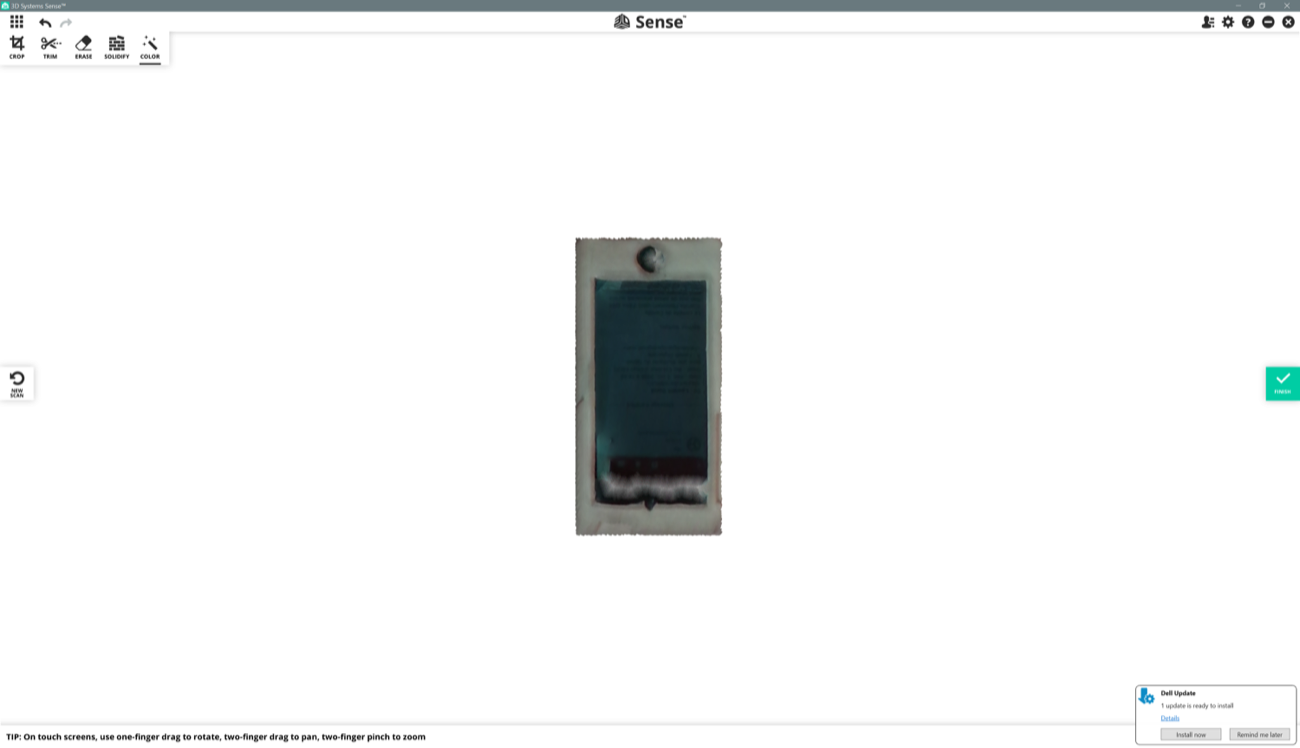
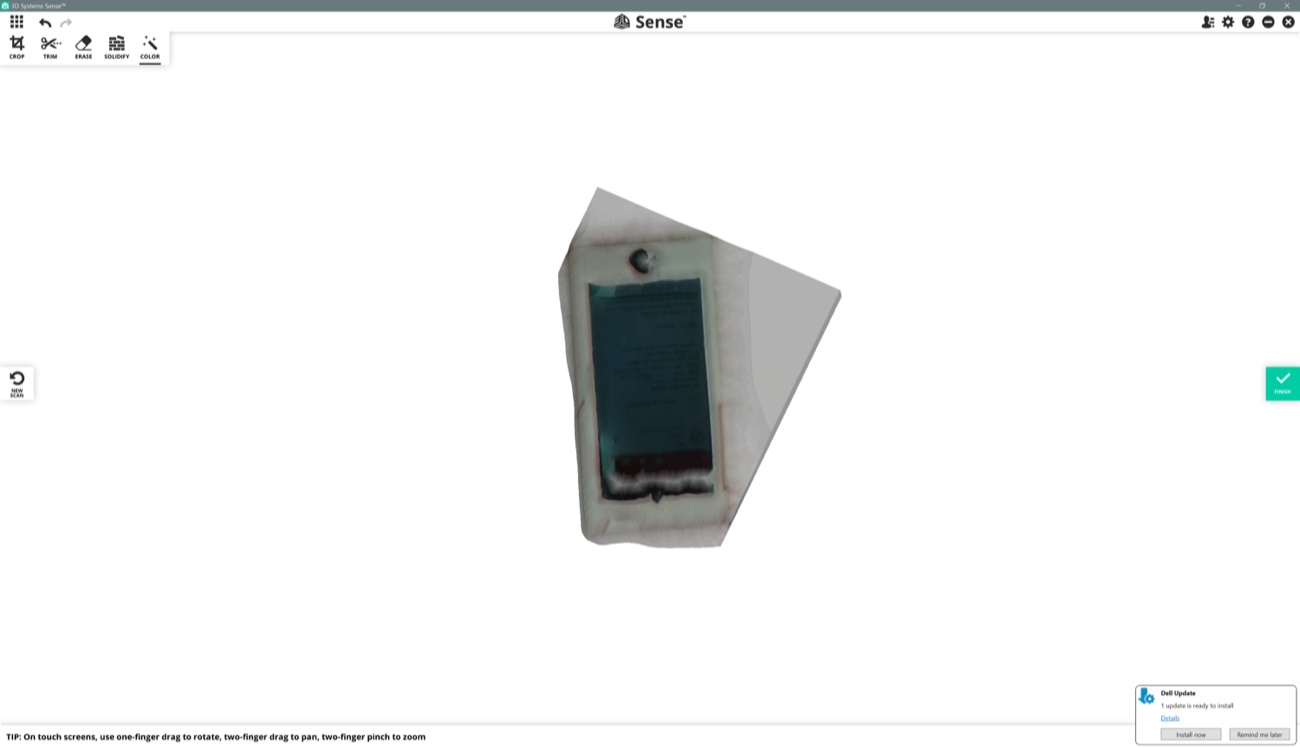
Once you closed the Welcome page your 3D Sense scanner is already sensing surfaces. You click the green "scan" button on the left side of the interface to start the scanning process. As you can see on the picture below, it tells you when tracking of the object you are targeting is lost with a dialogue box and showing the points in red.
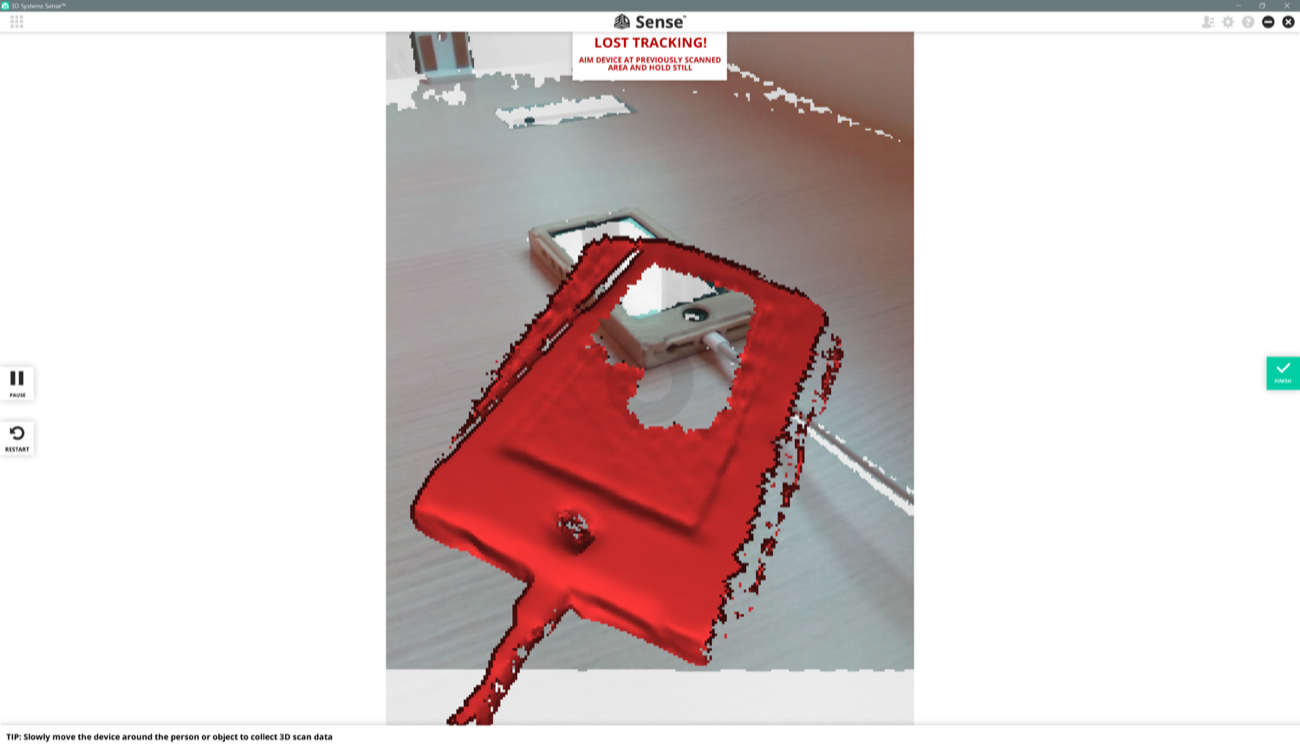
To stop the scanning process you click on the green button on the right side of the page that says "finish". Note that you can also pause the scanning process with one the white and black buttons on the left side of the window. Stopping this process gives the object you were scanning a material aspect. What you see is my phone inside its case.
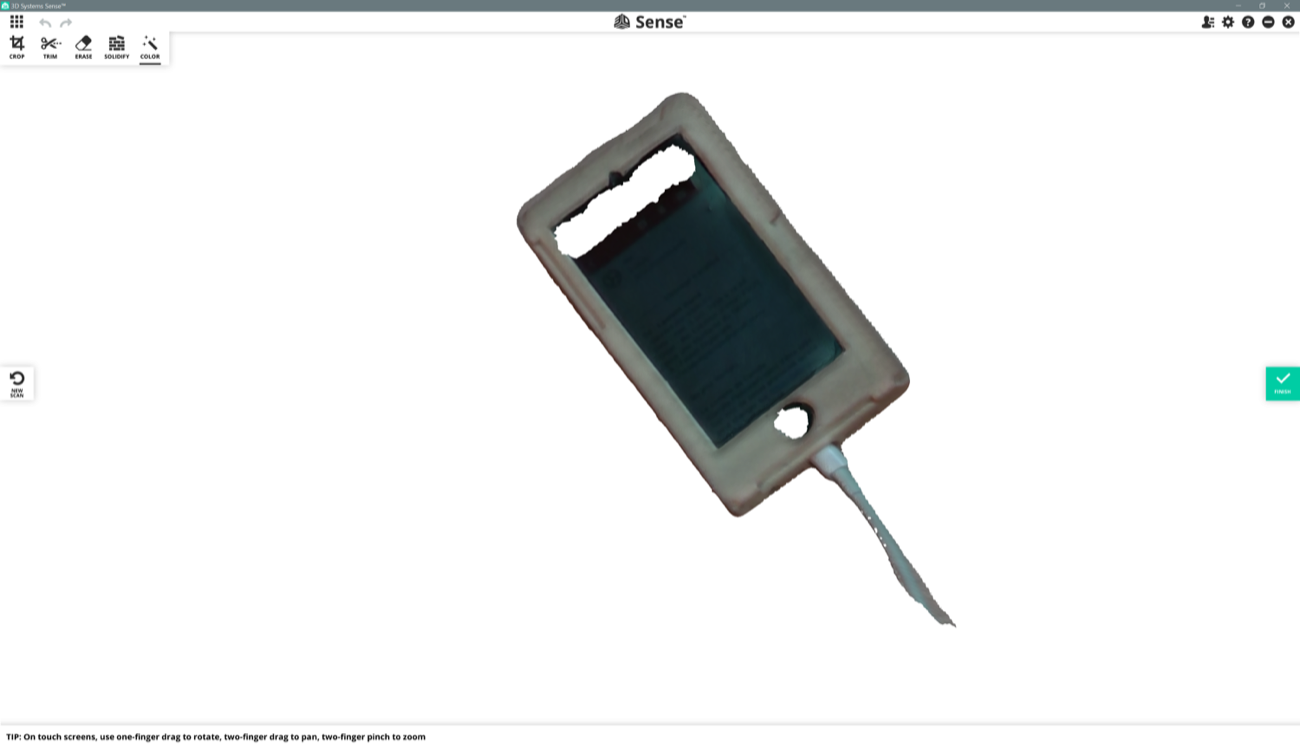
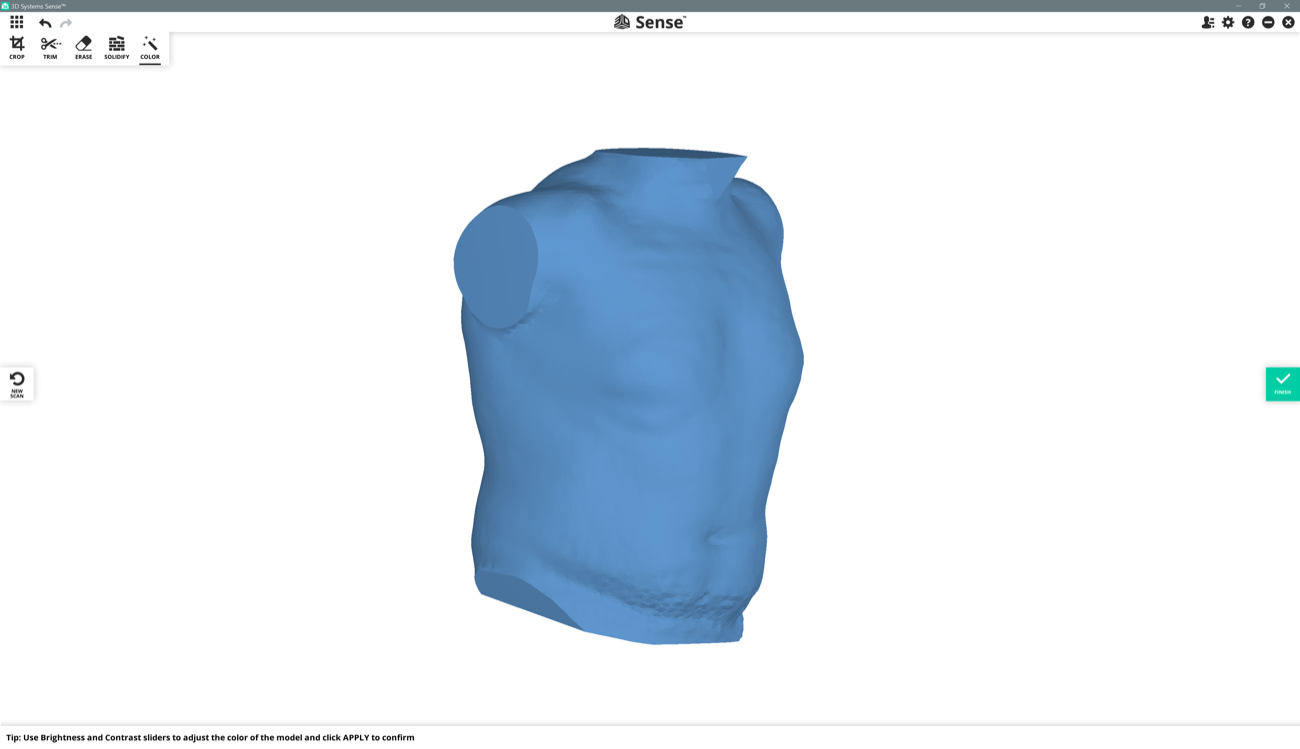
After pushing the upper-left button "Solidify", your objects goes from unconnected surfaces to a, say, solid block of points.
a | a
- | -
|
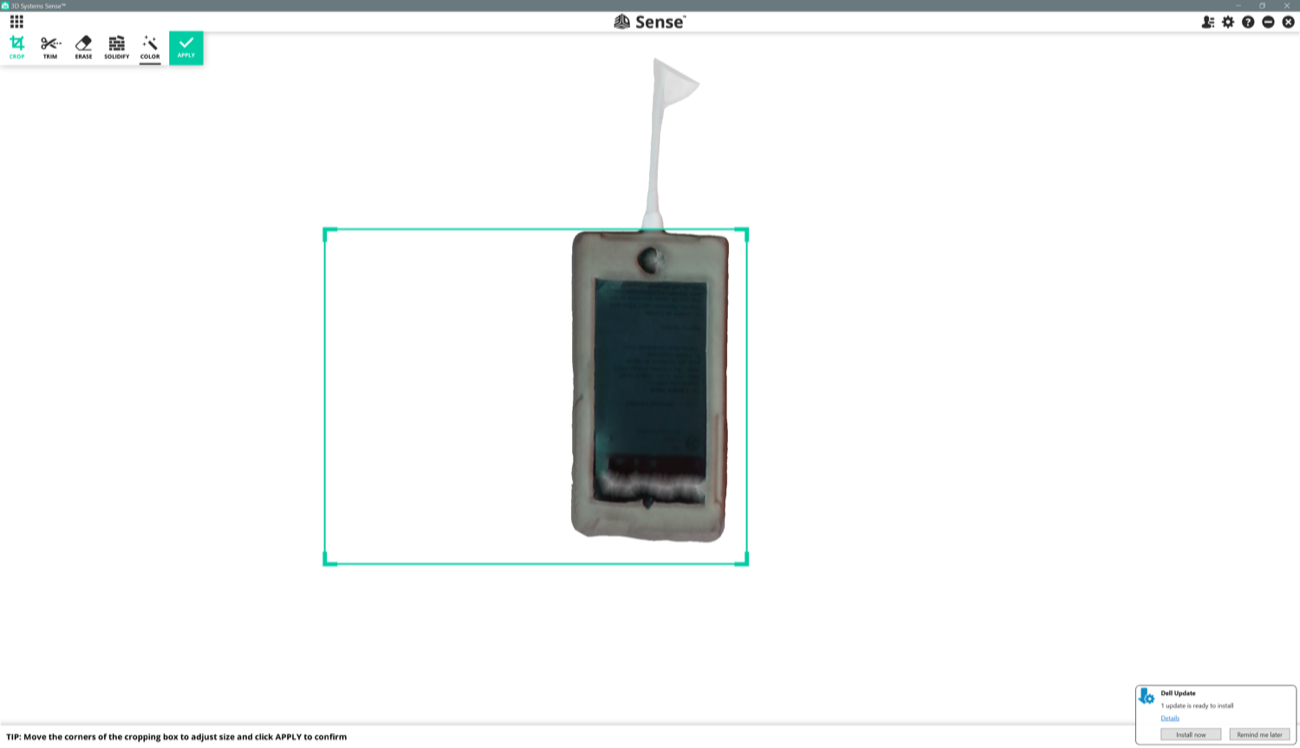
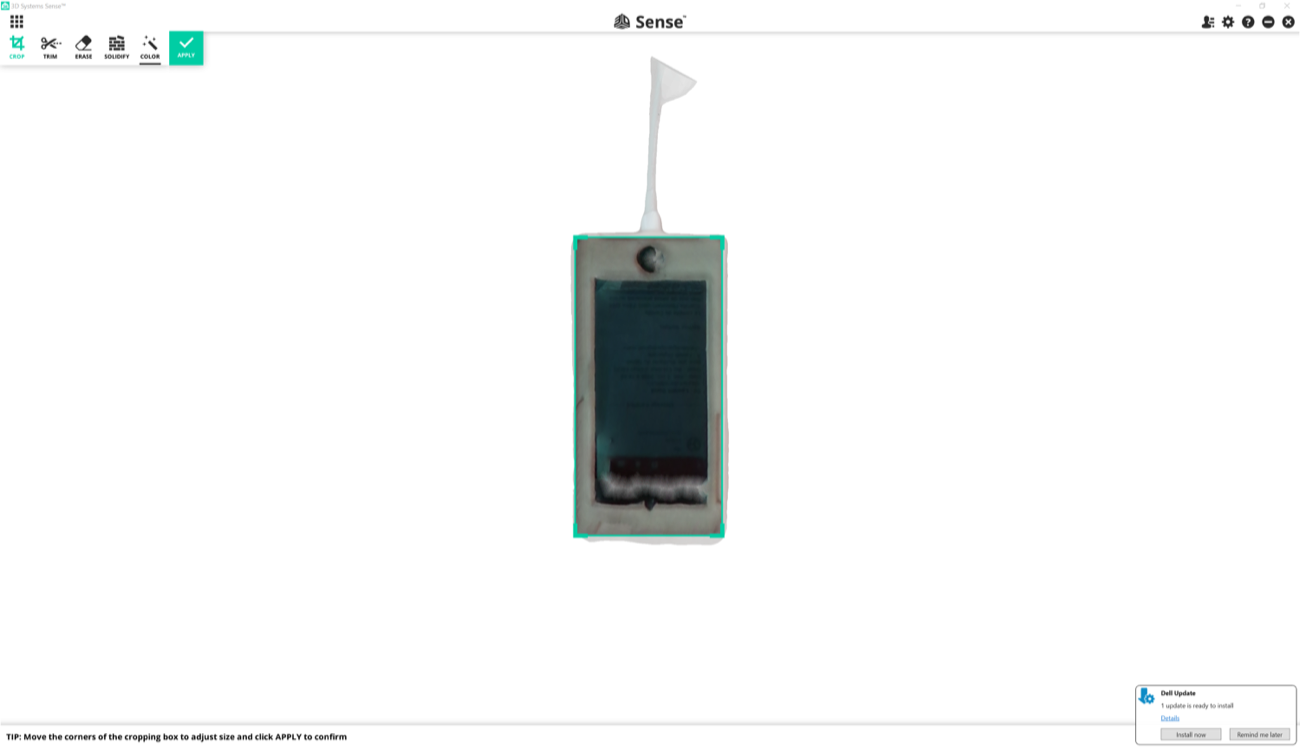
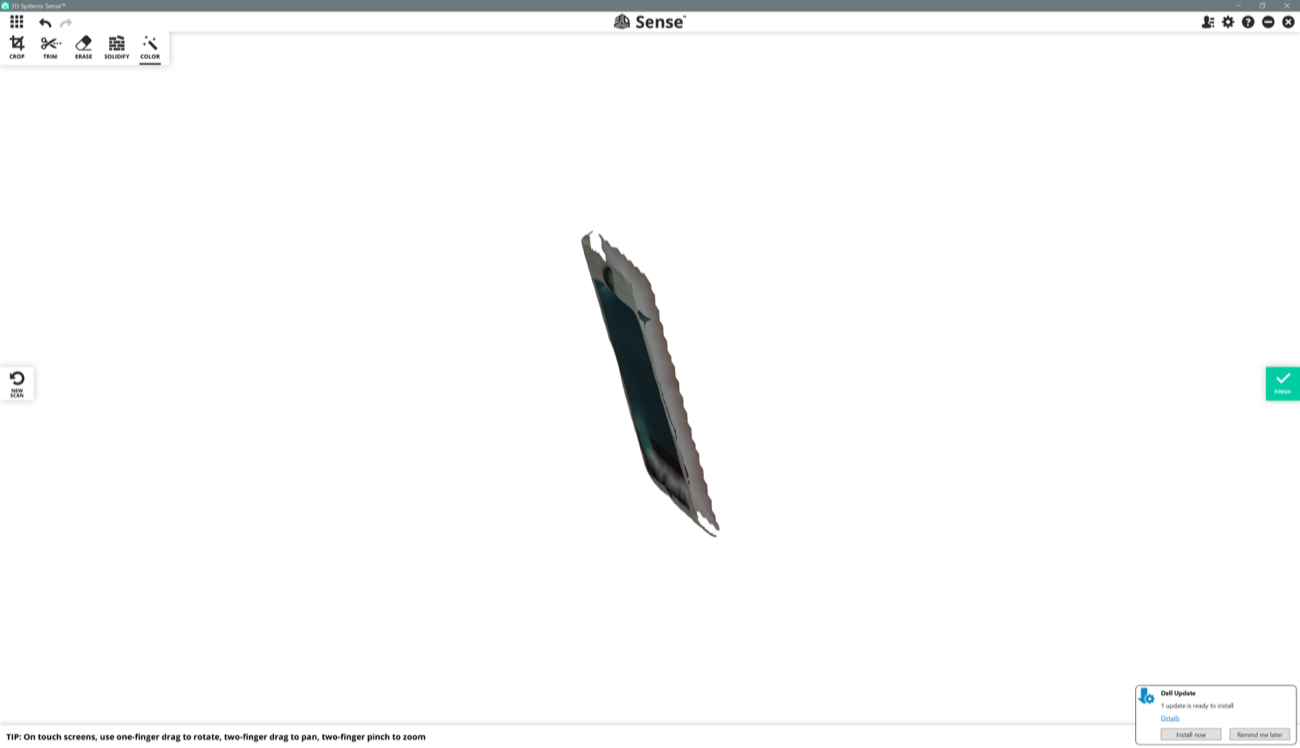
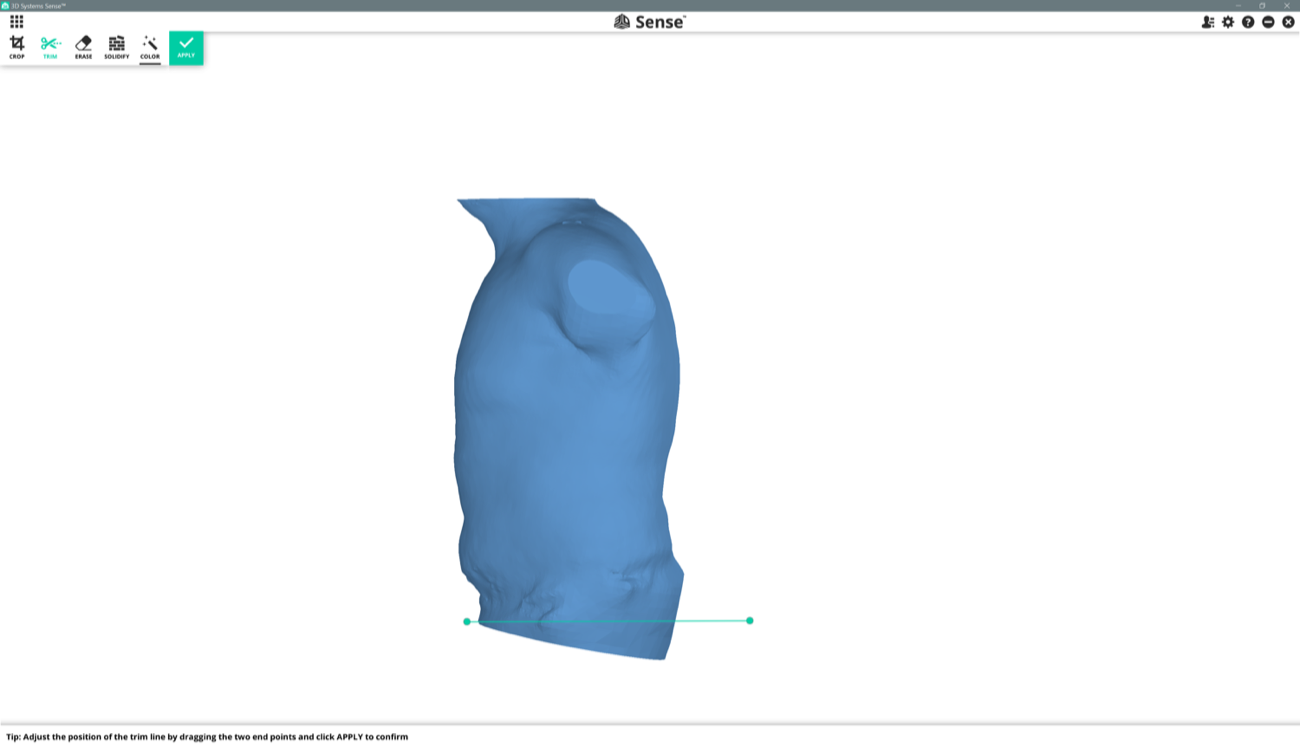
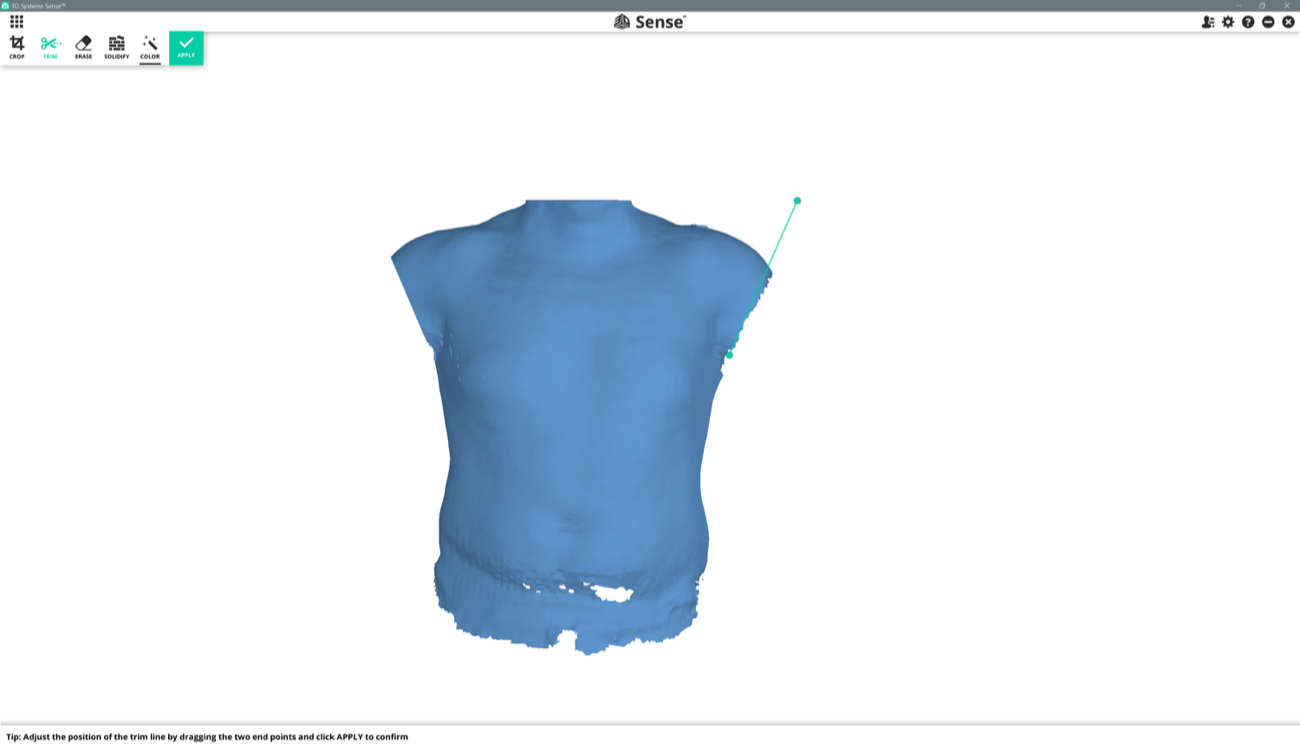
You can use the "crop" button on the upper-left to remove parts of the scan you don't want to keep. When you click on this button, a green rectangle appears. You grab the corners of this rectangle to change the size of it. When you have isolated the part you want to keep inside the green rectangle, you click the top-left green button that says "apply".
a | a
- | -
|
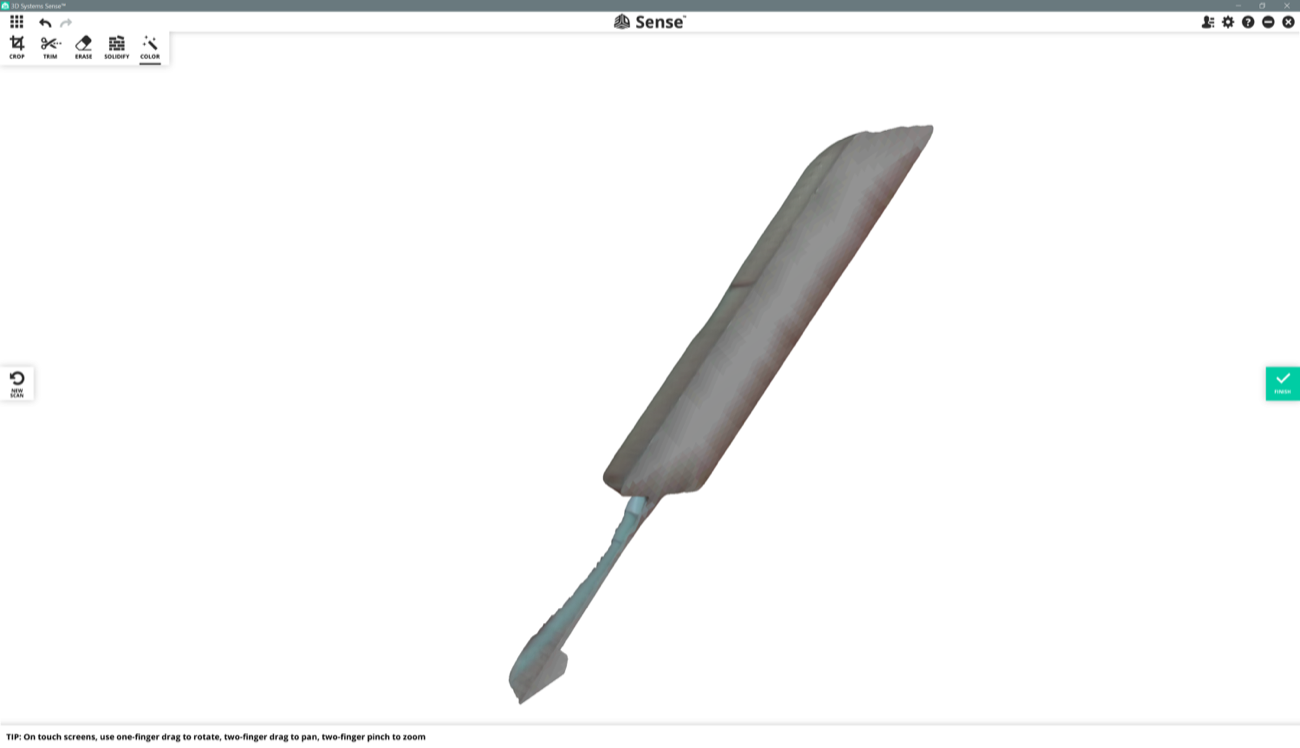
Below you can see that when I cropped the scan of the phone, I removed the walls as well.
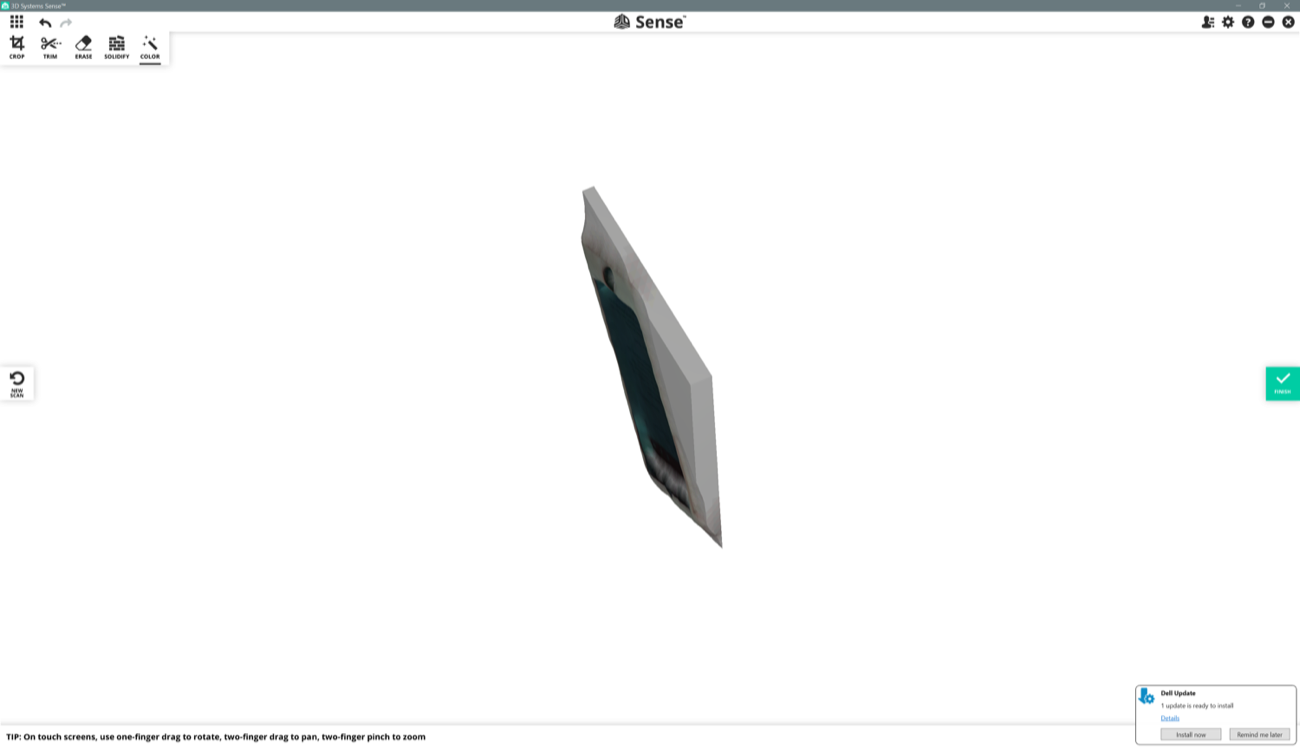
Then I click "Solidify" again to get new walls and obtained the strange result below.
a | a
- | -
|
The dialogue box below appeared after I pushed the parameters button on the upper-right of the window. There were a few parameters to tinker with. I switched to a mesh view.
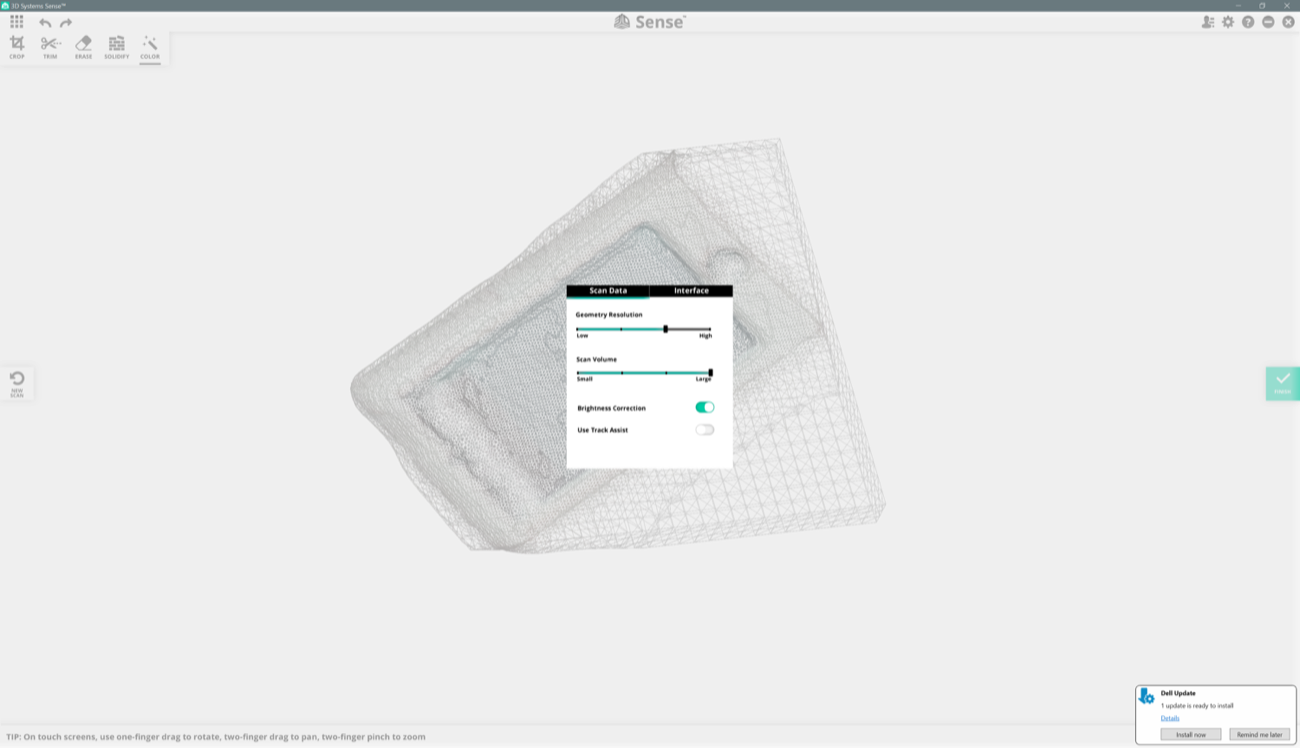
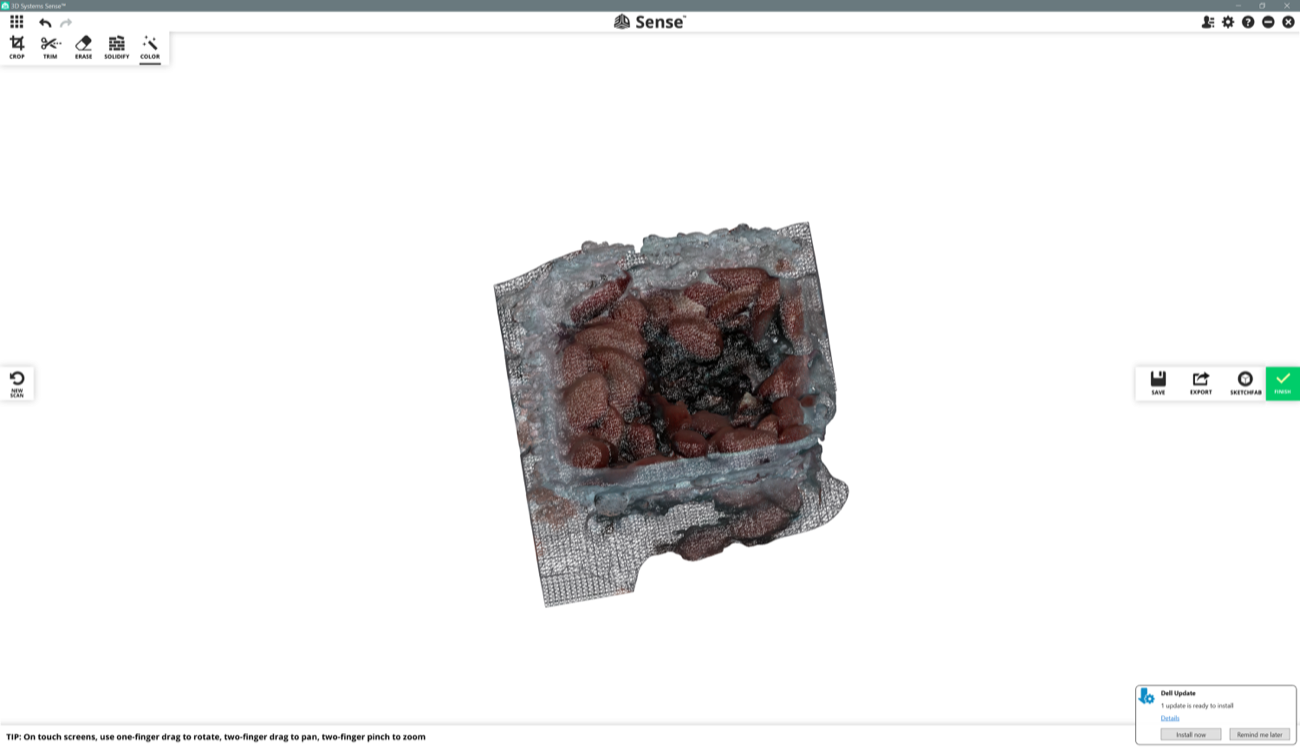
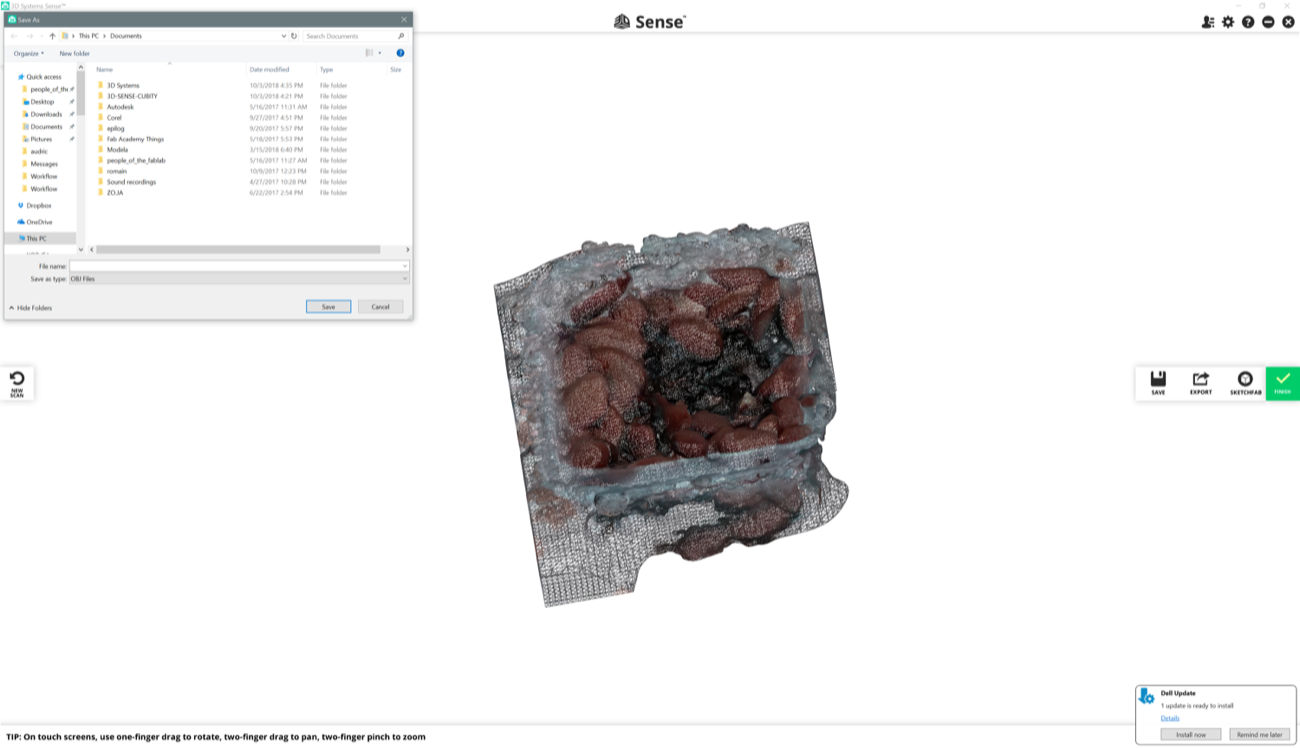
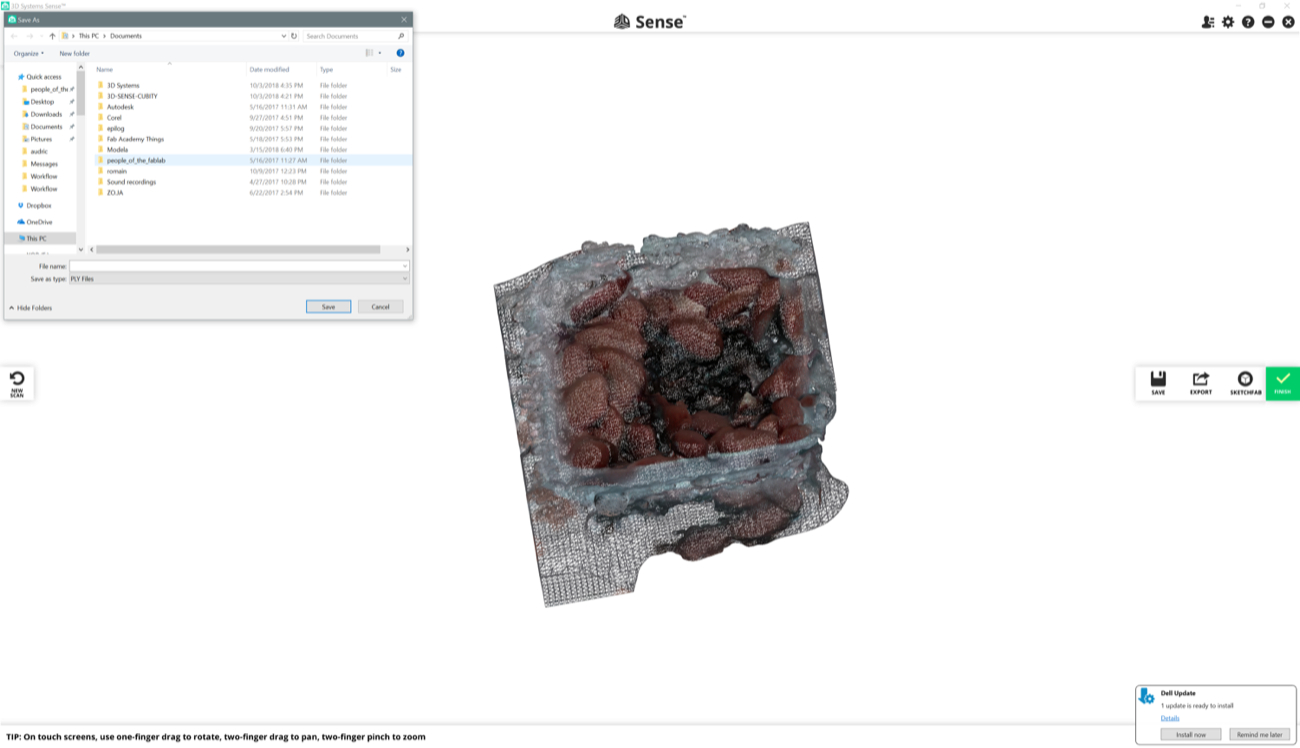
Here I tried to scan a plastic box with almonds and cranberries inside. It looked pretty bad. I was in a corner of the room with poor light. When you want to export your scan, you have 4 options: .obj, .stl, .ply, and .vrml extensions.
a | a
- | -
|
a | a
- | -

|
You can also share your scan directly on Sketchfab apparently.
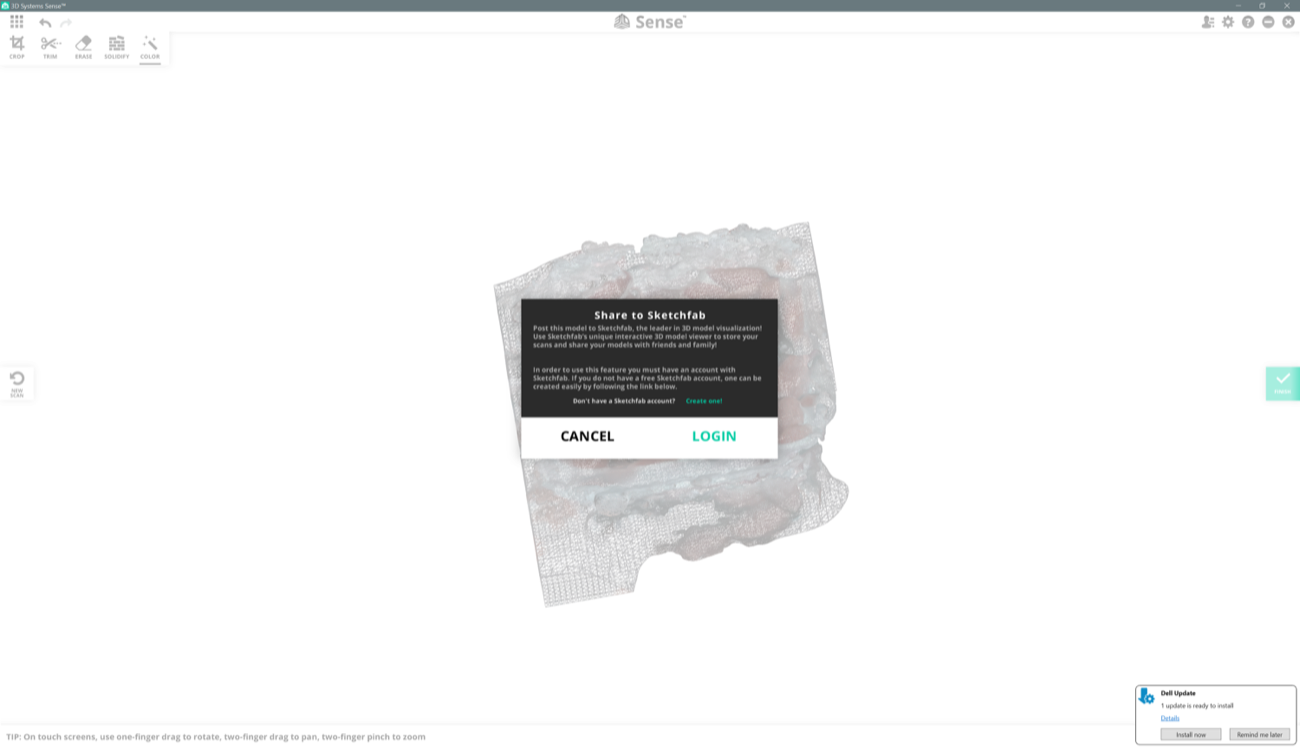
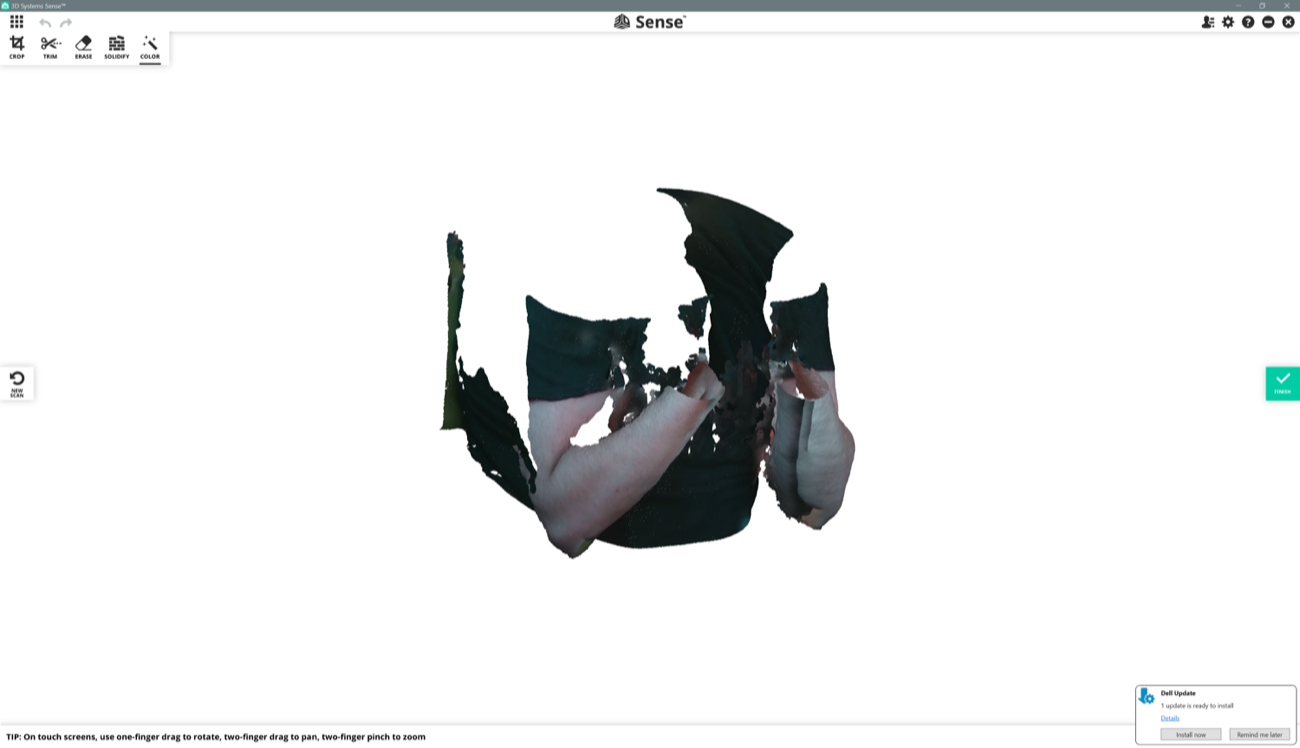
Here I tried to scan myself, seating on a chair that rotates, but again, the light was poor and the results look like some Francis Bacon paintings. And even more like a Francis Bacon painting after pushing the "solidify" button...
a | a
- | -
|
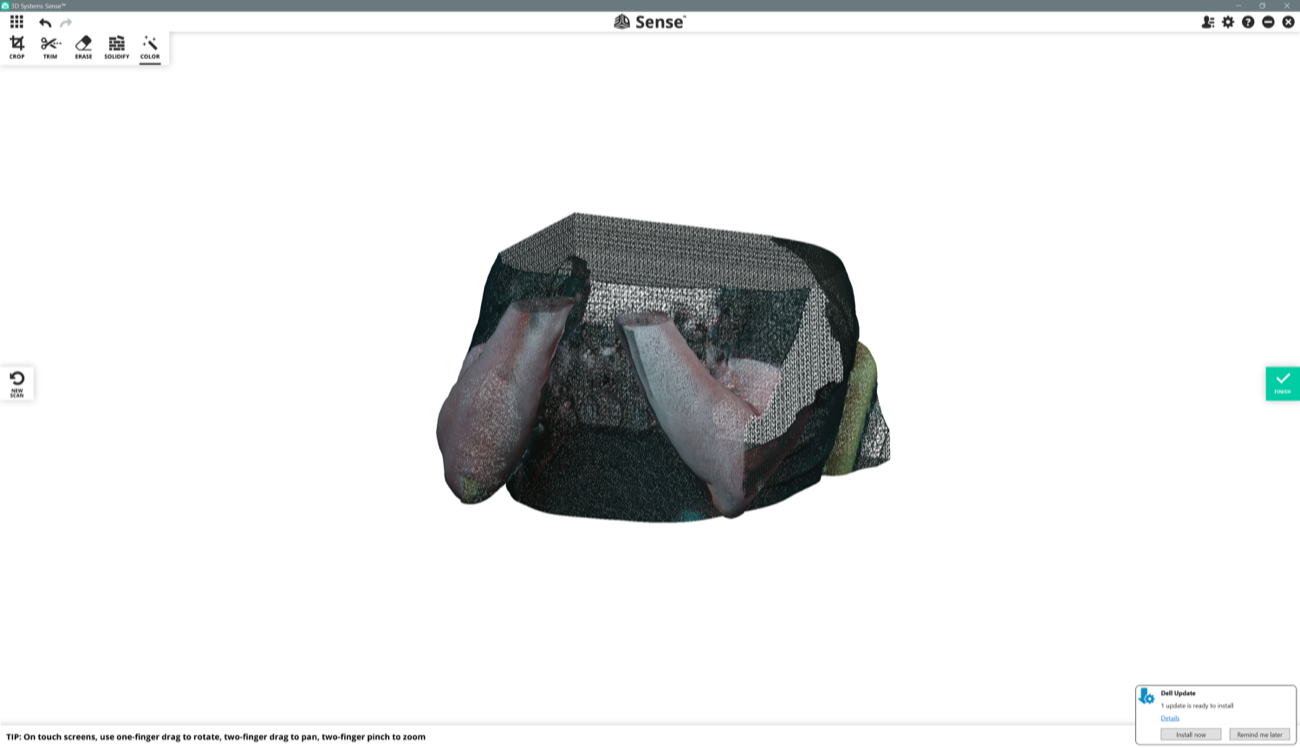
Finally, I started to scan Camille. I asked her to stay in an area where light was brighter, and it worked better because 3D scanning with Sense requires light on the surfaces you point at.
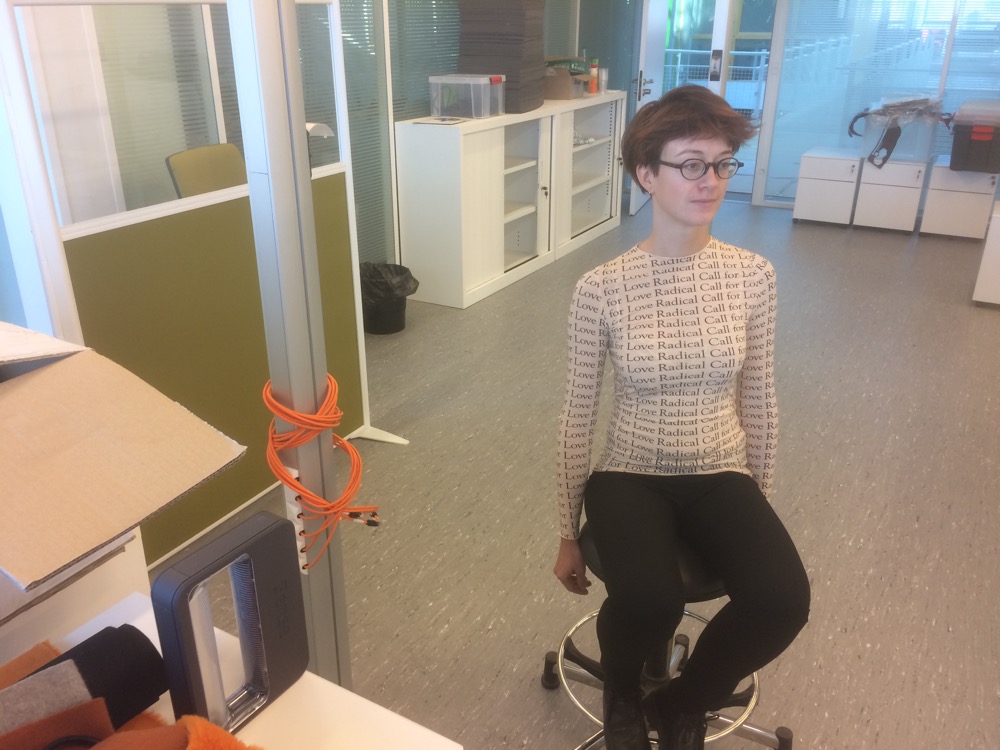
After a few more attempts, we found the right way to scan each others. Camille scanned me and it worked a lot better. 3D scanning is a lot funnier when you do it with someone else.
a | a
- | -
|
a | a
- | -
|
##### 6 | Digging deeper with 3D Sense 3D scanner and the Sense App (Windows only) |
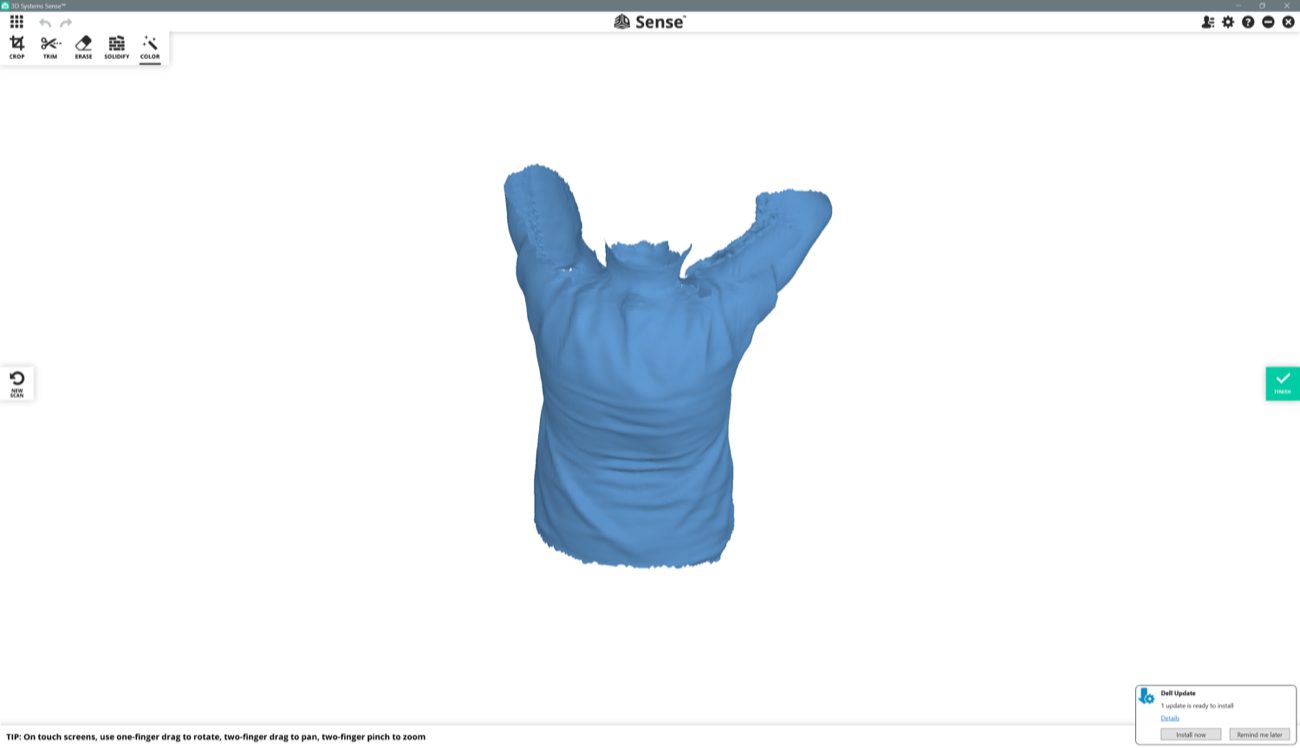
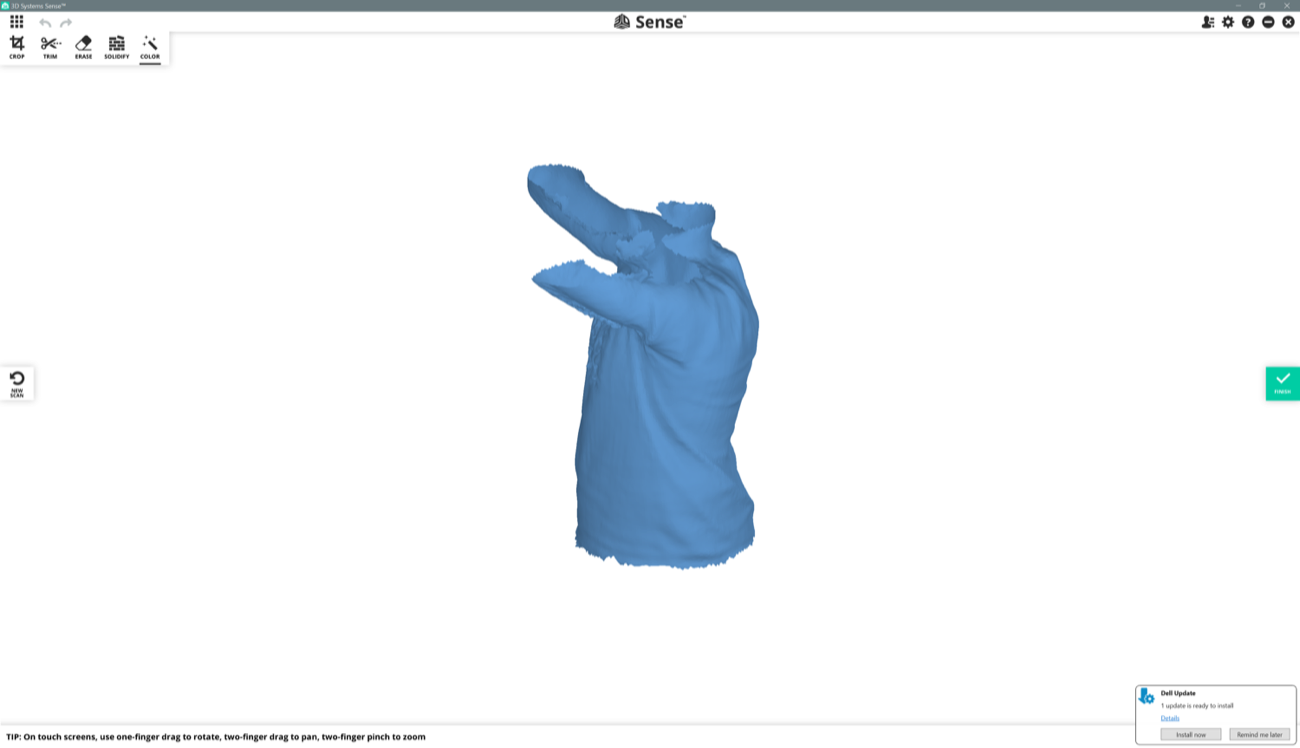
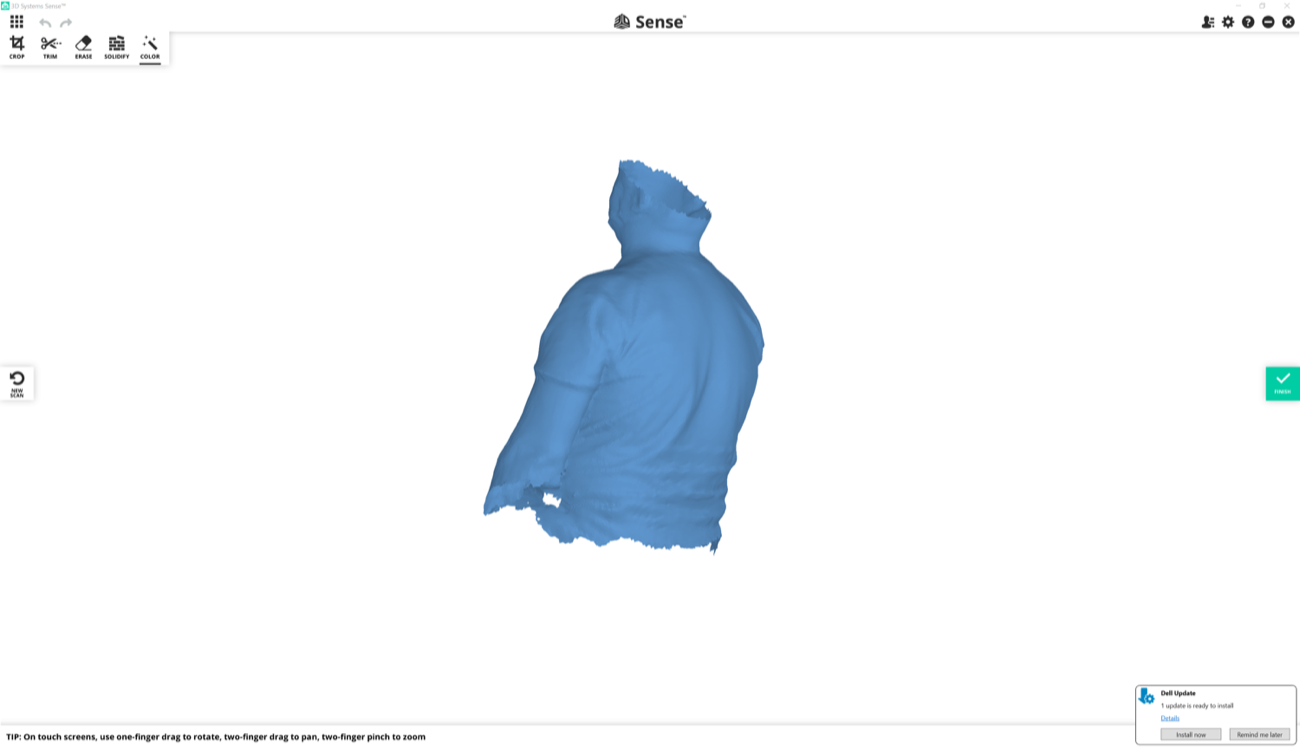
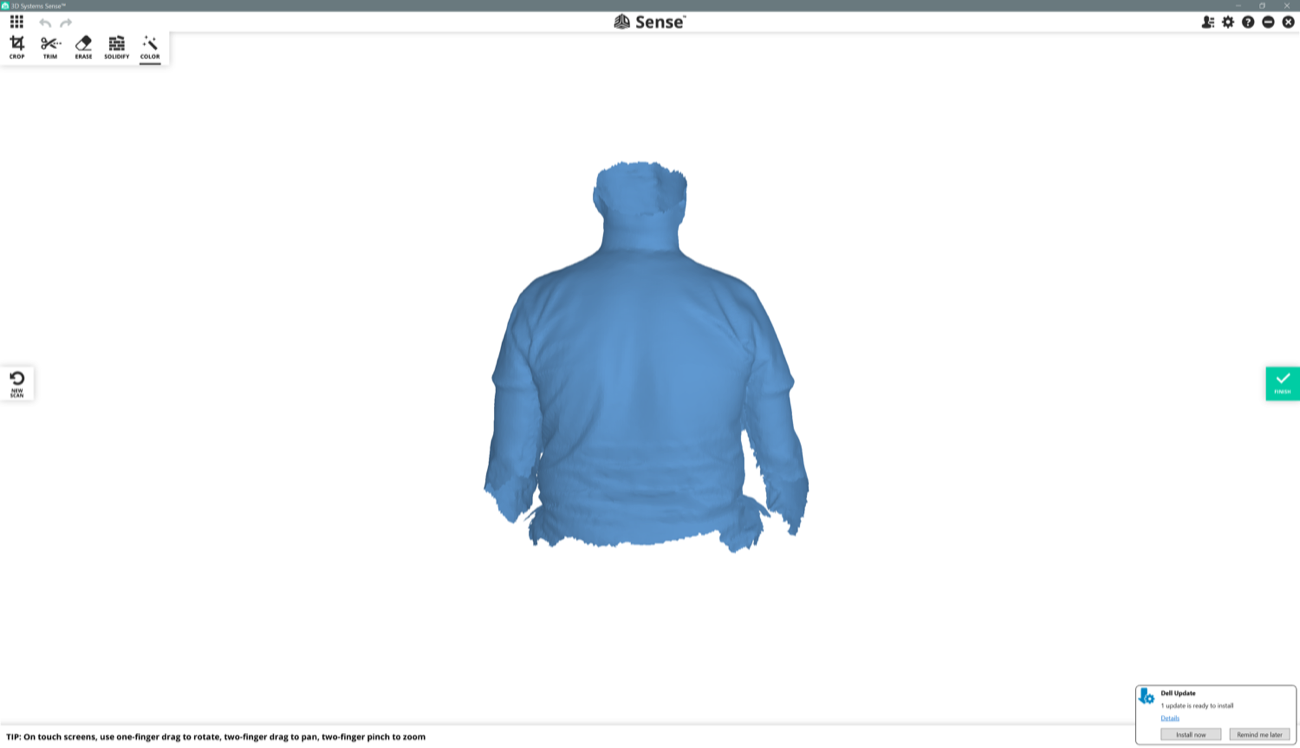
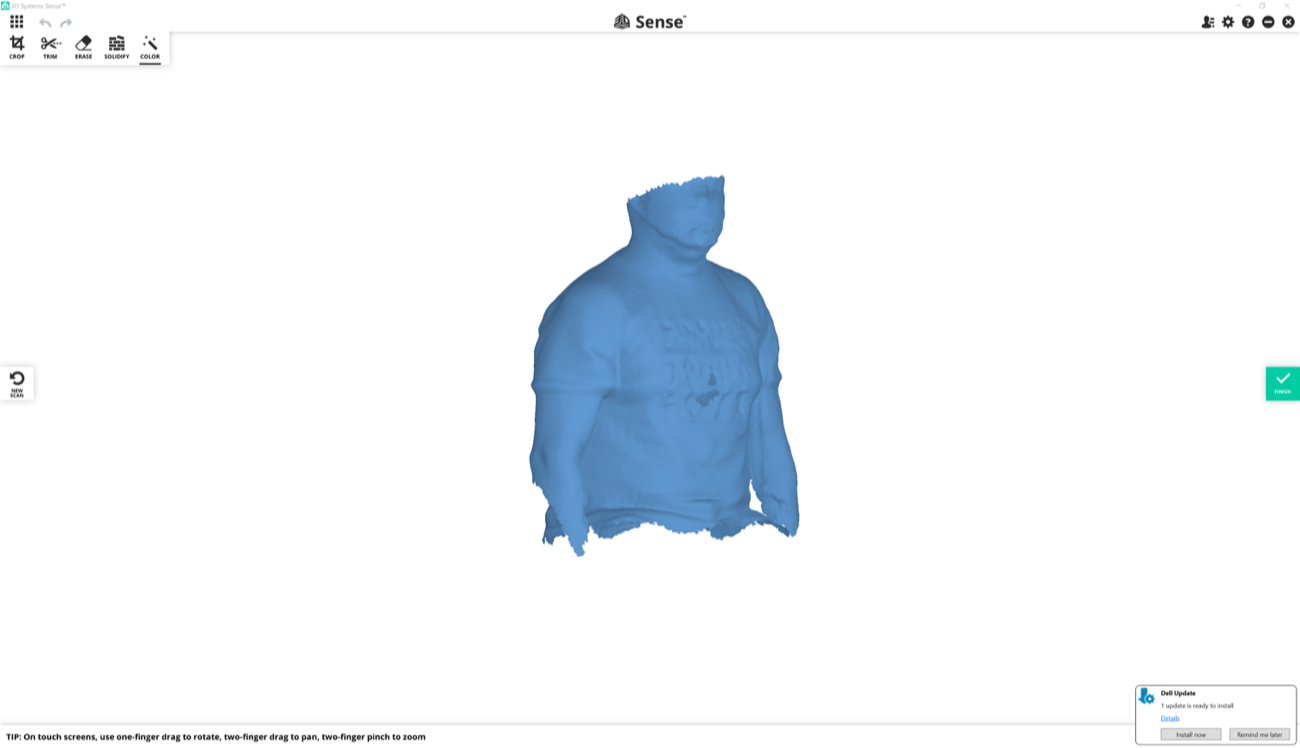
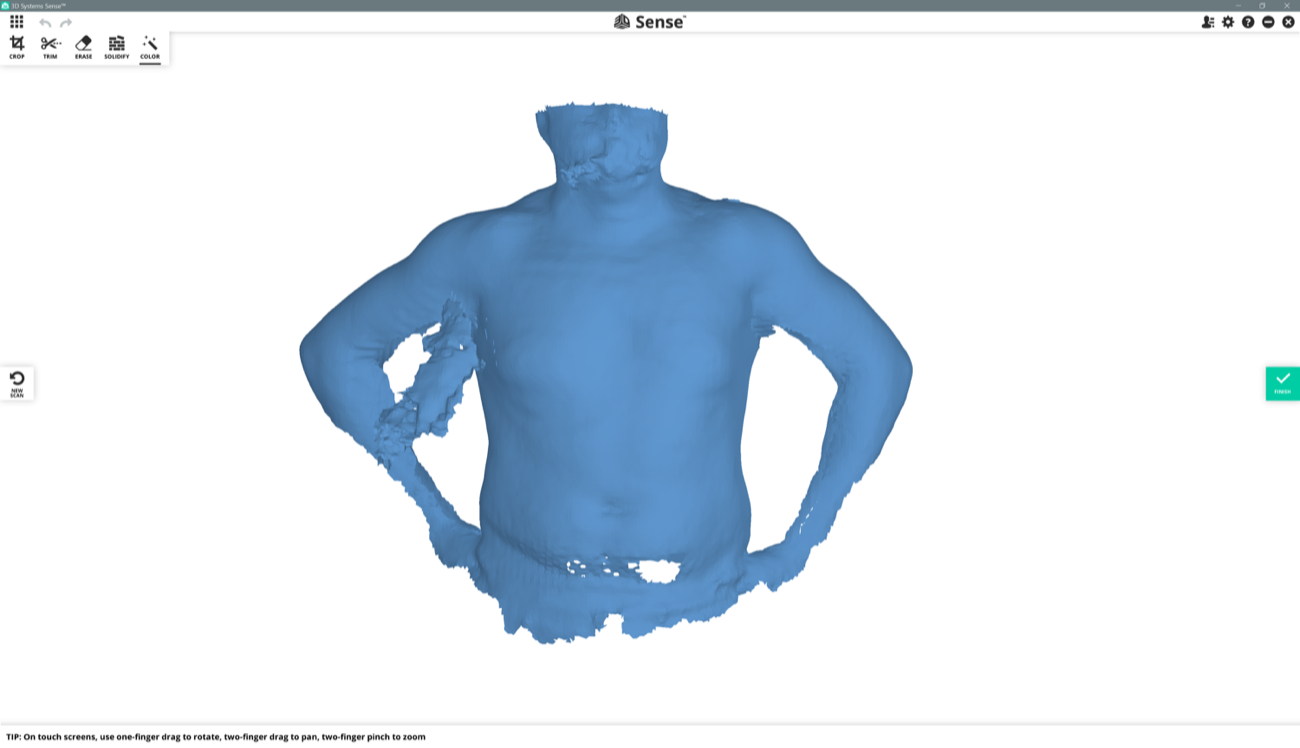
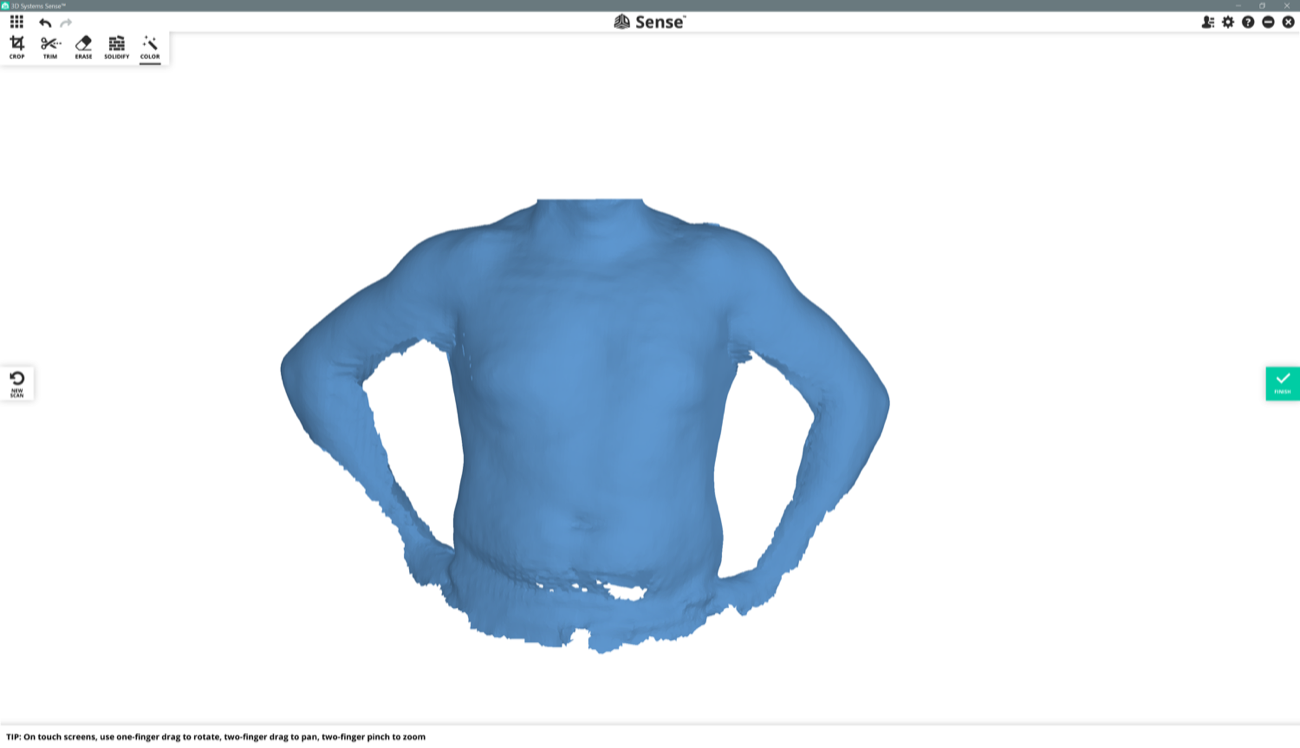
My first attemps with the 3D Sense were not good at all in terms of Output. There was no way I could fab a mannequin out of it. So I started it all again, alone, in my office, took of my shirt and I scanned myself again. The scanning process worked a lot better because I could master the light and I had a computer with a touch screen that allowed me to interact a lot faster with the Sense's app interface. Nevertheless, the Sense App crashed 3 times, and I lost my post-production work, and had to redo it again (under Windows 10). Here we go with the results.
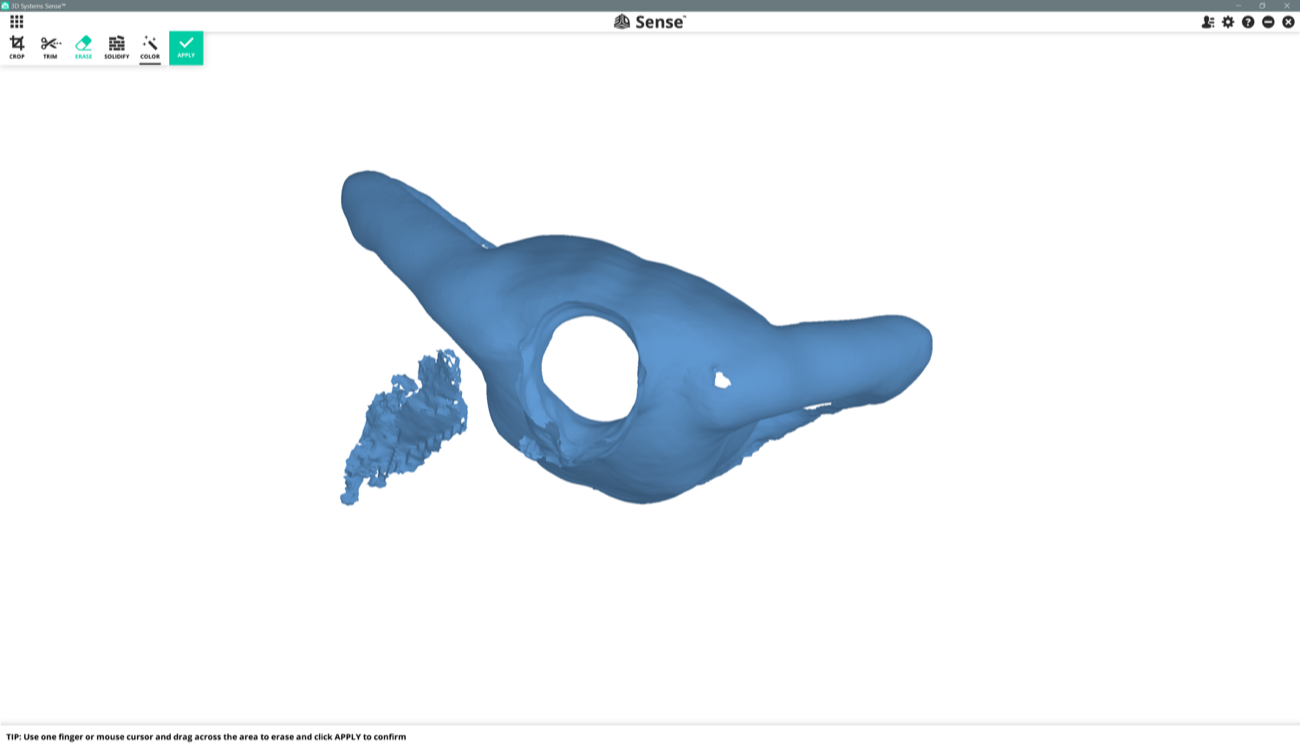
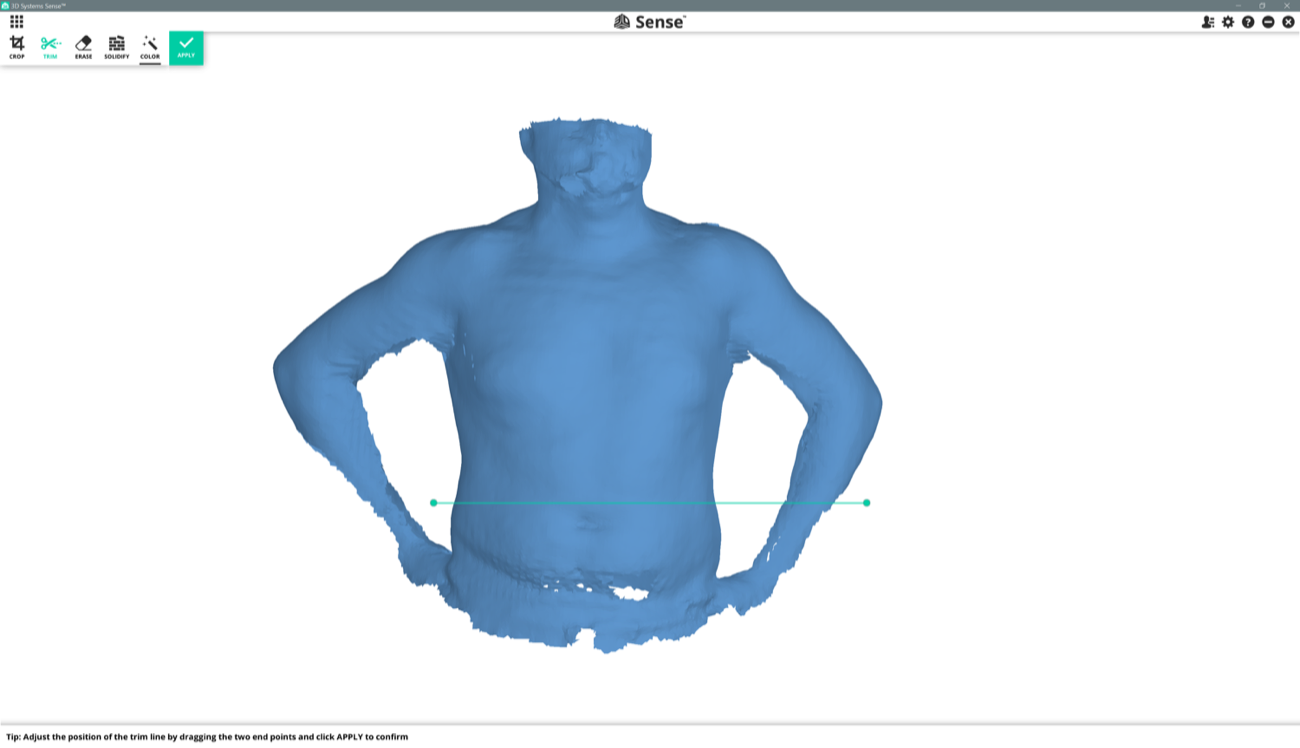
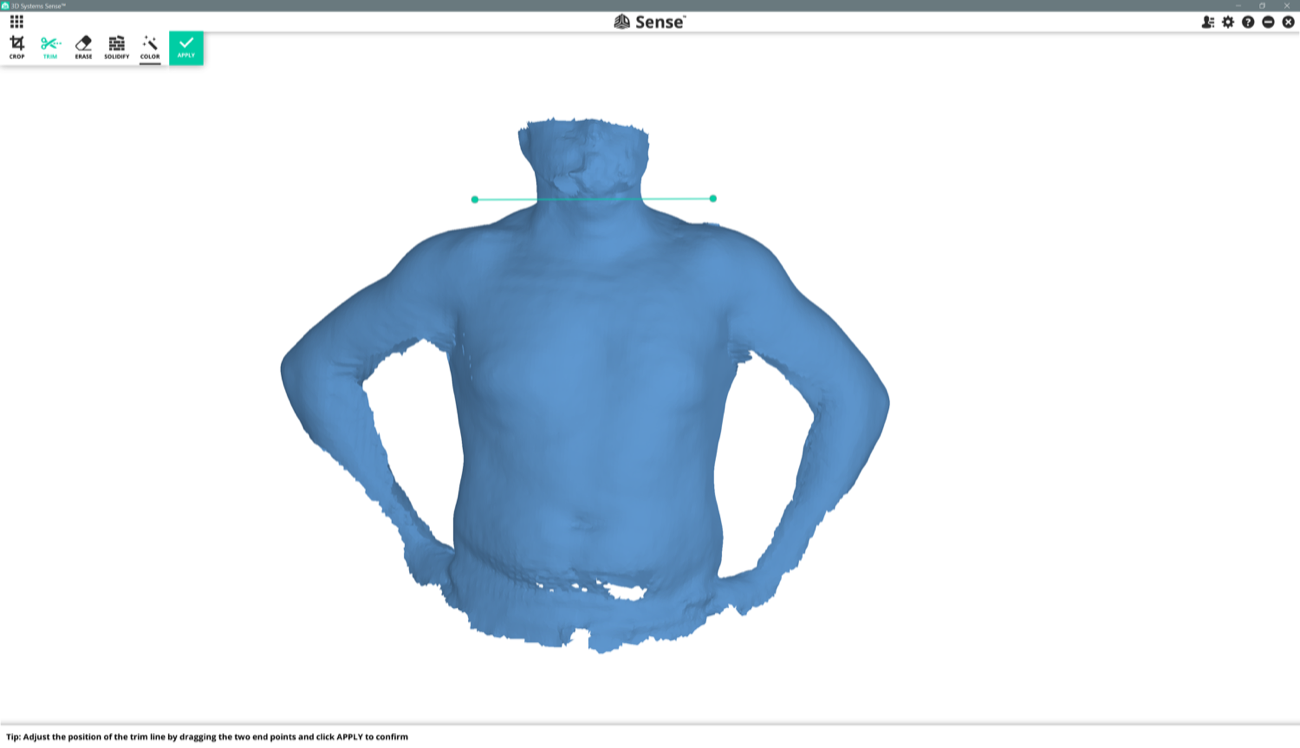
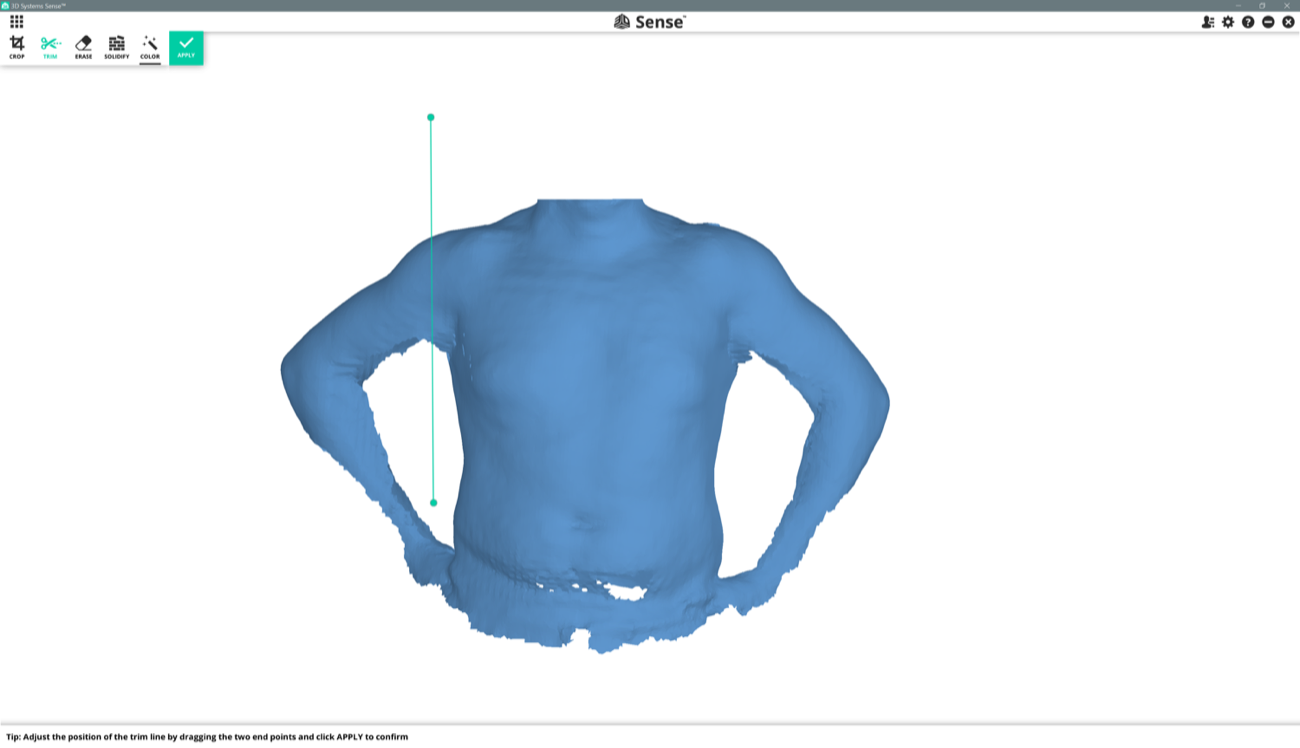
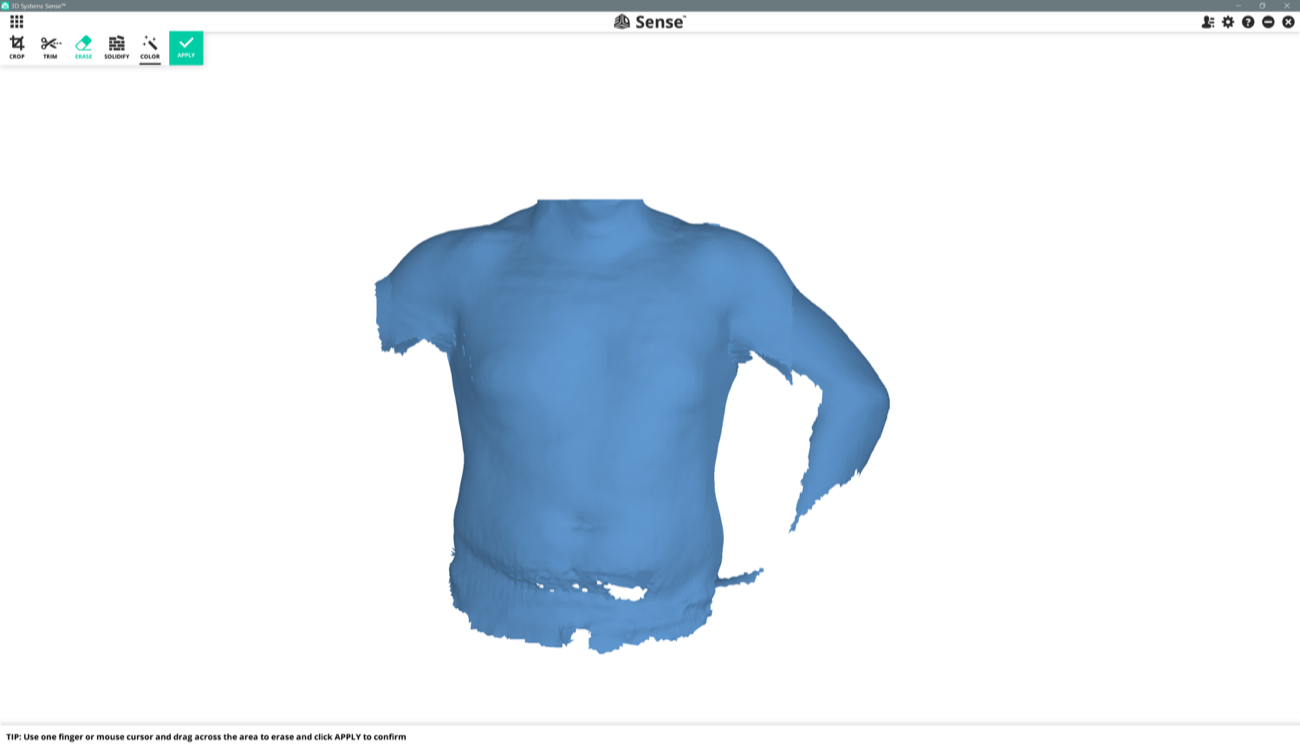
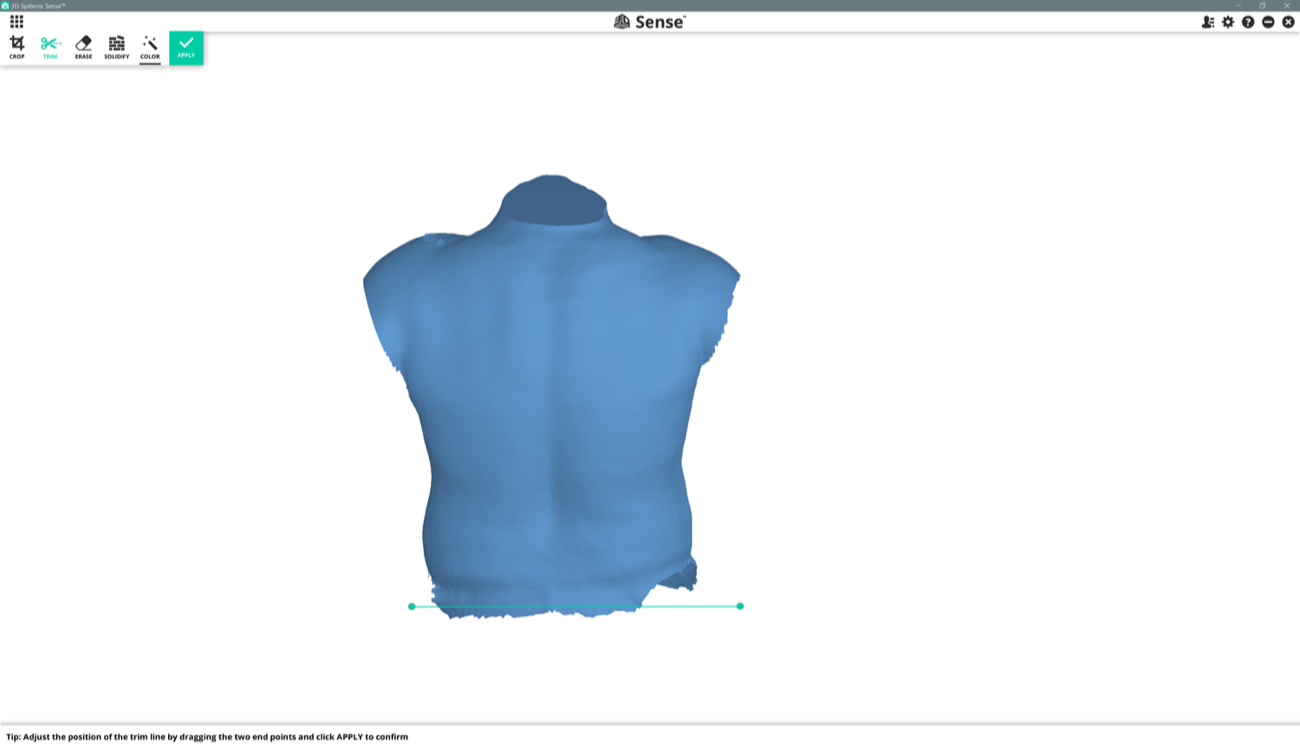
One good thing is that the 3D Sense app has embedded tools to trim, erase and solidify your scan.
Below is a file that comes automatically in the Sense folder when you scan something or yourself. It melt pictures and traces of the 3D scanning process.
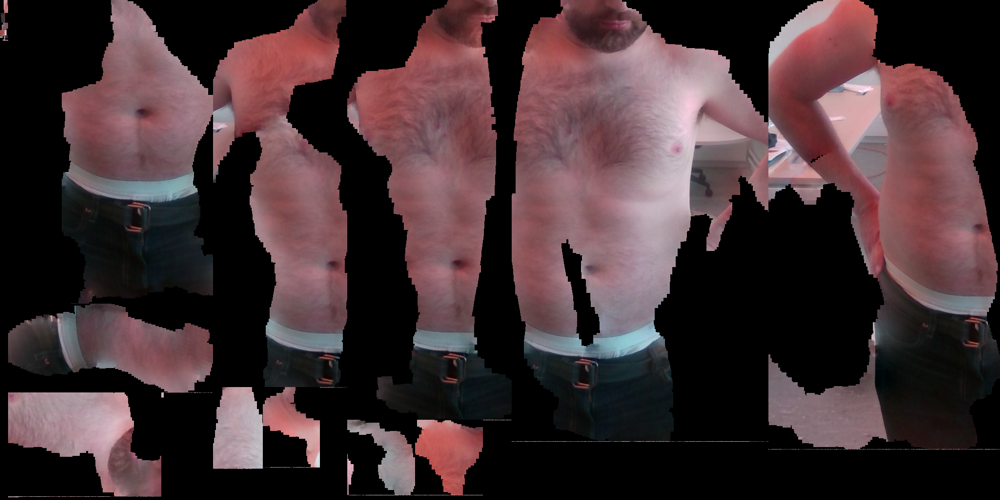
Below is a screenshot of the raw 3D scan of myself. A certain amount of operation is required to clean it.
a | a
- | -
|

b | b
- | -
|
c | c
- | -
|
d | d
- | -
|
e | e
- | -
|
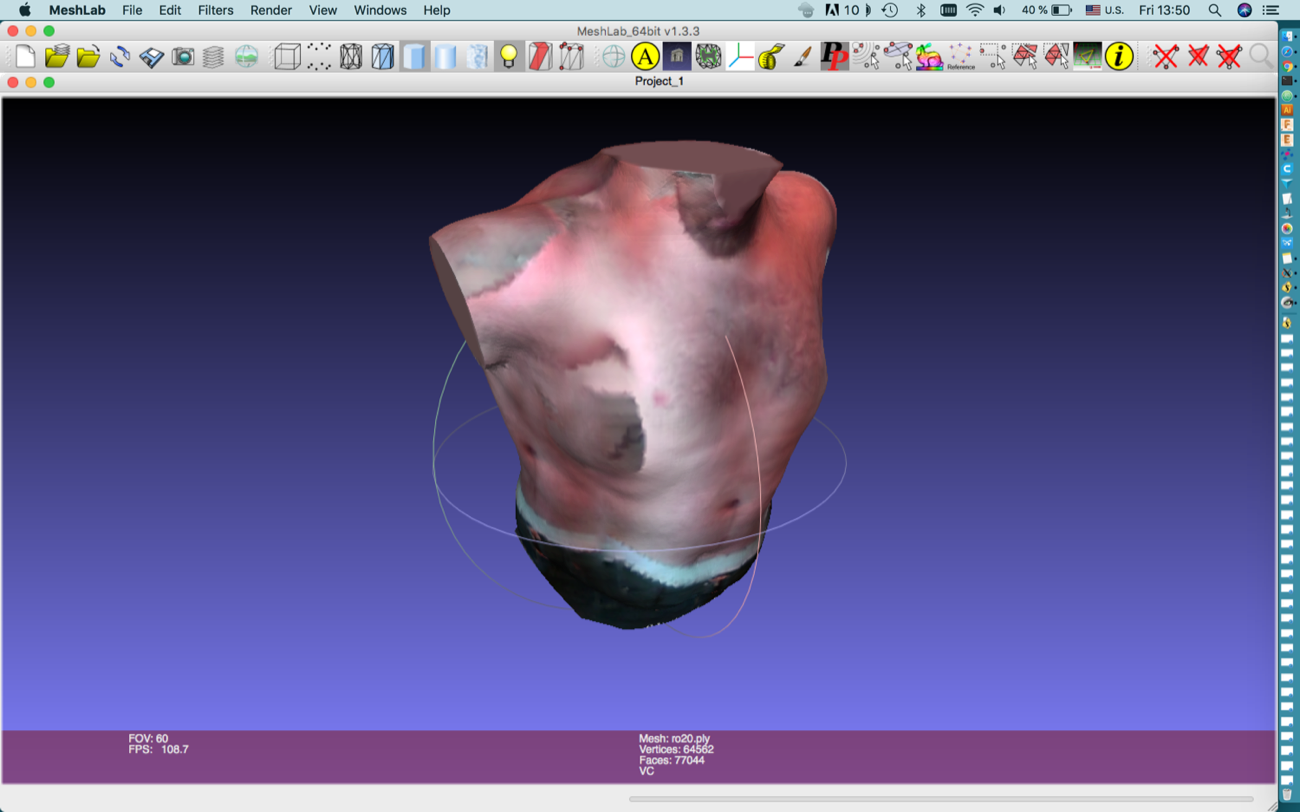
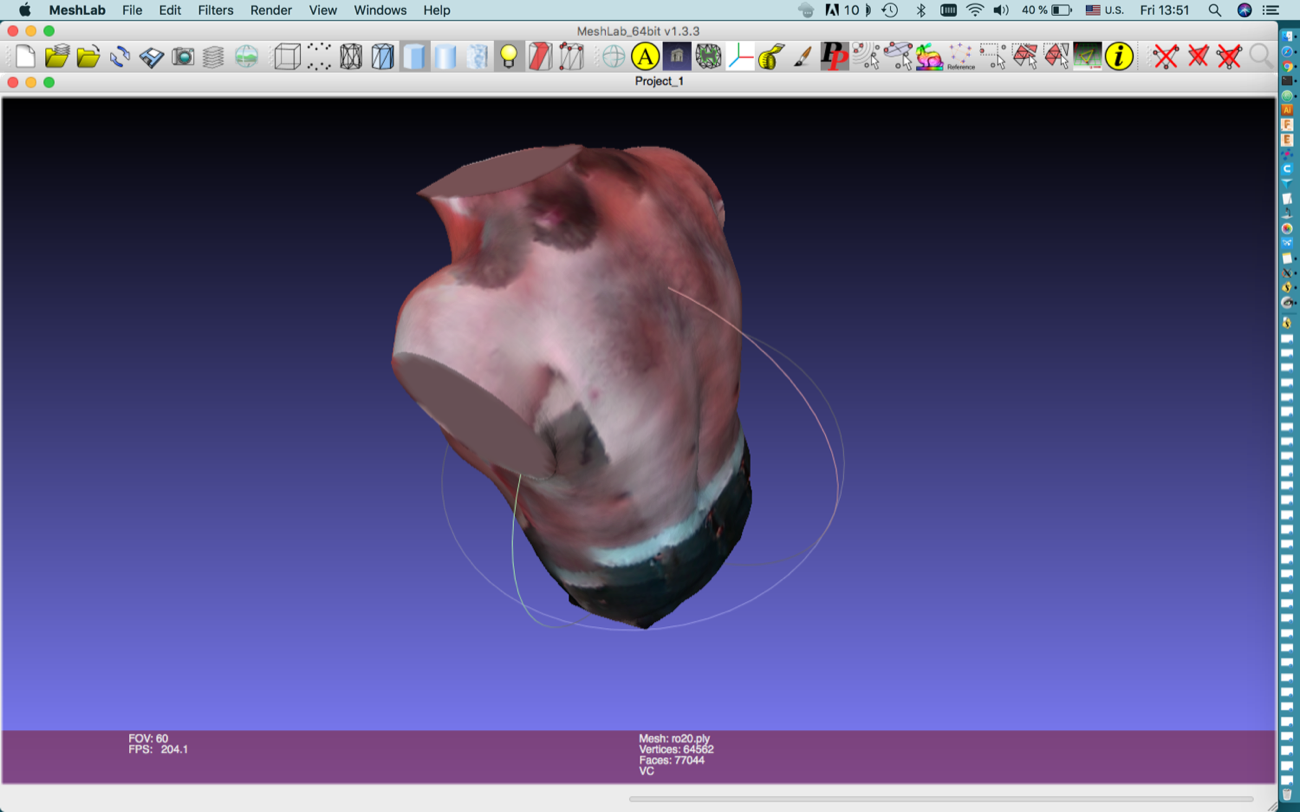
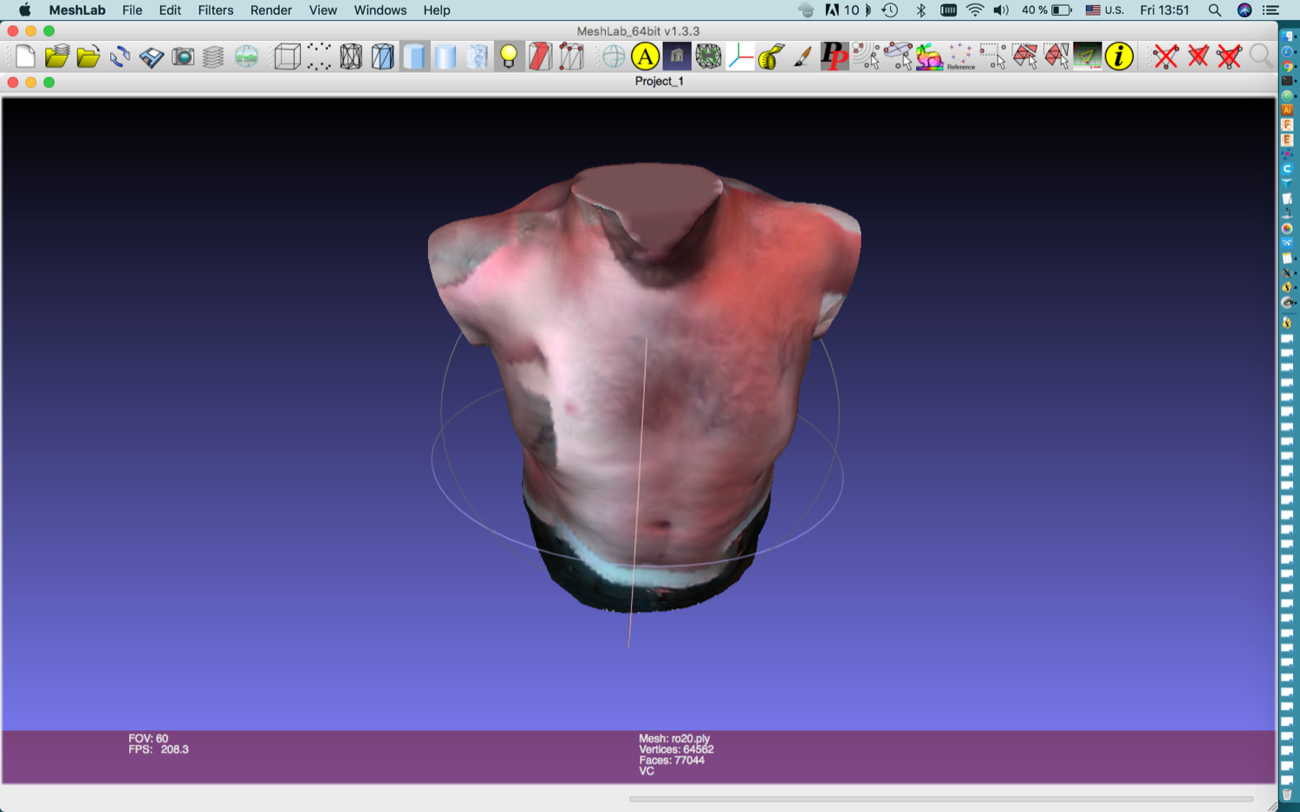
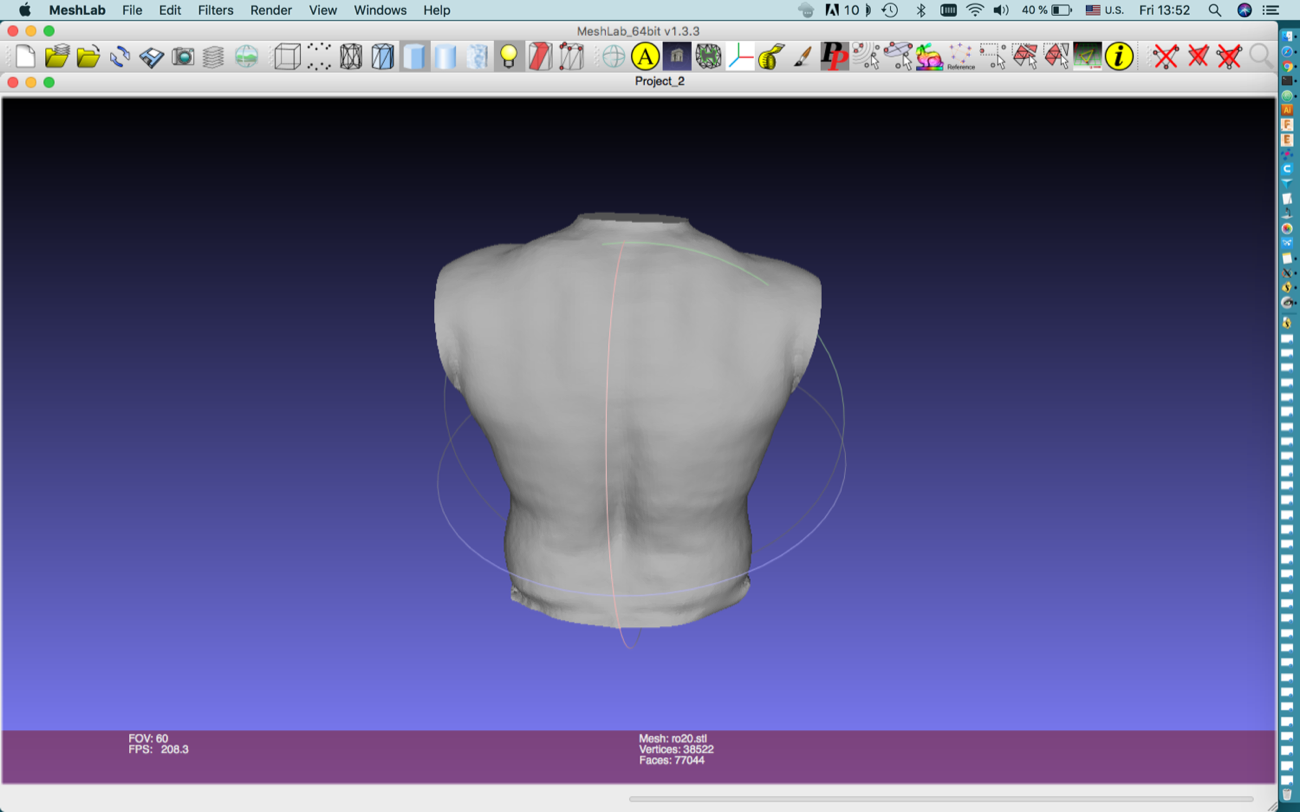
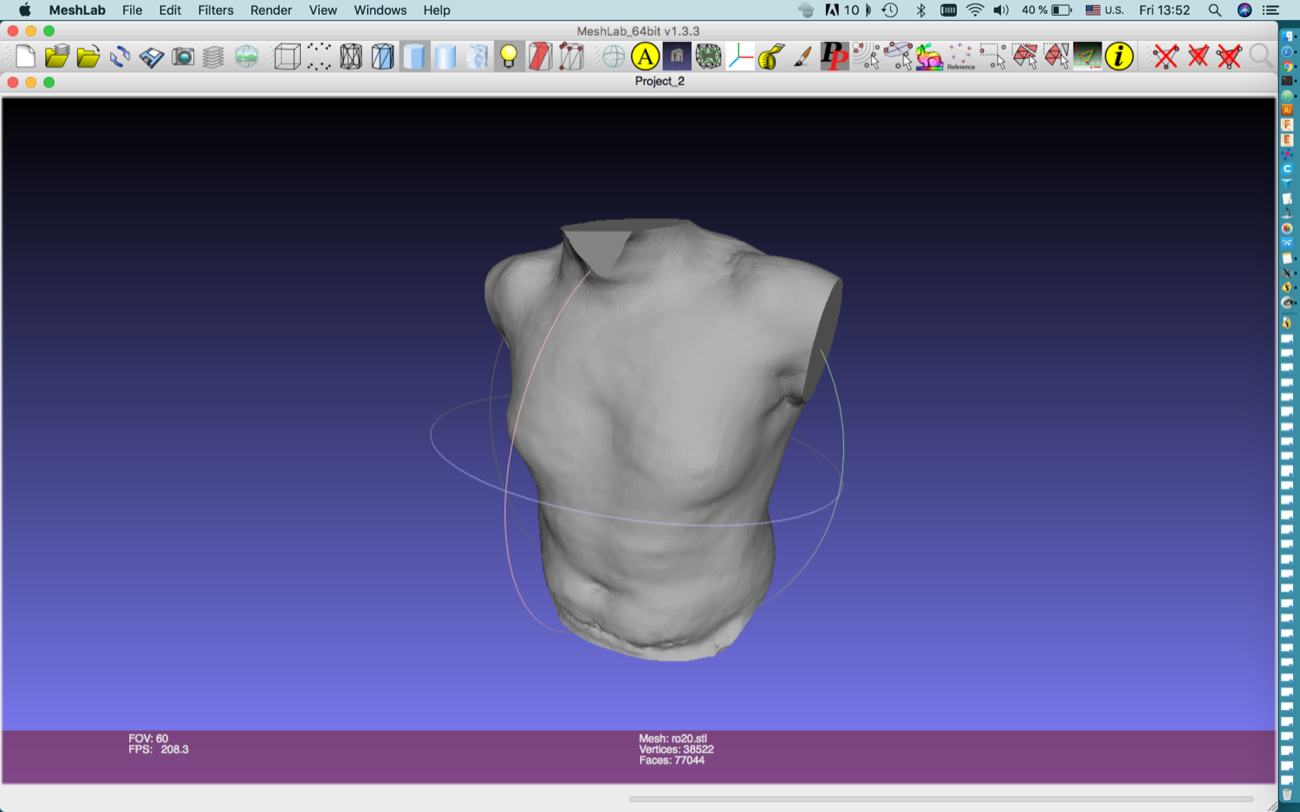
##### 7 | Using Meshlab to view .VRML and .STL files |
Meshlab is an excellent tool to view or modify a file that has 3 dimensions.
a | a
- | -
|
b | b
- | -
|
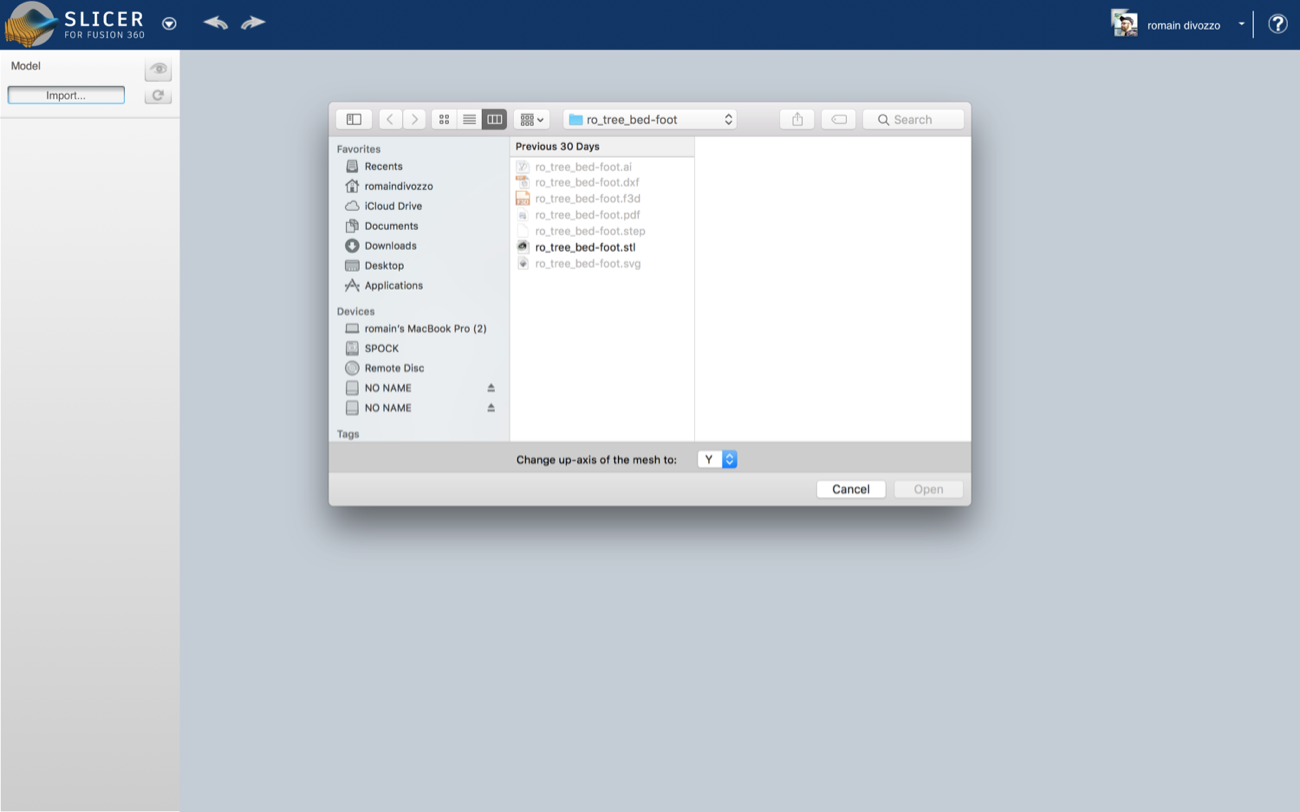
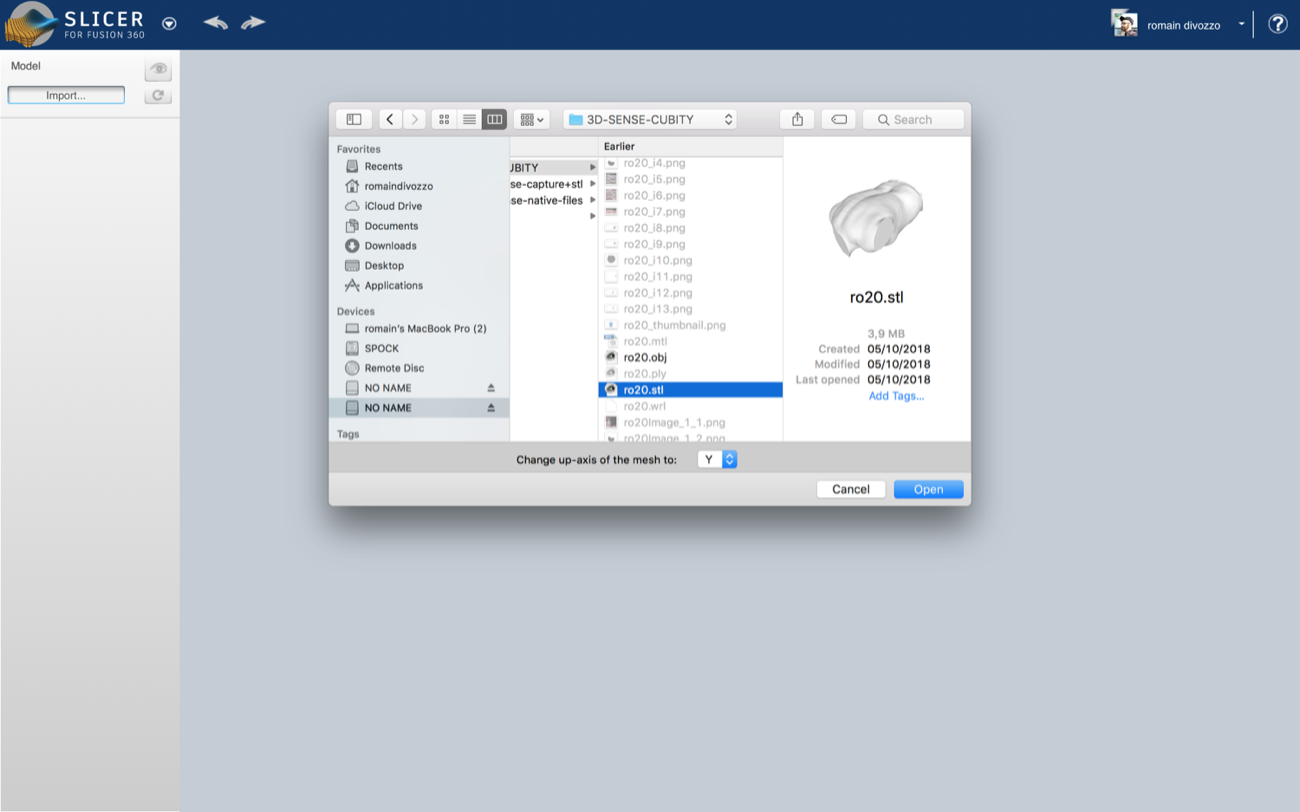
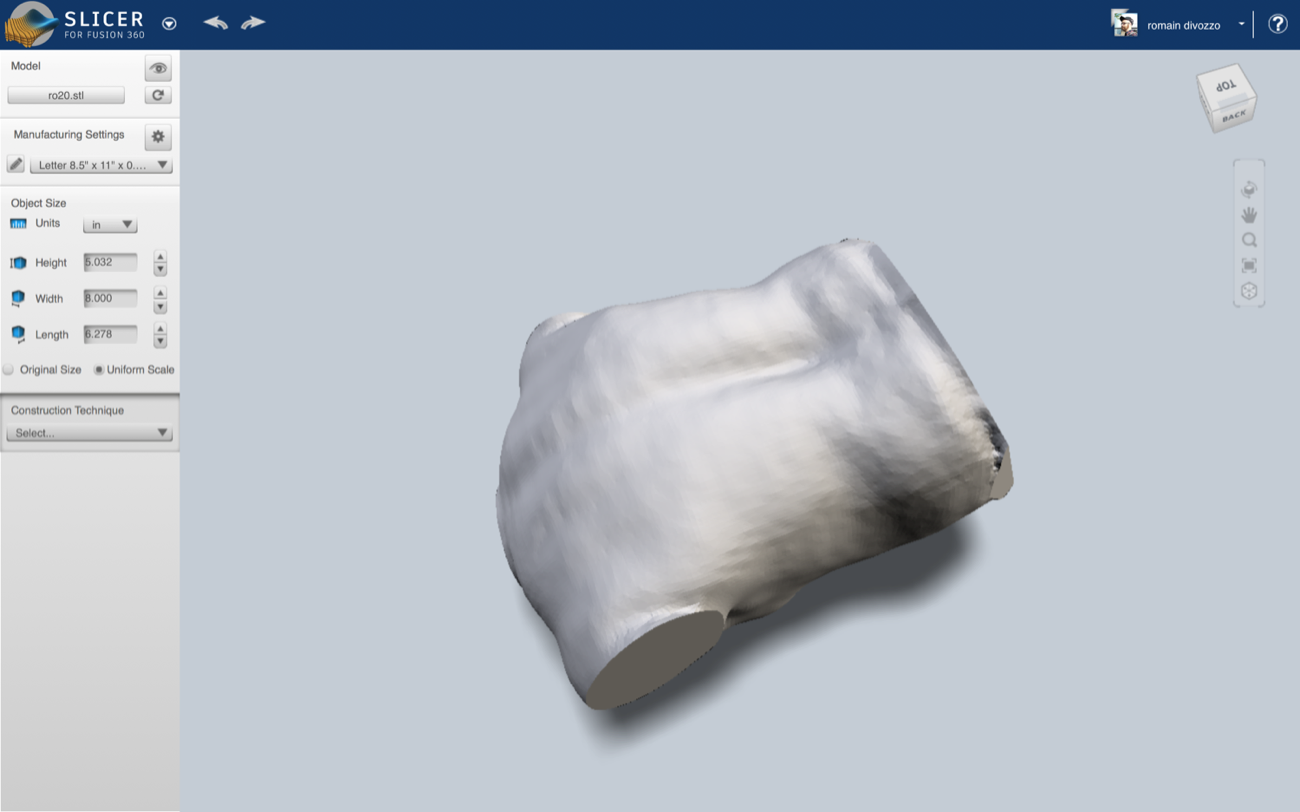
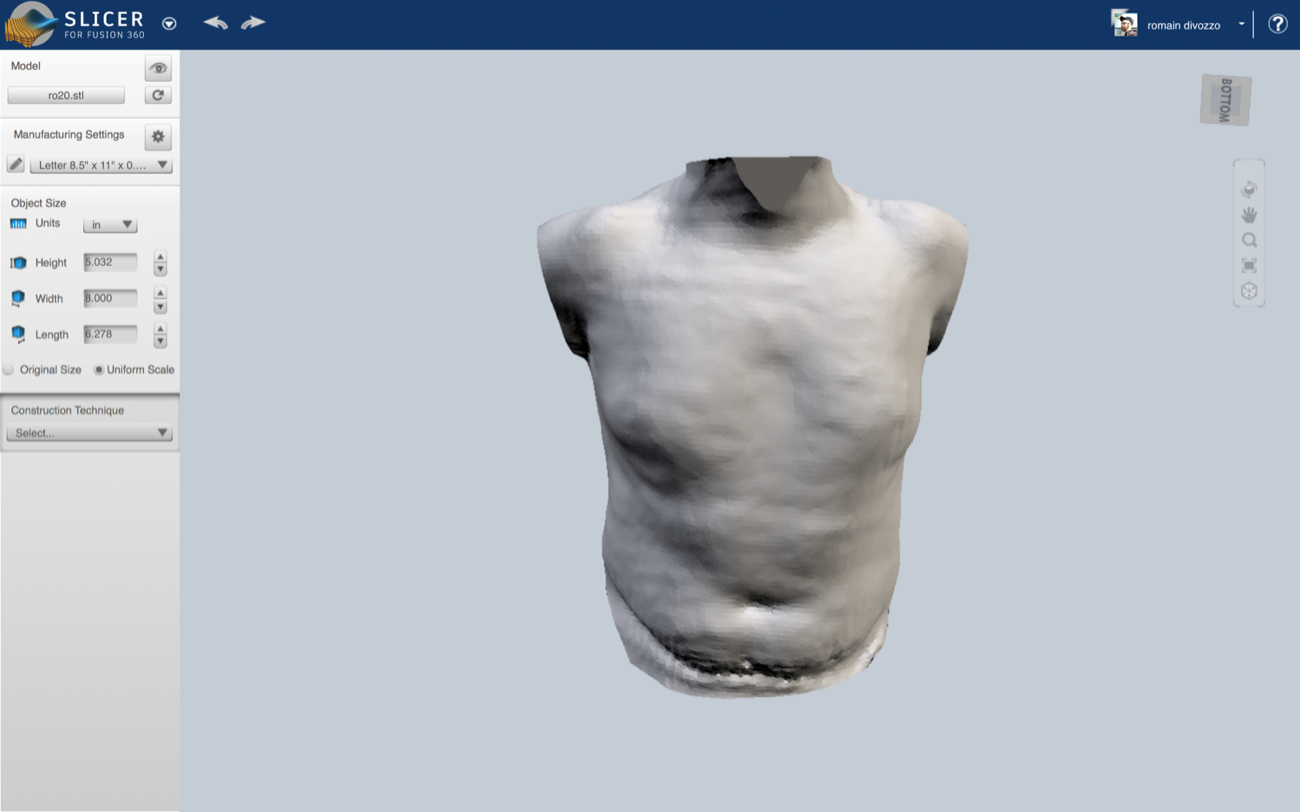
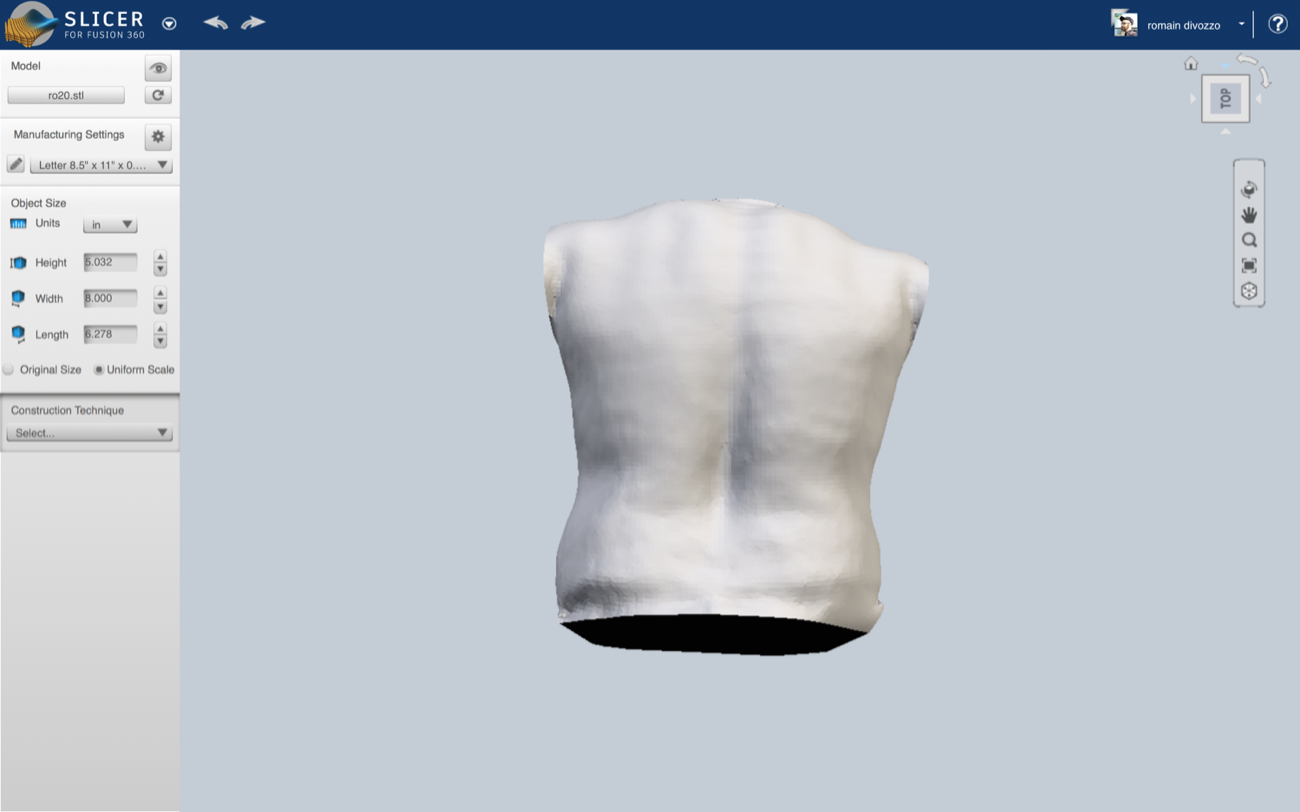
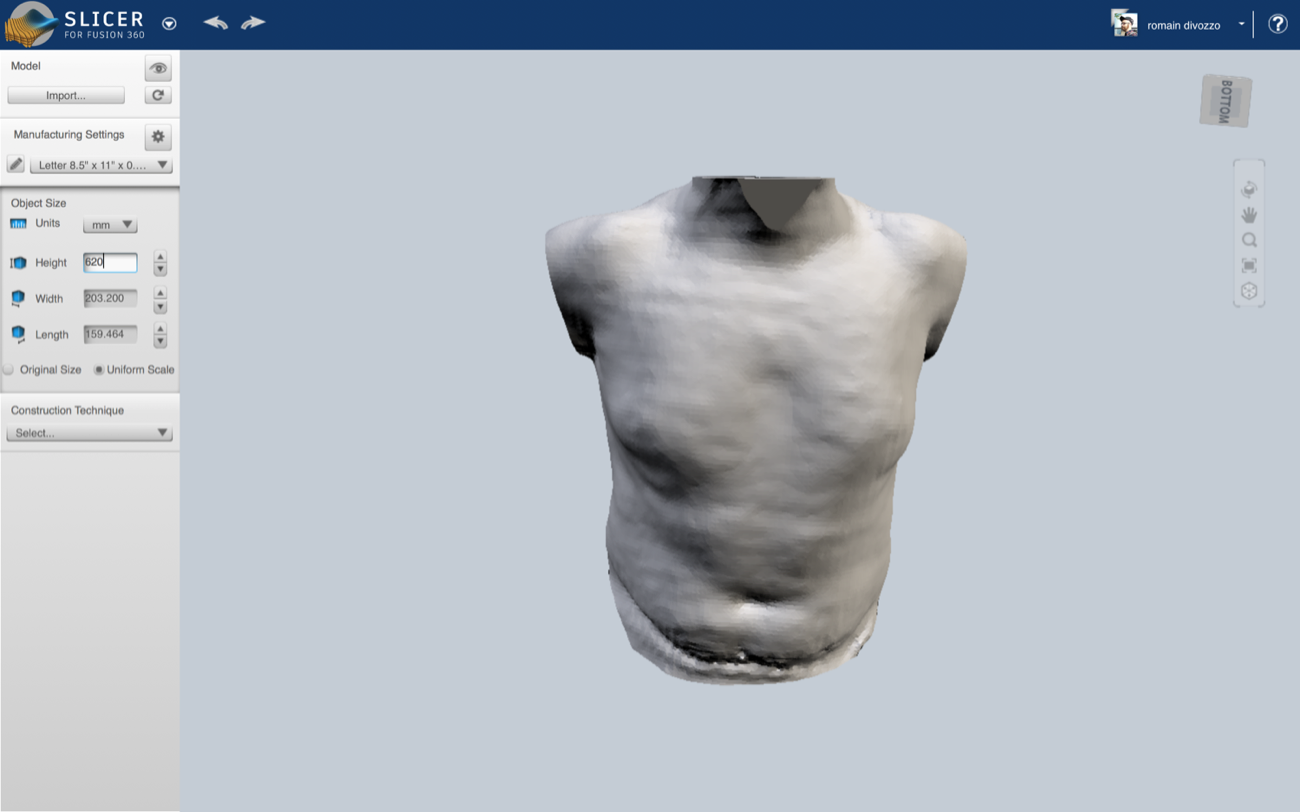
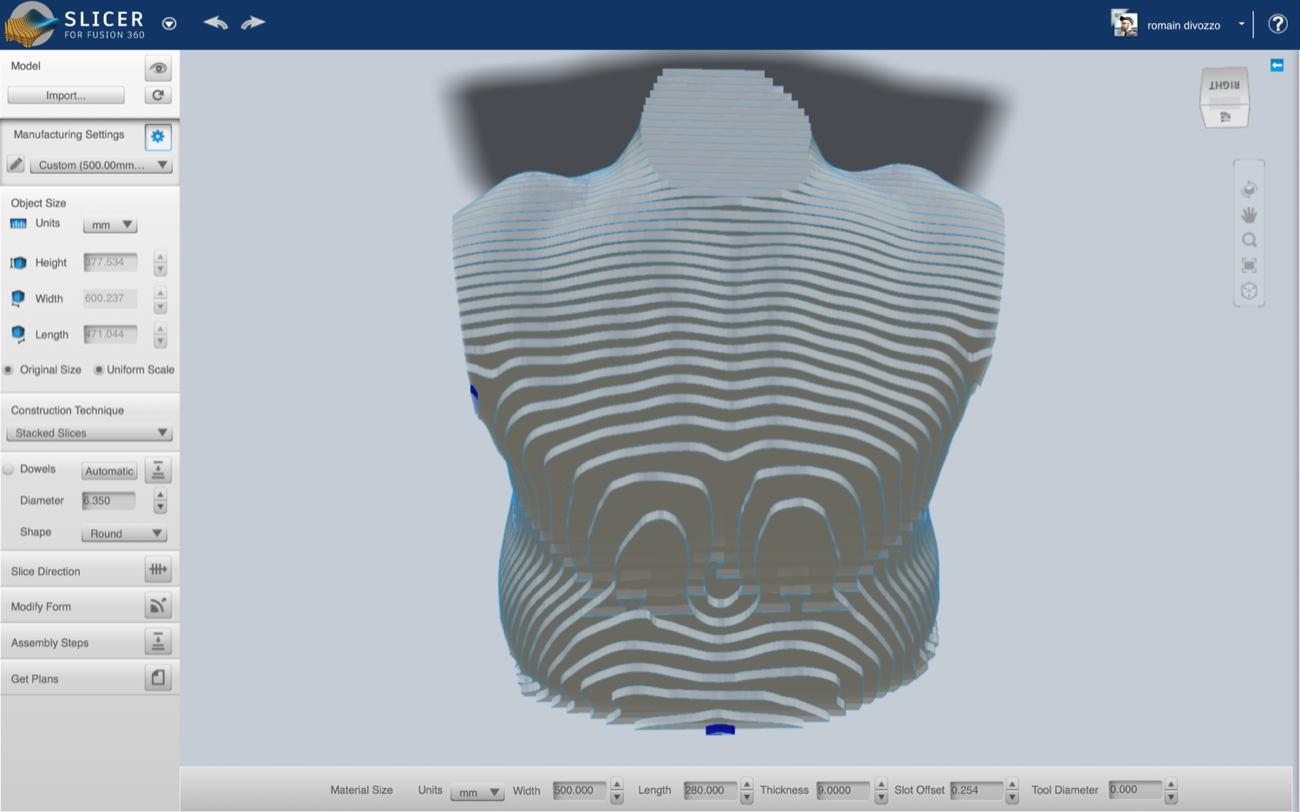
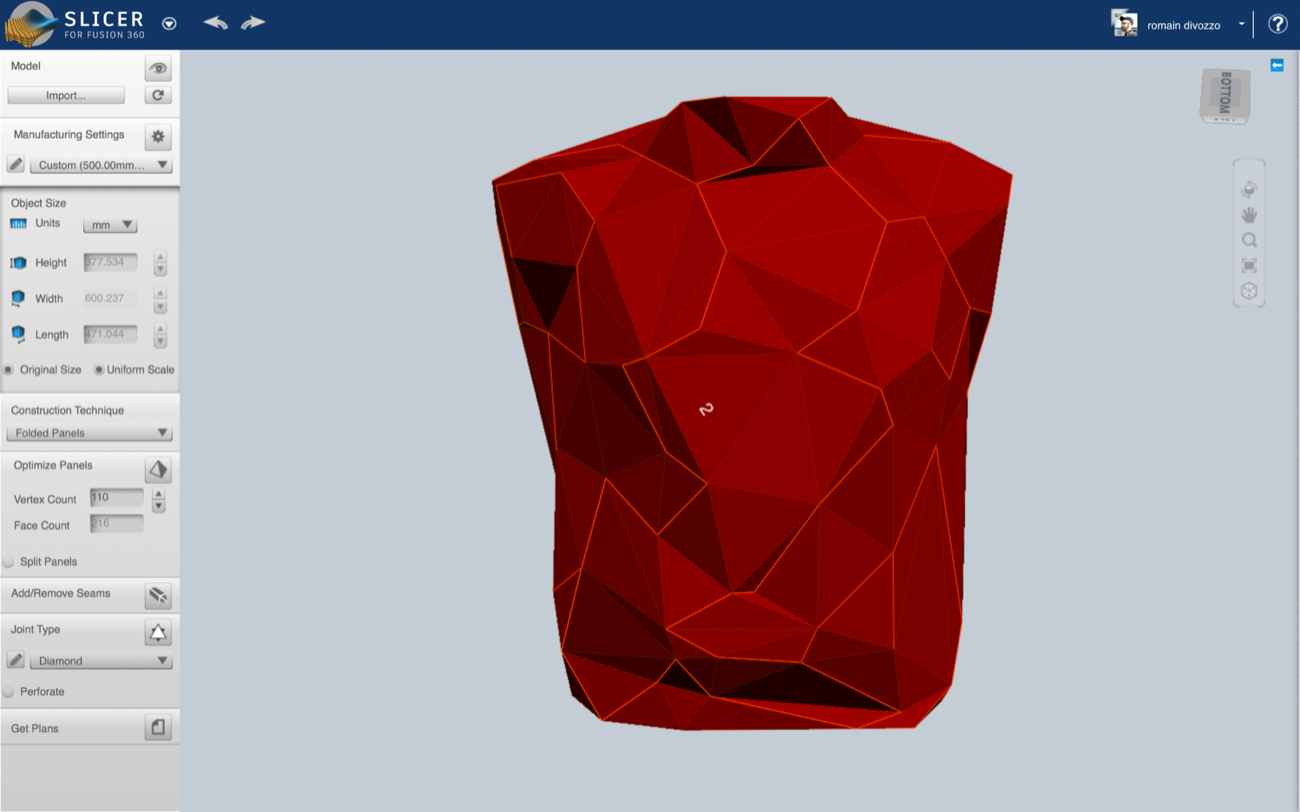
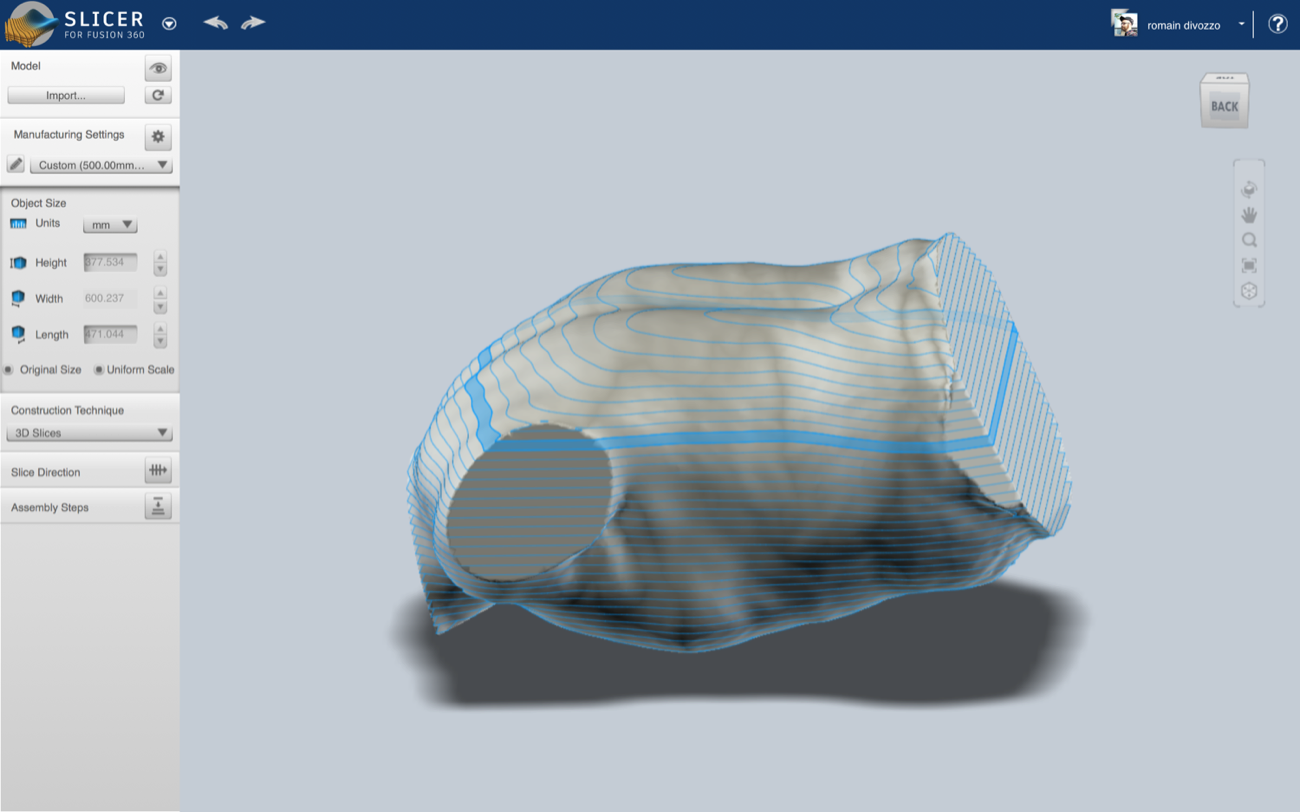
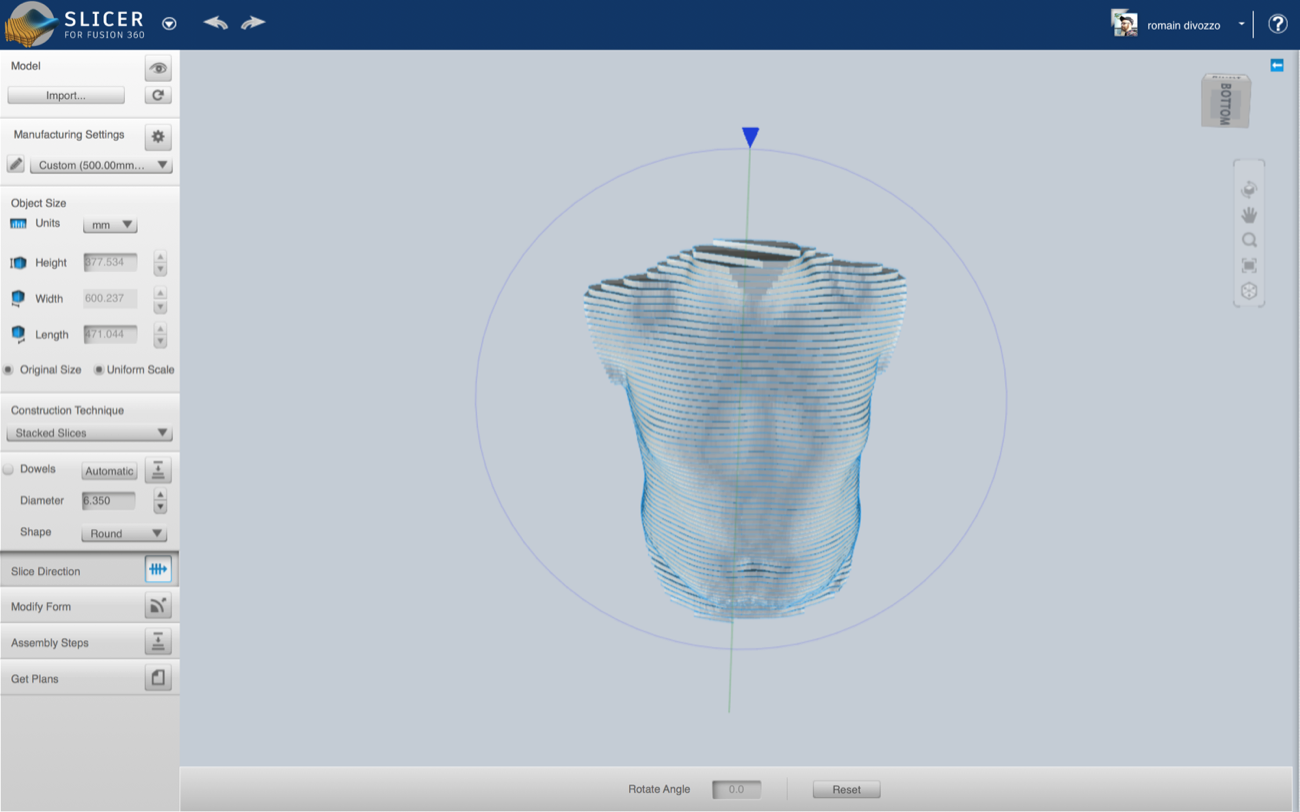
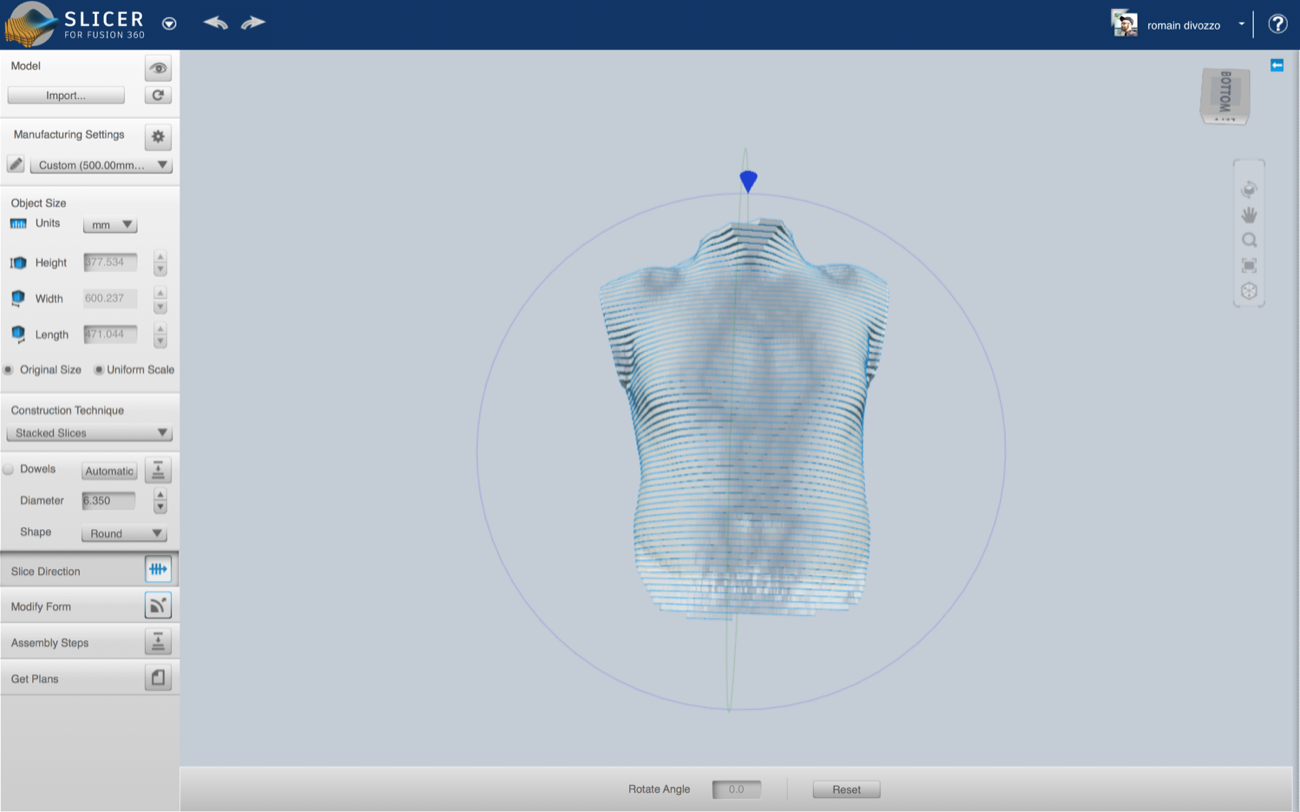
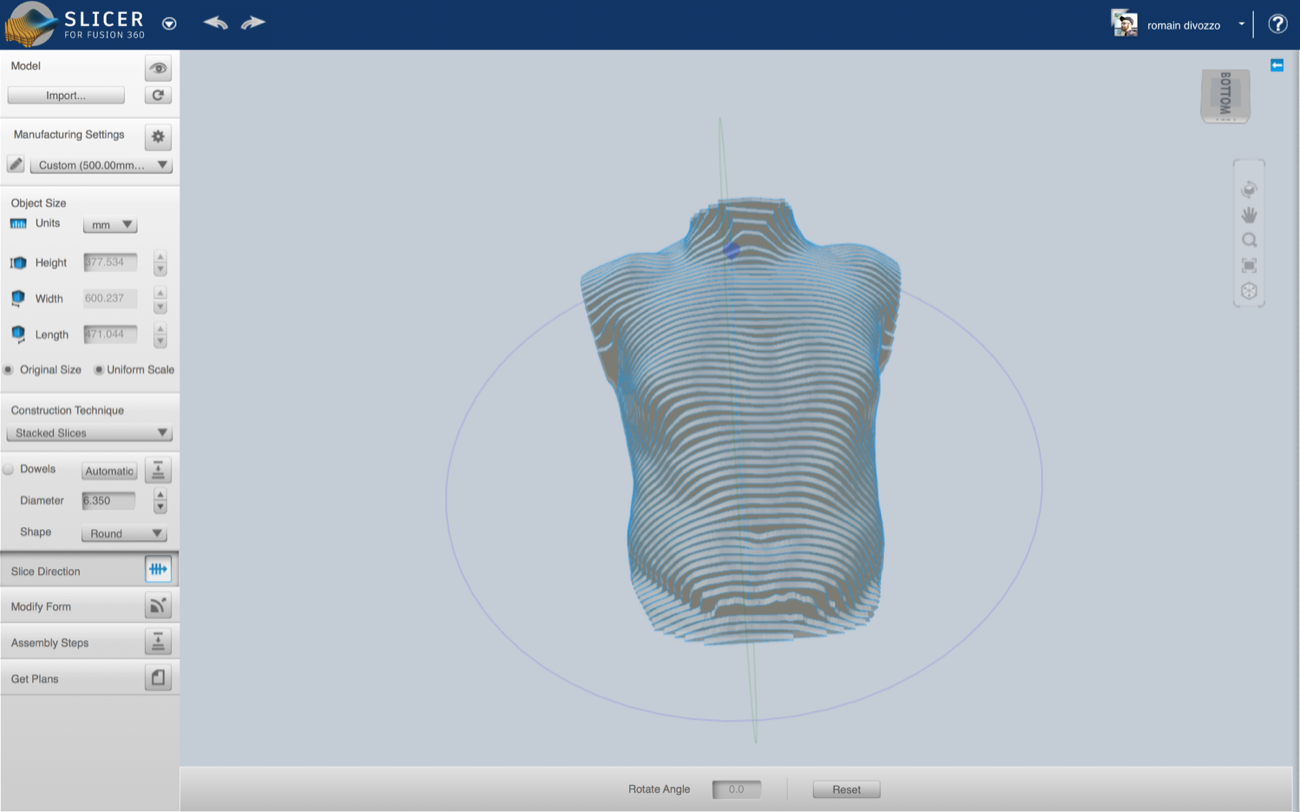
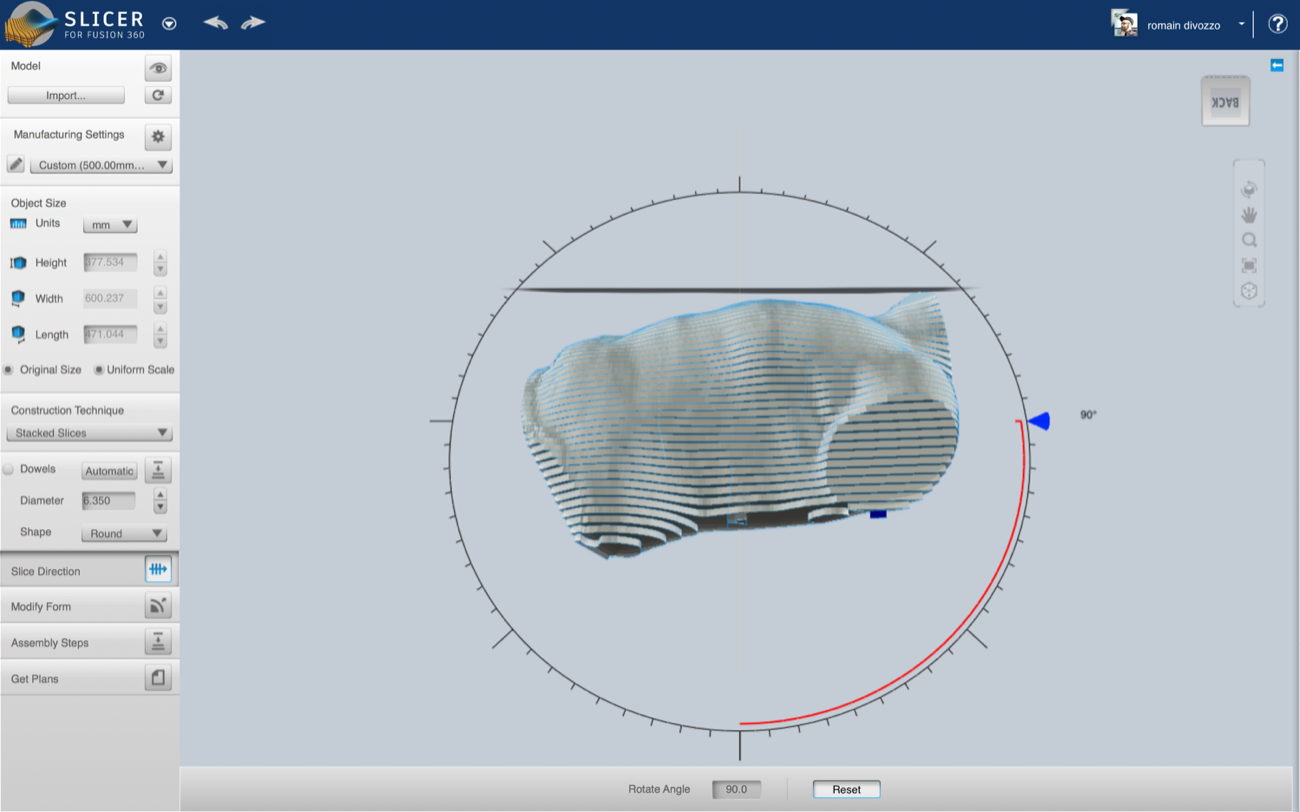
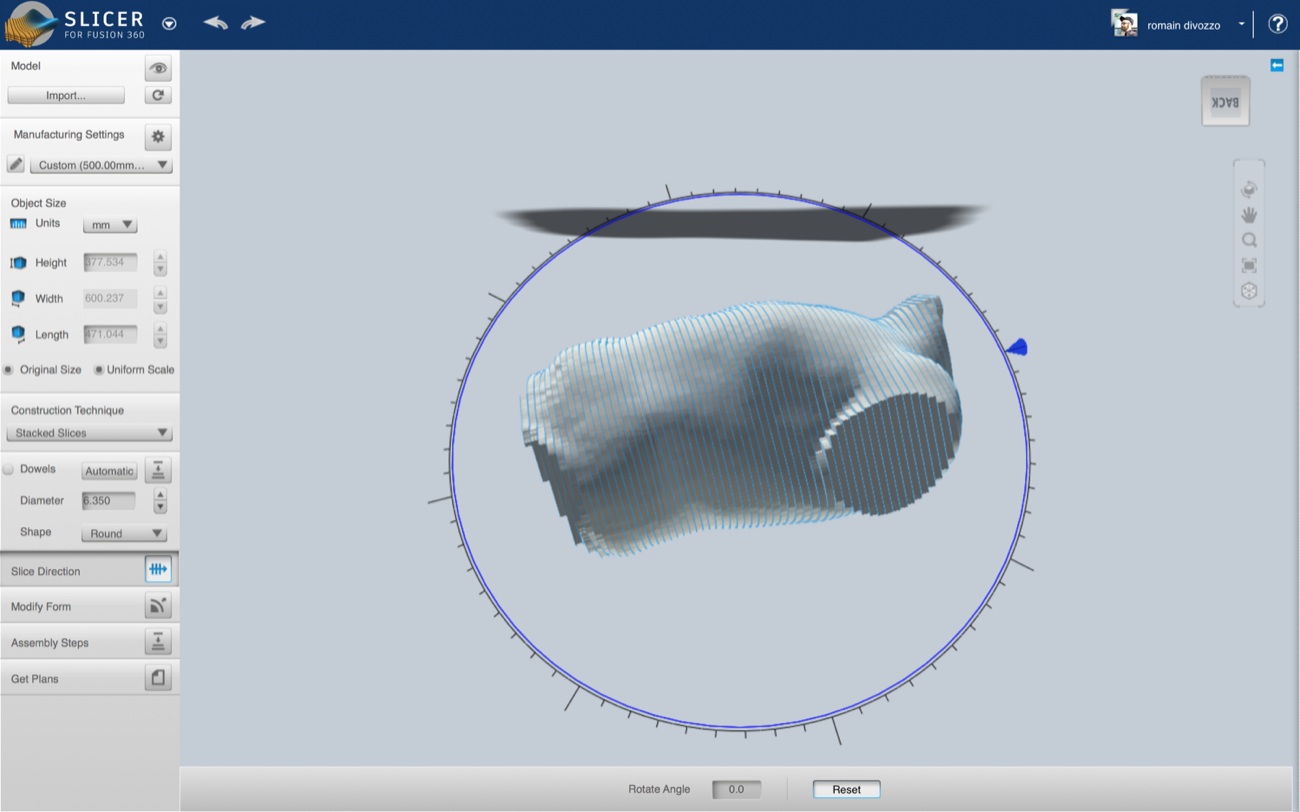
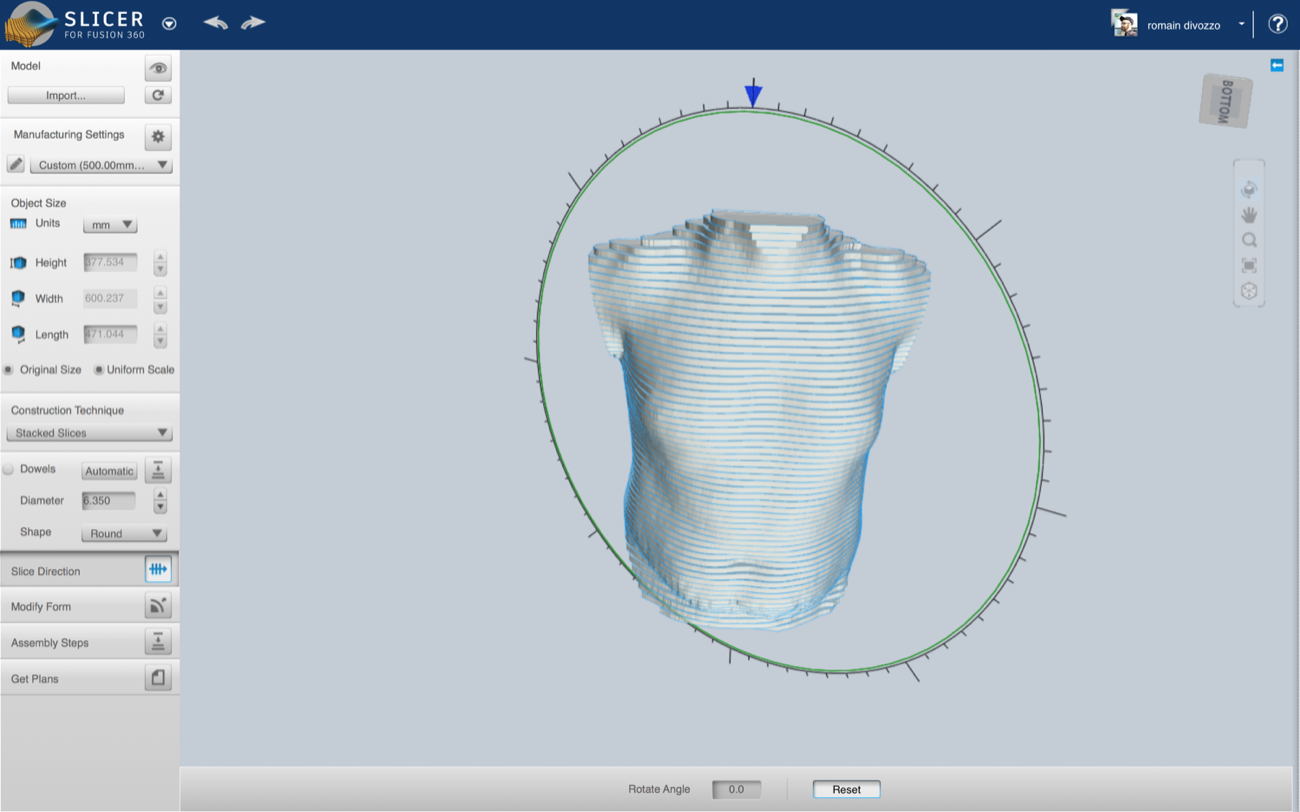
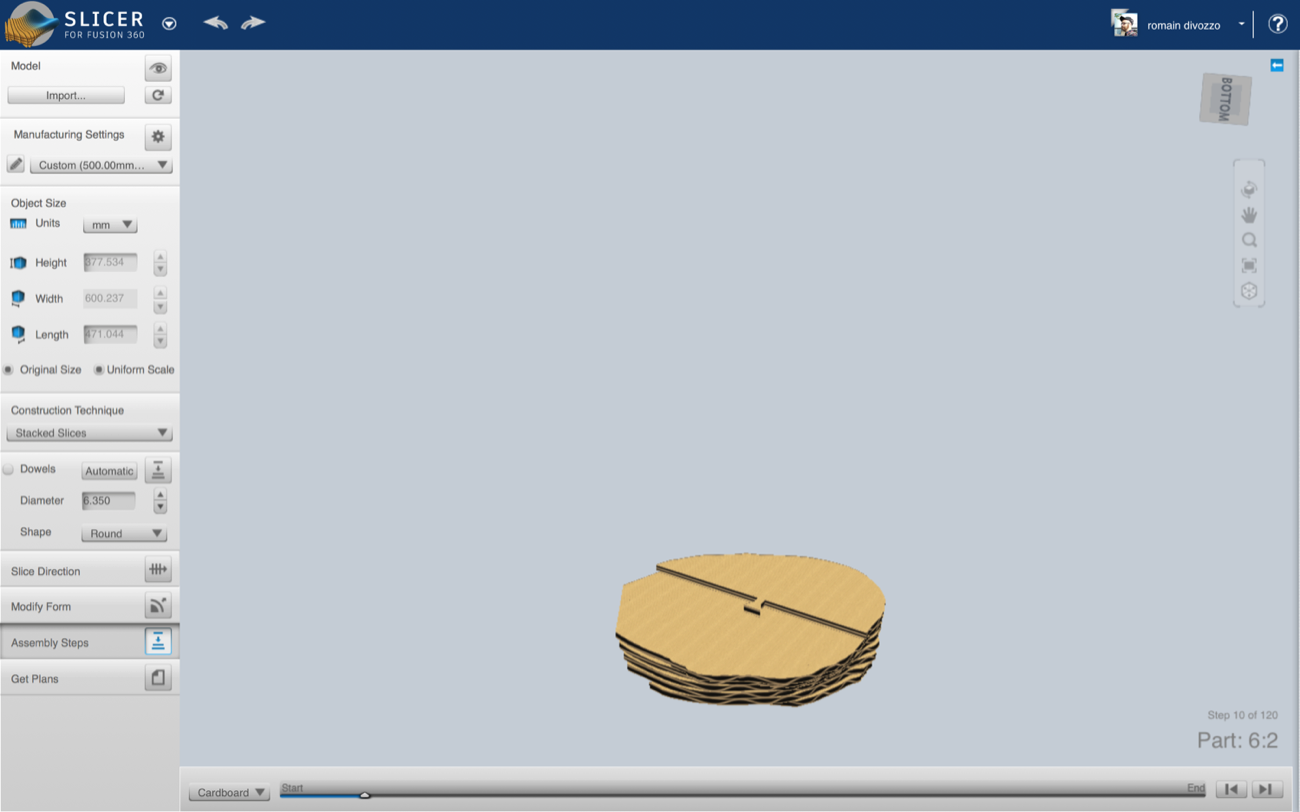
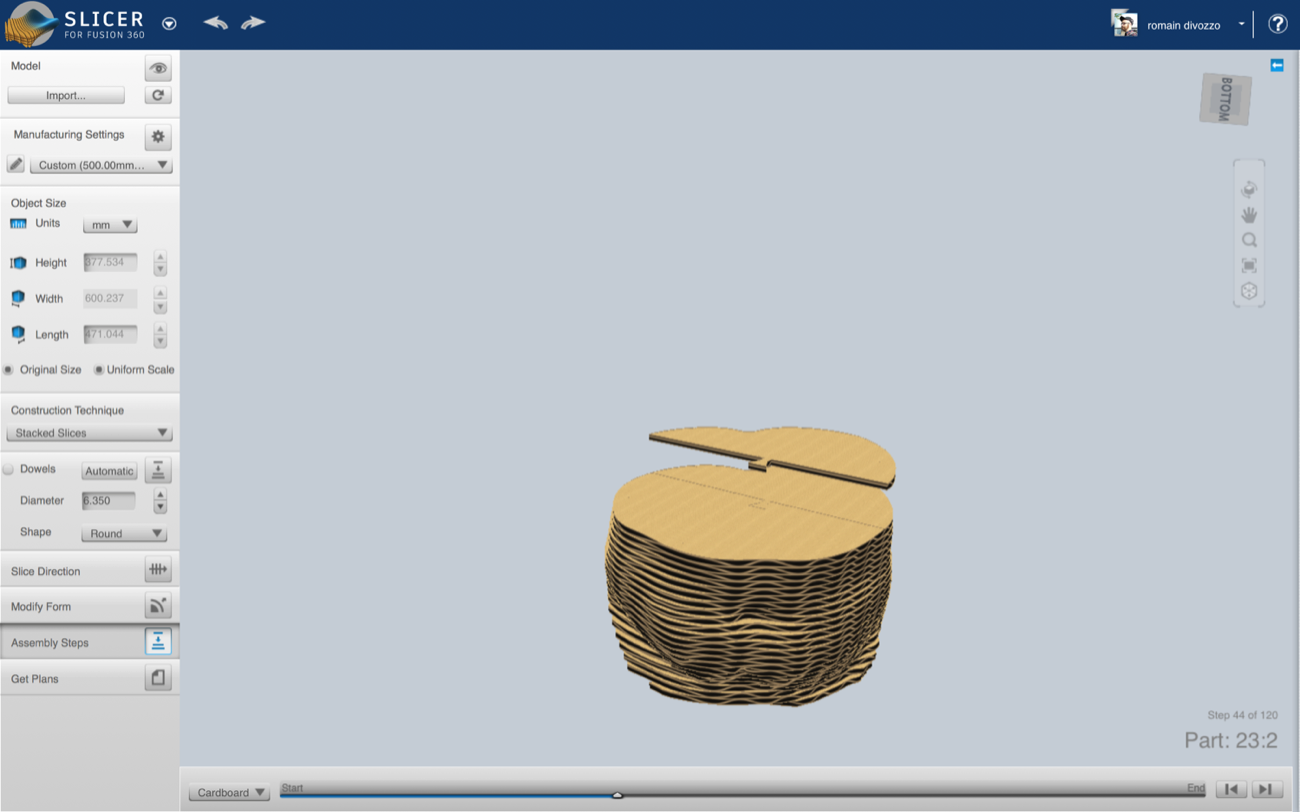
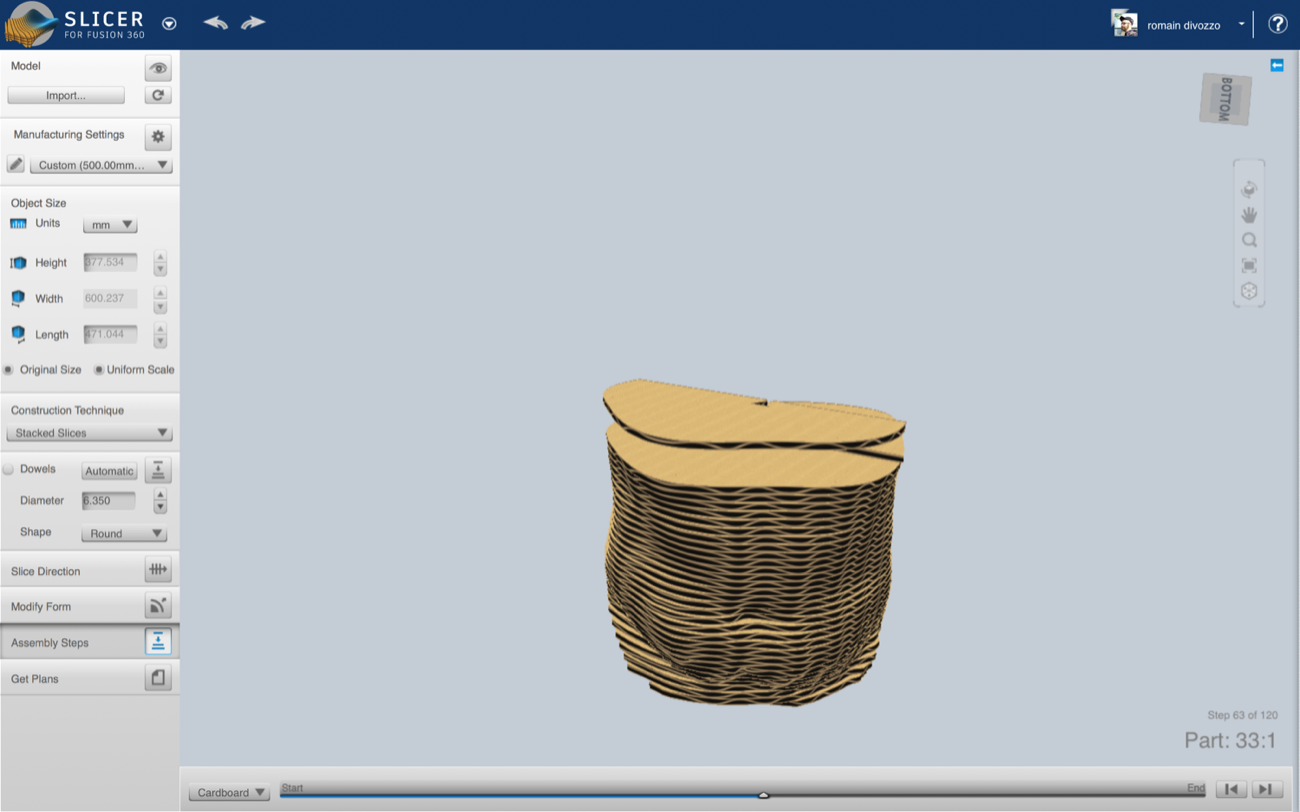
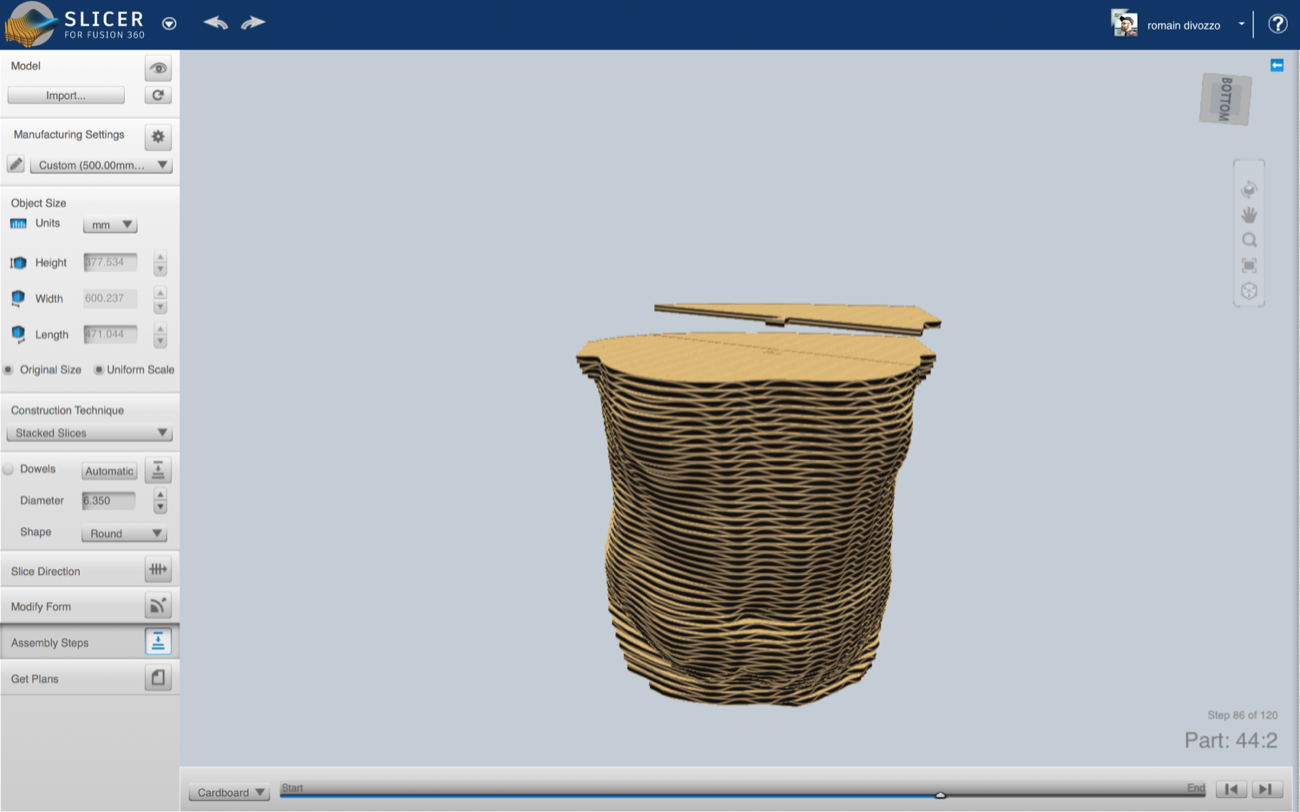
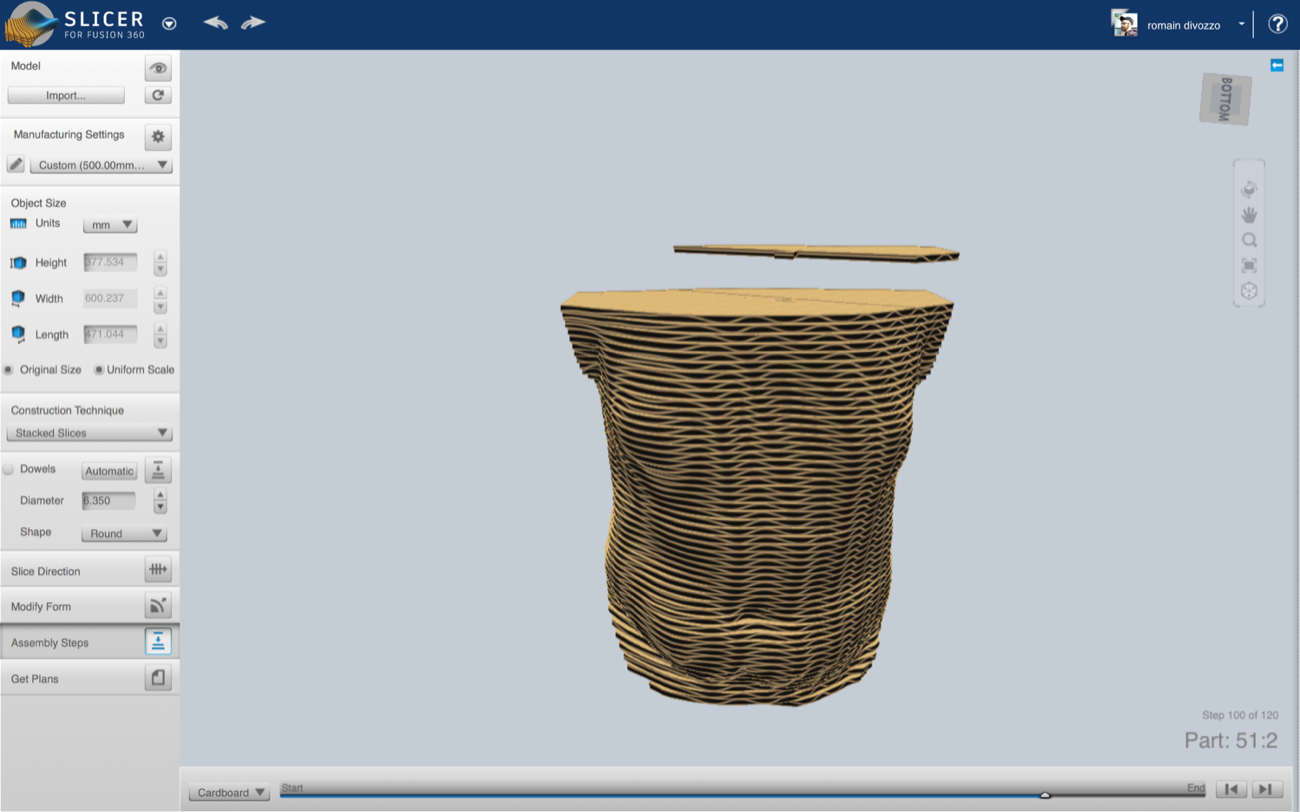
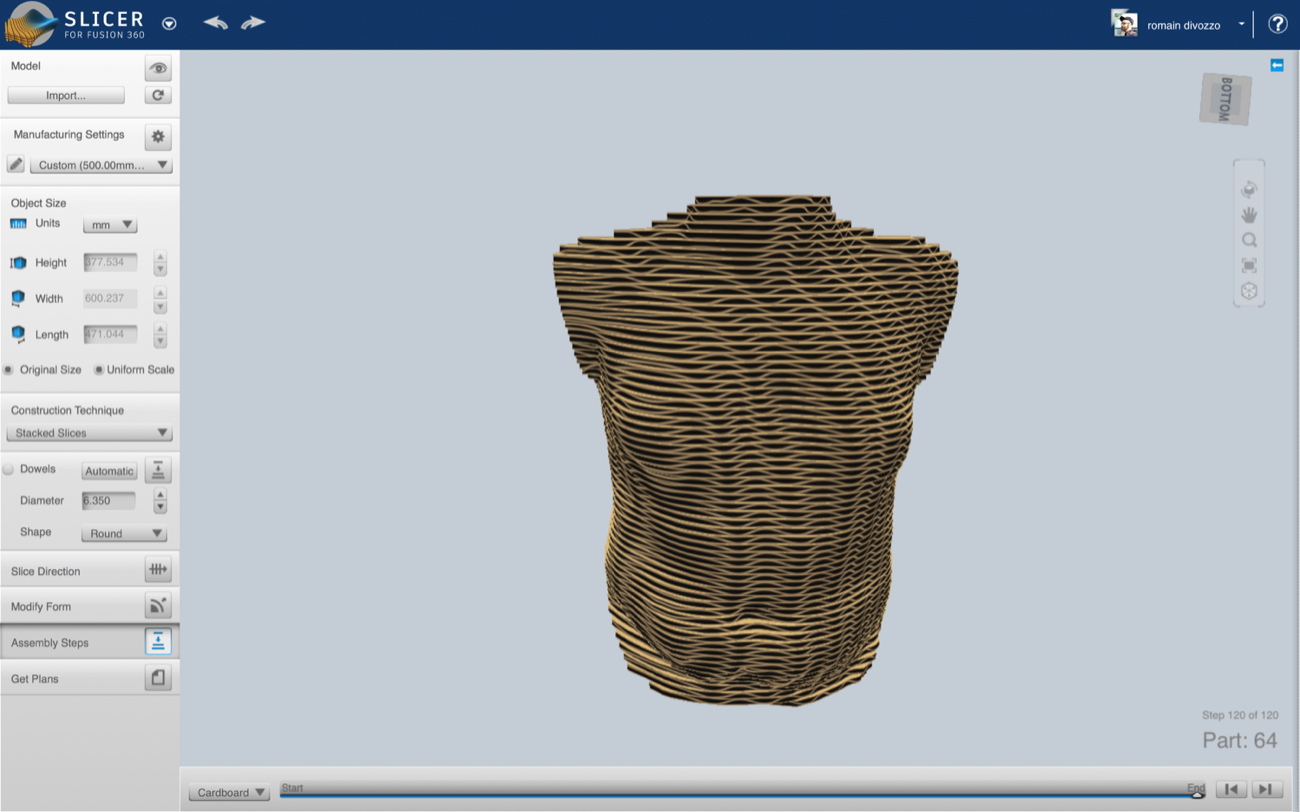
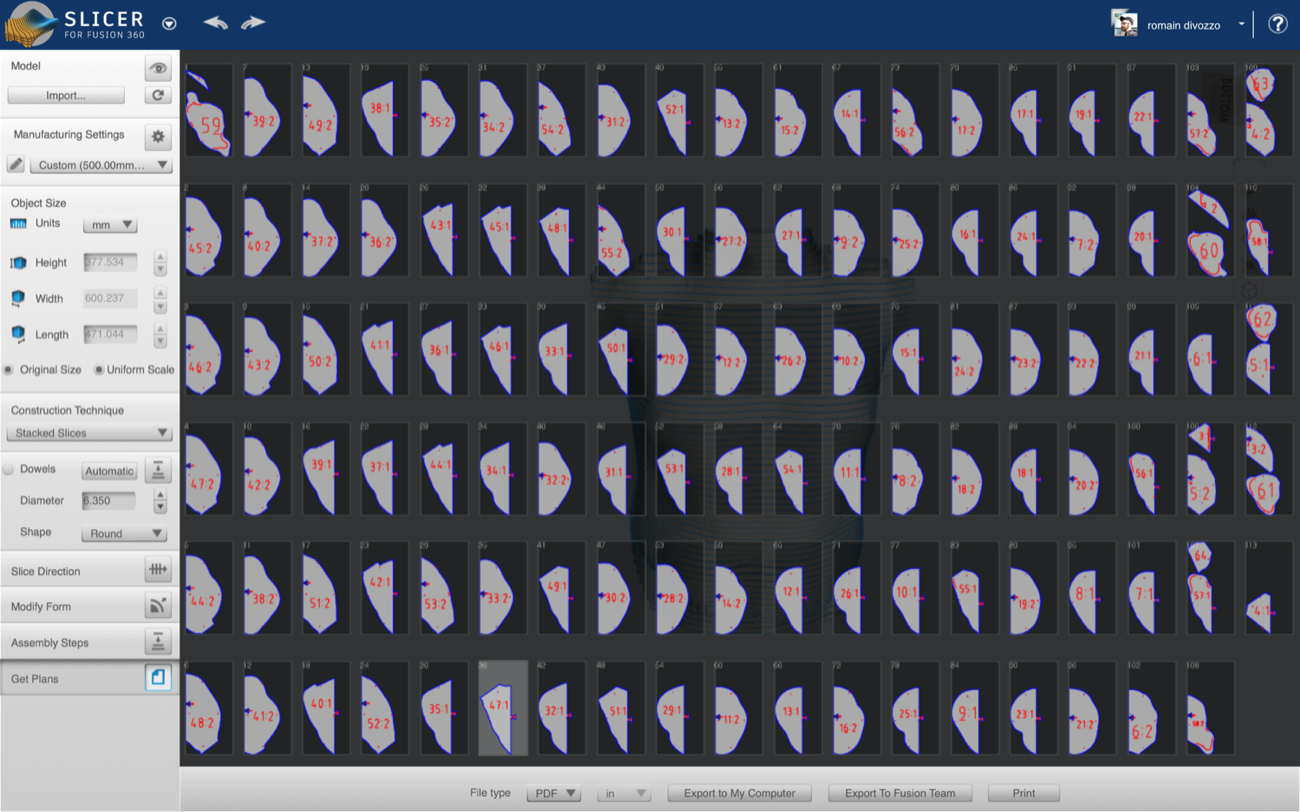
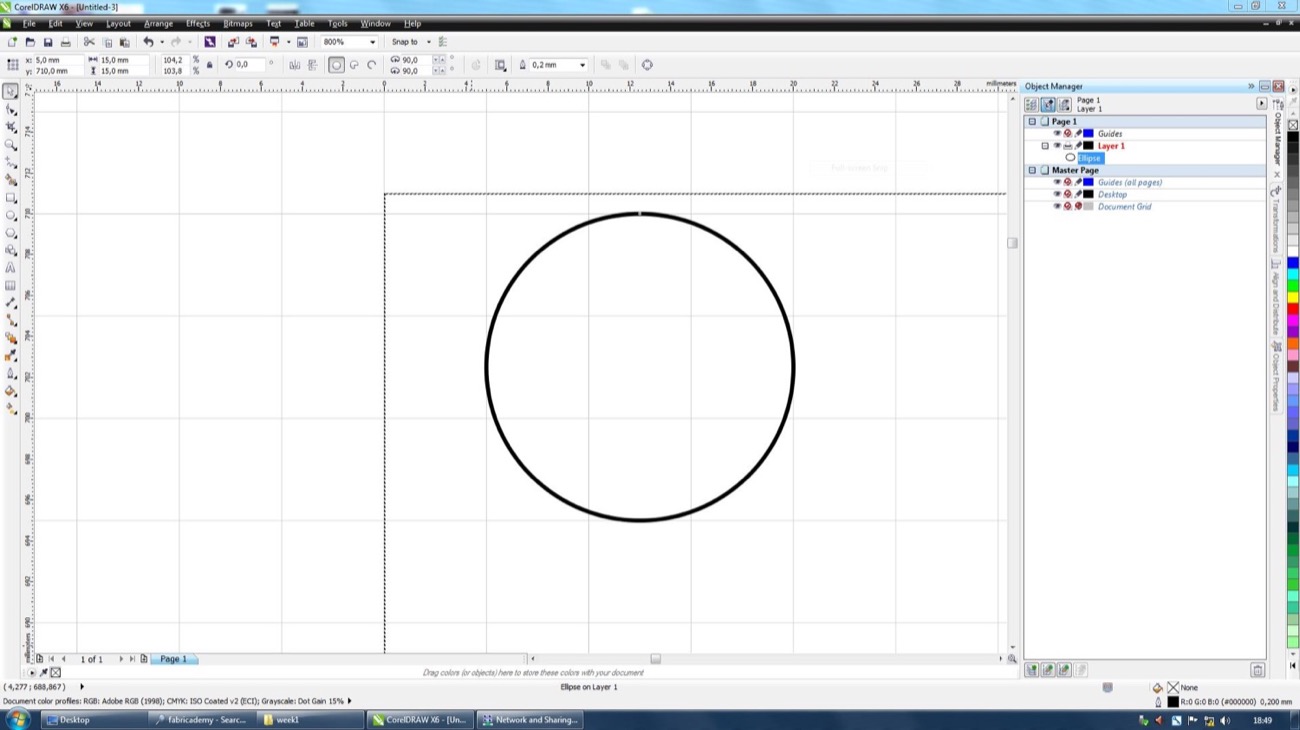
##### 8 | Slicing an .STL file with Slicer for Fusion 360 |
a | a
- | -
|
a | a
- | -
|
a | a
- | -
|
a | a
- | -
|
a | a
- | -
|
a | a
- | -
|
a | a
- | -
|

a | a
- | -
|
a | a
- | -
|
a | a
- | -
|
a | a
- | -
|
a | a
- | -
|
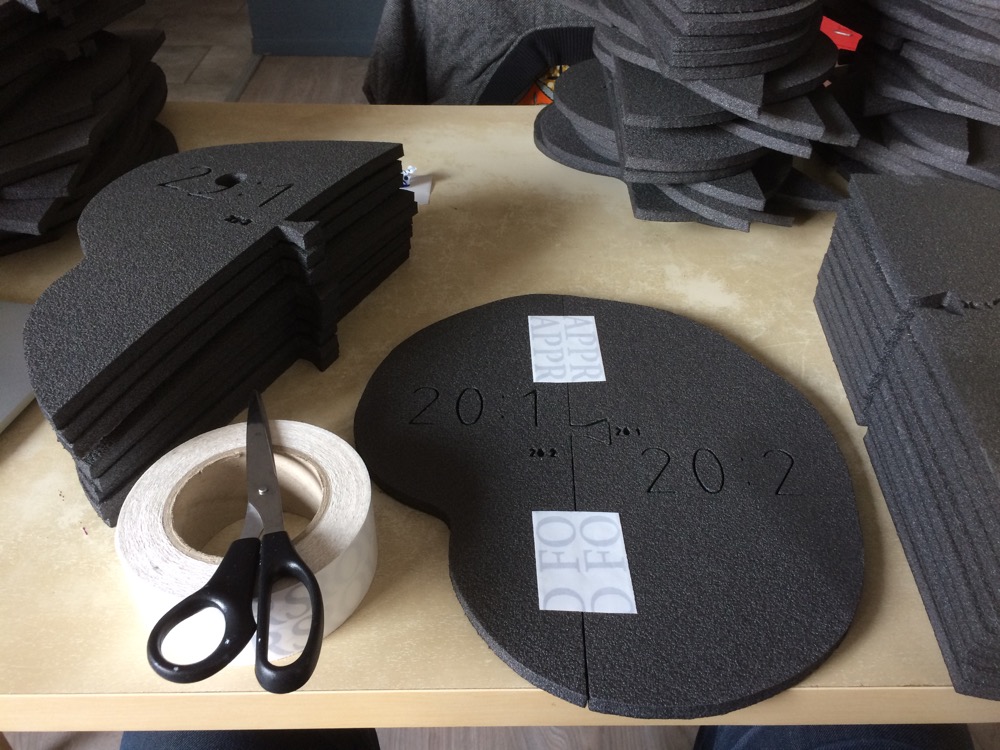
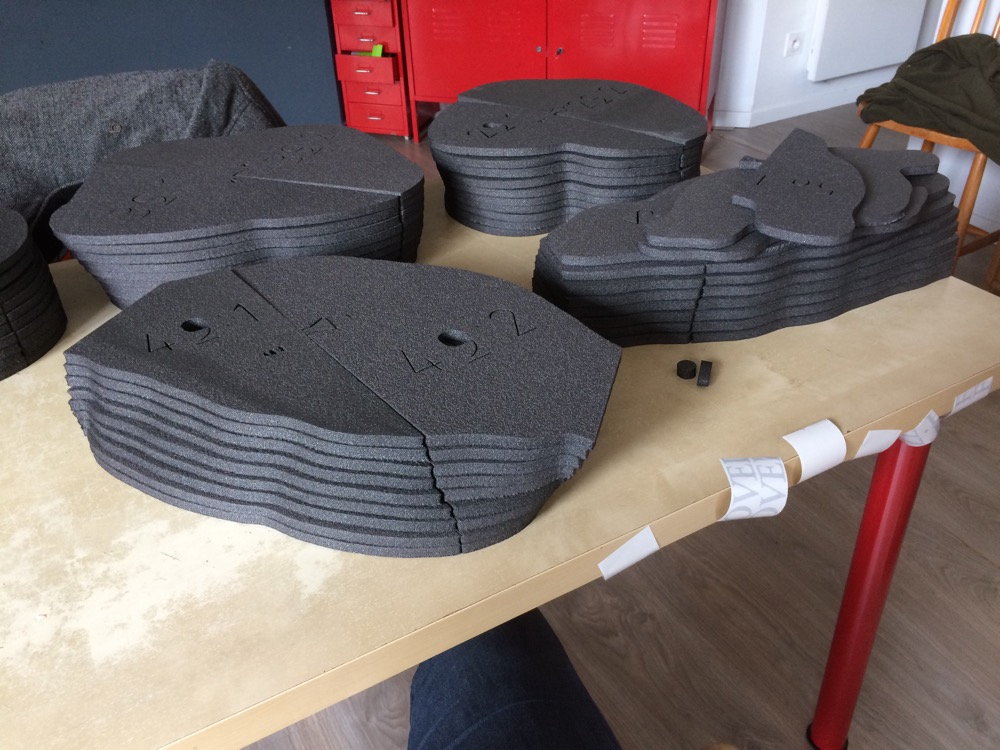
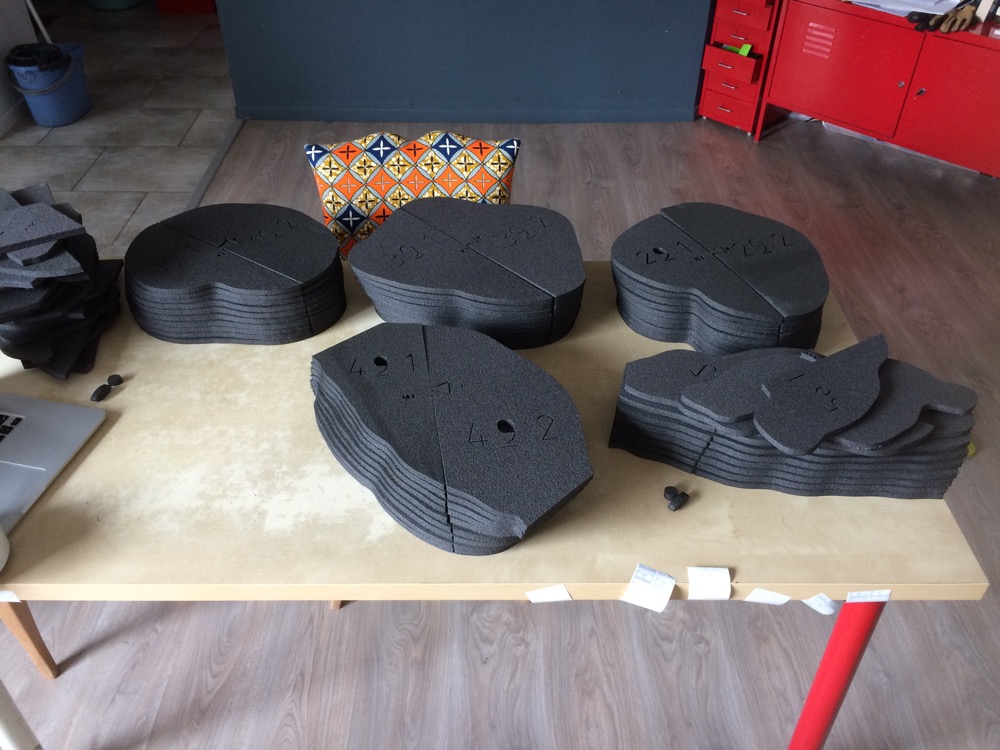
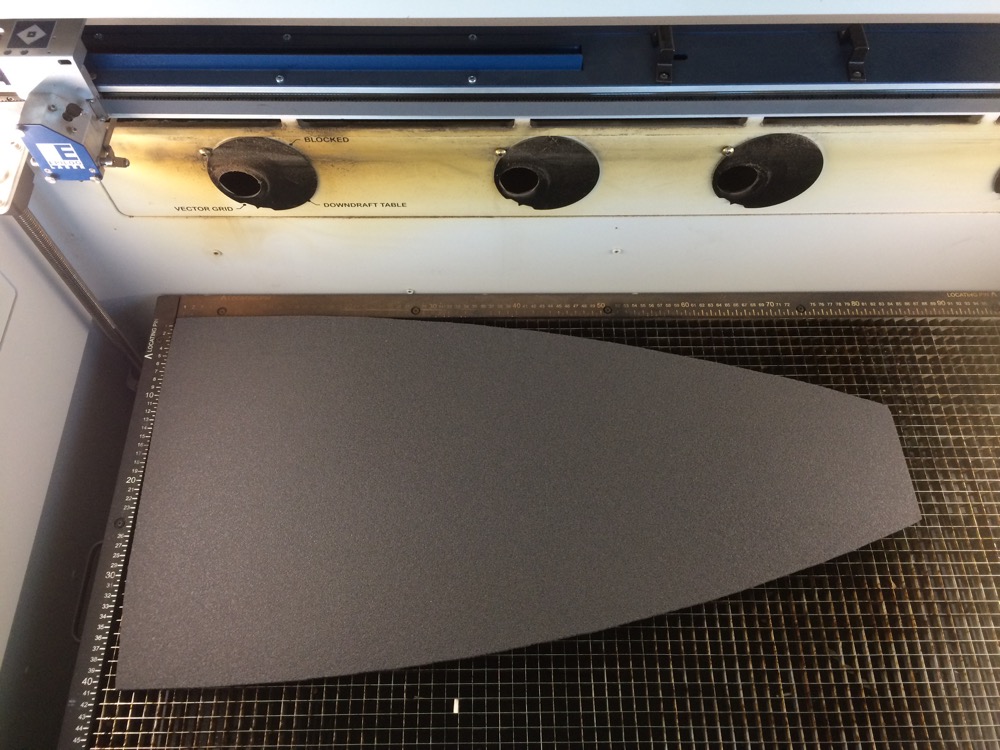
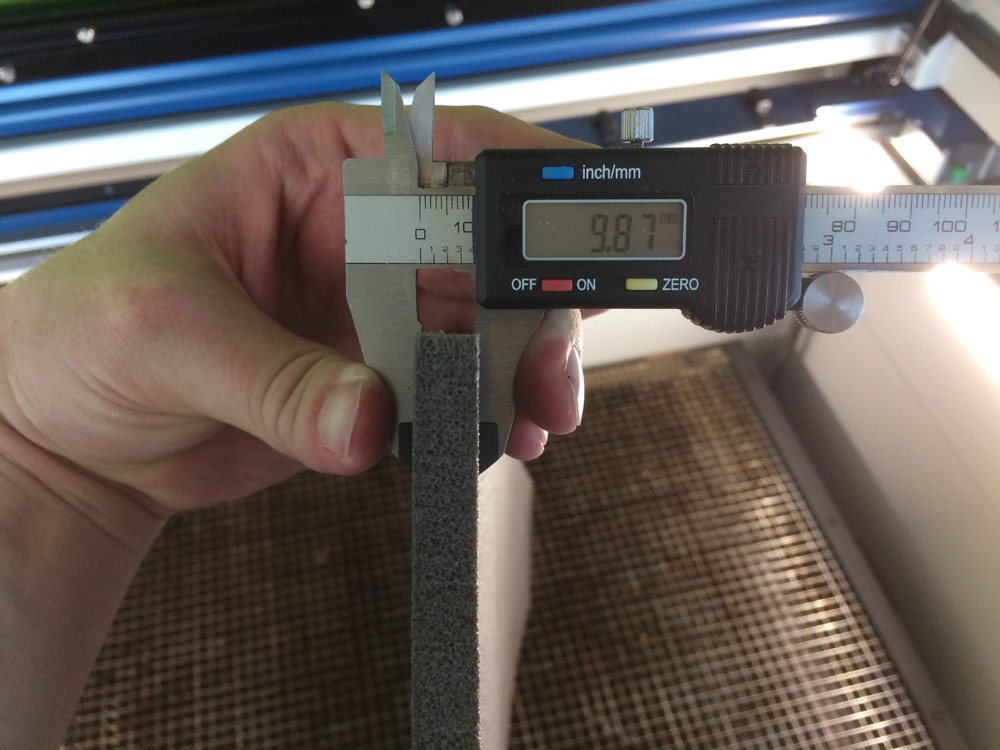
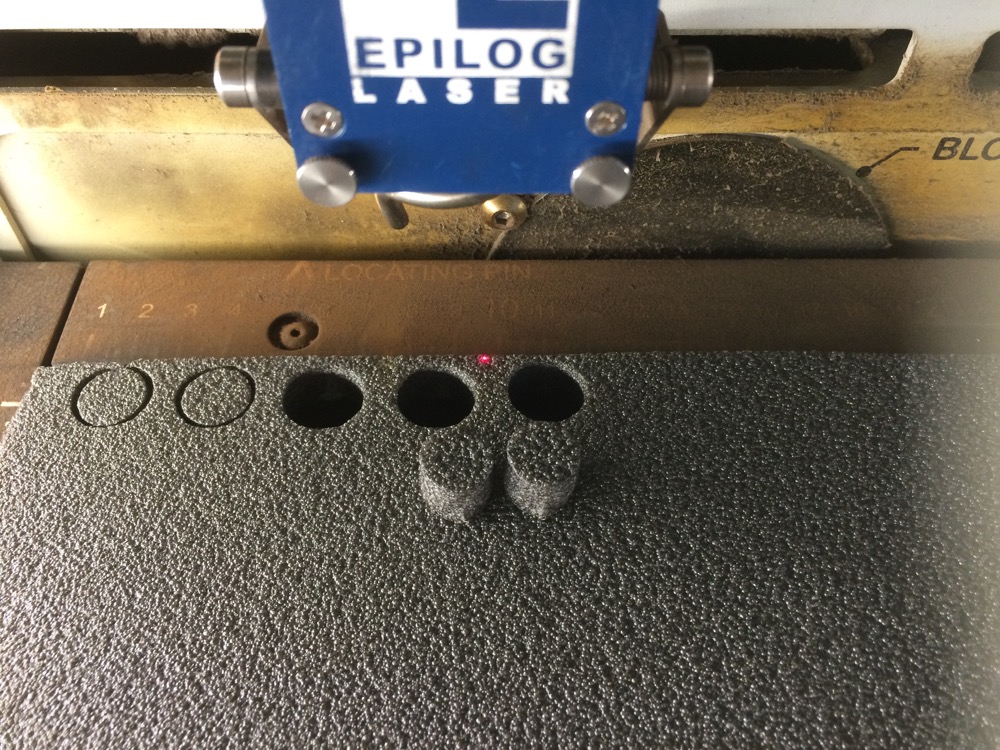
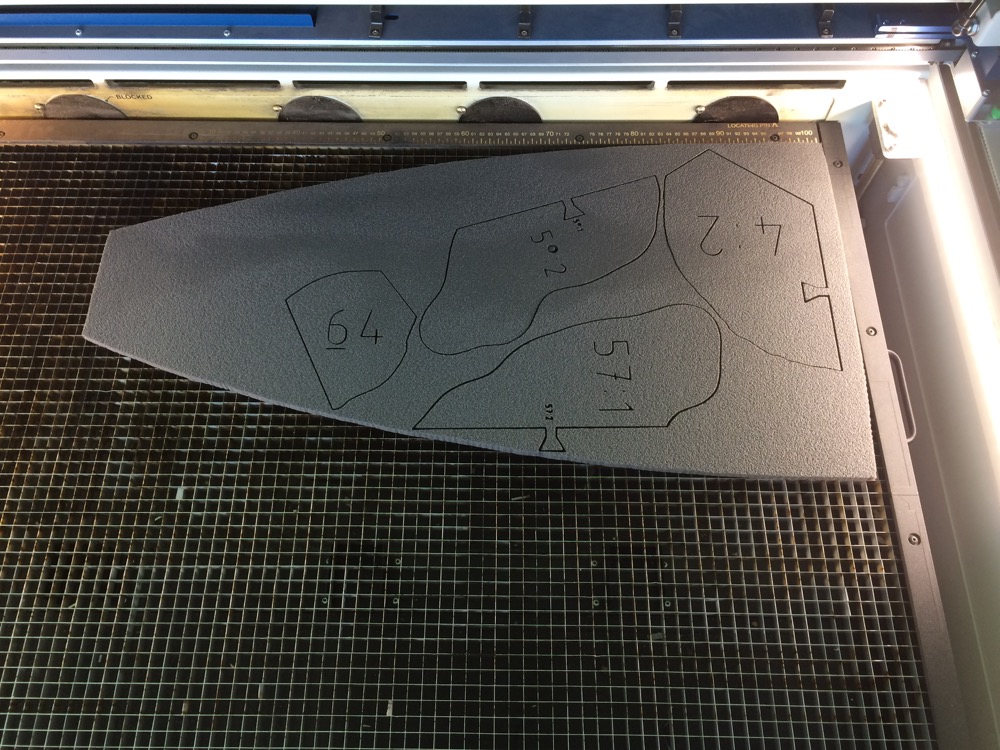
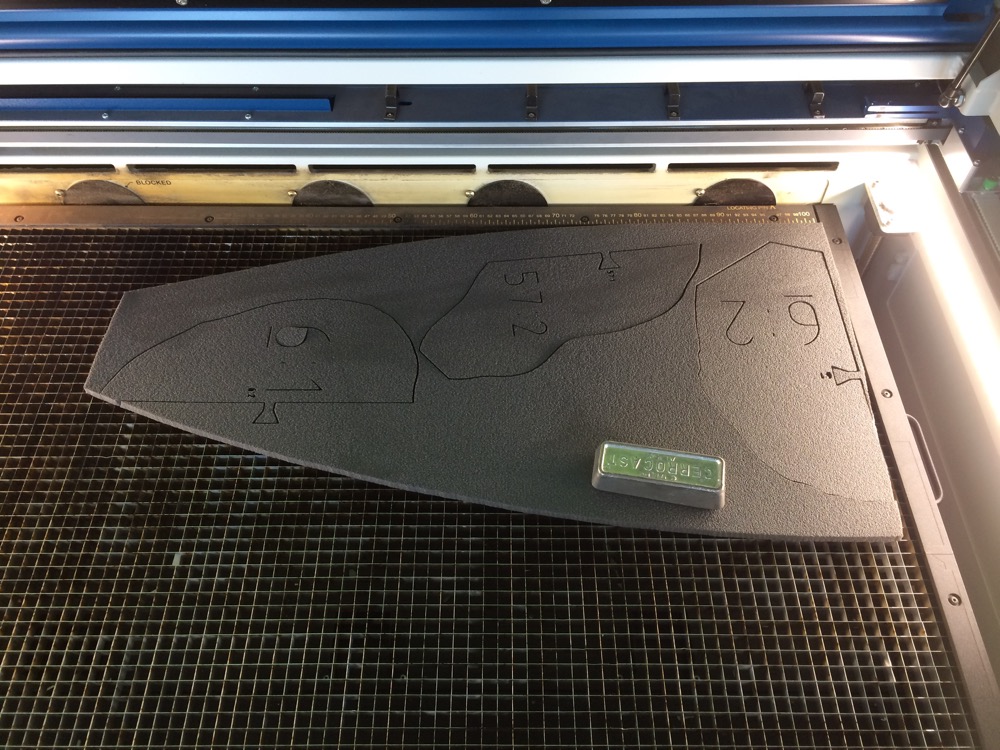
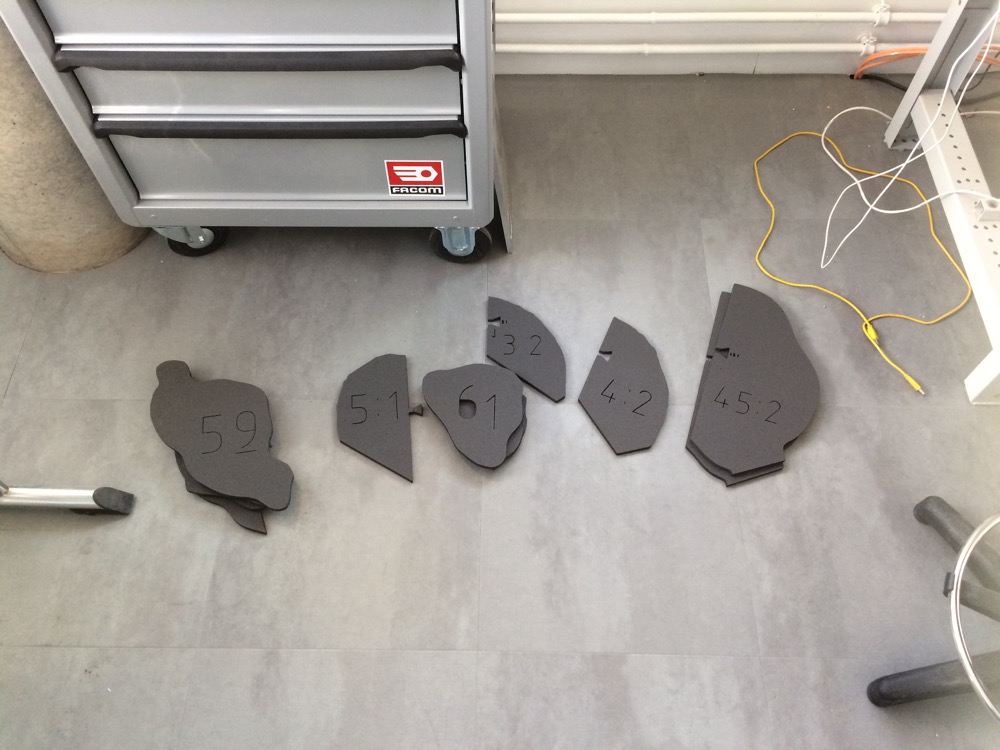
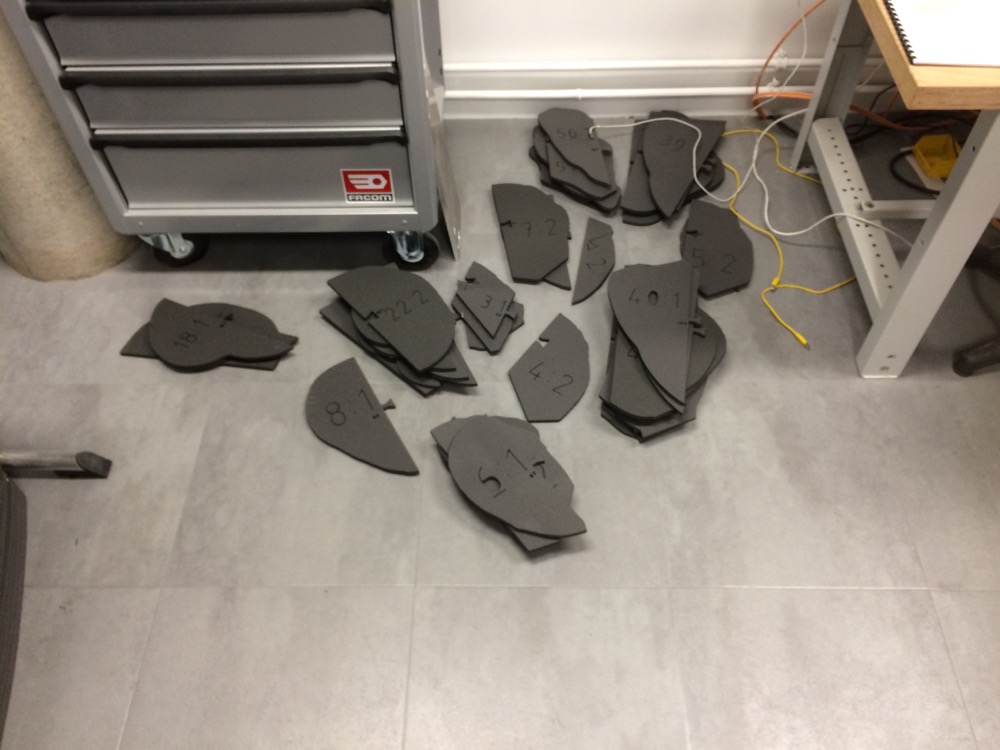
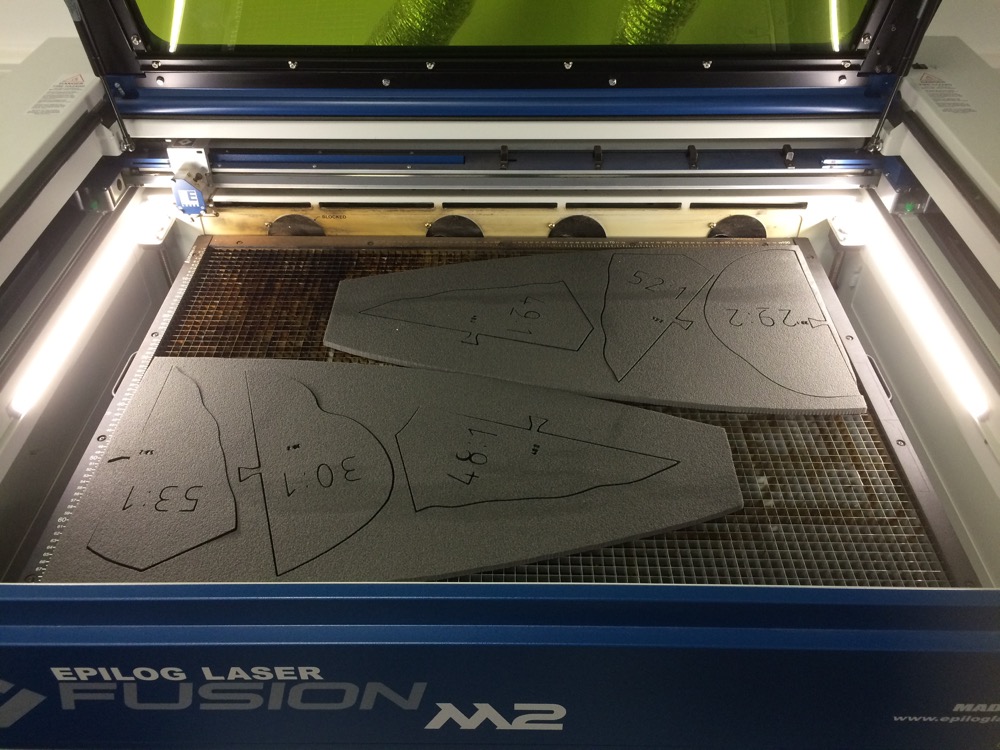
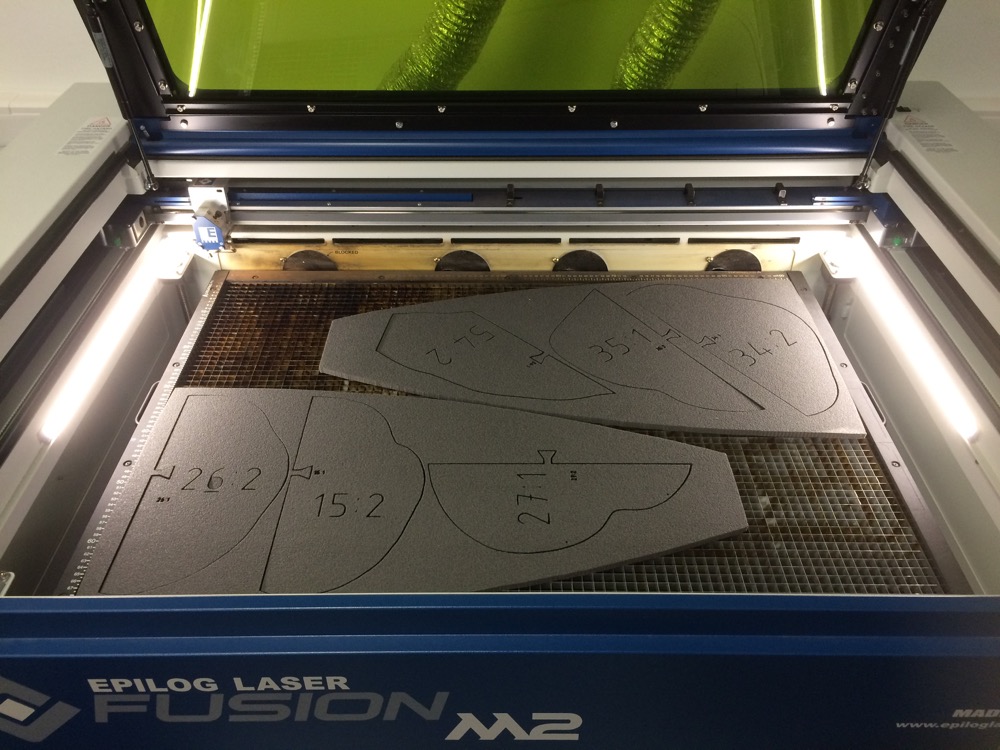
##### 9 | Laser-cutting Polyethylene Foam (parameters) |
Like I said above, I've bought second-hand Polyethylene sheets to make my mannequine. I had a few minutes to run a quick test on cutting polyethylene with our Epilog Fusion M2+ (75W). Parameters are visible below and can surely be optimized:
-Speed = 18%
-Power = 100%
-Frequency = 50%
-No "Power Compression"
At the begining 2 passes were necessary but with a more precise Z focus I was able to cut my parts in one single pass. Those Polyethylene sheets are 9.87mm thick.
0 | 0
- | -
|

a | a
- | -
|
b | b
- | -
|
c | c
- | -
|

First laser-cutting Session | Another one on the next day
- | -
|
-------
First laser-cutting Session | Another one on the next day
- | -
|
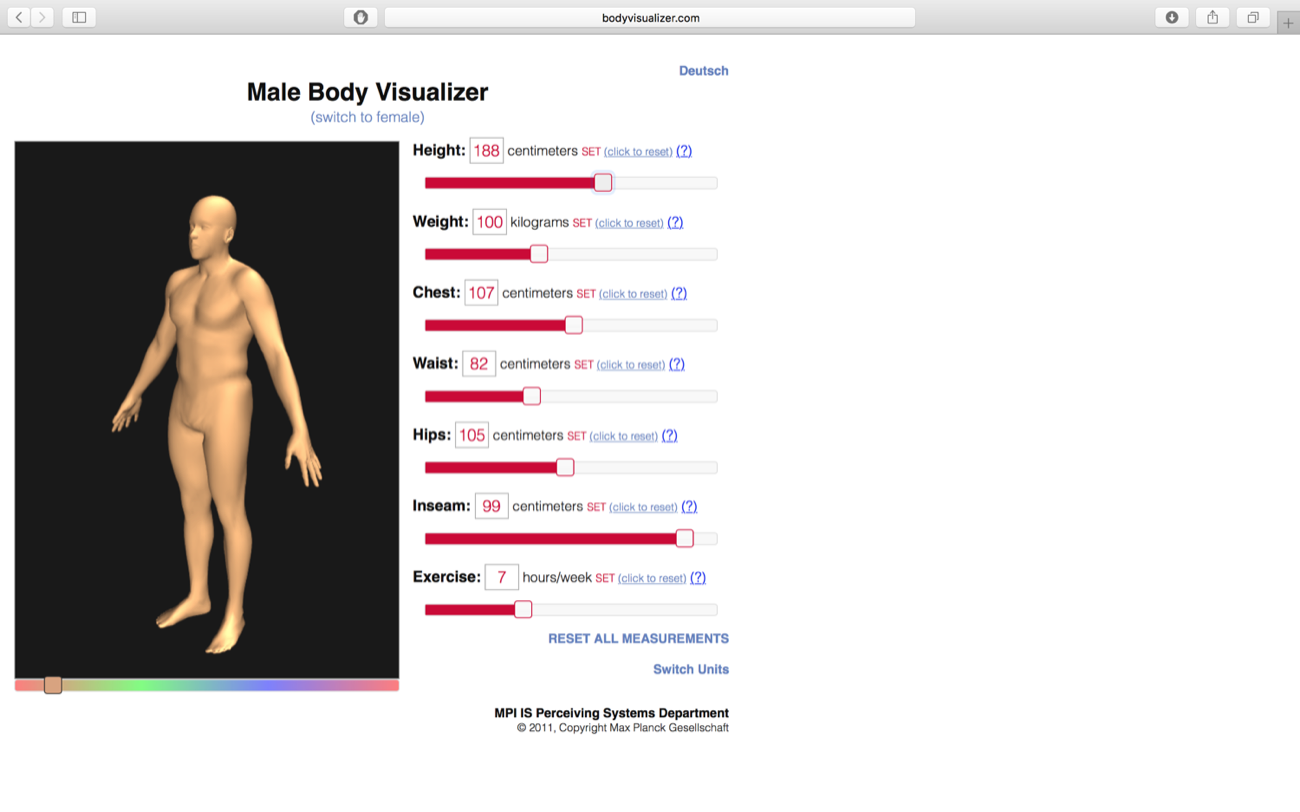
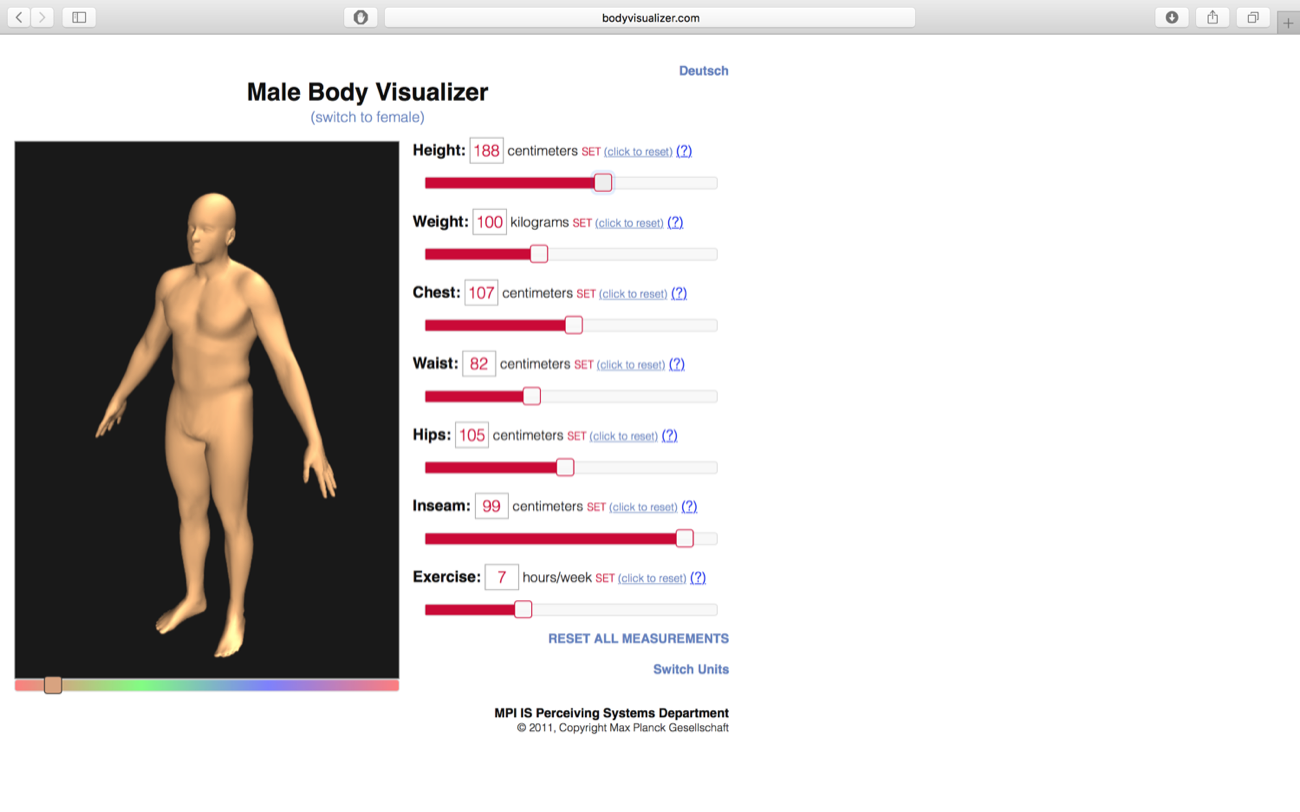
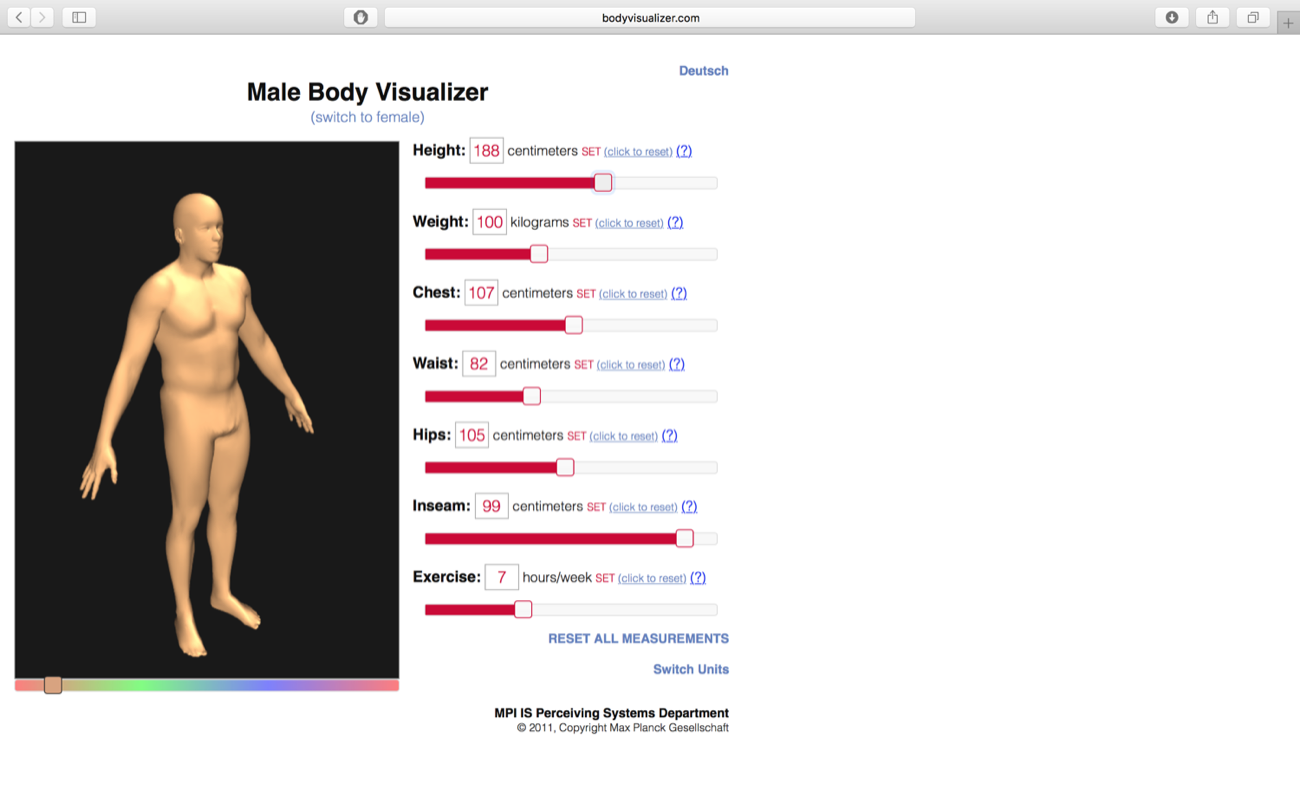
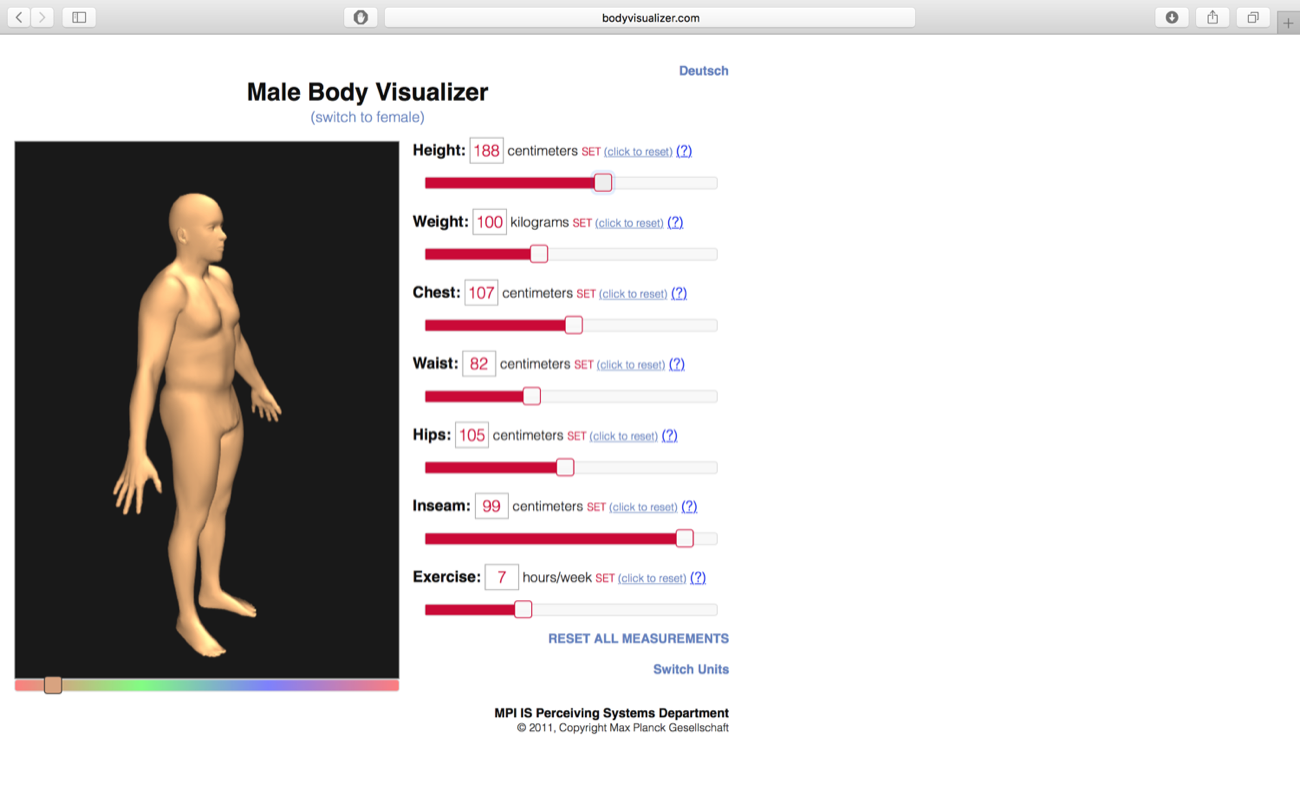
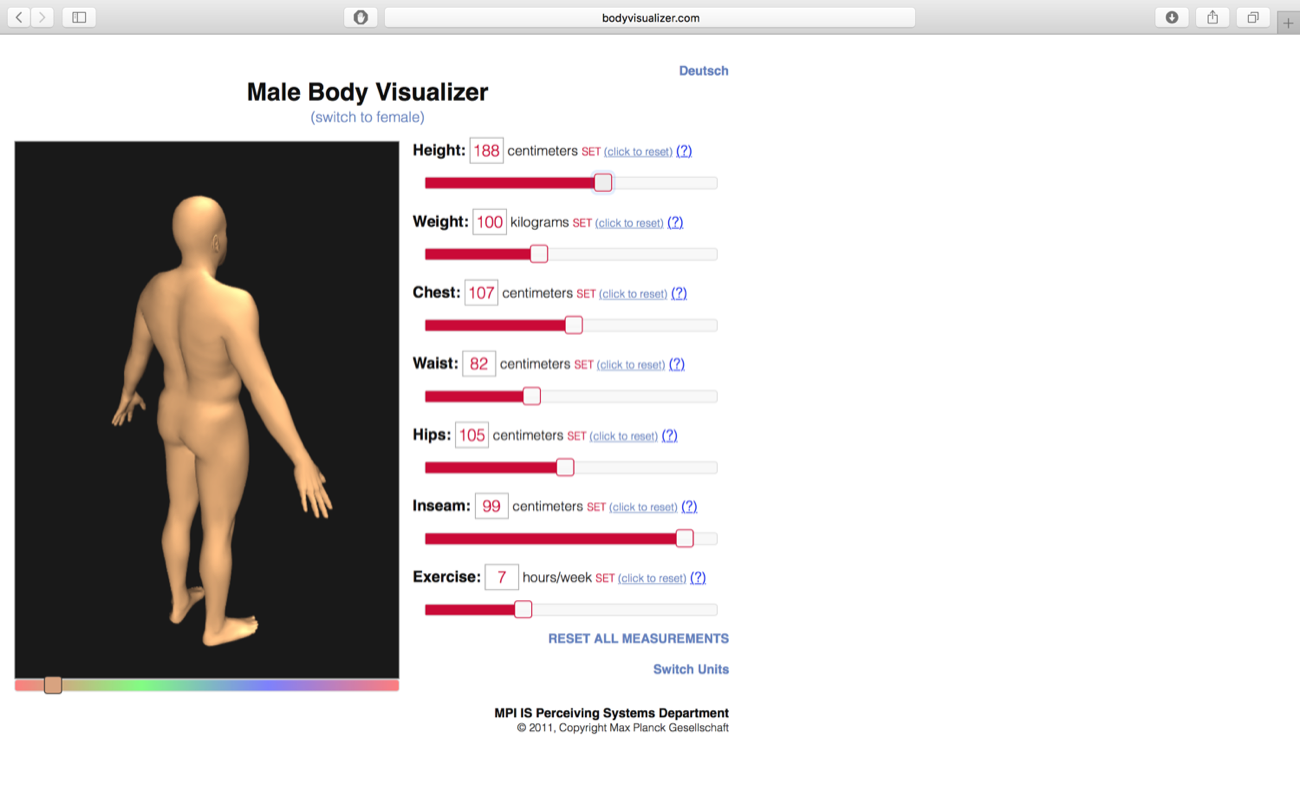
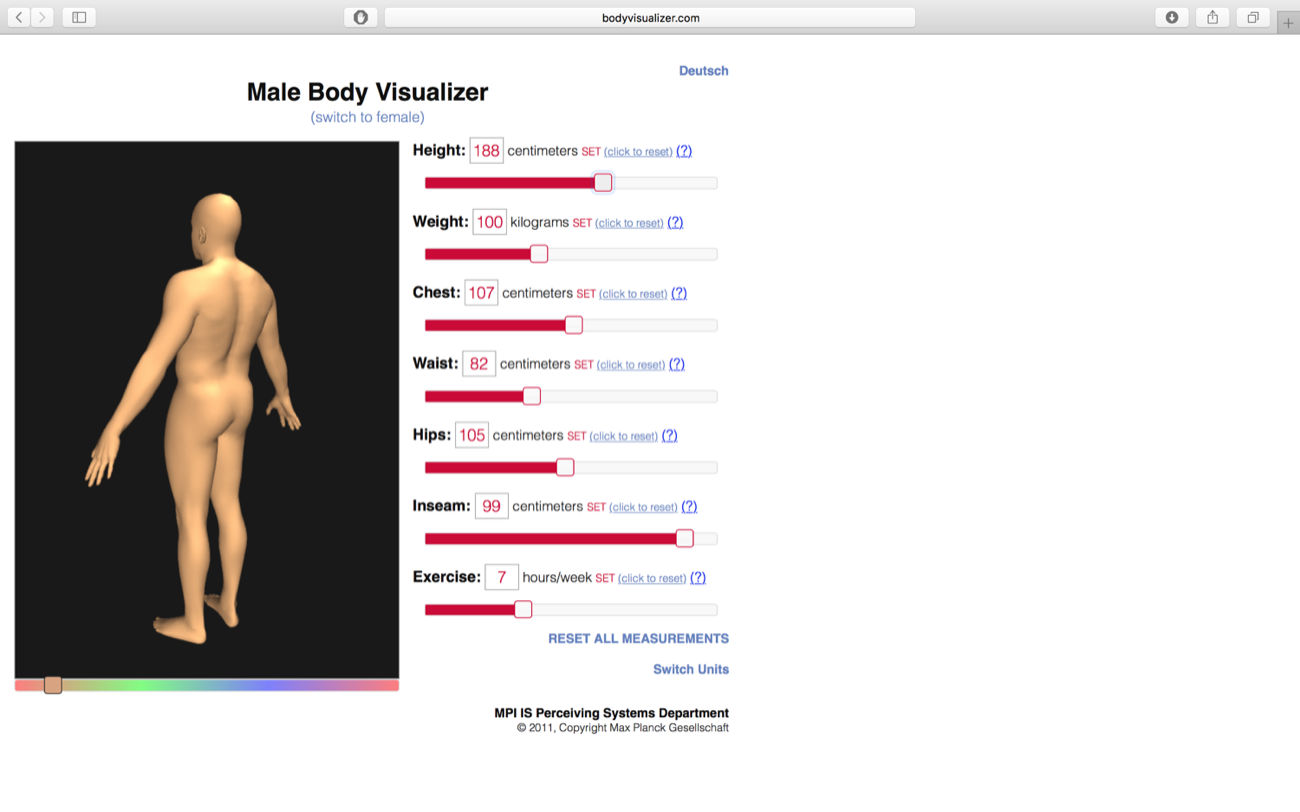
##### 10 | Testing Bodyvisualizer.com |
Here you enter parameters like your size, your weight, how many hours/week you do sports. I am surprised that there is no button to export a .stl from this web-interface.
a | a
- | -
|
a | a
- | -
|
a | a
- | -
|