..................................................
6. Textile as Scaffold#
Exploration of different techniques of applying textile in the industry such as composites, crystalization, concrete casting and agglomerates.
Crystalization#
The first exercise the team at Fabricademy Amsterdam did, was learning crystalization and how to let them grow on fabric.
Examples :
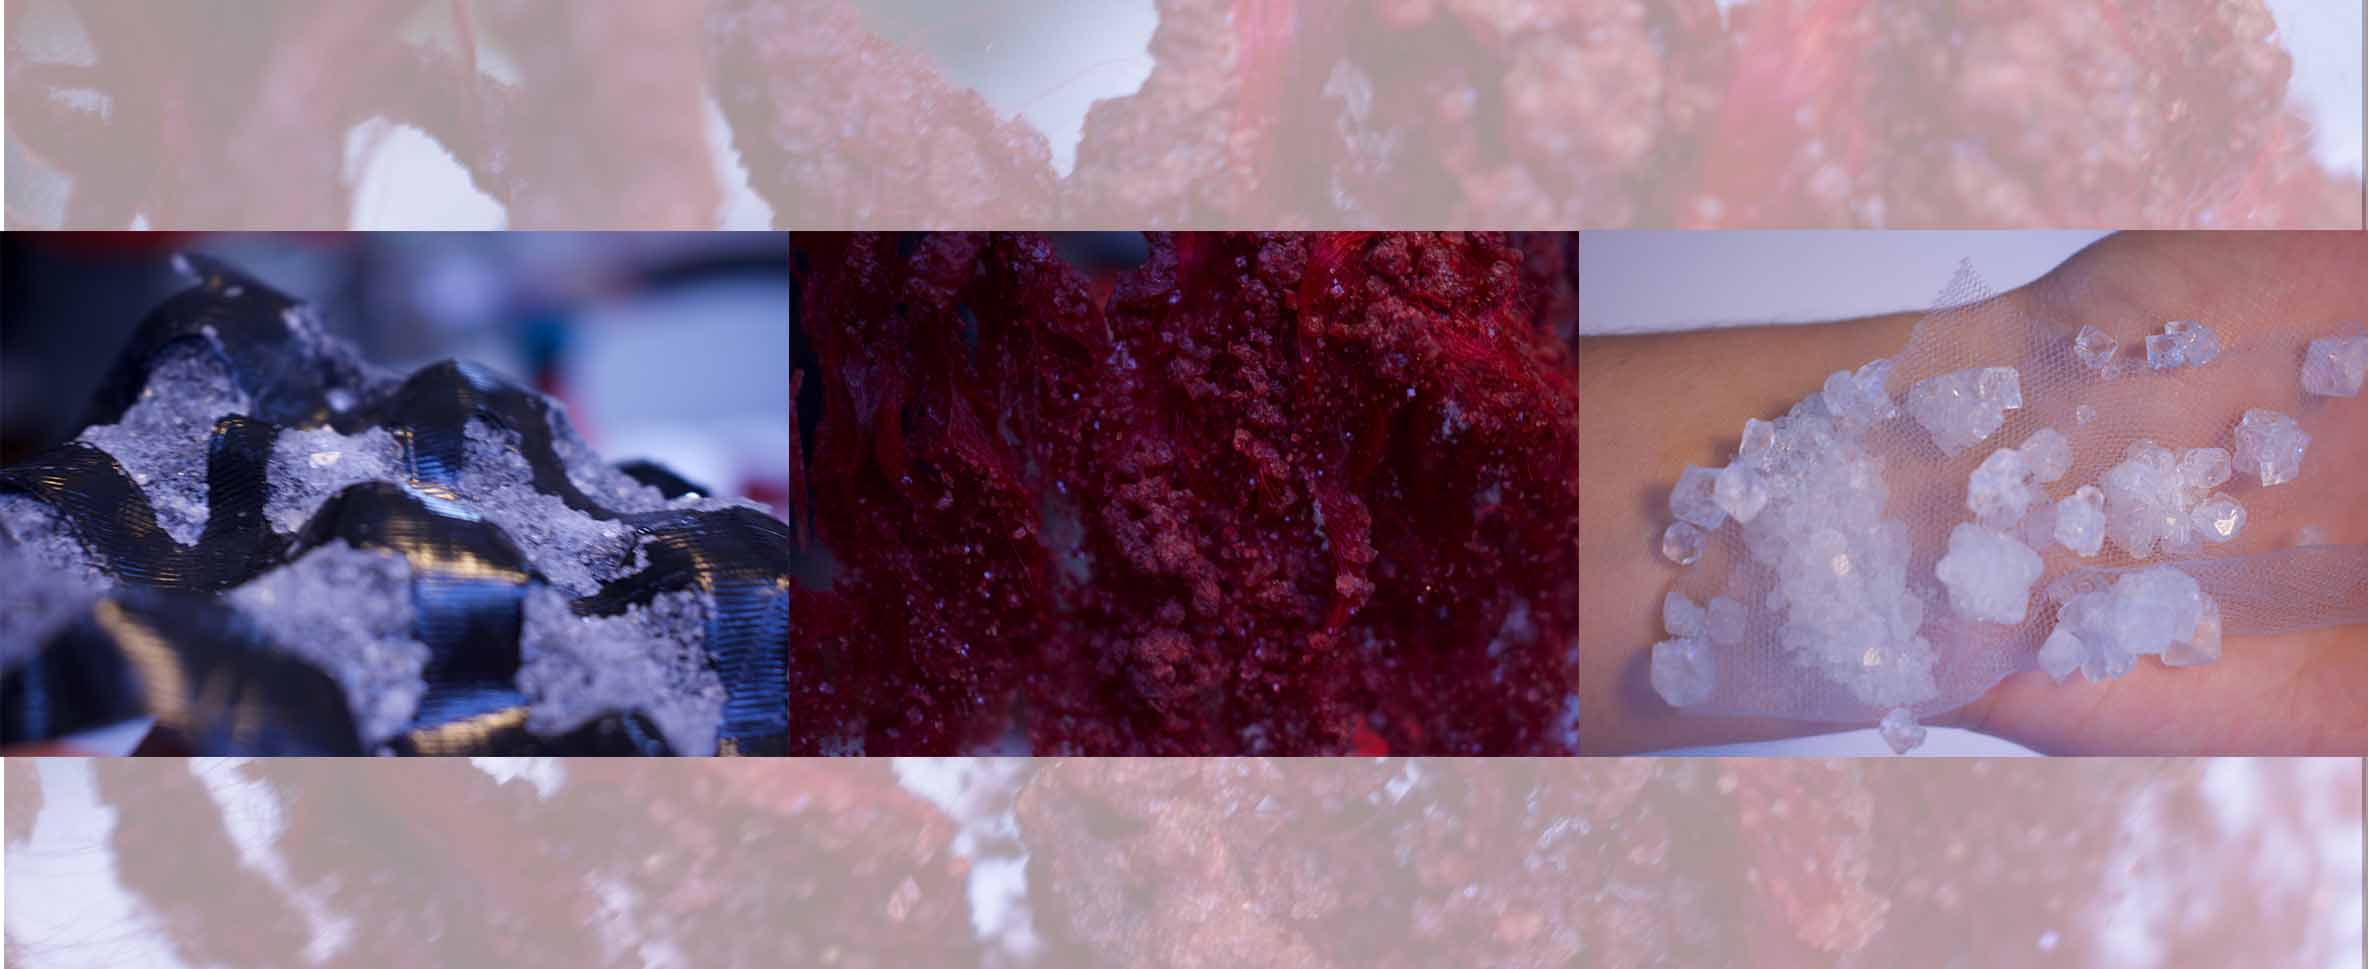
We started by saturating boiling water with a crystal composite :
- Crytal powder (salt - sugar - alum - …)

Mix well !
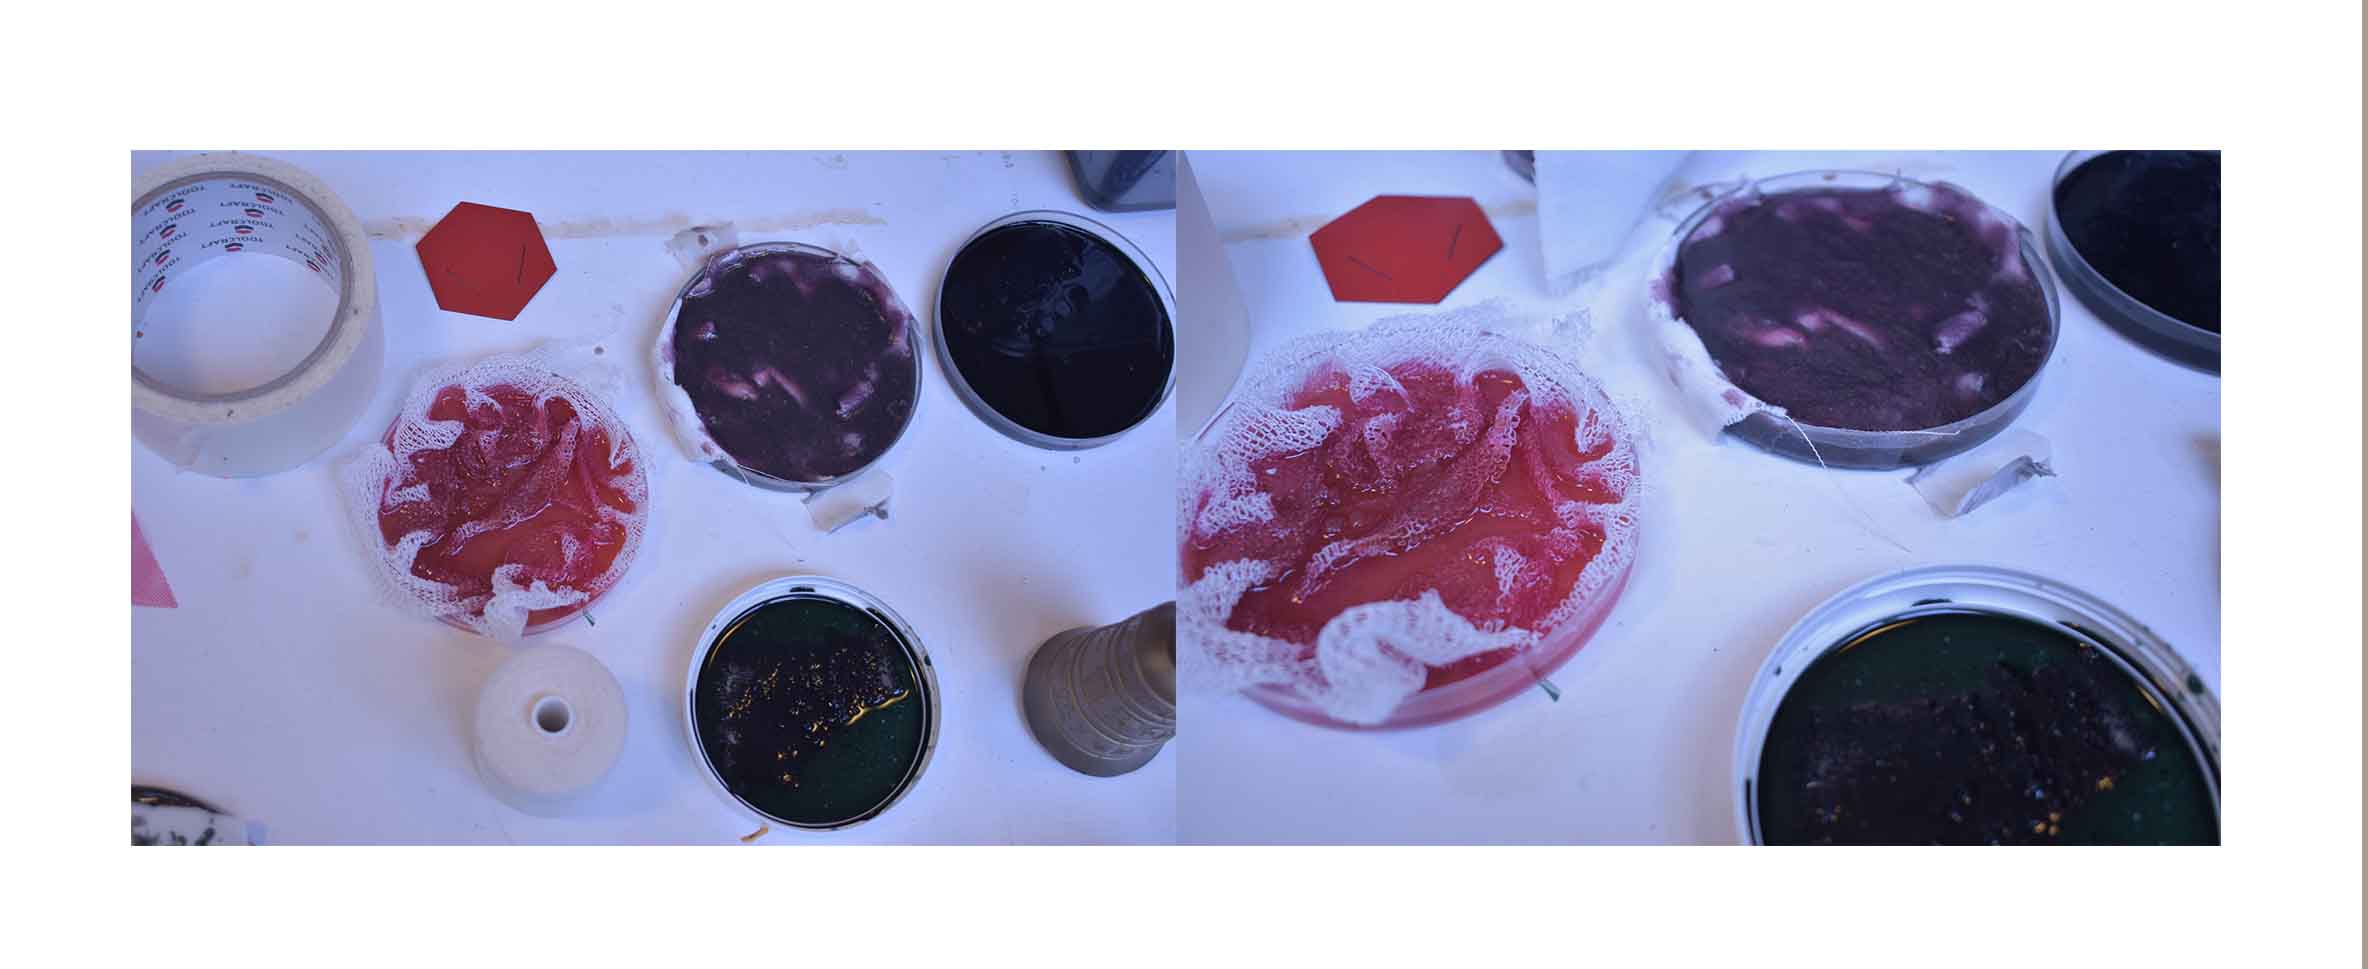
When ready, put some of the liquid into a small container and dip pieces of fabric as seen below :
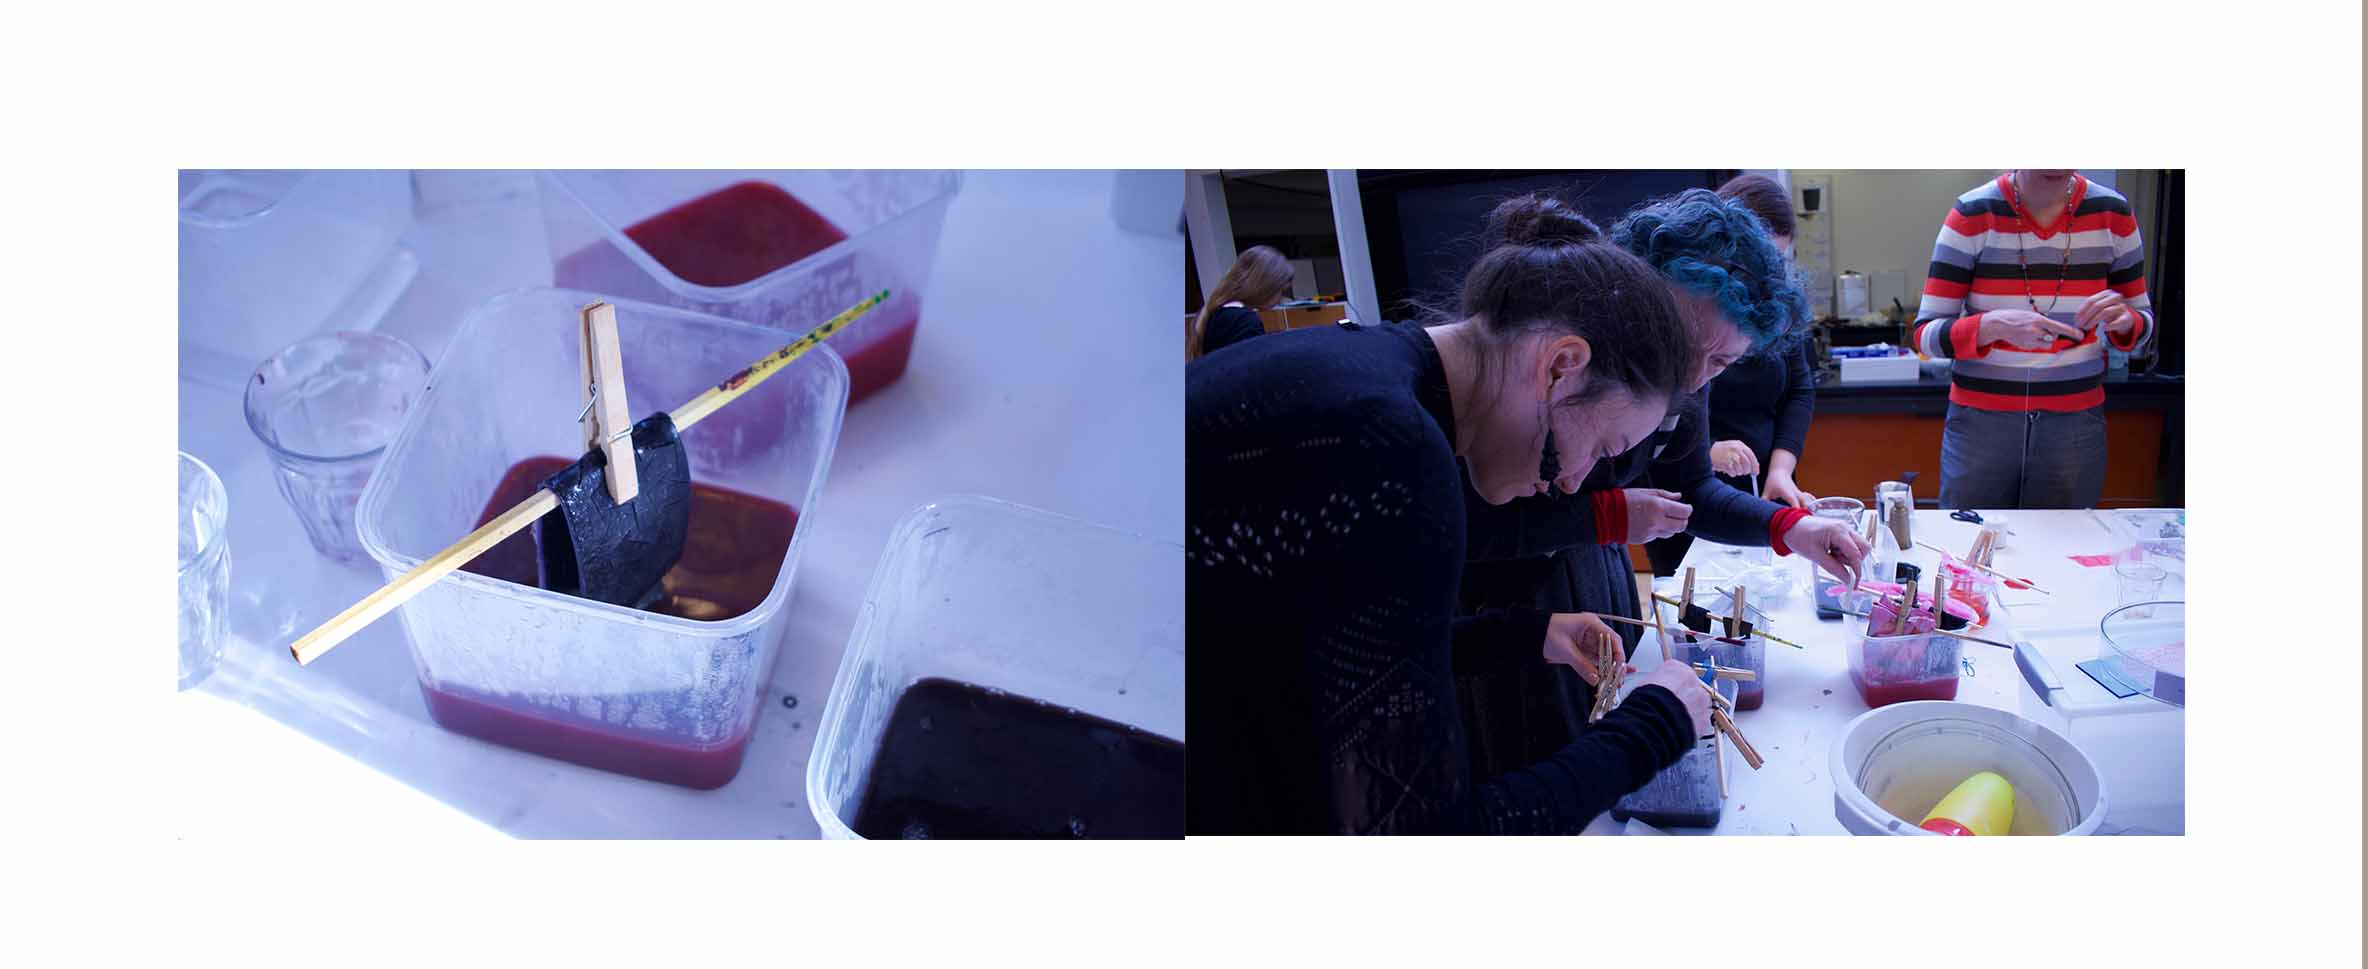
Or even in smaller containers like petri dishes :
.........................................................
Milling & Composite#
The next exercise consisted in learning on how to use the Big Milling Machine. We got an amazing introduction with all the explanations needed by Henk and Wendy. If you’re interested in knowing how the machine work i recommend to check out Teresa’s notes that are perfectly completed (and better than mine).
The Design#
My idea for this assignment is to create a biodegradable Corset, that I would design on Rhino3D. I will then export the model into the milling machine to get the mold needed for my composite. As I want it to be biodegradable I will choose to do a bioplastic for the composite and add some gold foil to give an artistic and fancy shine to it.
Steps#
It is my first time working with the Rhino3D software, and I had 48h to learn and figure out some basics I’d need for the design. To simplify my task, I first started with setting up a 3D female human body in MakeHuman, and exported the file into Rhino3D. There, I started to draw on the body the lines, mesh, and finally the shape of the design.

Starting with the lines to create a mesh. Therefor, I ‘group’ the lines together.

Then, I transform the mesh into a surface by using the command ‘Loft’. I tried different ‘Loft styles’ and happen to get different ‘Wolverine-scratched’ effects. LOL

I ended up finding the right surface type. Then added the half corset’s symmetry by ‘copy & paste’ and ‘transform’ it by using the command ‘mirror’ :

Milling the mould#
Next step is to export and set the file on the Milling machine.


Preview given by the software of the end result.
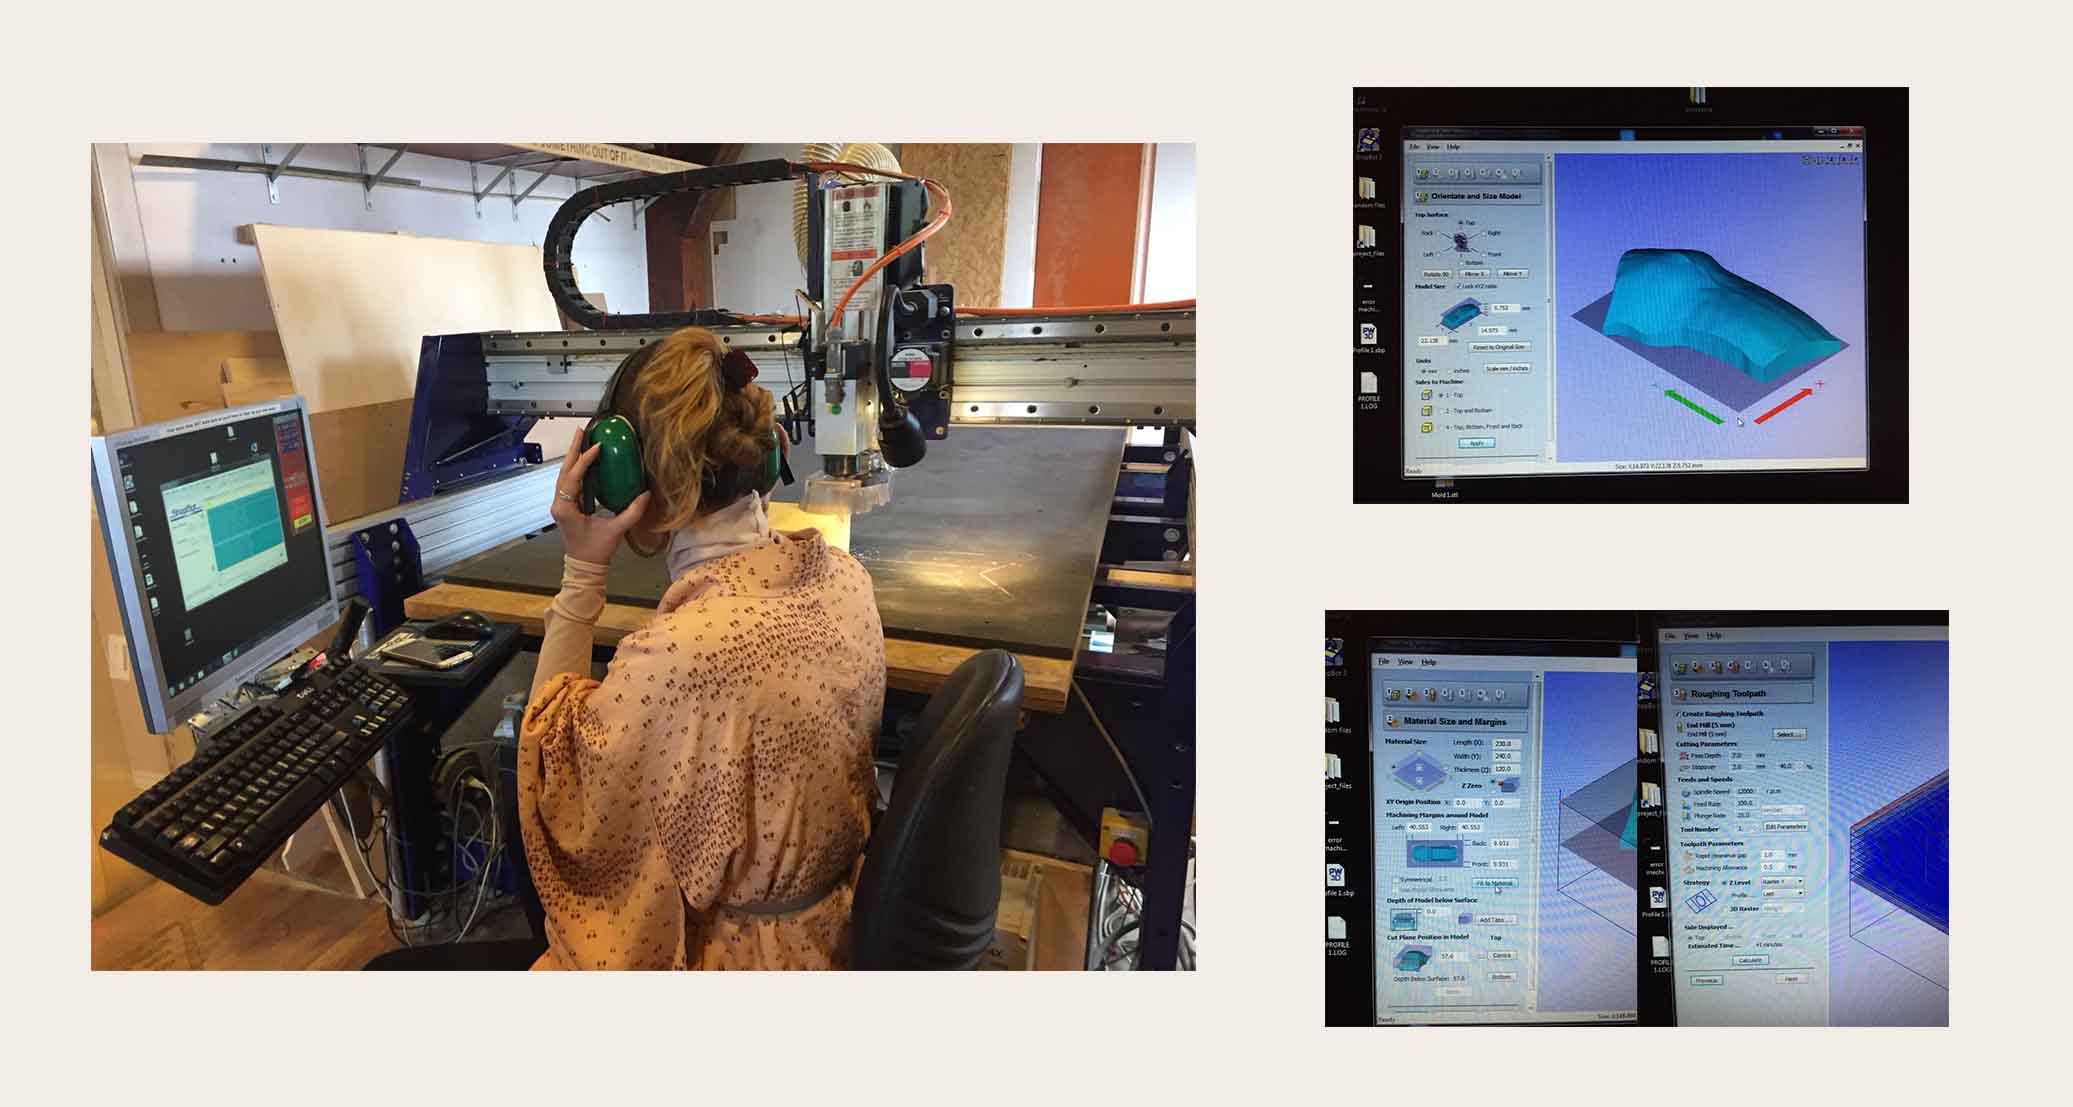
Here you can see the settings I adjusted on the Milling machine software PartWorks3D for the Corset mould.
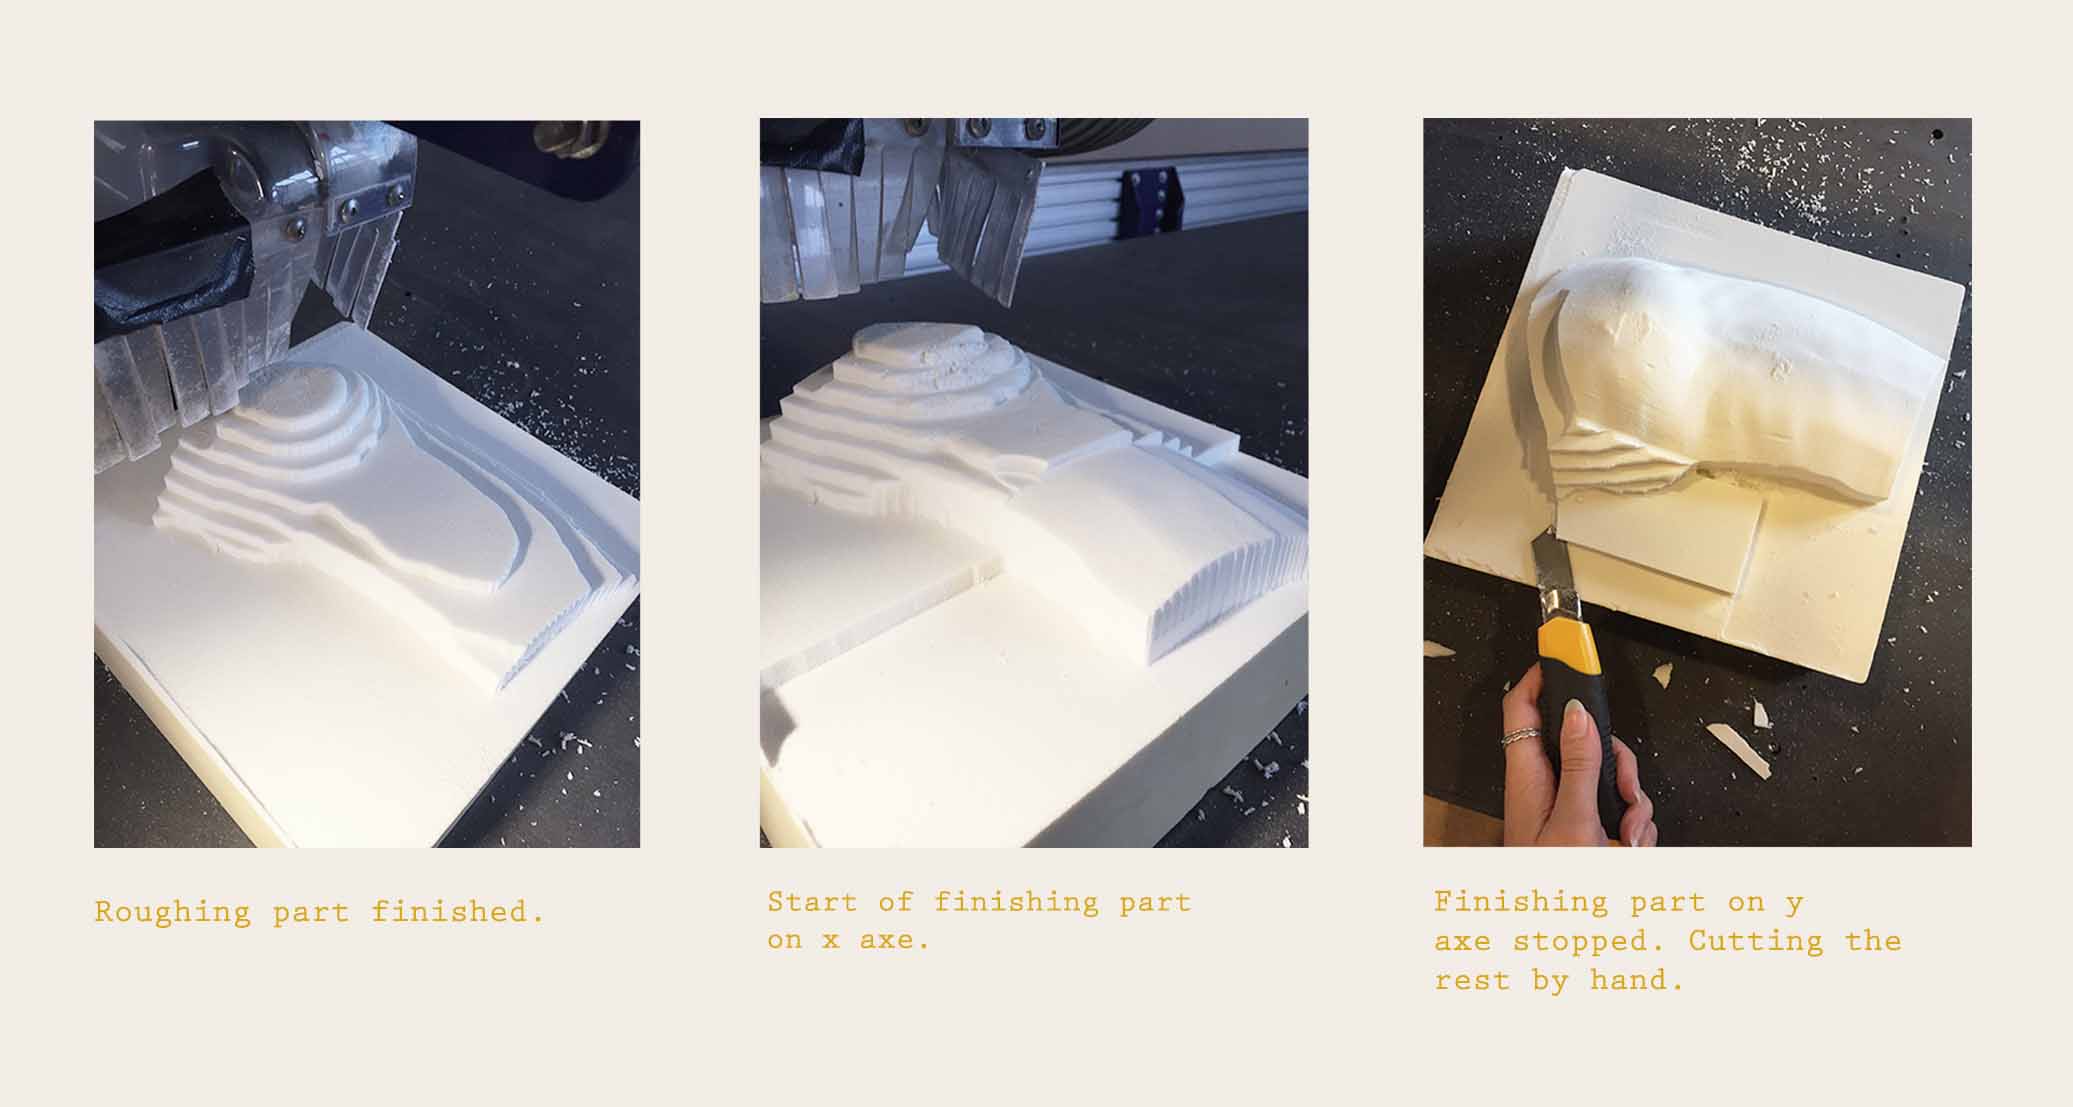
Unfortunately, I came across a few problems while the mould was being milled… the depth of the upper part of the mould was was higher than the size of the drill I was using.. the consequence is a hole in my mold ( you’ll see further down ).
I had to change the settings of my file a few times :
- I had to stop the roughing part on the 7th layer and not do the 8th the hole would have been bigger
- I first set the finishing part along the ‘x’ axe, but half through there was the problem with the drill size so I changed the setting on the file on doing the milling along the ‘y’ axe
- I also had to stop the last steps of the Finishing work, because I got the same situation as for the ‘8th layer-issue’ from before. So I stopped the machine and did the rest of the work by hand while using a cutter and paper-sand to smoothen that unfinished part.
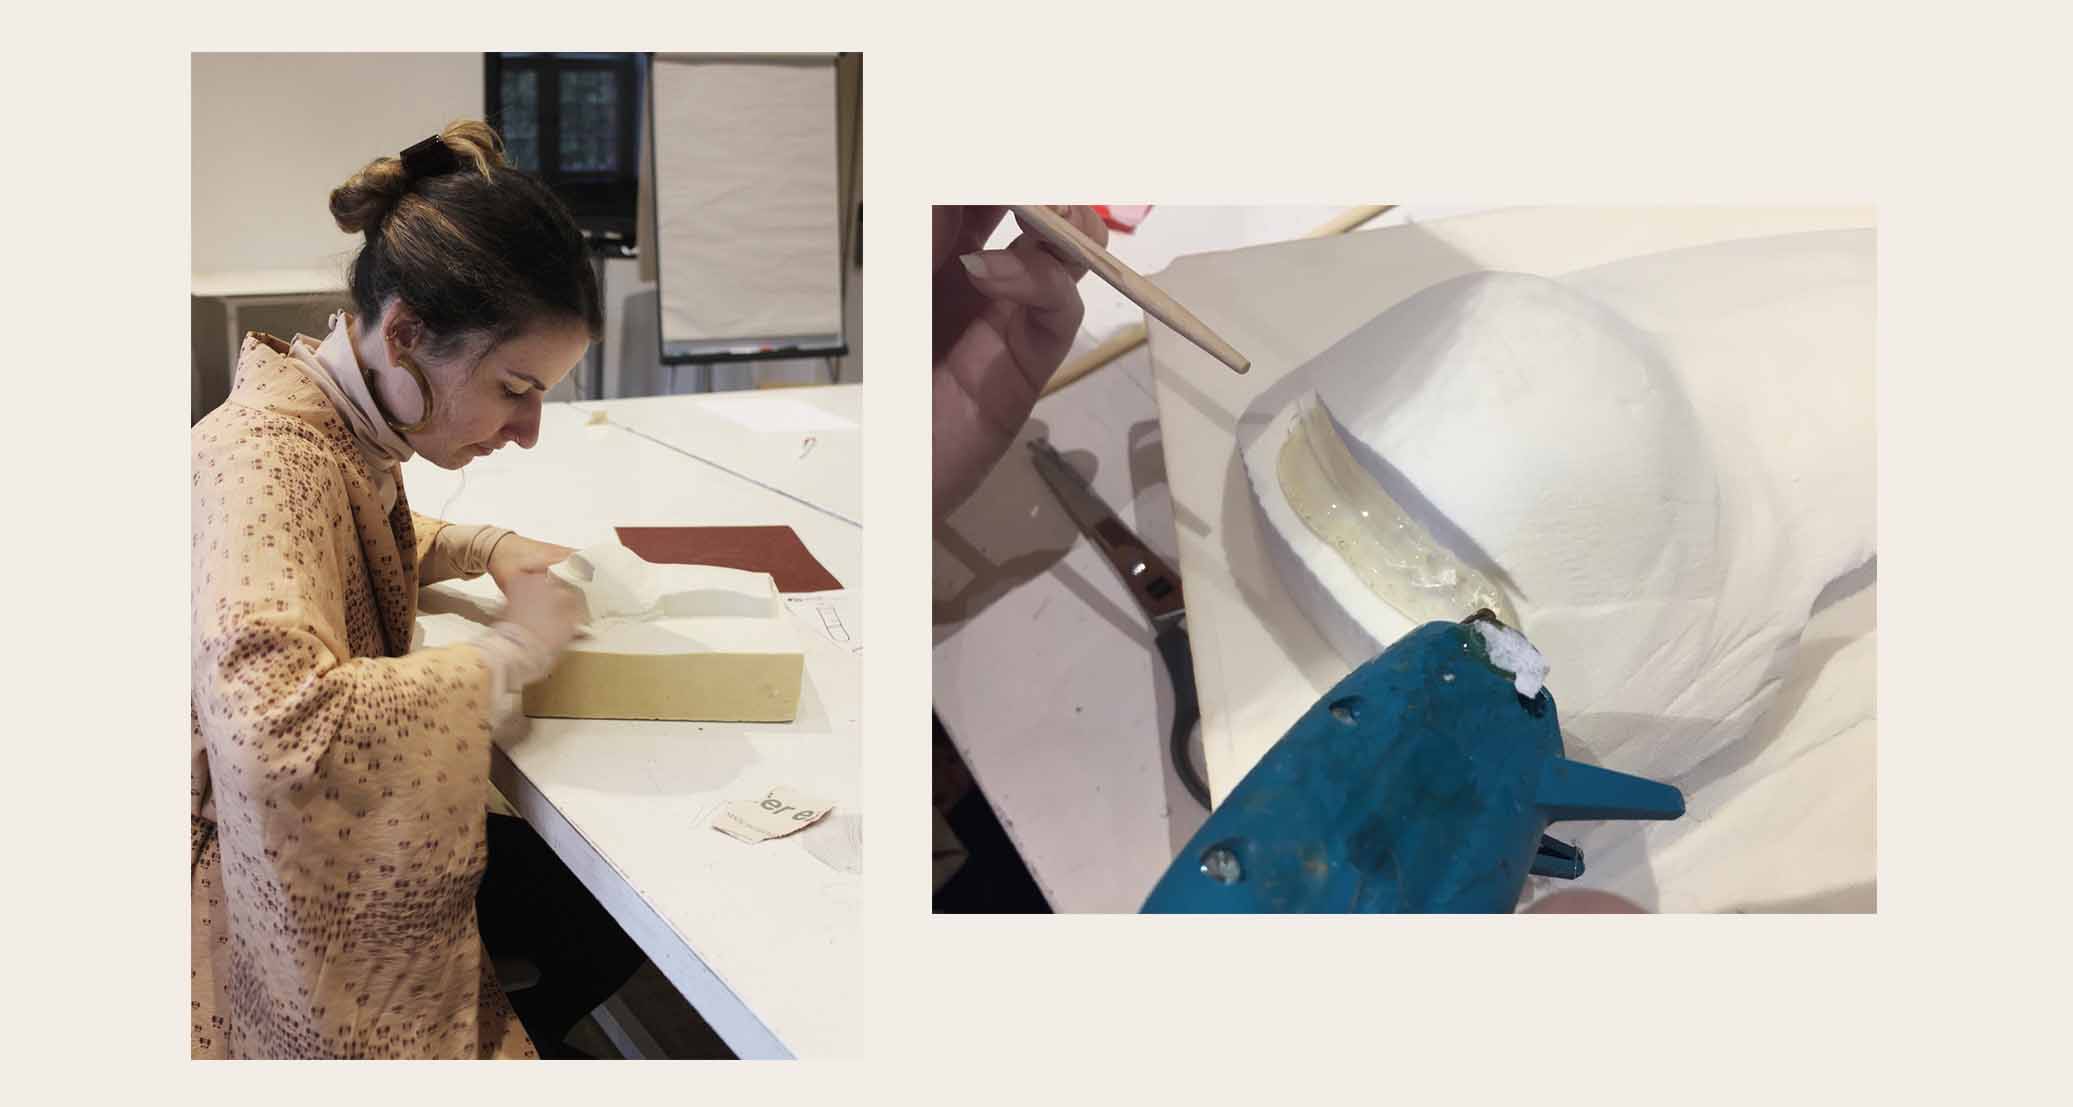
- Last step, was closing the hole. I used the hot glue gun to fill the it.
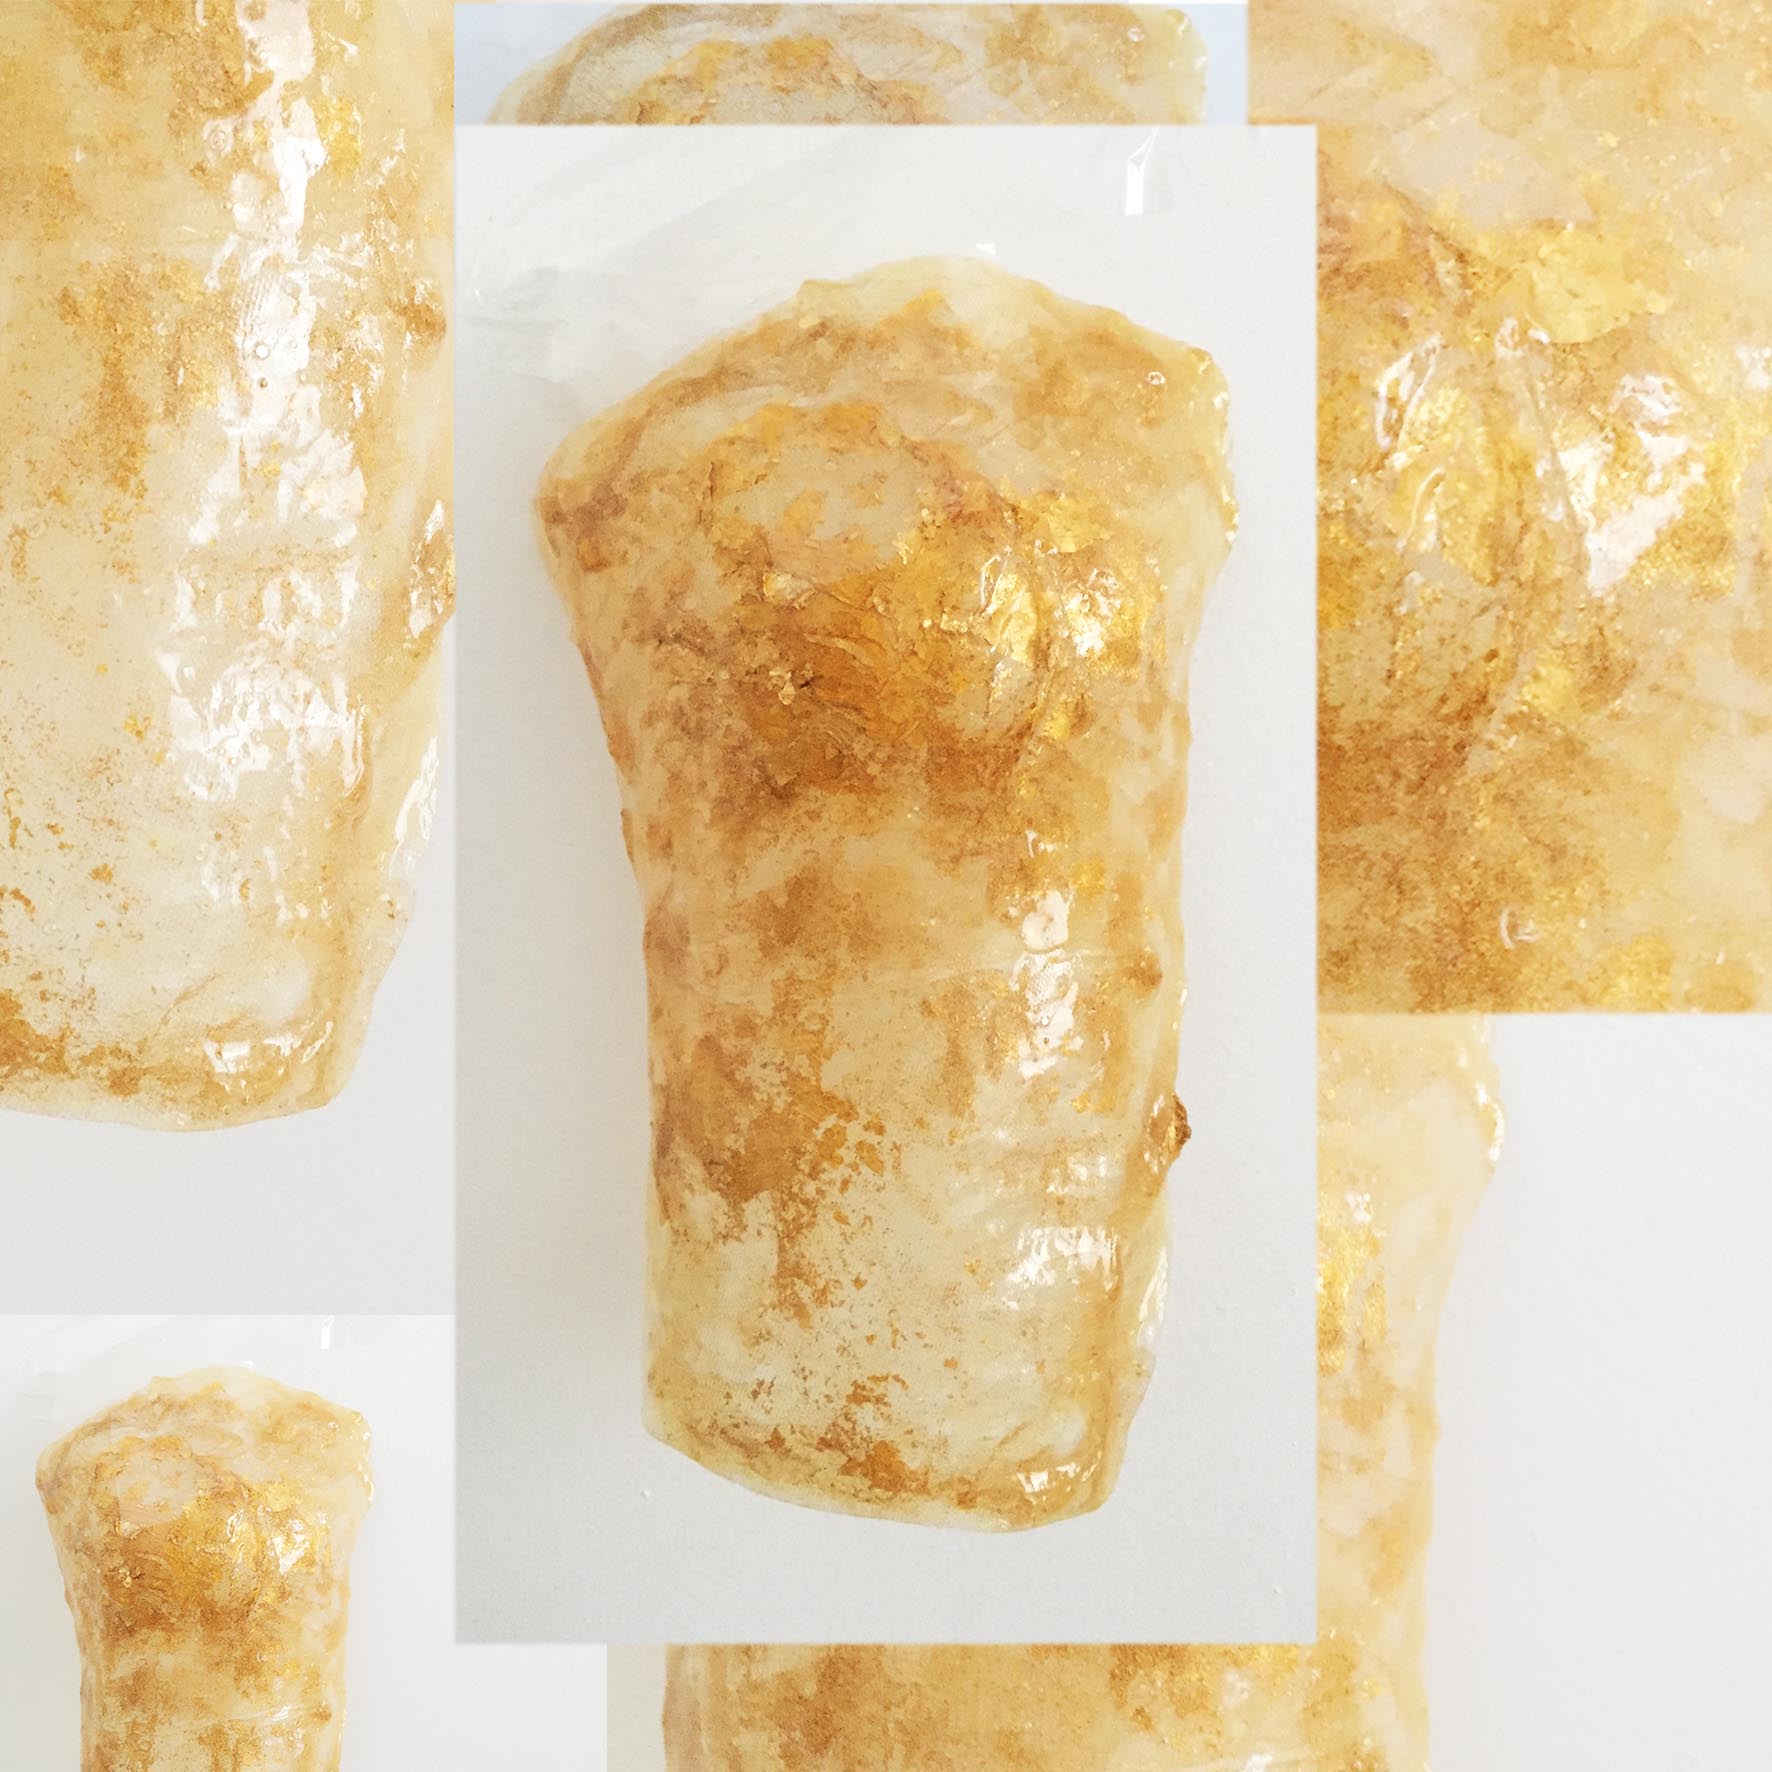
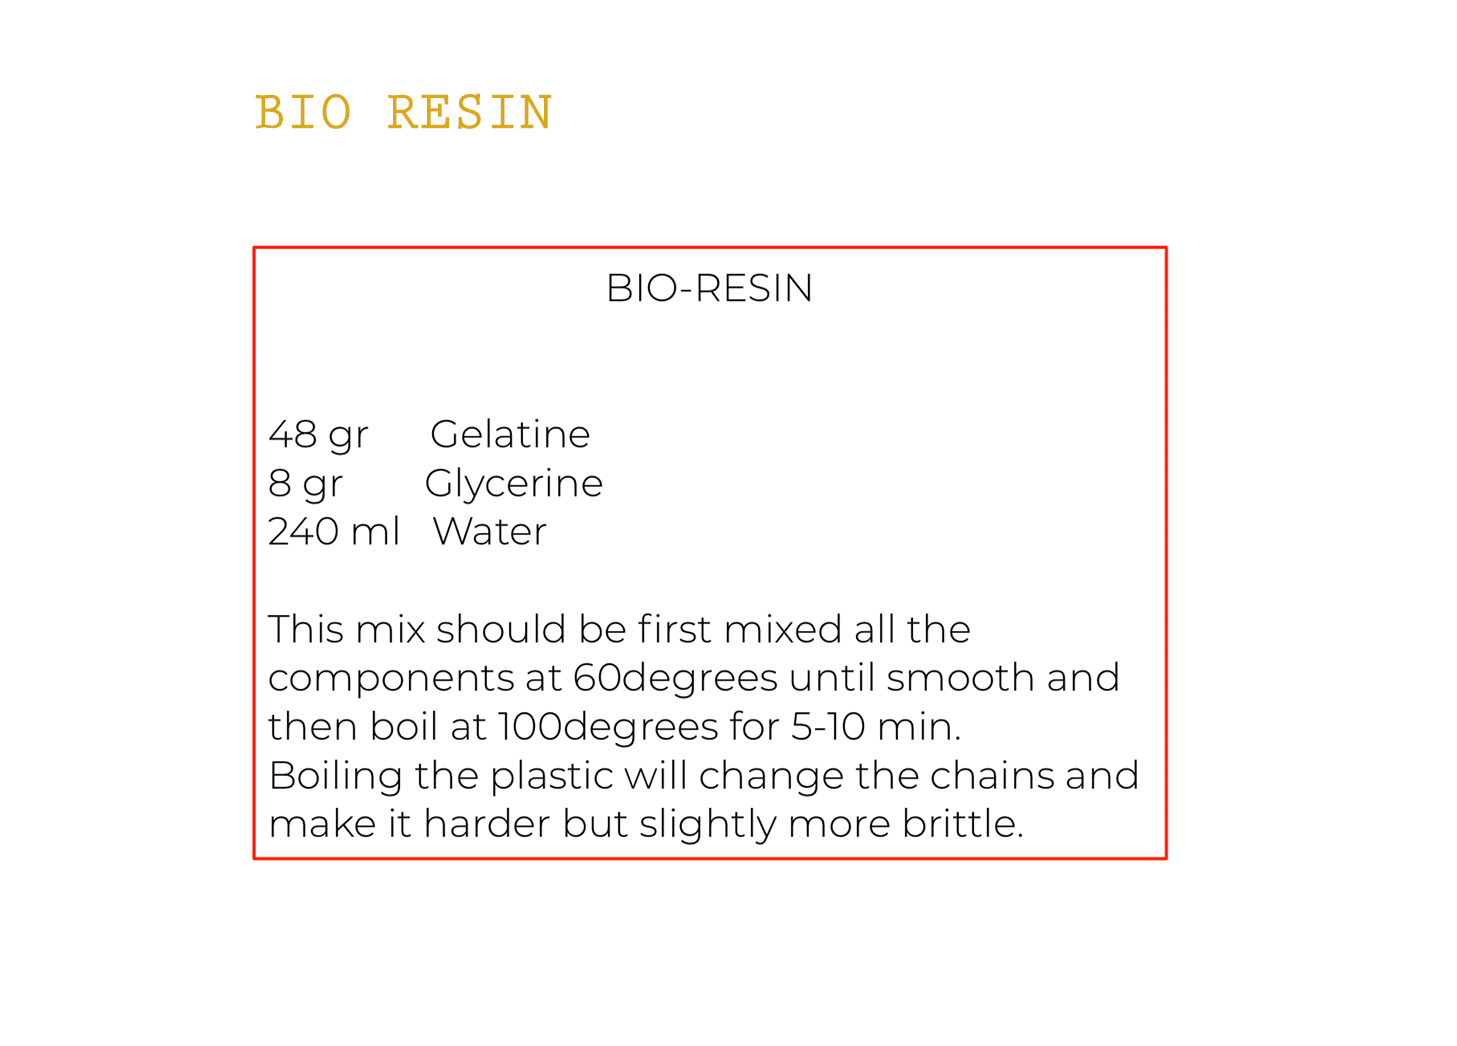
The Composite#
Recipe :
Steps :
- Put some plastic foil on the mould.
- Choose whatever fabric to put on top. I choose blush-coloured tulle. And put a rubber tie all around to hold everything in place.
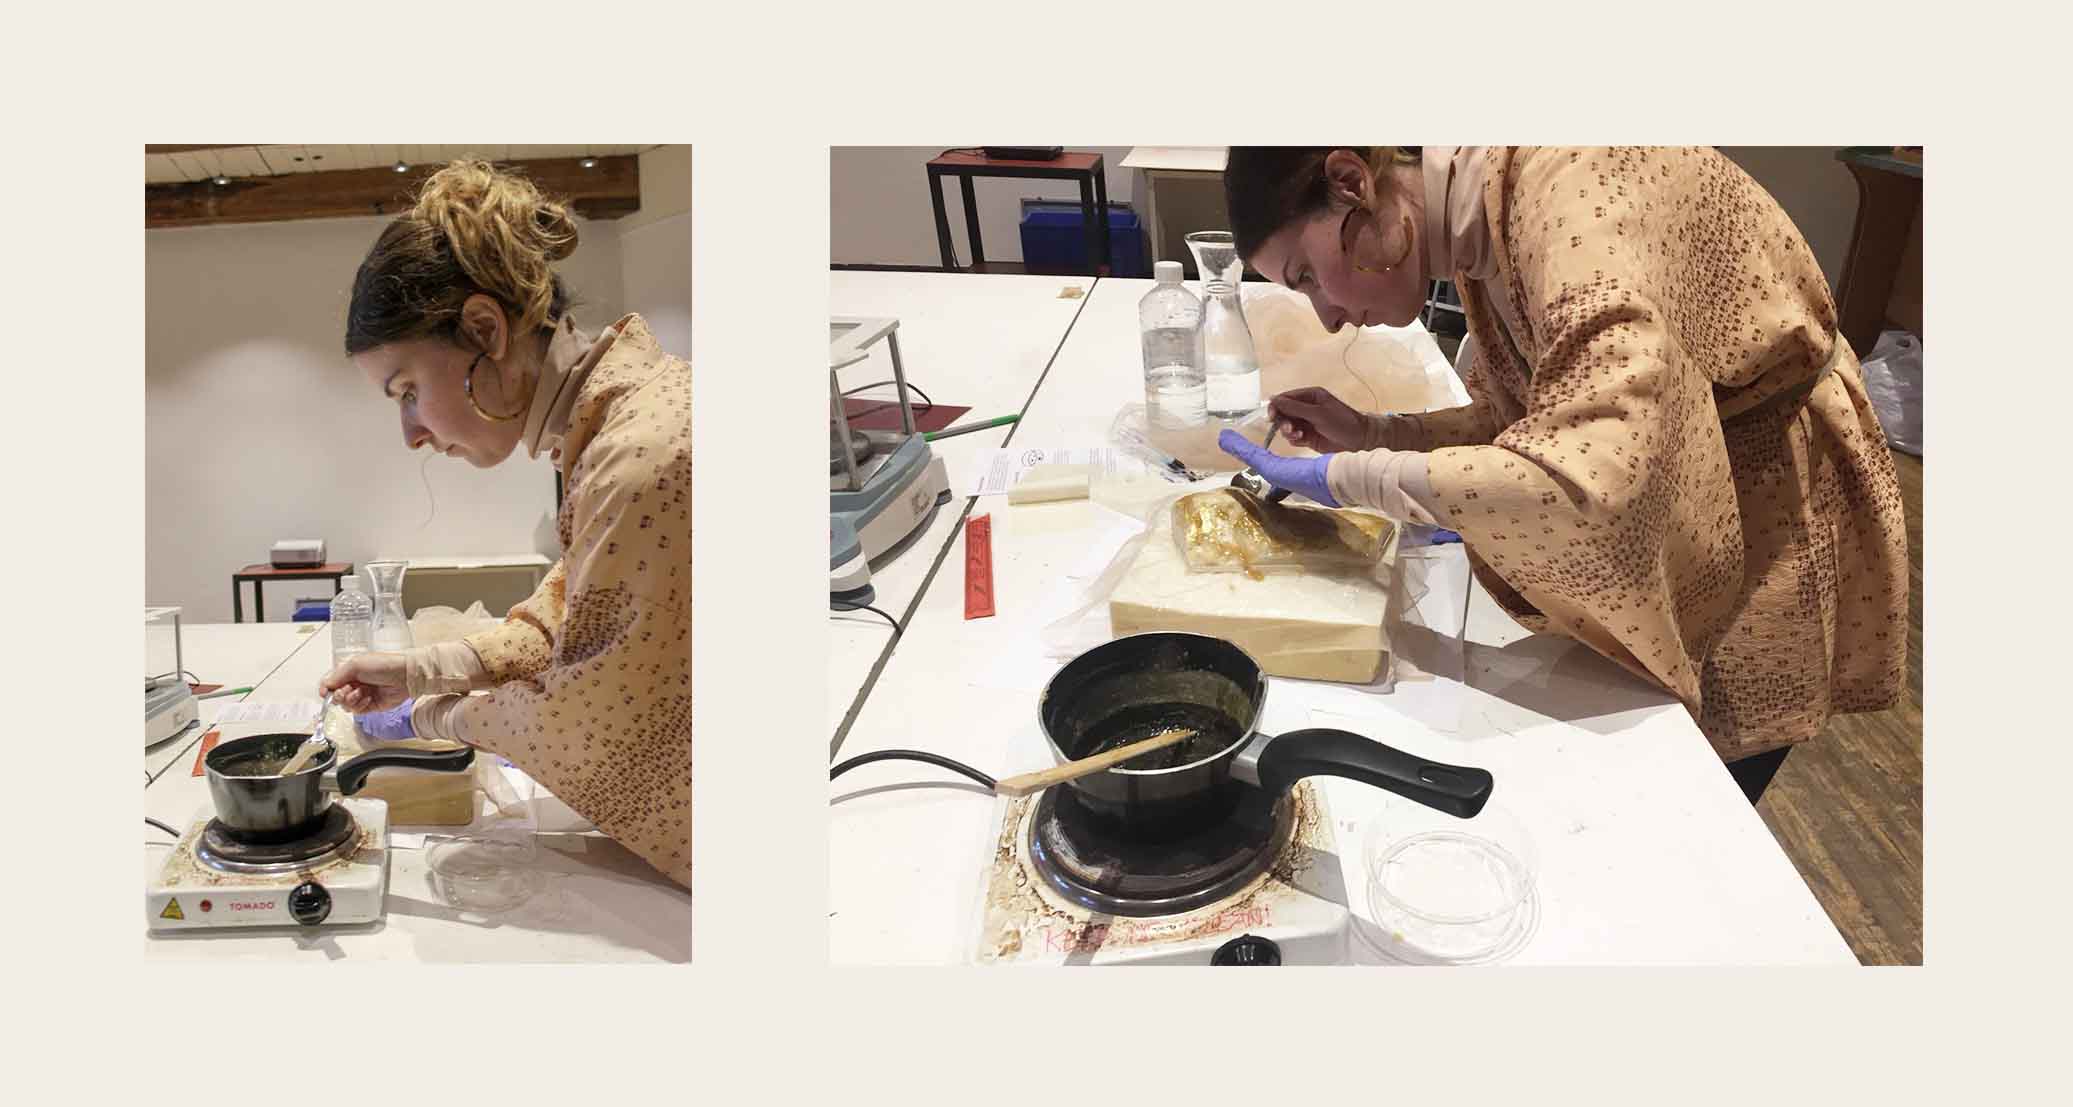
- I choose the bio-resin recipe for the composite. I spread the quite thick liquid on my mould with a first layer.
- Let it dry.
- Add whatever foil on top, like I did with the gold foil.
- Put one more layer of bio-resin/bioplastic.
- Let it dry until it gets hard.
More about Gold leafs/flakes#
You can find more information on Gold leafs here :
https://www.thespruceeats.com/what-is-edible-gold-leaf-520343
They can be easily purchased on Amazon

Composite drying :
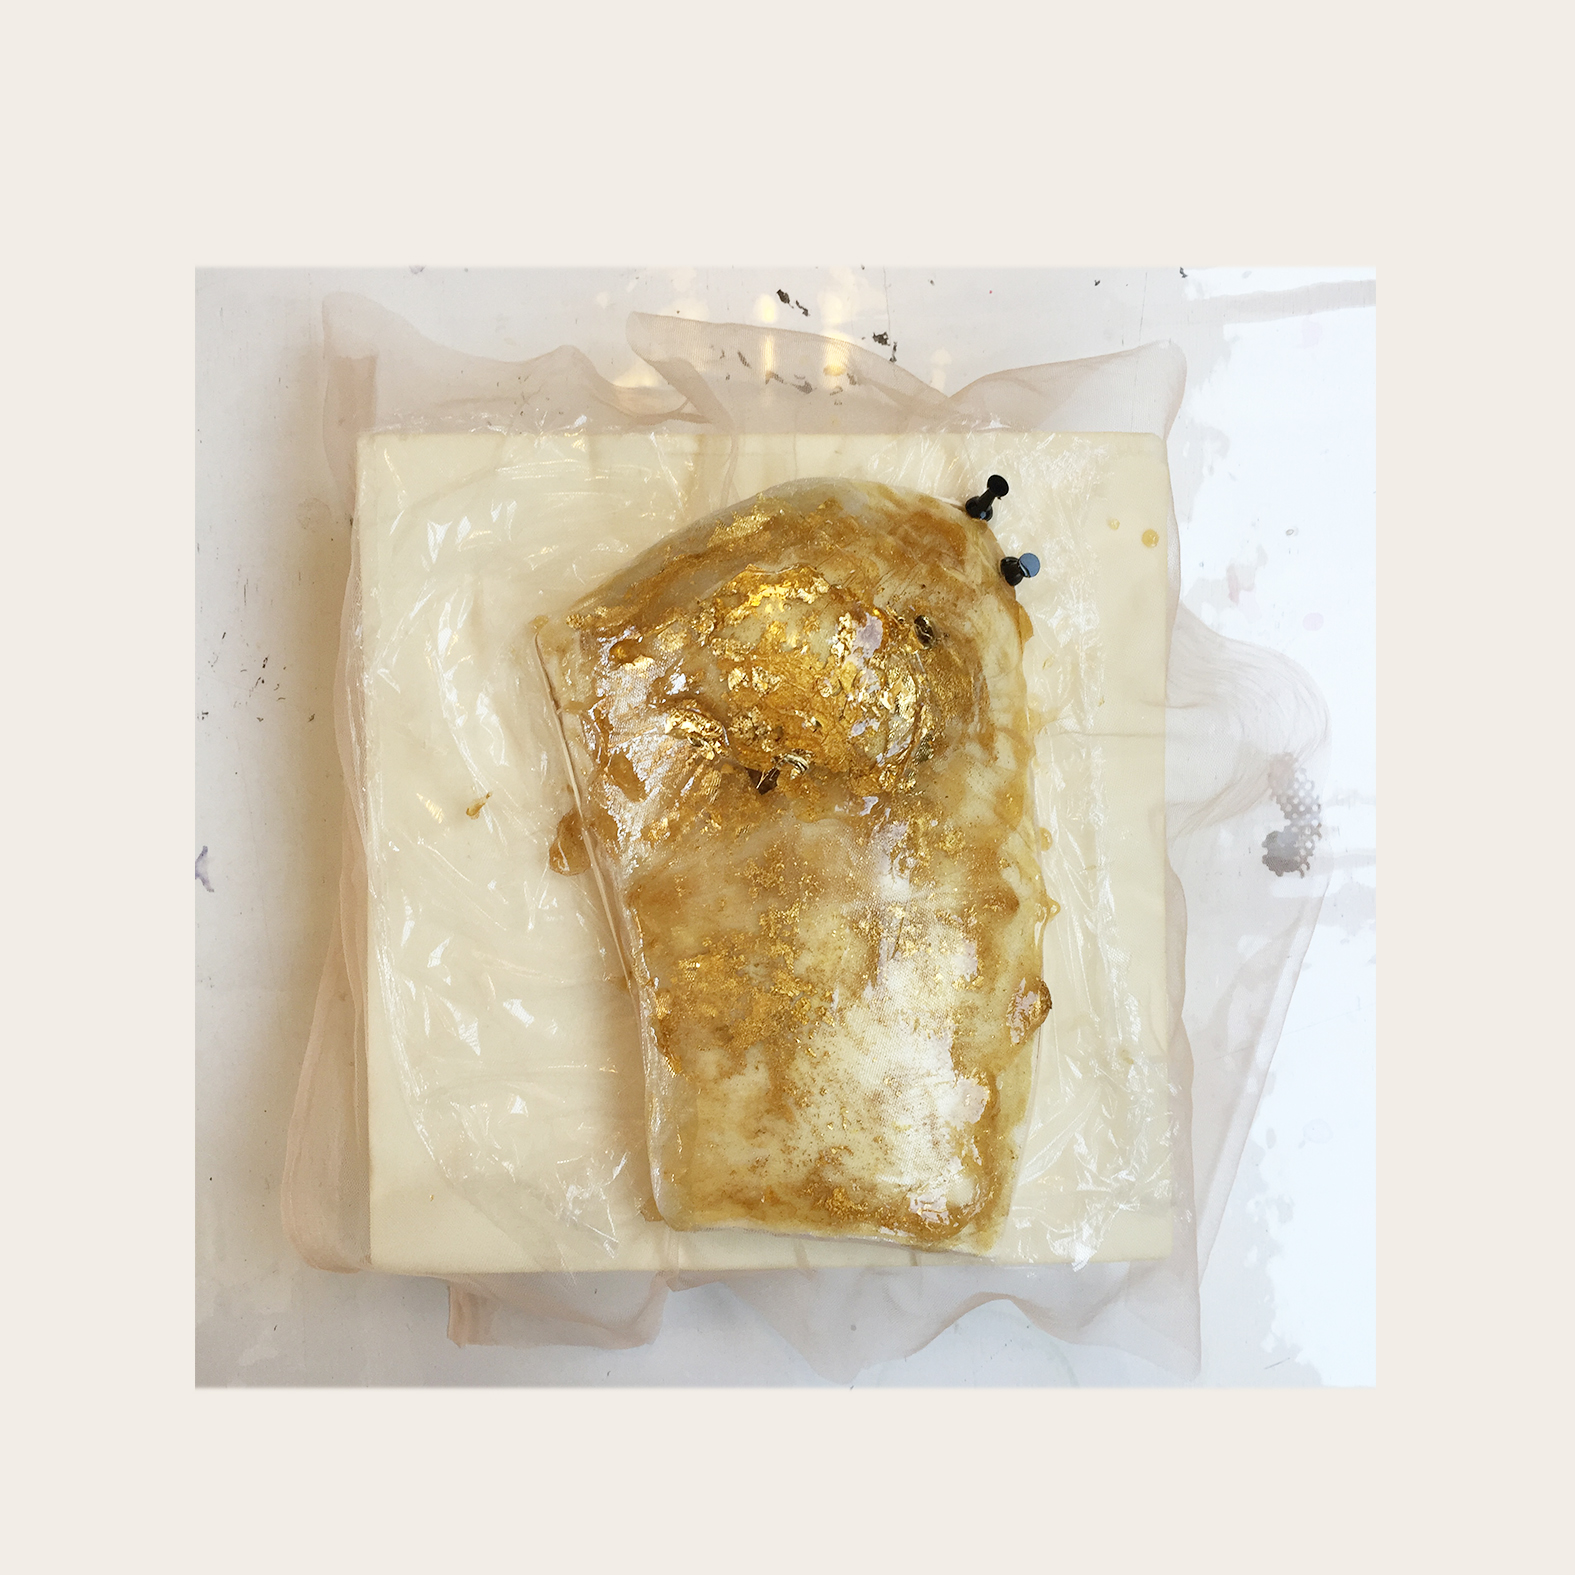
While drying, the composite dehydrated and got thiner..so that’s why you can add another layer of bioplastic on top (make sure to let it cook even longer with less glycerin so it hardens more). Another alternative is to take the composite out of the mould and put a second layer of tulle + bioplastic on top of the inner layer.
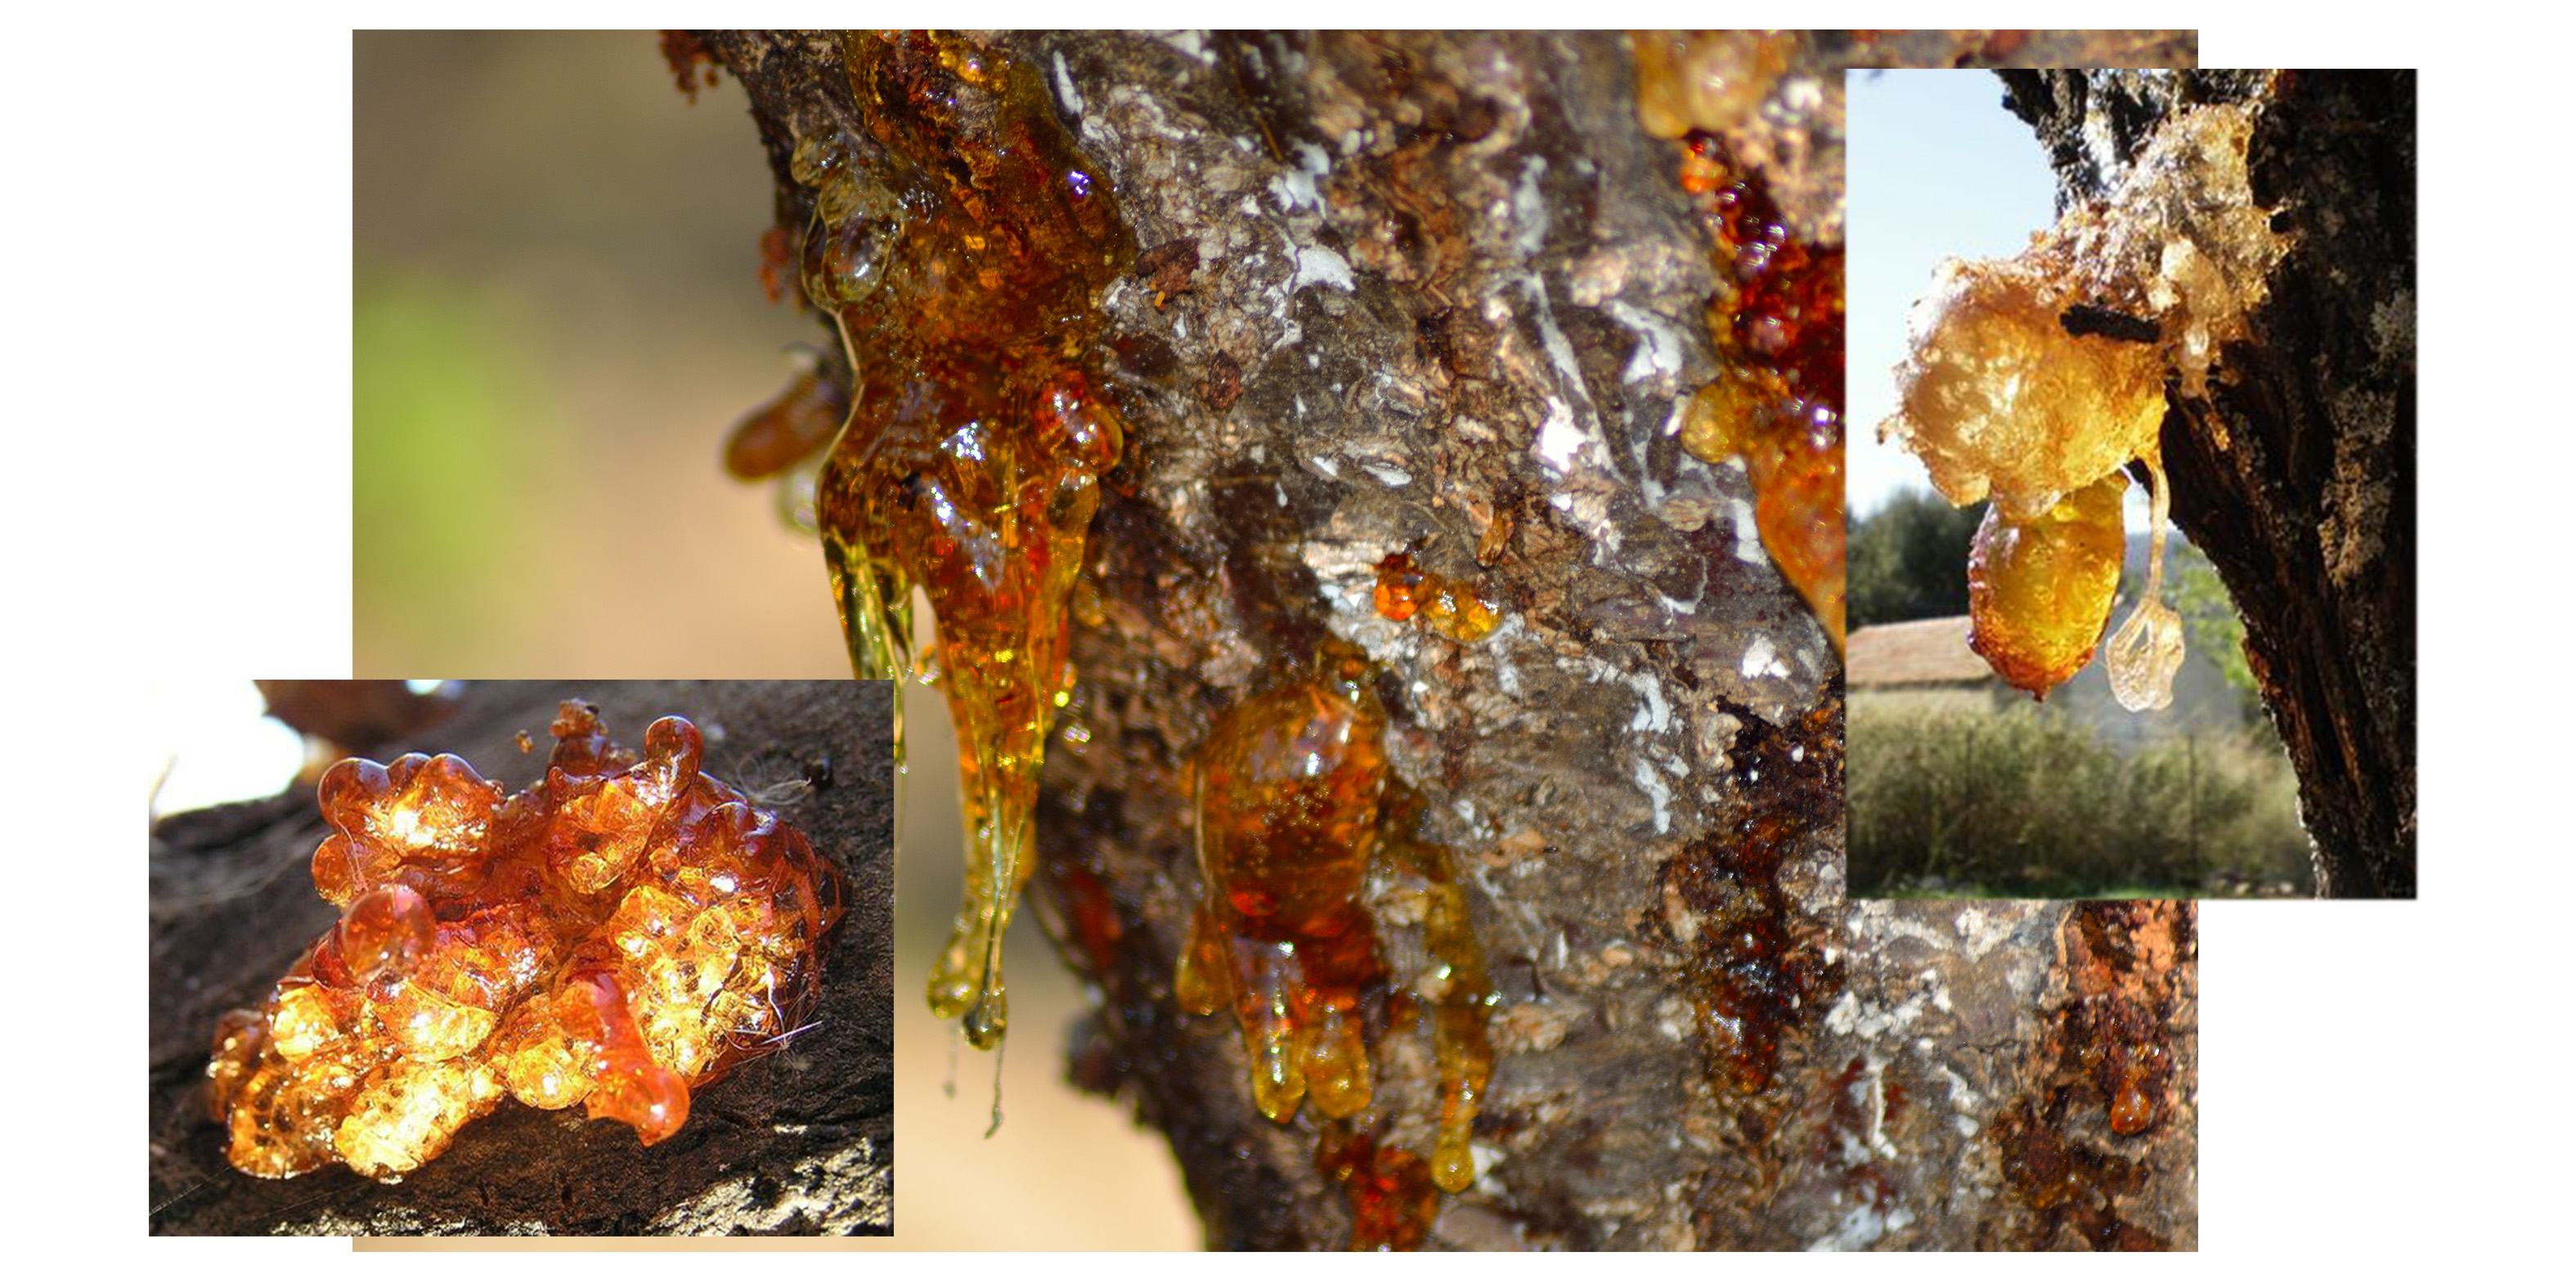
Inspiration behind the project#
I always thought that tree-resin was a beautiful liquid. So I wanted to mimic the aspect of it with ingredients I had available. I think that the end result is a pretty good mimic, maybe I could add some orange coloring next time !
Final result all dry :