Poem for a window
Poem for a Window is a project based on the fragile reality of living in confinement. It tries to encourage an healthy environment to it's user by monitoring and outputting information such as the air quality, the temperature and the humidity index. The project is embedded in a curtain that will open and close depending on the time of the day. The curtain is also the vector in wich the data is shared, using abstract form of communication such as light, the user will be able to inform itself on it's direct surronding.
The curtain is made for people who struggles with the actual context of being stuck inside, the lack of light and therefore vitamin D would already be a solid enouph argument for realising this project in my personnal case. To create an object that pull the user onto the external light is something that I consider very valuable. The ability to monitor and therefore adapt our environment is another very important aspect of the project, It gives insight on what's going on around you.
The reason on why now is a good time to generate this kind of tool is pretty easy to understand, but let me sum it up. It's now been a year since the whole world has "shut down". The human is a social species, not being able to see and interact with others is not easy for the mind, it becomes very easy in these circumstance to forget about our well being. Also the passage to telecommuting can be hard on people, working in front of a computer all day long is not healthy, without transport the routine of a worker or a student is now pretty much limited. Studies start to show that depression and anxiety is at an all time high due to these circumstance. To illustrate this, I used KFF , this non profit organisation gives insight on health policy analysis. Here are some stats that they shared on their platform.

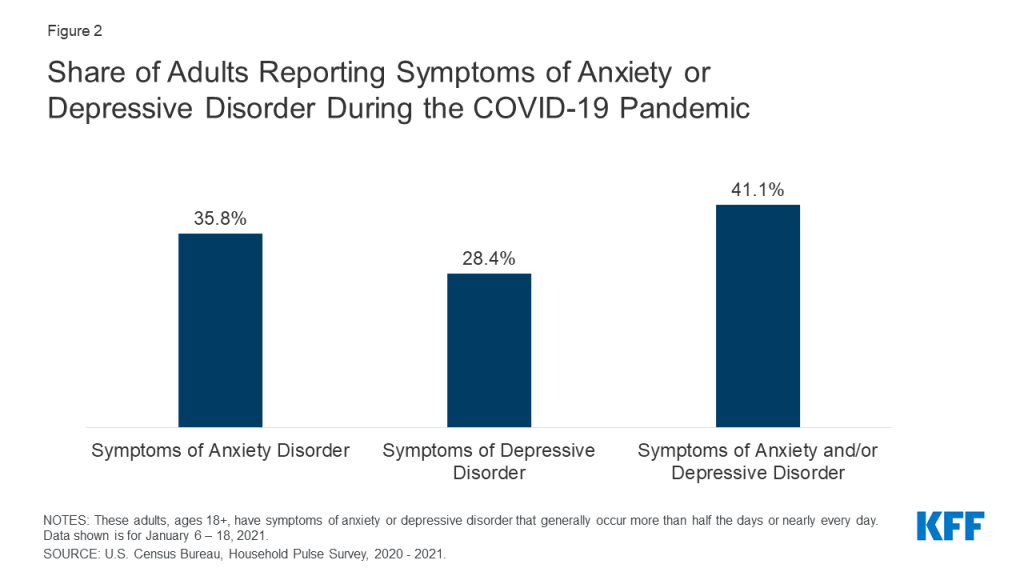
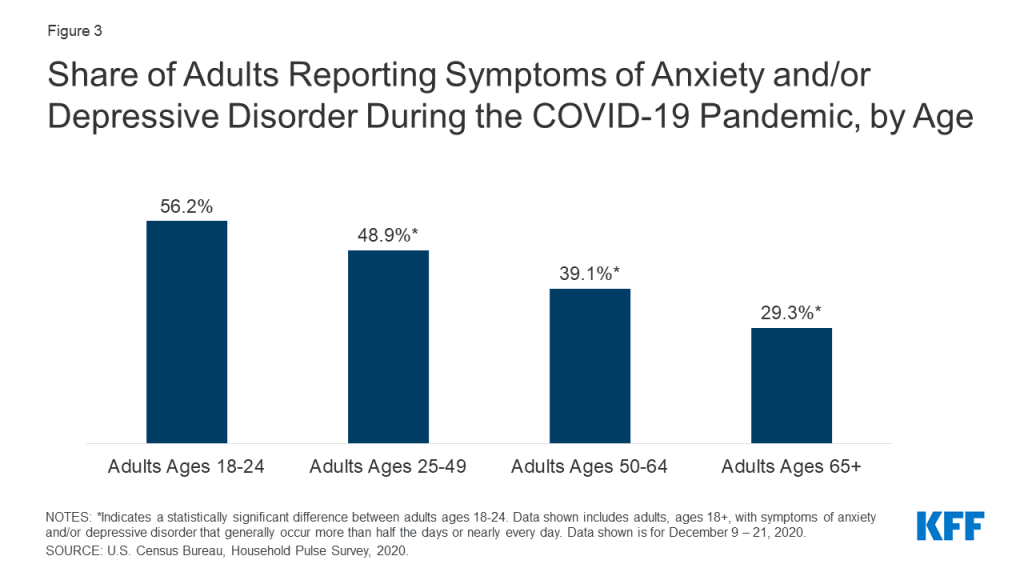
You can find more information about this survey here.
On top of this worrying subject, another reason why I am drawn to this kind of project is the fact that in lots of nothern countries, we have what we called Seasonal Affective Dissorder (SAD) . This is mostly due to the lack of light that winter brings on us, it is a very serious issue that many falls victim of, including myself. The number one treatment for this issue is light therapy, the curtain is again made for the user to be drawn to light, to let him contemplate the outside world for a while before going back to it's inside activity. It is a form of light therapy that encourage the participant to experience light in a more concientous way.
Mechanism
For my first prototype I designed simple parts to test the whole design.
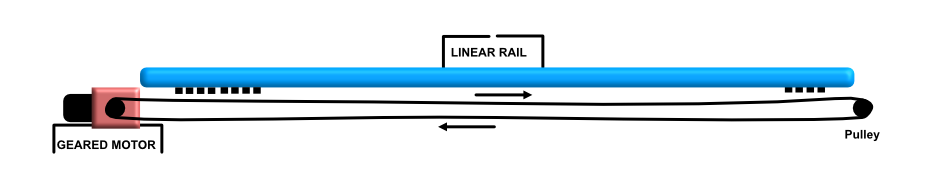
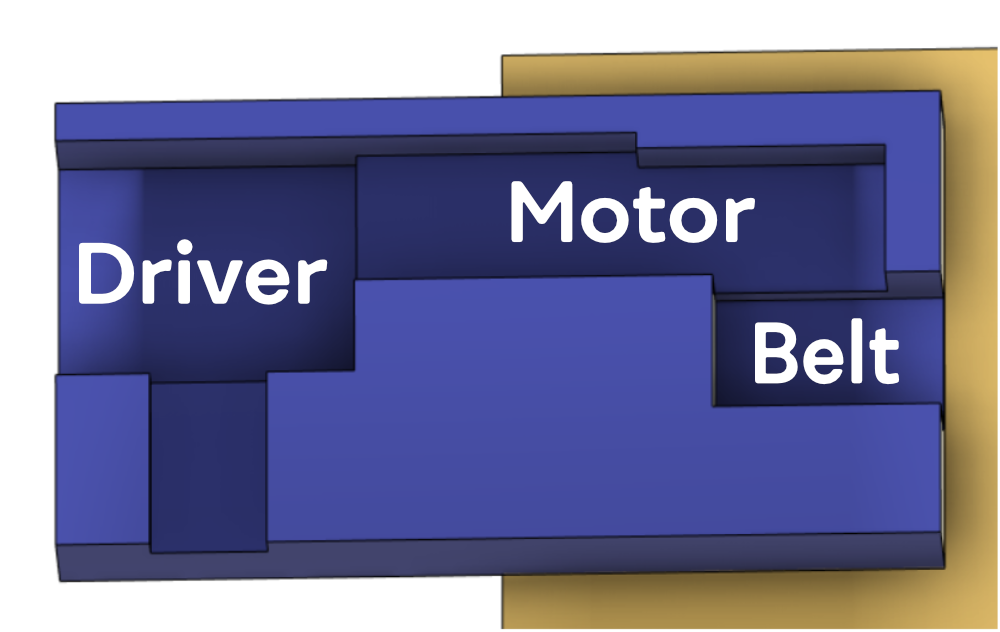
I needed two thing, First the part that would hold my motor, it's driver and the microcontroller controlling it. Second a simple pulley system on the other side of the window so that the belt would be able to easily turn on itself.
Also, I will make use of reed switches so that the motor knows when to stop when reaching the end of it's movement. Reedswitch are super easy to use, they are just magnet serve as a switch.
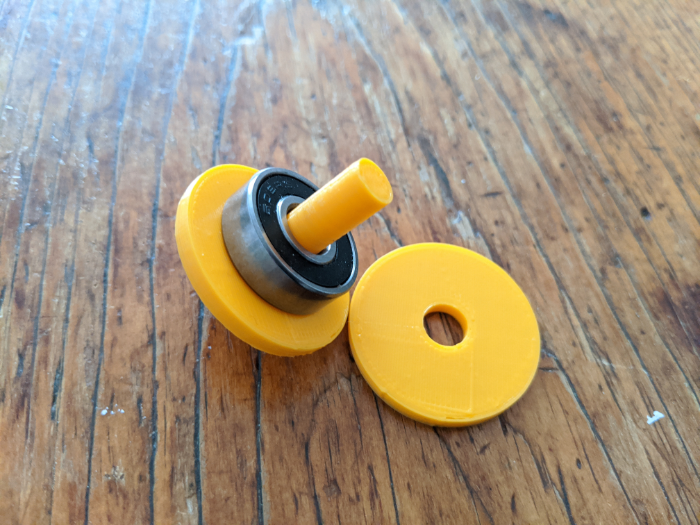
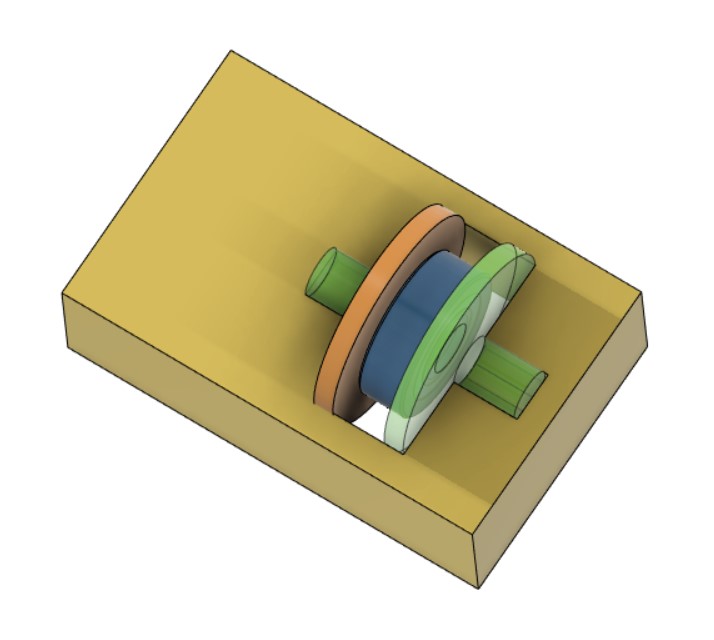
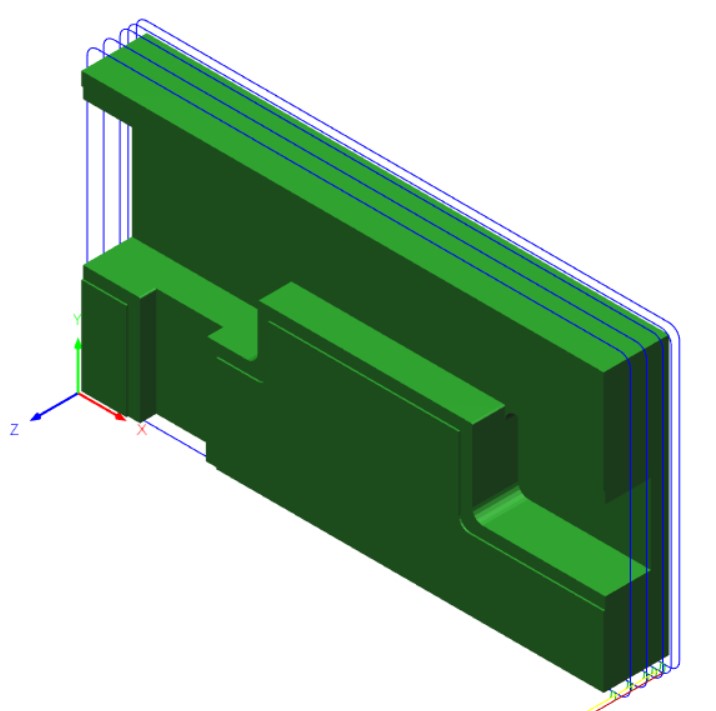
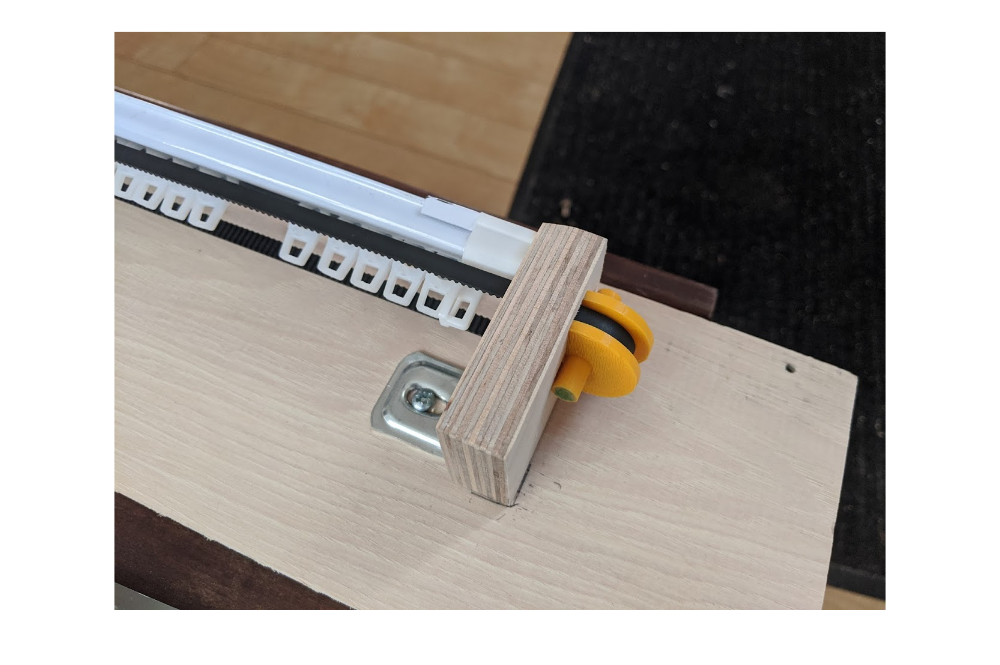
So I started the design using Fusion360. The pulley system was simple enoupgh to design, I just needed a 8mm bearing that would be inserted in a 3d printed chassis.
I used Cura to print the part on my Prusa Mk3 and the results were perfect, the snap is tight and solid enouph the bearing fits perfectly into the part.
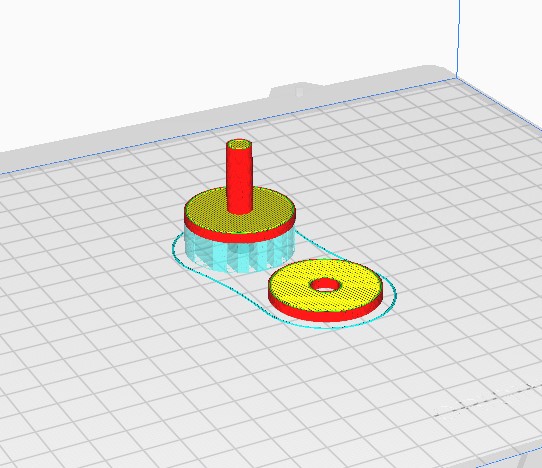
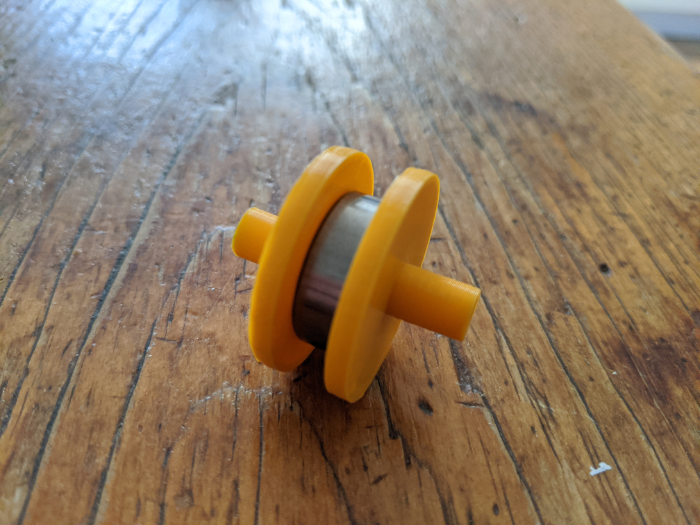
After that I simply create a rectangle that will fit this part using a simple slot, the belt will pull the part into the slot so it dosent have to be super tight.

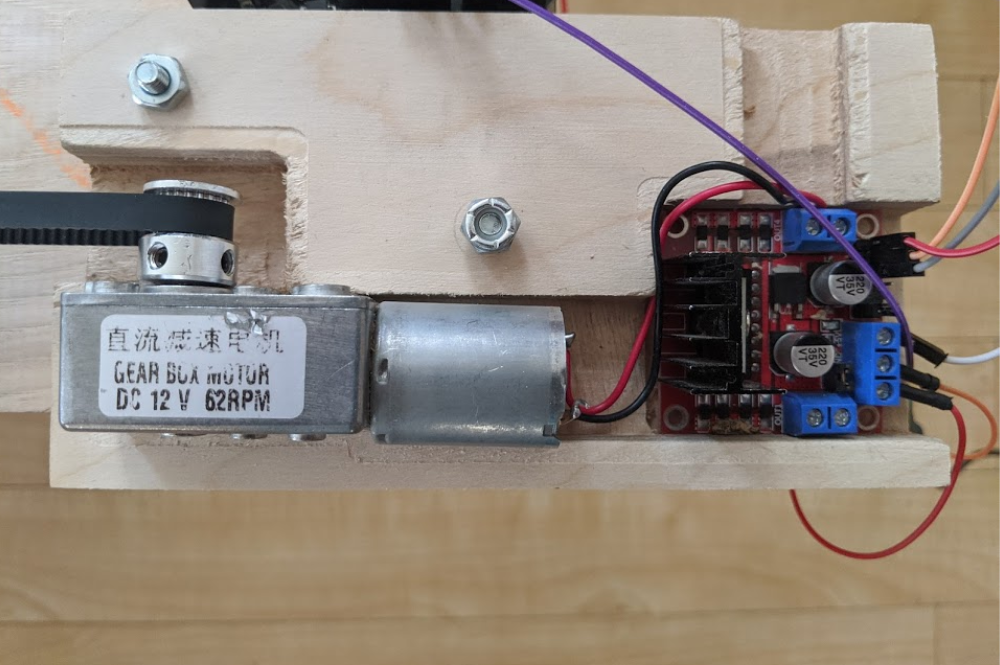
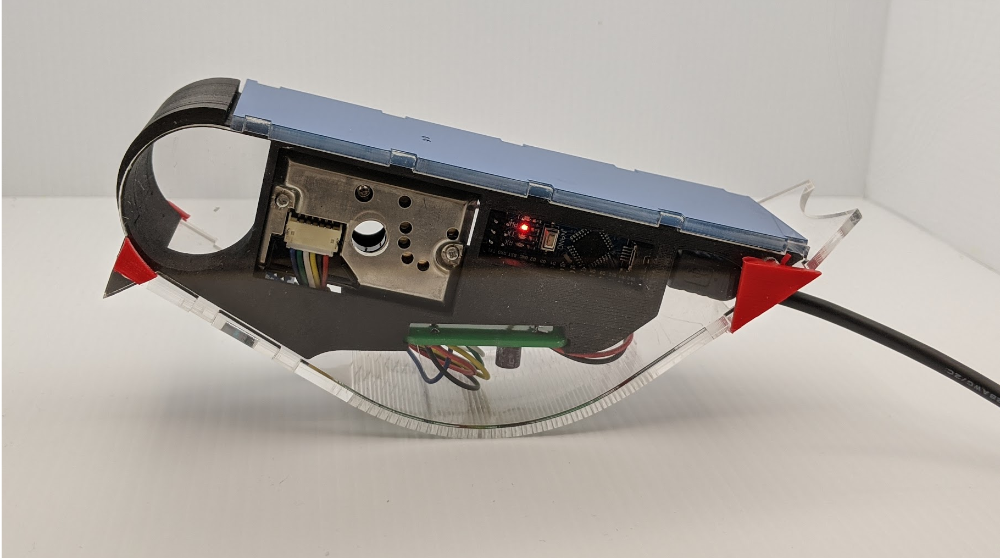
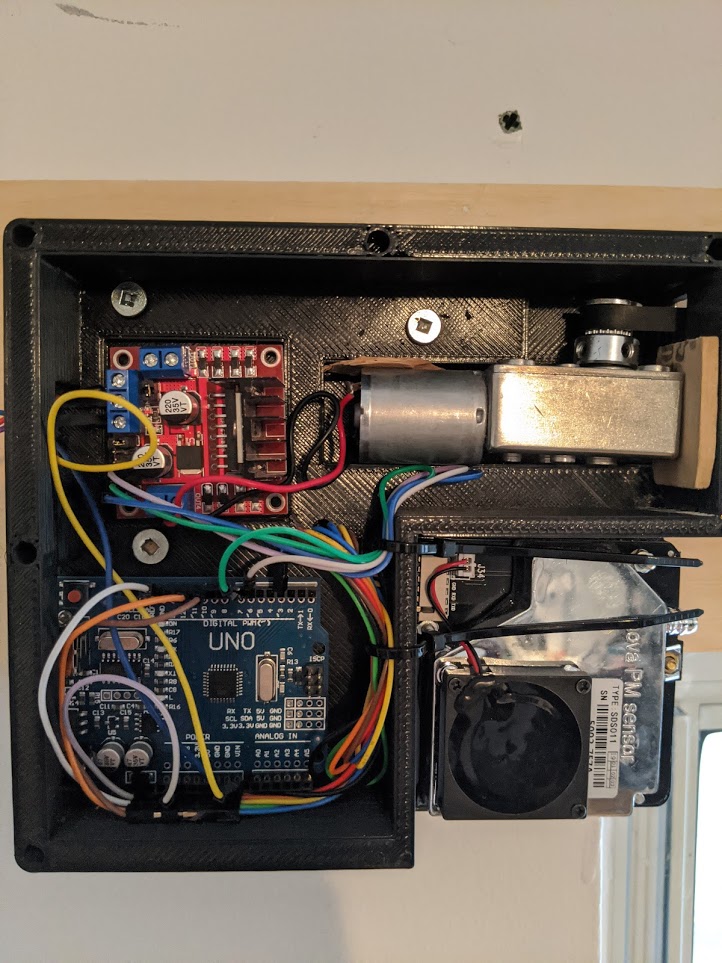
I fix everything unto a plank of wood to be able to debug and test the mechanism without having to go up onto the window, here how is the first prototype looks like.
Now I need to fit all of this in a nice package. For now the electronics are all over the place and the magnet are not set onto the belt. Also, I need to test the whole thing with a curtain on it to see how it reacts to weight.
Motor Control
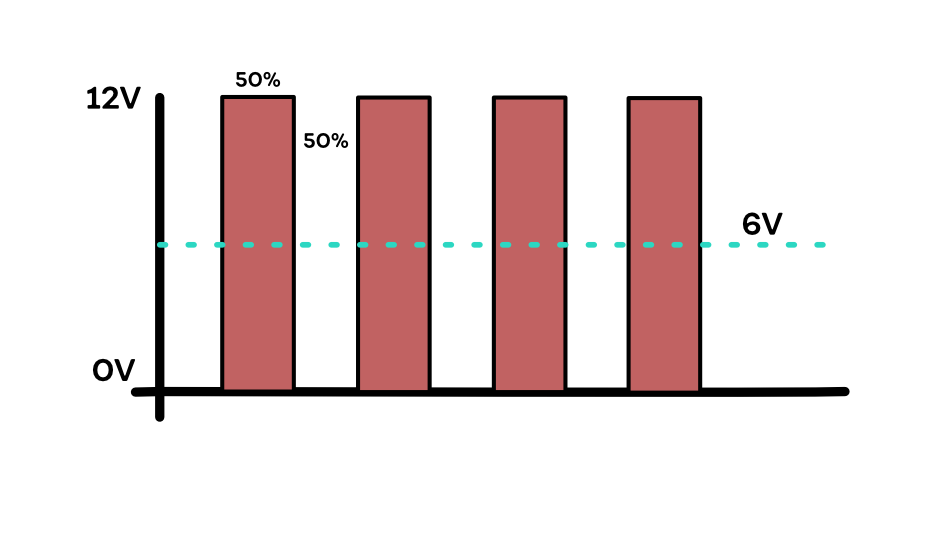
PWM is a digital signal (HIGH or LOW) that you can vary by calculating the average value in a duty cycle. For exemple, if inside a cycle that has a minimum value of 0V and a maximum value of 12V, you pass 50% of your time on LOW and 50% on high, the average voltage will then be 6V. You can see it has simulating analog signal using digital I/O.
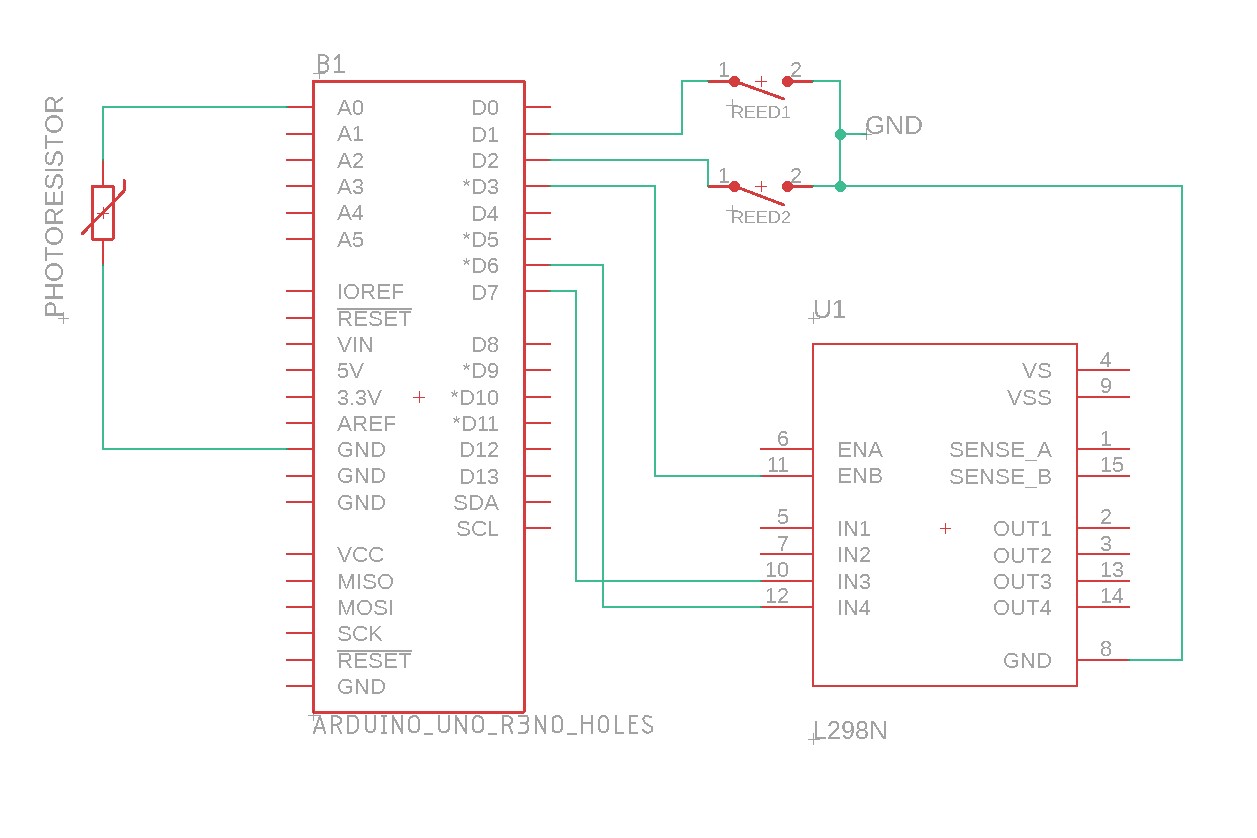
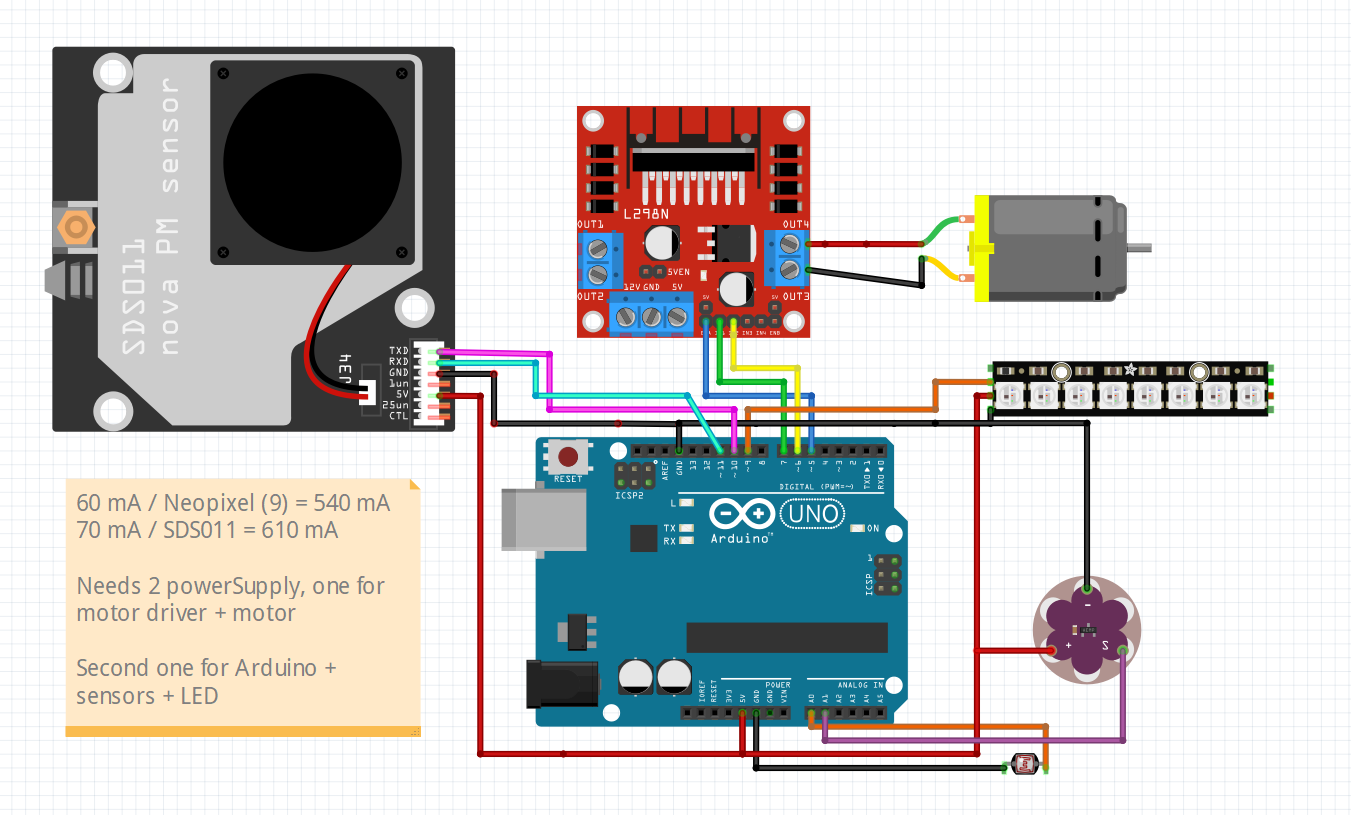
In my case, I used an Arduino Uno for my microcontroller and the famous L298N as my driver. This driver is very inexpensive and is able to efficiently control a DC motor that doesn't require more than 46V. I will also need a simple photoresistor to analyse the amount of light that surrounds the curtain so that it is able to open and close depending on it.
A photoresistor is a variable resistor that decrease it's resistance with the more light it gets. works like a non mechanical potentiometer.
First thing I did was to design the schematic of the circuit, please keep in mind that I had no intention of manufacturing a PCB out of this, it is just a schematic map to help me with my connection.
Once the schematic was done, I was able to write the arduino code. I tried to make my program as clean as possible, and achieve to do so quite elegantly I think instead of using if statements like I usally do I decided to draw myself a State Diagram and exploit the switch function. I will explain this a bit later, for now let's look at the state Diagram.

The general idea is that my system will have four possible state, Open, Close, Opening and Closing. The instruction that will be send to the motor will depend on what state it actually is. This make thing very easy to understand and make the code very readable.
If you look at the code, you'll see that I use the enum definition to create 4 hidden integer that are disguised as strings, those string reprent my four possible state, then using the switch function, I can control the flow of my program using certain condition (case), in my particular situation, those case represent my current state. I absolutely love writting this program, it gave me great insight on how you can optimize your code using more obscure funtion.
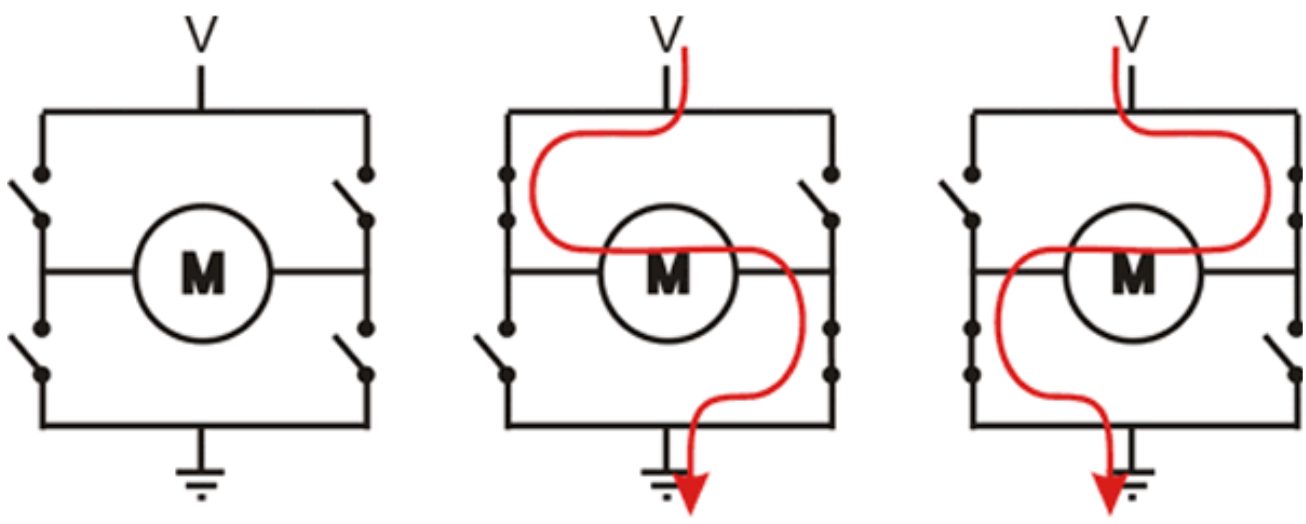
Let's take a closer look at the L298N,
Sensors
Air quality is a tricky subject, lot's of variable make the air surrouding you good or bad, the one that I will be concentring on is the amount of particle in your space. Particles comes in different size and the smaller they get, the more problematic they become.

Our human body is able to reject most particles over 10 microns, with our body hair, mucus and other defense mechanism. The issues really start with the particules that are under 2.5 microns, these particules are small enouph to bypass our mechanism system and go deeper into our bodies, in our lung and even in our blood. These are the particules that we need to monitor.
They are multiple plateform that are made for compilling these data, also multiple citizen project and citizen sensors has been made to democratize these data. In the world of Fablabs the most popular one is the SmartCitizen kit from barcelona that compile a range of data like these in a very small and well done IOT kit. There is also our project (echofab) that uses cheaper sensor for a greater audience (Project Canari)
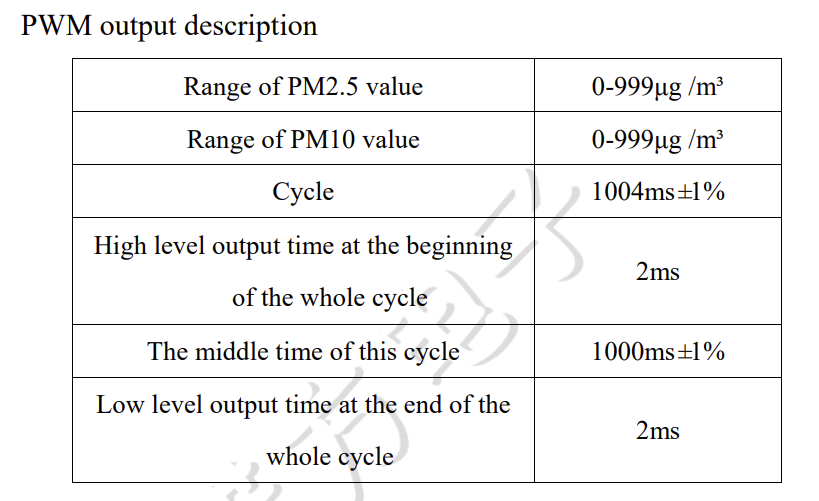
The SDS011 is an interesting sensor that output the density of 10 and 2.5 microns in our environment. To do so it uses a cycle of 1004 ms. The cycle needs 2ms to output the data at the end of it's analys, the rest of the time, it is looking for either high or low bytes. It is a digital sensor wich make it pretty interesting.
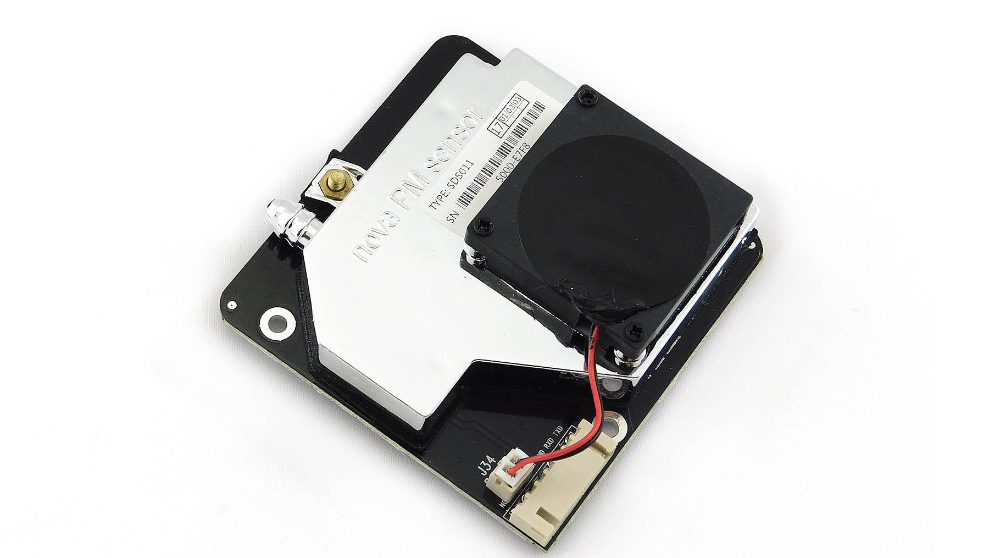
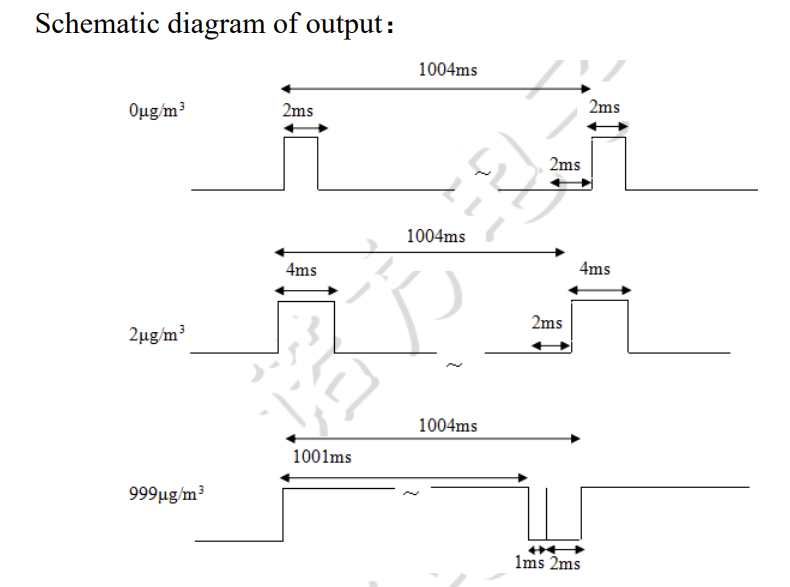
you can see here that for each xug/m3 the sensor will output HIGH 1 ms, this means that the maximum output would be 999 xug/m3. And it uses it's last 2 ms to output the data.
Exploring the output
One idea that Annie gave me is the fact that in nature, we often find beauty in things that are dying. A good exemple of that is in autumn when leaves takes beautiful colors before falling off, or when corals take vibrant colors in their last effort before letting go.

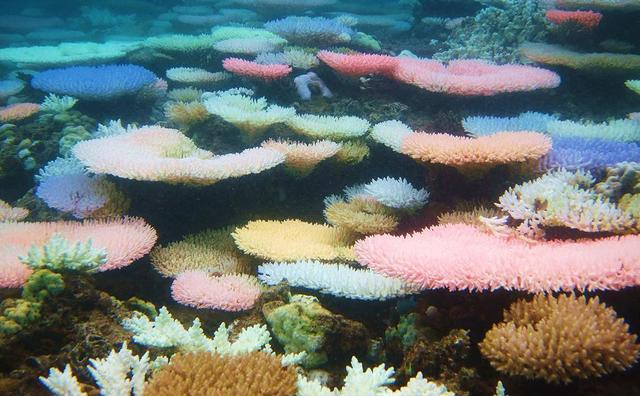
Starting from this concept, I could try to integrate element that intensify when the air quality around you is starting to get bad. This way, I could make sure that my curtain is minimalist and subile enouph and would only become extravagany when things are getting bad, wich would be a call to action.
I really enjoy digital embroidery, I think it is a interesting way to embellish fabrics without having to be an expert with working with textile. The first "swatch" that I tried was to draw a repetion pattern using my ipad and the amazing application Amaziograph. The result were quick to achieve and looked very interesting. Here are some exemples of the test that I did:

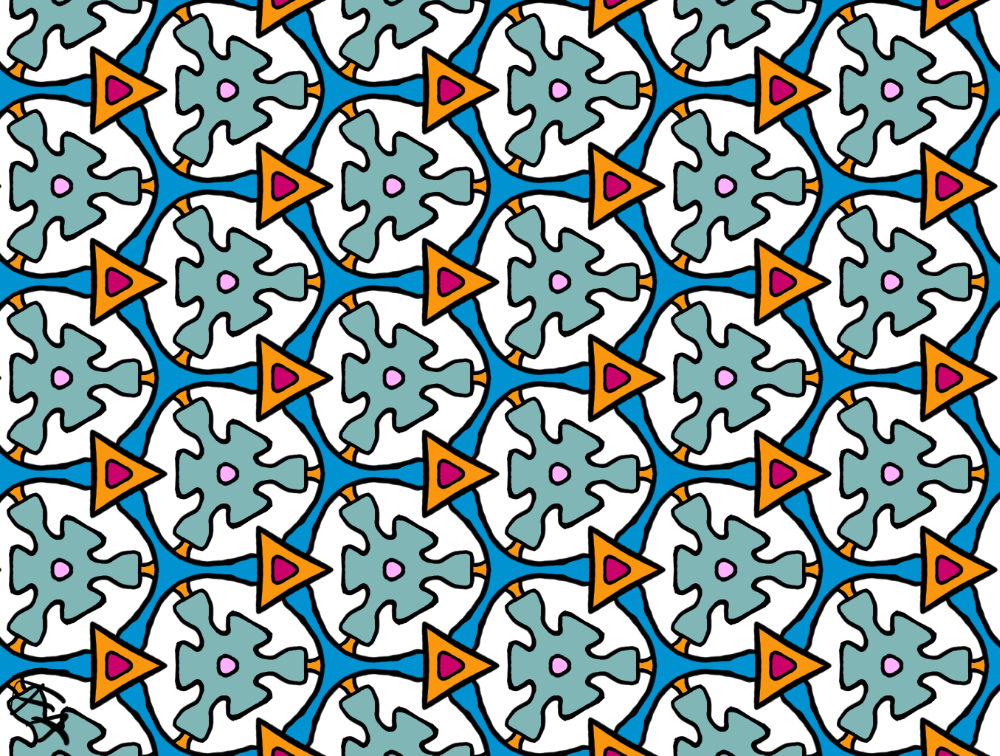
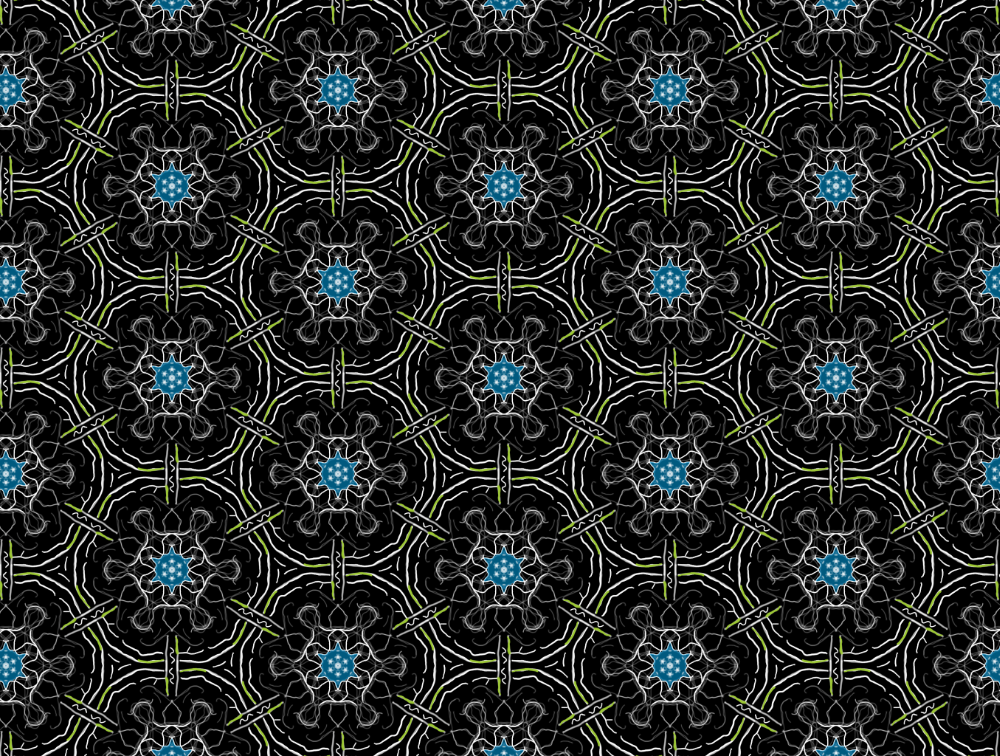
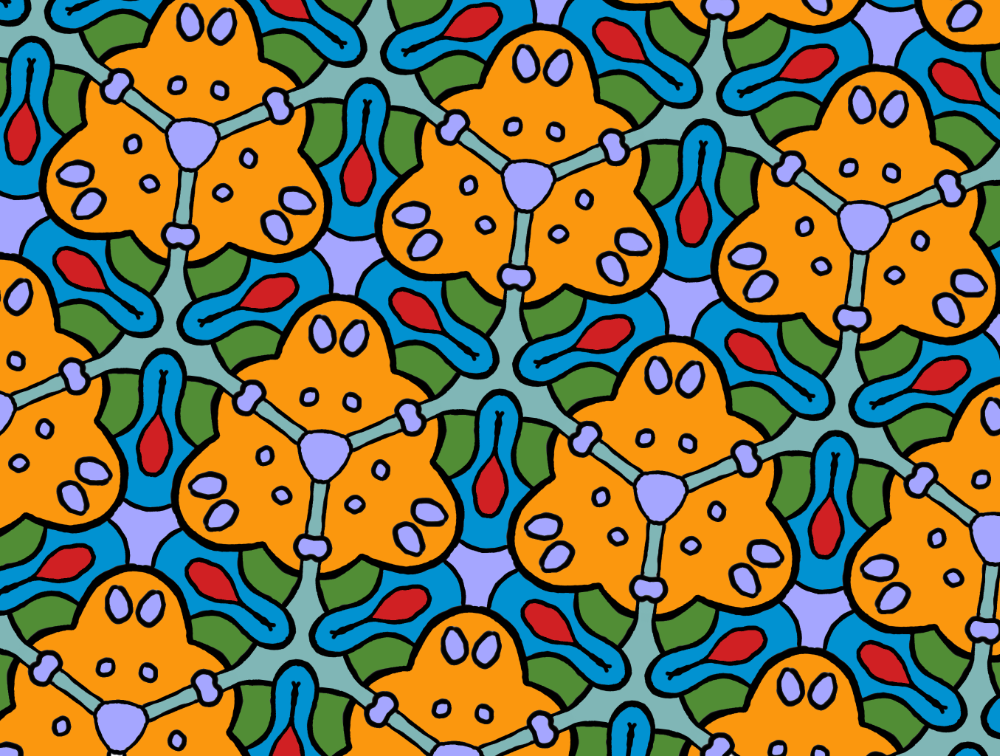
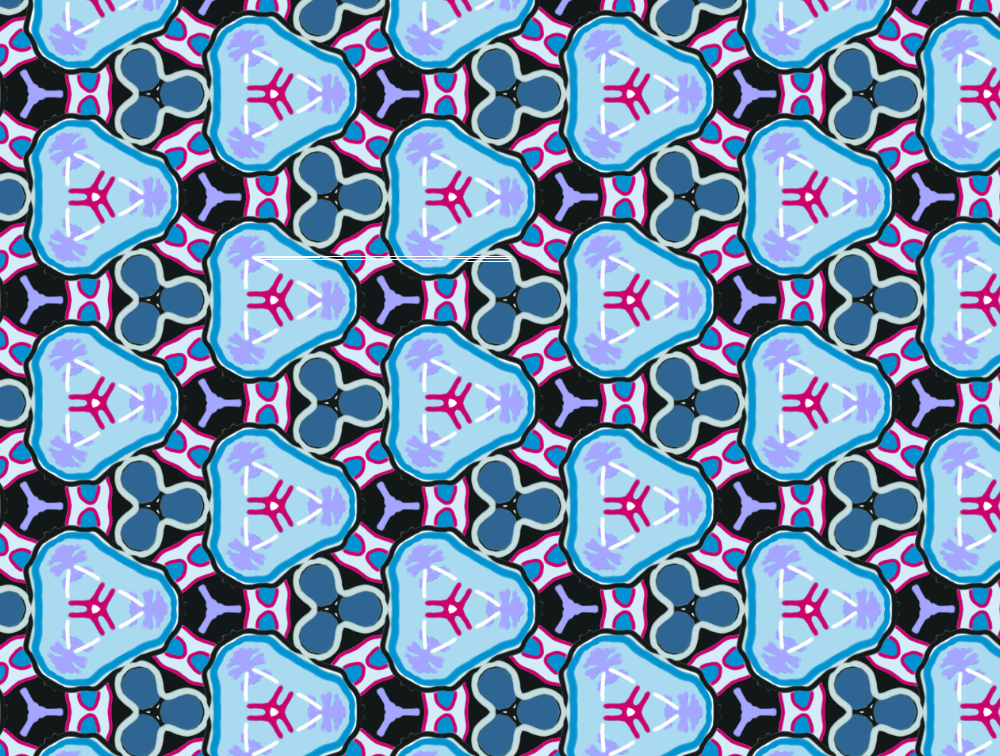
I then used Vector magic to vectorize one of these illustration for my embroidery test. Vector magic is an amazing vectorization software but it is quite pricey, if you are looking for something that those pretty much the same job without the cost, I would encourage you too look Vectorizer.
Once I had my design vectorize, I thread my embroidery machine and start the the test.
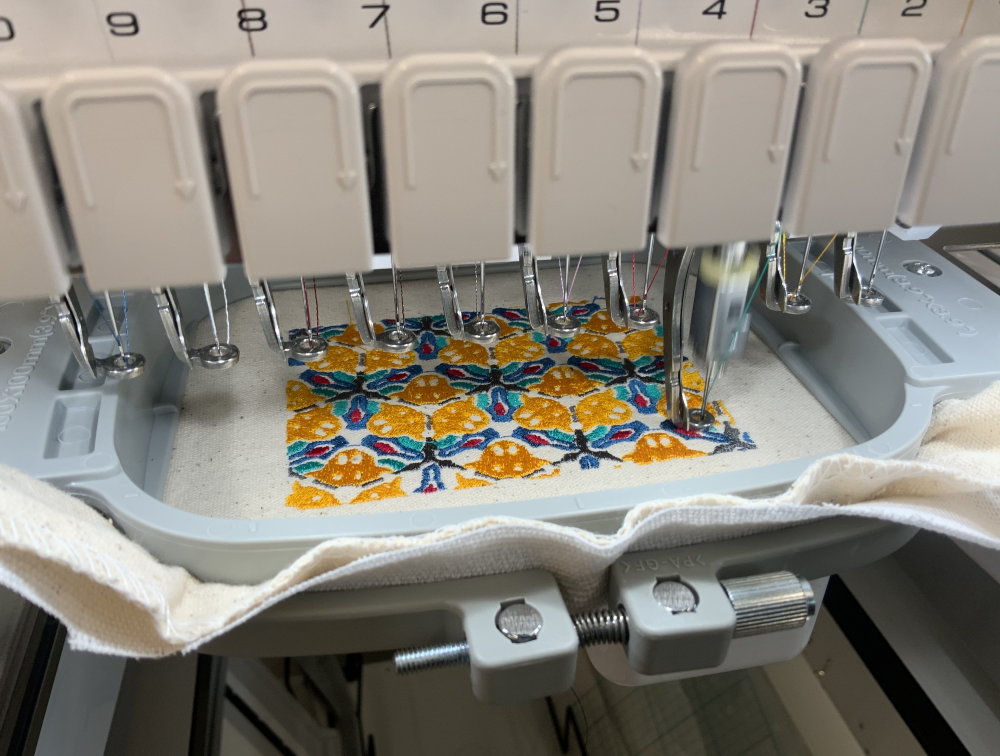
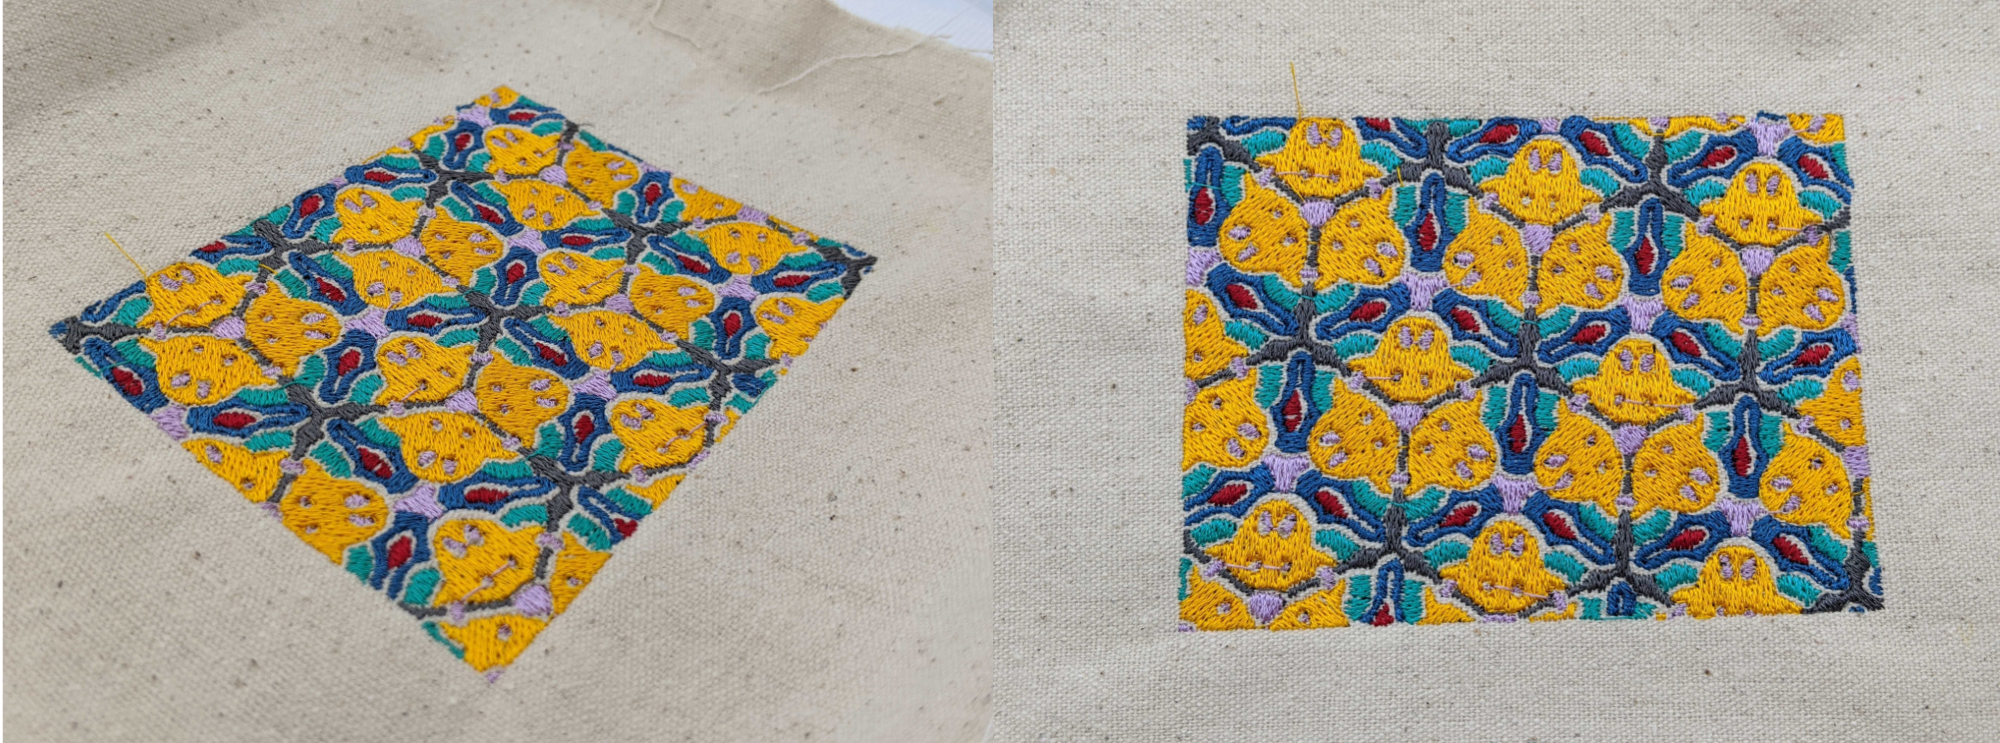
I love the results, I think I will integrate this kind of pattern repetition in my final curtain, I just still don't know what forms it will ultimately takes. Also, for those who wondering, The embroidery machine at the lab is a Entrepreneur ProX Entrepreneur Pro X by Brother it has 10 needle and works at amazing speeds, up to a point of 1000 thread per minutes. This is an amazing machine that works wireless and let me iterate easily and rapidly. The software I used to program my embroidery is PE-Design 11 , it is the official brothers software but for a cheaper alternative I would recommend SewArt wich has a simple enouph interface and works with the righ file extension (.pes).
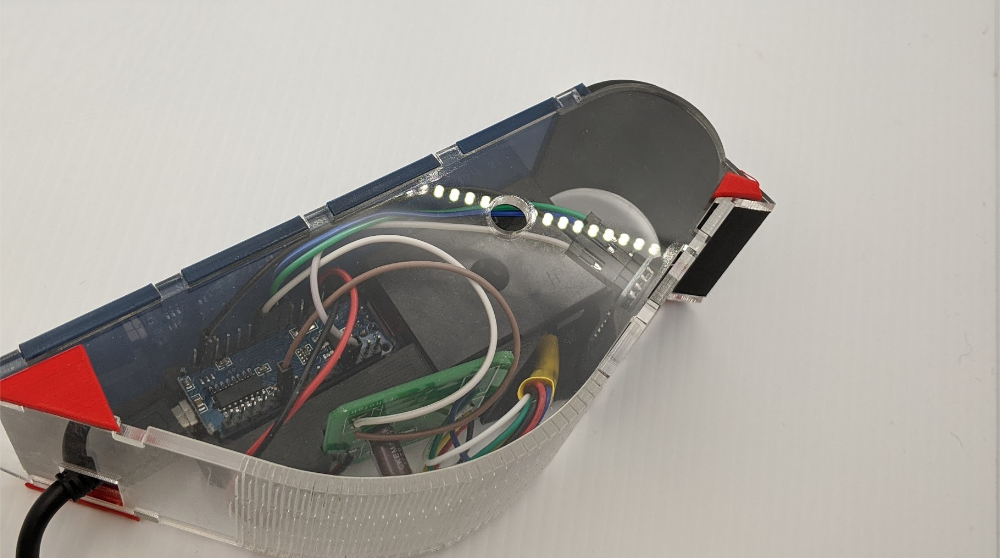
Another Idea I had was to see if I could output the meteo by make my curtain rain, I did a very small test using neo-pixel and and again a simple embroidery. I bought some neopixel on amazon for very cheap and was curious to try the out, unfortunately they come in a underpad package wich means I had to solder cable extension on each pad to be able to wire them together and to my microcontroller. I made a simple test drawing where I iterate the rain drop and also the conductive thread for embroidery.
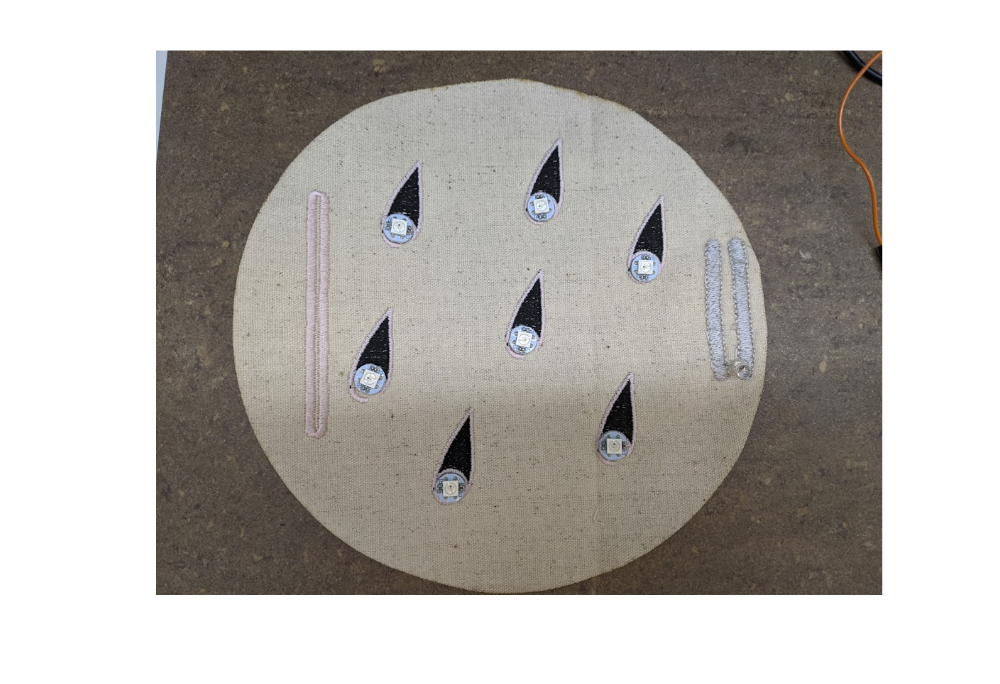
I've used the FastLed library and an arduino nano to program my neopixel, I tried to quicly wrote a little something that could look like rain, I'm not convinced with the result, I will have to do something a bit more clean before judging if this is an interesting alternative or not..
Final System
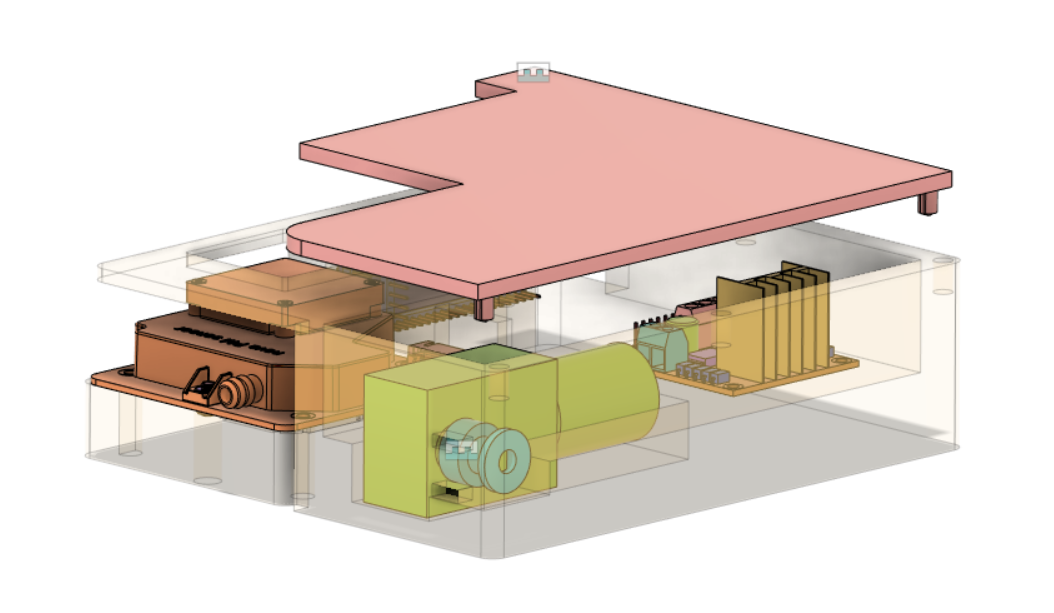
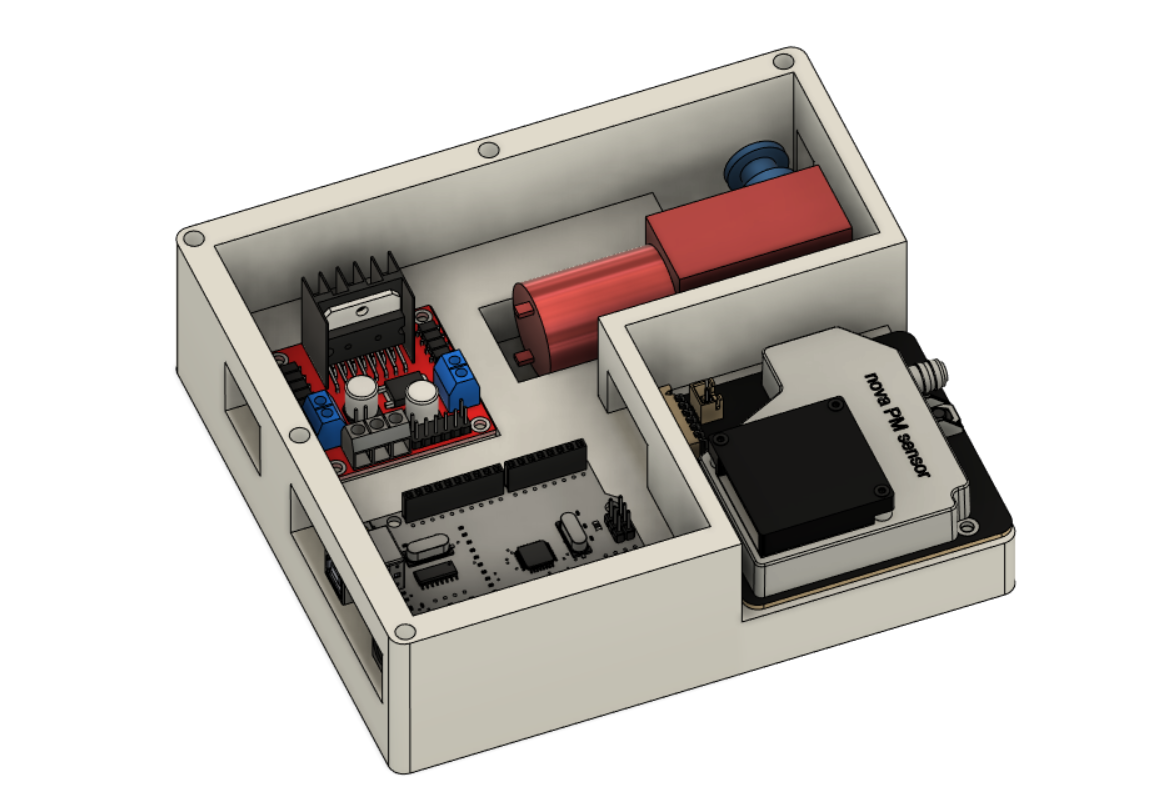
enclosing
For most of my component, I used Grabcad to facilitate my design. There are tons of very well designed 3D CAD that you can import into Fusion360.
Sountrack
The goal of this collaborative soundtrack is to create an ambiance in witch the people can contemplate and appreciate the light surrounding them. There is no better way to output emotions than via the vector of music. It is an artform that is accessible, intemporel and very triggering. We can understand music, nevermind the language it uses, and I think it fits perfectly this context of being globally in the search of a form of human interaction. I hope that for those who might stumble on this page, please please add a song to this playlist so that we can know we are not alone looking for light.
You can find all the files needed for this project here