The focus of this week is on alternative systems such as circular fashion, agile fashion, open value chains. We’ll create modular elements, structures and connections that allow the user to change the shape of a garment, resize it or replace certain elements. The design of this modular element will be publish on open source platforms and we learn how to monitor and promote their creations in a distributed network.
Details of this weeks assignments
- Design and prototype with paper and scissors modular configurations and locking connections.
- Document the paper prototypes
- Run tests of laser cutting of your designs in fabric and document the parameters for the chosen fabric.
- Design and Document the process.
- Laser cut the modules.
- Create a modular or seamless garment, showing that the connection is well designed and holds the pull/stretch of a garment.
- Document the assembly process and tests.
- Upload the open source file in pdf, in correct scale with 1-5 pictures at ooscilarfashion (preferably in white background)
- EXTRA POINT Submit some of the modules to the analog or digital material library of the lab. (20cm by 20cm aprox)
Inspiration
The modular system which is part of the assignment of this week reminds me of mosaic. And this again made me think of Penrose tiling.
A Penrose tiling is an example of an aperiodic tiling. Here, a tiling is a covering of the plane by non-overlapping polygons or other shapes, and aperiodic means that shifting any tiling with these shapes by any finite distance, without rotation, cannot produce the same tiling. However, despite their lack of translational symmetry, Penrose tilings may have both reflection symmetry and fivefold rotational symmetry. Penrose tilings are named after mathematician and physicist Roger Penrose, who investigated them in the 1970s.
If you want to know more about aperiodic tiling Professor Sir Roger Penrose himself is the best teacher to learn from.
This week he’s awarded the Nobel Prize 2020 in physics for the discovery that black hole formation is a robust prediction of the general theory of relativity. I love to honor his work by using the Penrose tile for this weeks assignment.
My focus is therefore not on a specific garment but on the main idea of how to create a pattern with a maximum of two modules. That can be used in an infinite tessellation that’s aperiodic. I want to use the locking connections in my design to set the rules to make the tiles aperiodic.
Dart & Kite or the Rhombus
My first decision was which tiling to use. As I wanted to have the smallest number of modules I wanted to choose between the “kite and dart” and the “pair of rhombuses”.
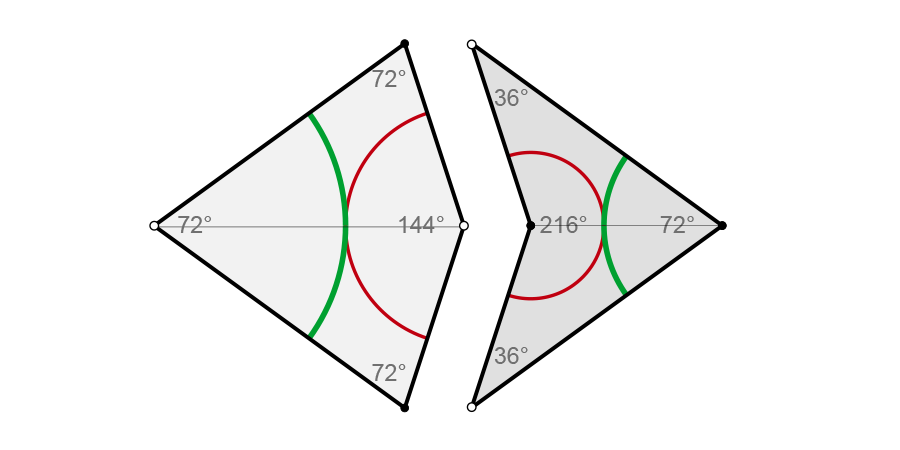
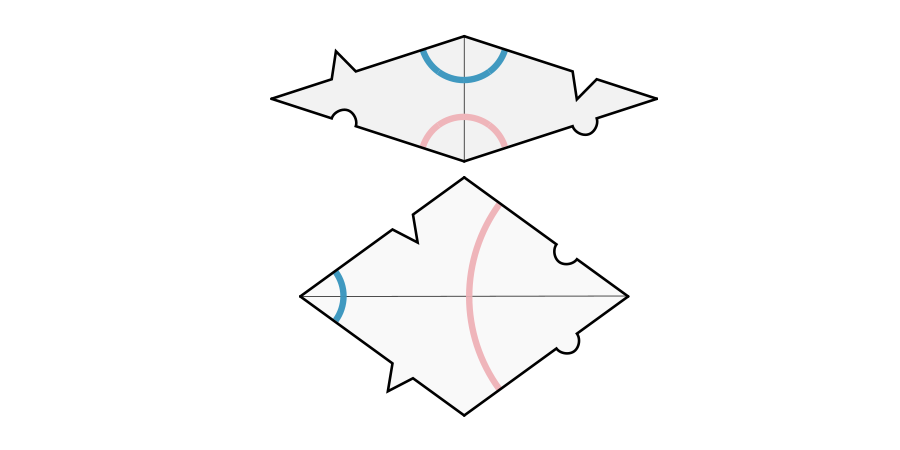
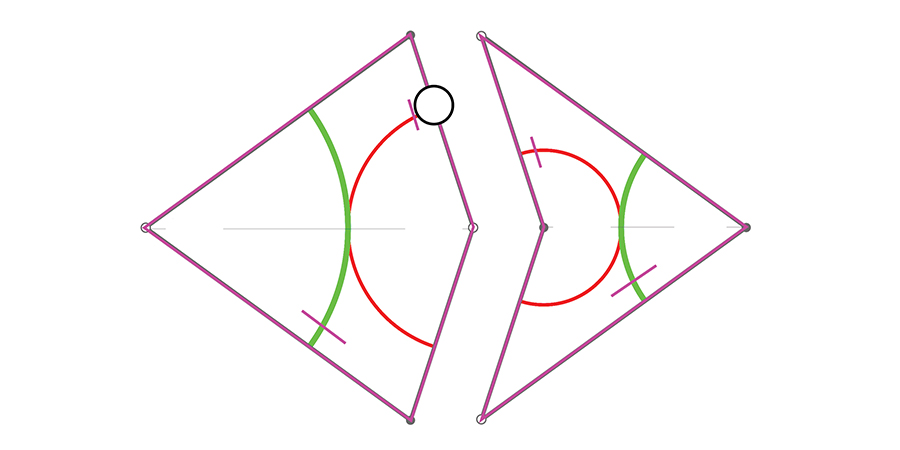
My first step to get a better feeling of these modules I printed them and cutted them out to see how they create a pattern. As you can see in the images above and the paper version below, the rhombuses already work with an interlocking system to set the rules for the tiling of the modules. The Kite and Dart system uses the circles as rule pattern.
The rhomubus are an easier starting point because they already use an interlocking system. However somehow I just really like the shapes of the kite and dart. So I decided to continue with this version.
Rhino and grasshopper
On Thursday we had a very interesting workshop by Lorenzo Masini who learned us the basics of grasshopper in combination with Rhino and how to use these tools to create interlocking tessellation design.
He provided us with a pre-made file which included a mesh of a body. This we could use to plot the tessellation of a module around the body. We work with the necklace sample.
My first step therefore was to try to design the Kite and Dart with grasshopper. Lorenzo showed us there are plugins for rhino and grasshopper that can be found on Food4Rhino and as the Penrose tile is a common geometric principle I thought the should be a plug-in available to use. And there were, but most of them are for windows.
For the mac I found the C# Penrose tiling. So I played around with it in grasshopper to see how this would work out. It includes a Penrose grasshopper file and a start mesh file for rhino. The links to these files can be found on Roly Hudson blog post. First step was to get this to work. I opened the startmesh file in rhino and whithin rhino I opened Grasshopper and I opened the Penrose file within grasshopper.
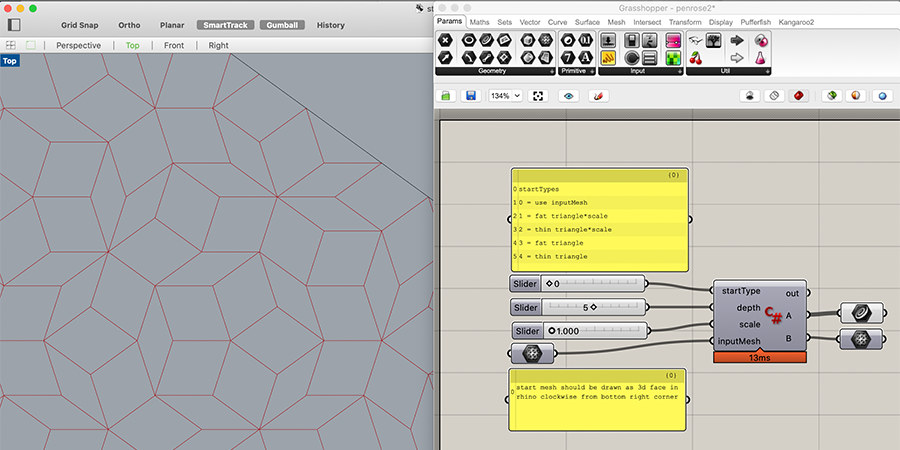
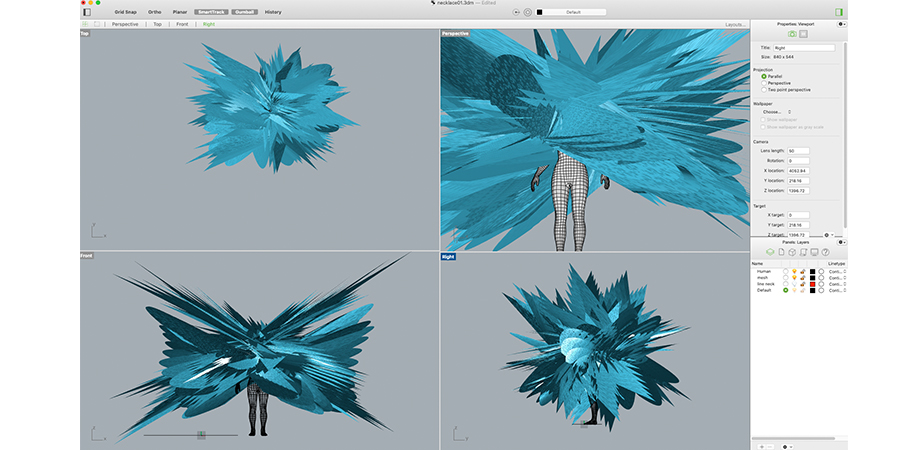
I liked the file and it created a Penrose tiling pattern within the starting mesh in Rhino. This worked so m next step was try out and combine it with the files we used in our workshop by Lorenzo. I thought I would just copy the C# module into the Grasshopper file and connect the mesh output of the Penrose tiling with the mesh input of the necklace file.
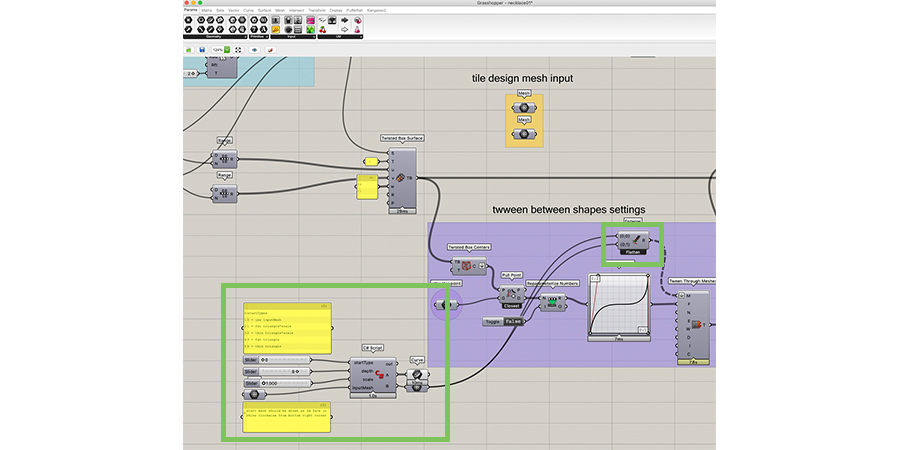
As I’m not experience with Grasshopper I wasn’t sure if this was the way to go. And the results was artistically interesting as it created a funky pattern. However it’s not useful at all! This was the moment I realized I just really know too little about Grasshopper and Rhino. There was too little time to get a full understand how to create shapes, meshes and tessellation patterns. Although I really like the way Grasshopper works, I’m saving it for when I have more free time on my hands to fully grasp the program.
Back to basics with illustrator
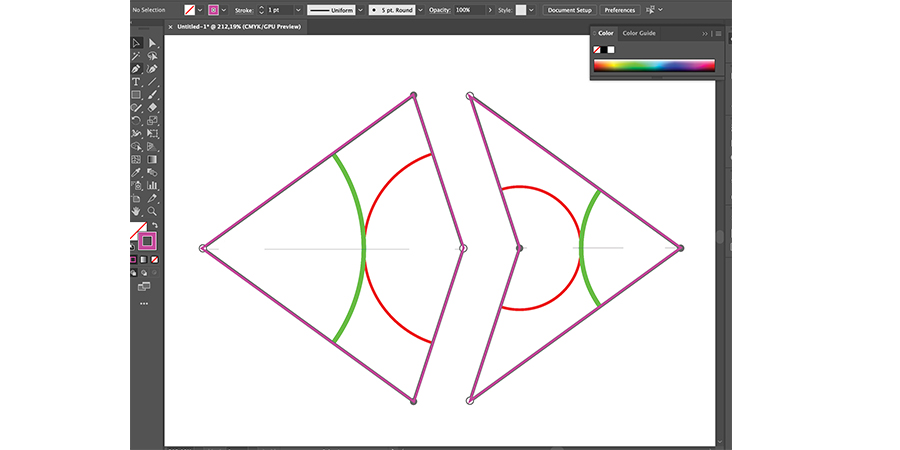
First I went back to what I already know that works for me. So I used Illustrator and traced the dart and tile using the pen tool. After the trace, I added the slots where the circle lines ended and at the same place I added circles to interlock with the slots.
While I was working on these version it didn’t feel accurate enough. I was mainly tracing and adding parts by hand while these tiles are based on mathematics, so my working method just didn’t feel good.
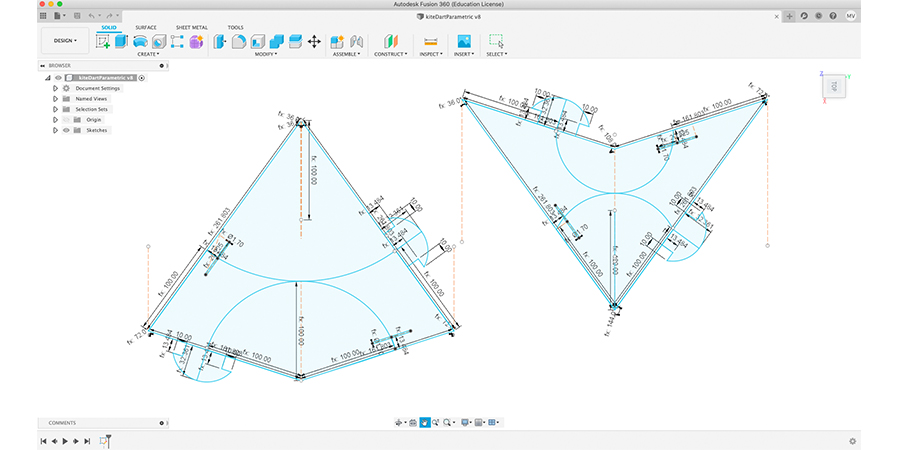
Parametric design with Fushion 360
My next step was to switch tools and I decided to use Fushion360 instead because I know how to use it. In my 2019 Fabacademy documentation you can find more on some basics of Fushion360 and how to use parameters.
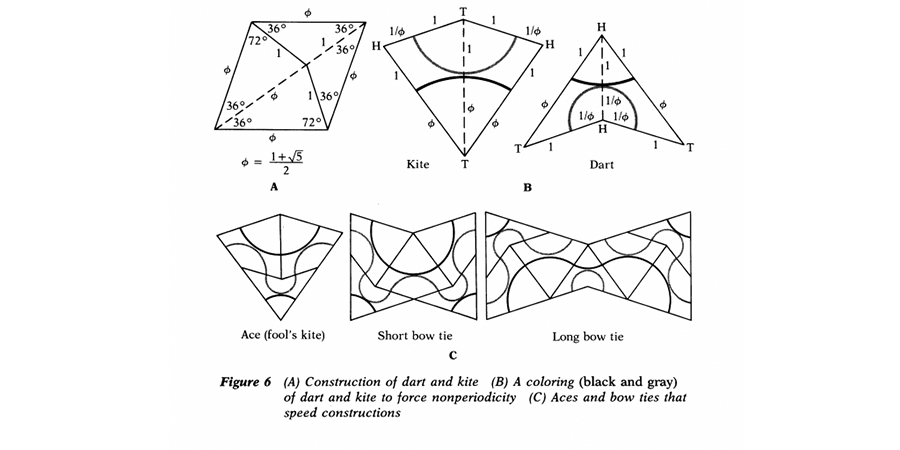
For this design I used the math provided in the readings on “Penrose Tiles and Aperiodic Tessellations” by the Mathematics department of Berkley University.
I added the different parameters; phi (the golden ratio), the degrees of the angles, x which is the length, and thickness for material. I was struggling with keeping the slots in place when changing the length (x). This still doesn’t work perfectly. My solution was to fix the middle of the slot to the middle of the outer line. And fixing the angle of the slot itself.

paper prototyping
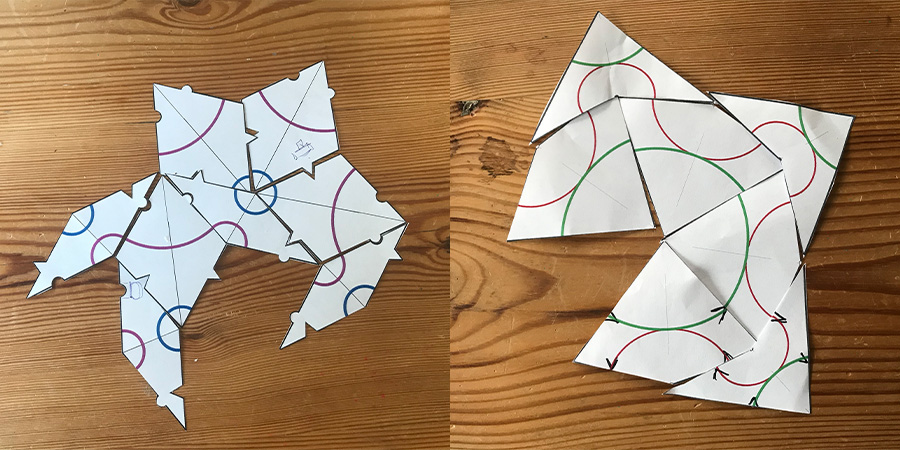
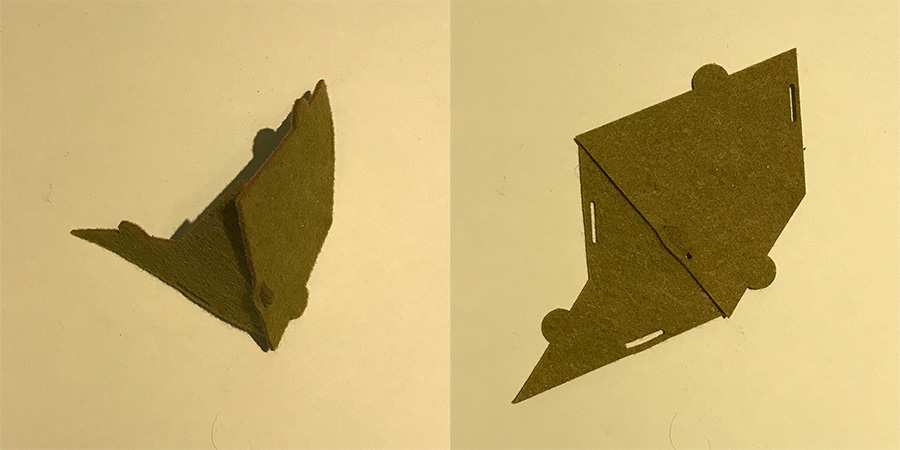
To get the design as I wanted in Fushion360 I prototyped first with paper to see if the interlocking as I designed it worked. My first version was a fast variation on the illustrator one just to check how it would work out if I print, would it fit? It did but the interlocking is too fragile and it overlaps too much.
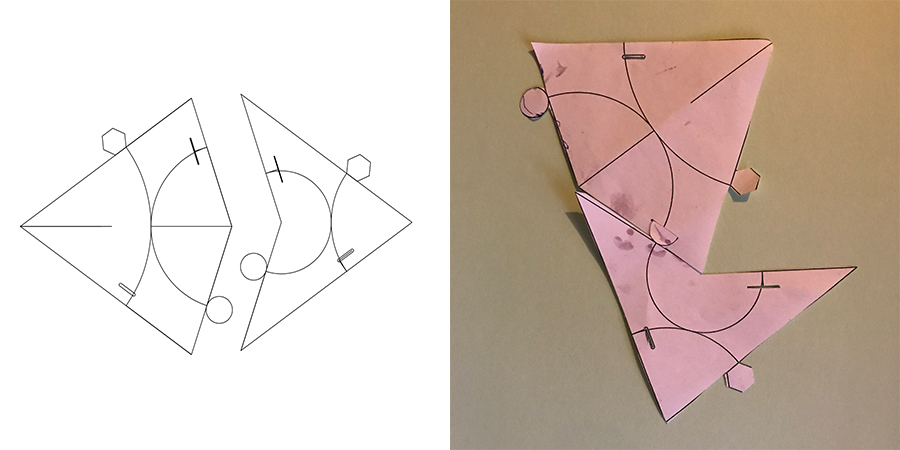
Before I continued I tested very quickly some possible interlocking systems that I could use. This was a very quick paper prototype.
After this test changed my design and with a link to the Rhombuses of Penrose I used the arc to create the interlocking. This to solve the fragility of the interlocking parts of my first design.
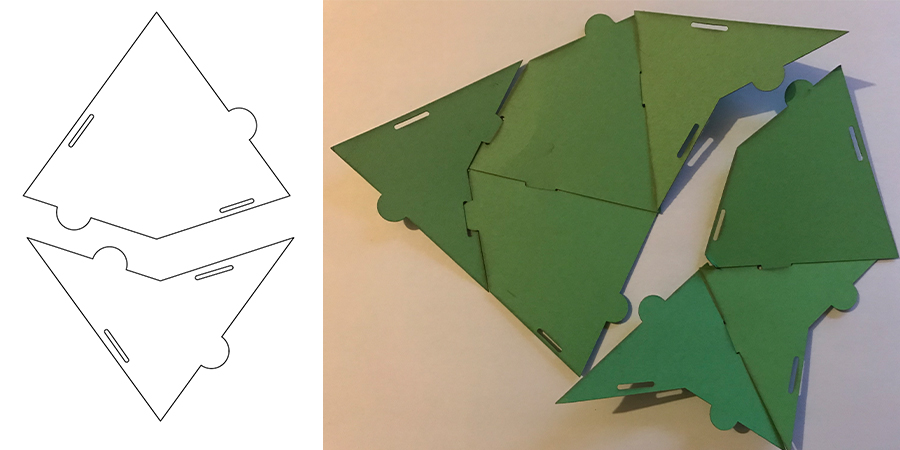
This worked well enough with paper, therefore I wanted to test how this design would work with a flexible material.
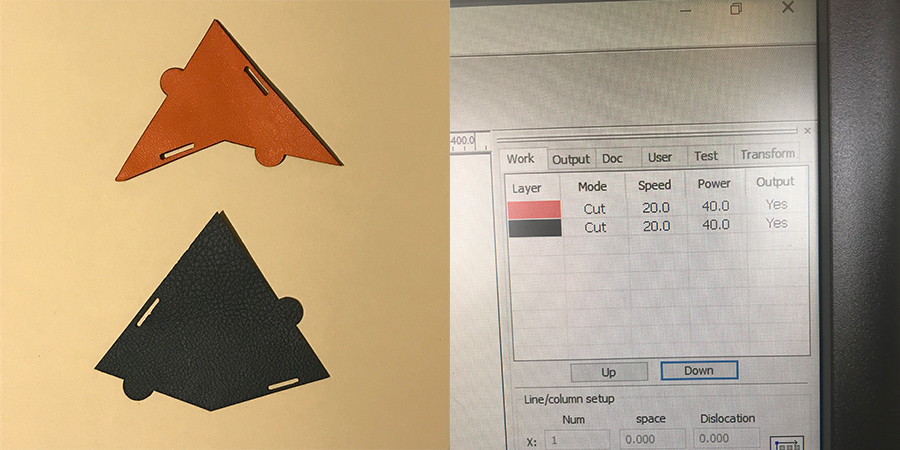
leather: testing flexible material
At our Makerslab we had some left over pieces of leather. I thought this could be a nice material to work with. I had two different colors so I could give each piece a different color and create a pattern. I used the laser to cut out some test pieces. The setup for cutting leather on our laser is speed: 20 and power: 40.
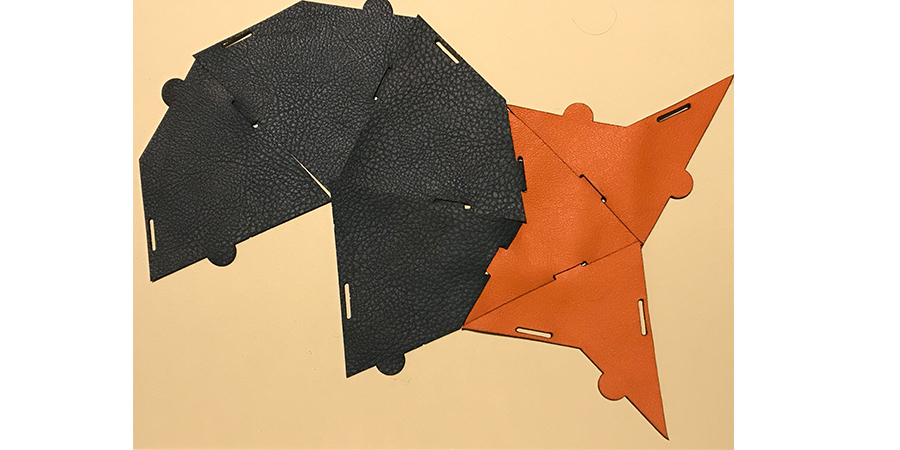
With leather the interlocking of the pieces didn’t work as nice as with paper. It fitted so the measurements are correct and it works when it lays down but it’s not firm enough, the pieces fall apart and it’s therefore not useful as a whole.
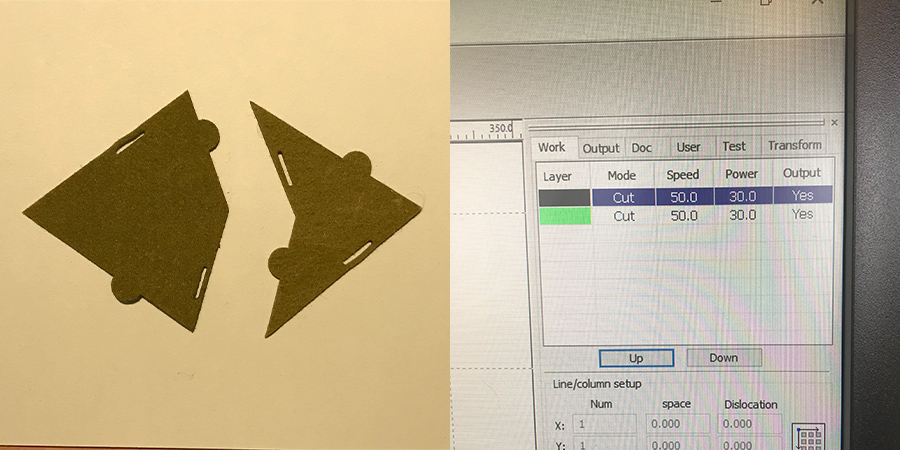
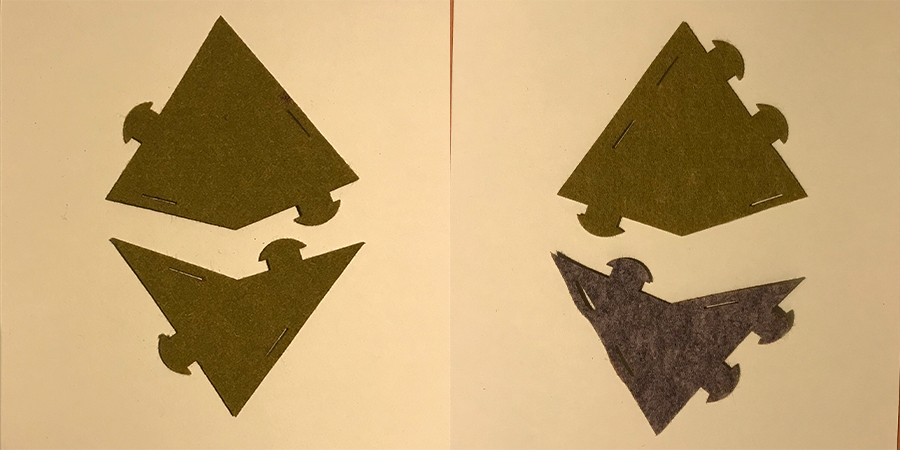
Felt
Because the leather pieces were too flexible I thought I would first try different material. So I used felt which is more rigid. So I used the laser cutter to cut the pieces of my second design with felt. The setting for Felt are; speed: 50 and power: 30
Felt worked a lot better, the interlocking is stable. However I still have the problem that the pieces overlap. And I’m not really happy with the firmness of the whole pattern when pulling the pieces. They still easily fall apart. To solve both problems I changes two part of my interlocking system.
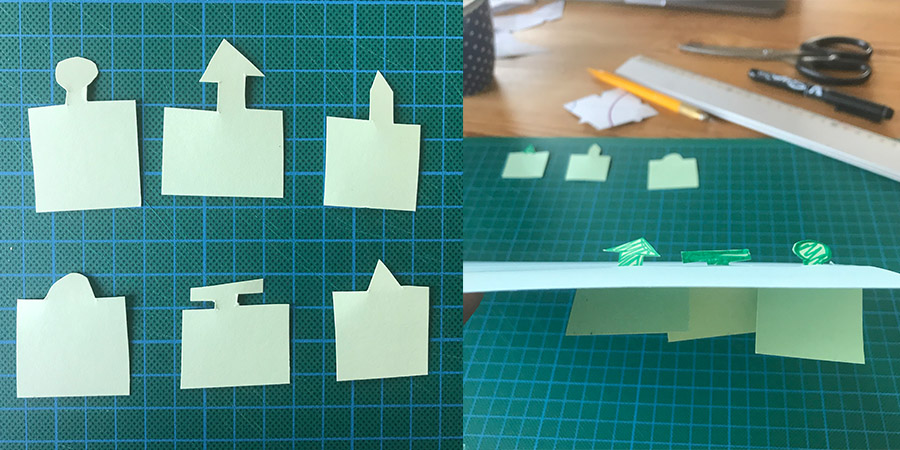
- I added a stem part to the arc which has the same distance the slot is placed from the board of the module. This way I can make sure the pieces neatly stay next to each other and they wont overlap.
- In addition I made the base of the arc wider than the slot. Like the versions of interlocking I used in paper prototypes. This way when you pull it locks itself.
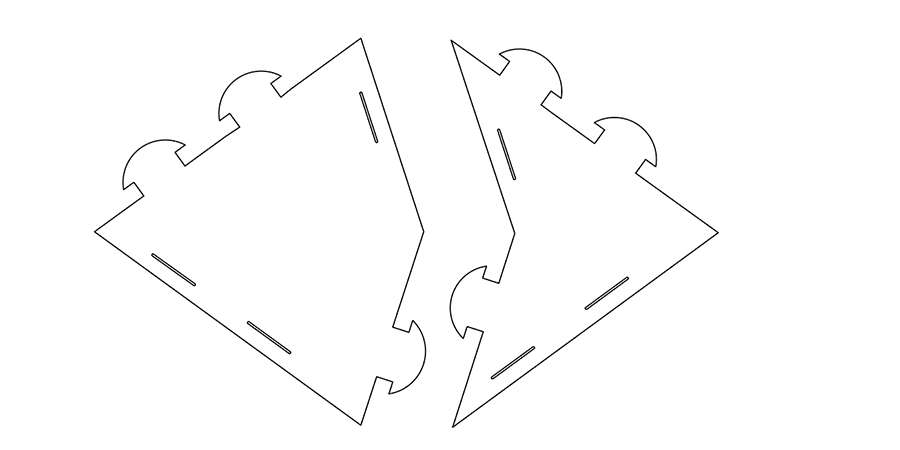
This is my Fushion360 design of my new tile including all the parameters. I tested this version and there was still one part that I wasn’t happy about. The interlocking of the biggest part of the tile was still a bit floppy. Because there was not enough time to add this in my Fushion360 design, I did a quick add on in Illustrator. I added an extra slot and an extra stem to make the connection between the pieces more stable.
Final design and pattern
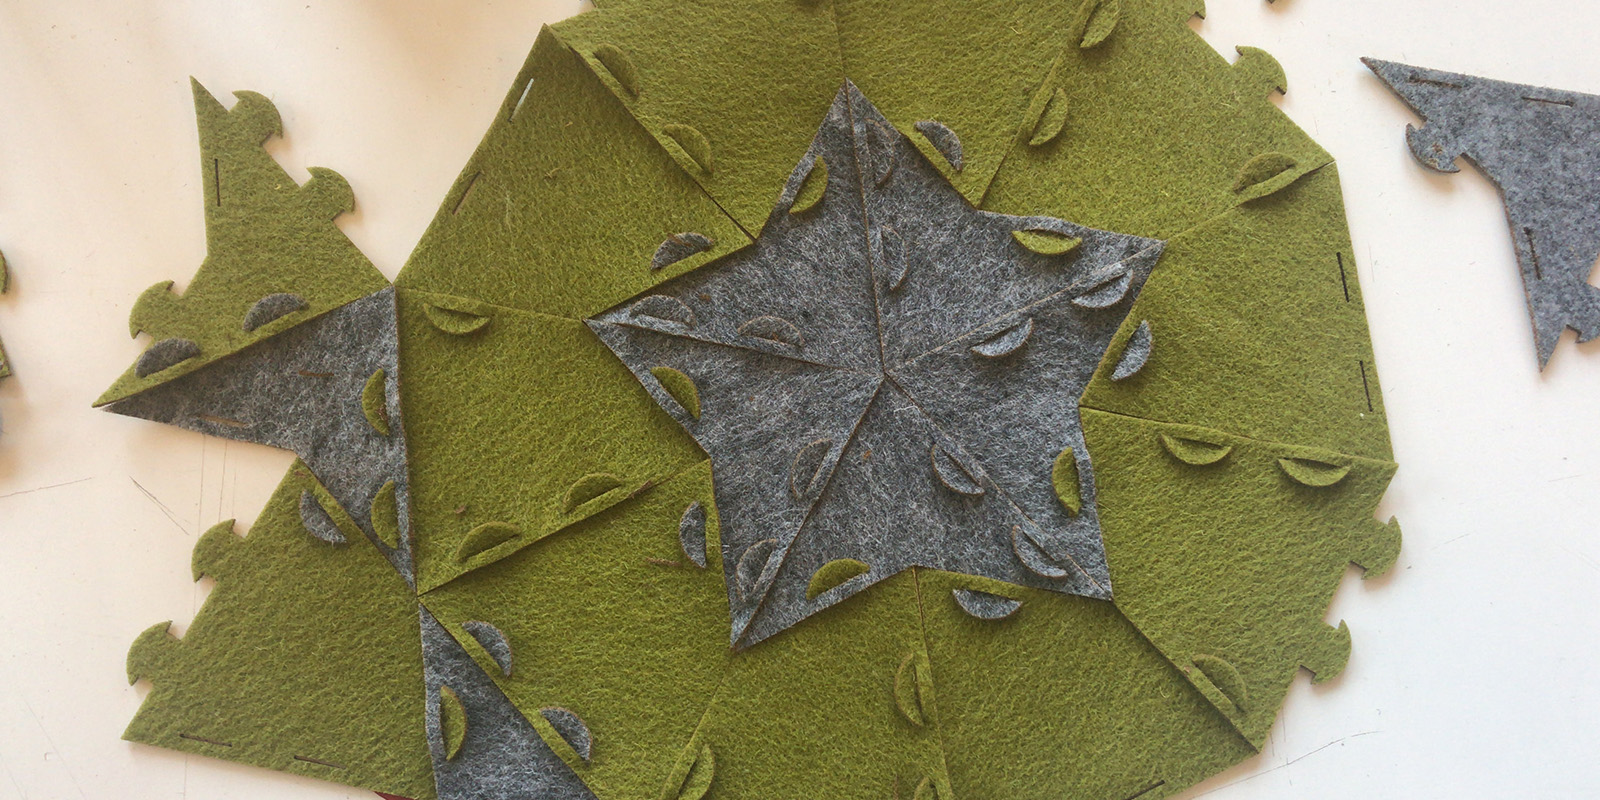
Once I was happy with my final version. I made more pieces, using green felt for the kite and gray for the dart. And I created a nice Penrose tiling.
What do I want to change
My knowledge of Fushion360 is still not complete as I always find it difficult to export my files directly from my Fushion360 sketch to use it for the laser cutter. I can use a DXF but somehow I always get confused with the units. In addition Fushion360 sketches have some extra lines that show up in the laser. To solve this I always use Illustrator as in between step to clean up my DXF. I would love to have a direct link between the Fushion360 sketch and a clean document that I can use while laser cutting.
Next step for this system would be, how can we make this into a garment or another useful fabric. For now I really wanted to experiment with the pattern but I see much more possibilities. First step would be to test this again with more flexible material and see if my new interlocking systems works with more flexible material as well. That way it can be used for garments.