9. Textile Scaffold
Let's start the week!!
I have been waiting for that moment since I know the Fabricademy program.
So many technics to learn about:
Inspiration

Local visites
We started the week by visiting a few studios from Barcelona:

The Footwearology specializes in 3d printed footwear and knitting machine technology. Then we visit a leather accessory studio called Madre a small local business structure. And finally, we visit the Norman Vilalta an interesting handshoe maker, an artist!
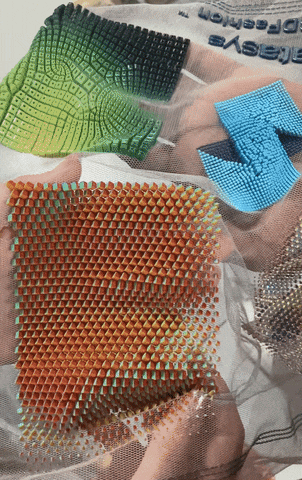
3D textures:
We also had the incredible experience to visit Jessica Diaz and Lara Campos workspace, they also studied in the Fabricademy a few years ago, so it's super inspiring to see them and their projects. During the tour, we learned more about molding and plating with mycelium.
The following video you could see how to unmold a mycelium shape with Jessica:
Mycelium unmolding de Emma
One intresting tip I learned in this visit is to continuously growing mushrooms in an object we must put them in a container with the lid slightly closed and spray it with water once a day.
1. Biocomposite


Example of the process to make a composite in the FabLab.
Composite de Emma
2. Leather molding
Process:
- Pour boiling water into a bowl and let it cool down to approx. 85ºC.
- Mix 5 big spoons of Baking soda in the water and stir until it is dissolved.
- Put the leather in the water and leave it for approx 30' until it has become soft. The time will change depending on the thickness of the leather, try before with a small piece.
- Take the leather out of the water and shake off the water.
- Place your object on a flat surface (cover it with varnish or thin film for waterproofing).
- Place the leather on the selected object and press it down over the object, stretch it and nail it, and massage it, until it starts to take shape. Use the vacuum machine to easily get your shape.
- Form sharp edges with the blunt side of the table knife.
- Use a blow dryer to make the leather shrink in and solidify over the object.
OPTIONL: To harden it more, when it's dried, cover with PVA glue or Polycell Deep Grap Polyfilla on the back side.
Tips:
- The mold has to be waterproof, if not involved with plastic film.
- You could do the mold in Rhino and then cut it in the CNC Milling.
- The longer it soaks, the more brittle it can get, as well.
- Vegetable-tanned leather works better.
3. Fabric formwork
Applications:
- Tensile structures
- Pneumatic structures
- Hydrostatic structures
- Shell structures derived from membrane form-finding
Advantatges:
- Possibility to get very complex shapes.
- Geotextile fabric is strong, lightweight, inexpensive and is reusable.
- Improved surface finish and durability.
- More efficient and sustainable design cause the material is placed only where it is needed.
- Use textile fabric formwork to increase freedom of design expression.
- Development of a fabric formwork system, reducing man's impact on the environment in terms of materials and energy usage.
Reciepe:
- Use Plaster for small mdels and tests.
- Micro Concrete.
- Thick Lycra for stretchable mold.
- Geotextile for rigid mold (made of woven polypropylene fibers).
- Shellac or petroleum jelly or mold release wax.
Tips:
- You can create a frame cube to strech and attach you fabric.
- Make sure you crate a frame-border so that the concreate does not overflow.
- Por the concreate, wait until it's "chessy" state and then lift the frame to apply the gravity for the deformation of the fabric.
- Place objects underneath the frame to achieve the desired design or attached threads on the frame.
- The cloth fabric deforms with the gravity according to type of fabric you use.
- Add fiberglass fibers in your concreate mixture if you can't reinforce it with a metallic mesh due to its shape.
4. Crystallization


General tips:
- The solution must be covered with a cloth, paper or alumini foil to prevent contamination, not sealed.
- Do not agitate-move your solution.
- If the crystals grow on the container, clean them as they are competing with your structure crystal or carefully take out your structure, microwave and mix the solution again and put your structure back.
- You could feed you experiment with more saturated solution after few days.
- Add some powder or some seed crystals to your structure to attract growth.
- You can speed this process by increasing the temperature where your crystals are growing or increasing air circulation.

More about:
4.1 Borax Crystals

Recipe:
- Powdered Borax
- Pipe cleaners (white or the color you want to make)
- Heat proof glass container
- Measuring spoon
- Scissors
- Thread
- Food colouring (Optional)
- Pencil or food skewer
Process:
- 9 tablespoons of borax dissolved in 3 cups of water.
- Bring 2 liters of water to boil in a glass/ beaker.
- Optional, add the food coloring.
- Add enough borax to create a saturated solution.
- Suspended the pipe clear form on a string immediately.
- Leave the beaker on the element as it cools. Cover to top with a cardboard piece to trape the heat.
- Let's soak during 8 hours, undisturbed in a dark place.
4.2 Alum Crystals
Recipe:
- Alum
- Clean beaker or jar
- Saucer or shallow dish
- Pencil
- Fishing line
Process:
- In one beaker, slowly add alum to 1/4 cup of very hot water, stirring to dissolve.
- Keep adding the alum until no more will dissolve. It's a saturated solution.
- Pour a little bit of this solution into a shallow dish and let it sit undisturbed overnight. Make sure to pour only the clear solution (You could use a coffee filter).
-
The following day, you should see small crystals growing. When it's in the correct size, carefully pour off the solution.
-
Make an other saturated alum solution with about 1/2 cup of hot water.
- Pour the solution into a clean beaker. Avoid pouring any undissolved material.
- Remove the biggest and use as your seed cyrstal with the little ones.
- Tie the finishing line to the seed crystal.
- Tie the other end of the finishing line to a pencil.
- Set the pencil across the top of the jar. So the seed crystal is suspended in the alum solution without touching the jar.
- Cover the jar and let the crystal grow until you are satisfied with the size.
- Take it out you sample and get it dry in a plastic wrap.
Tips:
- If the seed cyristal starts to disolve it's because the solution it's not saturated enough. REmove the seed quickly and add more alum, filtering off any undissolved particles.
5. Wood and textile
To transform wood into a flexible wooden surface you need to deconstruct it into pieces that are attached to the textile base. Depending on the geometry and the size of the tiles the design will have different flexibility and mobility.

Recipe:
- Cherry or Maple wood 0.6mm thick (the thick could change depends on what kind of shape you want)
- CNC Laser cutter or cutter
- Textile to support the material
Process:
- Cut the wood
- Stuck all the tiles by hand to compose a textile-like surface. The slices of the wood are 0.6mm thick and very flexible.
6. Digital and Biological
Fabrication with living organisms as a way to make a compostite.
Some examples:
- Mycelium and textile.

- Textile farming

- Silk Pavilion (2016).
To know more about this week follow the link.
My projects
After investigating all the possibilities and techniques to create shapes, this week I will explore the crystalization and the molding technique with leather.
Crystallization
The recipe:
* 150g Borax
* 400 ml Water
* Digital scale
* Pot/Vessel glass
* Spoon
* Object/surface to add the crystals
* Stovetop
* Thermometer
* Lid, Aluminum foil or Fabric
* Paper coffee filter
* Measure the ingredients depending on the pot you are going to use, calculate the water you will need to do the equivalance.
* Heat the water until to 80ºC or 90ºC.
* Mix in the mineral, until it dissolves completely.
* Optional: Add the pigment in the solution to get colour cyrsitals.
* Strain the solution with the coffee filter.
* Pour it into a container.
* Suspend your object in the solution with a thread. There must be space between the object and the pot to get the crystals grow.
* Cover the container with the lid to keep the heat from excaping too quickly.
* Put the container in a dark place and do not move. Wait for crystals to grow (8 hours aporx.)
* Take out the object when it's already crystalized and let it dry.
The first try was with a textured fabric joined with two safety pins to create a tub.


After seeing how the crystals work with Anna Cain we try to crystalize a roe deer horn, one night butterfly, two black and red butterflies, and a pork teeth.


We were super excited!
The crystals grow on them, however, they are super fragile, so if you touch or move a lot, especially the insects it falls...
Leather molding
What to say... I am anxious to try this technique! I studied for a master's in accessories and I found a super interesting way to create accessories and shapes. So finally, I am going to experiment by myself.

Crate the mold in Rhino
I already had some shapes ideas for the handbag:

I really like the idea to mix the utility of an object to convert in a other, the twist! So I start between a cowbell and a traditional vase.
Let's play in Rhino:


Add the handle with the pipe command and ajust in the base.

To control de dimension you should use the BoundingBox command. Remember for this mold the size couldn't be more than 9cm of thickness (The foam material's total thickness is 10cm).

To get properly molded leather the mold forms couldn't be sharp, it works better in an organic and soft shapes.
The final shape for the mold in .STL
Here you can download the vase handbag Rhino file.
Milling with CNC
RhinoCAM properties for the CNC machine:
CNC de Emma
Let's start milling.
First, we start roughing the shape, after we continuous with the finishing operation to get a better resolution of the mold.
CNC process de Emma
-
Material: SOPRA-XPS (a cellular foam, extruded polystyrene thermal in solution panel. 70% of it's recycled content)
-
Time milling: 30 minutes for roughing and 20 minutes for the finishes.
We use bridges to keep the mold attached to the block to prevent the mold fly up. When it's finished the CNC with a cutter you could easily remove it.

Process of molding
The material we are going to need is two big pieces of cow leather, the slightly blue for the insite and the maroon one for exterior of the handbag.

After we get the foam mold we are ready to procced:
-
Cover it with plastic film to protect it from water.
-
Put the leather in pot with cold water for 1 hour or more.
-
Add the leather in a hot water (80ºC) with 5 spoons of Baking Soda for 2'.
-
Drain as much as you could with a plastic glove, be careful the water is super hot!
-
Let the leather on the top of the mold and stretch the leather.
-
Turn on the vacuum machine. Help with your hands to fit the leather better.
-
Dry with the heat gun while the vacuum is on.

Unfortunately, the first try with the mold was a failure. The mold didn't work, we already made some holds to vacuum easily but it wasn't enough to get the shape. Moreover, the leather that I bought it's thin to get the shapes easily but it's a trouble to get the structure even though when the leather is dry.
So, for the next try, I should add glue to be more rigid.
![]()
Let's improve the mold:
I remove the foam base with a saw and a rasp to get just the vase shape. Then, I add a wood sheet in the foam mold with some screws to be more resistant. On the bottom I joined a conglomerate wood with the same shape but in a reduced scale to have enough space to hammer the nails which I need while I am molding the leather. This wood is joined with screws to get the chance to replace it in the future.
Because of the time, I did the inside part of the handbag with the traditional technique, as it is a hat.

Steps:
- Let the leather in cold water for 1 hour.
- Soak the leather in a pot with hot water (80ºC) and 5 spoons of Baking Soda for 2'.
- Drain as much as you can.
- Stretch the leather in the mold and help with some nails and a hammer to fit the shape.
- When you get the shape, add white wood glue on the top of the leather.
- Dry with a heat gun. Be careful to don't burn it!
- When it's dry, repeat the gluing process four times to get a rigid figure.
- After you have the optimal hard, take out the nails with a plier and unmolded.
- You have the shape!
I repeat this process two times to get the full interior.
Now is the turn to try for the second time the outer part of the handbag with the improve modifications:
- Let the leather in a cold water, 1 hour or more.

-
Drain the leather, use plastic gloves to don't scald the hands.
-
Paint the inside part with glue to get a rigid result, be generous with the quantity.
-
Stretch the leather on the top of the mold (covered with film to be waterproof).
-
Turn on the vacuum machine.

In the following video you could see how the vacuum machine works:
Leather moulding de Emma
I used a heat gun to accelerate the dry process.
Unmolding process:

After some time, we have the 2 exterior parts of the bag. Fortunately, the glue I used in the FabLab is more resistant than the wood glue, so the leather gets easily shaped and structured, with just one coat. Remember for the inside part I should reapeat the glue process 4 times, what a wasting time!

Finally, we have 4 shapes in total: 2 for the exteriors made with the vacuum machine technique and 2 for the interiors traditionally made.
So now, we are ready to join the parts of the handbag!
Let's continue!

To close the handbag I add a magnet, a rectangle on the bottom, and 2 triangles on the sides. Additionally, I added cardboard to firm the base. As a plus, I add 2 leather rings to have the option to hang a handle.
In the end,
THE VASE HANDBAG:

To be honest, after all the hours I spend on this sample I am not enthusiastic about it. It's a good prototype to study the errors and improve the finishes, and the development, to redefine the process and the tools we need.
Although, I add glue everywhere... but it was still not enough, cause while I was assembling it deformed the handbag.
A good start to depart!
This week was crazy!
I need more time, I would like to try ALL the different techniques, however, I enjoyed it.
PD: Special thanks to Petra & Josep to help me with the vacuum machine. Sometimes you need to be an octopus!
🦋🏺See you the following week!🙌💦