Week 02-27/09/2022
Sep 27, 2022
Hello there! This is a page that documents my second week of Fabricademy. Let's go!
1. Weekly Documentation planning
2.Representation of the human figure
3. Creating digital objects: Capture, Modeling, and Fabrication
From the first civilizations to our days we can appreciate the efforts to represent the human body, whether realistically or not, we can point out how the notions about proportion, beauty, balance, harmony, and movement were constantly evolving and changing.
During the first part of this week's class, we were able to appreciate different ways of visualizing and materializing the human body over time and through art. This reading helped me find inspiration and explore other ideas to do this week.
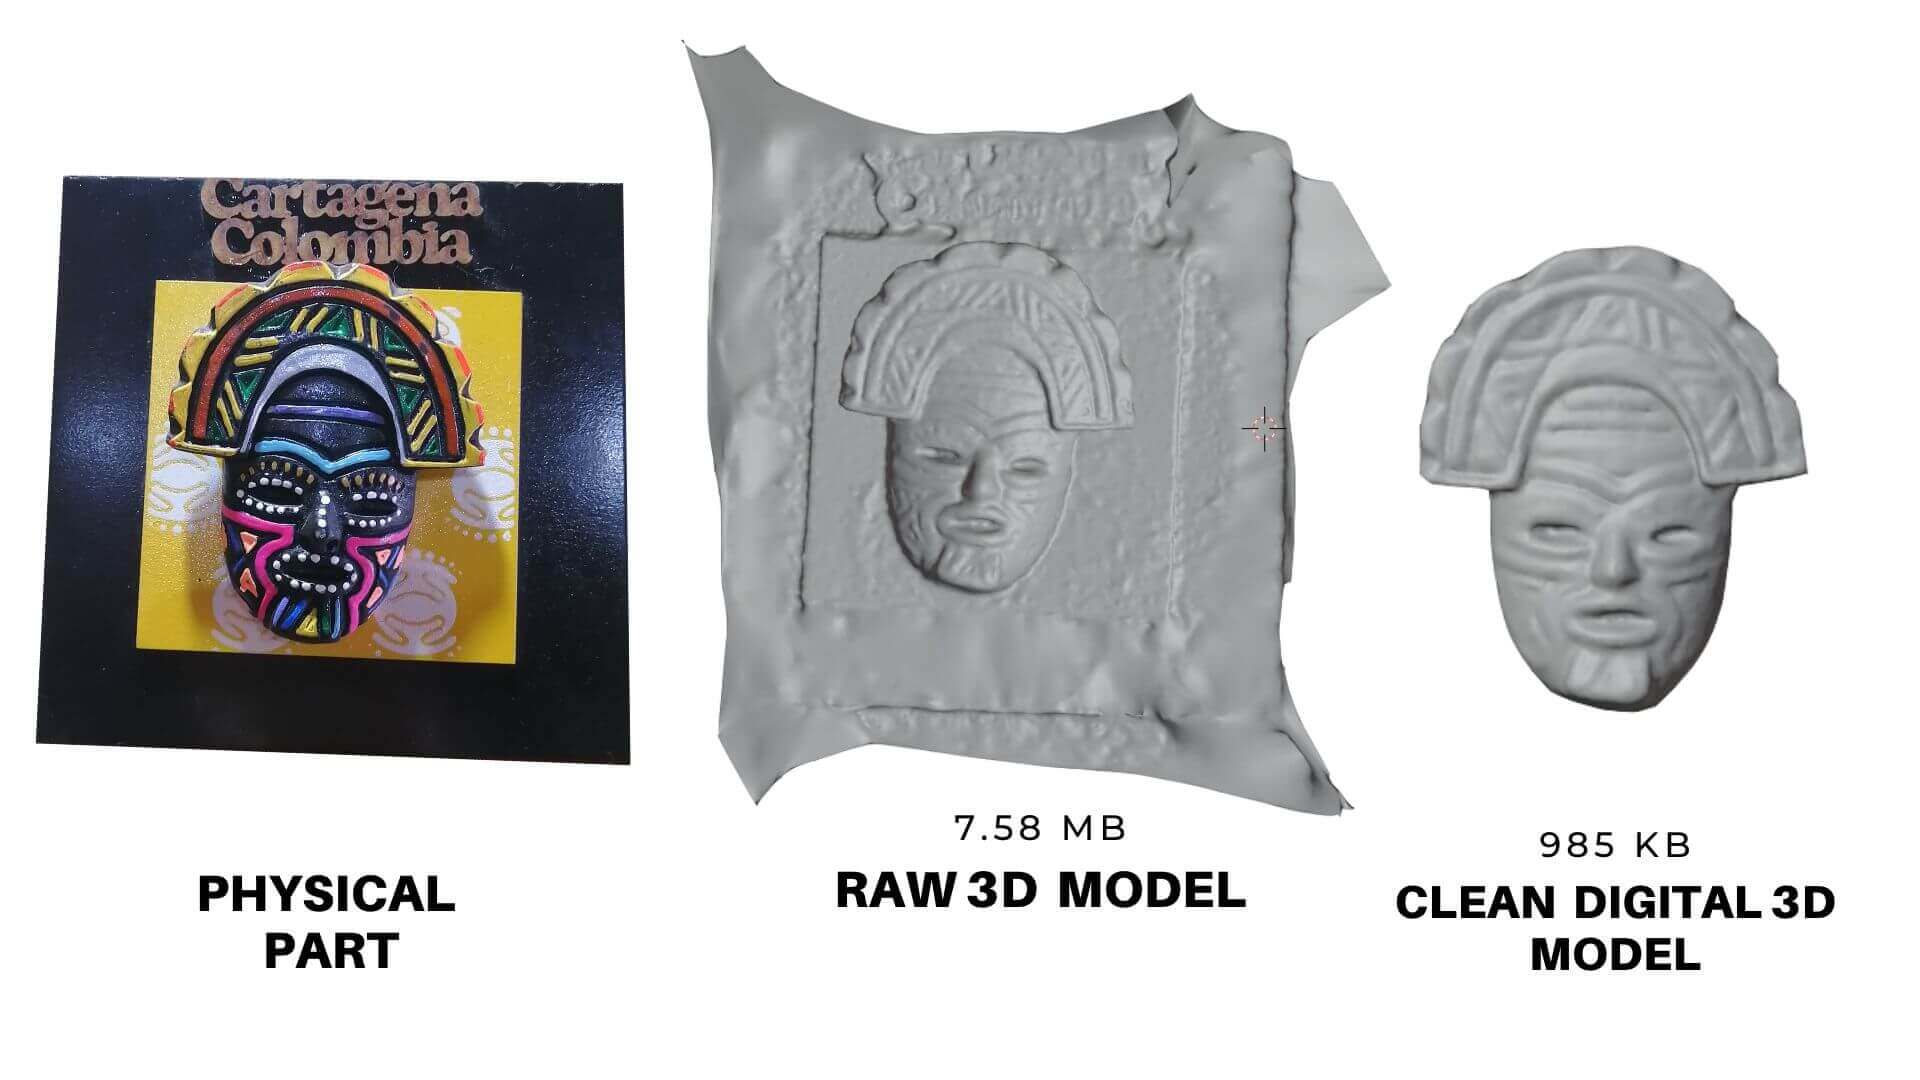
It is difficult to get precise measurements from objects with complex shapes like human bodies using tools such as calipers or rulers. 3D scanning technology is a fast way to collect surface measurements from physical objects into 3D digital form accurately with repeatable results.
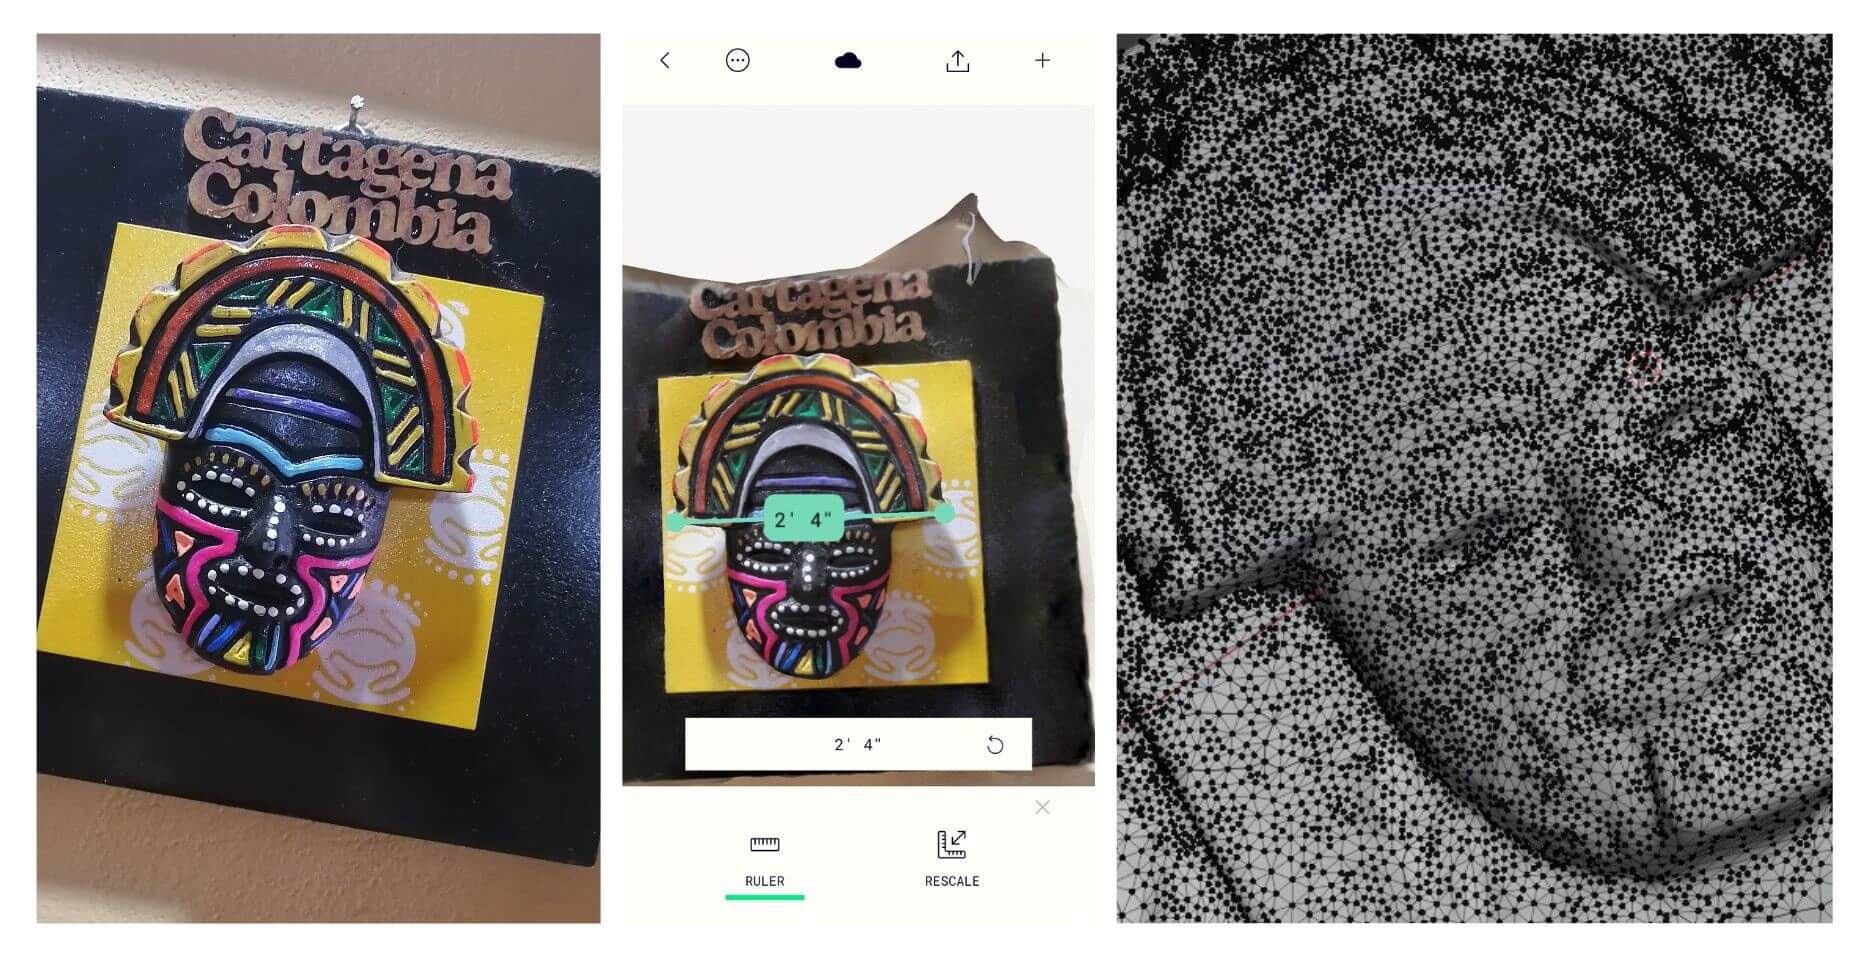
Currently, we don't have a 3D scanner at the Fab Lab, so I decided to try a phone app named "Polycam".
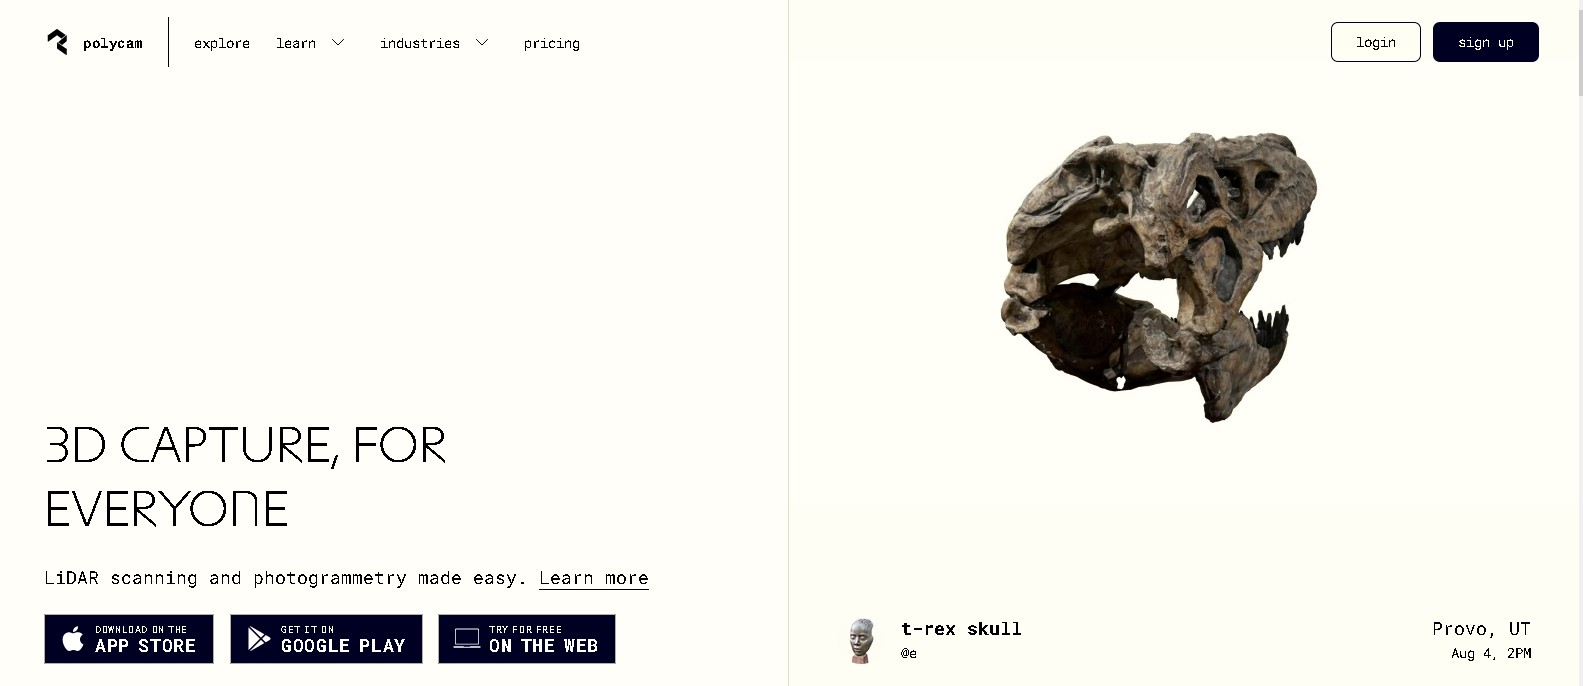
This app is a cloud-based photogrammetry pipeline that works on any iPhone. I made a test using a mask, the software was very easy to use and the first result ended looking really good. The free version of the app let you export the result in ".GLTF".
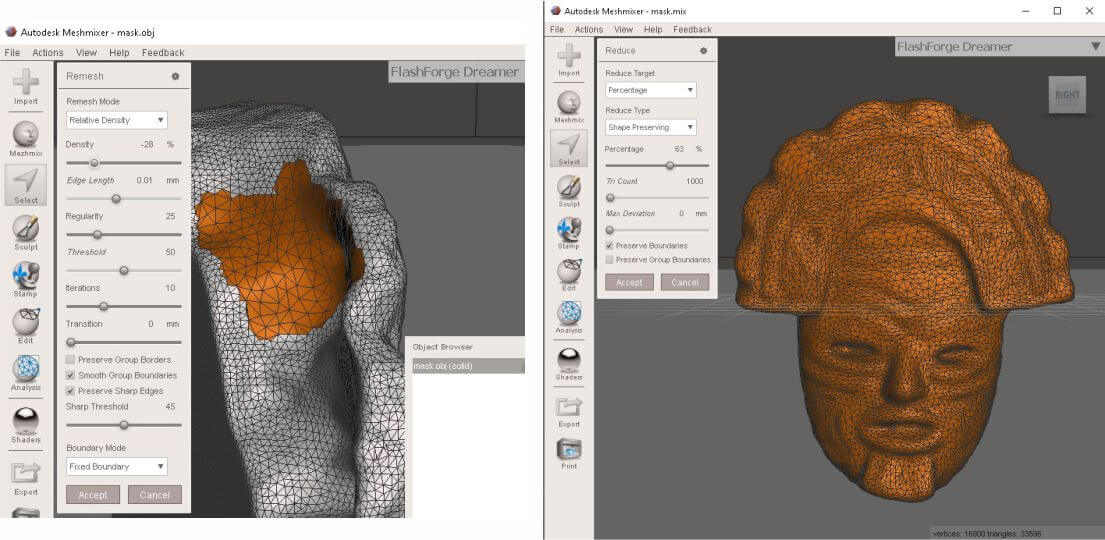
Usually, 3D scanned objects are heavy files of high-resolution models. Retopology is the process of simplifying the topology of a mesh to make it cleaner and easier to work with.
Meshmixer is state-of-the-art software for working with triangle meshes. I used it to solidify, clean and optimize the scanned Mask.
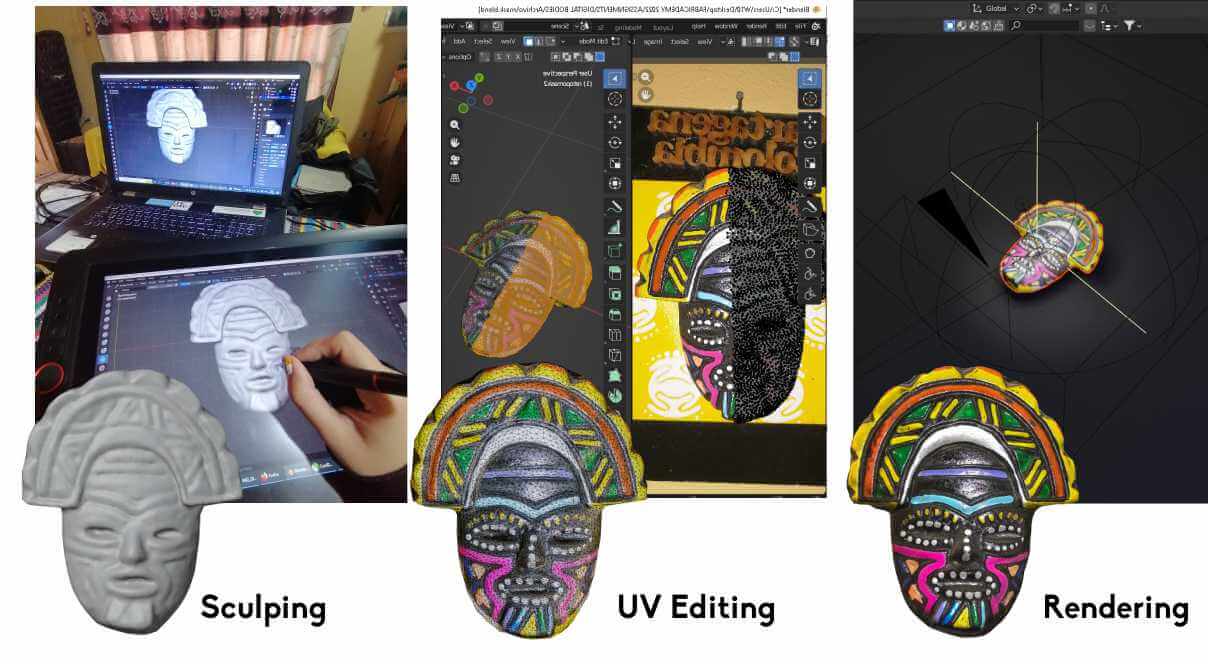
I use Blender to edit the last details, specifically the sculping panel, the UV Editing panel and the Rendering tab. Then I uploaded the result to sketchfab.
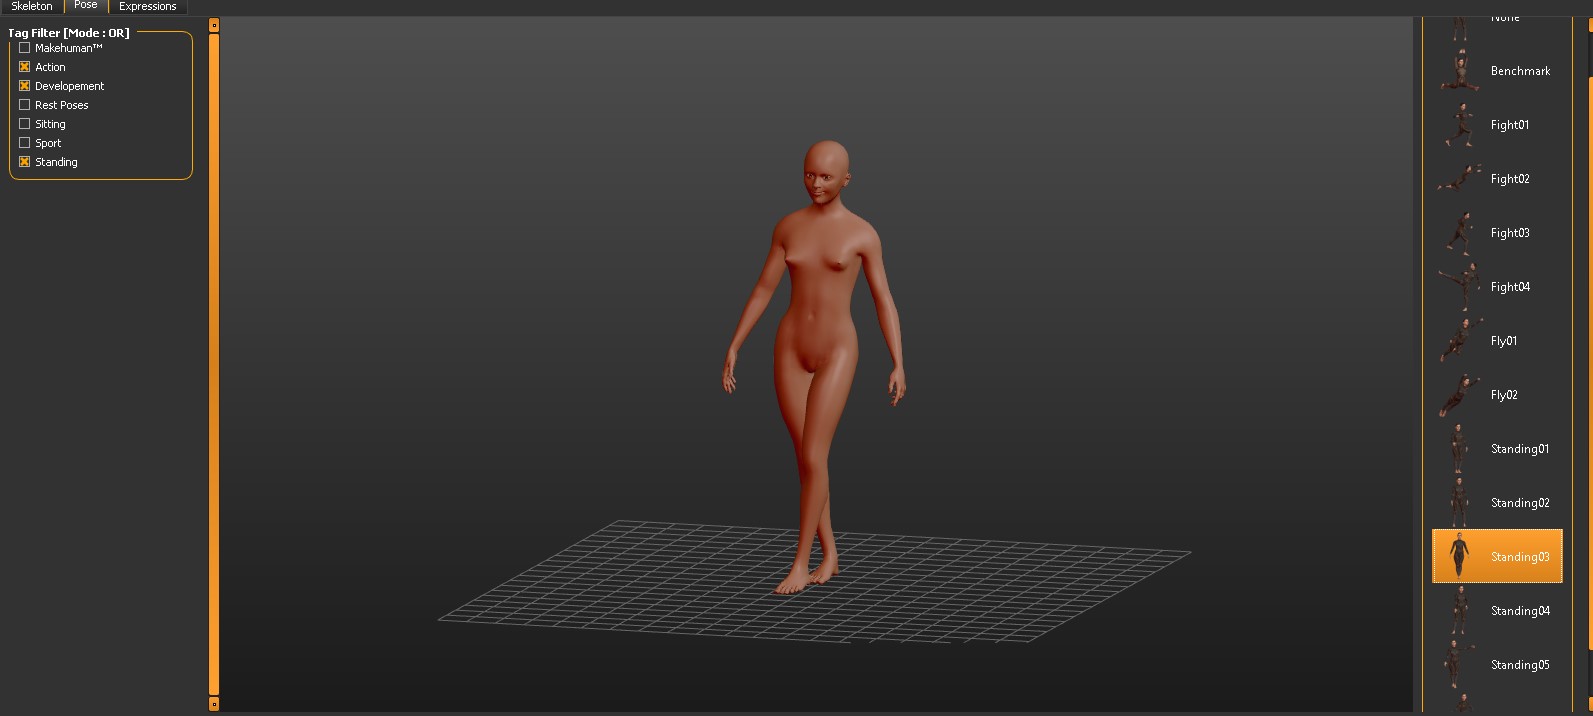
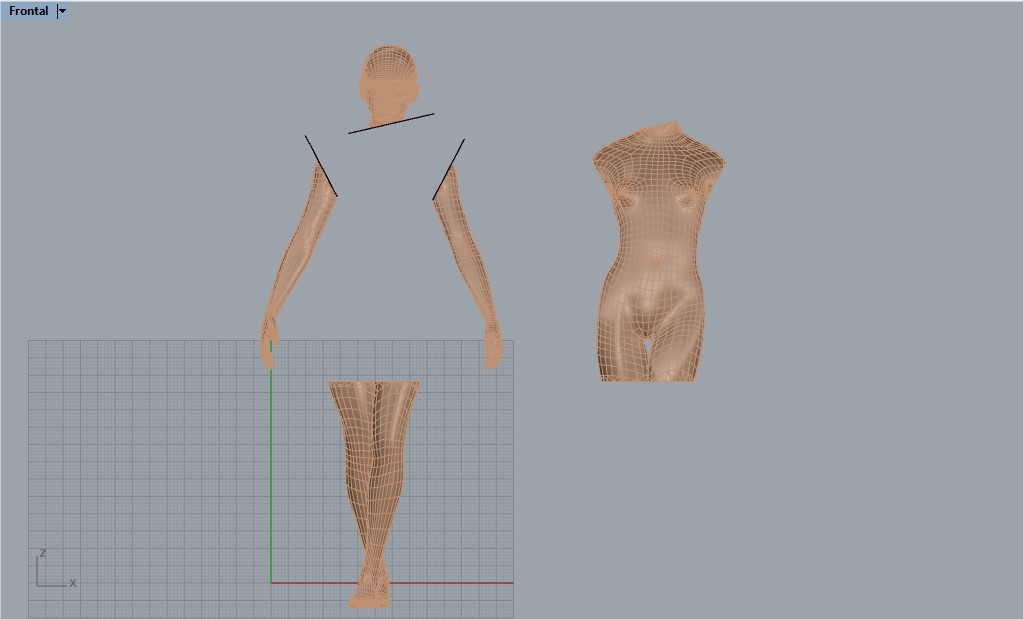
After going through all the steps of a 3D Scanning process, I decided to try a different approach to complete this week's assignment. I used Makehuman, which is a 3D graphics application for computer prototyping photorealistic humanoids for use in computer graphics, to create a model close to my appearance.
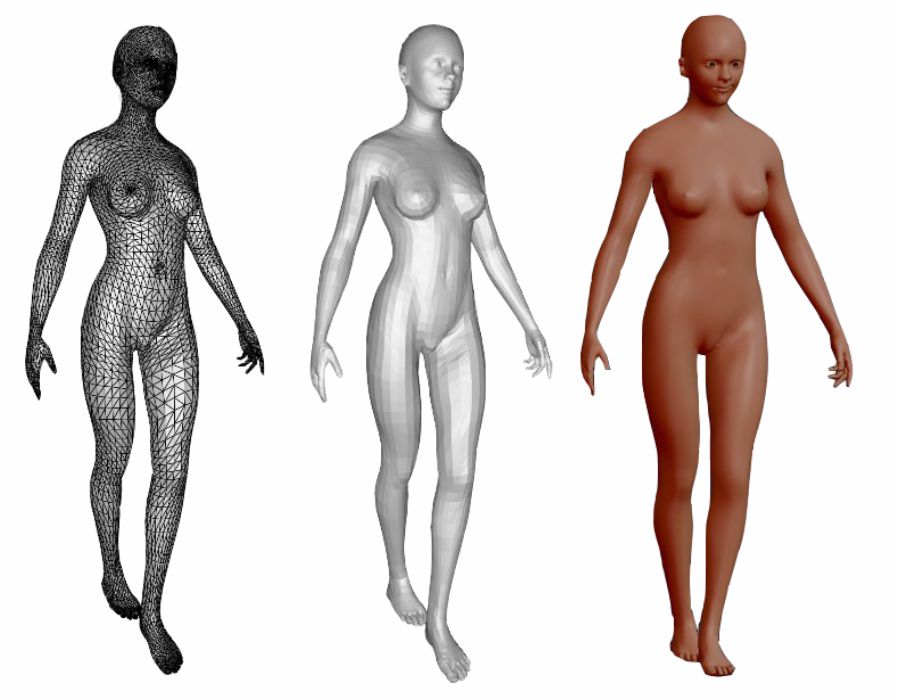
I export the Make Human file as an ".obj" file to slice it in Rhinoceros and Grasshoper.
First, I imported the 3D Model to Rhino and make some cuts using Polyline and Trim tools.
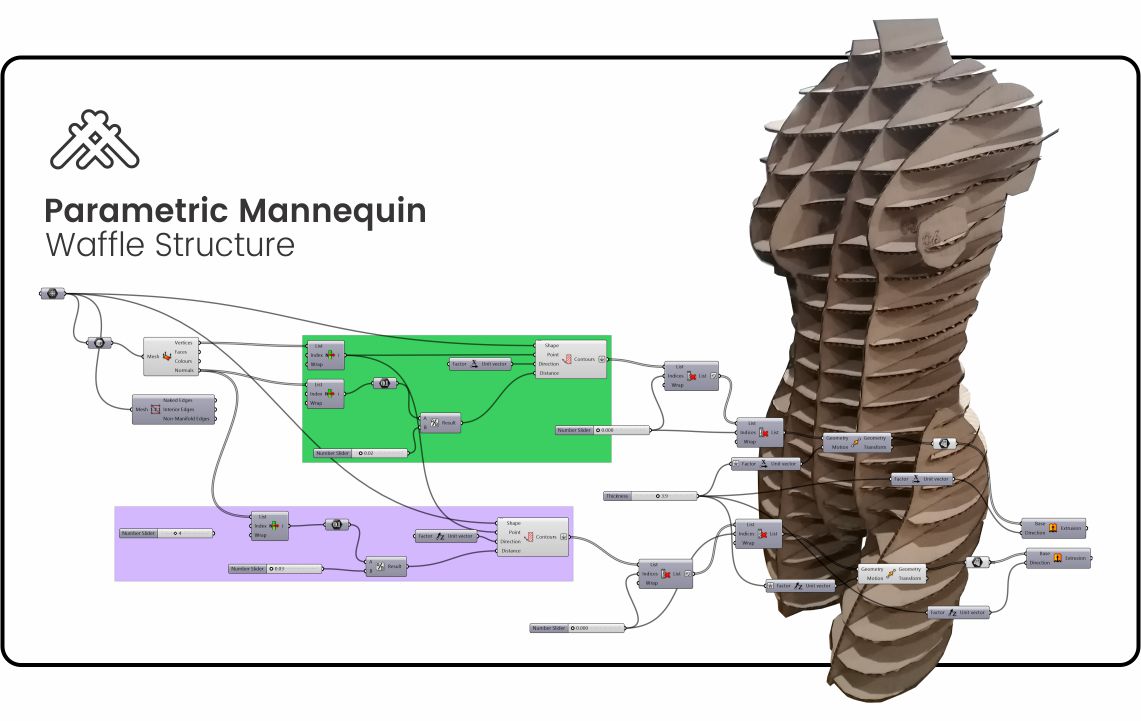
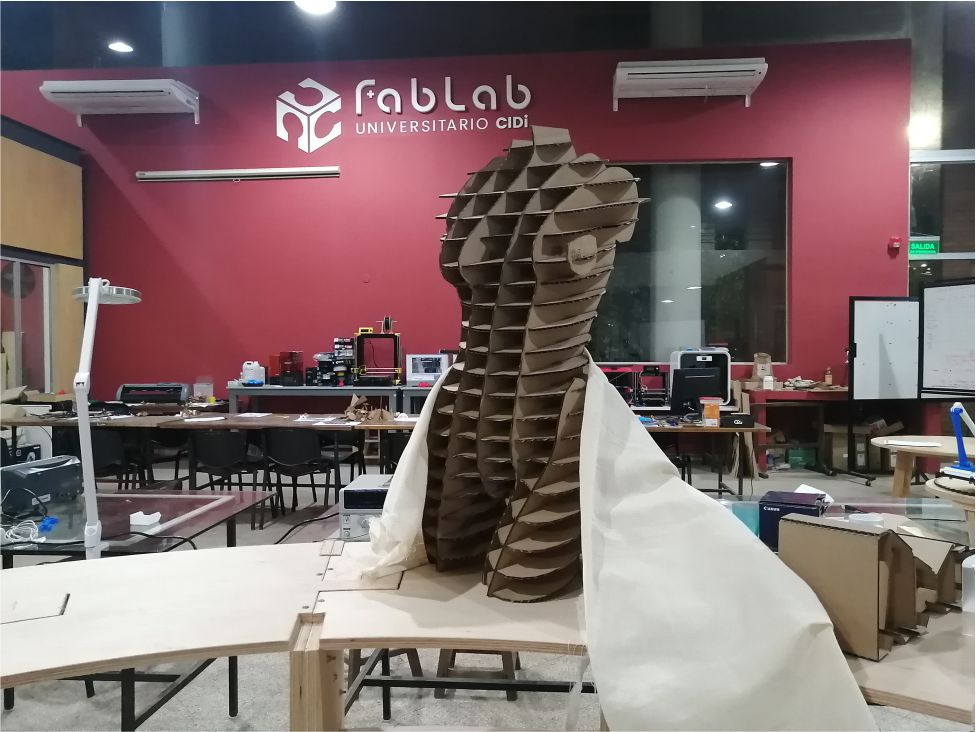
Using grasshoper, and following this tutorial, I made a waffle structure based on the trimmed mesh.
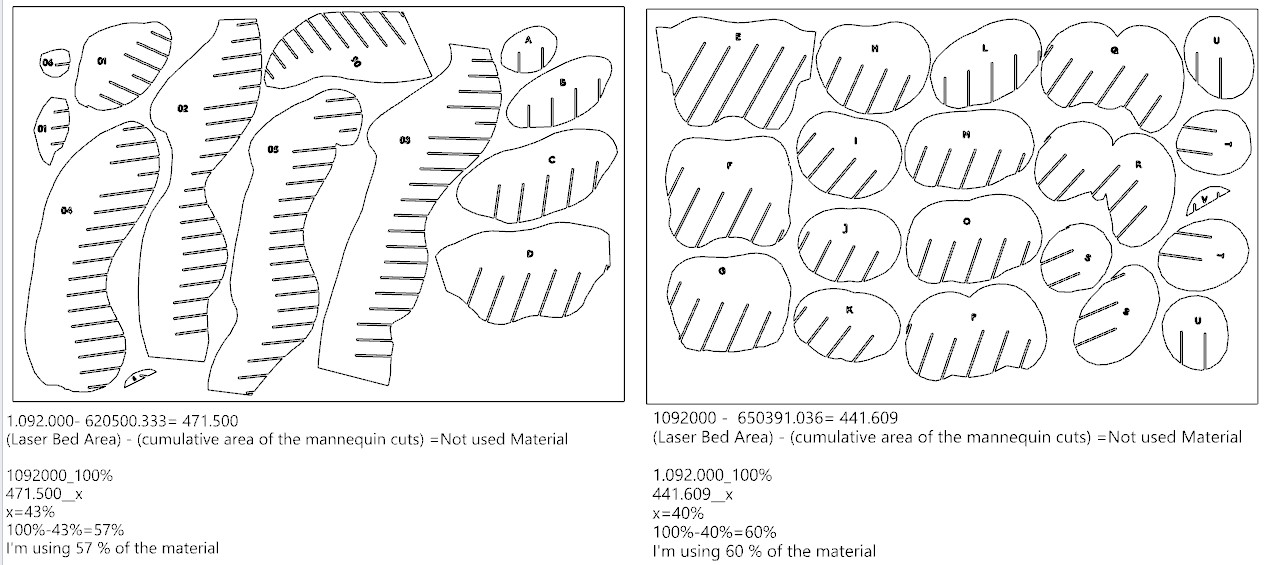
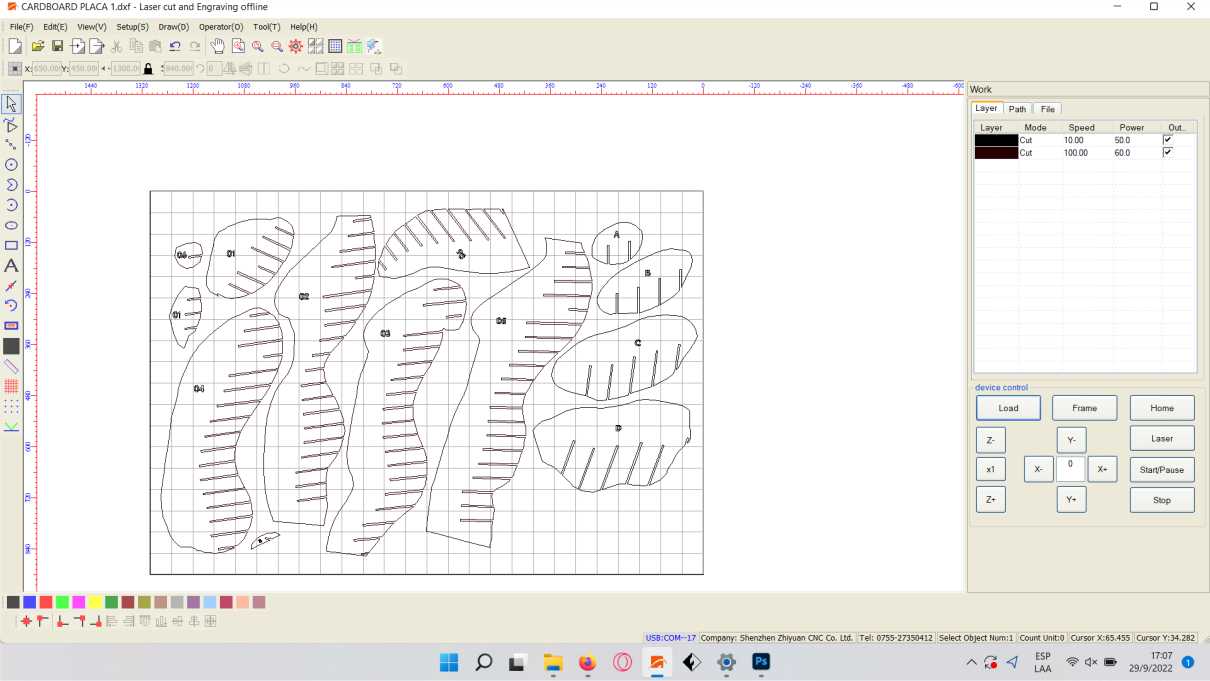
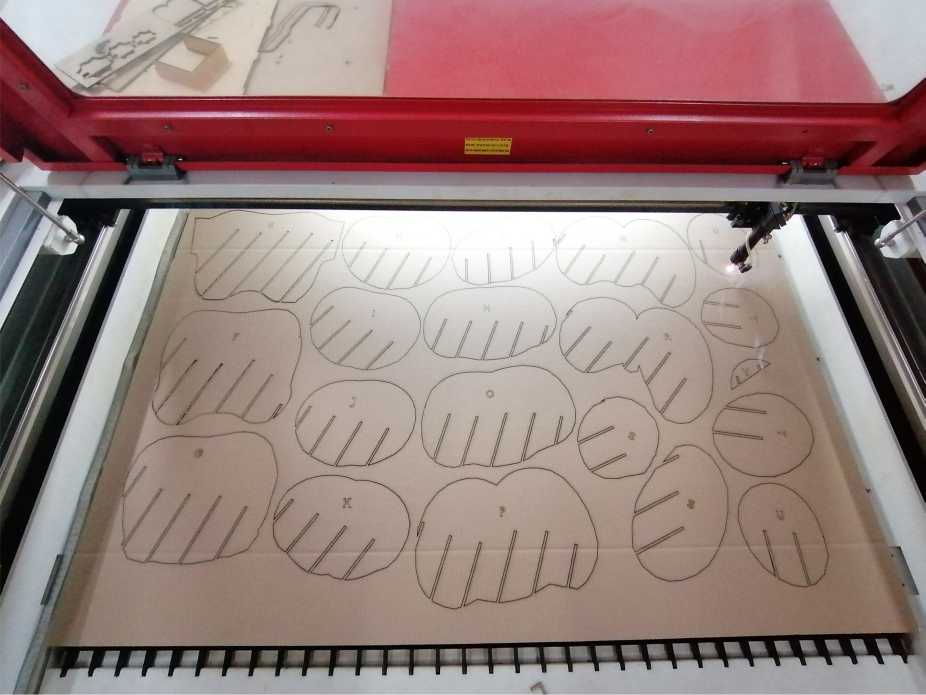
In the manufacturing industry, nesting refers to the process of laying out cutting patterns to minimize the raw material waste. Once I baked my grasshoper file, I prepare my "dxf" file and place the parts taking into account the size of the laser machine bed. I named every part with a number or a letter to make the assemble process easier.
 |
|
|---|
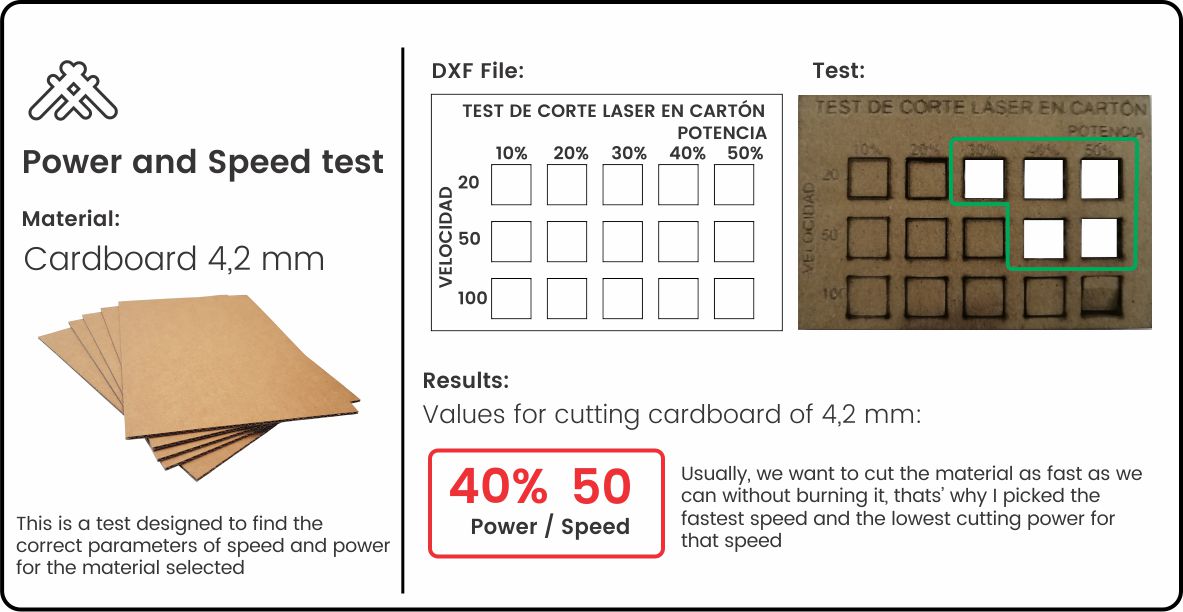
Before cutting a file, it is necessary to carry out tests with the material that we are going to use to ensure a clean job without major problems.
This test will help us find the correct parameters of speed and power for the material selected.
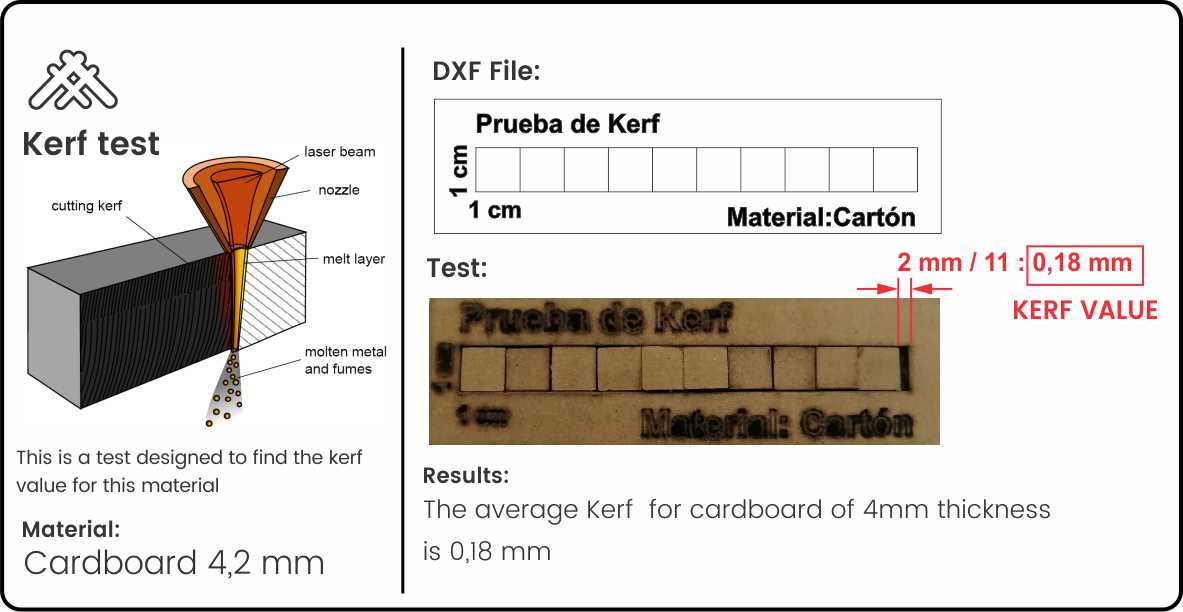
Kerf is the additional material burned away when laser cutting. We need to compensate for kerf to make great press-fit joints. In this simple test, you cut 10 squares of 1cm each, measure the gap between the squares and your material, divide it by 11 (because there are 11 lines), and that's the average kerf for your material.
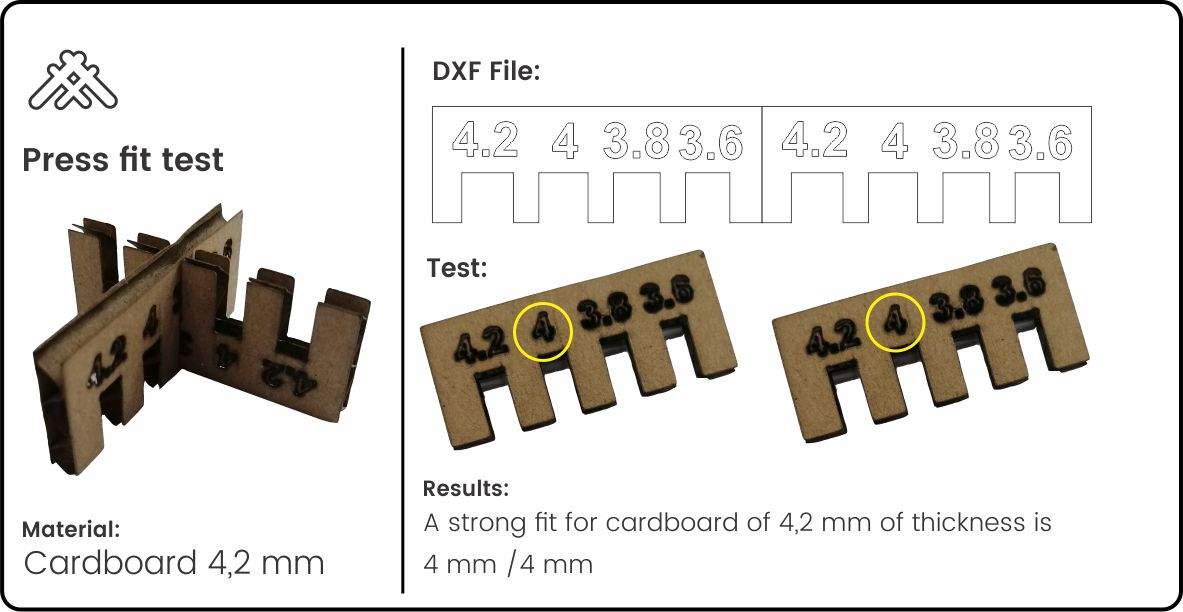
This test will help us ensure a great press-fit joint without using glue. We compensate the kerf by adding or reducing our original joint measurements until we find a strong fit.
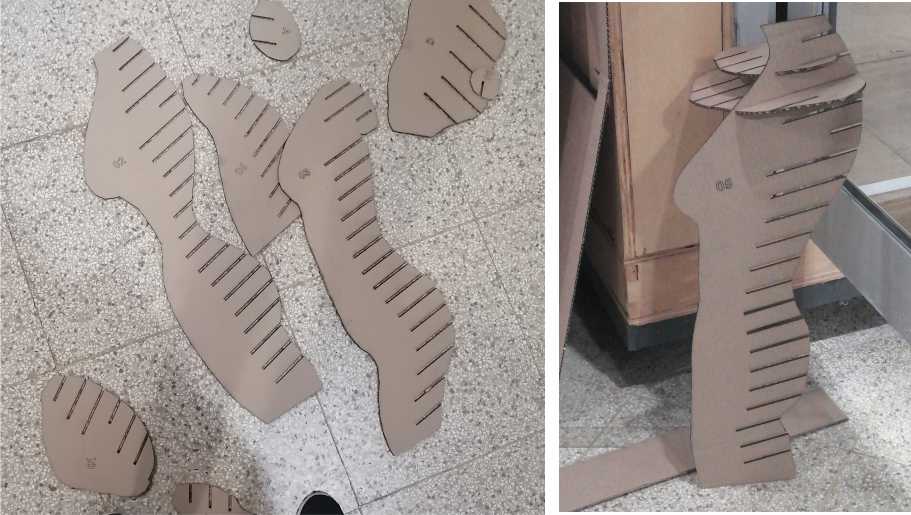
Now, I can start cutting my mannequin.
Creating digital humans: Capture, Modeling, and Synthesis
Industry Application of 3D Scanning