03. Open Source Circular Fashion
Week 03 | This class informed us on the systems behind fashion and the textile industry, focusing on alternative systems such as circular fashion, agile fashion, open value chains
• • •
Introduction
Assignment
- Include some inspiration: research on artists or projects that work with modules and zero waste systems
- Document, Design and prototype with paper and scissors modular configurations and interlocking connections
- Document, Design and prototype digitally your modular configurations and interlocking connections in 2D
- Document the process of testing and laser cutting your designs, including the machine settings, material type and thickness
- Laser cut the modules. Create a modular or seamless garment, showing that the connection is well-designed and holds the pull/stretch. Document the assembly process and tests
- Upload the fabrication PDF file at https://oscircularfashion.com/, in 1:1 scale accompanied by 1-5 pictures (preferably in white background)
- Submit some of the modules to the analog or digital material library of the lab. (Recommended size 20cm x 20cm) (extra credit)
This week focused on creating modular fashion pieces that could be as close to zero-waste as possible and seamless by combining maths and art by using techniques such as tesselations and kirigami. I really enjoyed getting inspiration from nature at the microscopic level which shows how formulaic and perfectly arranged cells are.
Inspiration
I used Pinterest to start to gather my thoughts and images, you can view my board here. I was drawn to 3D microscopic elements in nature that were colourful and showed movement. These were images related to bacteria, fungi, corals, seafoam, webs and scales. I was imagining a puff bag with different layers and heights sort of a combination of these pictures from my board! I would love to use ink or spray paint to create the effects that are illustrated here.

There is also an online database of previous students' work for this topic. I really liked Elena Bannaia's modular mesh bag that was functional and looked pretty cool!
Tools Used
- Rhino 8 - software to edit your models and prepare for laser cutting.
- SVGNest - open source application for automatic nesting.
- TinyPNG - to compress your photos for upload.
• • •
Prototyping!
Step 1: Play around with some paper :)
I wanted to create a female connection that allowed for lots of different variations of size and height for the 'male' 3D component so I added quite a few slits. I also made the male connection have many arrows so that it kept the circular shape when connected with the female part.

Step 2: Model it to scale on Rhino
Using the skills I had learnt from last week with Rhino I started creating some models for my design. Here is my first attempt, although I didn't like the male connection design as I thought it would create quite a bit of material waste.

Petra suggested to change the design to this which I think works alot better!

Make sure that you aren't creating any duplicates in the lines of your model as this wastes time in the laser cutting stage - you can delete them by using the 'SelDup' tool.
The final dimensions:
Female connections: 6x6 cm
Male Connections (diameter): 5.7cm, 9cm and 10cm
Step 3: Optimise space according to the fabric
SVG Nest helps optimise the space in your design to create the most efficient process and as little waste as possible.
I measured the fabric I wanted and created some diagrams on Rhino according to the measurements trying to minimise the least amount of fabric possible. I changed the layer colours in preparation for the laser cutter - blue for the outline and red for the inside cuts.
TIP!
Using the tool 'Rectangualar Array' helped to copy and paste each geometry to the amount that I wanted. Chose the amount of modules you want in the x, y and z directions - make sure to place them in an efficient nest!
The fabric I chose was 1mm thick felt.

• • •
Laser Cutting
It is important to know what material you are laser cutting as some can cause hazards such as fires if they are made with flammable fabric or even coated with something that is toxic (e.g aritifical leather contains PVC compounds).
Here is a list of materials you CAN laser cut:
- Cotton
- Felt (synthetic)
- Silk
- Linen
- Lace
- Polyester
- Fleece
- Softshell
- Denim
- Alcantara
- Leather
- Laser Leather
I used the Speedy 400 laser cutter - for the parameters there was a standard for felt of:
-
Power = 50
-
Frequency = 1000Hz
-
Speed = 1 (I tested different parameters: 5, 2.5 and 1 - where 1 enabled the laser to cut straight through the fabric).
I tried to keep the male pieces to the white fabric and the female pieces to the black fabric as I didn't have enough of the same colour fabric. Although, I ended up using some spare black fabric for some more male pieces.

• • •
Assembling
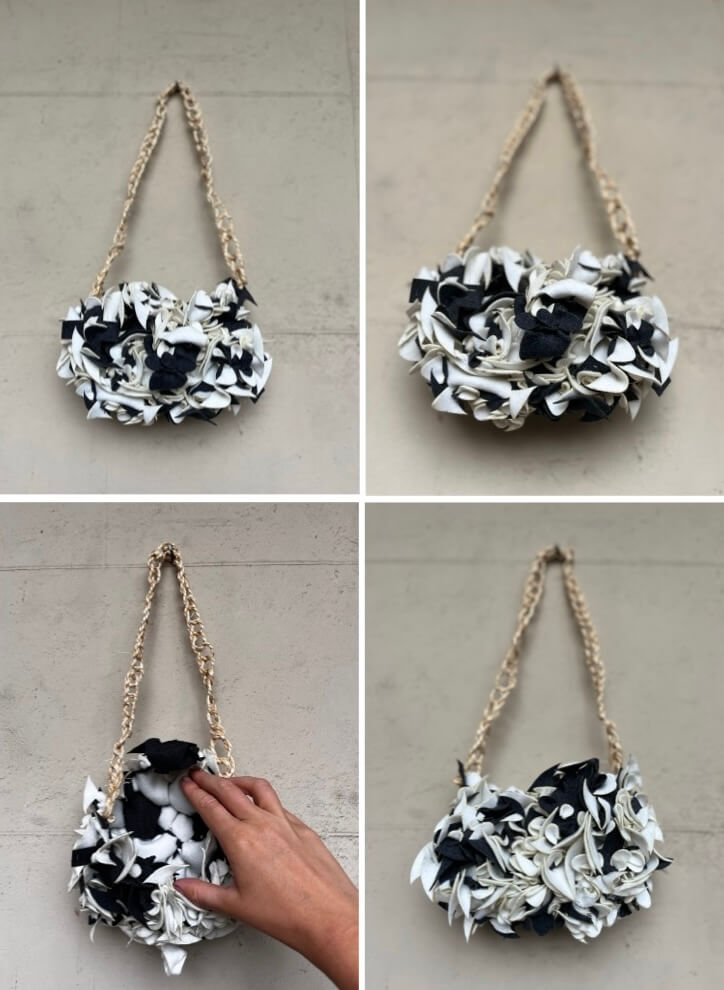
My process was very random and involved inserting the male pieces into any slit and stuffing the shape with leftover fabric to create the 3D effect. I had originally wanted the bag to look like the inspiration picture but I wasn't sure I liked the final look so I reversed it and it creates a cool effect! I just need to add a strap to finish the bag off.
Here is the finished product :)
Review:
-
I would have preferred all the male parts to be white but I didn't have enough fabric
-
If I had more time I would have loved to use natural dyes to colour the modules like the inspiration photos!
-
The final product didn't look anything like how I wanted or expected but it was an interesting process and showed how the reverse can look better!
Link to OS Circular Fashion Platform
• • •
Fabrication files
-
File: Rhino Pattern Design ↩