11. Open Source Hardware - From Fibers to Fabric
Research & Ideation

Week 11 is dedicated to group work, from initial concept to final project planning, and it resonates deeply with a philosophy that is close to my heart: open source.
After three weeks of reminding my colleagues [with my usual performance anxiety, which often pushes me to improvise, but which is actually rooted in the real biological timing of designing and ideating — ideas need to be digested too] that we needed to start thinking about what we wanted to build—given the tight schedule of Fabricademy—we finally began structuring our ideas. Time is extremely limited, so planning ahead is essential. We started by analyzing our desires and needs, creating a mind map of possible machines and tools, and discussing the distinctions between a tool, a machine, and a robot.
Tools, Machines, and Robots
- Tool
A tool is a direct, usually manual instrument that extends human capability.
- Automation: None; works only with continuous human input.
- Examples: hammer, manual stapler, scissors, engraving pen.
-
Summary: A tool is an extension of the hand or skill, without autonomous processes.
-
Machine
A machine is a mechanical or electromechanical device that can perform more complex, often repetitive processes, without constant human input.
- Energy: Can be powered by electricity, heat, or hydraulics, converting energy into work.
- Examples: 3D printer, blender, lathe, centrifuge.
-
Summary: A machine automates or facilitates work but follows predetermined routines, without "intelligence."
-
Robot
A robot is a machine with a degree of autonomy and responsiveness, often programmable or sensor-equipped.
- Capabilities: Can make limited decisions, react to the environment, and adapt to variable inputs.
- Composition: Usually combines mechanics, electronics, and software; may include AI or logic control.
- Examples: industrial robotic arm, domestic robot, exploration robot.
- Summary: A robot is an "intelligent" or reactive machine that can modify its behavior based on the environment or programmed rules.
Quick Overview
| Type | Autonomy | Human Input | Example |
|---|---|---|---|
| Tool | None | Continuous | Hammer |
| Machine | Partial | Occasional | Centrifuge |
| Robot | High | Minimal | Robotic arm |
Creativity Map by Mercedes Leon merchesico.blog
 Biolab Lisbon team Brainstorming Map, illustration by Carlotta Premazzi
From this process, we narrowed down our options to four potential projects: Crystalizator, Shred Machine, Biomaterial Screenprint, and a Vibrating Plate for leveling biomaterials. We quickly discarded the projects that seemed deceptively simple but were in fact problematic. The Shred Machine, for example, posed risks of handling large amounts of metal and chemicals from commercial materials. I was particularly concerned about safety and environmental impact—microplastics and residual chemicals released in uncontrolled spaces made it unsuitable for open use.
To ensure fairness and clarity, I suggested a vote, which allowed the Crystalizator to become our course project. Given the tight timeframe and other constraints(The other team members either did not feel the need for certain elements or preferred not to use them), we made a conscious compromise: all automatic and microcontroller-based parts were removed, leaving a fully manual process. This was a very difficult compromise for me, but it also became a valuable reality check, highlighting the challenges that remain in the digital version—such as material choices for pumps, which are still under consideration, and the risk of not having enough time to build and program it. For now, only a pseudocode workflow accompanies the second manual prototype.
This week allowed us to translate ideation into a tangible, open-source concept, balancing creativity, safety, and practicality. It was a clear reminder of how collaboration, discussion, and compromise are essential in turning ideas into viable projects while staying true to the open-source ethos.
Open Source Philosophy
Remix Culture


Some Slides from my lecture for Intro to VJ Workshop, VJS ANONYMOUS 2024 [LIVE VISUAL THEORY/> GLITCH&FLOWER(Carlotta Premazzi)]
Spectrum of right
Authors/Property rights Private vs Public
Major Open-Source Projects Overview
| Category | Project / Platform | Year | Notes |
|---|---|---|---|
| Software | Linux Kernel | 1991 | Operating system kernel |
| GNU Project | 1983 | Free software ecosystem | |
| Apache HTTP Server | 1995 | Web server | |
| Mozilla Firefox | 2002 | Web browser | |
| Blender | 1998 | 3D creation suite | |
| VLC Media Player | 2001 | Media playback | |
| LibreOffice | 2010 | Office suite | |
| Python | 1991 | Programming language | |
| PostgreSQL | 1996 | Database system | |
| MySQL | 1995 | Database system | |
| WordPress | 2003 | CMS | |
| OpenSCAD | 2010 | CAD modeling | |
| Godot Engine | 2014 | Game engine | |
| Arduino | 2005 | Microcontroller ecosystem | |
| Hardware | RepRap | 2005 | Open-source 3D printer |
| OpenBCI | 2013 | Neurotech hardware | |
| RISC-V | 2010 | Open CPU architecture | |
| Open Source Ecology | 2003 | DIY industrial machines | |
| Knowledge | Wikipedia | 2001 | Collaborative encyclopedia |
| Archive.org | 1996 | Digital library | |
| Wikidata | 2012 | Structured open knowledge | |
| Project Gutenberg | 1971 | Public domain books | |
| Public Domain Review | 2011 | Curated public domain works | |
| OpenStreetMap | 2004 | Open geographic data | |
| Science | OpenWetWare | 2005 | Open biological research |
| OpenFOAM | 2004 | CFD simulation tools | |
| CERN Open Data | 2014 | Particle physics datasets | |
| Human Genome Project | 1990 | Public genomic data | |
| Art & Design | Processing | 2001 | Creative coding |
| Pure Data | 1996 | Visual audio programming | |
| TouchDesigner Community Tools | Var. | User-made open tools |
🛠️ Open Source Hardware and Documentation
Open Source Hardware (OSH) refers to tangible objects—machines, tools, textiles, materials, furniture, electronic devices—whose designs, instructions, and knowledge are openly shared so anyone can reproduce, modify, and improve them.
The goal of OSH is to create a world where technology and materials are accessible to everyone, fostering a global culture of collaboration and innovation.
Vision and Goals
-
Accessibility and Common Good: Make technology, machines, and processes accessible to all of humanity.
-
Open Knowledge Sharing: Build a collective repository of learning that grows through contributions.
-
Collaboration and Reproducibility True collaboration is only possible when designs are fully replicable by others.
📚 Documentation as the Core of Open Source Hardware
High-quality open documentation is the central medium for collaboration. It guarantees:
Reproducibility Transparency Participation Long-term evolution of the project
It provides all the necessary information for reproducibility, and consequently, inspires people to participate and contribute to the project.
Essential Documentation Components
Open Source Hardware documentation must include all pertinent information (design, components, and instructions) to allow anyone to recreate and improve the product. Key contents are:
- License
- Project Overview / README
- Assembly Instructions
- Design files [Source Files & Export Files]
- Bill of Materials (BOM)
- Purchased Parts
- Unique / Custom-made Parts
- Source Files & Export Files
- Software / Firmware
- Review & Rebuild Notes
- Additional Features
- Safety & Risk Assessment
- Maintenance & Repair
- Changelog / Version History
- Contributing Guidelines
- References
- Acknowledgments
🧵 From Fibers to Fabric — Open Source Textile Production
"Form Fibers to Fabric" expands the Open Source Hardware philosophy into the textile world, proposing a modular open-source hardware ecosystem capable of transforming raw or recycled material into fibers, yarns, and fabrics.
It is designed for makers, researchers, biomaterial labs, and designers who want to experiment with local production, sustainable materials, and DIY fabrication.
🔧 The Production Stages (Open Source Workflow)
| Stage | Input | Process | Output / Result |
|---|---|---|---|
| Raw Material | Natural fibers (incl. biopolymers) / Synthetic polymers / Recycled waste | Harvesting, shearing, shredding, melting, dissolving. | Base material for fiber formation. |
| Preparation | Loose fibers (or polymer masses) | Washing, carding (alignment), blending. | Clean & aligned fibers (sliver). |
| Yarn Production | Aligned fibers (sliver) or extruded filaments | Spinning, twisting, drawing, extrusion, texturing. | Yarn. |
| Textile Construction | Yarn | Weaving, Knitting, Braiding, felting, embroidery. | Fabric. |
| Applications | Fabric | (N/A) | Final products in: Apparel, interiors, automotive, architecture, industry, medicine. |
| --- |
Carding
Carding is a fundamental mechanical process in the Preparation stage that:
-
Function: Disentangles, cleans, and intermixes fibers to produce a continuous web or sliver suitable for subsequent processing.
-
Mechanism: It is achieved by passing the fibers between differentially moving surfaces covered with "card clothing." This action breaks up unorganized clumps and aligns the individual fibres parallel to one another.
get inspired!
Check out and research alumni pages to betetr understand how to document and get inspired
-
OS Loom - Kae Nagano - Fab Lab Kamakura
-
The pattern machine - Marion Guillaud - LeTextileLab Lyon
-
Shopbot Hack - Painting machine Asli Aksan - Textile Lab Amsterdam
-
Prusa - Pegboard - Viviane Labelle - EchoFab
-
Final project - Pauline Gamore
References & Inspiration

Open Source Hardware Inspiration Moodboard by Carlotta Premazzi
- Crafting Fashion With Robots by Zoe Romano and Francesco Perego.zoeromano.eu
- Sensor Knitting by Liza Stark liza-stark.com
- Bab Loom Telar by Walter Gonzales [fabricademy slide lecture]
- ELECTRO-SPINNING by Petra Garajova Fabricademy site
- DIY CENTRIFUGE by Petra Garajova Fabricademy site
- Fiber spray by Anastasia Pistofidou and Ali Yelder[fabricademy slide lecture]
- Knit-tink by Stéphanie Vilayphiou gitlab.com
Crafting Fashion With Robots
Sensor Knitting — Liza Stark(2018)
Event: New York Tech Zine Fair
Author: Liza Stark (thesoftcircuiteer.net)
Key Points
- Concept: Textiles that function as electronic sensors (“soft circuits”) by combining conductive yarns with regular textile yarns.
- Circuits:
- Electricity → electrons flow from positive to ground
- Variable resistance → controls LED, motor, sound
- Pressure or deformation → changes resistance
- Surface area → larger area, lower resistance
- Materials: Conductive yarns (Elitex, Karl Grimm, Bekinox, Adafruit Stainless Steel), regular textile yarns, carded roving, LED, batteries, Arduino
- Tools: DIY loom, crochet hook, tape, HILO software (for yarn properties)
- Process:
- Prepare loom (cut & reroll tube)
- Place LED and connect to battery
- Test circuit → LED lights up
- Cast on → wrap yarn around pins
- Work stitches using crochet hook
- Continue until desired length
- Test sensor → LED varies with pull/deformation
- Cast off → remove textile from loom
- Arduino: Connect analog sensor to input pin, control LED or other outputs
- Takeaways:
- Integrate electronics directly into the textile
- DIY, sustainable, experimental approach
- Inspires projects like The Crystalizator, where textiles and materials physically or chemically react
Resources
- Kobakant’s eTextile Database (kobakant.at)
-
eTextile tutorials and zines
-
Soft sensor guides
Crafting Fashion With Robots — Zoe Romano & Francesco Perego
Authors / Source: Zoe Romano & Francesco Perego (zoeromano.eu)
Key Points
- Concept: Exploring the integration of robots in fashion creation, blending automation with textile design and craftsmanship.
- Focus:
- Use of robotic arms and automated tools to assist in garment making
- Combining digital fabrication with traditional textile techniques
- Enhancing precision and repeatability in fabric manipulation
- Applications:
- Robotic embroidery, sewing, and cutting
- Hybrid workflows where designers and machines collaborate
- Innovative garment patterns enabled by robotic capabilities
- Takeaways:
- Robots can become creative partners rather than just production tools
- Enables complex geometries and textures not feasible manually
- Inspires new approaches to interactive, wearable, or experimental fashion
Resources
- Project website: zoeromano.eu
The Crystalizator
OPEN SOURCE CRYSTAL-GROWTH MACHINE
[Analogic / Manual Version]
 The Crystalizator illustration by Berrak Zeynep Okyar
Inspirations


1. Project Overview / README
Project Name: The Crystalizator — Crystal-Growth Machine
Description:
The Crystalizator is an open-source device for preparing, filtering, and crystallizing saturated salt solutions directly onto fabrics or textile scaffolds. It integrates controlled heating, magnetic stirring, gravity-based filtration, and a pulley-based immersion system to create consistent, repeatable, and well-documented crystallization workflows.
The system provides a protected, stable environment where crystals can form reliably, improving upon inconsistent open-air manual methods.
Version: V1.0 (Analog Prototype)
Author(s): Carlotta Premazzi, Ndeyfatou Ceesay, Berrak Zeynep Okyar, Carolina Delgado, Carlos Roque, Guilherme Martins
Lab: Biolab, Lisbon
License: CC BY-SA
2. License
This project is released under Creative Commons Attribution-ShareAlike (CC BY-SA).
You may:
- credit the original creators
- adapt and modify
- redistribute
- release derivatives under the same license
3. Bill of Materials (BOM)
BOM
| COMPONENT | IMAGES | LINK | PRICE |
|---|---|---|---|
| Structure | |||
| Laser-cut Plywood Board (70×100 cm) |  |
leroymerlin.pt | €26,12 |
| Components | |||
| 1× Thermomagnetic stirrer with hot plate | AliExpress | €59,95 | |
| 1× Magnetic stir-bar (5×40 mm, chosen via Stir-Bar Data Sheet) | Amazon.es | €14,22 | |
| 1× pack Magnetic stir-bars (5 different sizes) |  |
Amazon.es | €13,10 |
| 2× Borosilicate glass jars (1 L) |  |
Amazon.es | €73,96 |
| 1× pack 200 filtration units | Amazon.es | €19,04 | |
| 3× Dark fabric curtains (light-shielding system) |  |
feiradostecidos.com | €13 |
| Chemicals | |||
| Salt / Copper sulfate | Amazon.es | €17,25 | |
| Salt / Alum | Amazon.es | €17,18 | |
| Distilled water | Amazon.es | €28,45 | |
| 96% alcohol |  |
Amazon.es | €5,97 |
| Textile / Scaffold | |||
| Cotton, linen, biotextile, or other scaffolds | 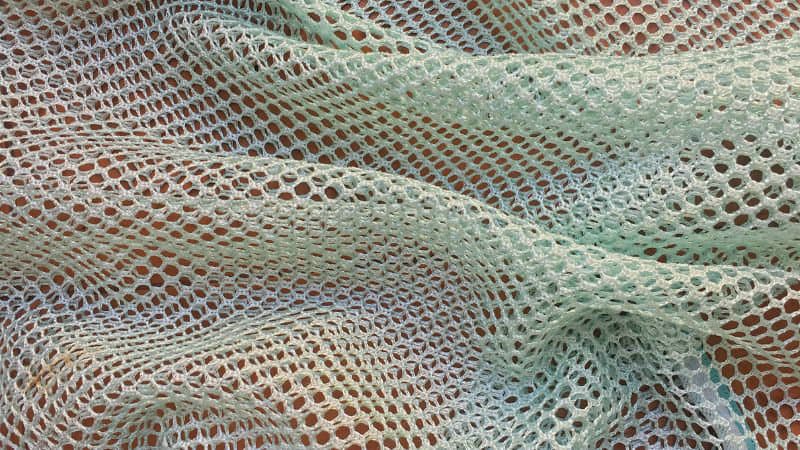 |
||
| TOTAL | €288,24 |
Structure
- Laser-cut plywood (70×100 cm)
Components
- 1× Thermomagnetic stirrer with hot plate
- 1× Magnetic stir-bar (size chosen via Stir-Bar Data Sheet)
- 2× Borosilicate glass jars (250 ml / 500 ml / 1 L / 2 L)
- 1× Removable filtration unit (filter mesh + frame)
- 1× Pulley system (mini pulley + cord + hook + textile holder)
- 3× Dark fabric curtains (light-shielding system)
Chemicals
- Salt / Alum / Copper sulfate / other minerals
- Distilled water
Textile / Scaffold
- Cotton, linen, biotextile, or other scaffolds
4. Purchased Parts
- Thermomagnetic stirrer (lab-grade or DIY portable version)
- Borosilicate jars
- Mini pulley + cord + hooks
- Filter mesh (nylon, metal, or lab filter)
- Curtain or shading fabric
5. Custom / Unique Parts
- Laser-cut structure
- Filter/lid solution
- Pulley-mounted textile holder
- Light-shading curtain system
6. Assembly Instructions
1. Build Structure
- Laser-cut plywood frame
- Assemble two compartments: left = Jar 1, right = Jar 2
- Clean jars with 76% alcohol + distilled water
2. Heating & Mixing Unit (Jar 1)
- Place thermomagnetic stirrer under Jar 1
- Insert stir-bar
- Fill jar with distilled water, heat, dissolve salt until saturation
3. Filtration System
- Mount filter above Jar 2
- Tilt Jar 1 to pour hot solution through filter
4. Textile Immersion System (Jar 2)
- Mount pulley above Jar 2
- Attach textile to holder
- Lower fabric into filtered solution
- Cover with lid + shading curtain
7. Design Files (Source Files & Export Files)
Include folder structure:
/design-files /cad /schematics /drawing /laser-cut
File Types:
- CAD source (.fusion)
- Schematics
- Drawings
- Laser-cut files: SVG / DXF
8. Software / Firmware
Analog Version
- No software (manual operation)
Digital Version
- Microcontroller firmware (temperature control, timed cycles, sensor logging)
- Material-specific crystallization profiles
9. Review & Rebuild Notes
- Verify jar sizes and frame spacing
- Confirm filtration flow speed
- Adjust pulley height for textile length
- Add shading curtains for consistent crystal formation
- For large batches: upgrade structure to acrylic panels
10. Stir-Bar Selection Data Sheet
(Based on Fisher Scientific, 2025)
| Jar Volume | Recommended Stir-Bar Length |
|---|---|
| 250 ml | 20–30 mm |
| 500 ml | 30–40 mm |
| 1 L | 40–50 mm |
| 2 L | 50–70 mm |
Avoid bars that are:
- too long → scraping
- too short → weak mixing
- mismatched to plate magnet
11. Additional Features
- Light-Shading Curtain: prevents light-induced uneven crystallization
- Multi-Fiber Cap: allows parallel crystallization of multiple fibers
12. Safety & Risk Assessment
Hazards: hot surfaces, glass breakage, dense solutions
PPE: gloves, goggles, apron
Safe Use:
- stable surface
- ventilation
- no open flames
- never leave heating unattended
Risks: thermal burns, cuts, splashes
Disposal: dilute residues before draining; follow lab rules
Standards: general makerspace / lab safety guidelines
13. Maintenance & Repair
- Routine: rinse jars, remove crystal buildup, clean frame
- Replace: jars, filters, cords, supports
- Repair: cracked jars, loose joints, misaligned pulley
- Longevity: avoid thermal shock, store dry, keep components clean
14. Changelog / Version History
- v1.0 — Initial release / Analog prototype
- v1.1 — Digital prototype (in process)
15. Contributing Guidelines
For collaborators:
- Fork → modify → submit pull request
- Use templates for issues (bugs, features, questions)
- Maintain respectful, inclusive communication
- Use clear file-naming conventions
- Include photos, diagrams, and measurements in hardware documentation
16. References
- Fisher Scientific — Magnetic Stir Bar Selection & Use (2025)
- Accumax Lab — How Do Magnetic Stirrers Work?
- DIY portable version: BHA_Stirrer
- BioClub/BHA_Stirrer
- Instructables — DIY Magnetic Stirrer
17. Acknowledgments
Rafael Calado, Biolab and Fablab Lisbon
Tools
Hardware - Laser Cutter - Power supply
Software - Fusion 360 (2D / 3D modelling)
Fabrication - Sheet material for laser cutting (plywood)
Process and Workflow
 Draft and testing process, prototiping, laser cut model, build model, demo test.
Biolab Lisbon Team
Draft and testing process, prototiping, laser cut model, build model, demo test.
Biolab Lisbon Team
Research & Ideation ↓ Sketching ↓ 3D Modelling ↓ 2D File Preparation ↓ Laser Cutting ↓ Assembly ↓ Component Integration ↓ Testing
General Workflow
- Hand Drawing
After brainstorming, ideas are translated into hand drawings as an exploratory design tool. This phase is intentionally open-ended and precedes any final decisions, Sketches function as a thinking process.
Hand drawing is used to: * Explore multiple formal possibilities * Test different assembly logics and joints * Understand proportions and spatial relationships
- Physical Maquette
Based on the most promising sketches, a physical maquette is built using cardboard boxes and pre-cut elements. This low-fidelity mock-up helps to translate abstract ideas into physical scale.
The maquette is used to:
- Define approximate dimensions
- Test overall volume and spatial presence
-
valuate how modules relate in three dimensions
-
3D Modeling in Fusion 360
The selected concept is developed into a 3D model using Fusion 360.
The modeling workflow includes:
- Creating sketches for the base modules
- Extruding profiles to define material thickness
- Designing slots and joints for press-fit assembly
-
Organizing components to test spatial relationships and repetition
-
2D Montage for Laser Cutting (Plywood)
Once the 3D model is finalized, flat components are extracted and prepared for fabrication.
This step includes:
- Projecting or exporting planar faces from the 3D model
- Arranging the elements into a 2D cutting layout (montage)
- Optimizing material usage and part orientation
- Exporting the files as DXF or SVG for laser cutting
Material thickness and laser kerf tolerance are carefully considered to ensure accurate assembly.
- Laser Cutting
The prepared 2D files are fabricated using a laser cutter on plywood.
Before the full cut:
- Material thickness is verified
- Laser parameters (power, speed, frequency) are adjusted
- A test cut is performed to validate settings
-
Once confirmed, all components are cut and organized for assembly.
-
Assemblage
The laser-cut elements are assembled manually using press-fit joints, without the use of glue or fasteners.
This phase focuses on: * Verifying joint tolerances * Evaluating structural stability
- Testing
The assembled structure is tested to evaluate:
- Structural resistance
- Visual coherence and spatial presence
Observations from this phase inform potential improvements, such as adjusting joint dimensions, material thickness, or module geometry for future iterations.
🔧 Frame Modelling
Fusion 360 — Frame Modelling Workflow
 3D Model Screenshoot and Laser Cut Screenshoot
In Fusion 360, the workflow for modelling the frame of the device begins with defining the overall dimensions and structural logic of the frame based on the design requirements.
The process starts by creating accurate 2D sketches on the primary reference planes. Constraints and dimensions are applied to ensure correct alignment, proportion, and symmetry. Once the base sketches are complete, Extrude, Cut, and Fillet operations are used to build the solid geometry of the frame, including slots, mounting holes, and connection features.
The model is organized using Components and Assemblies, allowing each part of the frame to be managed independently. This structure makes later modifications easier and ensures that design changes propagate consistently throughout the model.
Export for Fabrication
Before exporting the design for fabrication, technical drawings or 2D projections are generated in Fusion 360’s Drawing workspace to verify critical dimensions.
For laser cutting, the Manufacture workspace is used to export flat profiles for each component:
- Export format: DXF or SVG
- All sketches are fully constrained
- Profiles are projected correctly onto the XY plane
- Closed vectors are checked before export
🔥 Laser cutting The Crystalizator
 Laser cut montage
🔥 Laser Cutting Settings
| Parameter | Value |
|---|---|
| Machine | Dholetec DT 1000 CO₂ Laser Cutter |
| Control Software | LightBurn |
| Material | Plywood |
| Material Thickness | 3 mm |
| Laser Power | 90 % (3 mm) |
| Cutting Speed | 35 % (3 mm) |
| Frequency (PPI / Hz) | |
| Number of Passes | 1 pass |
| Focus Height | 0 mm (focused on material surface) |
| Air Assist | ON |
| Lens | 2" focal length |
| Nozzle | Standard cutting nozzle |
| Kerf Compensation | ~0.15–0.20 mm |
| Cutting Order | Inner cuts first, outer contours last |
| Pre-cut Test | Yes (mandatory test cuts before final cutting) |
Assembling & Demo test The Crystalizator
"Quick and dirty" first The Crystalizator's Test. Wondering the Result. Biostuffers, Biolab Lisboa
Results


Fabrication files
🔗 References, Tutorials & Software
References & Inspiration
- Open Source Hardware Association (OSHWA) — definition & principles
- Creative Commons — CC BY-SA (Attribution-ShareAlike) license
- GNU Project / Free Software Foundation — free software philosophy
- Linux Kernel — open-source operating system kernel
-
Arduino — open-source hardware ecosystem
-
Lawrence Lessig — remix culture / Free Culture / copyright & commons
-
Mercedes León — Creativity mental map image + article
https://merchesico.blog/2013/10/14/on-creativity/ -
Rachel Freire & Melissa Coleman — eTextile crystallography
https://www.rachelfreire.com/etextile-crystallography -
Kobakant — eTextile knowledge base
https://www.kobakant.at/DIY/ -
Magnetic stirring & lab processes:
- Fisher Scientific — Stir-bar selection guide
https://www.fishersci.se/se/sv/scientific-products/featured-categories/magnetic-stirrers/stir-bar-selection-guide.html -
Accumax Lab — How magnetic stirrers work
https://www.accumaxlab.com/how-do-magnetic-stirrers-work-the-science-behind-them/ -
DIY magnetic stirrer references:
- Waag / Biohack Academy — BHA_Stirrer
https://gitlab.waag.org/biohack/BHA_Stirrer/-/tree/master - BioClub — BHA_Stirrer (GitHub)
https://github.com/MicheleCacciapuoti/BHA_Stirrer -
Instructables — DIY Magnetic Stirrer
https://www.instructables.com/How-to-Make-a-Cheap-Portable-Magnetic-Stirrer/ -
Textile Academy / Fabricademy alumni inspiration:
- OS Loom — Kae Nagano
https://class.textile-academy.org/2024/kae-nagano/assignments/week10/ - The Pattern Machine — Marion Guillaud
https://class.textile-academy.org/2024/marion-guillaud/assignments/week10/ - Shopbot Hack — Painting Machine — Asli Aksan
https://class.textile-academy.org/2024/asli-aksan/assignments/week10/ - Prusa Pegboard — Viviane Labelle
https://class.textile-academy.org/2024/viviane-labelle/assignments/week10/ - Final Project — Pauline Gamore
https://class.textile-academy.org/2020/pauline.gamore/projects/1-final-project/
Software Used
- Fusion 360 — 2D/3D modelling, parametric design, DXF/SVG export
- Adobe Illustrator — 2D vector editing and laser-cut layout
- Arduino IDE — firmware and microcontroller programming (when used)
- GitLab — documentation, version control, and open-source sharing
Artistic Inspiration & Open Source Context"
Crystal Growth, Matter & Time-Based Processes
-
Kiichiro Adachi — The Crystal Incubator series
Crystal growth as a controlled, time-based sculptural process combining chemistry, gravity, and technological environments.
https://www.kiichiroadachi.com/ -
Isaac Monté — crystal-coated garments and material experimentation
Exploration of crystallization as a transformative process applied to textiles and fashion surfaces.
https://www.isaacmonte.com/ -
Dior × Isaac Monté — Studio Oktober collaboration
Haute couture integrating material crystallization and experimental surfaces.
https://www.studio-oktober.com/
https://www.dior.com/
Open Source Fashion, Robotics & Fabrication
-
Crafting Fashion With Robots — Zoe Romano & Francesco Perego
Integration of robotics, open-source thinking, and digital fabrication in fashion practices.
https://zoeromano.eu/2018/10/01/le-borse-in-pelle-si-fanno-con-il-robot/ -
Bab Loom / Telar — Walter Gonzales
Open-source loom systems and experimental textile machinery.
(Fabricademy lecture material) -
Knit-Tink — Stéphanie Vilayphiou
Hybrid knitting machines and experimental textile tools developed through open-source hardware.
https://gitlab.com/svilayphiou/knit-tink
Biomaterials, Fibers & Experimental Textile Processes
-
Sensor Knitting — Liza Stark
Soft circuits and sensing textiles combining conductive yarns and traditional textile techniques.
https://www.liza-stark.com/projects/sensor-knitting.html -
Electrospinning — Petra Garajova
Open-source approaches to fiber generation from biomaterials using electrospinning techniques.
https://class.textile-academy.org/2022/petra-garajova/Final-Project/06_applications/ -
DIY Centrifuge — Petra Garajova
Open hardware for biomaterial processing and material separation.
https://class.textile-academy.org/2022/petra-garajova/Final-Project/%7C%20X.%20-%20FABRICATION%20%7C/d._DIYCentrifuge/ -
Fiber Spray — Anastasia Pistofidou & Ali Yelder
Alternative fiber deposition and fabrication techniques for experimental textiles.
(Fabricademy lecture material)
Open Source, Remix Culture & Knowledge Sharing
-
Open Source Hardware Association (OSHWA) — definition & principles
https://www.oshwa.org/definition/ -
Creative Commons — CC BY-SA License
https://creativecommons.org/licenses/by-sa/4.0/ -
Remix Culture / Free Culture — Lawrence Lessig
Cultural framework supporting reuse, adaptation, and collaborative creation.
https://www.free-culture.cc/ -
GNU Project / Free Software Foundation — free software philosophy
https://www.gnu.org/philosophy/free-sw.en.html -
Arduino — open-source hardware ecosystem
https://www.arduino.cc/
Lecture on November 24th, 2025, Global Instructors: Sara Diaz Rodriguez, Global Tutorial: Stephanie Vilayphiou Local Instructors: Carolina Delgado, Carlos Roque; Support: Guilherme Martins, Rafael Calado
Student checklist
- [ ] Research and document existing fabrication methods, machines and industries, add references, tutorials and sketches of the hardware you will make
- [ ] Document the process of designing the files for your machine/machine-hack/tool and its fabrication including the assembly process
- [ ] Document the schematic and the software source code (if any)
- [ ] Document the parts and how to make your tool or machine
- [ ] Document your BOM (Bill of materials): electronics, materials, their amount, etcetera (with references of the components)
- [ ] Upload your 3D model and CAM files (if any)
- [ ] Design, create and document a final outcome, a sample project of your process
- [ ] Make a small video of the machine
- [ ] Create an interface for controling your machine (extra credit)