6. Computational Couture
Research & Ideation
This week I found the lectures incredibly stimulating and exciting. I adore 3D printing for its ability to speed up historically very complex processes and make it more accessible. The technology is only getting more affordable so I intend to continue keeping tabs on this space.
My goal this week was to print a parametric design on various types of fabric to see how stretch affects the look of the pattern. I was inspired by snakeskin and other animal patterns.
 I also know this is an inkblot test, but similarly, I really like the look of it and how it's reminiscent of animal print. I found it on Pinterest. It's by Laura Ingram and it's called Anubis Emerging.

I also liked this research by Mark Beecroft of the Manchester Metropolitan University School of Art Flexible Textile – Parametric House
Unfortunately there were a lot of learning curves this week so I didn't get to make anything looking like these prints - but I'm definitely going to continue working with Blender in combination with 3d printing technology.
Tools
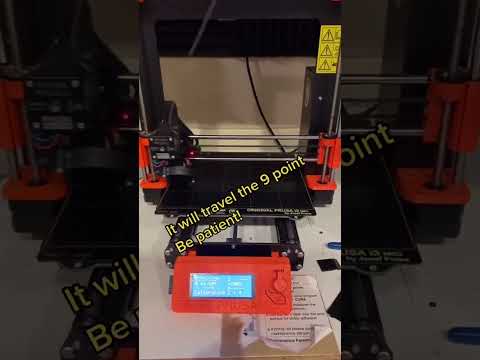
I was working with the Prusa i3 printer.

I first ran a test with this chain on Thingverse: Thingiverse: Thing 647557
Printing Safety Tip!!
-
You shouldn't touch the bed while it's printing because it can get hot.
-
Always tie up long hair of watch for loose fabrics anytime you are working with rotating press parts ... its very dangerous if your hair gets stuck.
Process and workflow
Edit - In Week 11 I more thoroughly document the process of setting up a file for 3d printing and run through the essential "getting started tips - it can be found here ... " Claire Cavanagh — Week 11 Assignment
First I downloaded my chain as an .STL and pulled it into Orca Slicer.
I inspected it in more detail using the slice plate.

The side panel was very useful for seeing the amount of time the print would take, how many layers there were, and what they looked like internally.

Under the Process tab on the left - we went with a
-
.20mmspeed.
-
A skirt of loop of 1
-
and a skirt height of 3

This site expains the differents between skirts, brims and rafts to secure your print.
How to Use Rafts, Brims, and Skirts in 3D Printing
In my chain file there was a small button on the bottom of the design that was preventing it from sitting level on the bed so I had to flip it 180 degrees using the rotate tool.
Once the file looked good I exported my G-Code to an SD card.
This video from Singapore Polytechnic helped me get started navigating the printer menu: Flexible Textile – YouTube Video
Before printing, I sprayed the printer bed with and adhesive solution 3DLAC PLUS to help the elements stick.
Annie recommened I name my file something very discernible because sometimes you only see the front of the file name:

When I pushed my G-Code to the printer it was encountering an error. I cleaned the printer bed because there was some debris on it and tried to push the file to print again.
I followed the video below to figure out the problem.
The videos below cover how to calibrate your printer.
Watch on YouTube - Calibrating Your 3D Printer
Once I cleaned the bed the printer read my file - however in the first test I found the filament was not sticking to the bed so it started to get wonky. I cancelled the print.

The problem was that the printer head wasn't calibrated properly. It was too high. So we ran a calibration test and brought it down.
We manually played with the Tune > Flow, to push a little more PLA to fill the gaps while it was calibrating.
This time when I printed it was much better. This was the resulting chain:

BLENDER
I had a lot of trouble with blender, so after trying to model in it for a while I eventually ended up using Rhino to make custom snake skin pattern. I then imported it to Rhino, but this also proved very difficult to manipulate, so eventually I decided I should just make my first parametric print super simple.
So I followed Rico's tutorial and instead of making a monkey head I used a cone.


I ran into another glitch when exporting my model. I really like working in inches because it's very familiar to me, but it just causes so many problems when it comes to setting the scale in blender.
My parametric cone pattern from the tutorial needed to be resized so that it would fit on the printer bed. So I tried to scale it.
I think the problem is that the Unit System can be changed to imperial but the Unit Scale still reads in metric, so instead of 1:1 I needed it to be 1:0.0254 (i.e. 1 inch = .0254 meters... I think. I never truly figured it out.
Eventually I just ended up scaling my object directly in orca slicer to make sure it fit on the bed but I didn't worry this time about knowing the exact dimensions.
I really like thinking dimensionally at the beginning of my design process so I suspect I might like Rhino/Grasshopper for its precisions better - so I'll try that next time.
I saved my file as an .STL. It could be a .OBJ but apparently .STL is compatible with most printers.
For my first test on fabric I scaled it down so it would take only 10 minutes to print
This was the result:

very tiny!
Also sharp. So I decided at a bigger scale I should change it to a cylinder.
For the next print I used mesh. What I should have done was start the print, pause the printer and then apply the mesh to sandwich the mesh between the PLA. The result is the PLA isn't super secure and the parts can pop off quickly so I'll try this next time.


Last, I tried may parametric design on the jersey fabric from my first test with the cylinders. Because it was stretch it got a little shifty near the end so it wasn't as smooth as the mesh. I will continue to play with methods for securing the fabric next time to see what is the most staple to prevent this.


I played a bit longer with Blender. I would have liked to try and print this weird looking mushroom pattern I achieved by playing with the Geometric Nodes, but the printer was reading the file as empty, as it was only a grid with no extruded surface. So I will also trouble shoot this soon. I'd love to print lace like materials and other interesting forms.


...
3D Models

Parametric Cylinders for 3D Fabric – Sketchfab
Blender files as an .STL for Sketchfab Model
---
Fabrication files
-
File: 3D Model of Parametric Cylinder Design ↩