11. Open Source Hardware - From Fibers to Fabric
References & Inspiration
I took inspiration from Leva Marija Dautartaitė this week, who in 2023 did research on tablet weaving and designed a loom in Rhino. Leva did a lot of research on the history of band weaving (dating back to the Bronze age in Europe) as well as lace and other table weaving techniques. - Week 10 Assignment — Textile Academy Class
Like Leva, I also wanted to focus on band weaving for it's versatility, small size and fairly inexpensive set up.
Research & Ideation
 © Lady Elewys
Tablet weaving, is a traditional form of weaving where, along with the typical up and down motion, warp threads also weave around eachother to create an even stronger band. It's an extremely old method. The oldest piece was found in a salt mine in Austria and dates back to as far as 1200 - 1500 BC
Inkle weaving can be done on the same loom as card weaving; however it works on the principle of simple up and down motion of the warp threads.
Both are used to make bands and take up less space than a typical large cloth loom - so as a beginner, this felt like the perfect place to start.
This Video by Elewys of Finchingefeld was a very comprehensive tutorial on the history and the process of getting started with Card Weaving.
And her site:
Tablet Weaving for the Absolute Beginner – Birka 6
I also enjoyed this very simply blog by Shelagh Lewins with step by step pictures of the loom set up.
Tablet Weaving: Getting Started
Process
My goal this week was to make a inkle loom and try my hand at weaving - to see if I could understand it better. I was also hoping, that after understading the basics, I might be able to automate it in some way to make the process quicker.
As it happened, someone at the lab had started a prototype of an inkle loom. I just needed to secure the tension peg. We didn't have the right screw to do this, but I found a wood dowel and bolts that served the purpose. So I was able to take a loom home that night to test it.
I made my card patterns on AutoCad and cut them out of acrylic on the laser cutter.

Based on Shelagh Lewin's blog above, I made them 2.5" square with filleted edges.
I threaded it as a card loom by watching Elewys of Finchingefeld tutorial.
Here are some tips I learned by going through the motions
1. String up your first thread and leave a long tail at the end. You are going to tie a knot and you need this extra string to do this comfortably to control the tension.

2. Now unthread your string and used it as a gage. Leave this one string aside as a reference in case you need to cut more later.

3. S threading is when you thread the card from left to right. Z threading is when you thread right to left (Elewys also explains it really well in her tutorial)
 © Example of S and Z threading by Linda Hendrickson
This is a example of a classic pattern ( being strung up by Elewys)
 © S and Z threading using a pattern by Elewys of Finchingefeld
-
In this pattern there are 13 cards.
-
Each card has 4 holes, A,B,C,D.
-
The pattern shows if the cards will be s threaded or Z threaded.
-
The colour on the square connotes what colour goes in which hole.
To get familiar with the process I just wanted to invent my own quick pattern - to see if it would work the way I was expecting. So I made up this pattern:

-
After threading for a long time I realized I needed to simplify for my first test. So instead of using all 11 cards, I used six and moved to the second drawing on the right, (minus the red stripes in the middle)
-
Then I figured out how many threads I needed in each colour.
-
I cut all the rest of my strings based on my initial string size, as mentioned above.

- For the white string I had to cut quite a few (24) so I was moving quickly. It's important to check every so often that your length isn't getting drastically thrown off from the original thread.
 © Claire Cavanagh, Fabricademy 2025
-
It wasn't a huge deal because my string was getting longer not shorter, but still good not to waste thread.
-
To tie off the threads the knot I used was called a surgeons knot. It's fairly easy to untie if you make a mistake.
This was the result:
 © Claire Cavanagh, Fabricademy 2025
I have so much respect for weavers because this art takes some real concentration!
By this point I really wanted to automate the process somehow to make it a little more fun for me.
So I decided to create some kind of a gear system. Annie helped me think this through.
I was also inspired by this little contraption in the lab:
The bottom gold gear, as seen in the video, would represent my cards (only without a bar in the middle). The top gear would have a lip for an elastic to sit. Each card would have its own top and bottom gear. When I cranked the handle, in theory the elastic would work like a gear belt.
 © Claire Cavanagh, Fabricademy 2025
Annie helped me print circular cards and a crank.
 © Claire Cavanagh, Fabricademy 2025
 © Claire Cavanagh, Fabricademy 2025
 © Claire Cavanagh, Fabricademy 2025
I modified the existing peg holder using rhino. The gear/ pulley tab needed to shift further foward.
I did this in Rhino using the "seldup" command on the edges of the original model and drawing over it / extending the piece:
 © Claire Cavanagh, Fabricademy 2025
 © Claire Cavanagh, Fabricademy 2025
I also didn't like the existing front stabilization tab on the prototype bottom so I took this out of the design because it was blocking my ability to thread the loom.
 © Claire Cavanagh, Fabricademy 2025
When I was ready I popped my .Stl files into Orca Slicer
I did a little refresh on setting up the model in Orca Slicer.
Here are some tips I learned by going through the motions
1. To open your file you need to select the proper printer first.

2. Then you can open your .stl by pressing the Import button. (It has to be the Import button because .stl  won't show up as an option in "new file" or "open")

3. The Move tool opens the gizmo that gives you better control when moving your object around.

4. You can also type in the values for your x, y and z

5. The rotate tool let's you choose which access to rotate along.

6. The Layer height controls the detail of the model. A lower number will give you higher smoother detail but it will take longer.

7. Infill is like the inner scaffolding. More infill means more time but it will be more structural inside, but again, the longer it will take.

8. To save settings you like, click the save disk icon to the right to get a dialogue box saying what you want to name your preset.

9. When you are ready, press the slice plate button and scroll with the right slider to check your model.

10. When you're ready to print, turn your model into G-code.
For my model I had to add support because I was getting a notice that I had cantilever pieces. So I went to the support tab and enabled support.


Someone had already tried to print this part without support and this picture shows why you need the support. The piece can snap or print poorly if you don't.
 © Claire Cavanagh, Fabricademy 2025
When the support was added, the piece no longer fit on the printer bed so I rotated it a little until it sat well diagonally.
 © Claire Cavanagh, Fabricademy 2025
Next I went to the strength tab. The Infill was originally 15. Because this was a proto type I changed this to 10 so it would print quicker.
 © Claire Cavanagh, Fabricademy 2025
I also played with a few different patterns to see if that cut down my printing time. Ultimately I stuck with Cross Hatch, because Annie also suggested, as far as strength this pattern was diagonal which was better to support the curve in my object.
Next I ran a calibration test on my printer.
This video by 3DP Doctor runs through the steps.
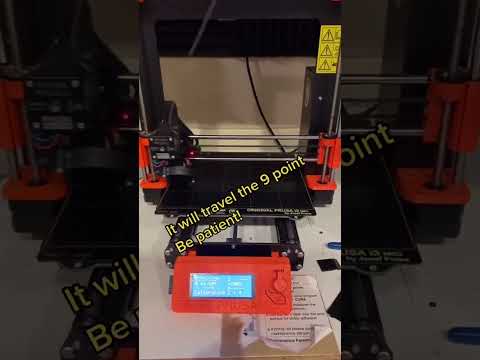
As the test went along the lines closer to the front got flatter and more consistent because we manually pushed the printer head closer to the bed by turning the knob.
What we were looking for was a smooth flat printed surface. We want the printed element to be about half the height of the filament before it's pushed through the extruder, because this means it's getting squished down slightly by the machine. This is sign that the printer head is the right distance from the bed.
 © Claire Cavanagh, Fabricademy 2025
In the mean time we mocked up our test without the part I was working on. And we realized, probably the elastics weren't going to cut it...
 © Claire Cavanagh, Fabricademy 2025
So I started brainstorming new options.
My part finished printing before I went home. This was it:

The next day I tried modelling a new crank. But after assessing it, Annie suggested it might be too brittle if we 3D printed it, because the parts would be too thin to hold so much tension.

So instead I cut this dowel with the chop saw and I measured the exact placement of where the screw eyes should sit, alternating them on top and bottom.
 © Claire Cavanagh, Fabricademy 2025
Finally I re-threaded the machine.
 © Claire Cavanagh, Fabricademy 2025
 © Claire Cavanagh, Fabricademy 2025
 © Claire Cavanagh, Fabricademy 2025
This was my shuttle and it came with the machine. I used it to tamp down the thread but I actually found a saftey pin was a better shuttle.
 © Claire Cavanagh, Fabricademy 2025
My dowel piece worked fairly well and I wove a small test section. But I found the wool yarn kept snapping.
So I took it apart and re - threaded the whole thing with stronger thread.
I wasn't get much of an effect with the weaving because I was beating the threads too tight. But I also figured it was because I really hadn't used that many threads.
 © Claire Cavanagh, Fabricademy 2025
I also found the lifted strings were very fiddly. I used a slip knot because I needed them to be easy to adjust, but I had to keep re- tying them. So I decided to replace them altogether with a new system.
I elevated the bottom threads with a small dowel and also used S-hooks.
For the top threads I used s-hooks and safety pins. This way if something went awry I could simply unclip the safety pin.
 © Claire Cavanagh, Fabricademy 2025
 © Claire Cavanagh, Fabricademy 2025
Ultimately it wasn't perfect because the yarn got stuck in the safety pins sometimes, but it was better than the knots.
I also re-threaded it again, this time adding more threads to see if that made any difference - so at this point I was completely going off pattern. But I had fun getting a sense of what emerged naturally by simply weaving up and down.
Adding threads actually didn't matter but I found the less tight I wove, the better my warp showed up, and the less dominant my weft become, so I did some variation.
This was the final result.
 © Claire Cavanagh, Fabricademy 2025
Materials & Components
 © Claire Cavanagh, Fabricademy 2025
-
1 - wooden dowel 1/8 " thick
-
2 - large saftey pin (x2 L & R)
-
3 - S hook for bottom warp (x2, L & R )
-
4 - Eye hooks (x 5 small on top, x5 medium on bottom)
-
5 - Screws to faciliate turning (x2)
-
6 - Wooden dowel chopped down
-
7 - S hooks for top warp, side threads (x2)
-
8 - S hooks for top warp middle threads (x2)
-
9 - large saftey pin (x2)
-
10 - small saftey pins (x8)
 © Claire Cavanagh, Fabricademy 2025
-
1 - Inkel loom frame
-
2 - Inkle tube 1
-
3 - Inkle tube 2
-
4 - Inkle tube 3
-
5 - Inkle tube 4
-
6 - Inkle tube 5
-
7 - Inkle tube 6
-
8 - Inkle tube 7
-
9 - Support / Clamp piece
-
10 - Tension dial
-
11 - Wooden dowel threaded through tension dial, secured with (x2) adjsutable bolts
Final Thoughts:
For basic prototyping I would recommend this loom, especially if you want a quick way to print something and get started with weaving. However there were some challenges. If I were to continue with weaving these are the things I would change about my project.
I found this inkle loom model to be quite small. It was difficult to threads due to the close proximity of the tubes. I would re-design the model to be longer and the tubes more spread out, so that a hand could easily get around and under the tubes.
The reason I also chose these specific saftey pin sizes is because I didn't have enough eye screws of the same size. Therefore the distance between the threads and the eyescrew was slightly different. If the eye screws were the same size I could have probably used all the same type of saftey pin (which might be more cost effective or simply consistent). But I do like the mechanism of being able to simply latch the threads with a pin instead of tying them down, as the traditional inkle weaving method does. At least while I was learning.
Also figuring out a crank handle that can rotate a full 360 degrees, and lock at each half rotation to free up your hands for the shuttle would provide a more more fluid user experience. Something that uses the same principle as the butterfly toy in this video by Ravindra Godbole on Youtbe:
Otherwise this is a great starter loom for basic tablet weaving tests.
Files:
The original file is found on Thingiverse here by Zydac is licensed under the Creative Commons - Attribution license: :
My Rhino file adjustments here:
My Cad Acrylic Card Outlines for the Laser Cutter: