Computational Couture
What is 3D printting?
Inspiration
ThreeASFOUR Collective
The ThreeASFOUR Collective founded by the designers: Gabriel Asfour, Angela Donhauser, and Adi Gi combines cutting-edge technologies with couture craftsmanship to promote international, intercultural, and interspecies unity.
threeASFOUR’s signature elements consists of – curvilinear shapes, fractal structures and formal biomimicry – drawing inspirations from the natural geometries that connect the human body to the infinite shapes sorounding us. They are known for being pionners in production methods such as – 3D-printing and the creation of digital fashion and virtual environments.
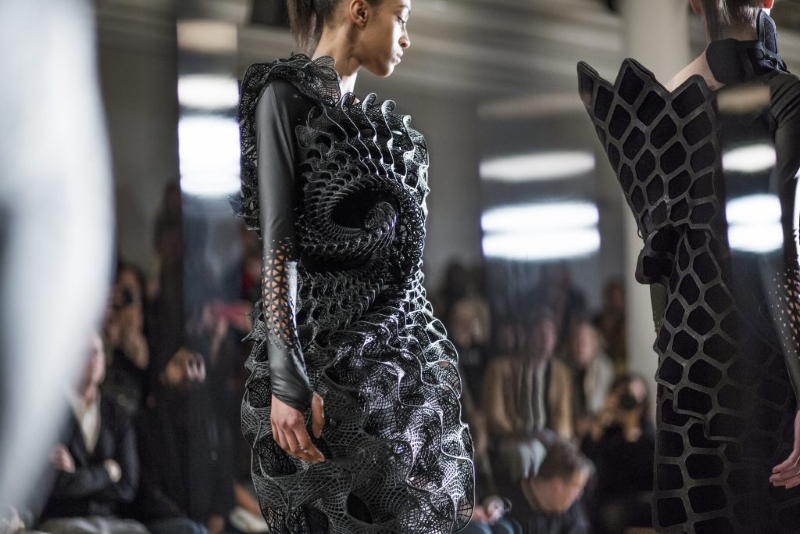 " Harmonograph" dress made by Schohaja in collaboration with Travis Fitch, 3D Printed by Stratasys. Courtesy of threeASFOUR
videos que quero meter :
https://www.youtube.com/watch?v=4j6iZDKpwTQ&list=PLQ5NBP4MZb1o&index=2
https://www.youtube.com/watch?v=JKK7RIlRJ8o&t=35s
Check out and research alumni pages to better understand how to document and get inspired

* Blender research and tutorials - [Erika Mirzoyan - FabLab Armenia](https://class.textile-academy.org/2025/erika-mirzoyan/assignments/week06/#creating-my-design-step-by-step-process-with-3ds-max-and-blender)

* Documentation grasshopper - [Ola Muhanna - CPF](https://class.textile-academy.org/2025/ola-muhanna/assignments/week06/#grasshopper-research-stained-glass-inspiration)

* Dual filament 3d print research - [Stephanie Johnson - TextileLab Amsterdam](https://class.textile-academy.org/2024/stephanie-johnson/assignments/week07/#r-e-s-u-l-t_1)

* 3d print on fabric - [Zahia Albakri - CPF Makerspace](https://class.textile-academy.org/2024/zahia-albakri/Projects/week07/#final-results)

* 3d print on fabric  - [Aslı Aydın Aksan - TextileLab Amsterdam](https://class.textile-academy.org/2024/asli-aksan/assignments/week07/#research-ideation)

* Visaulisations & Ideation - [Dinesh Kumar - FabLab Bcn](https://class.textile-academy.org/2023/dineshkumar-gunasekaran/1.Assignments/week07/)
- or embed your own PDF as:
- Video references: Vimeo (only when not yours)
ThreeASFOUR Collective
Tools & Software
✦ Blender
✦ Fusion 360
✦ BambuStudio Software
✦ 3D Printting Machine: 3DP-093-330
✦ Tulle Fabric
Ender 3D printer - experiment
Vaccum machine experiment
Rico's Blender tutorial
I started by following Rico’s Tutorial in Blender to understand how to create different shapes and make grids using the Geometric Node Editor.
Recipes Tutorials: https://reflective-earwig-dd8.notion.site/Fabricademy-Blender-Geometry-Nodes-400934f14952809f9856d71f527a0f5a
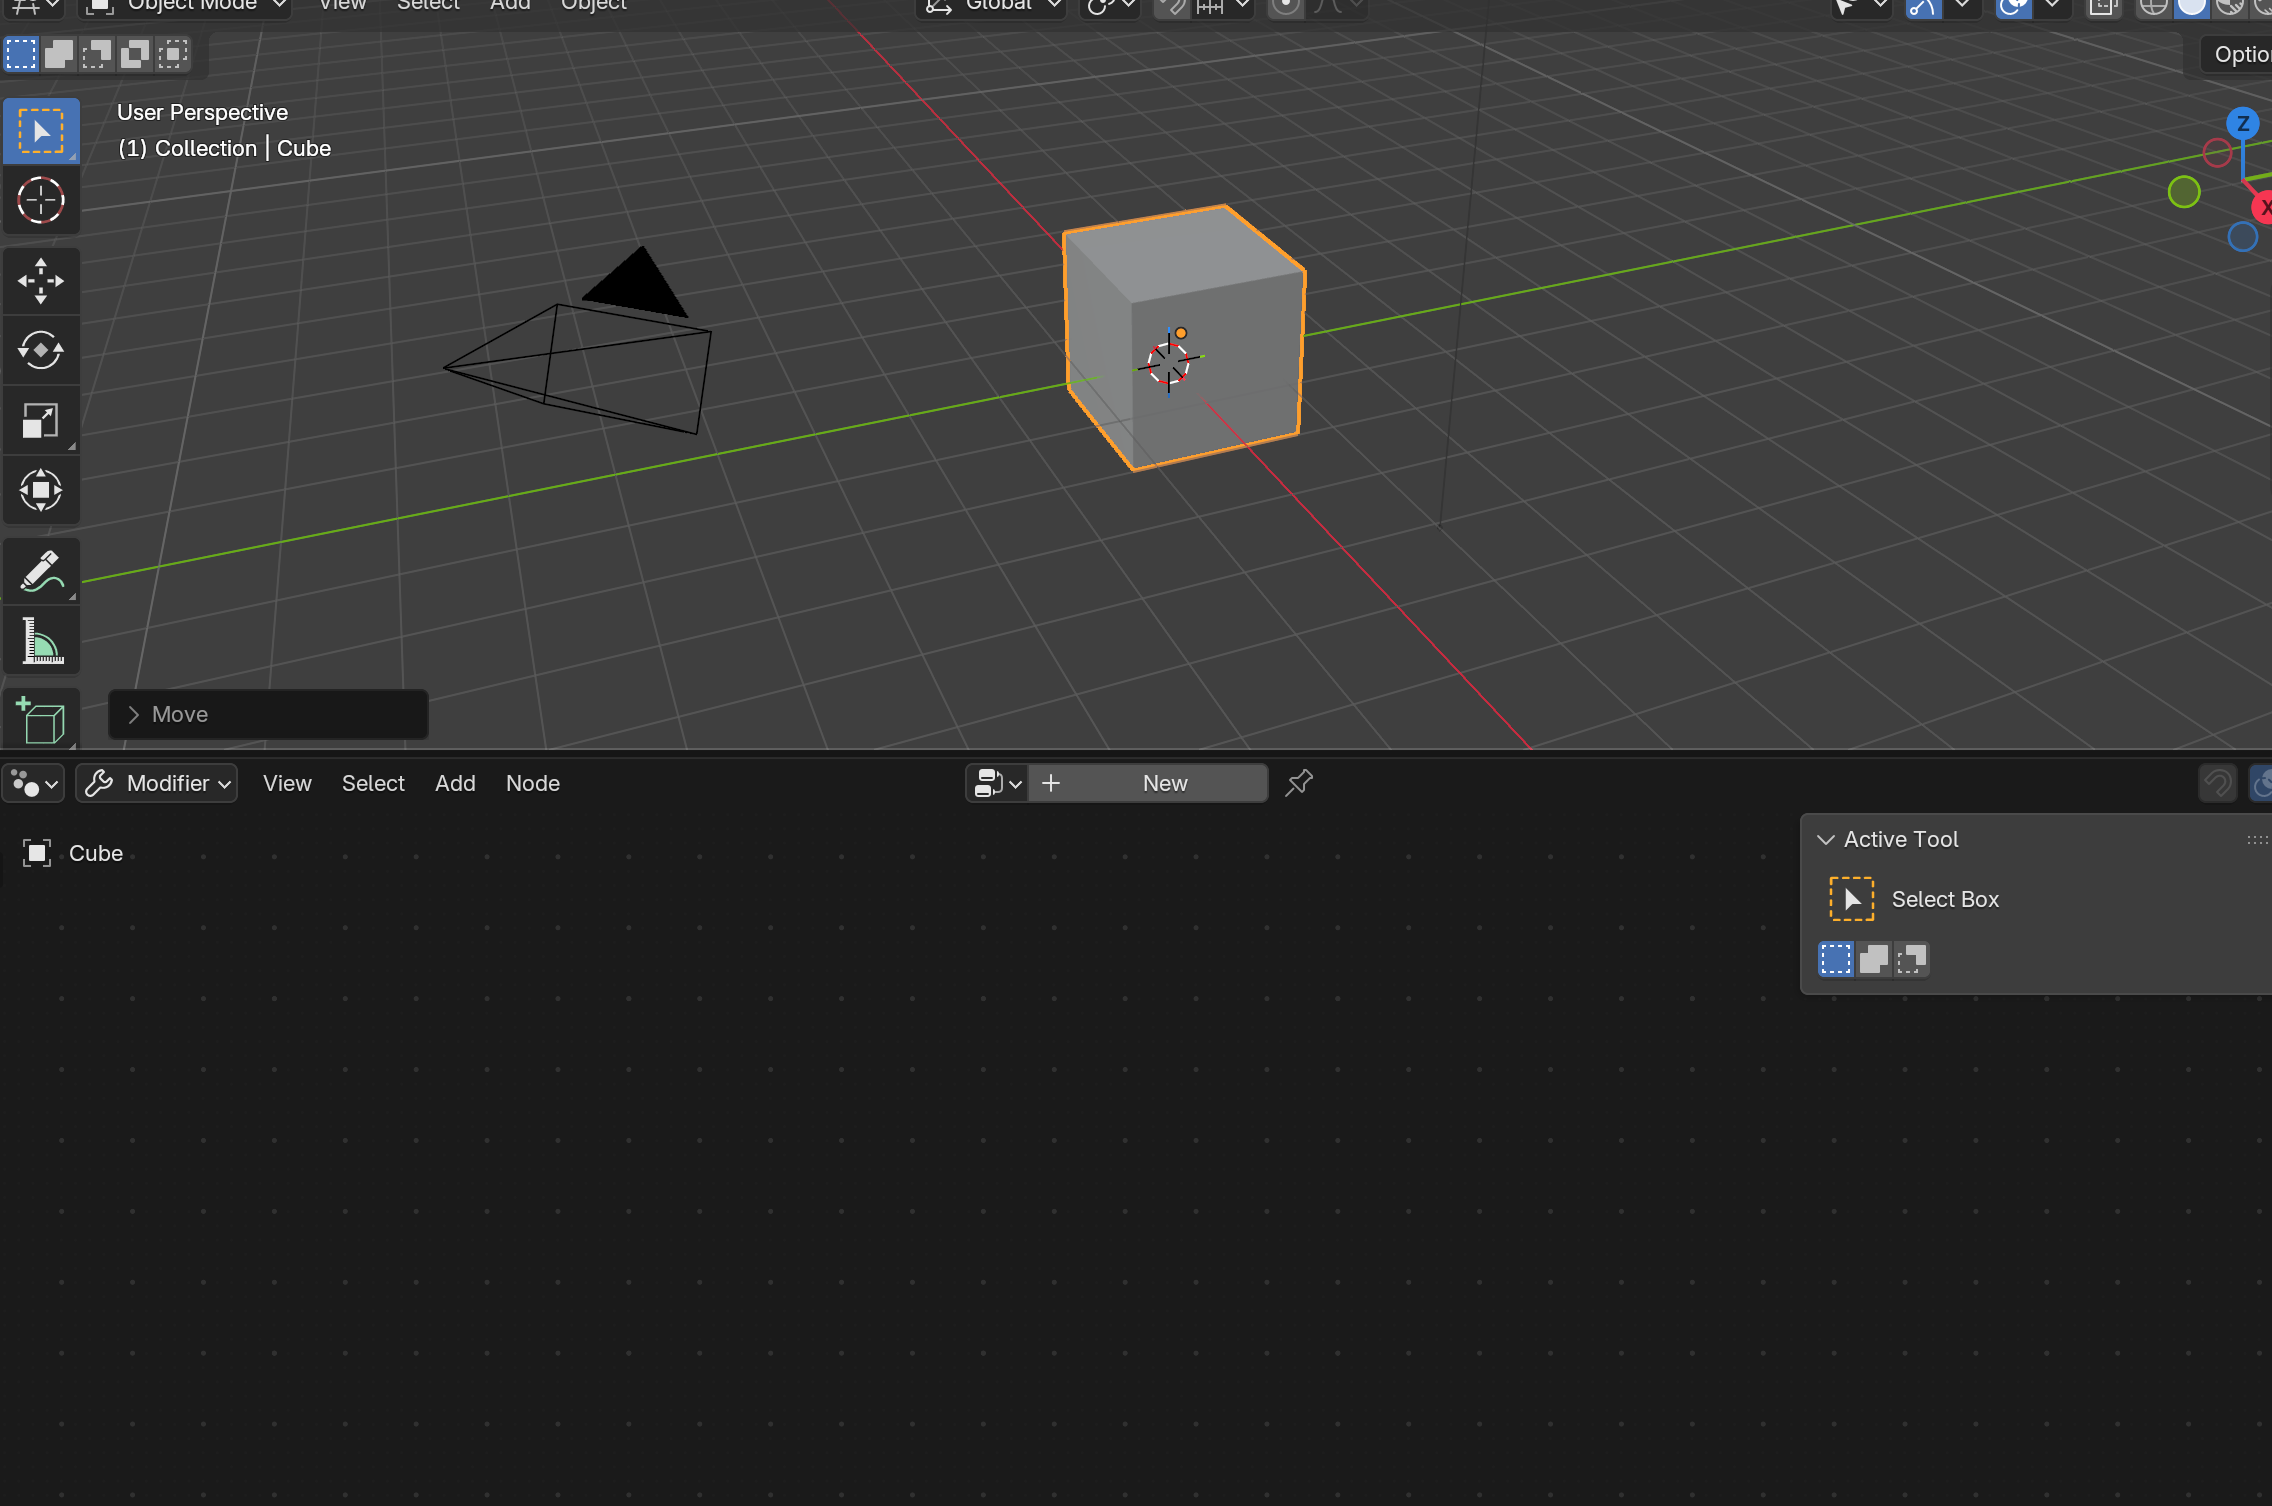
Screenshoot of by Blender while following Rico's Tutorial - Rita Manuelito/2026
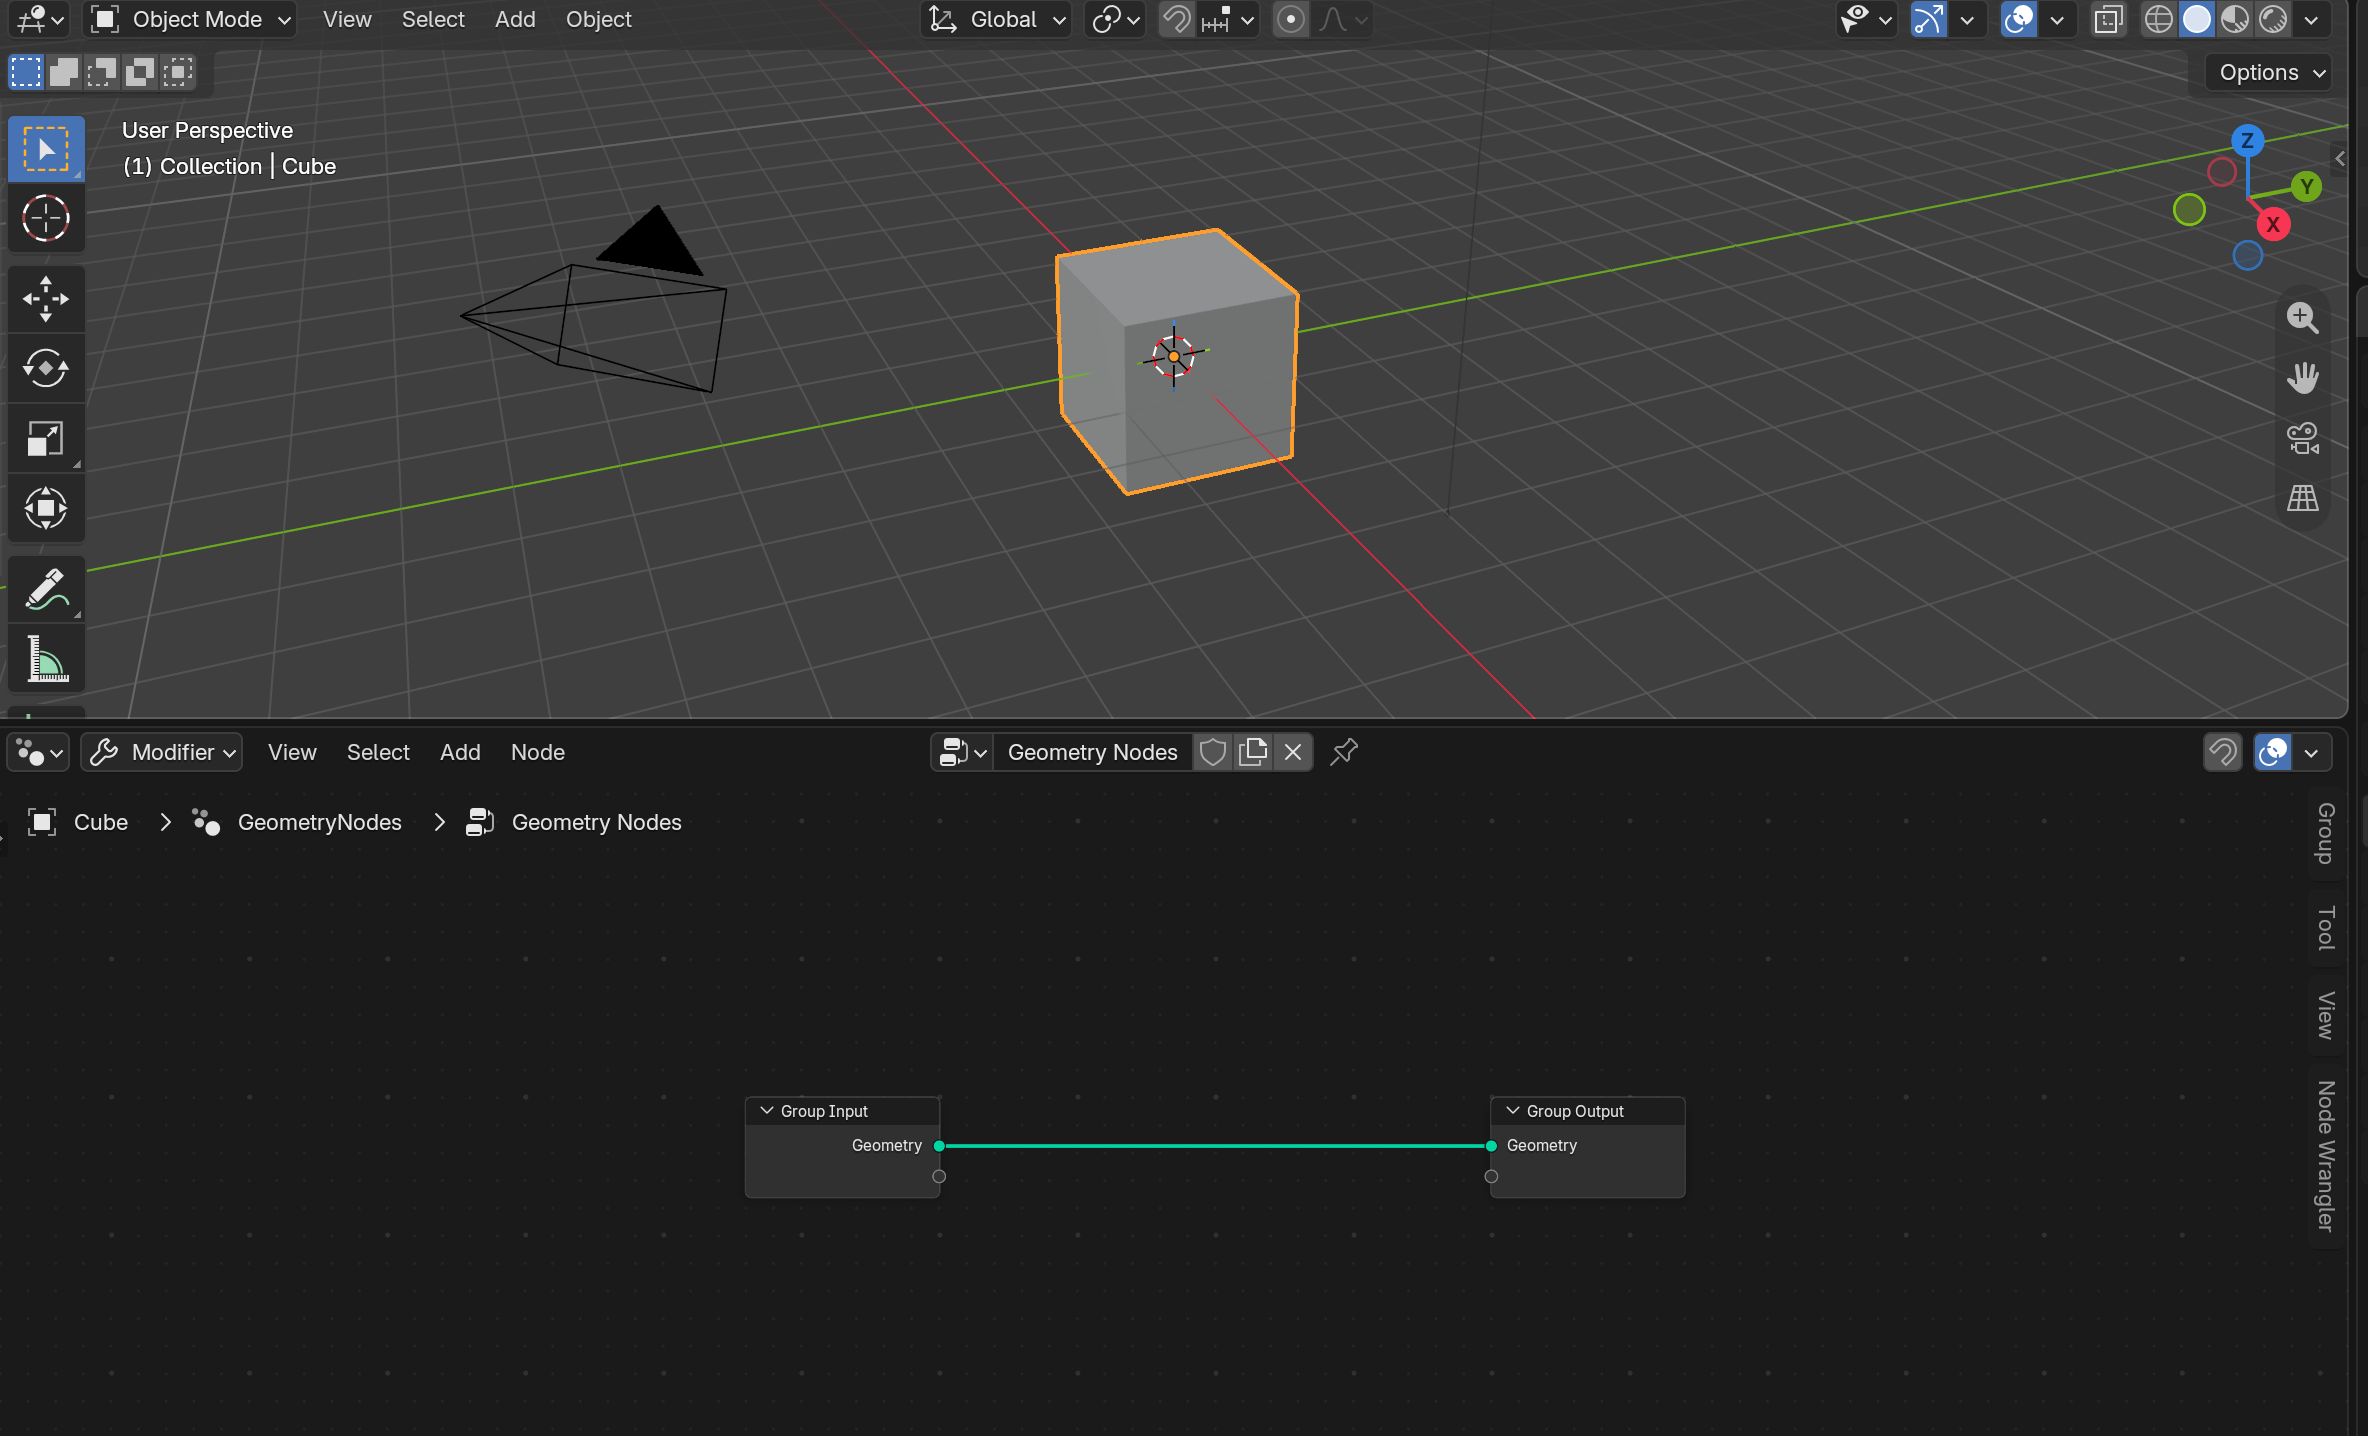
Screenshoot of by Blender while following Rico's Tutorial - Rita Manuelito/2026
Edit Type ❥ Geometric node Editor ❥ Slide viewport UP ❥ click New+ ❥ Zoom IN to see the Group Input and Output
First I follow this “Recipe” from Rico’s Blender Workshop, speccifically - Frames & Boolean Tutorial
❥ Each time we want to add another node, we place the cursor over the Geometry Nodes Editor and press Shift + A.
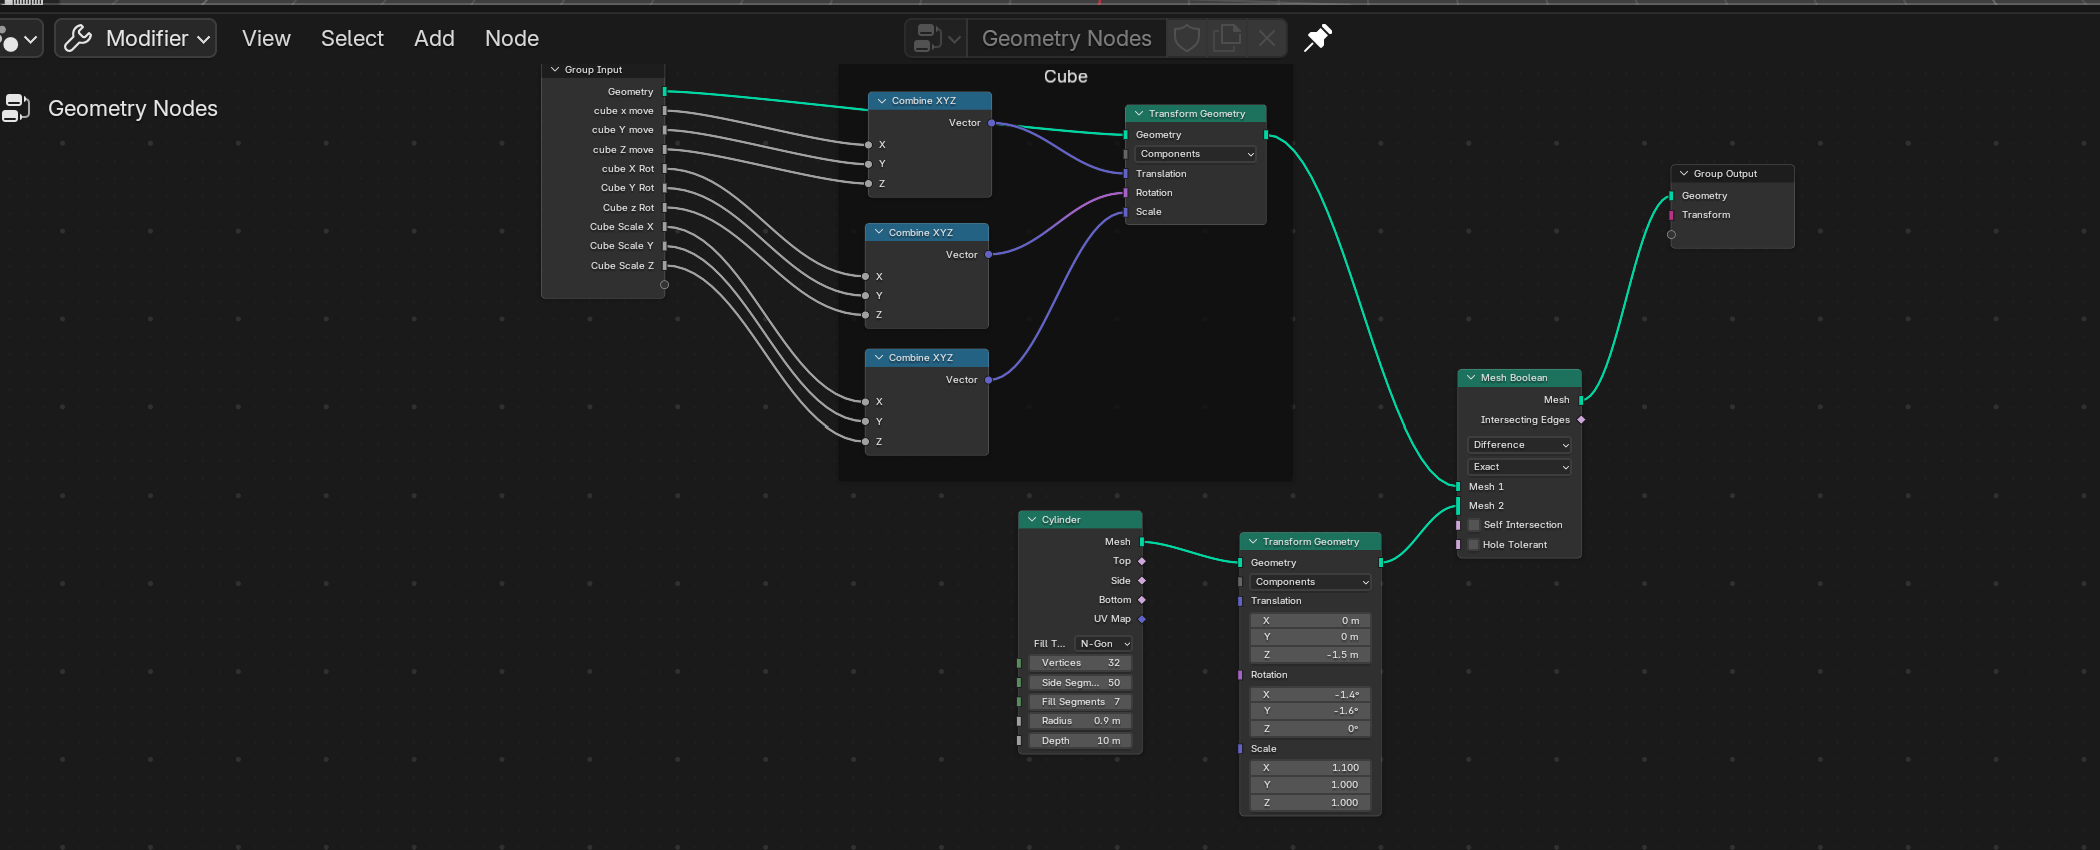
Screenshoot of by Blender while following Rico's Frames & Boolean Tutorial - Rita Manuelito/2026
Next try:
I decided to follow the same structure of this recipe but changing the geometic forms, just to experiment.
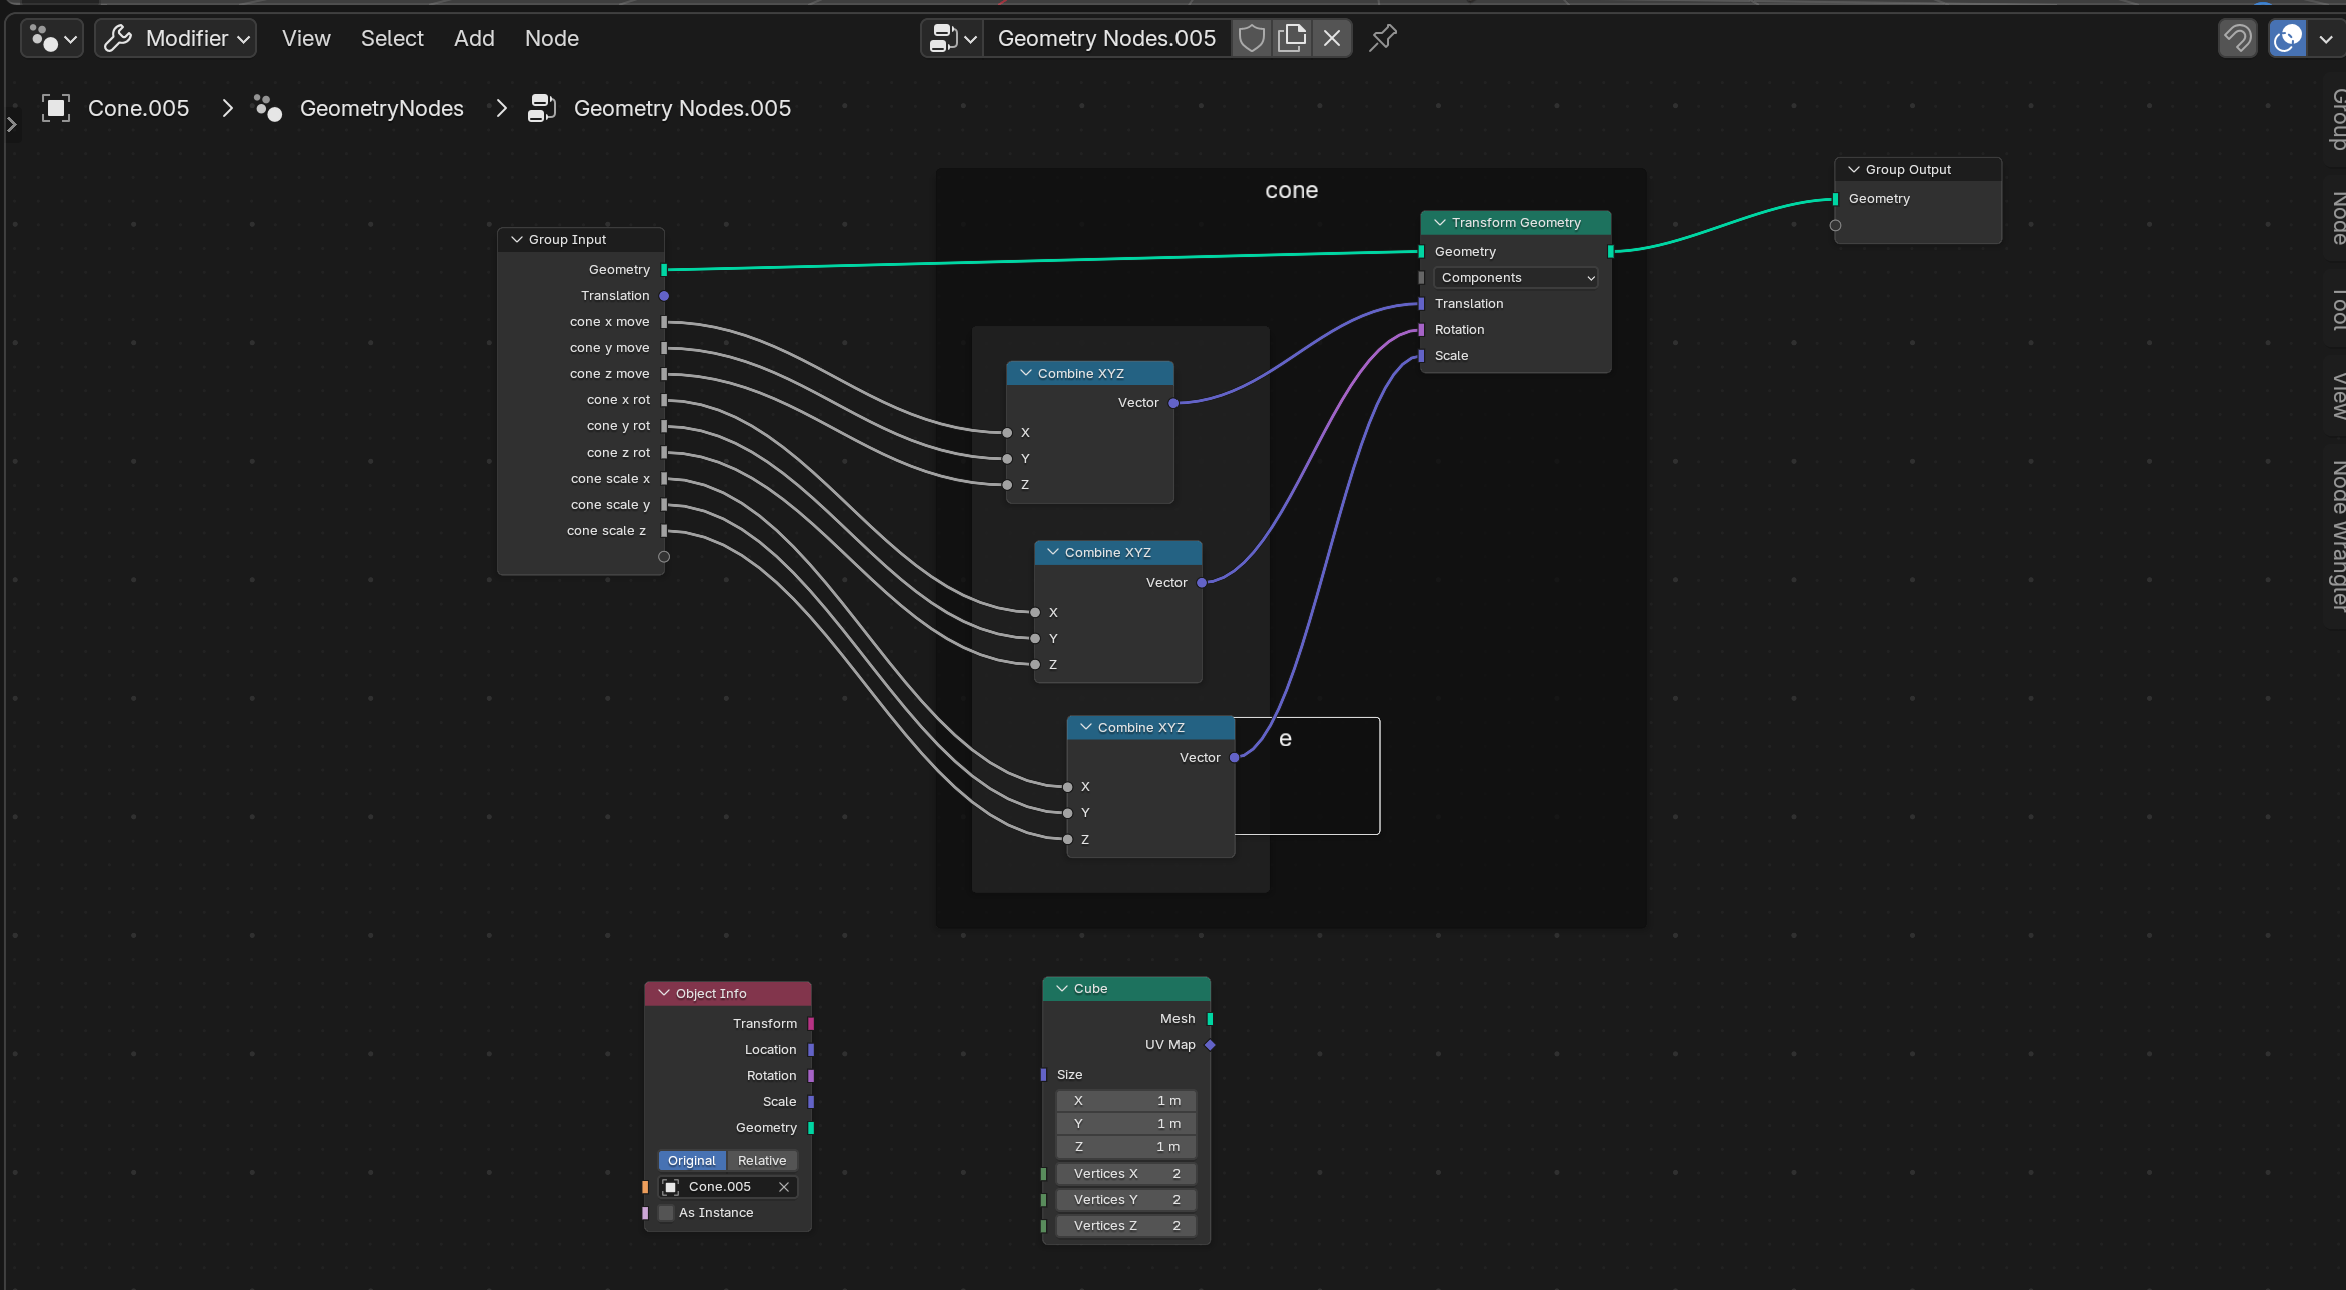
Screenshoot of by Blender recipe but changing the geometic forms - Rita Manuelito/2026
My Project
While following the Grid Instancing Tutorial by Rico's Blender Workshop, Rico explained that the shape used in the tutorial could be replaced with any object. He demonstrated this using a MakeHuman avatar, maintaining the same grid structure while changing the instanced object.
I decided to experiment with the 3D model I created for the Digital Bodies module. Since my avatar was a sculpture inspired by Michelangelo's work, and my concept for this week's project was Sculptural Fashion, I thought it would be interesting to explore different positions, orientations and scales to discover what could be created from a single avatar.
Grid Instancing
First, I followed the Grid Instancing Tutorial to create a base structure in which I could later replace the original object with my own 3D model.
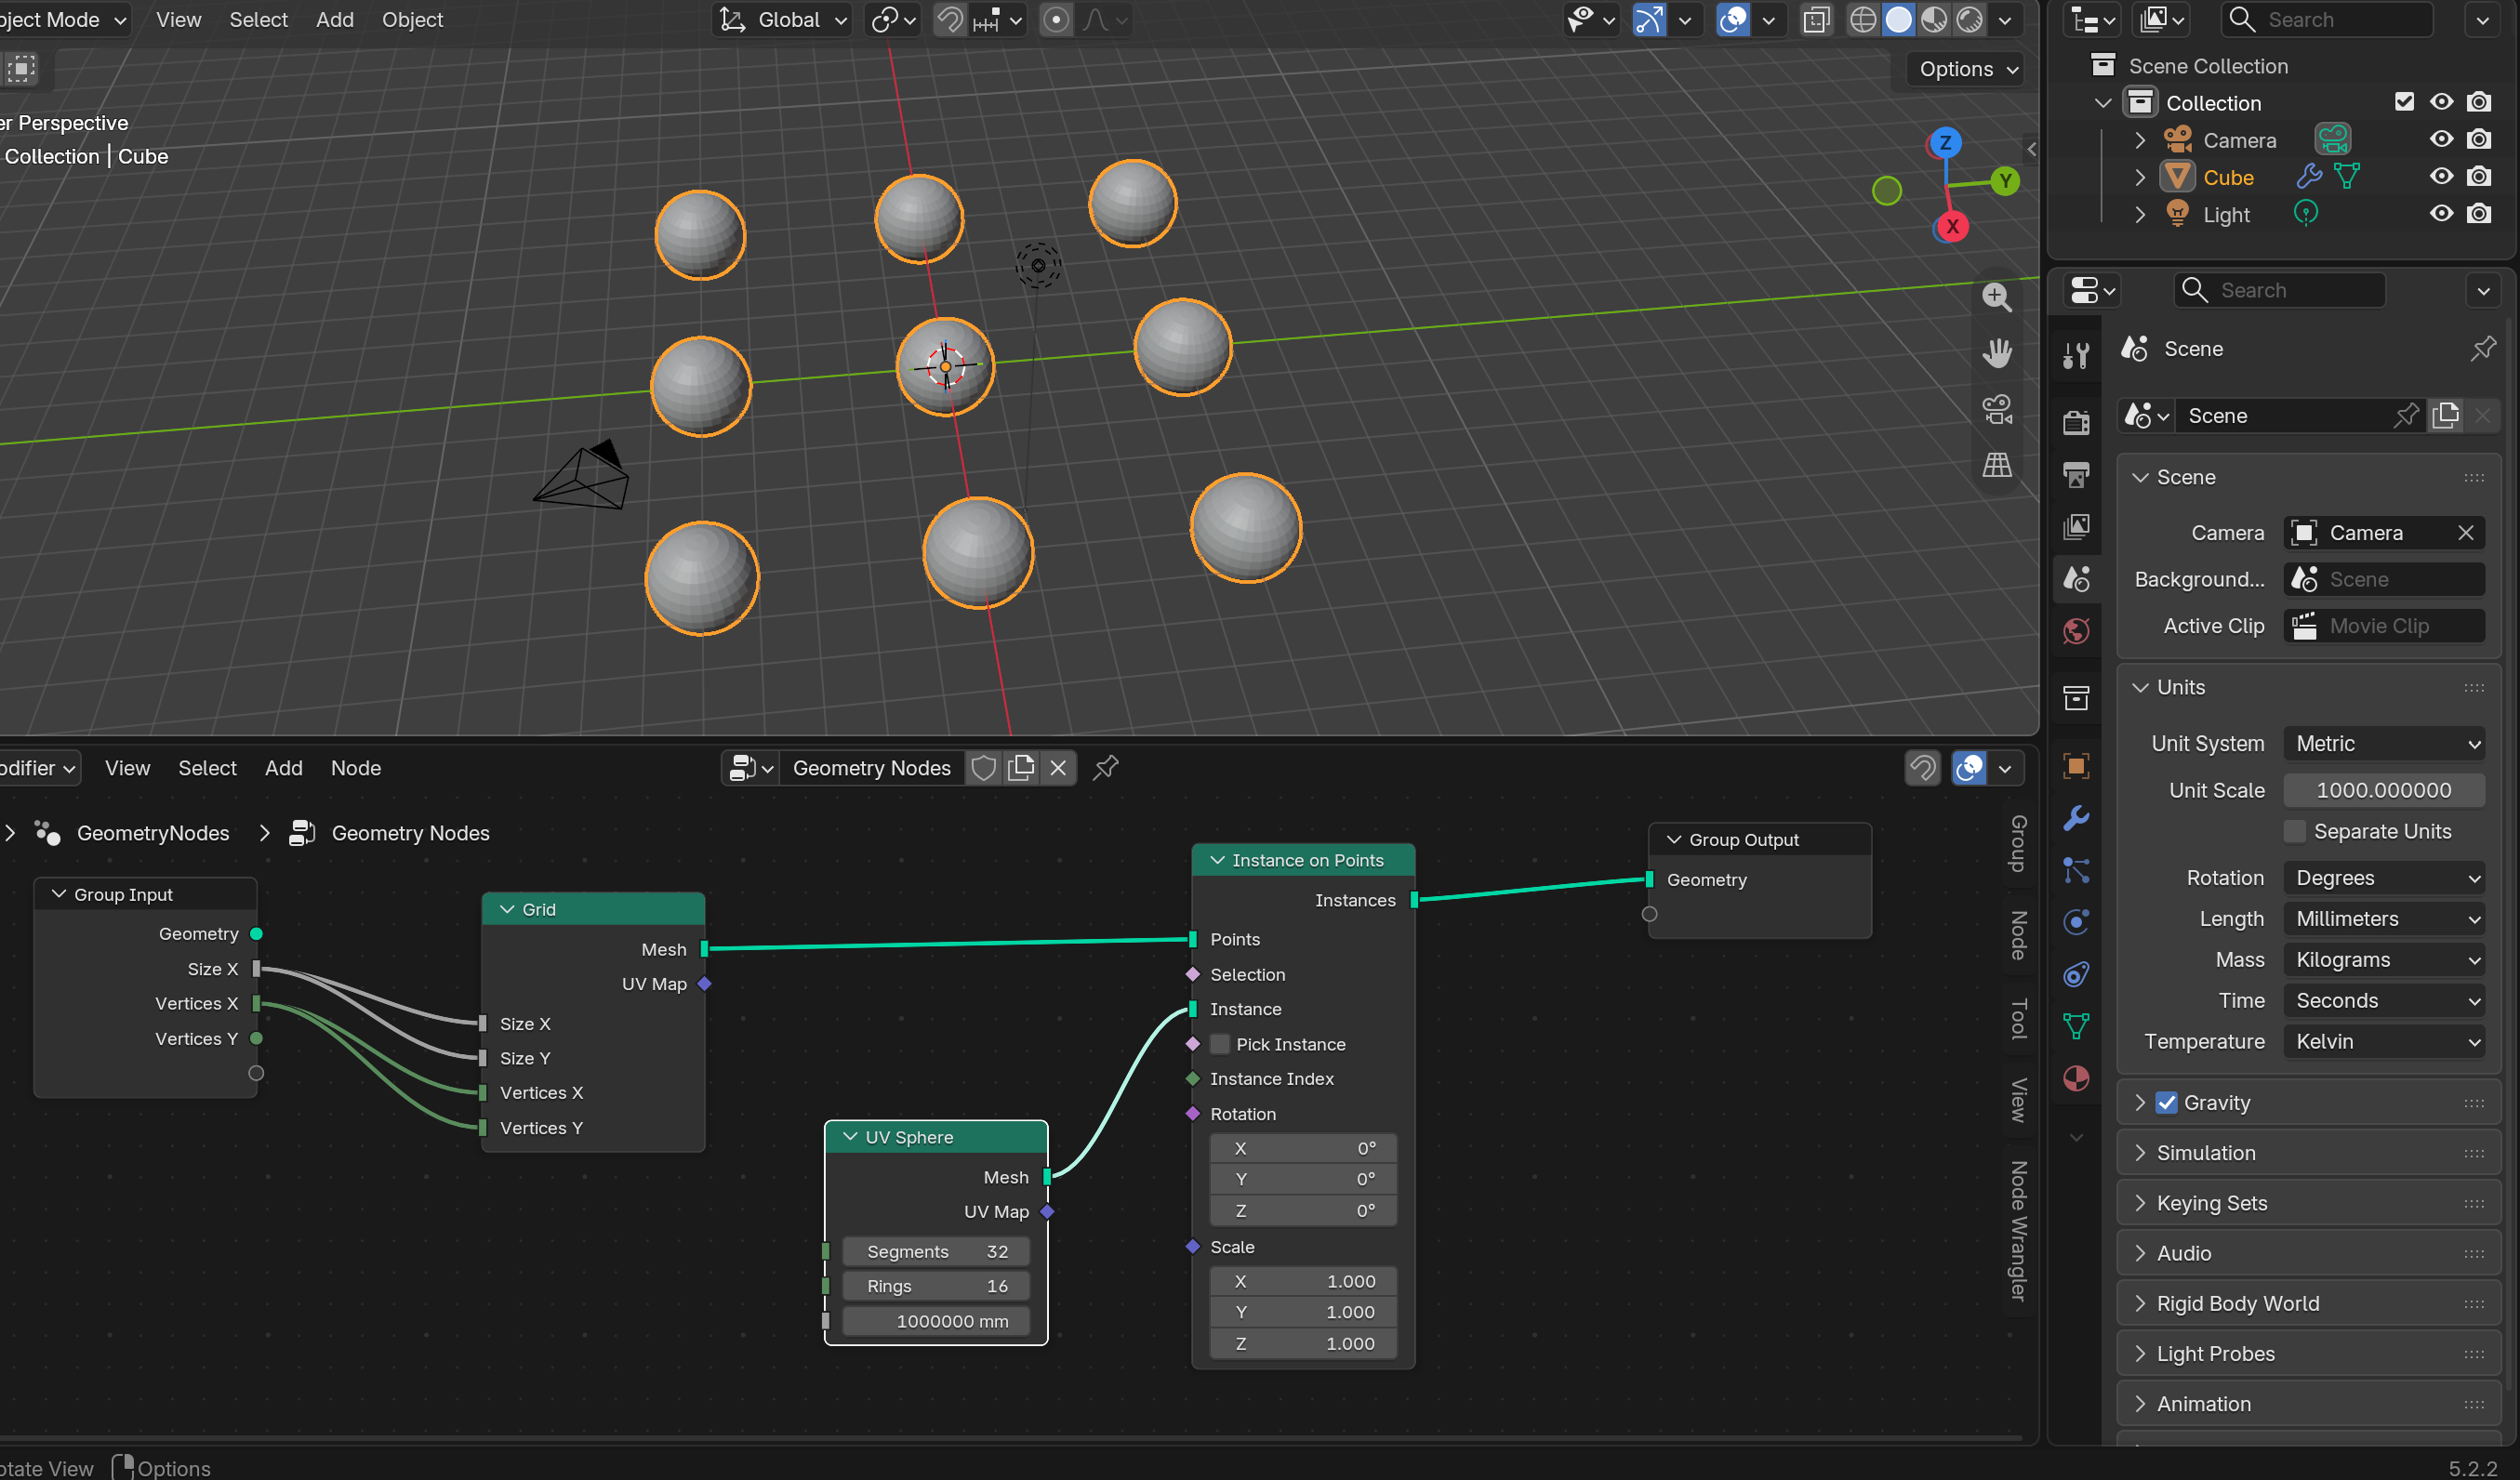
Screenshoot of by Blender recipe following the Grid Instancing Tutorial - Rita Manuelito/2026
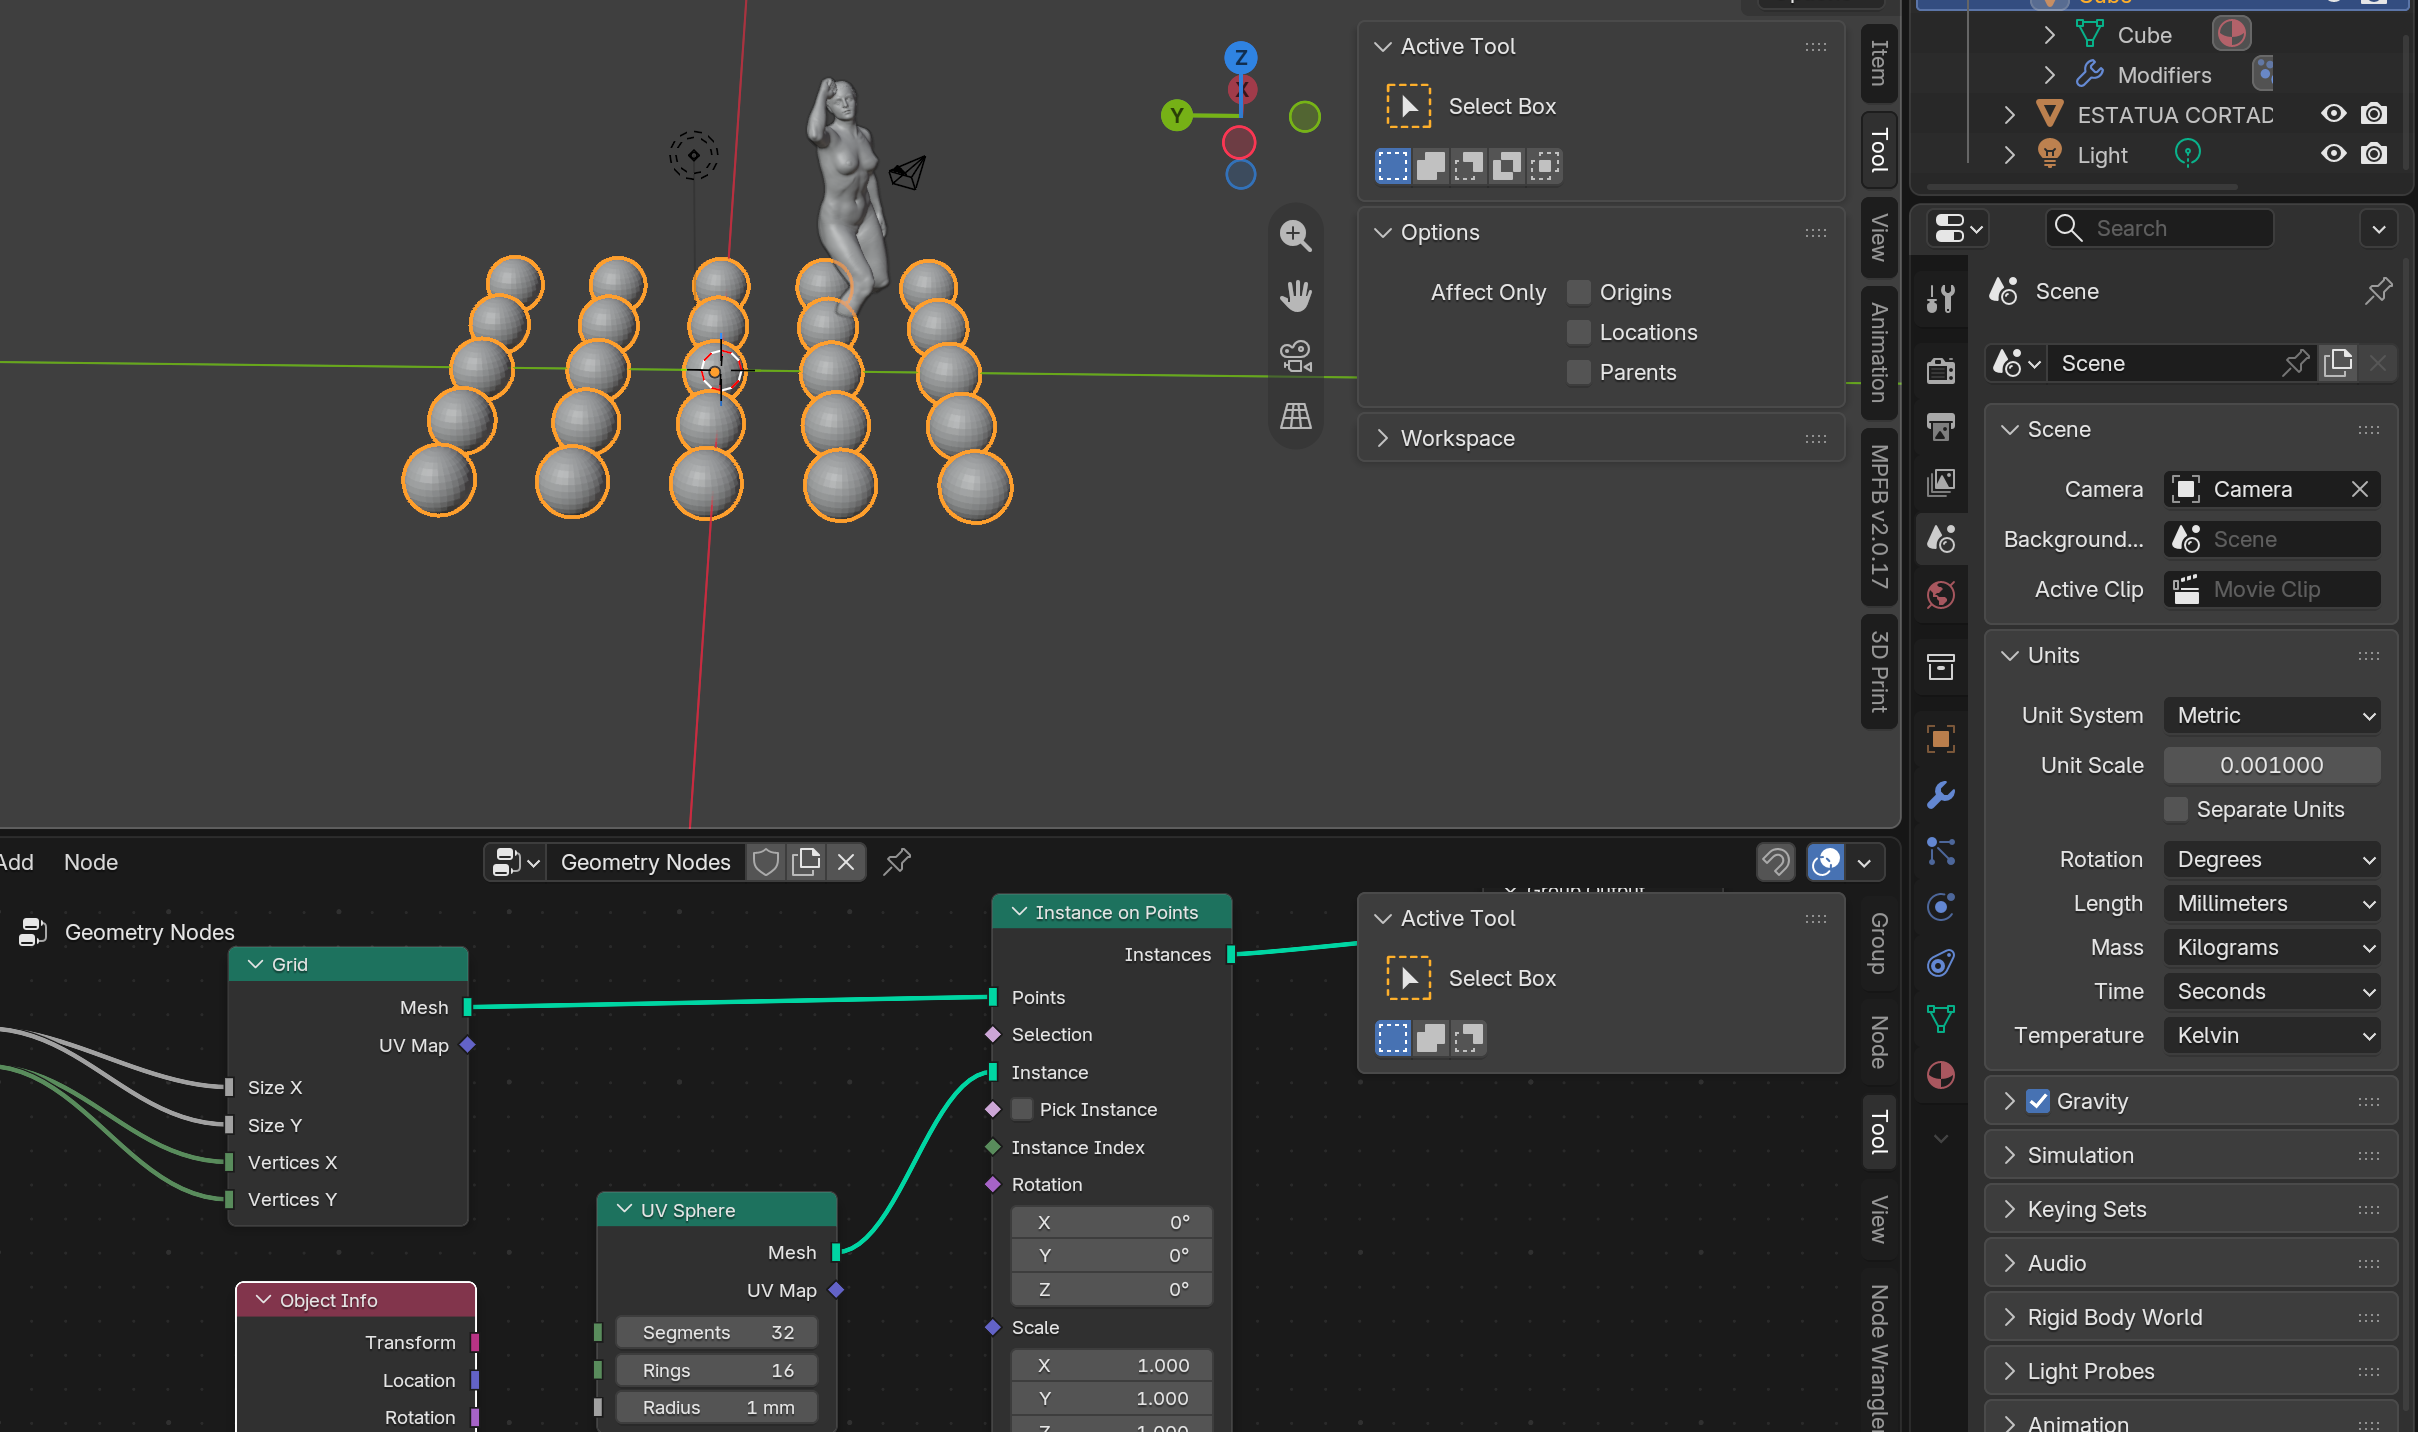
Avatar Substituion - Rita Manuelito/2026
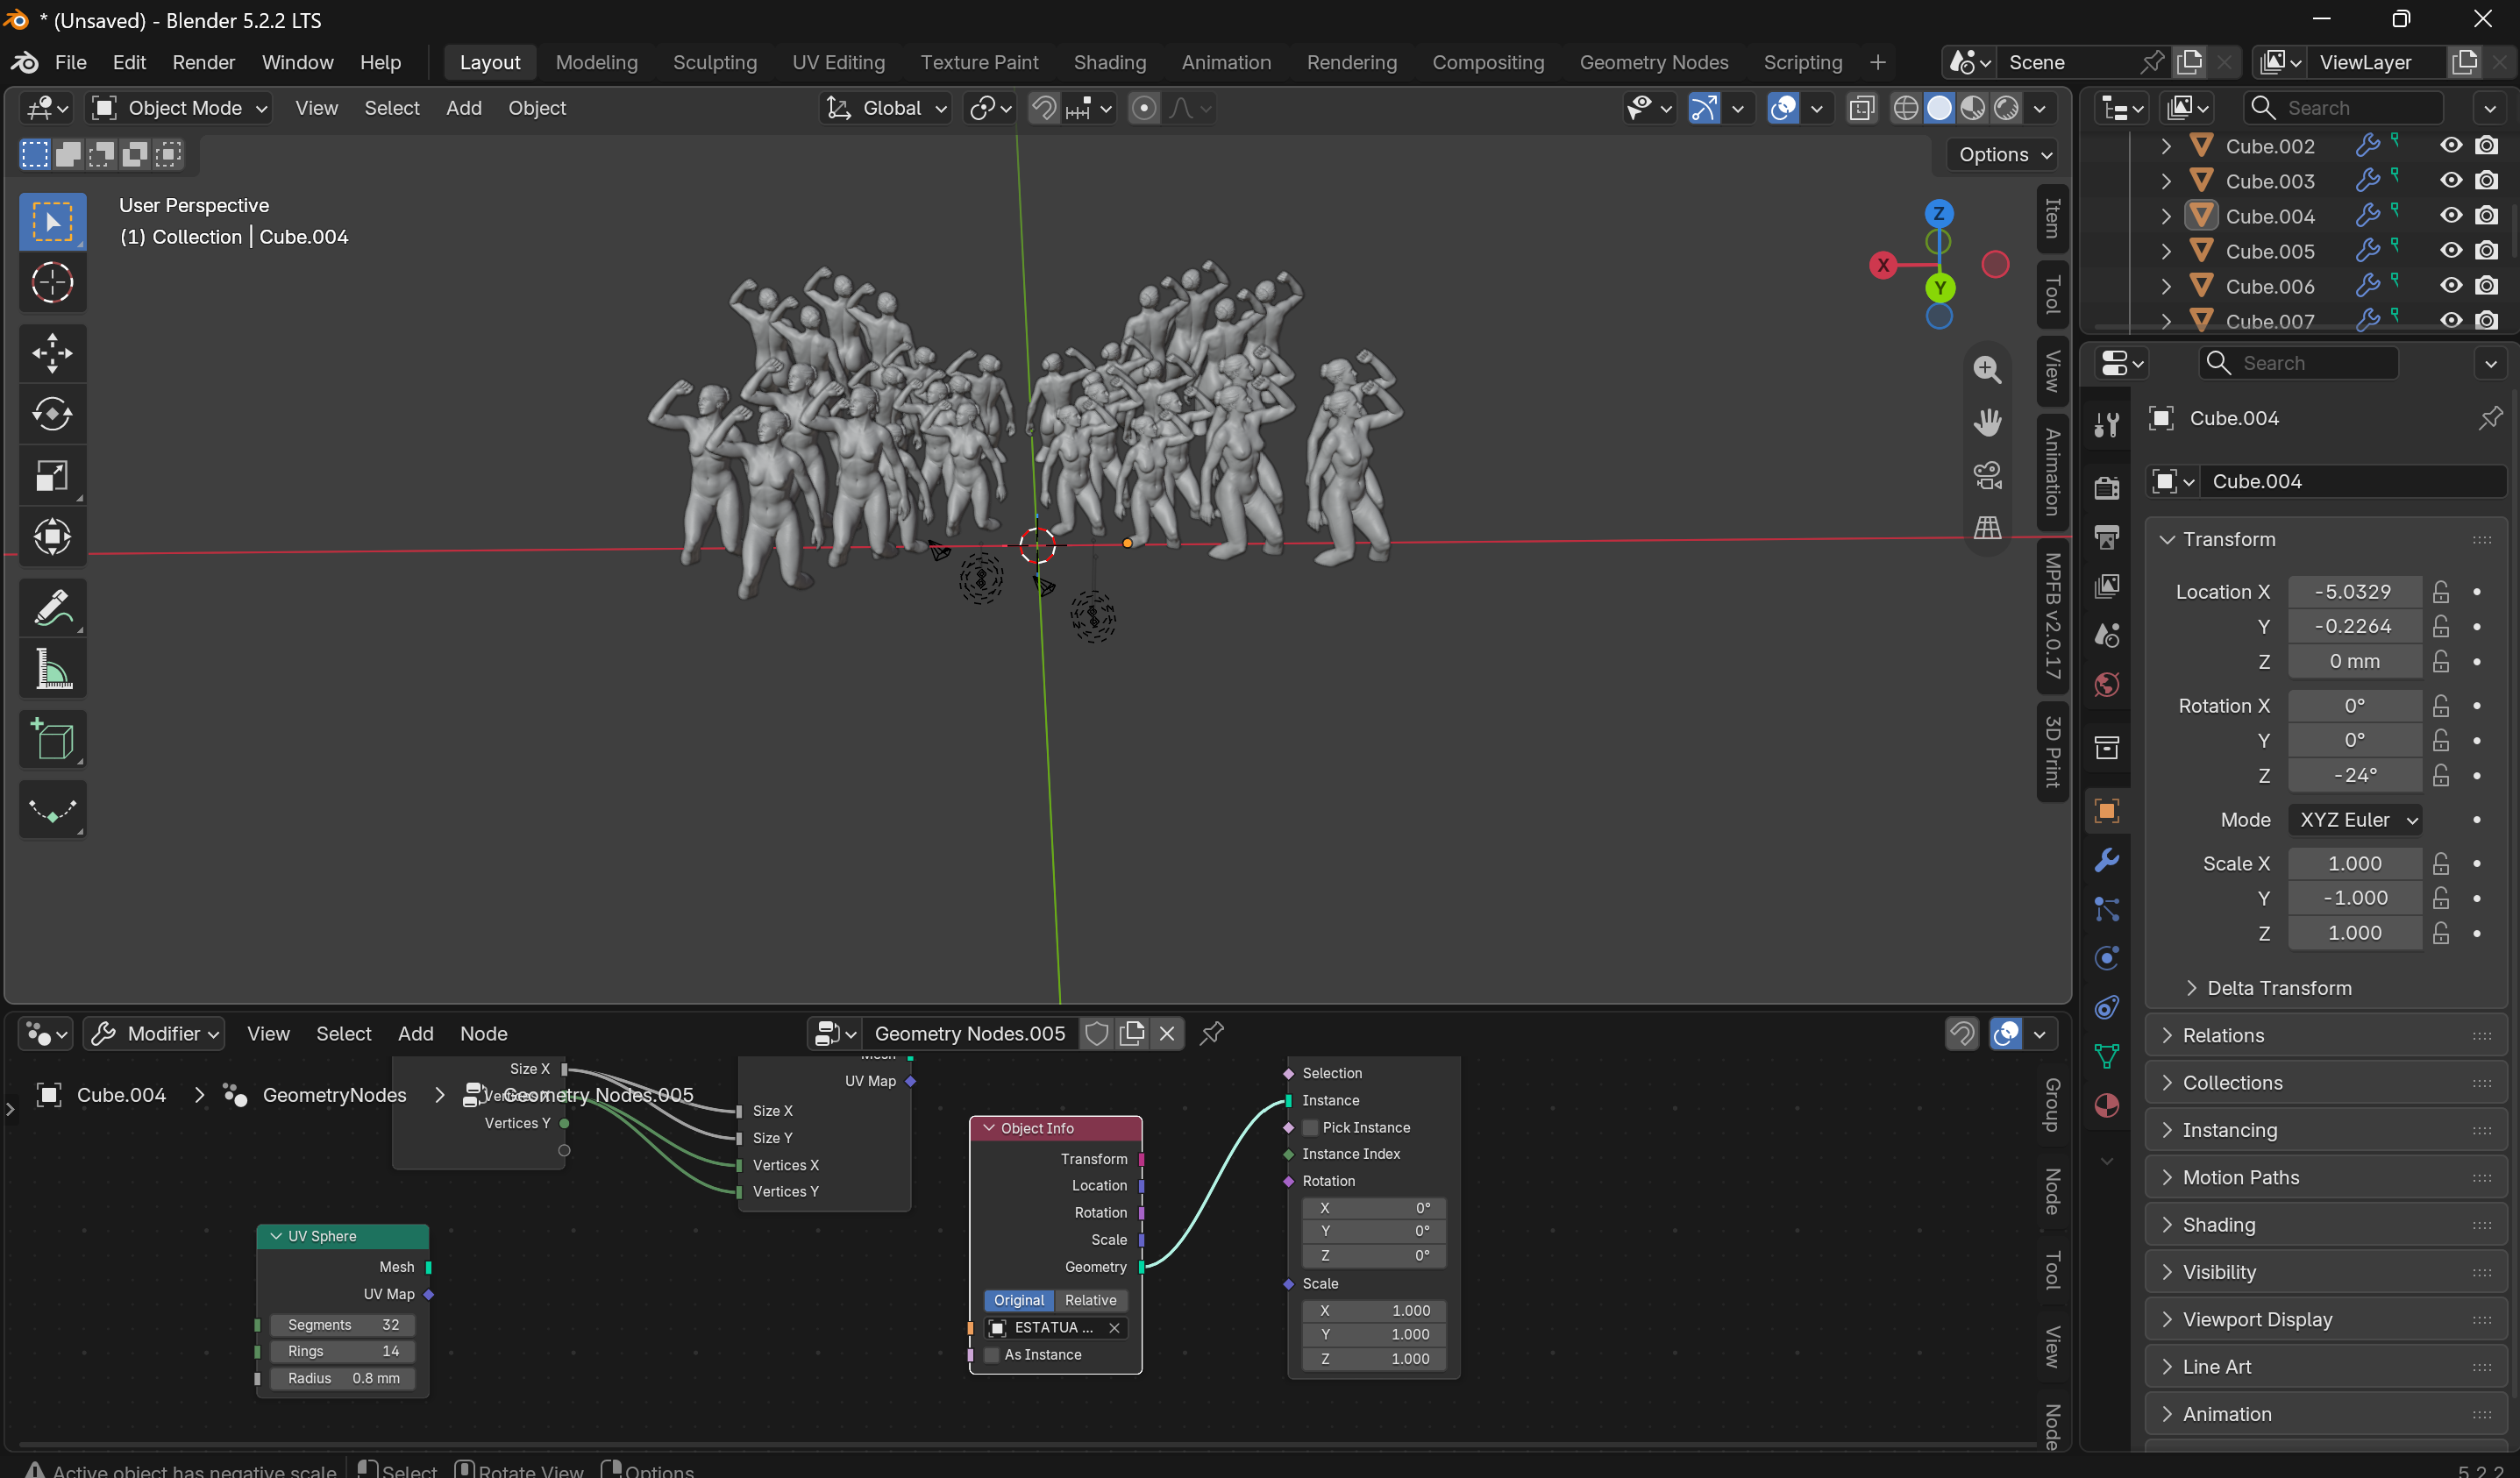
Avatar Substituion - Rita Manuelito/2026
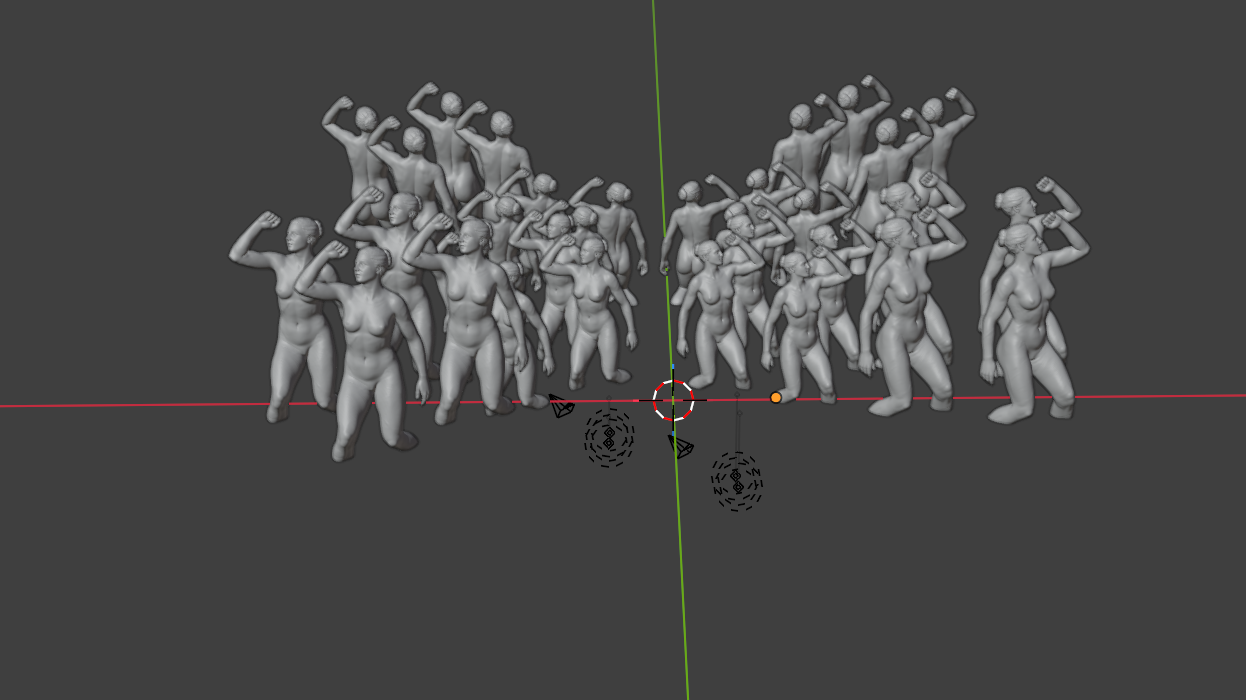
Avatar Substituion - Rita Manuelito/2026
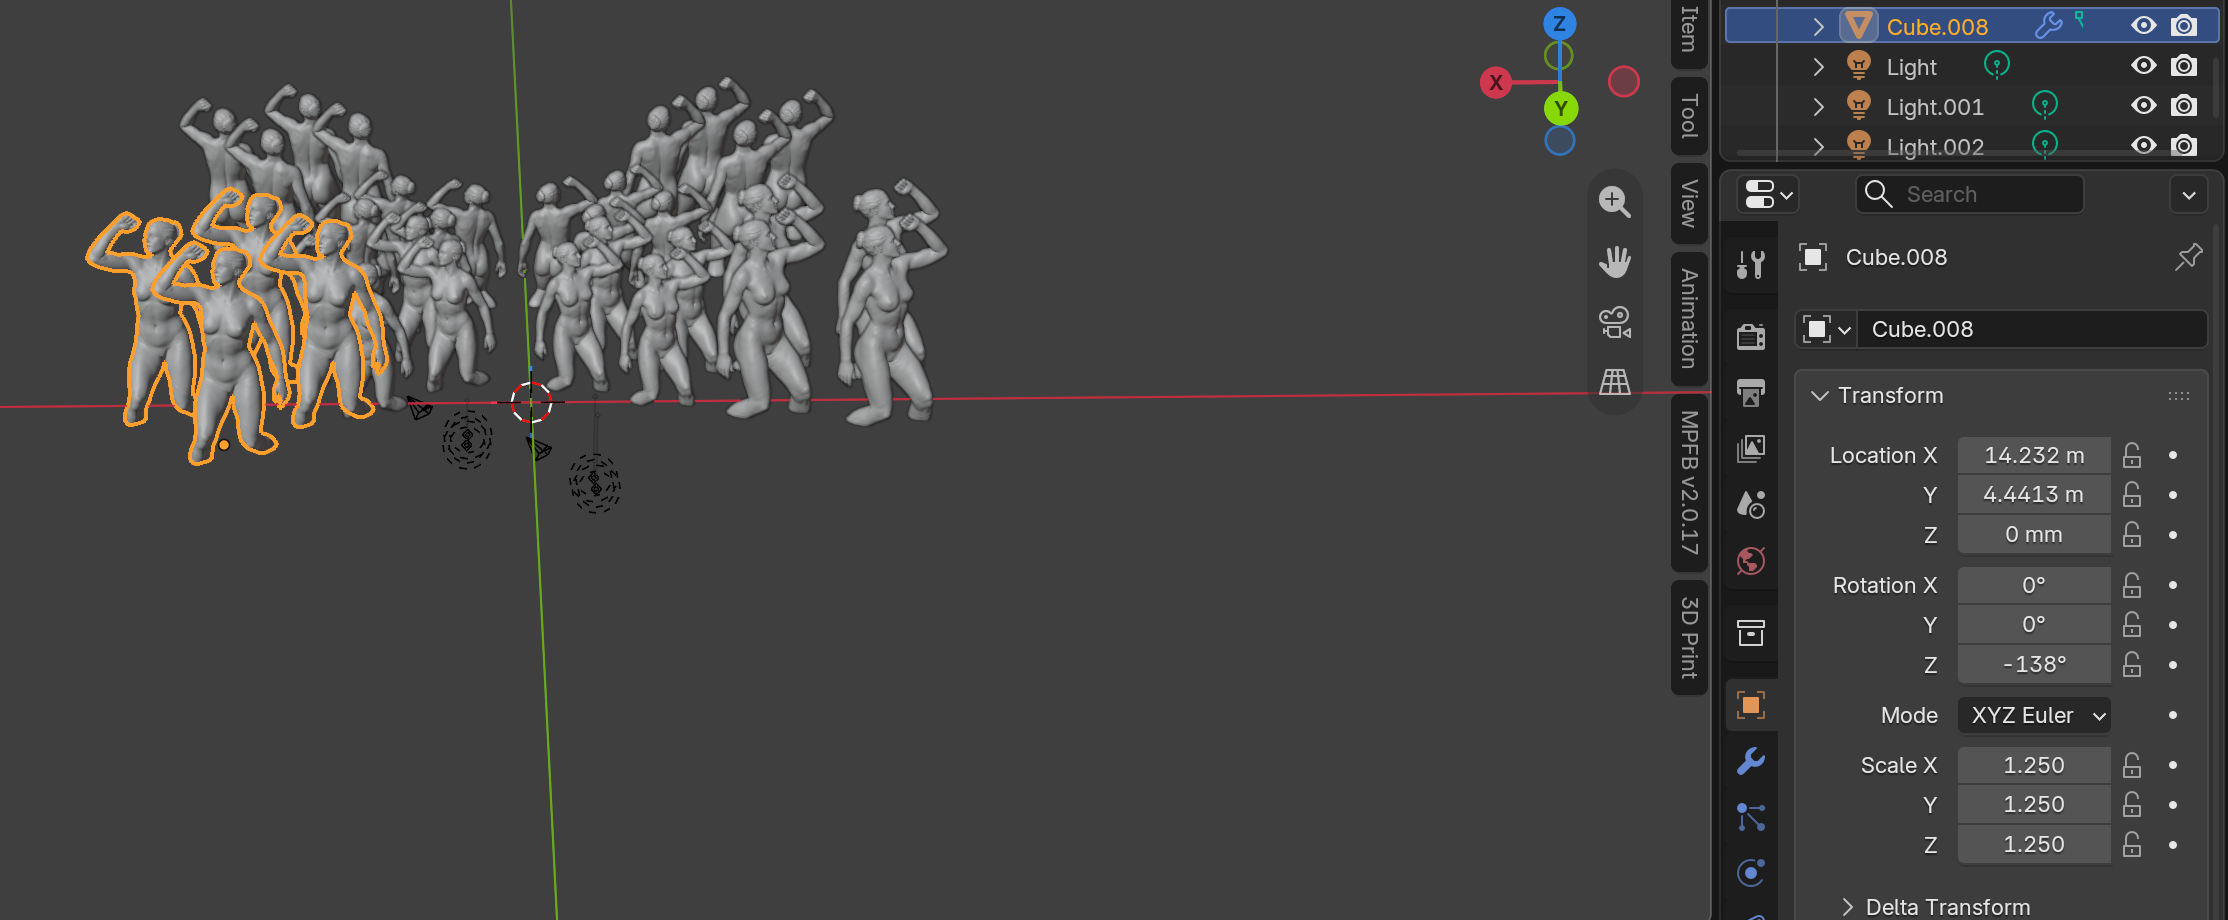
Avatar Substituion - Rita Manuelito/2026
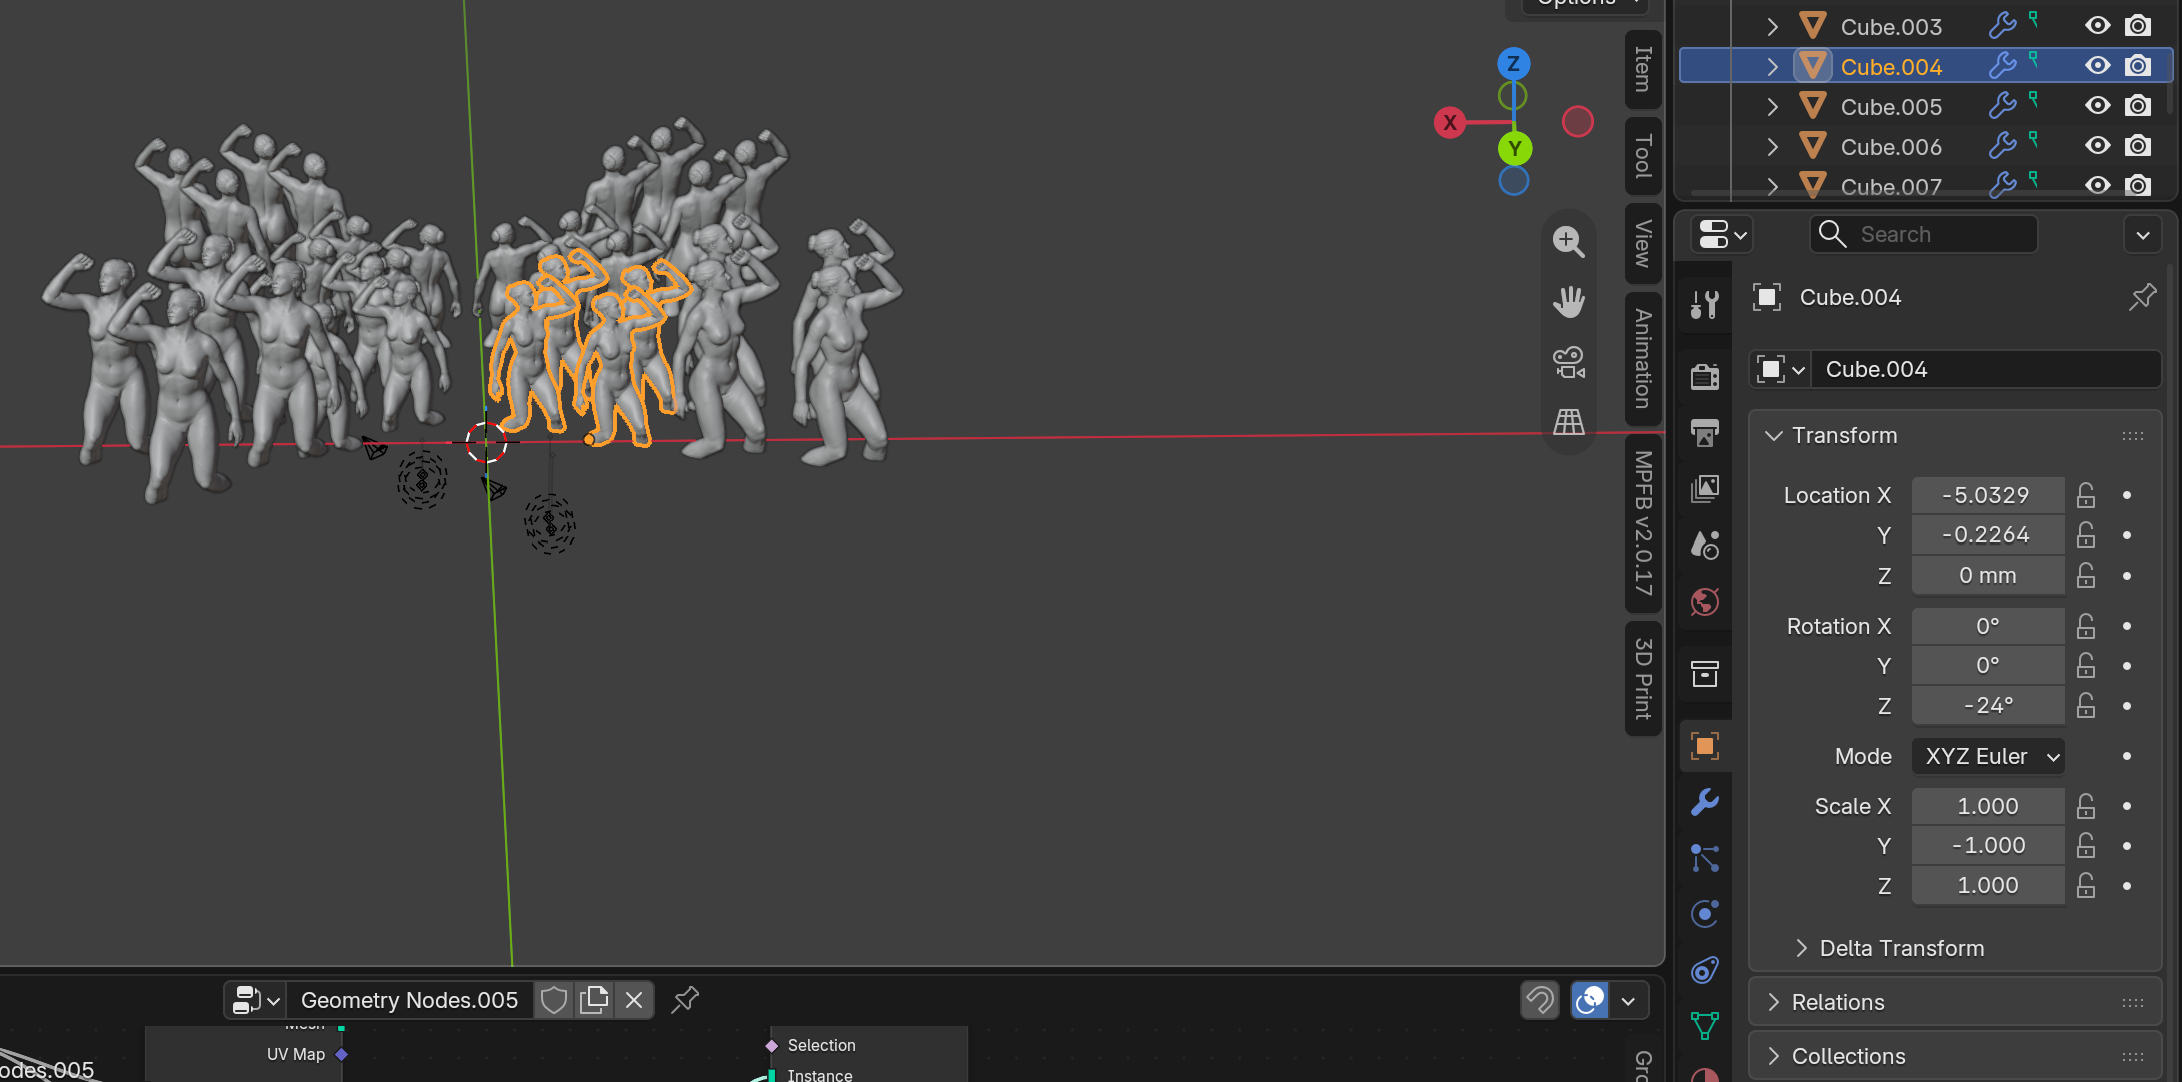
Avatar Substituion - Rita Manuelito/2026
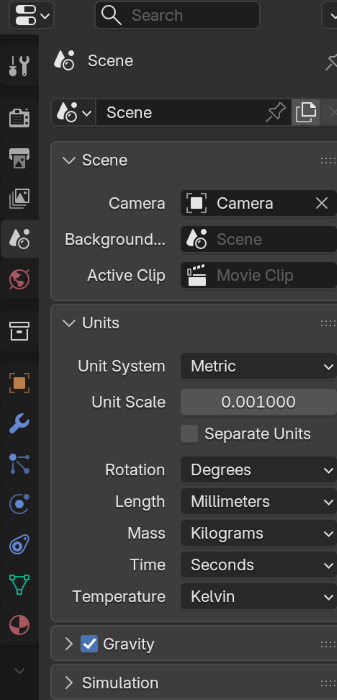
Putting the correct Unit Scale used by the 3D Printting Machine - milimiters - Rita Manuelito/2026
❥ Scene Properties ❥ Unit System - Metric Unit Scale ❥ 0,001 ❥ Length - Milimeters
Cutting the Sculpture - Fusion 360
Step by step - notebook
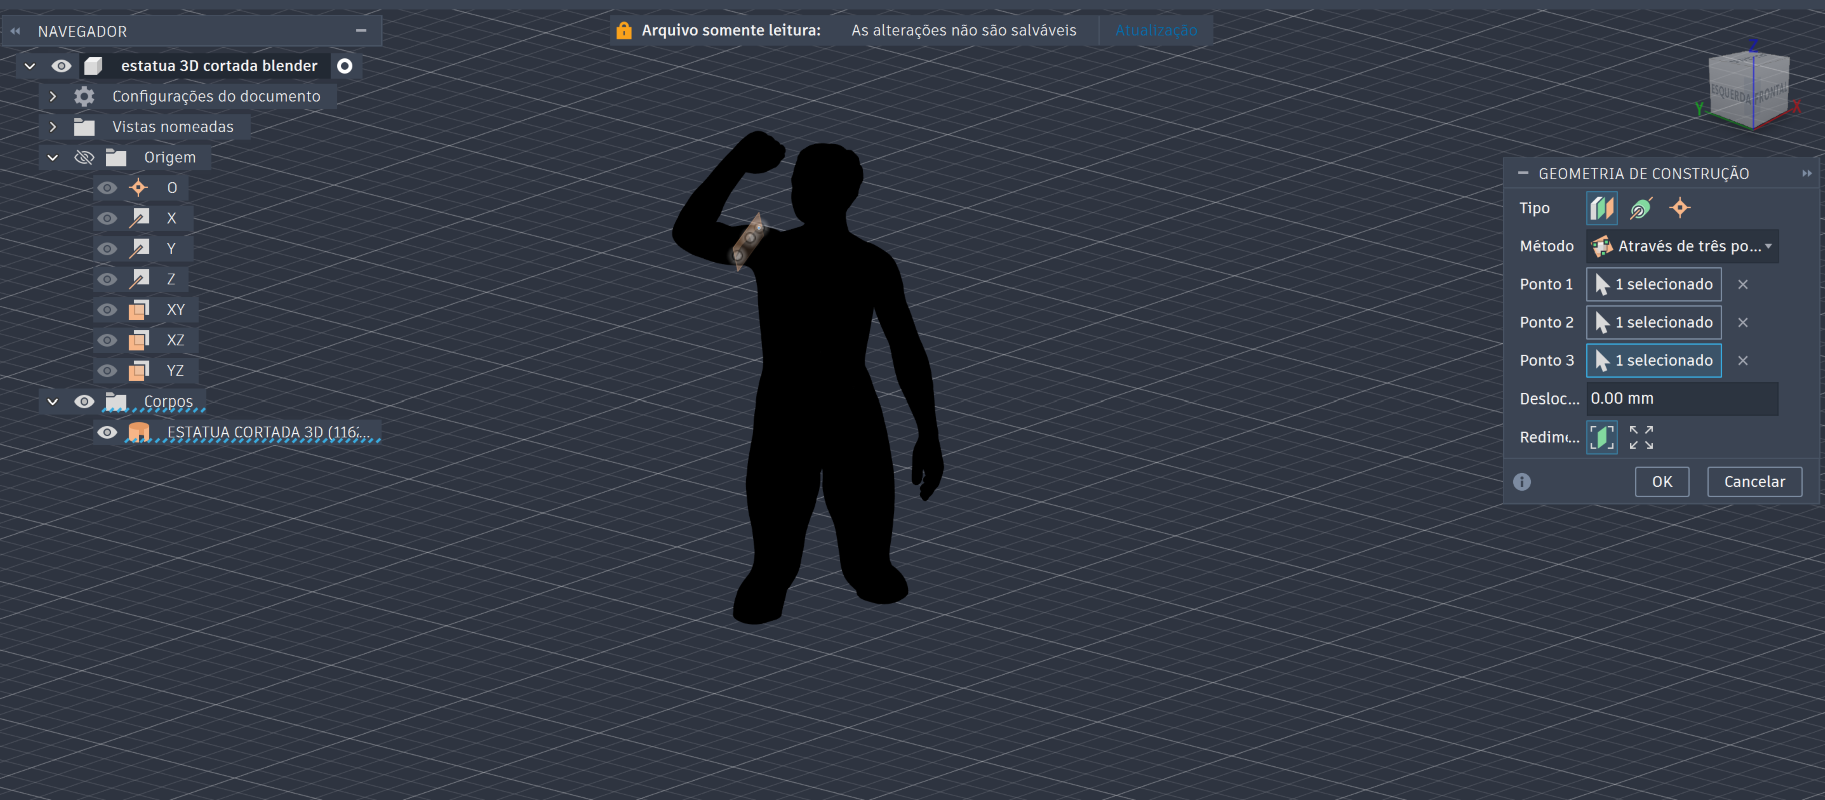
Cutting the sculpture in Fusion 360 - Rita Manuelito/2026
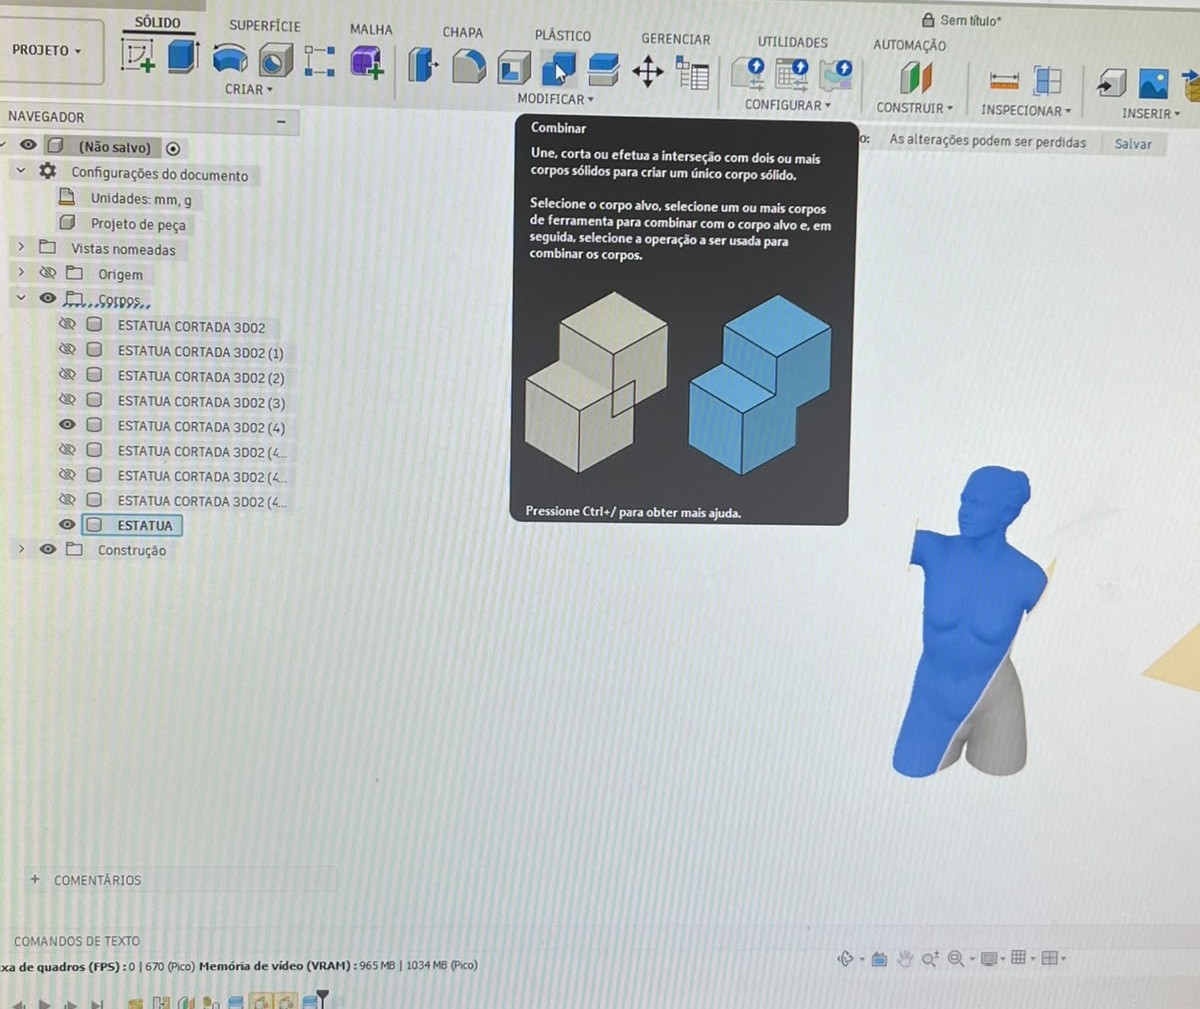
Cutting the sculpture in Fusion 360 - Rita Manuelito/2026
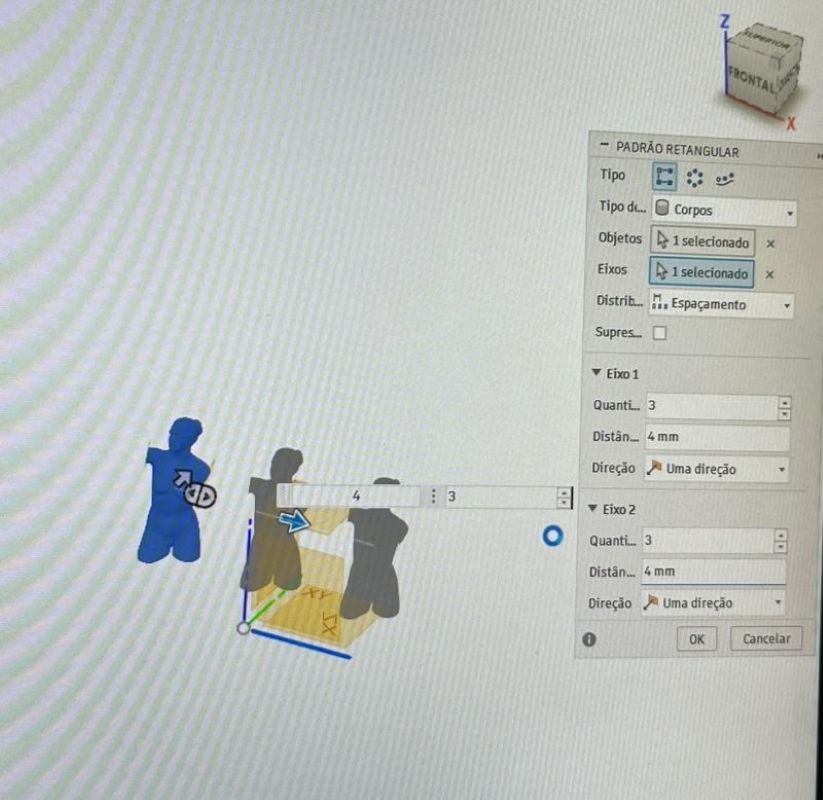
Cutting the sculpture in Fusion 360 - Rita Manuelito/2026
Substitute my previous Sculpture with my new one - Blender
❥ In the Scene Collection, locate the newly imported statue
❥ Drag the statue into the Geometry Nodes Editor to create an Object Info node
❥ Disconnect the Geometry output of the existing Object Info node from the Instance input of the Instance on Points node
❥ Connect the Geometry output of the new Object Info node to the same Instance input
Replacing the original object in the grid with my imported statue while preserving the existing instancing structure.
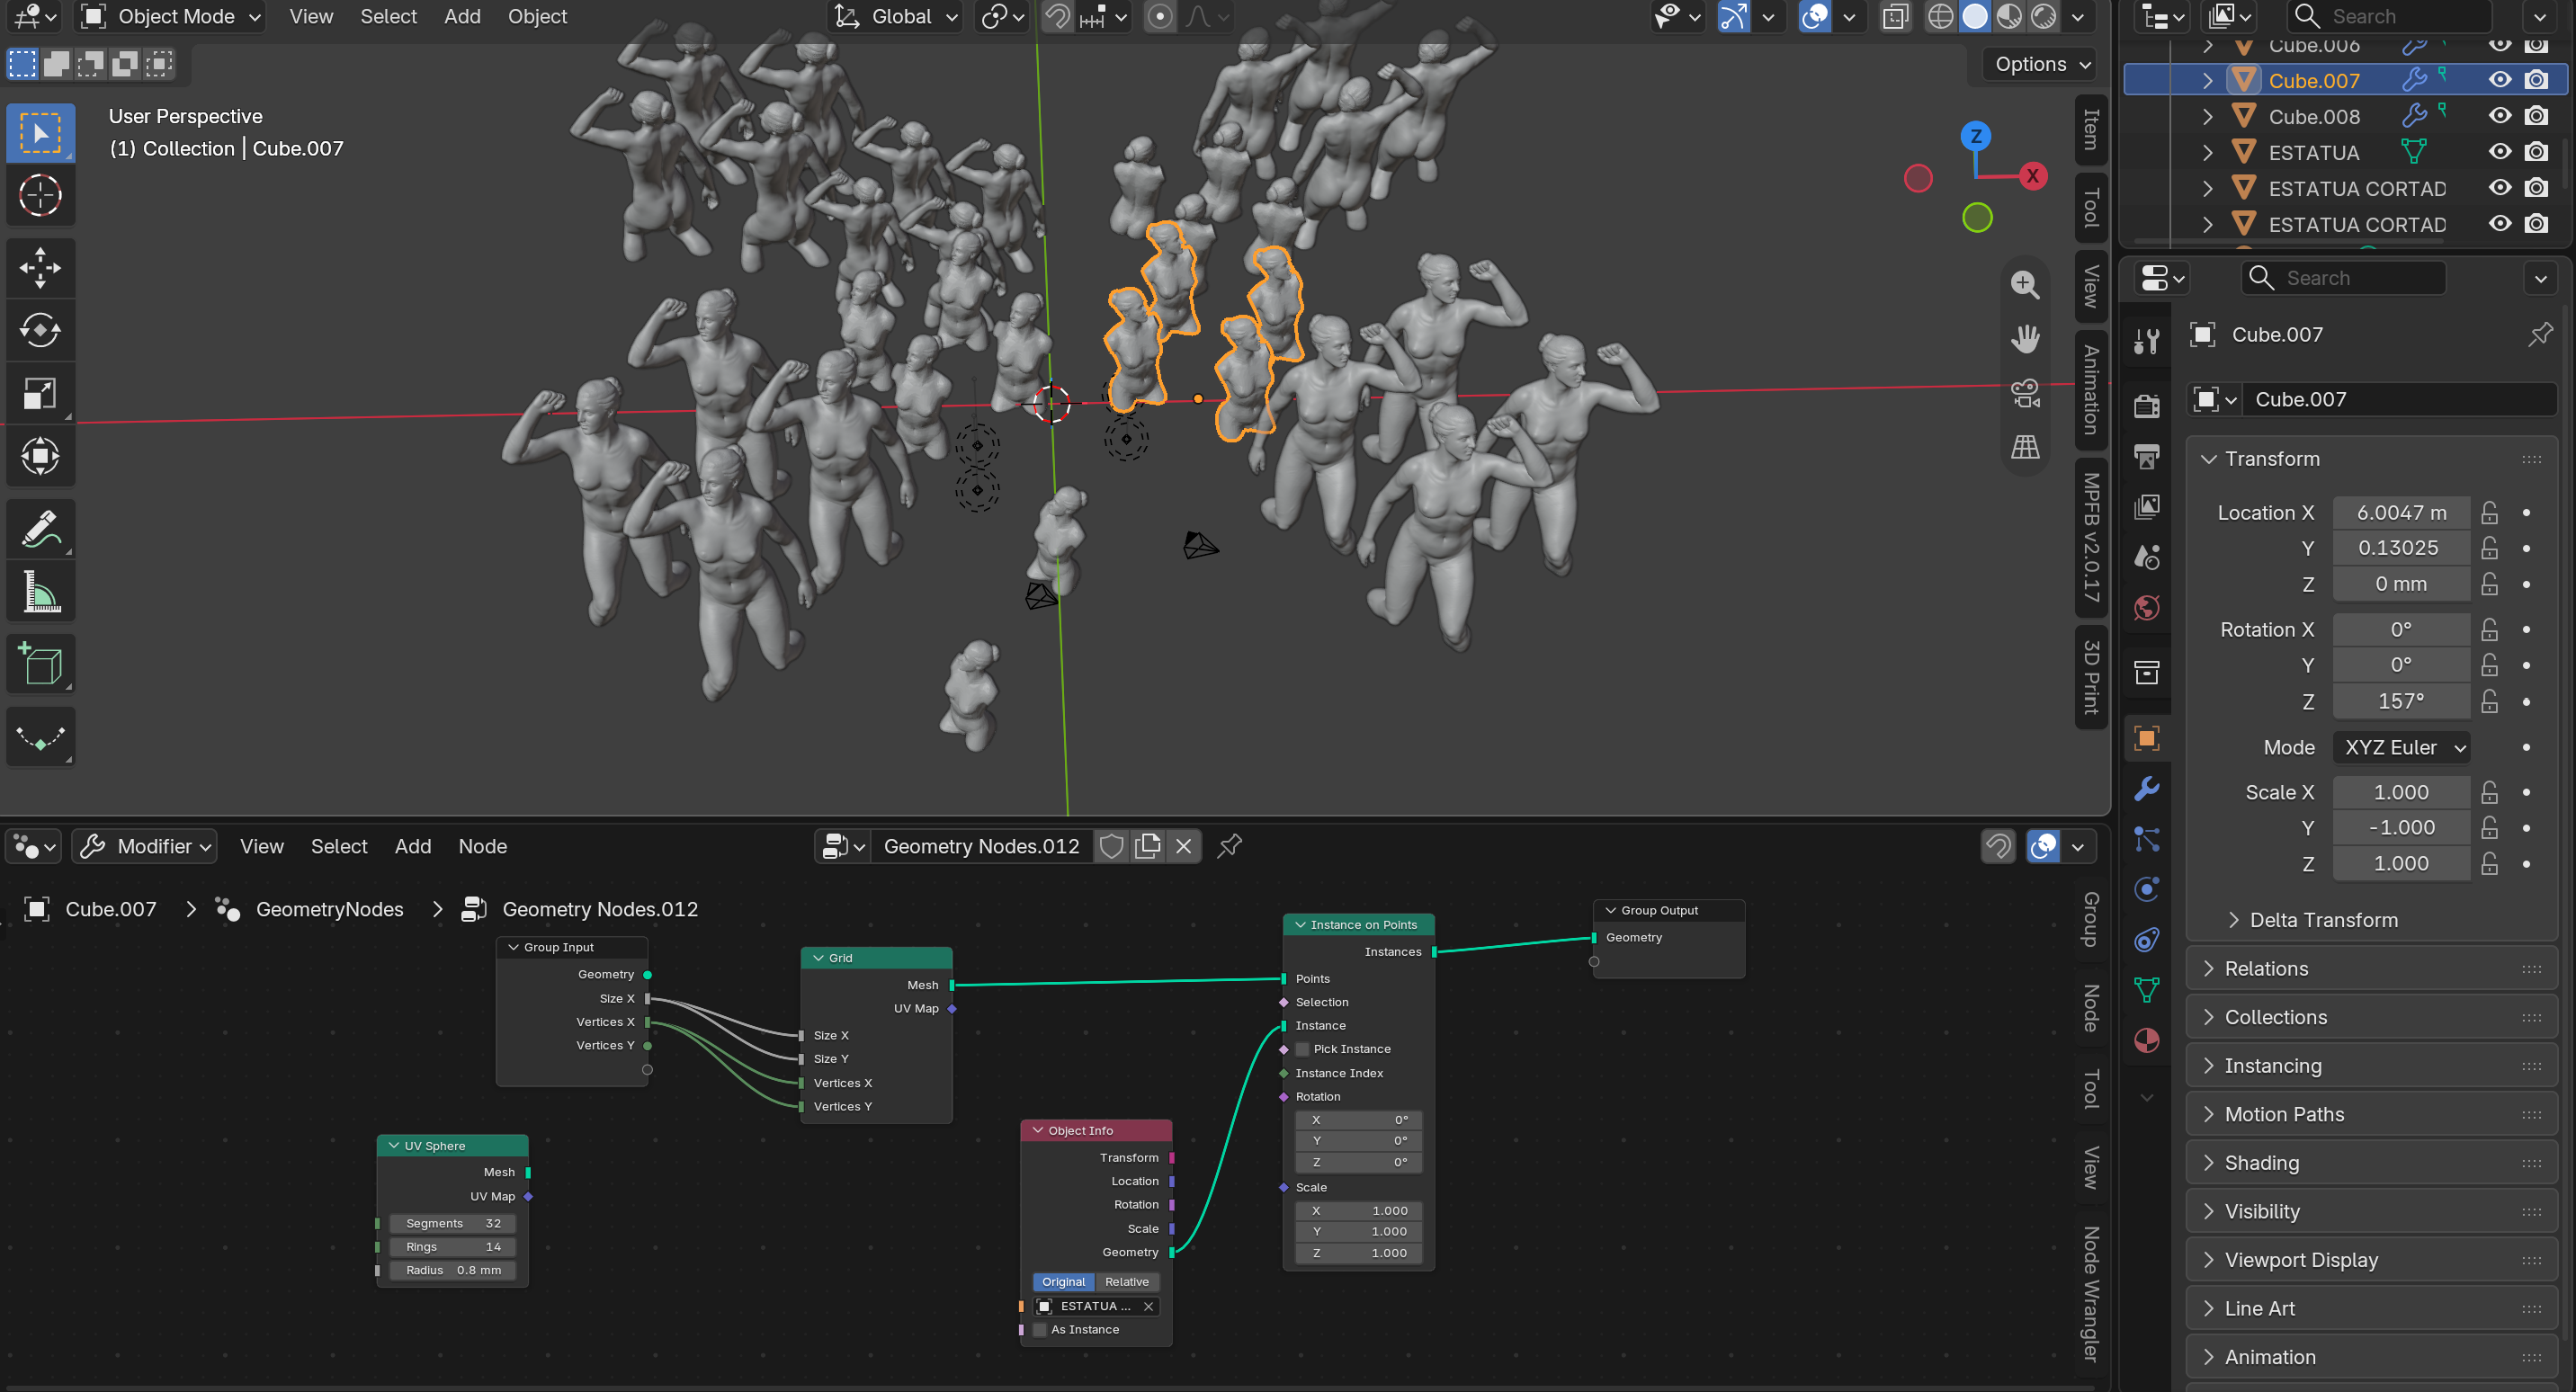
substituing Sculpture in Blender - Rita Manuelito/2026
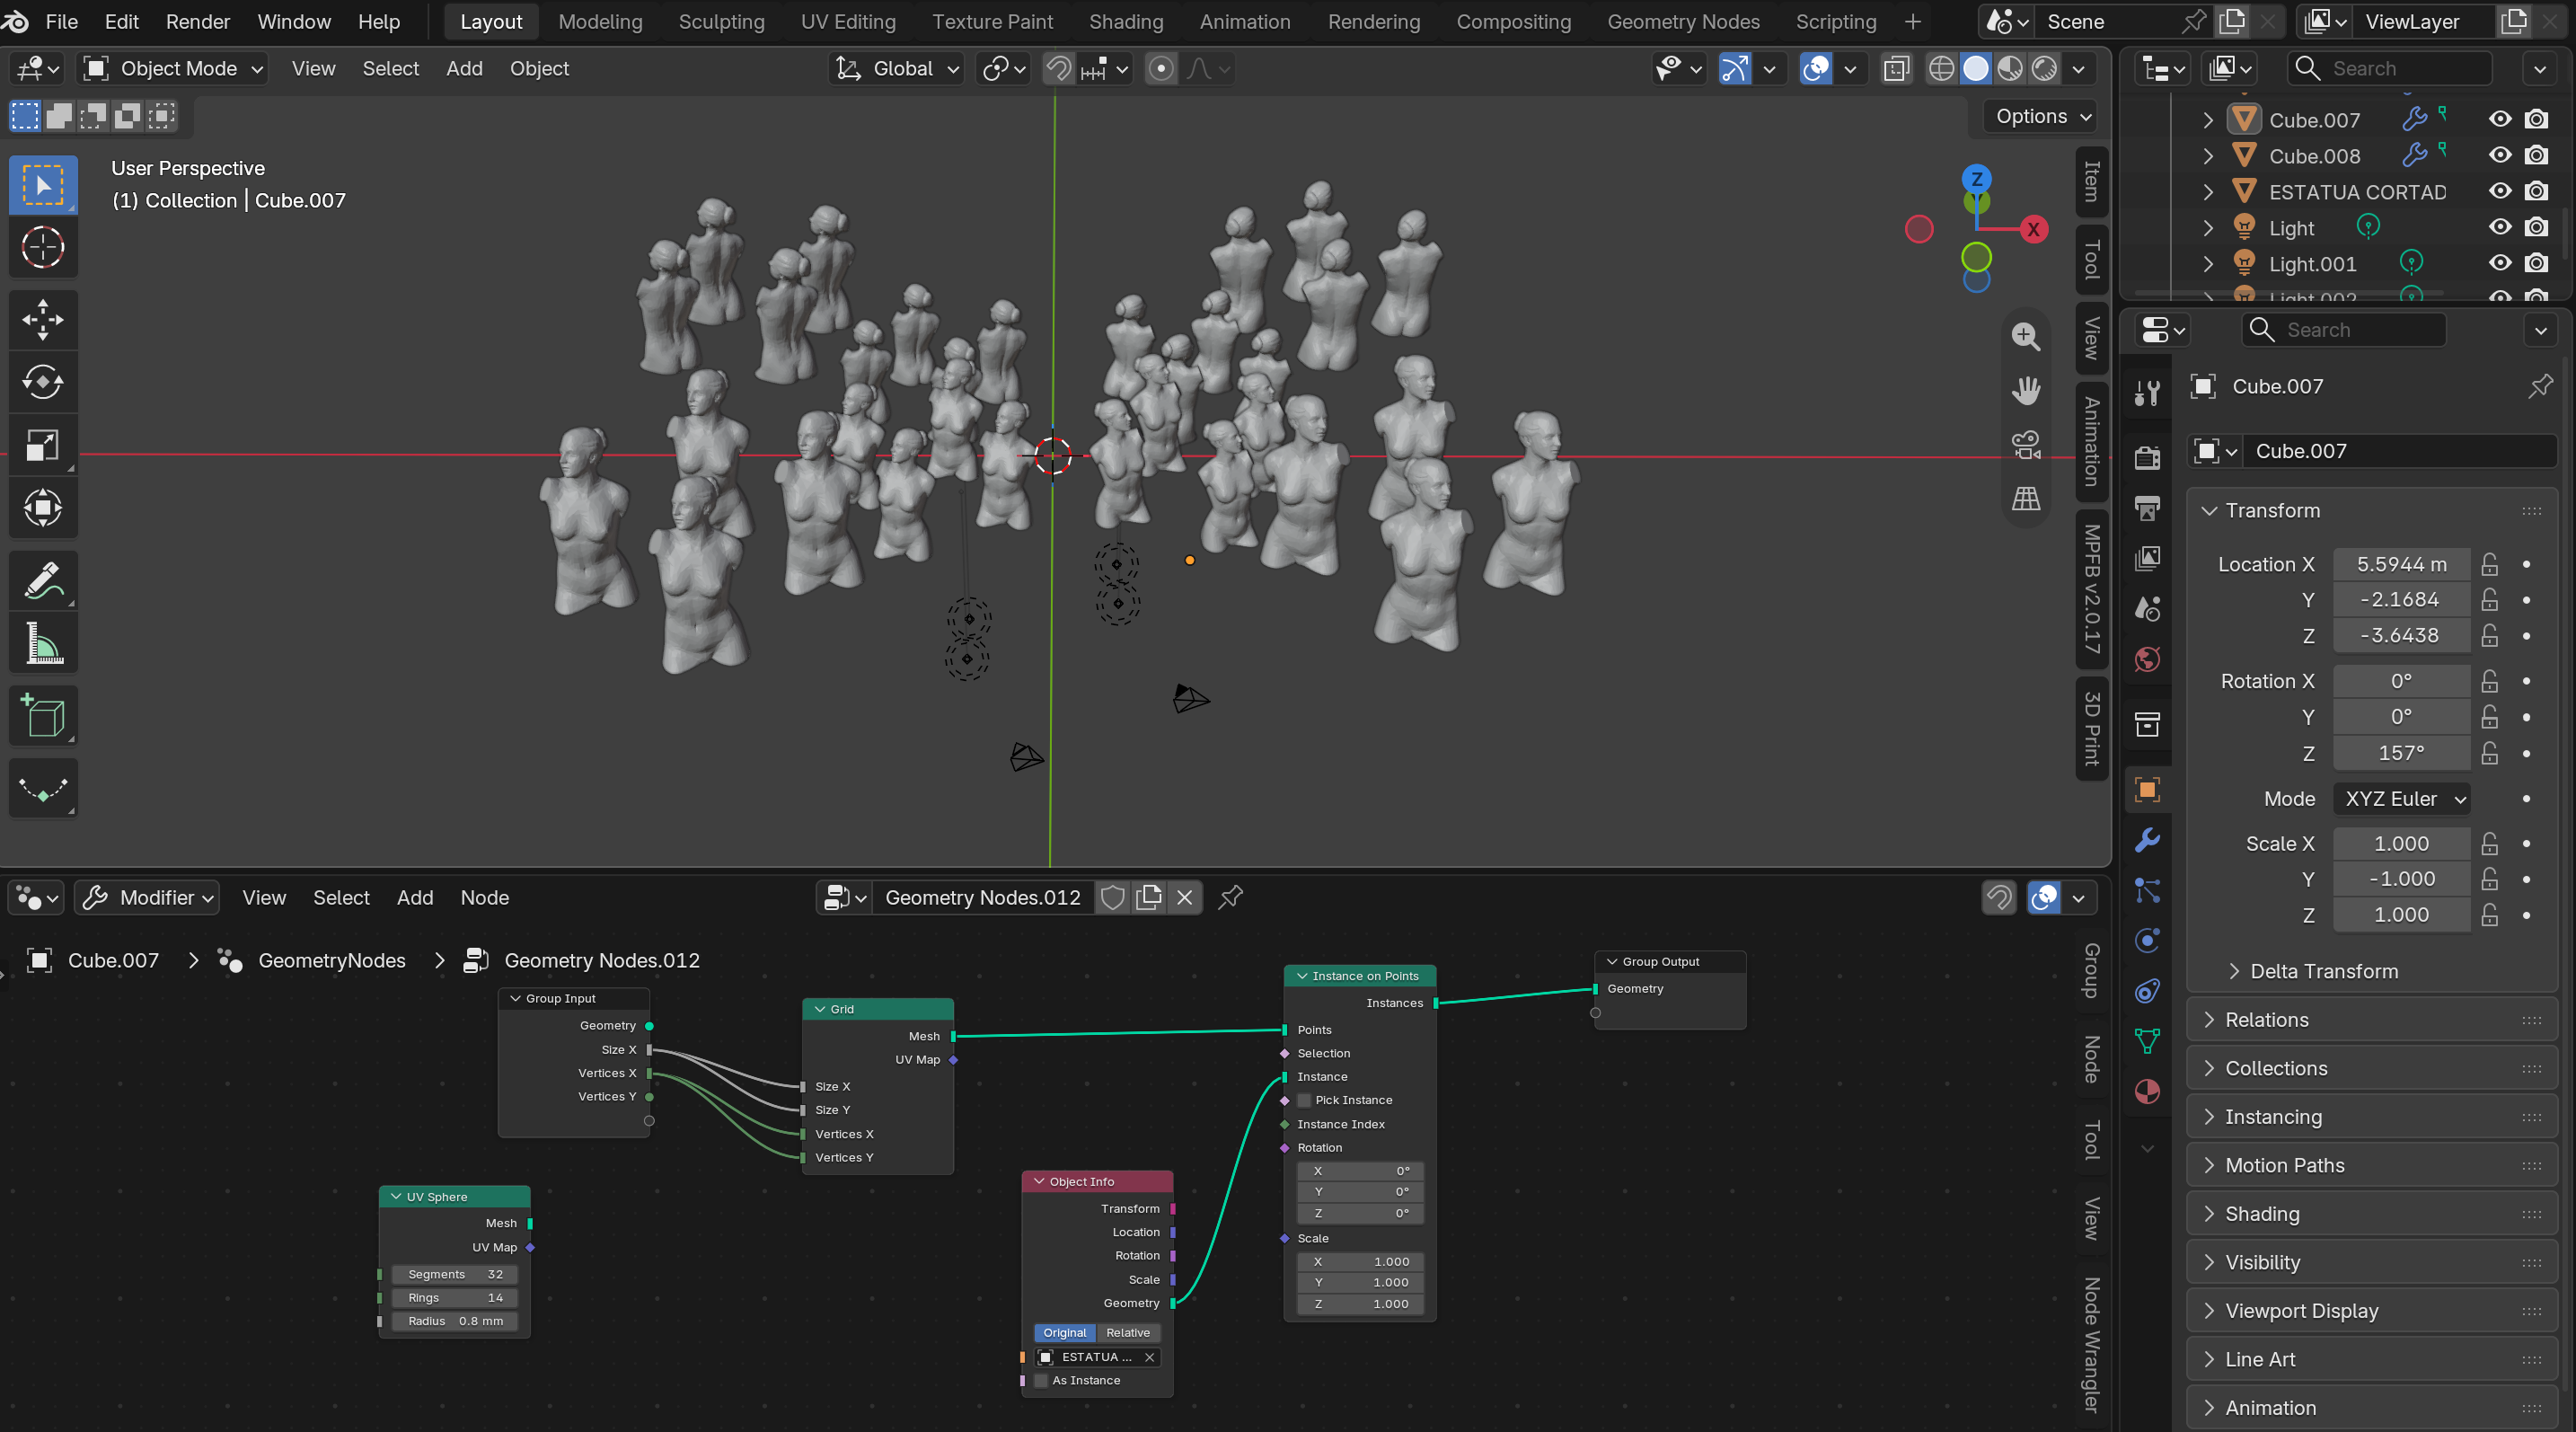
substituing Sculpture in Blender - Rita Manuelito/2026
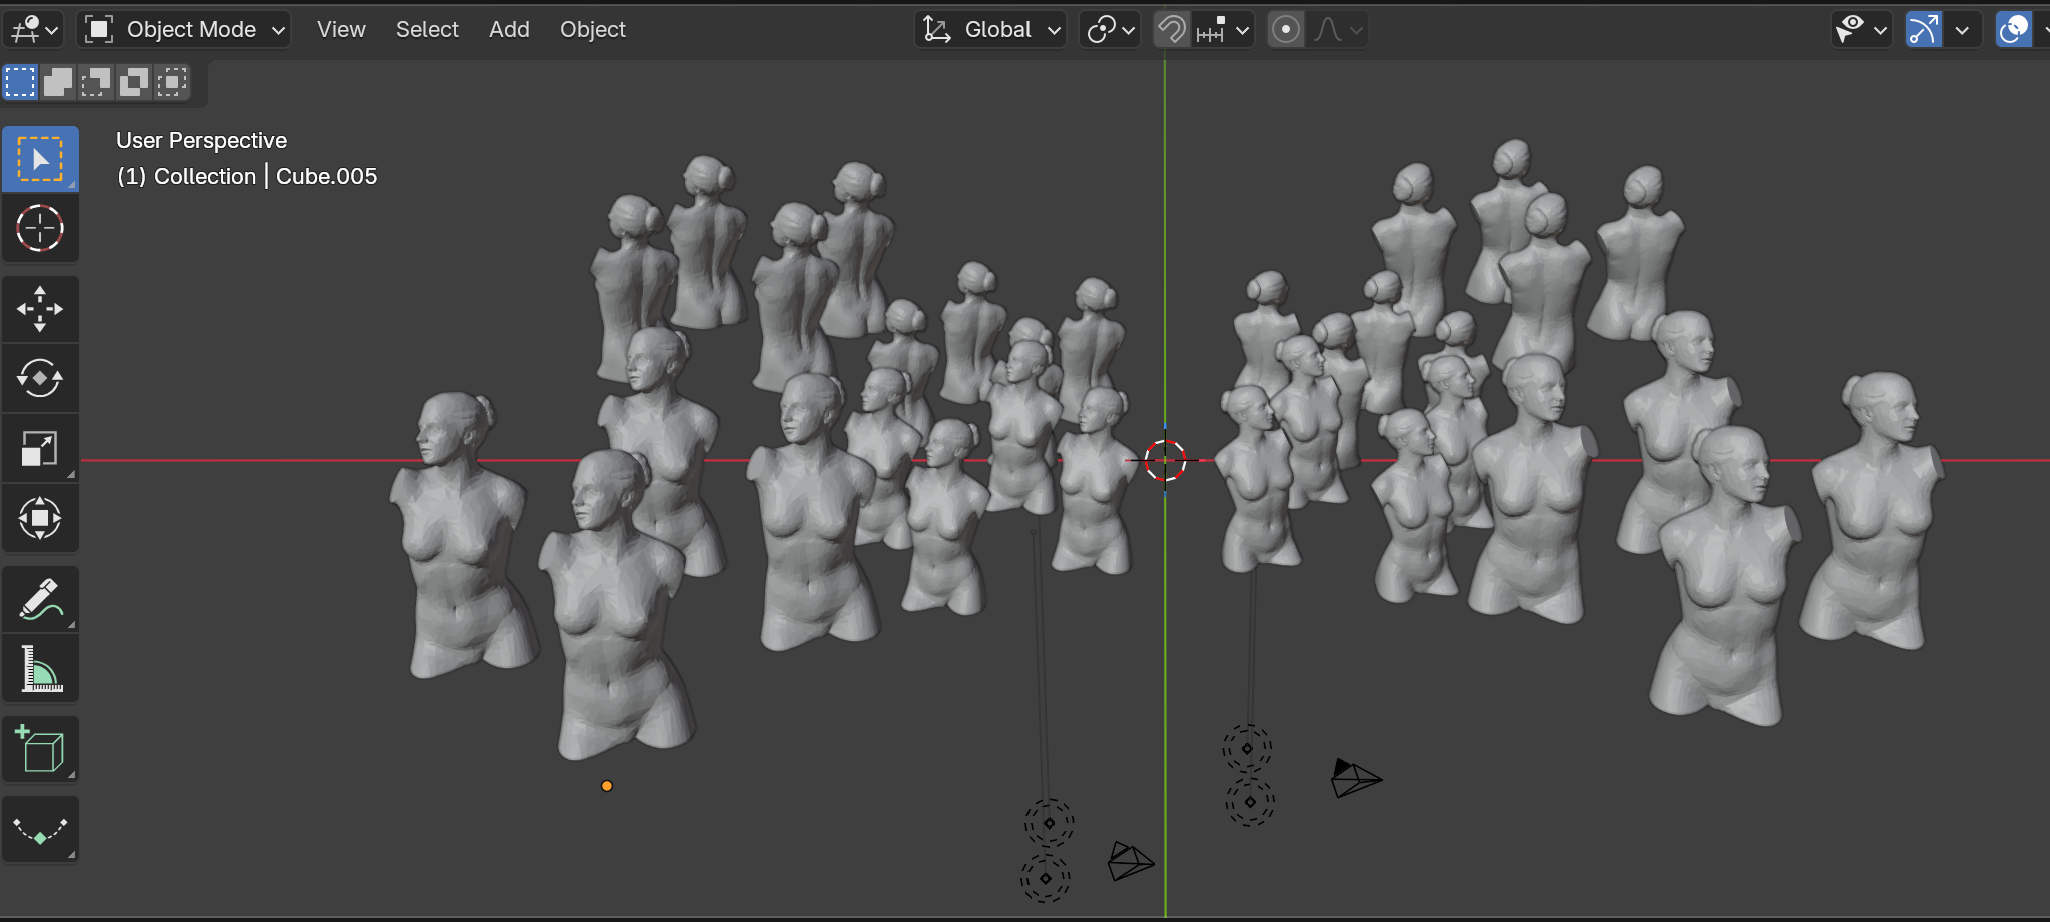
substituing Sculpture in Blender - Rita Manuelito/2026
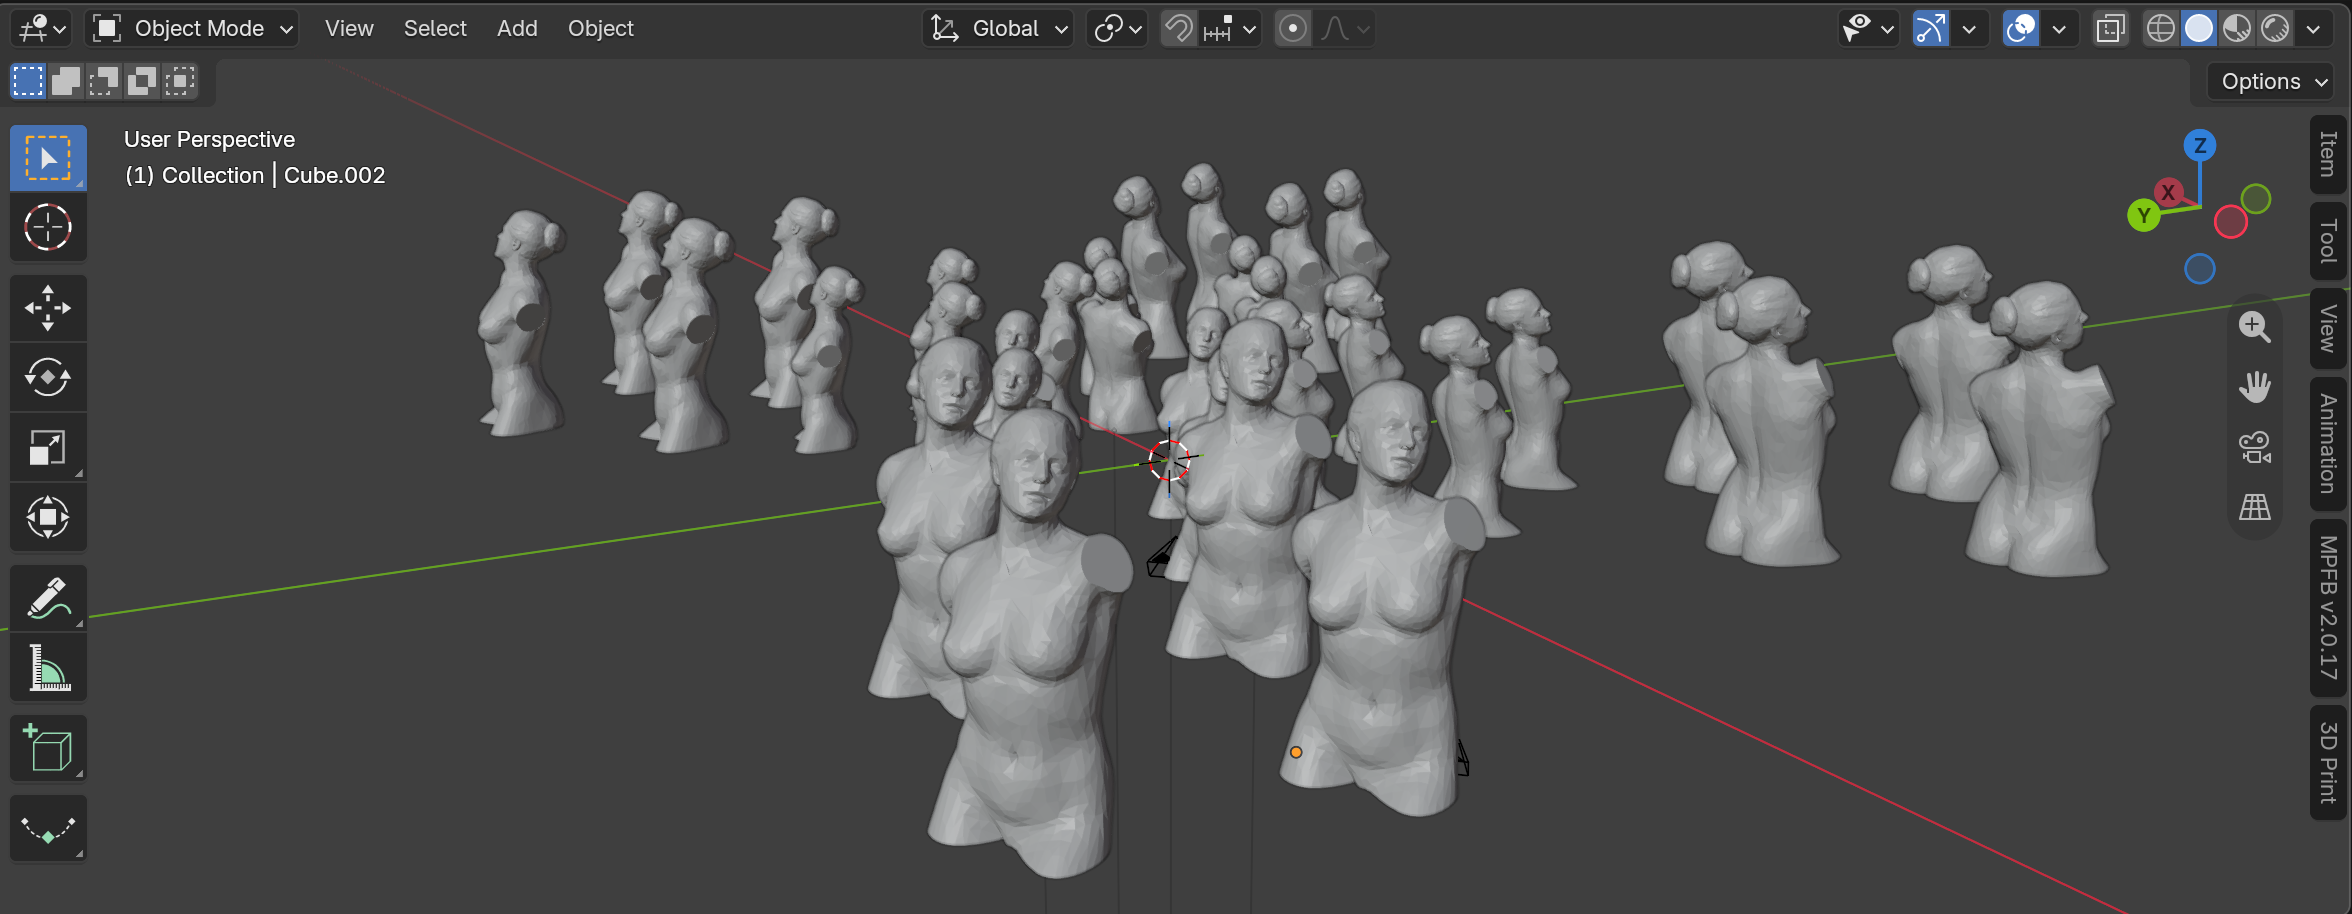
substituing Sculpture in Blender - Rita Manuelito/2026
I ultimately had to simplify the grid considerably. Despite setting all the Z-location values to 0, the smaller and larger statues were not aligned at the same level after being exported to the 3D-printing software.
Asymmetrical Grid
I exported a grid of four statues, which I had previously created in Blender, into Bambu Studio. This software was used to prepare and send the file to the 3D printer. I then duplicated the grid and rotated each copy so that the statues faced in opposite directions.
Asymmetrical Grid:
❥ Right-click on the grid and select Clone.
❥ Right-click on the cloned grid and select Mirror, using the X-axis as the mirror axis.
❥ Select both grids by holding Shift and clicking on each one.
❥ Right-click and select Merge.
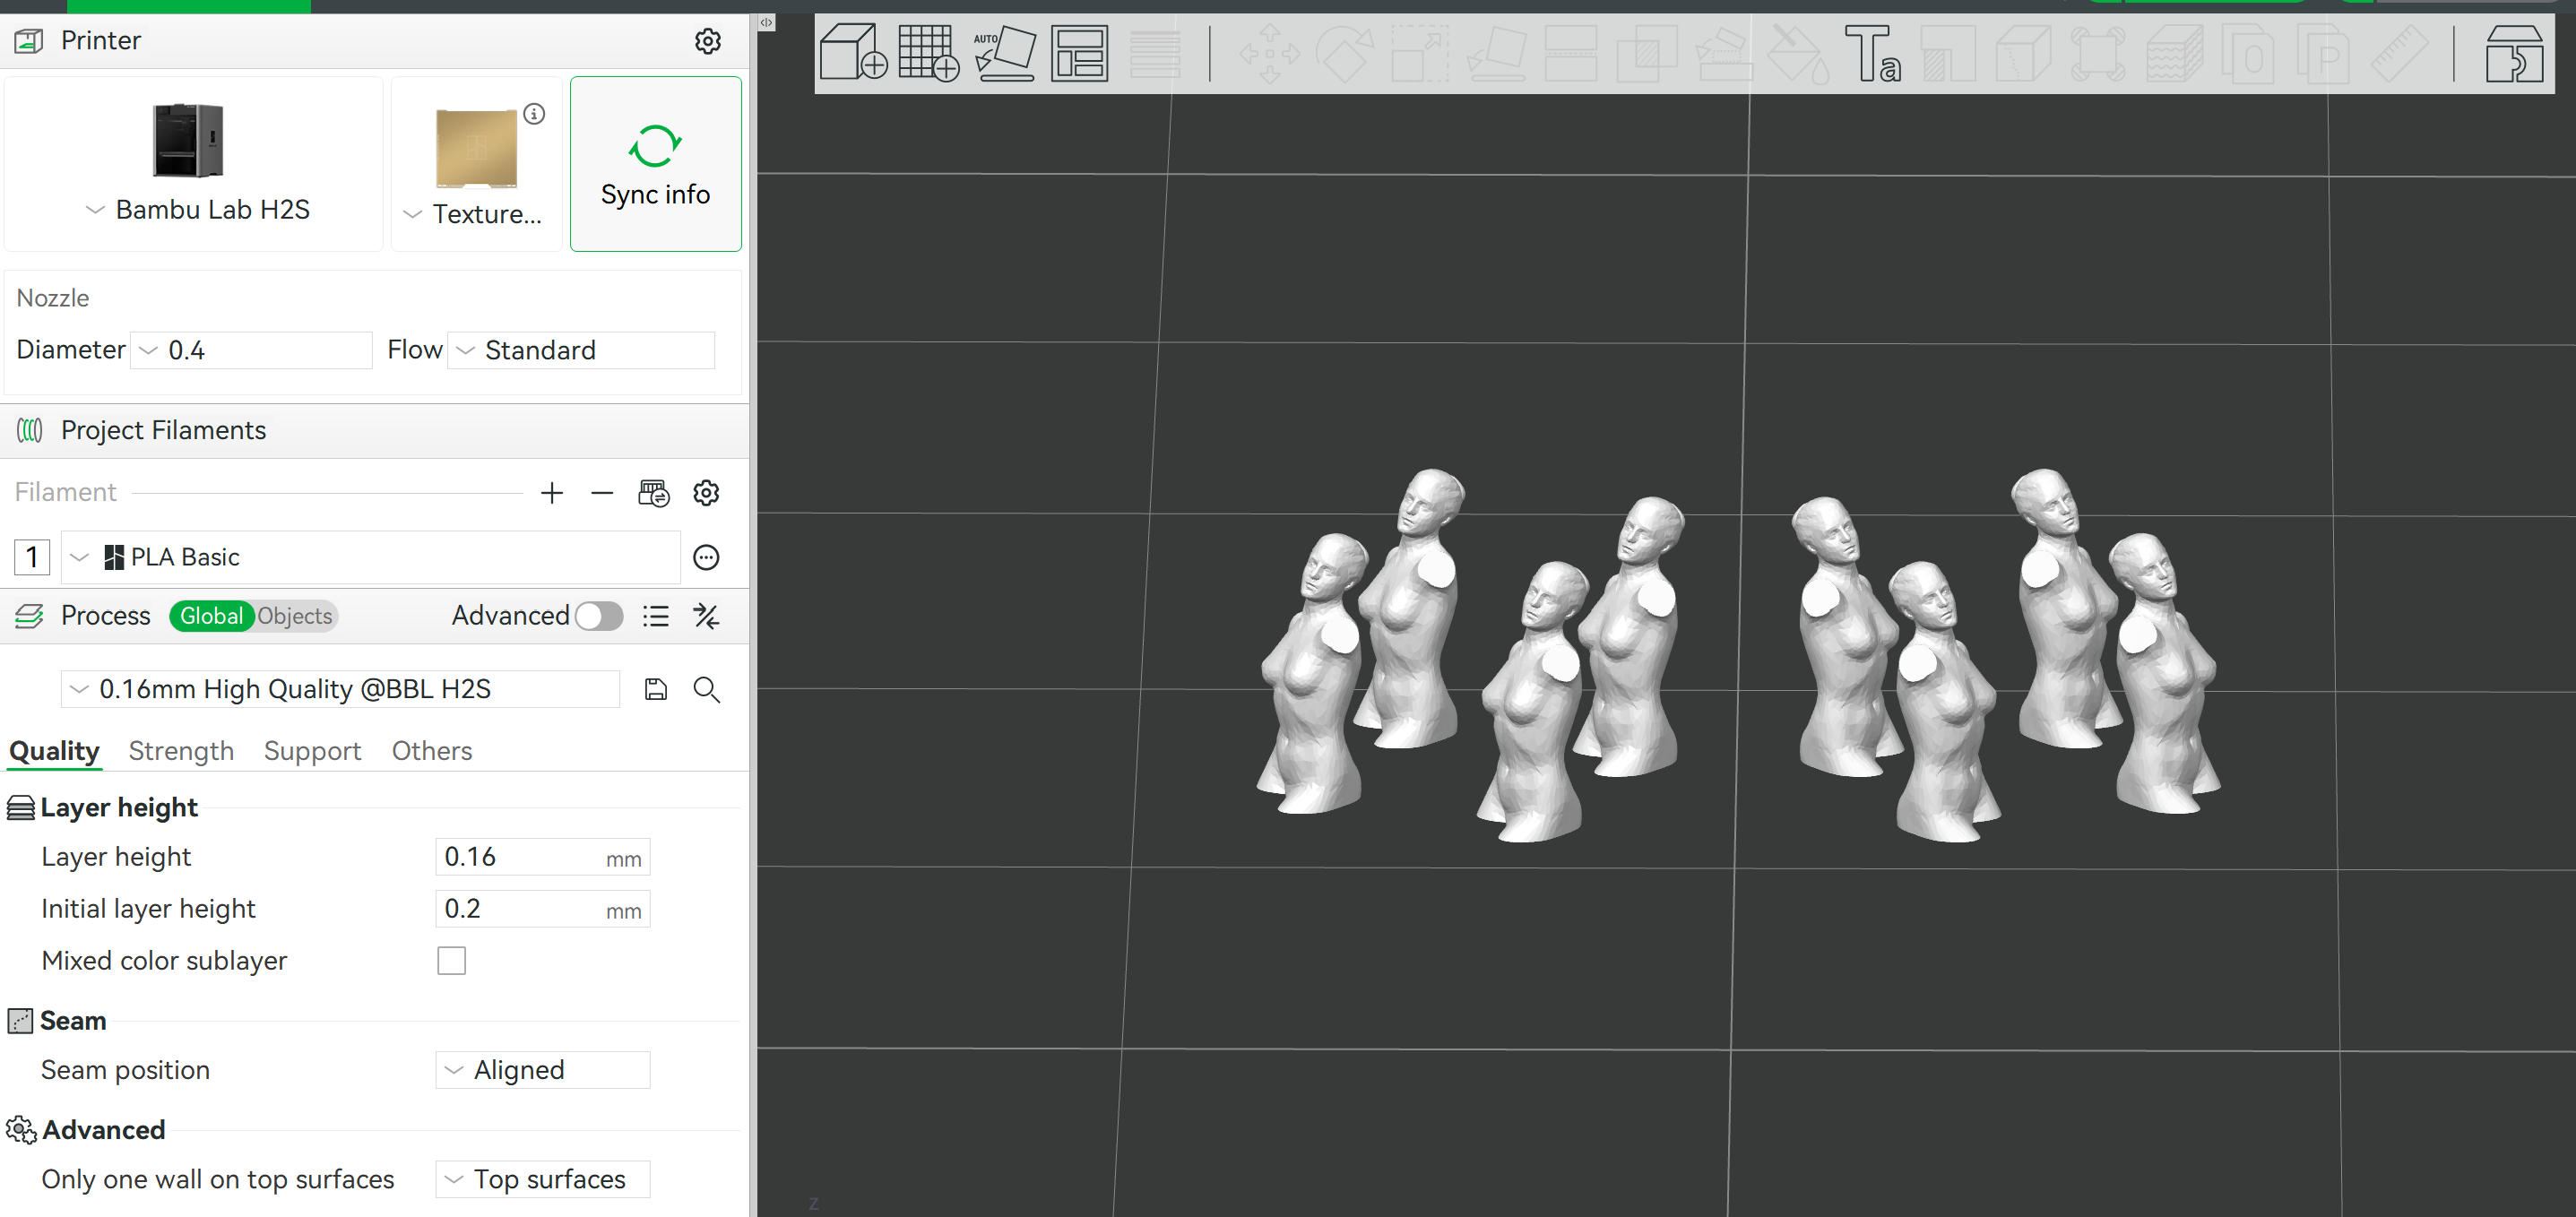
Asymmetrical Grid - Rita Manuelito/2026
Preparing my File for 3D Printting - BambuStudio
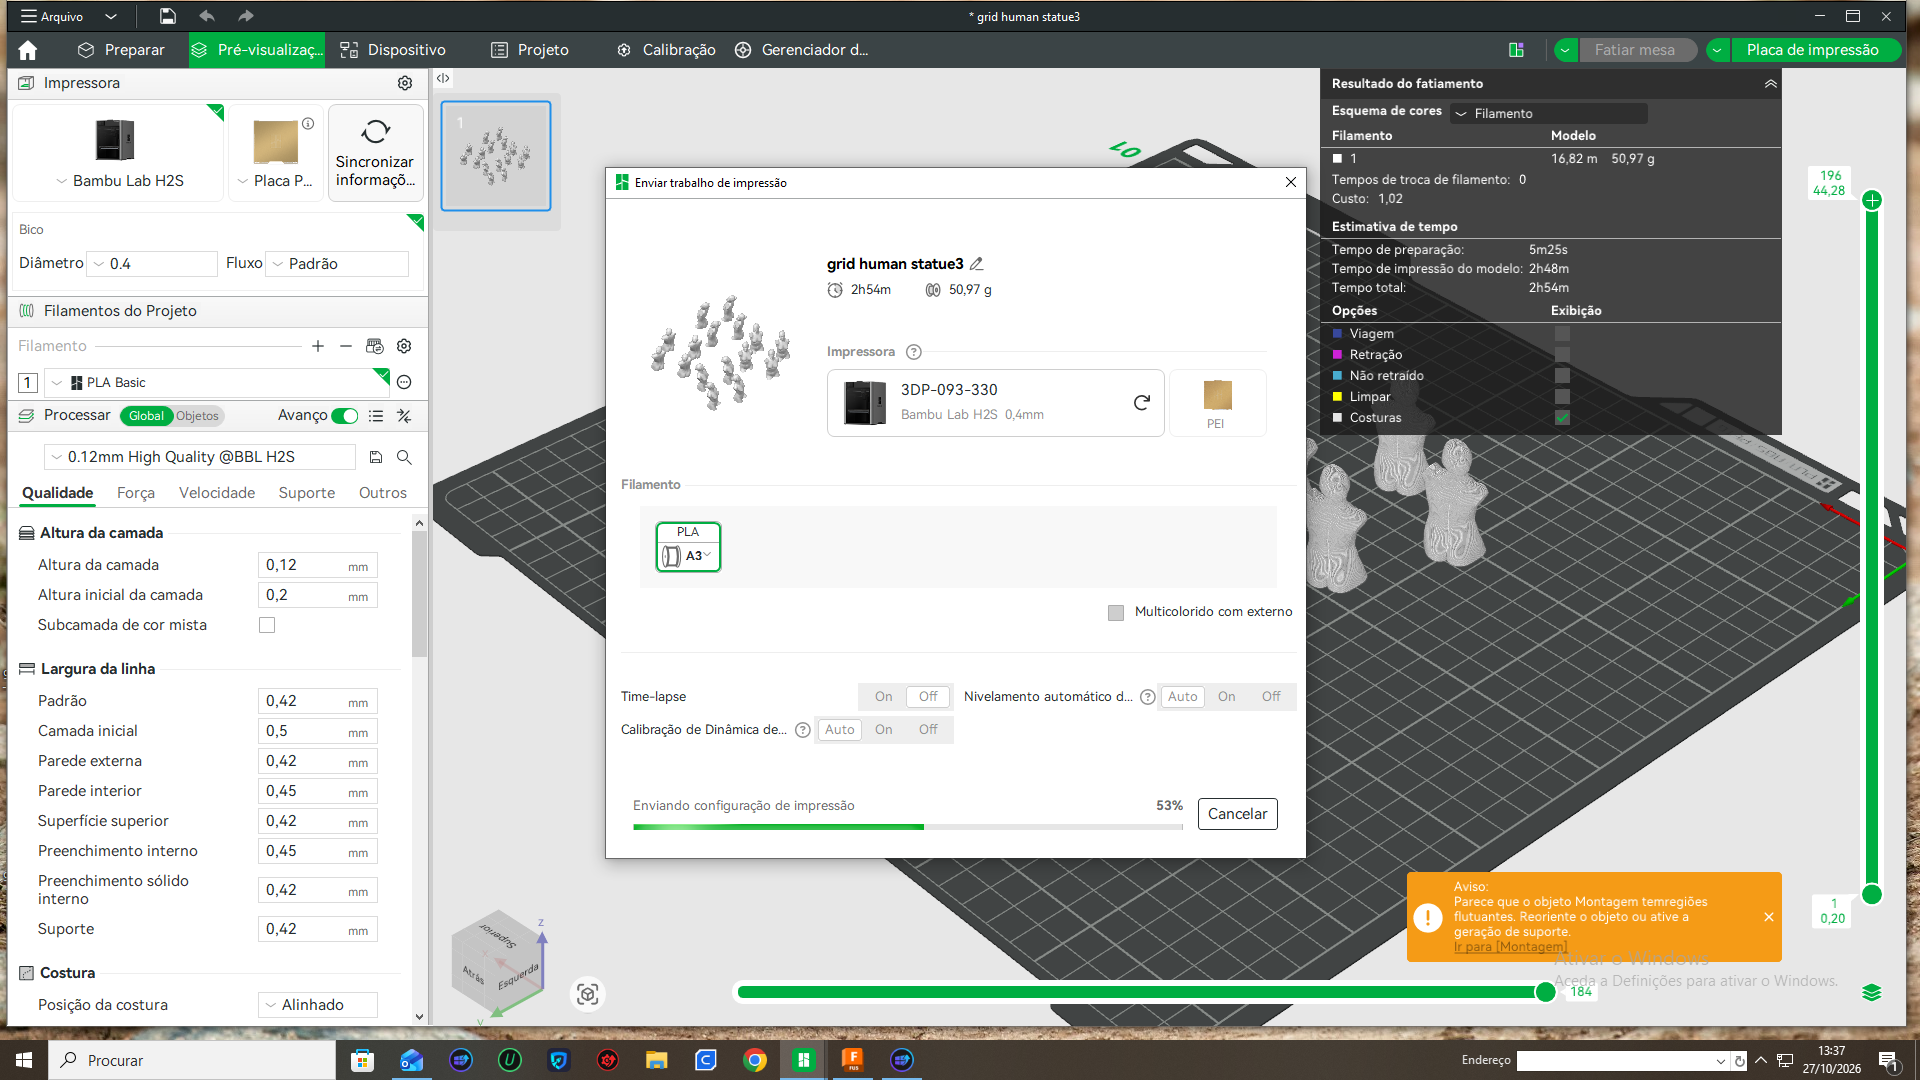
Preparing my file for the 3D Printer - Rita Manuelito/2026
3D Printting Process
First, I cut the fabric to size, ensuring that its surface area was slightly larger than the 3D printer's metal build plate.
I then ironed the fabric to make it as flat and wrinkle-free as possible.
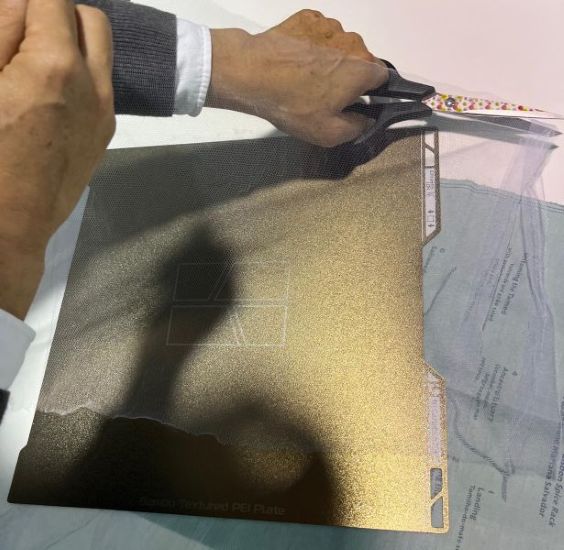
Preparing my Fabric - Rita Manuelito/2026
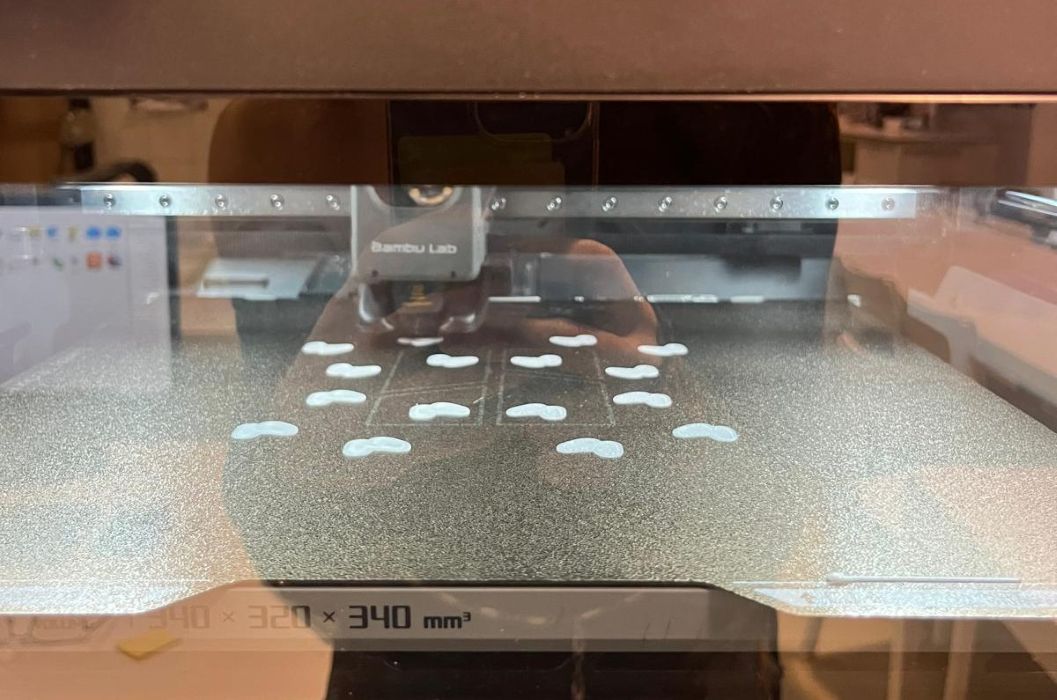
Printing Process - Rita Manuelito/2026
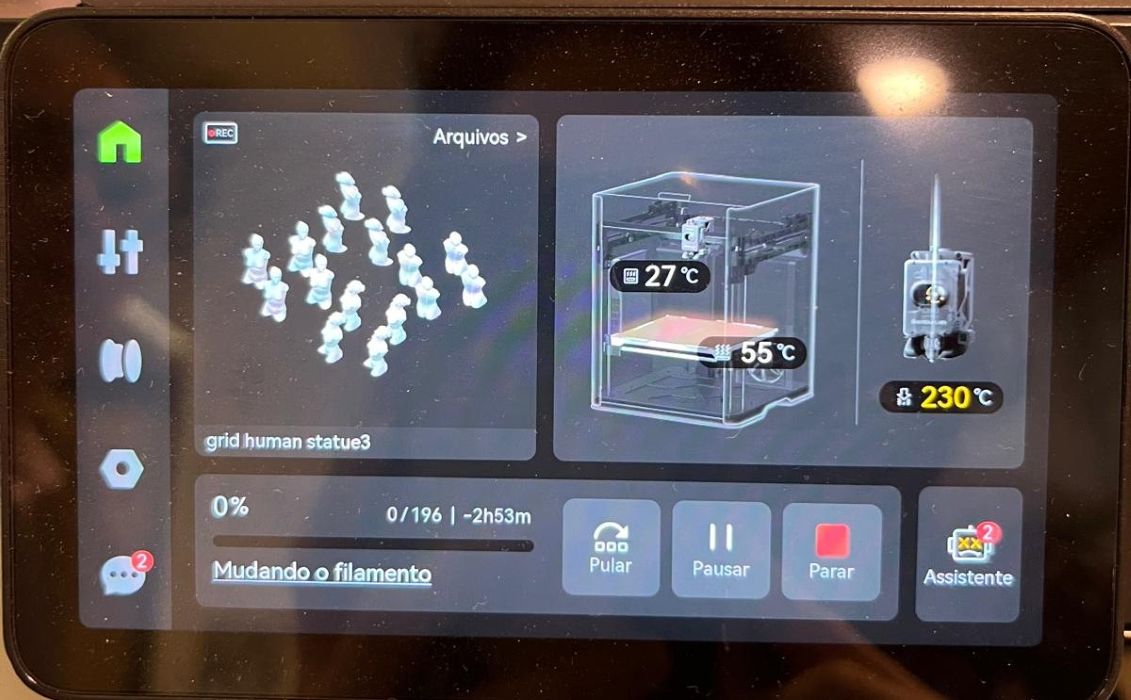
Printing Process - Rita Manuelito/2026
The printing process had to begin directly on the 3D printer's metal build plate, without any fabric in place. After the first two layers had been printed, we carefully positioned the tulle fabric over the build plate and continued the printing process.
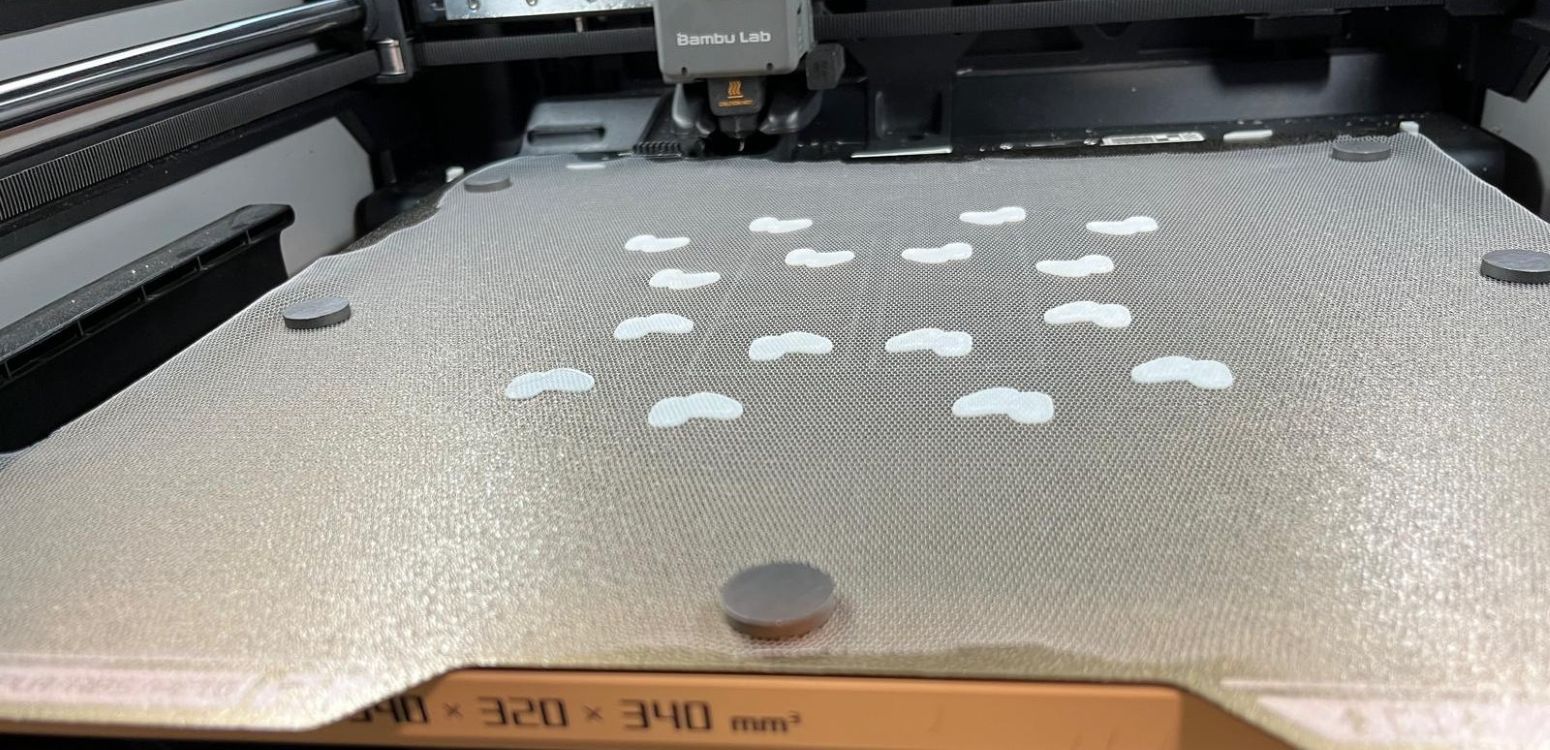
Printting Process - Rita Manuelito/2026
Final Result
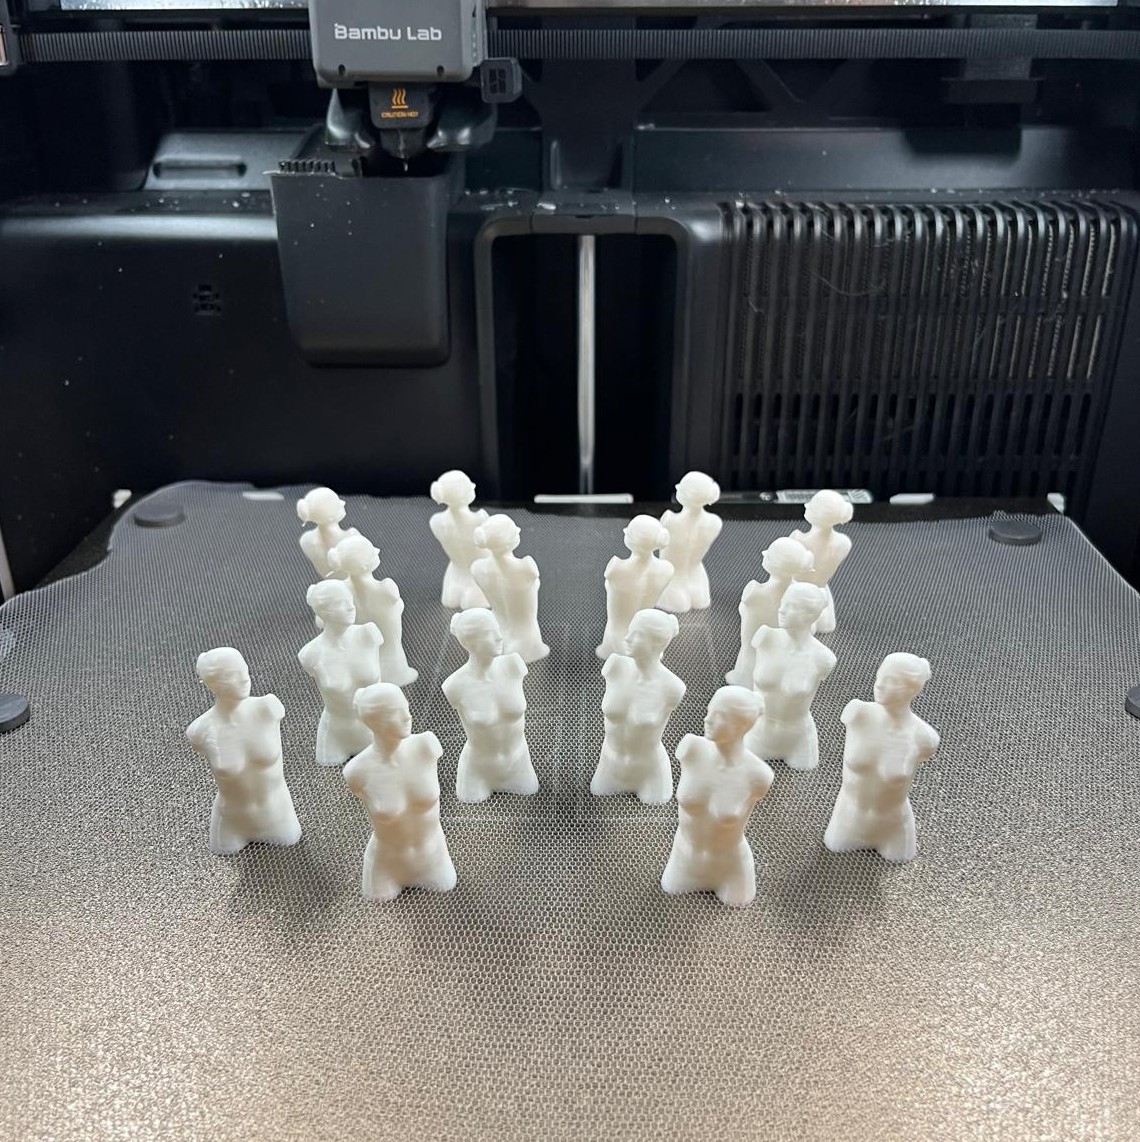
Final Result - Rita Manuelito/2026
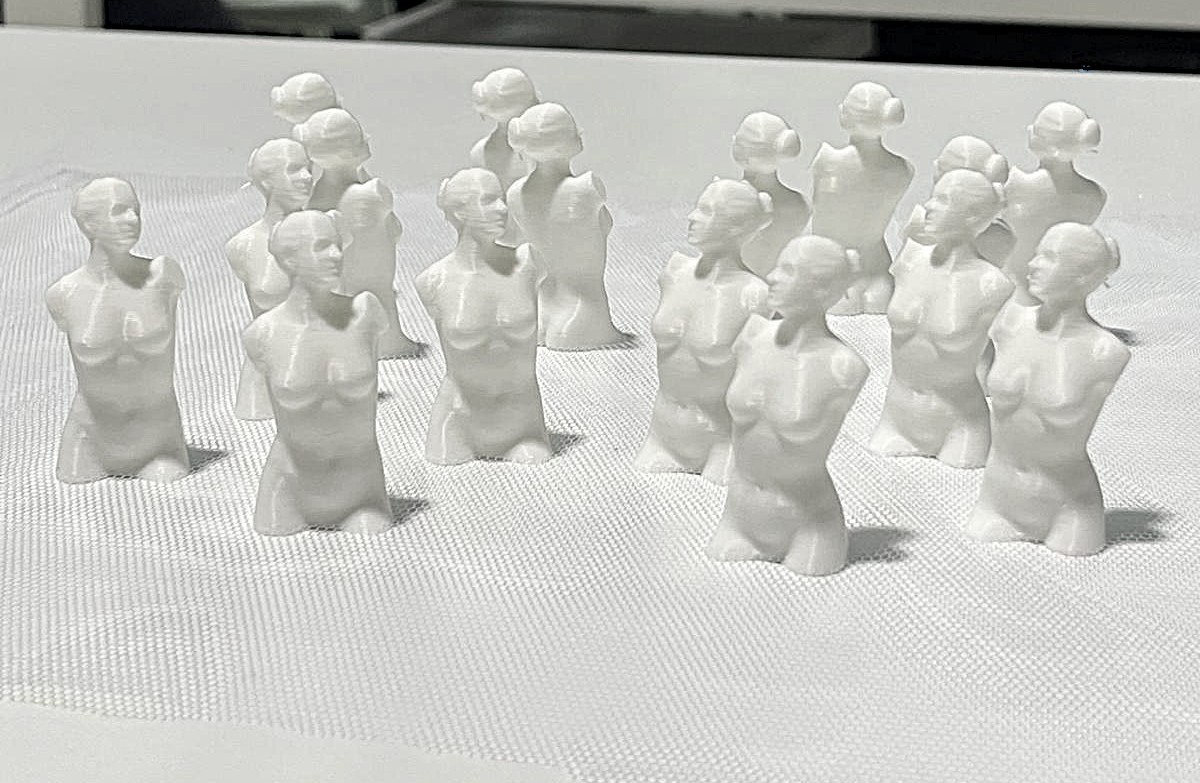
Final Result - Rita Manuelito/2026
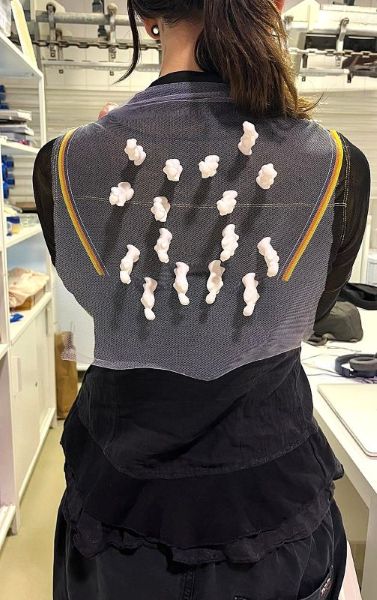
Final Result - Rita Manuelito/2026
Materials used in the 3D Printing Process:
❥ PLA filament material
❥ Tulle Fabric
❥ Meseurements:
* Upload the photos & files on [oscircularfashion](https://oscircularfashion.com)
- Include measurements or a reference object to give a sense of scale
Weekly reflection & critical thinking
- What did I learn? What did I personally find interesting or surprised me?
- What would I do differently? If something "failed" do I know how else to tackle it now?"
- How does this connect to my final project or my learning trajectory?
- What are implications and possible applications, think also from the ethical or environmental aspect, how it could connect to your practice and project?
References
threeASFOUR Collective
https://threeasfour.com/pages/about-threeasfour
Fabrication files
-
File: BambuStudioFile ↩
-
File: Grasshopper definition.. ↩
-
Reference: Author; Title; Source; year ↩