6. Textile as Scaffold#
introduction#
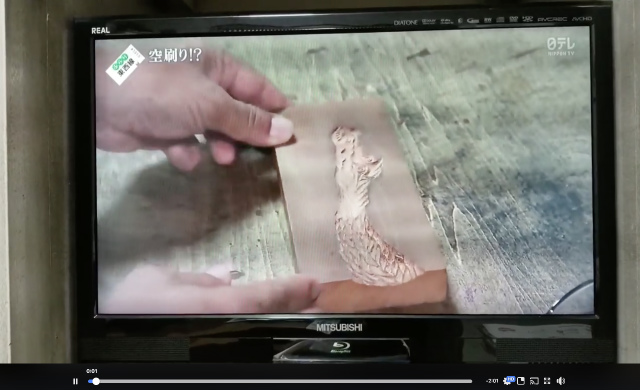
空摺(karazuri) is a traditional printing technique, which literally means “empty printing.” It also goes by name “Gauffrage” in French, “Embossing” in English. Since I saw this video, I wanted to try it in Fabricademy.
Sadly, it doesn’t meet requirements for an assignment because it isn’t composite and doesn’t need compression. I gave up the technique, but wanted to use 和紙(Washi, Japanese paper).
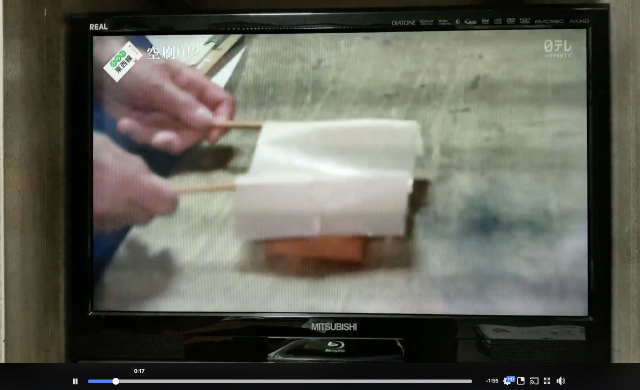
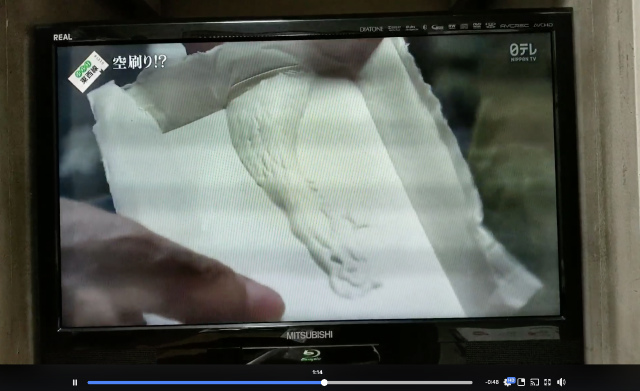
空摺(karazuri) technique’s explanations. First, curving wood as a mold.
Then, place a sheet of Washi after immersing it in the water.
Next, pushing a paper with brush along the mold.
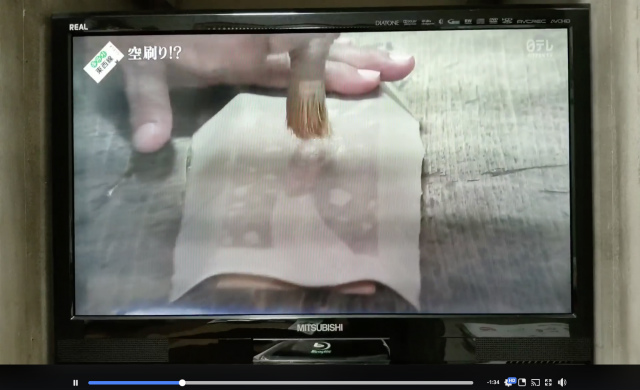
Drying with a dryer.
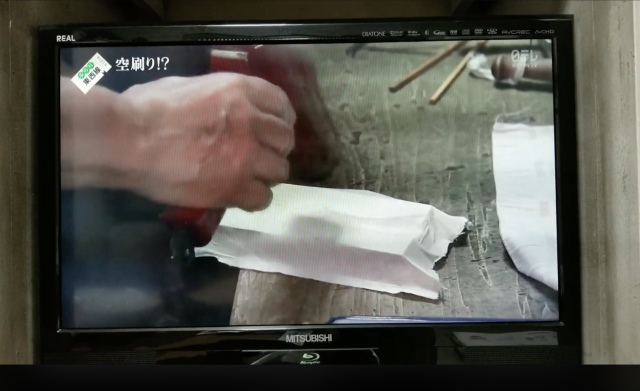
It can reproduce extremely intricate design.
composite#
3d modelling#
I wanted to design water ripple surface, but I can’t afford the time to learn Grasshopper from the scratch.
This is what I wanted to make.
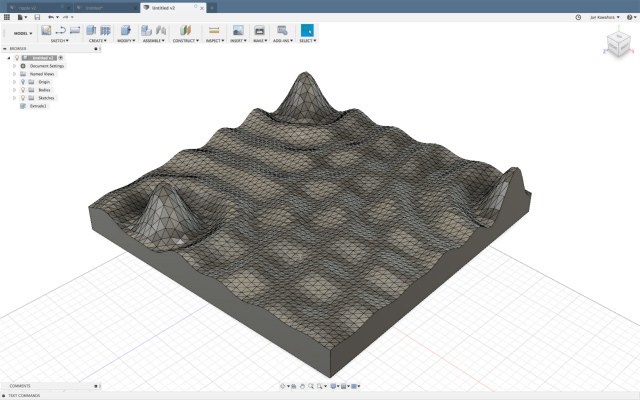
This is the reality. I designed a kind of water surface by fusion 360.
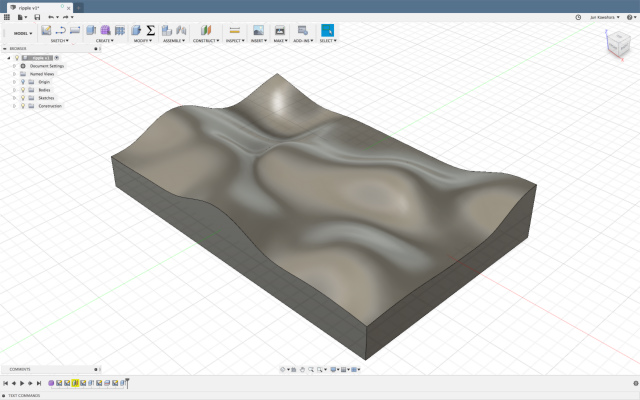
Here is how I designed the model. In Sculpt mode, I drew a plane with some length and width faces.

Edit surface.
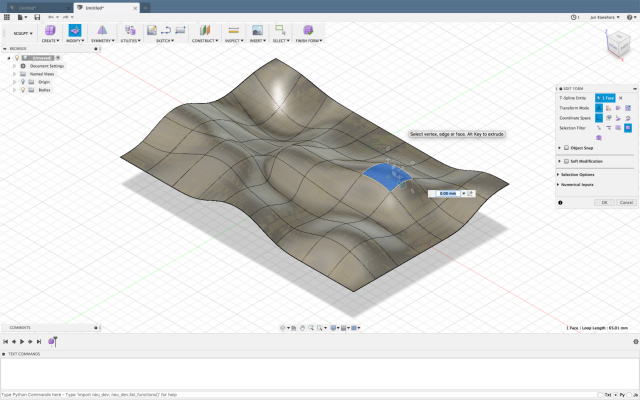
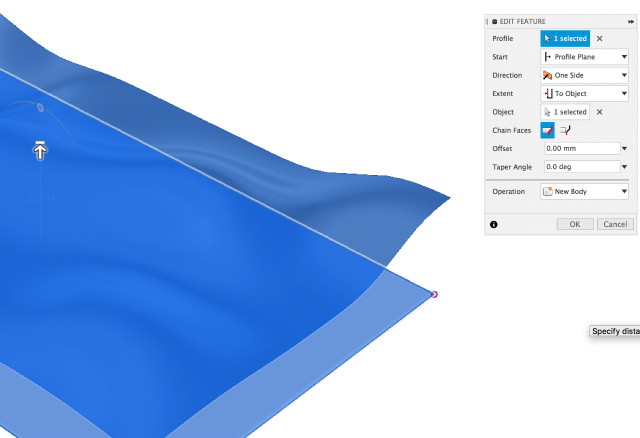
Draw a rectangle on the offset plane and extrude it to a object(wave surface). I exported the model as STL for milling.
milling#
I milled styrofoam with using SRM-20. I Started MODERA Player and open a STL file.
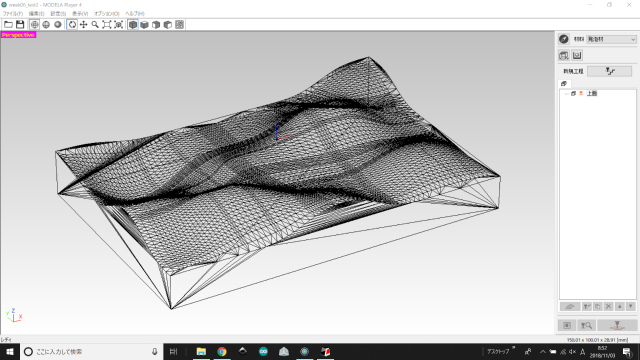
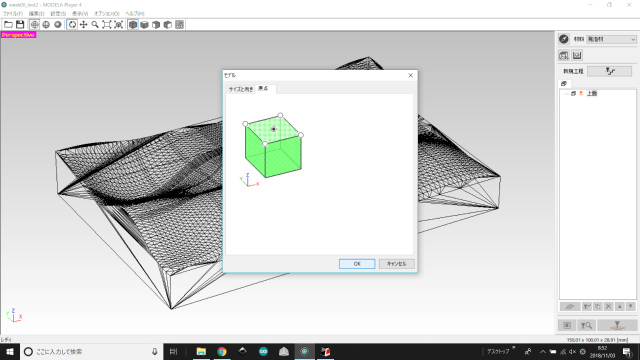
Set the origin point of a model and orientation.
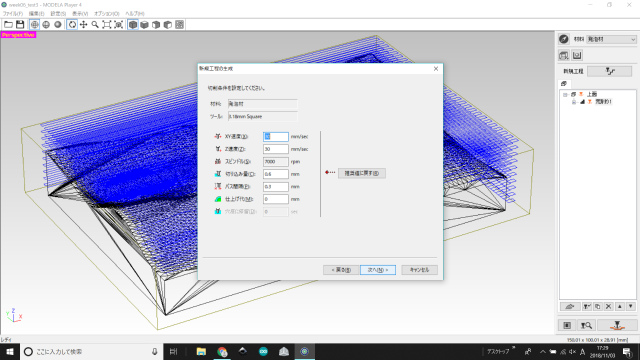
Choose the type of tool path to create. Select [Roughing], then click [Next].
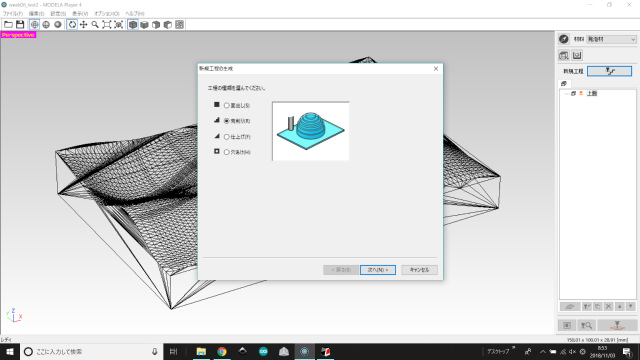
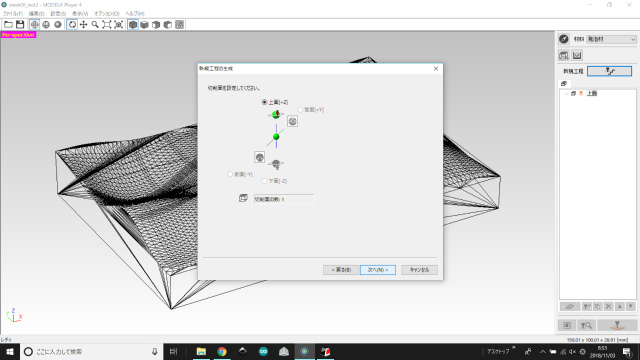
Select the cutting surface. Select the [Top[+Z]], then [Next].
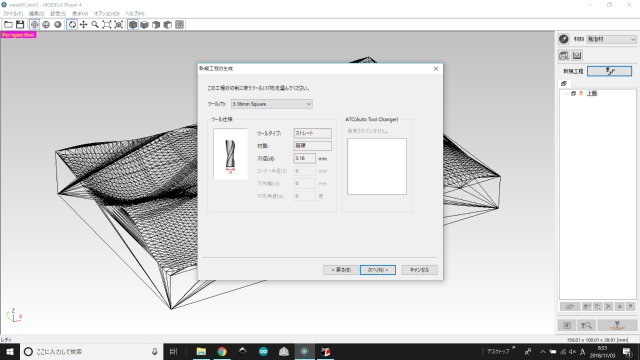
Choose the tool (blade) to use for the cutting in this process. Select [3.18 mm Square] and click [Next].
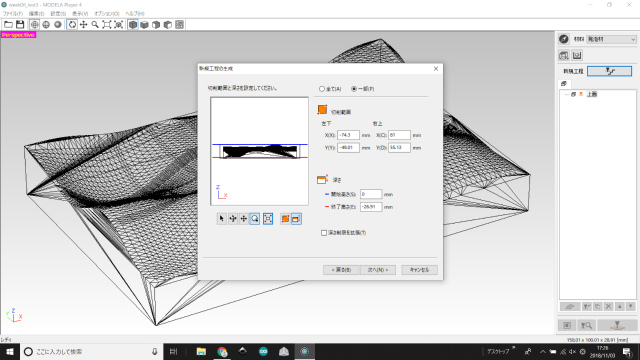
Set the cutting are and depth. Select the cutting area /[Partial] and [End Height] / [-10 mm].
Choose the type of tool path to create / [Contour][Up Cut] and click [Next]
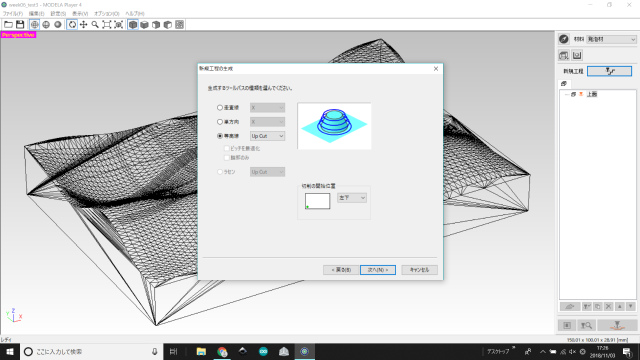
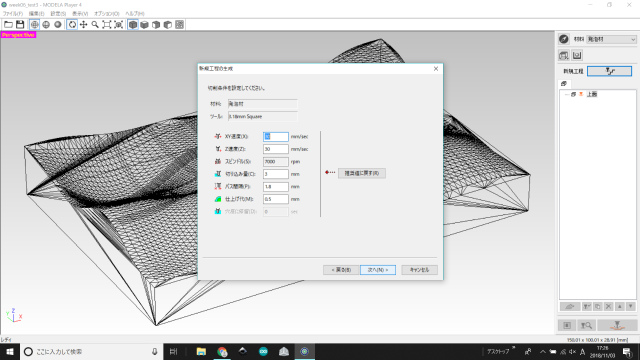
Cutting parameters. I used default values.
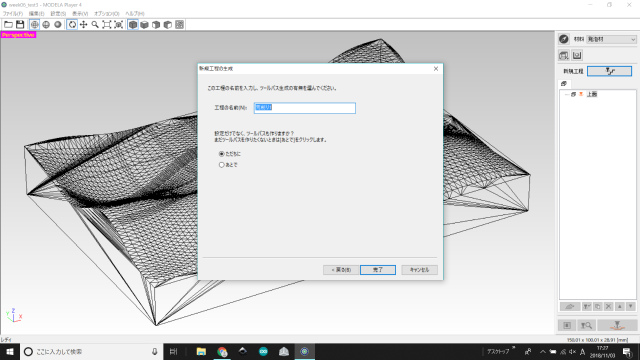
Enter a name for this process and create the tool path : [Right Now] and [Finish]
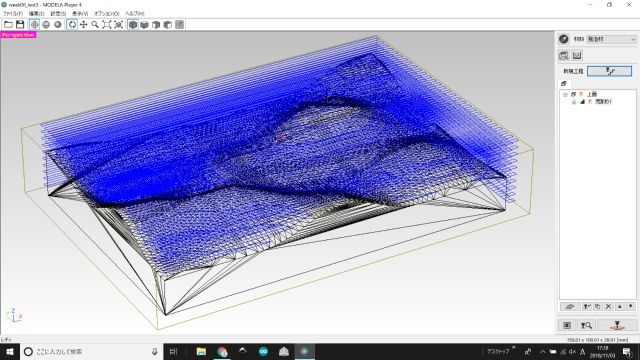
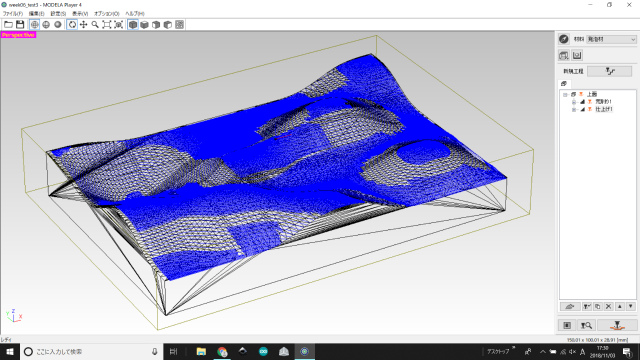
Here is a toolpath for a roughing cut.
Click [New Process], then select [Finishing]

Cutting parameters. I used default values.
Enter a name for this process and create the tool path : [Right Now] and [Finish]. Here is a toolpath for a smoothing cut.
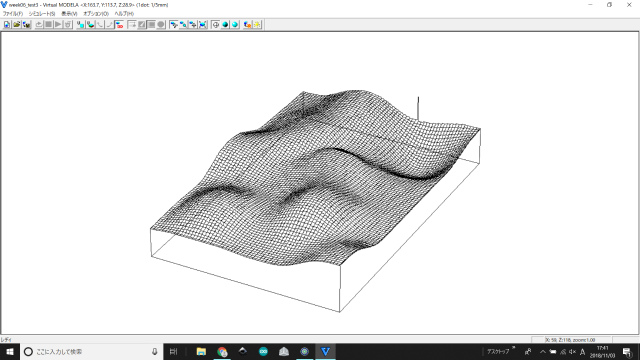
This is supposed to be the milled result.
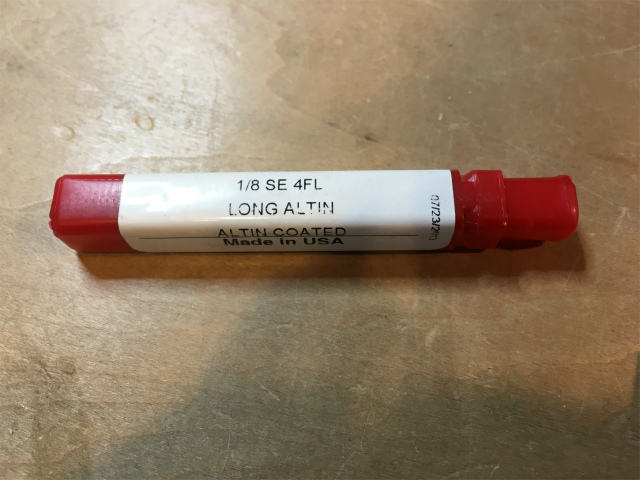
I used 1/8 inch (3.18 mm) long AlTiN drill bit.
Set the origin point of a model.
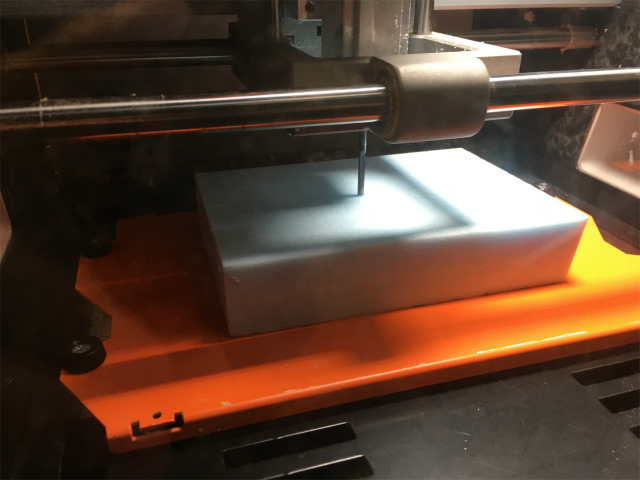
Start milling.
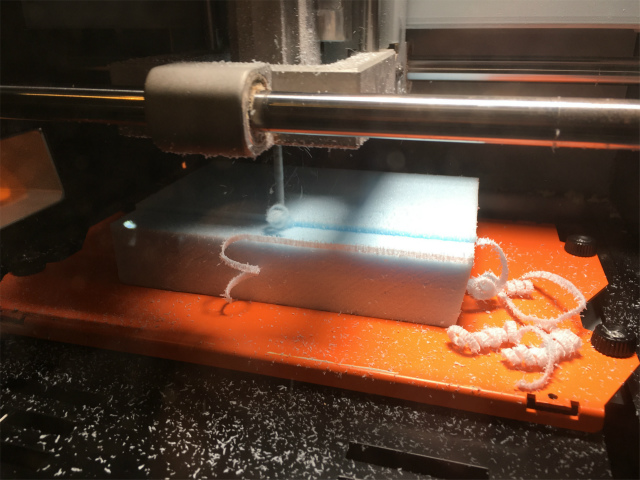
Done with a roughing cut.
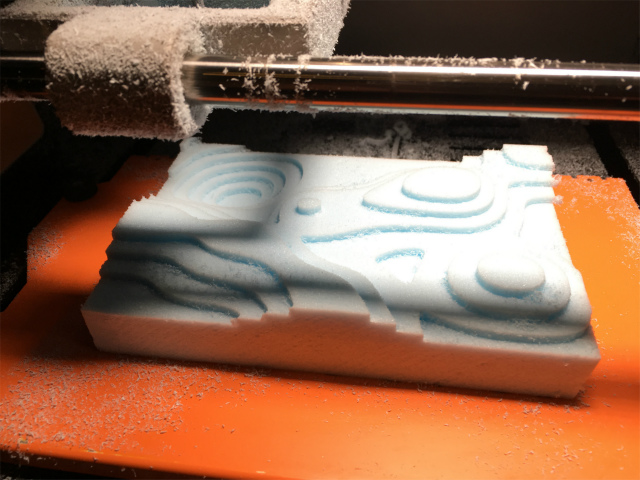
Done with a smoothing cut.

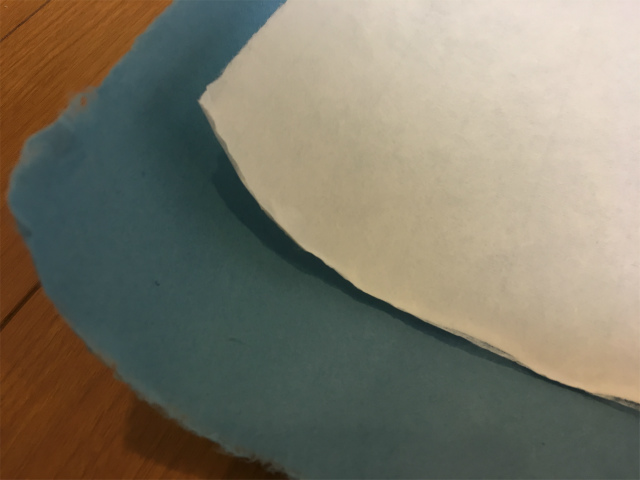
Washi paper#
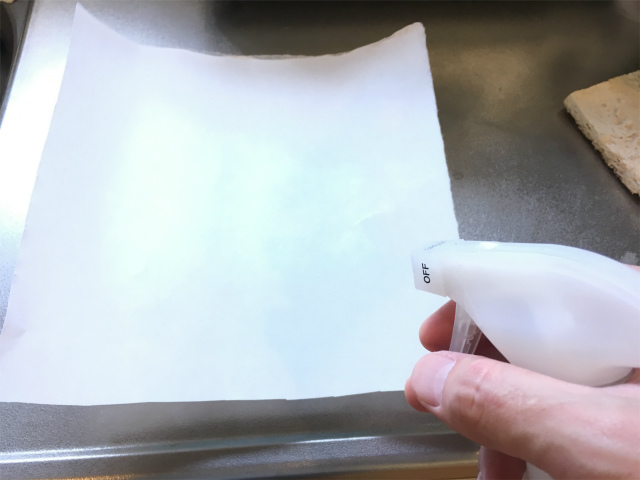
I soaked a sheet of paper with water.
I put it on and push it along a mold.
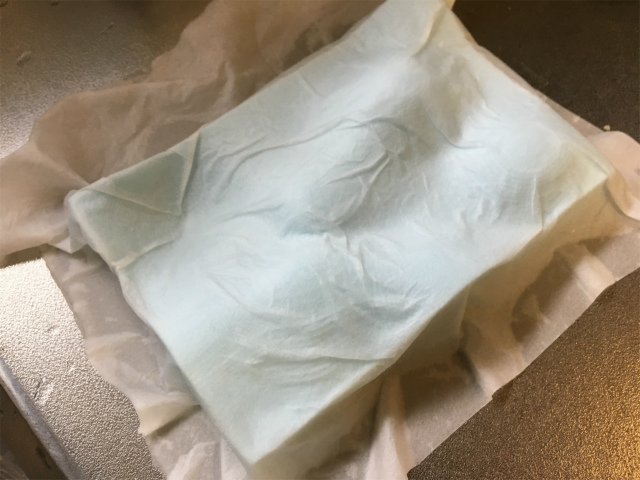
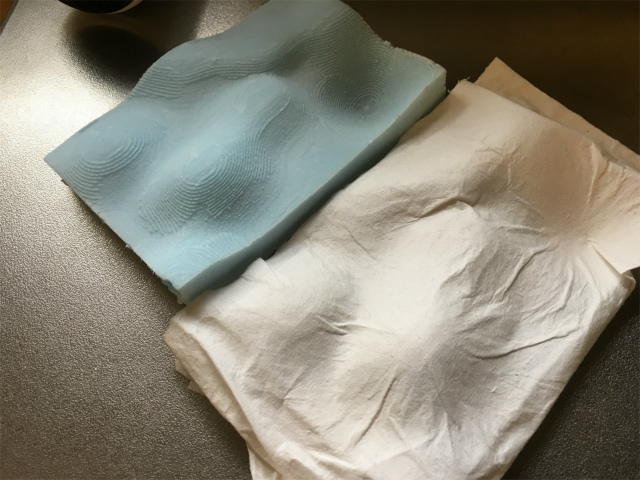
After drying, this is what I got. It was difficult to leave a paper along a mold, maybe because paper was a rigid even after being soaked and the curvature of a mold was high.
paper + epoxy resin#
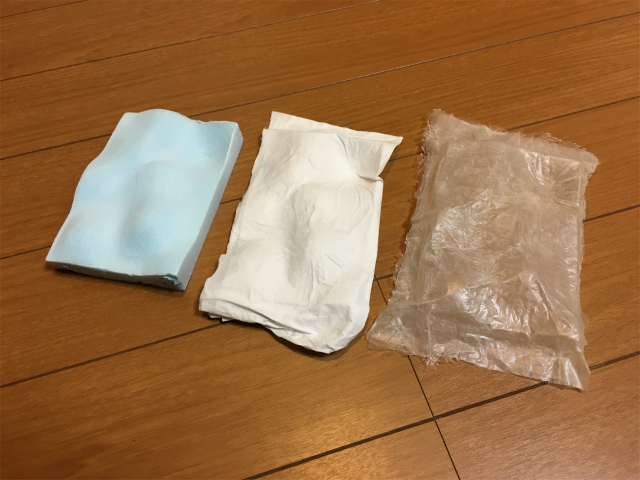
I tested a plastic vacuum bag for compression. It was not flexible enough to get along with a mold.
Anyway, I soaked a sheet of paper with an epoxy resin. I used two-part epoxy resin, GM-6600.
I don’t want a mold to be messed with a resin. I wrapped it with a usual plastic bag.
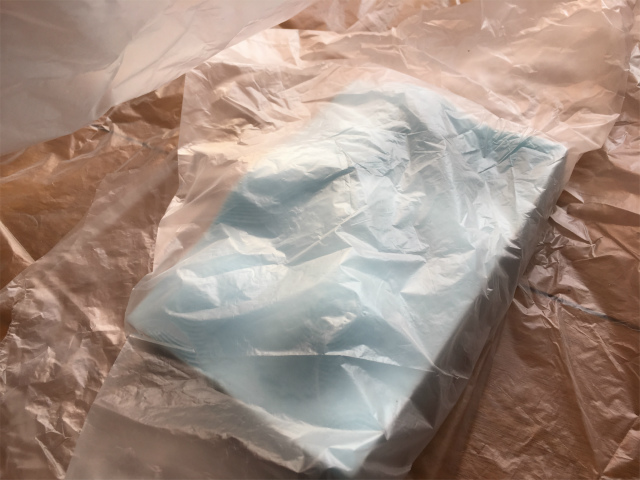
I put a resin-soaked paper on it.
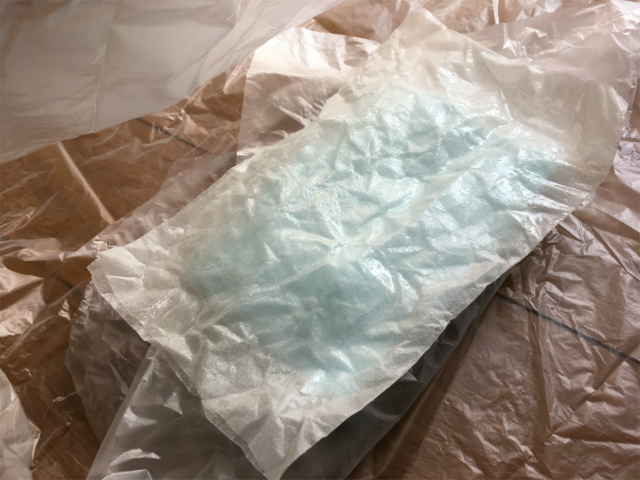
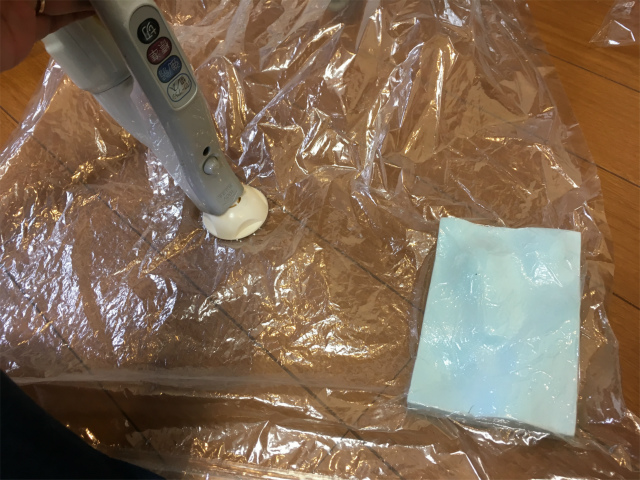
I put it in the plastic vacuum bag for compression and sucked the air with a vacuum cleaner.
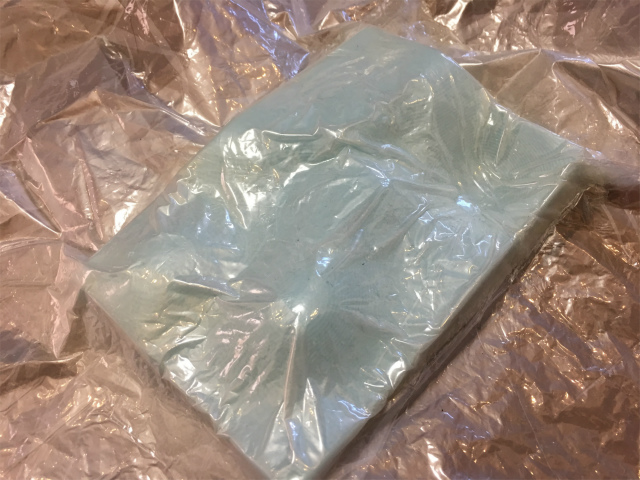
I put a water bag on it to add pressure.
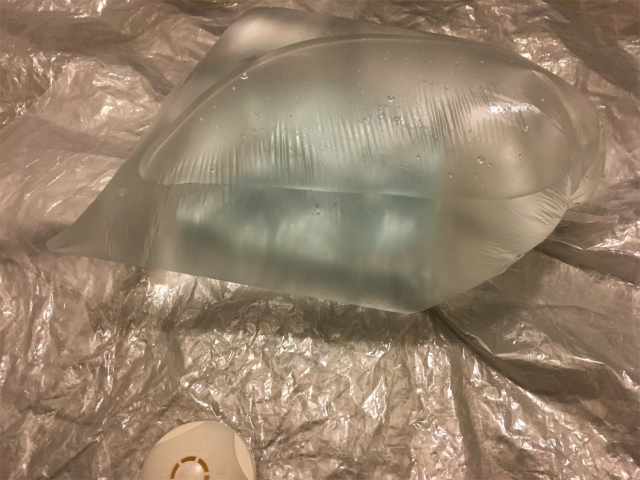
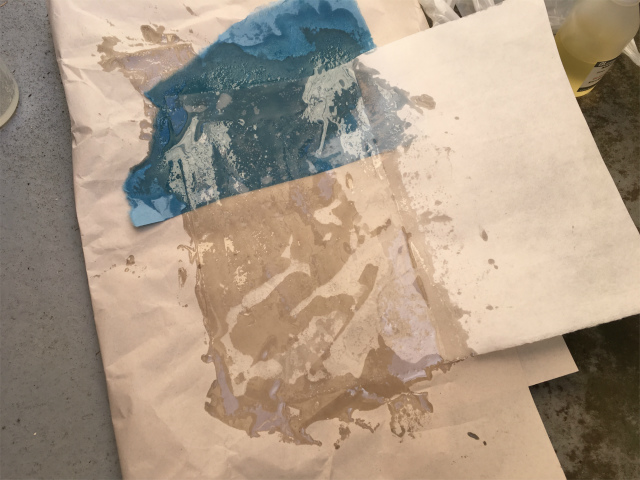
Here is what I got. I think a refractive index of paper(cellulose) and an epoxy resin is close, so the composite is relatively transparent.
crystallization#
I used sodium chloride(NaCl) salt for crystallization. I made a saturated solution by pouring NaCl to boiling water until the salt will not dissolve clearly. I used boiling water because I thought that the solubility of a salt will increase with temperature of water. I knew it later that the solubility of NaCl was relatively insensitive to temperature as solubility curve shown below. I didn’t have to use boiling water.
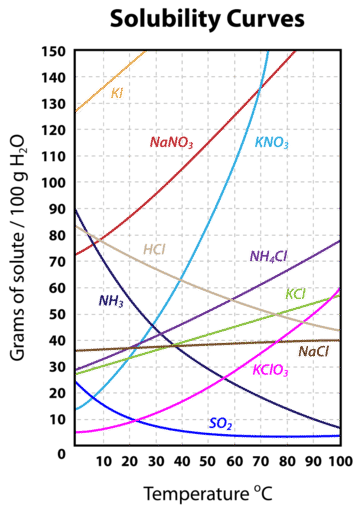
(image source: The LibreTexts libraries)
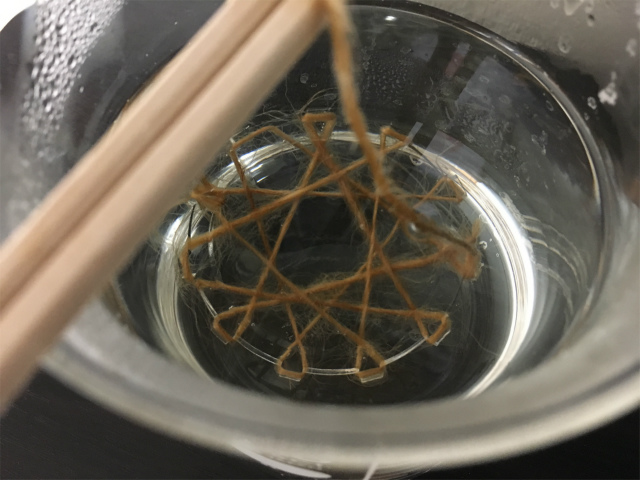
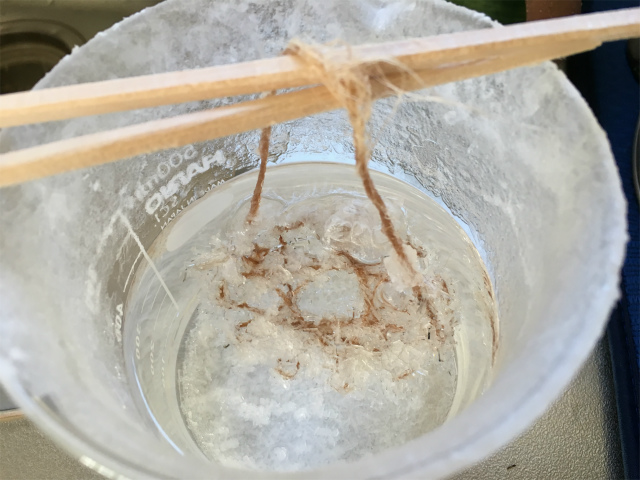
solution and put a few fibers in it to see if how crystals grow. Most crystals are at the bottom of a beaker and a little on a wool. There is little crystals on polypropylene fiber. Is it because they are all hydrophobic fibers?
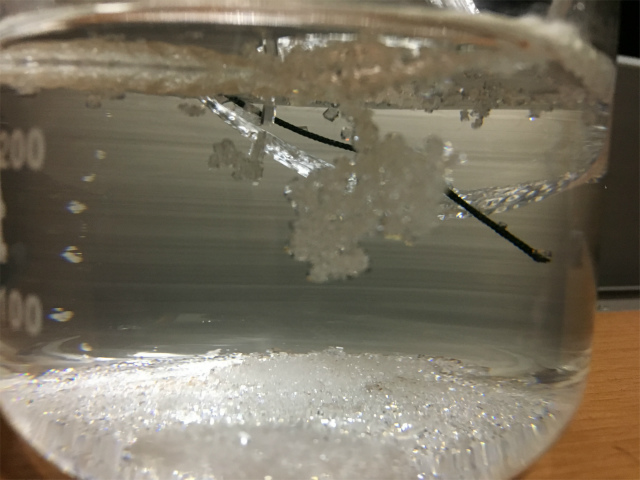
I tried again with more hydrophilic material, hemp fiber. Let me see how it goes.
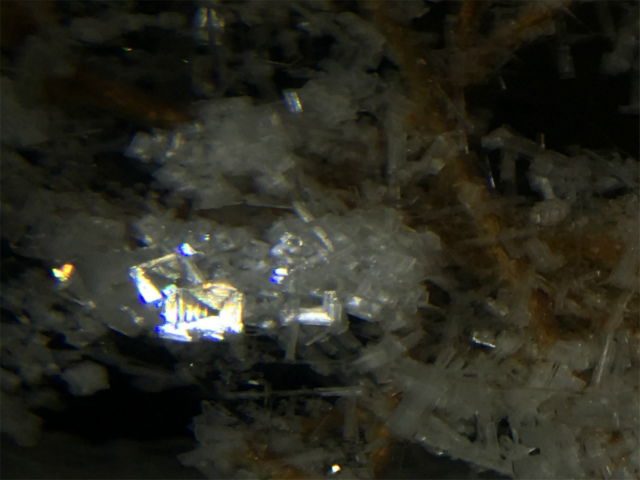
Most crystals were needle-like or small cubic structure.

On some parts, square and wedge shaped csyrtals were grown. It was beautiful.
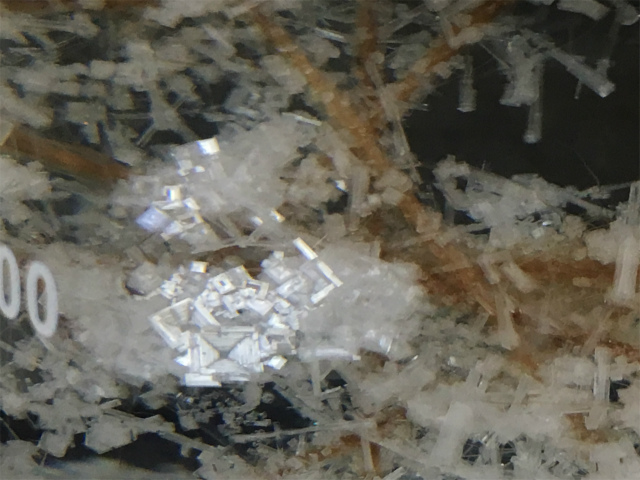
The crystal looked like colored depending on from where I look at it. Is this a structural color, which selectively reflects the light?
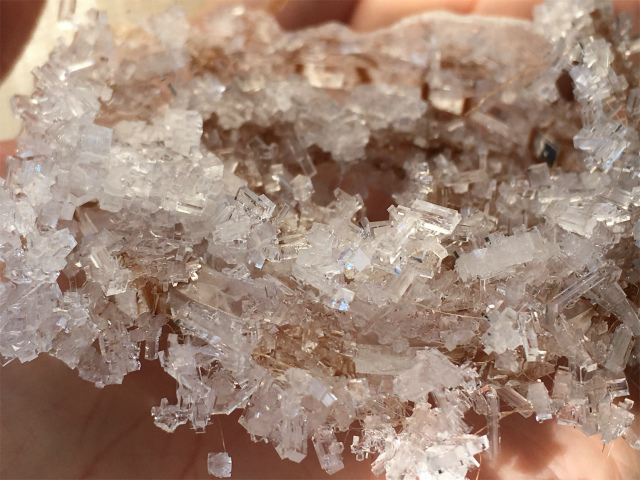
I left the salt solution for days. Water evaporated a lot and crystals grew on glass beaker.
I thought a big crystal would glow on a thread, but the reality was innumerable, itty bitty crystals everywhere.
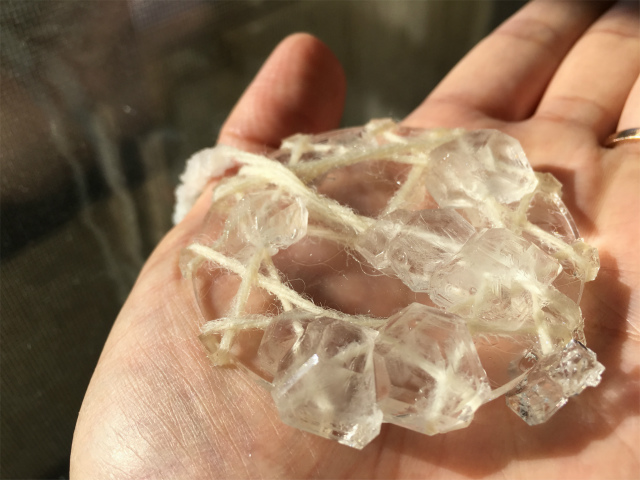
I also tried crystallization from alum solution. The way of making a saturated solution is the same as NaCl. This was much bigger and better.
files#
reference#
- 16.4: How Temperature Influences Solubility - The LibreTexts libraries