WEEK 7: COMPUTATIONL COURTURE#
WEEK 7: COMPUTATIONAL COURTURE
INSPIRATION + CONCEPT
This week’s assignment is to explore the techniques of computational design and create garments or accessories out of digital fabrication. This is a perfect oporotunity for me to explore 3D printing on garments, specifically to turn 2D fabrics into 3D structures. Following my curiosity I stumbledd upon the worked Gabe Fields , who worked on an exploratory project to create self-forming structures by 3D printing on stretched fabric during his internship witeh Nervous Systmems. From Gabe I then found my way to MIT’s Self Assembly Lab’s “Active Shoes” which is a project that explores creating a shoe through 3d printing on stretched fabric. Very inspiring work. My goal is to combine these two concepts and potnetialy create shoes that are completely void of any seams.
PROCESS
Fabric SetUp
The first step is selecting and preping the fabric to be printed on. From the articles mentioned above the best fabrics to print on are knitted textiles. The reason is because the knitted structure gives them great elasticy and when strethced the settings for the plastic to bond is high. Stretching the fabric is simple and depends on the 3D printer you decide to use. We decided to use the MakerBot Replicator Gen5 for our experiments. To secure the stretch fabric to the print bed we used nylon spring clamps.
FABRIC SELECTION: LYCRA | NEOPRENE | STRETCHY

Computaional Method
Before we can print we have to first deisgn the printed in a CAD software, for this our software choice is SolidWorks. When designing we our print we first thought in 2D and tried to visualize how the fabric will transform to 3D. This quote from Gabe’s website helps with this concept:
To get from a process that flattens a shape to one that induces a shape on a flat surface, the way shrinkage is represented has to change. The areas that experienced the most shrinkage in the flattening process should experience the least shrinkage when the fabric contracts after printing, and the regions that experienced little to no shrinkage in the flattening process should contract as much as possible in the fabric representation.
This makes the CAD creating process fairly straight foward. Since our designs will mainly be in 2D, the minimum tools we have to use in SolidWorks is “sketch” and “line”. The first print we created was a sample print to test out the printing parameters of the printer and fabrics. For the test we created a 3X3 array of different sized hexagons ranging from 8mm to .5mm diameters.

Fabrication
With the fabric set up the print design ready, we started the printing process with a 0.3mm thick layer ontop of the fabric. We did this we with the three fabrics we selected above which are lycra, neoprene and stretchy knit.
Results


Neoprene: Didnt no work well. Bond between plastic and neoprene very weak
Lycra: Pretty good the plastic bonds well with Lyrca but if the fabric snaps back to quickly or is stretched good chances of plastic separating
Knitted Cotton: Best bonding. Bond is sturdy and shapes come out well defined
Printer Settings
PLA @ Default Settings
No Support or Building Material
Layer Thickness 0.3mm
QUICK NOTES:
THE THINNEST LINE THE MAKERBOT CAN MAKE IS 2MM. ANYTHING SMALL WILL NOT BE PRINTED
LAYER THICKNESS PLAYS A HUGE ROLE IN HOW THE FABRIC TRANSFORMS WHEN RELAXED. THE THICKER THE LESS DEFORMATION
FURTHER EXPLORATION
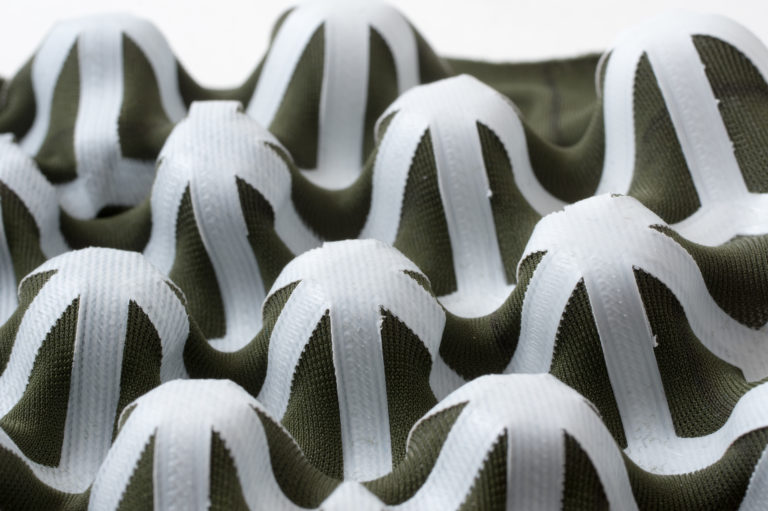
SHAPE EXPLORATION
We wanted to explore creating different 3D shapes with the fabric. We explored with various designs but this one had the prettiests results.


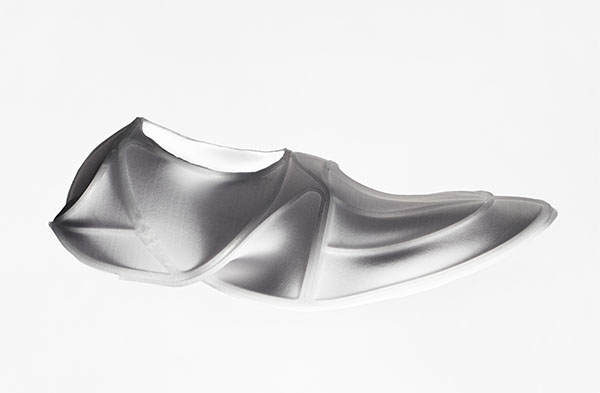
MIT’s ACTIVE SHOES
I was really impressed by MIT’s Active Shoes project and was curious to the design pattern. I did some googling and found the pattern used to create their shoe silhouette . I downloaded the file ,edited the file in Adobe , transferred it to Solidworks and then printed it onto the fabric. The shape came out really well.


MY OWN DESIGNS
These are some design idea I want to further explore

