4. Biochromes
Week 4. Color Magic.
 This week was charming: I absolutely loved playing with color and feeling like a chemist. I definetly would like to go deeper on this theme. I got to experiment with Natural Dyes and Inks and also could have a "meeting" with the famous Serratia bacteria. Unfortunatelly, I did not get to make the Pigment yet because I had not enough time to do everything by myself. Everything was so new!
Bellow I will go through the process made in each adventure.
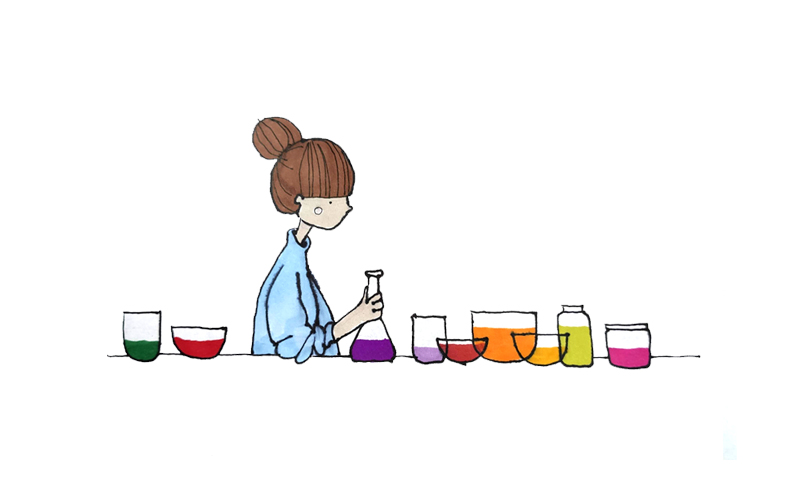
Olivia´s version of this week´s header :D
Adventure 1: Natural Dyes
When Biochrome week started, and right after Cecilia´s Lecture, the feeling was quite desperate: too many new things, too much stuff to buy, to little time!! Maite and I try to organize in order to buy things and split them in half so we could start working as soon as possible. We looked quite fast through the ingredients and materials, and went to buy/find all the necessary:
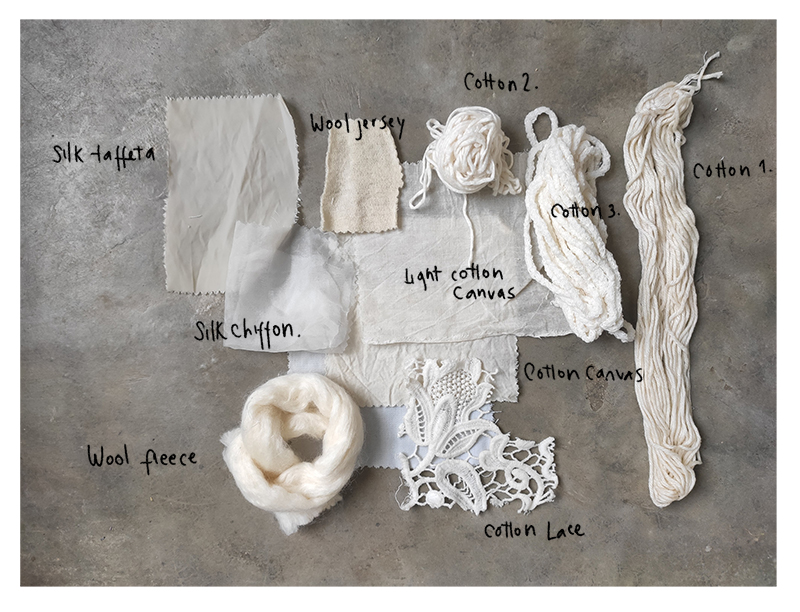
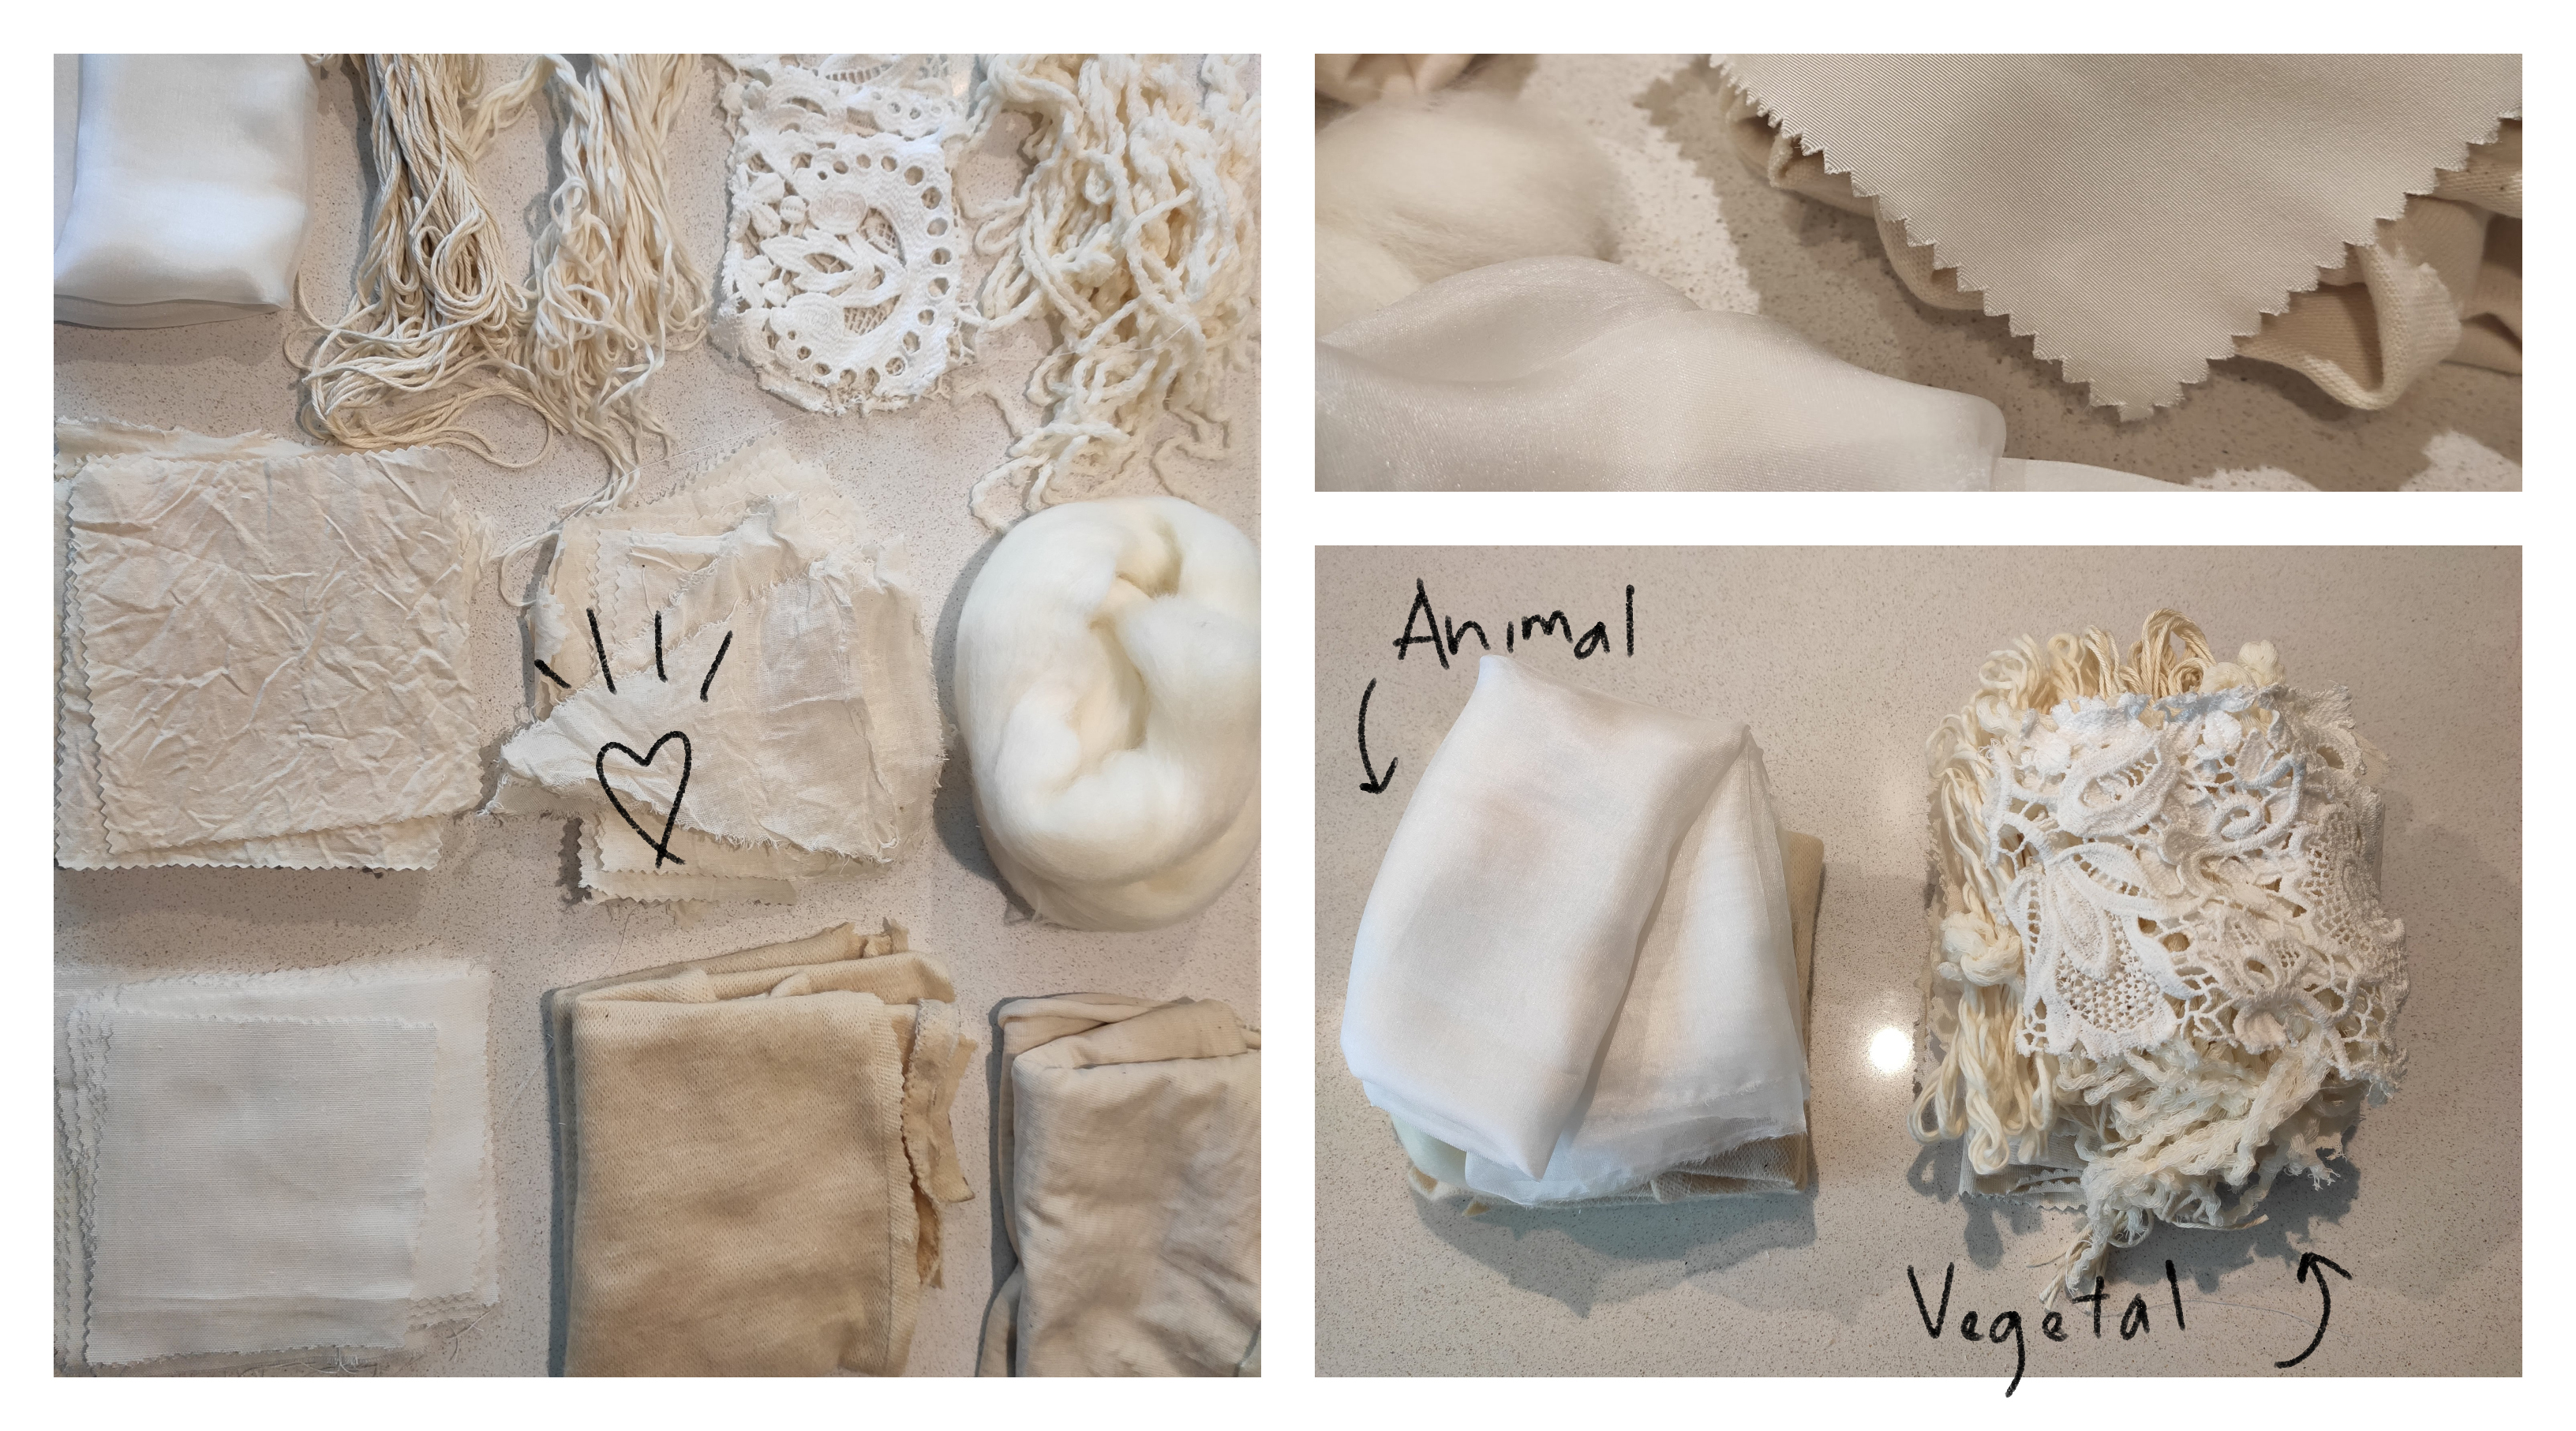
1.Fabrics and yarns:
-Wool felt
-Cotton canvas
-Cotton yarns
-Silk
-Linen
-Wool fabric
 2.Ingredients
-Ethanol
-Soda Carbonate
-Alum
-Various glass containers
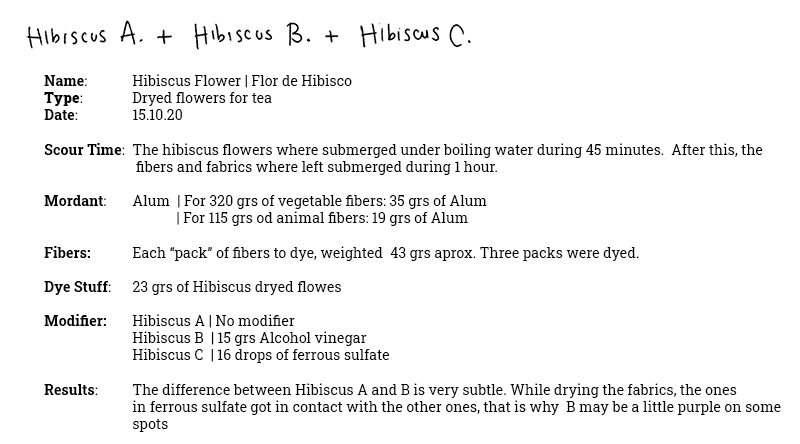
-Hibiscus Flower
-Avocado
-Palo Campeche
-Yerba Mate
The following day, and right after watching the tutorials, I realized that we had not bought some of the materials required. As I had already advanced in the process, I prefered to go on, and to document the process as I did it. Some of the missing products were "replaced" with some stuff I had at home, but some were not used:
3. Ingredients replaced/not used:
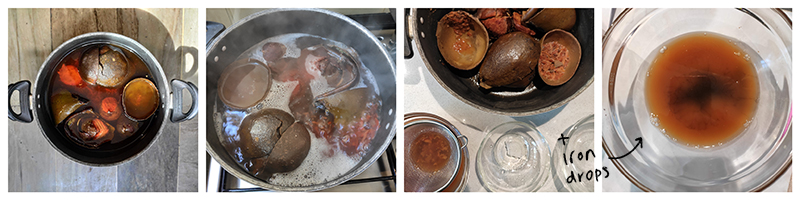
-Iron powder (I used Ferrous Sulfate, from my kids)
-Citric Acid (I tried with Vitamin C powder)
-Tartaric Acid (I did not used it because I did not have a possible substitute at home)
Buying the materials and Preparing the fabric
Scouring and Mordanting
 The first step, once I had all the materials, was to cut the fabrics in 10x10 squares and to cut the yarns in order to scour and mordant them.
Then, the scouring. It is an important step of the process, as it takes out all the chemical and/or dirt that the threads and fabrics may have in them. This will allow a better dyed fabric. I begun by weighting all the fabrics and yarns, classified by its origin: animal or vegetal.
The first step, once I had all the materials, was to cut the fabrics in 10x10 squares and to cut the yarns in order to scour and mordant them.
Then, the scouring. It is an important step of the process, as it takes out all the chemical and/or dirt that the threads and fabrics may have in them. This will allow a better dyed fabric. I begun by weighting all the fabrics and yarns, classified by its origin: animal or vegetal.
I thought that I was accidentally working with a dirty pan: the water started to turn yellowish. Then, I realized that was part of the process. To Scour the vegetal fibers, I boiled during 40 minutes 2 spoons of Soda carbonate in 4 liters of water. To Scour the animal fibers I washed them in boiling water, and let them rest there for 40 minutes.
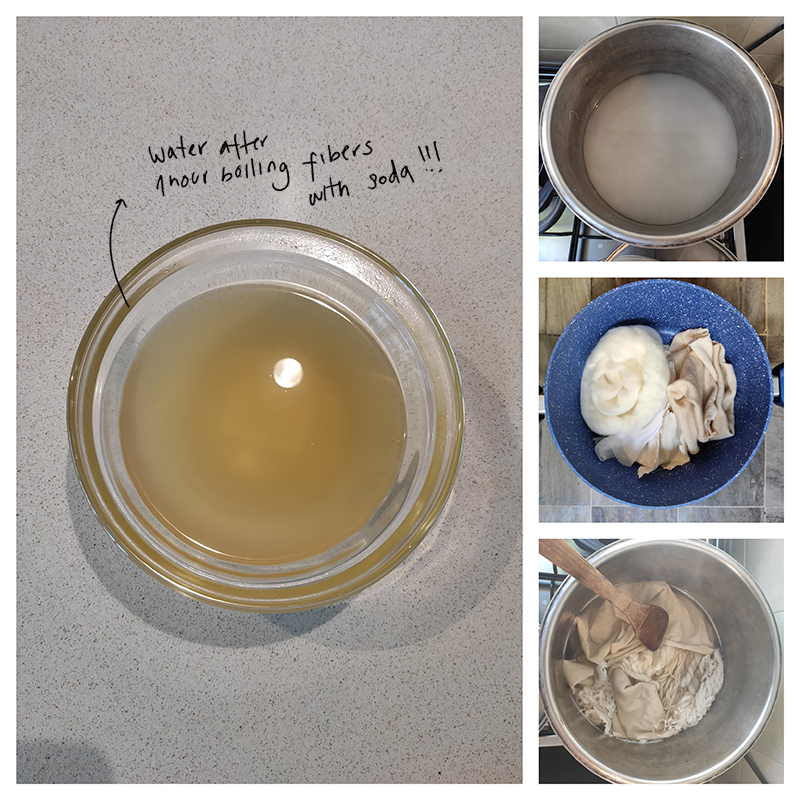
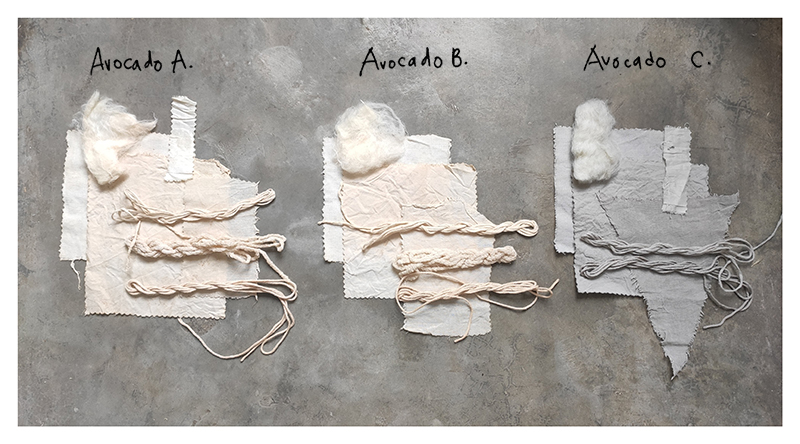
Finally, Mordanting. Mordanting is the most important process of preparing fibers to accept color. Using a mordant helps to ensure the most durable and long-lasting colors. There are many options, but I choosed to use Alum as a mordant.
The recipie is different for Vegetal yarns and Animal Yarns. For Vegetal Yarns you should use 10%-15% of the weight of the fabric, so as they weighted 320grs, I used 35grs of Alum. For Animal Yarns you should use 10%-20% of the weight of the fabric, so as they weighted 115grs, I used 20grs of Alum. I boiled both during aproximately one hour.
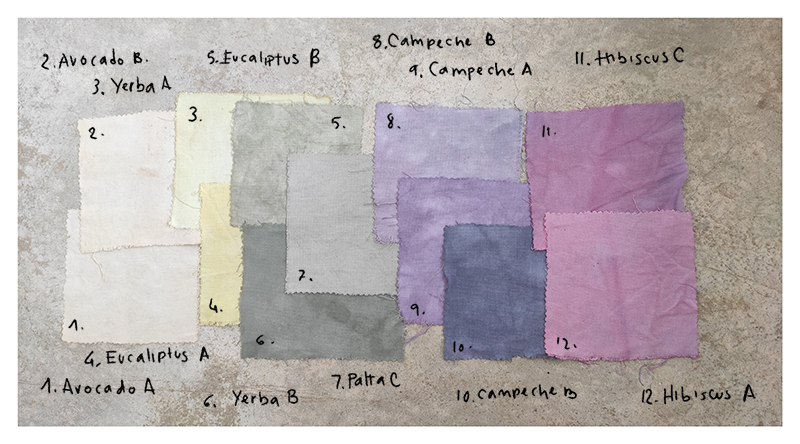
Dying: Avocado, Hibiscus flower, Eucaliptus Leaves, Palo Campeche, Yerba Mate
Dying was so exciting! If I would have hade more time, I could spend ages doing it.
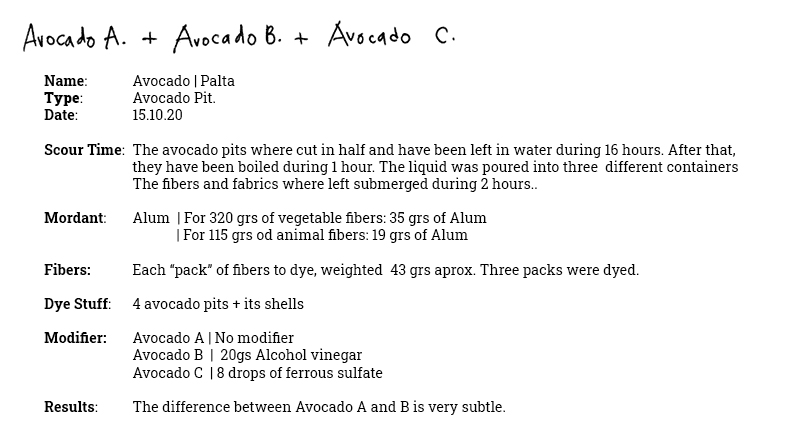
1. Avocado
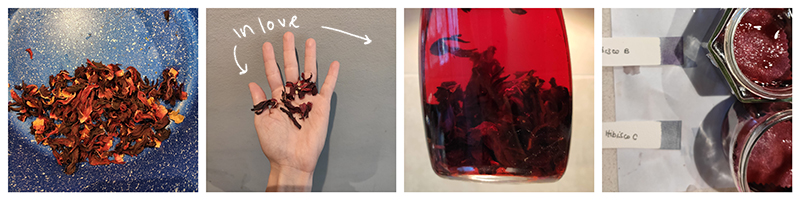
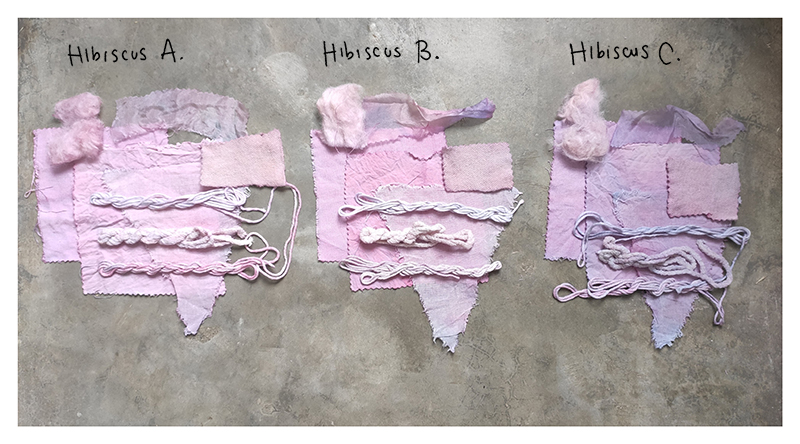
 2. Hibiscus flower
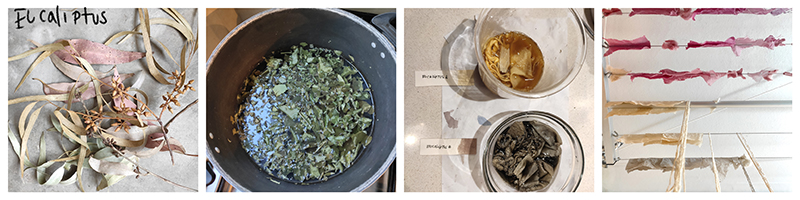
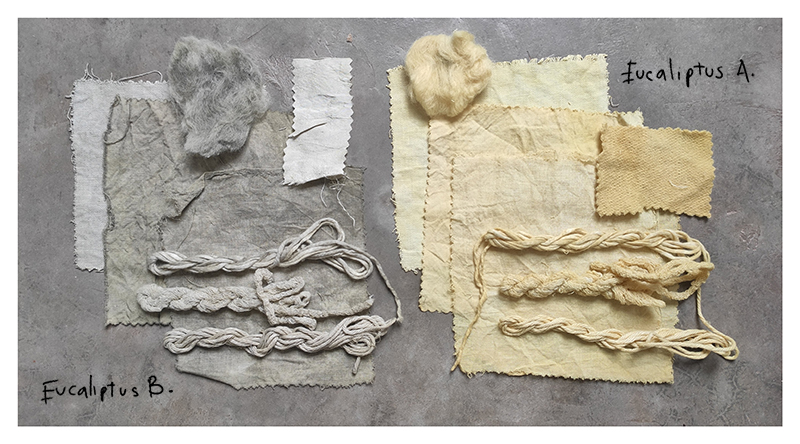
 3. Eucaliptus leaves
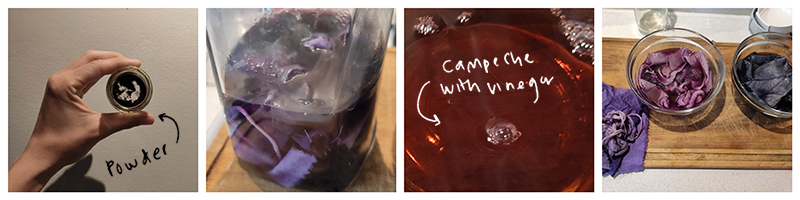
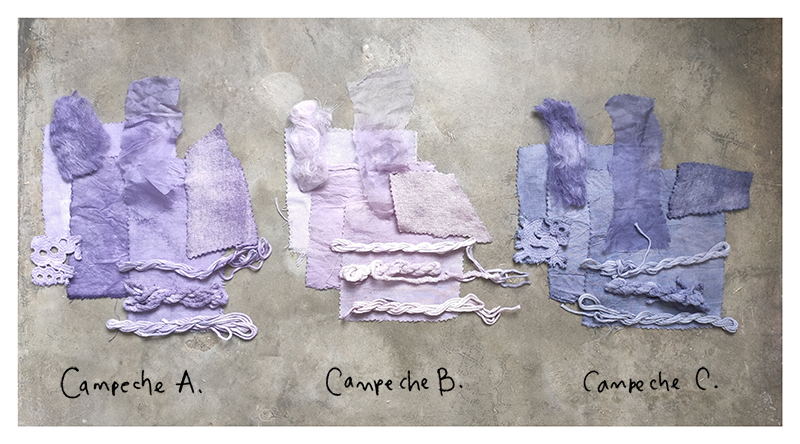
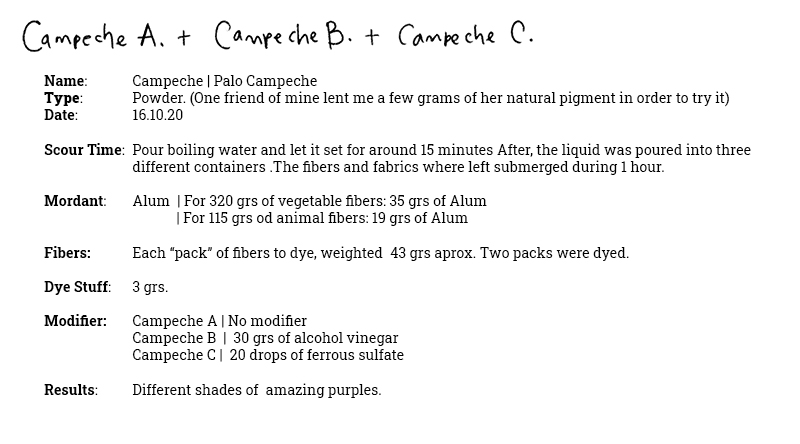
 4. Palo Campeche
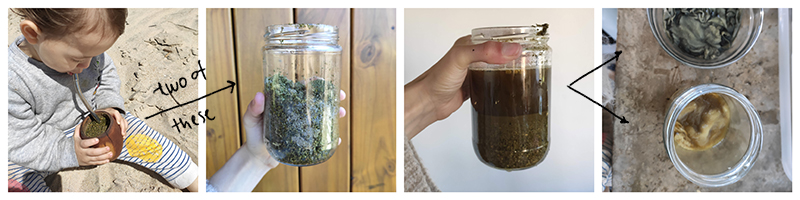
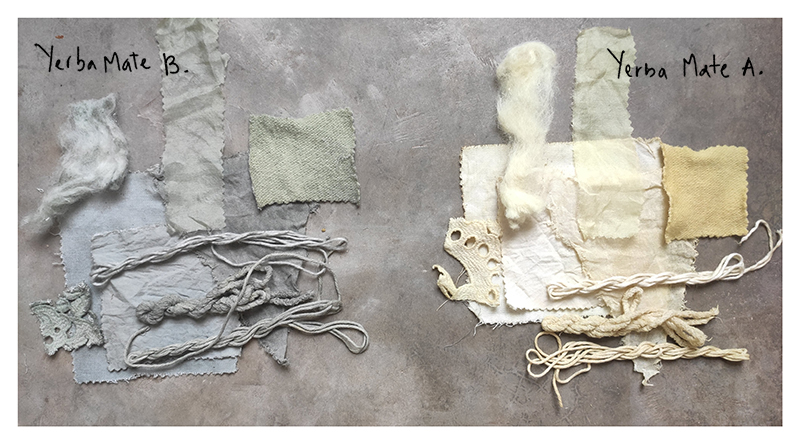
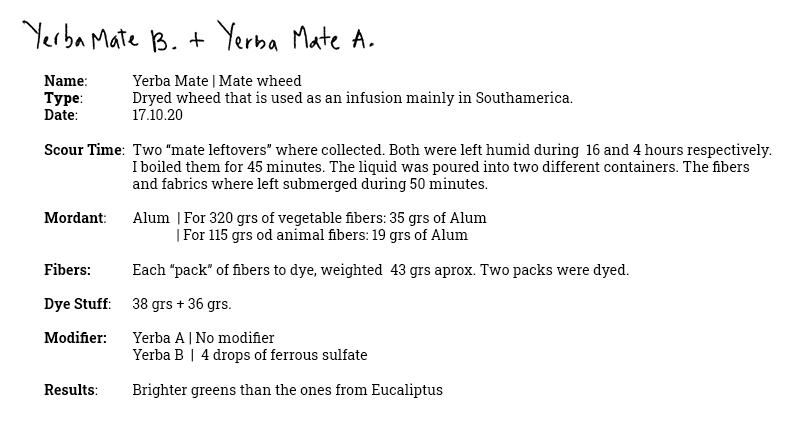
 5. Yerba Mate
 All of them together:
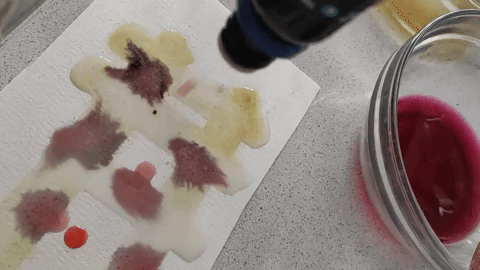
Ink...(or my "try with Inks)
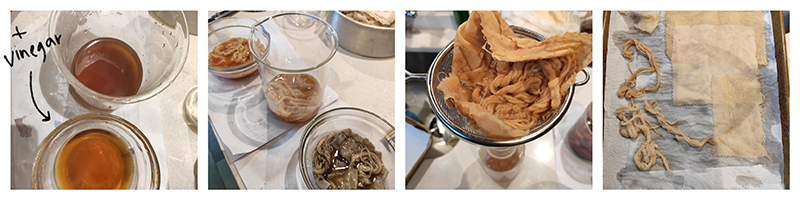
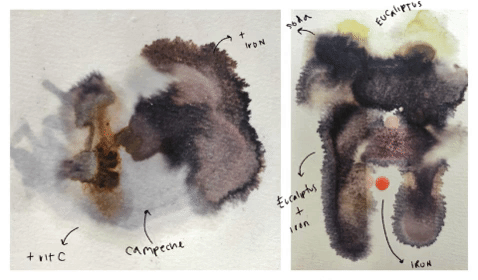
I really wanted to experiment with Inks and Pigments, but I had not time process all the information and I couldn´t follow the recipie: I kept the liquid of my dyes, but I throwed away the solid waste. When I was going to do the ink part, I realized that I needed solid stuff and I hade no remains.
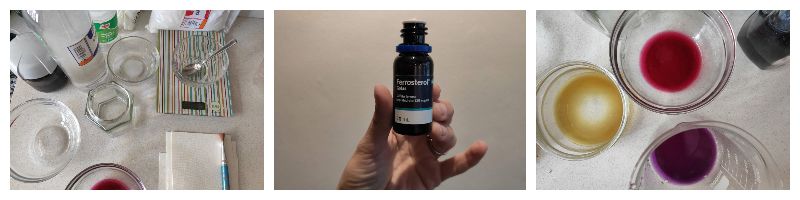
That is why I finally "played" with the liquid of my dyes, the ethanol and the modifiers, but I think It wasn´t actually Ink. I poured alcohol into the liquid of Hibiscus, Avocado and Campeche. As modifiers, I used vinegar, Vitamin C, Ferrous Sulfate and Carbonate Soda. The color of the "ink" was very light, but It was enough to have fun:
Adventure 2: Serratia Dying
One week before Biochromes Week, I started to look for the famous "Bacteria", Janthinobacterium lividum. The fablab in my University does not have a Biolab, so I had no oportunity to dye with the "in situ". A the beggining, I believed that It was an esasy task, and that I could find and take the bacteria home in a bag as it was a seed... But of course it wasn´t that way.
I am part of the Universidad de la República the main public University in Uruguay that holds more than 130.000 students and 14 Faculties. In this context, I decided to try to "find the bateria" at the [Faculty of Chemistry]((http://www.fq.edu.uy/) and at the Faculty of Science. I tryied to reach some professors working there in order to know if it was possible to get the Bacteria and try to dye with it. As there is some wonderful people here, I got the contact of Phd Silvana Alborés part of the Microbiology department on the Faculty of Chemistry.
Silvana explained all the process of biosecurity required to work with a bacteria, and let me know that beisdes not having Janthinobacterium lividum in Uruguay, we could reach Serratia Marcescens and try to dye with it.
After watching some tutorials and reading about the process at [BioShades]((https://bioshades.bio/) I met at her Lab in the Faculty.
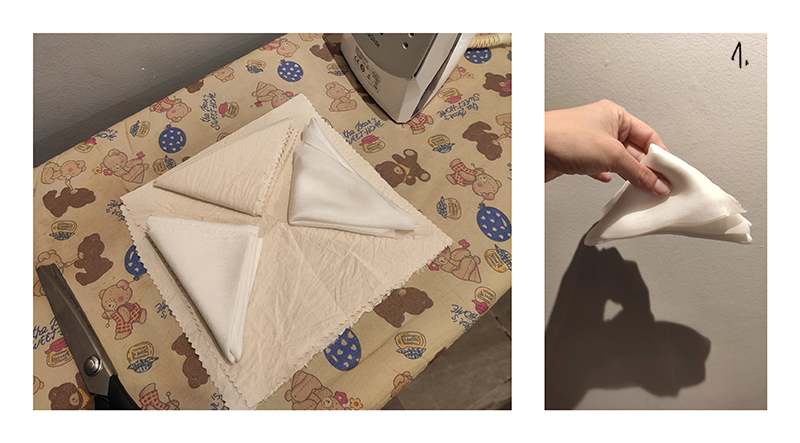
1.Preparing the fabric.
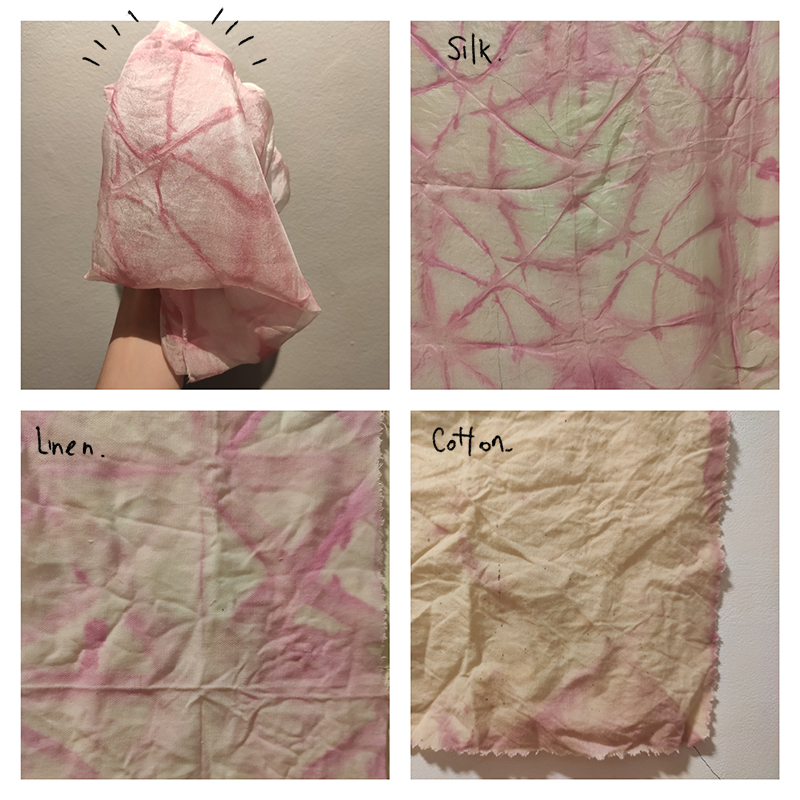
The night before, I ironed the fabric in order to make it small to fit it into the Petri Dishes. I did not sow them because I did not know the exact size of the Petri, and there was a chance that maybe it didn´t fit and I should cut it (what actually happened!). I prepared Silk, Linen and Cotton.
When I got to the lab, I copnfirmed that silk fitted quite good on Petri Dishes (as is very light) but that Linen and cotton should be trimmed.
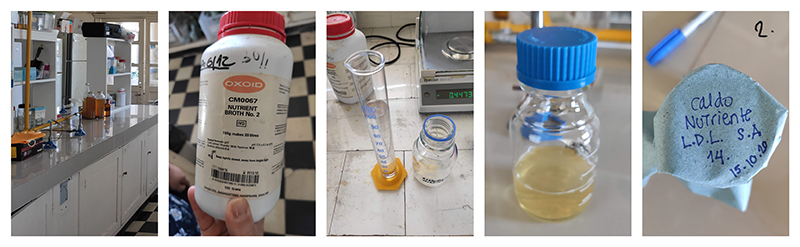
2.Preparing Serratia lunch.
We made the bacteria lunch. We used Calonutriente and put 2,5 grs with 100ml of water. Then we labeled the jar, as this was a requirement to go into the autoclave.
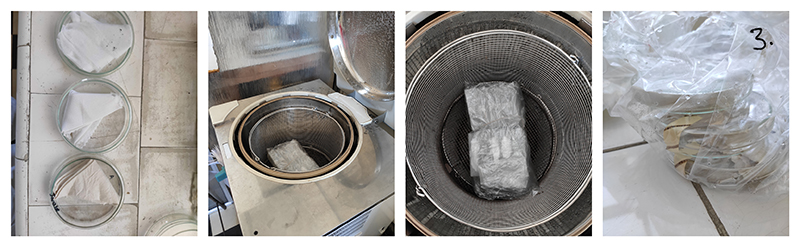
3.Autoclaving the materials
After placing each fabric on a Petri Dish, we put everything into the autoclave: the food and the fabric. We also added some autoclave tape to each petri. This tape shows two lines if the material is properly sterilized. The autoclave heated up too 121 degrees Centigrates during 15 minutes.
4.Letting the bacteria act.
We took the stuff out of the Autoclave and put it between two lighters (to get an sterile environment to work at) and we brougth the Serratia that has been already grown for us in order to know if it was growing with pigment.

After doing that, we poored the Nutrient into the dish of each fabric. The linen and the silk were quite absorvent, while the cotton looked as it was coated an did not absorve the liquid. I am intrigued to know it this will have any incidence on the final result! Inmediately, we "painted" the fabric with the bacteria. To achieve it, we first burned the metalic stick in order to sterilize it, then collected some bacteria from its dish, and finally take it to each fabic´s Petri.
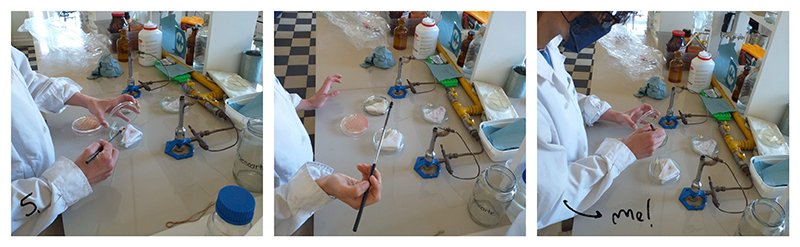
5.Getting it into the oven.
When we were placing the Petri with fabric, bacteria and food in the oven, I accidentally spilled the content of one of the Petri dishes-theone with cotton- all over my hands. SERRATIA CHAOS!!. Mental note: Is important to be consious that the petri dishes are not hermetic. I rushed to wash my hands and to clean them with alcohol. We decided not to add more food in order to see if there is any difference on the final result.
We left the bacteria grow during 4 days, in the oven at 37 degrees Centigrates.
6.Cleaning the fabric.
The Petri dishes with the fabrics were put once again in the Autoclave in order to eliminate the bacteria. This time -as the charge of bacteria was much higher- the temperature was 121 Degrees Centigrates for 30 half an hour instead of 15 minutes.
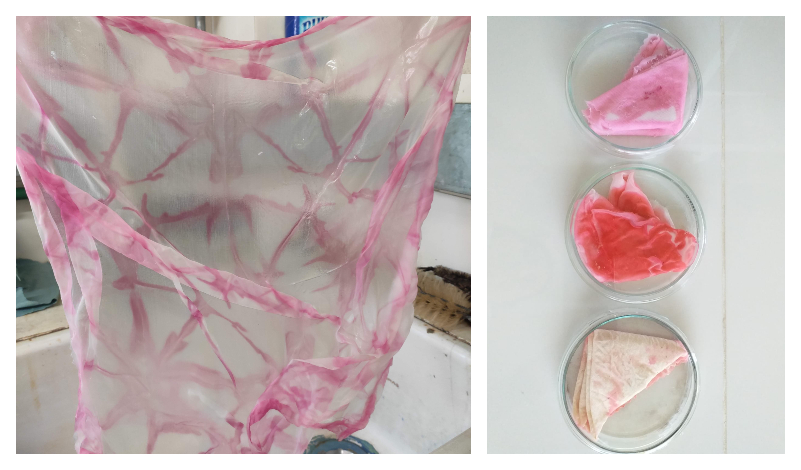
7.Final results.
The silk was, by far, the one that showed better the pigment of Serratia. Getting to dye with Serratia was an amazing experience. I am extremely thankful to Silvana!!