FINAL PROJECT
CIRCUMFLEX
This is my final project:
Circumflex is a portmanteau word. The word "circum" comes from the latin and means "around, in a circle". The word flex as we all know means to bend without breaking. For my final project I decided to call it CIRCUMFLEX because I want it to mean and relate to the circularity it approaches and the property of a material without sacrificing aesthetic or durability.
Circumflex aims to biomanufacture materials for footwear
PRESENTATION
RESEARCH
Three different approaches = many possibilities.
Biomimicry approach is the first concept I want to use for my final project. First things first; Biomimicry is a practice that learns from and mimics the strategies found in nature to solve human design challenges. The aim for using biomimicry is to use nature as a model an use it to transfer its behaviors into new materials. Here are some images of inspiration found in nature in living organisms including humans.

Biological and botanical approach is the second concept I want to incorporate for this project. The aim is to use nature now as a co-worker, meaning that the foucs will be in collaborating with nature such as living organisms like bacteria, fungi, etc to fabricate new materials.
And the third concept I want to use for the project is circularity. Circular principals will be use to design out waste and pollution, to keep materials in use, and regenerate natural systems.
DESIGN PROCESS
I also did a lot of reading and research of how shoes are made and came out with a lot of resources free and for a fee. The first step was to discover how to make a shoe last at home while I was quarantining and I did not had access to a lab. This is a great way to make your own shoe last, made to measure at home, for instructions click HERE
I tried to make the same experiment using plaster, but from a pair of boots that I already like the style and of course it was my size. (Boots that I have not used in a long time and which leather is already too damaged to fix). This is how it looked while the process was being done:
 Then I went to back to Boston, and it never really dried, so once I got there, I still had to wait a few days to let the plaster. When I tried to take out the shoe last, it was in many little pieces. It did not survived the whole flight journey from Mexico to Boston.
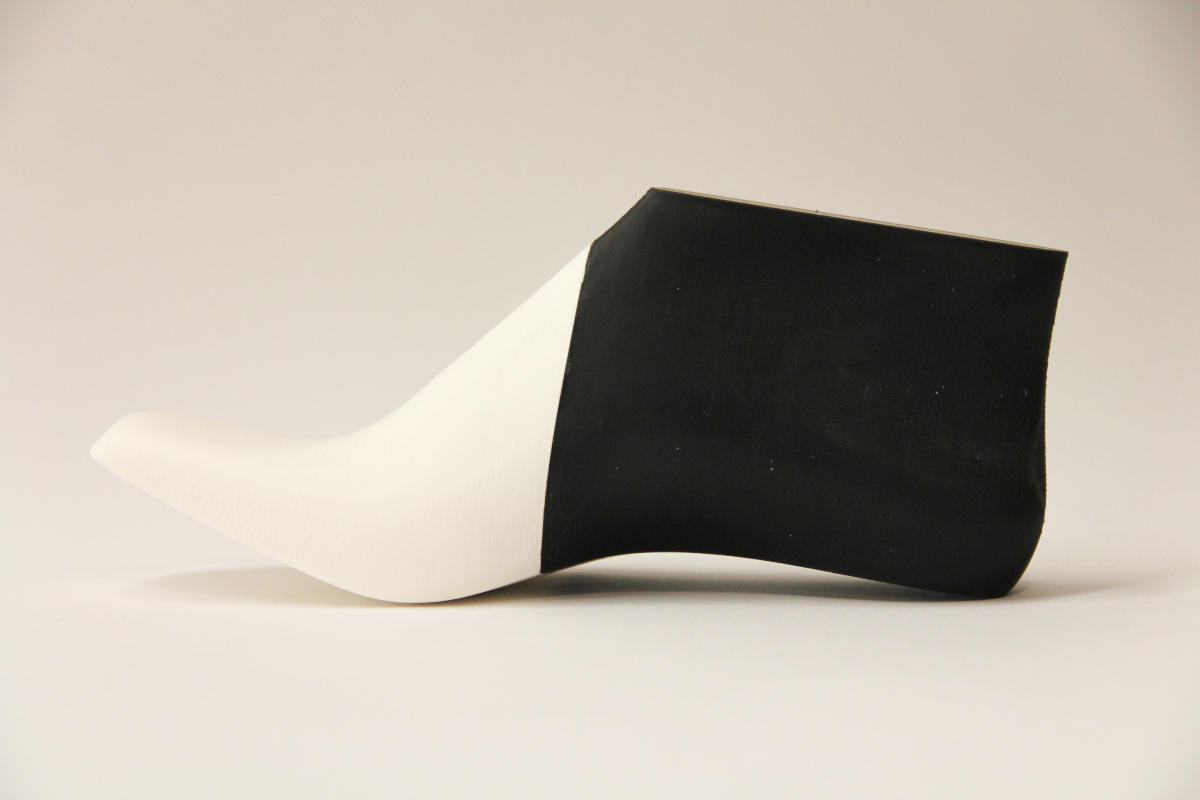
What I had to do next was to simply get a shoe last from thingiverse or any other website, and edit it to the form and shape you wish. You can also buy a shoelast on Etsy for 5-10 US dls, which is what I did to get me started on the project. Then I was able to 3D printed at the lab, and this was the final outcome:
Then I had to decide if I wanted to design boots inspired by nature based on materiality or design materials based on biomimicry designs. It was a tough thing to decide given that I already had a very tight timeline, but I had to do both at the same time.
Since the beginning of the project I always new I wanted to biofabricate materials that could replace leather, and my main interest was on making kombucha leather, fruit leather, and mycellium leather.
3D modelling and 3d printing
In parallel I started getting out of my comfort zone and finally gave it a try to 3D modelling. I looked up to free online courses of shoe modelling, and there were a lot in AUTODESK, so the software I chose to use was Fusion 360. I had to watch several tutorials along with the free course to understand what all the tools do and what was a mesh or a t-spline and so on. Honestly it was not that hard after a few days of practice, it dies get easy. In comparison to other 3d modelling softwares, I can say that SOLIDWORKS is pretty similar to Fusion, but you can tell the difference of how engineered based SOLIDWORKS is. Rhino is another good option for 3D modelling that can work wonderful for shoe design and in deisgn in general. The free course I found is THIS
The first thing I learned to design was the sole that could match the sole that I already had. From that point I designed a platform sole that could give the boots more height, then a heel and a front platform. It took me a long time to get these components in the exact shape that could match the sole and the shoe last.
Bio materials
The Biomaterials I want to developed for footwear should achieve this:
-Be durable -Not fragile -Water resistant -Aesthetically pleasant
NOTE: I added activated charcoal to some recipes to achieve black color materials and because of its properties, one of those is that acts as deodorant. Charcoal may absorb smells and harmful gases, making it ideal for underarm, shoe and refrigerator deodorant. Charcoal is also reported to be able to asborb excess moisture and control humidity levels at a micro level.
Fruit leather
A fruit leather does not always mean is vegan, but definitely means tackling a food waste problem.
Recipe: - 1 cup of water (250 ml of water) - 30 grams of natural gelatin without flavor (or corn or potato starch) - 1 tablespoon of white vinegar (cane vinegar) (5 ml) - 1 tablespoon of vegetable glycerin (5 ml) - Fruit peels (banana, mango or any other fruit) Approx 50 gr
Tools: -Cooker or stove (optional: temperature controlled) -Pot -Scale -Spoons -Whisk -Molds / container to pour material
Preparation:
-
In a container, mix the ingredients: water, gelatin (or starch), vinegar and glycerin, stir well until all the ingredients are united. (In the case of starch until they form a paste)
-
The mixture is heated until it is homogeneous and the gelatin is liquid. We will know that it is ready when we see bubbles or foam on the surface, in the event that these do not appear, let it boil for a few minutes and remove from the heat. You have to move all the time while it heats up. (In the case of starch, make sure that the paste loses thickness, it will be ready when it no longer contains large lumps, there may be lumps but small)
-
At the same time, the peel of the fruit that we have chosen is liquefied with a little water, until the mixture is uniform. It is kept in the blender. (If a lot of water is required, this amount should be considered as adhering to the original formula)
-
Subsequently, once the biopolymer mixture is uniform, it is removed from the heat and emptied into the blender. The elements are mixed until both mixtures have been integrated.
-
Once finished, the mixture is emptied onto a container or flat container - which allows the biotextile to dry and shape - it is left to dry and we will have obtained a material that depending on the fruit, and the thickness could be a biotextile or a bioplastic.
GENERAL NOTE: If your substrate or raw material is a hard shell, coffee beans, etc., we recommend in the case of hard shells, dehydrating and pulverizing them, either in your blender, food processor or automatic coffee grinder. Also with coffee beans.
Sustainability approaches:
-Renewable ingredients: yes -Vegan: can be -Made of by-products or waste: yes -Biocompostable final product: yes -Gelatine-based bioplastics can be recasted by melting them in a pot with some water. Should not be recycled as part of PET-plastics waste: this causes contamination of the waste stream.
Banana leather 🍌
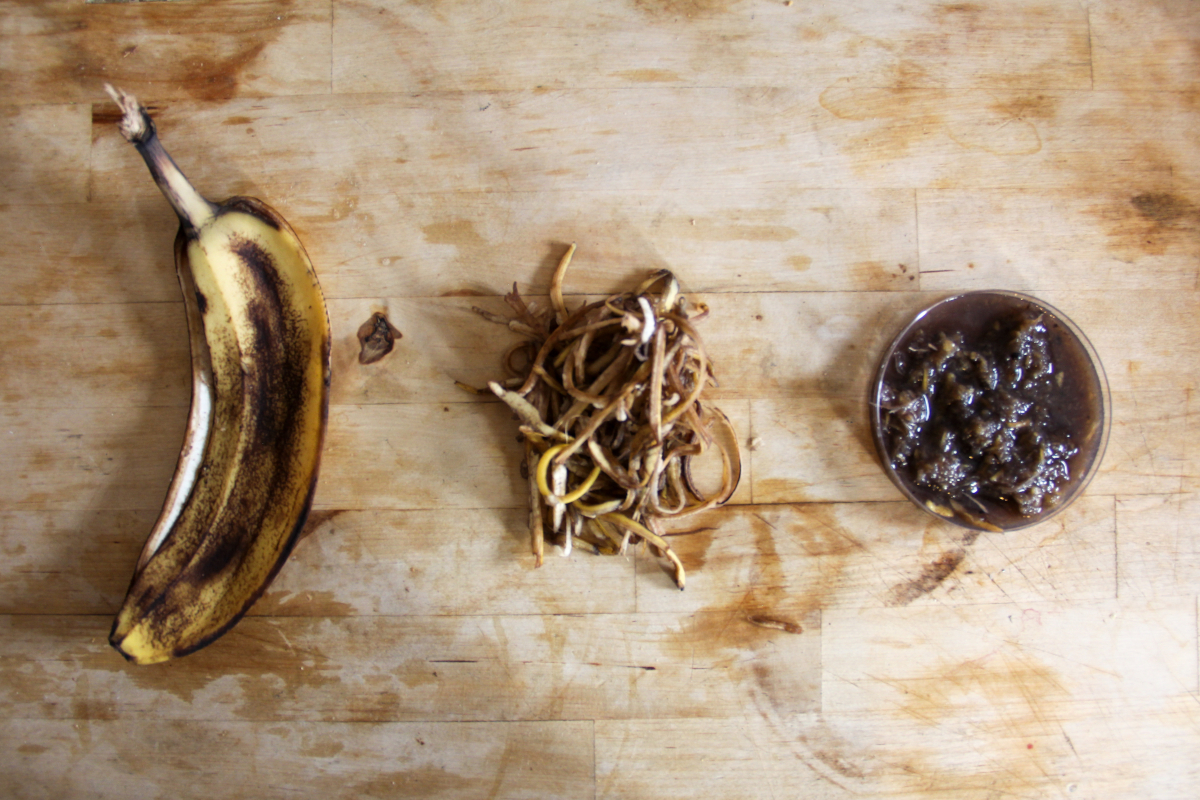 Ingredients. In this case I blended a few banana peels with water.
 This was the result of the banana leather material.
Note: Adjust recipe according to needs. For this recipe I would have to add more glycerine to make the material more flexible and being in a nice temperature room ambience so the material. So consider a room that is not too cold, otherwise your material will dry out. Consider not a humid place otherwise you will get your materials contaminated with bacteria. This recipe was gelatine based, and so far was great at molding to a desired shape, but it is still too dry and transparent to use for footwear.
Tangerine peel leather 🍊
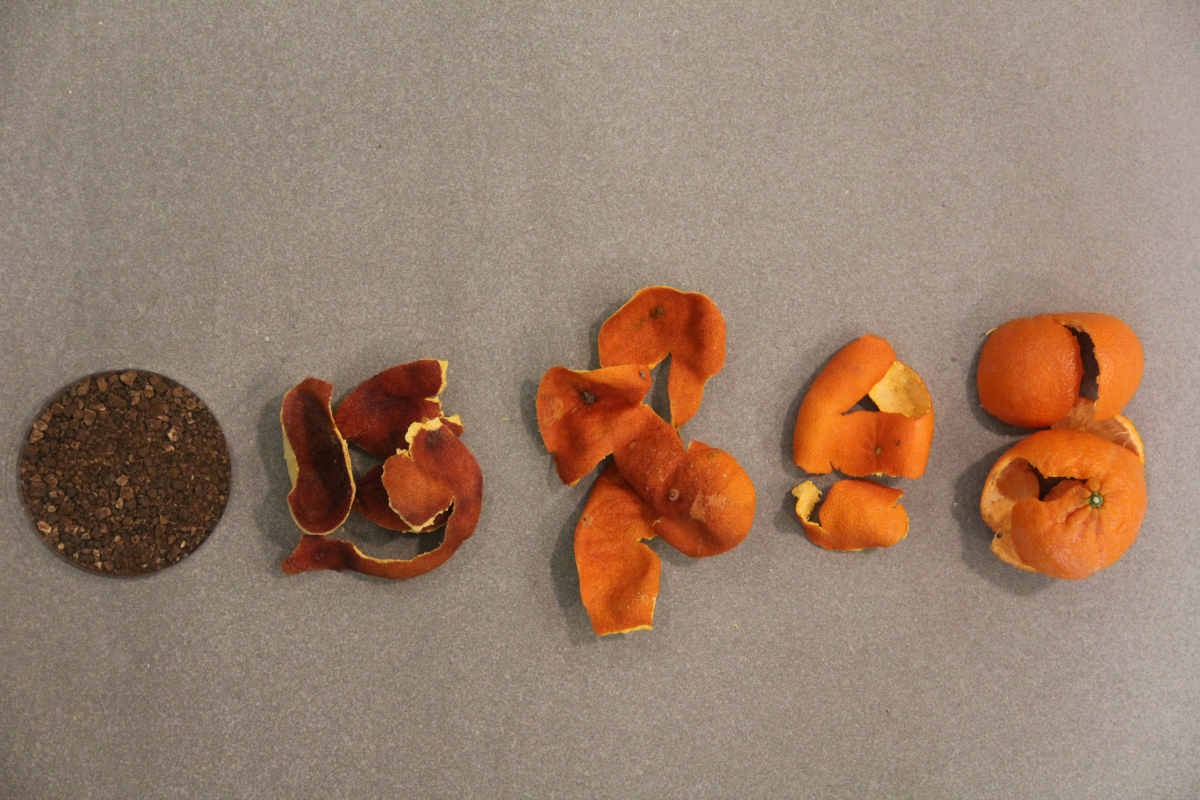 Ingredients. For this type of nutrient you have to follow a different process. What I did first was to let all tangerine peels dry with sun light, then I used a morter to pulverized the dry peels. If the peels are still chewy and nor completely breakable, you can toast them and put them back in the morter to pulverize as much as you can. You should have a powder like substance. Then you can incorporate it to the regular steps of your recipe preparation.
NOTES: The first batch came with the perfect density and texture, but I left the materials unattended in the lab over the weekend, and they dried out completely. They looked like burned toast. To avoid this, plase make sure it is at adequate temperature room and constantly checking on them.
Bio foam 💭💬
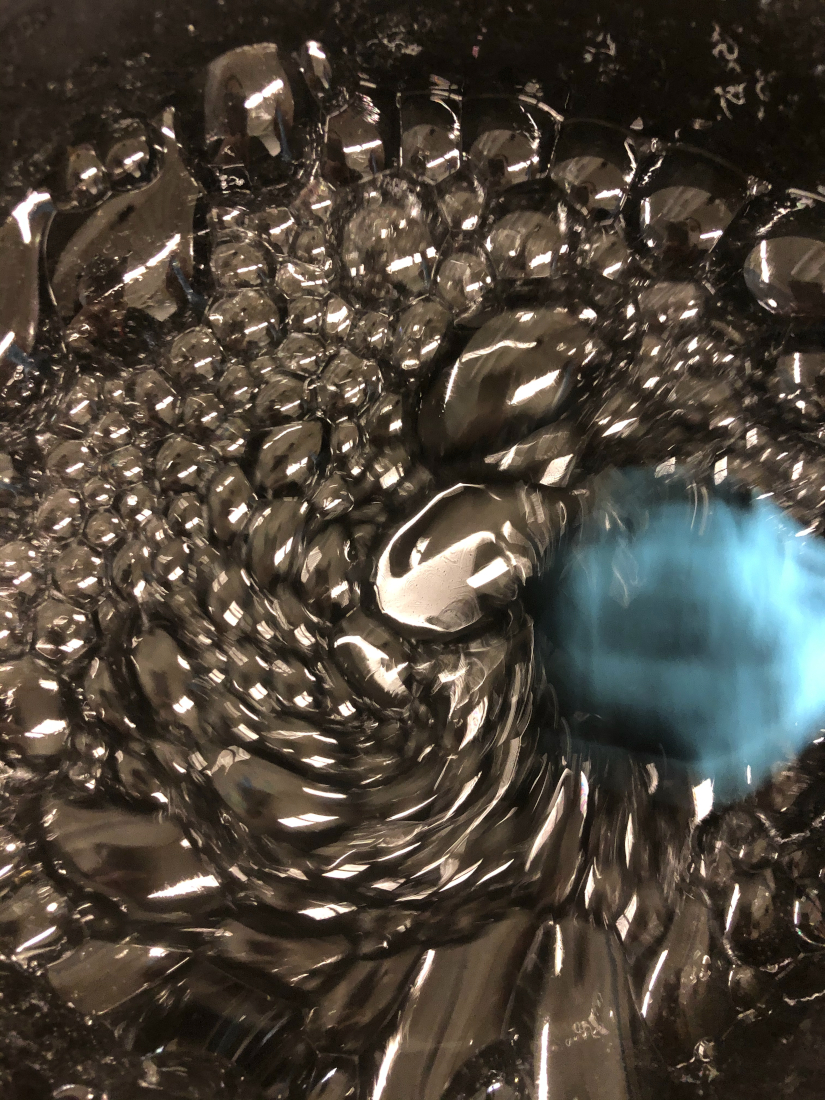
A thin, textured sheet, and half domes of foamy, flexible bioplastic. Gelatine-based. The biofoam feels like the foam-like packaging materials sometimes used for shipping fragile goods or thick foamy kitchen cloth. It feels colder to the touch and is slightly stickier. The upside shows visible bubbles, but the mold-facing side feels very smooth if the mold had a smooth surface. It somewhat keeps the smell of the dishwashing liquid and smells less like wet dog than other gelatin-based bioplastics.
Recipe:
- Gelatine powder - 12 gr Functions as the polymeer (makes it hard)
- Glycerine - 12 gr Functions as plasticizer that bonds with the gelatine (makes it flexible)
- Water - 150 ml/gr To dissolve and mix the polymeer and plasticizer
- Dishwashing soap (organic) - 1 tsp Is the expanding agent that makes the mixture foamy
Tools:
-Cooker or stove (optional: temperature controlled) -Pot -Scale -Spoons -Whisk -Mold/ container
Preparation:
-
Bring the water to the boil. Optional: add natural dye if you wish to use color. Add glycerine, add gelatine and keep the temperature below 80 degrees celcius while stirring gently, until the gelatine is dissolved.
-
Simmer and slowly stir the mixture between 60-80 degrees celcius for 20 minutes or until it's thick like a syrup or honey, then add in the soap.
-
Whisk vigorously to create foam bubbles and simmer for another 2-5 minutes until the mixture thickens.
-
Stir slowly to let the bigger bubbles pop until you have a foam with small bubbles. Then pour it into mold.
-
Peel it off the mold after 48-72 hours. The foam should not feel cold to the touch, then it's still drying. Pinch off the more fragile sides first to create some grip. Then pull it off carefully, pulling upwards.
Notes: Waiting too long to release from the mold can result in tearing. The foam gets a bit more brittle and thin as it dries. Releasing it too early might leave finger prints and presses in the foam as its still too soft.
 This is how big bubbles have to look.
Variations:
-Add a natural colorant such as a vegetable dye or water-based ink (e.g. hibiscus, beetroot, madder) -Add less glycerine for a rigid foam, add more for a flexible foam (up to 1 part glycerine, 1 part gelatine and a dash of water) -Stiffeners such as fibres or natural debris may be added for more structure and reinforcement. -Fillers such as almond or sunflower oil, chalk or egg shells can be added to prevent additional shrinkage. -Soaking the foam model in water for 2 hours and then letting it dry again makes it firmer. First it expands, then it shrinks again and gets quite rigid.
Sustainability approaches:
-Renewable ingredients: yes -Vegan: no -Made of by-products or waste: no -Biocompostable final product: yes, but only professionally (home composting of animal-based materials is not allowed in the EU) -Re-use: melt with heat and a splash of water, and recast -Gelatine-based bioplastics can be recasted by melting them in a pot with some water. Should not be recycled as part of PET-plastics waste: this causes contamination of the waste stream.
Properties:
-Strength: variable (can be quite strong, depending on thickness and curing time) -Heat resistance: low -Water resistance: low -Hardness: medium/variable (depends on thickness, curing time and amount of glycerine) -Scratch resistance: poor -Shape memory: medium
Egg shell Bio resin 🥚🍳
A (naturally) amber-coloured hard bioresin, gelatin-based. This resin is strong, dense and rather heavy, but as much as say, synthetic epoxy or cold like glass. It is also warmer to the touch.
Recipe:
- Gelatine powder - 96 gr Functions as the polymeer (so it becomes a solid)
- Glycerine - 16 gr Functions as plasticizer that bonds with the gelatine (makes it flexible).
- 30 gr of eggshells powder
- Water - 480 ml/gr To dissolve and mix the polymeer and plasticizer
- A large round coffee filter to absorb froth
Tools:
-Cooker or stove (optional: temperature controlled) -Pot -Scale -Moulds (ideally with removeable base to increase airflow). I have modular silicon walls with metal wire inside them that allow me to cast and then turn the moulds on their side for more airflow and drying from top and bottom. I use a silicon or acrylic sheet with these mould walls. -Spoons
Preparation:
-
Bring the water to the boil. Optional: add natural dye if you wish to use color. Add glycerine, add gelatine. Keep the temperature below 80 degrees celcius while stirring very very slowly and gently to avoid making bubbles. Add eggshells.
-
Simmer and slowly stir the mixture between 60-80 degrees celcius for at least 20 minutes or up to an hour. Turn it lower when bubbles appear: you don't want the liquid to move, don't boil it.
-
Longer cooking time allows more water to evaporate and will dramatically reduce shrinkage of the casted object. You will get a thicker liquid. To cast larger volumes and solids with this recipe, evaporate a lot of water, until it's very very thick. Sometimes it's worth reheating and melting scraps, they've already dissipated a lot of water and result in nice castings.
-
If froth appears on top of your liquid and doesn't go away, you can use a coffee filter to absorb it by covering the surface with it and then taking it off. In cooking this is called a cartouche, you can also make one from kitchen paper. Take a round coffee filter that fits into your pot. Absorb additional froth using some kitchen paper.
-
Let the liquid cool for a couple minutes until it gels a little but is still liquid and pourable. Cast into the mould slowly to avoid bubbles. Pour from the middle and hold still, let the liquid distribute itself.
-
Put the mould away to dry in a cool place with lots of air flow (like near an open window). A warmer place might speed up the drying process but also allow bacteria to grow faster and can result in fungal growth. If the mould has a removable base, remove it after 4-8 hours and put the mould on its side to allow air flow from both sides.
-
When using a flexible mould: let it dry without releasing to keep the form as much as possible. The resin will likely shrink and release itself from the mold. If it feels cold to the touch it is still drying. If you are using a rigid mold: release after 4-8 hours and dry flat.
NOTE: The resin does not cure evenly across the surface, some might be negotiated by shaving off some slides while it is still relatively soft and flexible. Letting it dry up to 2 weeks to get to the final form. It will be flexible at first but will slowly harden until its totally rigid.
 Ingredients. Similar to the tangerine peels process, the egg must be pulverized. Luckily the shells are very easy to break and turn it into powder in a simple morter.
Sustainability approaches:
-Renewable ingredients: yes -Vegan: no -Made of by-products or waste: no -Biocompostable final product: yes, but only professionally (home composting of animal-based materials is not allowed in the EU) -Reuse: yes, by melting and recasting
Properties: -Strength: strong -Hardness: rigid -Shape memory: high -Weather resistance: low -Scratch resistance: moderate -Heat resistance: poor
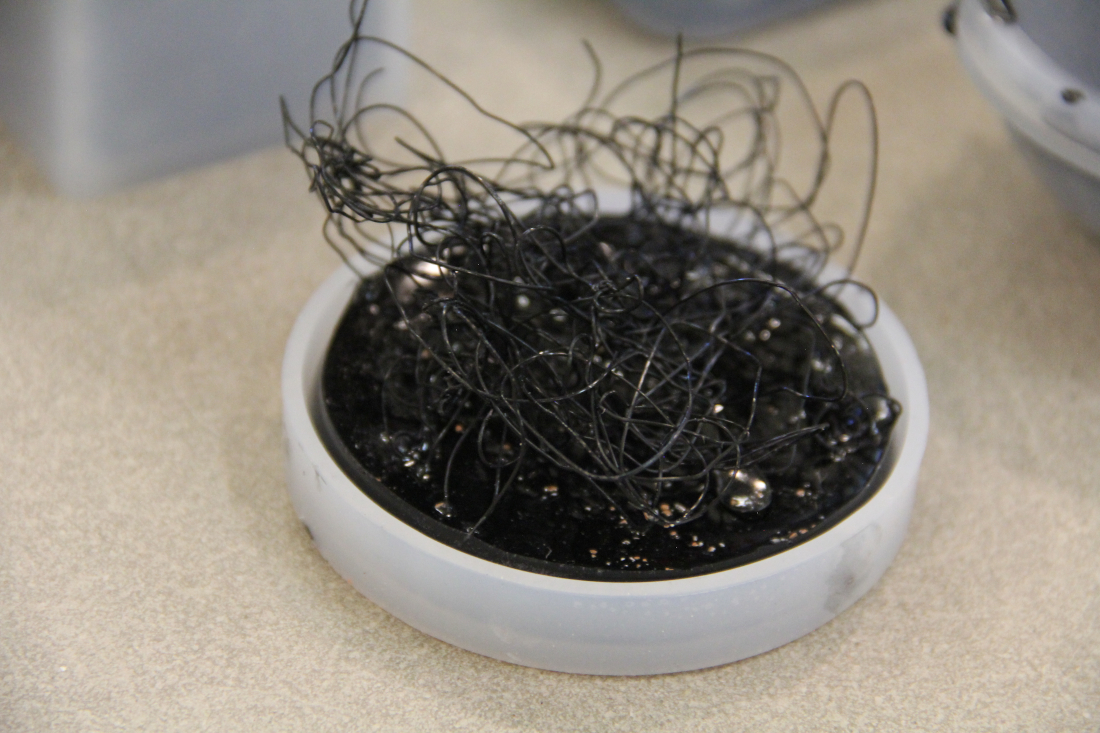 Image of a sample resin with 7 days of drying with PLA filament of 3D printer.
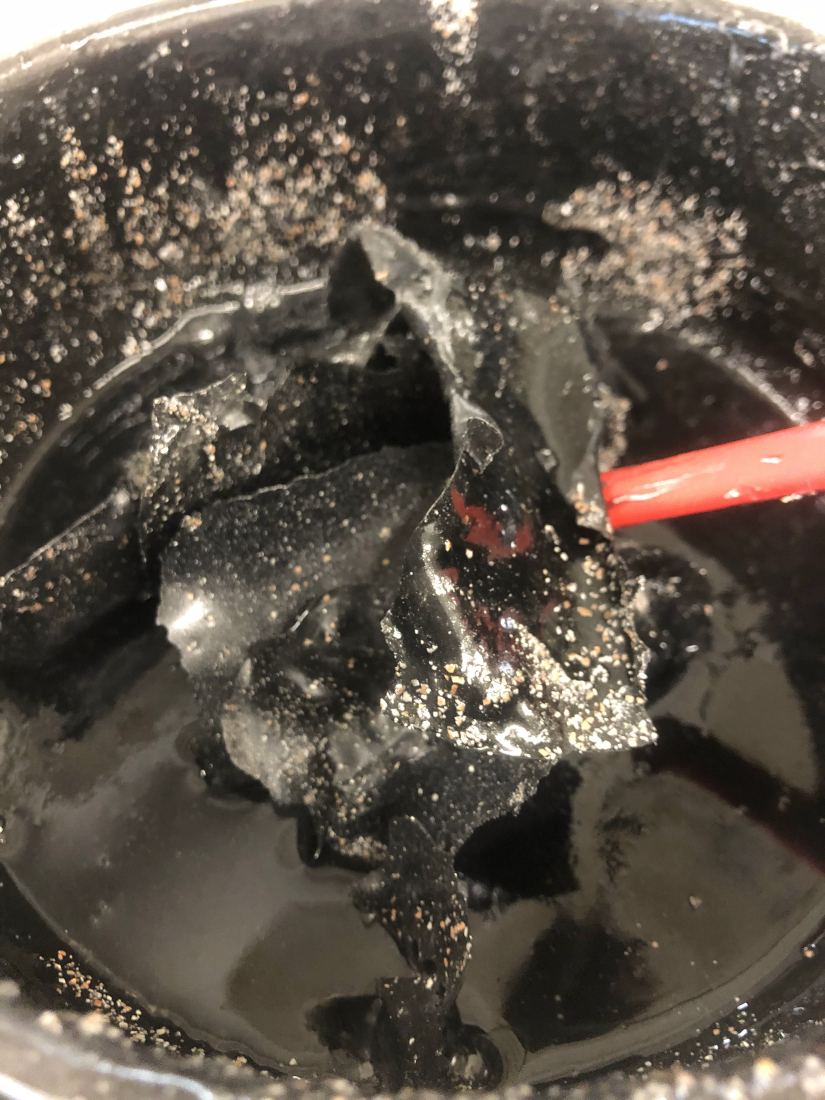 Image of reisn that is being reused and recast.
FUTURE DEVELOPMENTS
- 3D model more intricate deisgns, to really achieve the biomimicry approach.
- Design a better way to assemble the different components. Perhaps woven, knitting, interlocking?
- Explore more process/ingredients to make materials resistant to water.
- Explore growing crystals as embellishments on boots.
- Collaboration with local shoe artisans, designers.
CHALLENGES
My biggest challenge was to start my final almost a month after, because materiality consists about constantly testing and changing/adjusting recipes, which makes it time consuming.
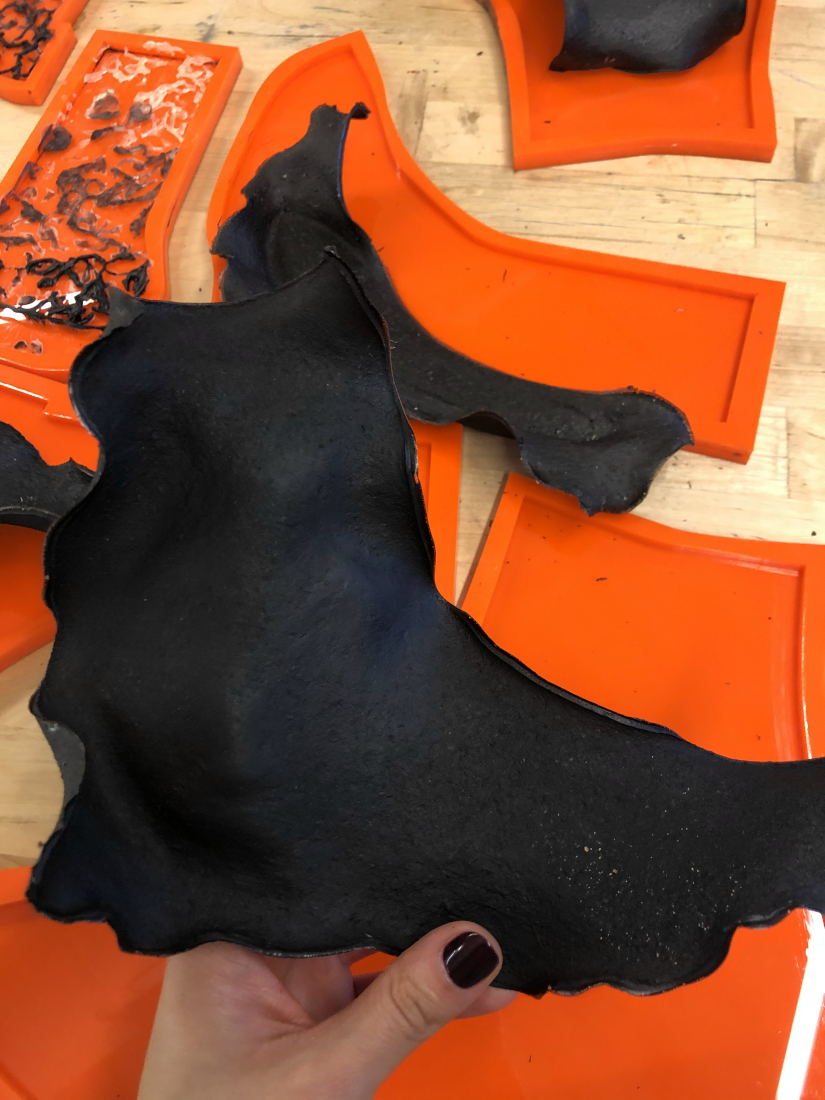
My main troubles were achiving the right properties of the materials between 3d modelling, and moving back home at the same time. I finished casting the molds for the toe platform sole, and they got contaminated with some fungus. The molds of the heels did not printed correctly, therefore my heels were shorter and werent matching with the sole.
USEFUL LINKS AND RESOURCES
- Biomimicry concept
- Bio materials recipes for bio foam and resin
- Wood ash cement
- Sole projects
- Recipes for Material activism
- I can make shoes course
- Make your own shoe pattern
- Last grading tutotrial
- Recipes for Material activism