10. Open Source Hardware - From Fibers to Fabric
🗓️ 2023_November 14th to 20th
The pattern machine 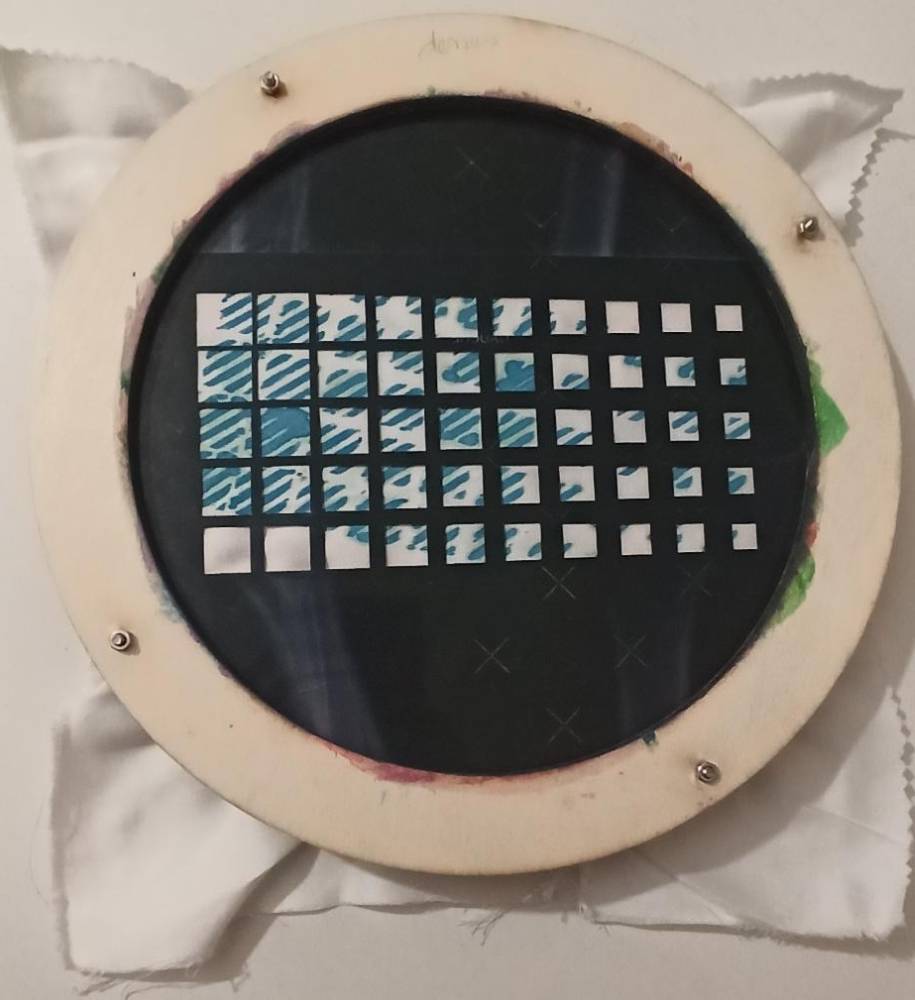
🎨 Work of the week
This week's Lecture presented by Sara Diaz Rodriguez from Studio Hilo, helped us to understand the different techniques to go from fibers to fabric:
- Carding: mechanical process to make fibers (like a giant hairbrush)
- Spinning: twirting technique to form yarn from fibers (where is sleeping beauty?)
- Braiding: interlaces stands of yarns to create materials like rope
- Weaving: threads are used to create fabrics
- Knitting: numbers of consecutive rows of connected loops
- Felting: mathing, condensing and pressing fibers together
- Tufting: type of textile manufacturing where thread is inserted on a primary base
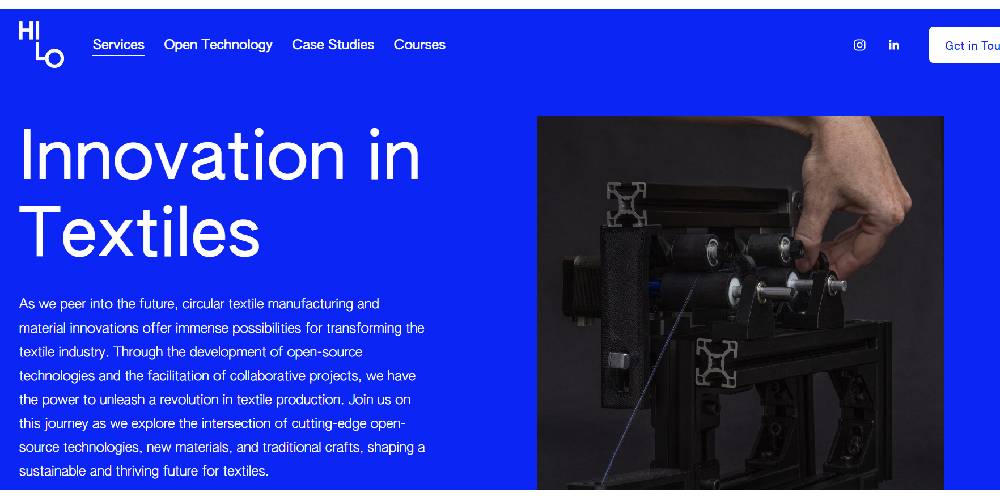
Screenshot of the website
weekly assignment
- Understand how the existing machines work
- Document process and steps
- Hack/make a machine??
Some inspiration!
- Ala Janbek Techworks Amman
- Pauline Gamore TextileLab Lyon
- Riko Kanthatham Fab Lab Kamakura Japan
📚 References & Inspiration
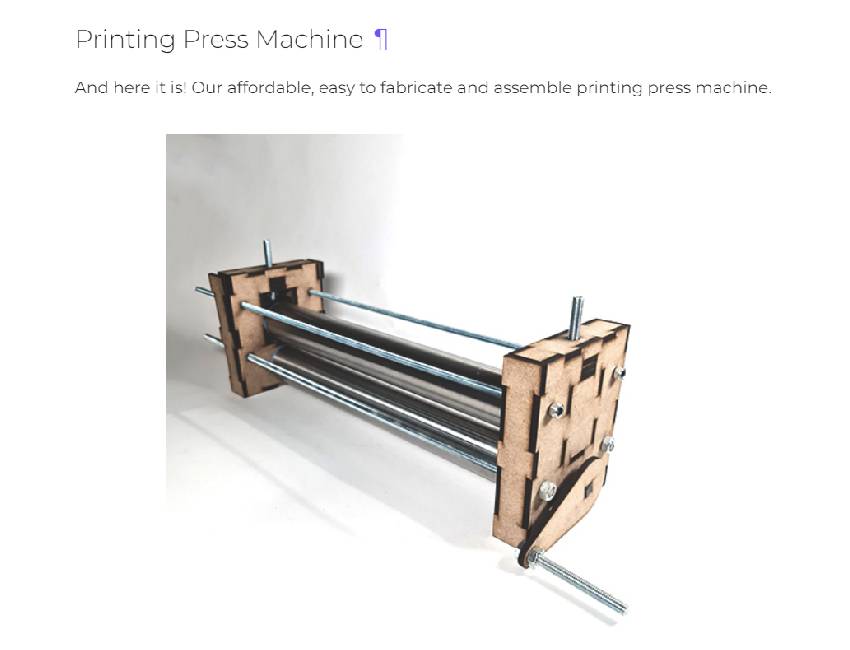
The week before I'd started thinking about the kind of machine I wanted to make. First I wanted to make a machine to print patterns like the printing press machine made by Jordan's 2022 alumnis, Techworks.
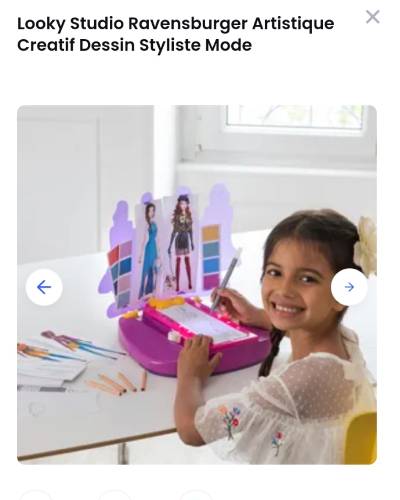
I remembered a game I played as a child where I could "draw" patterns to make dresses for my dolls by putting plates of different textures under the sheet of paper... I haven't found my childhood game, but I found several versions of it on the Internet.
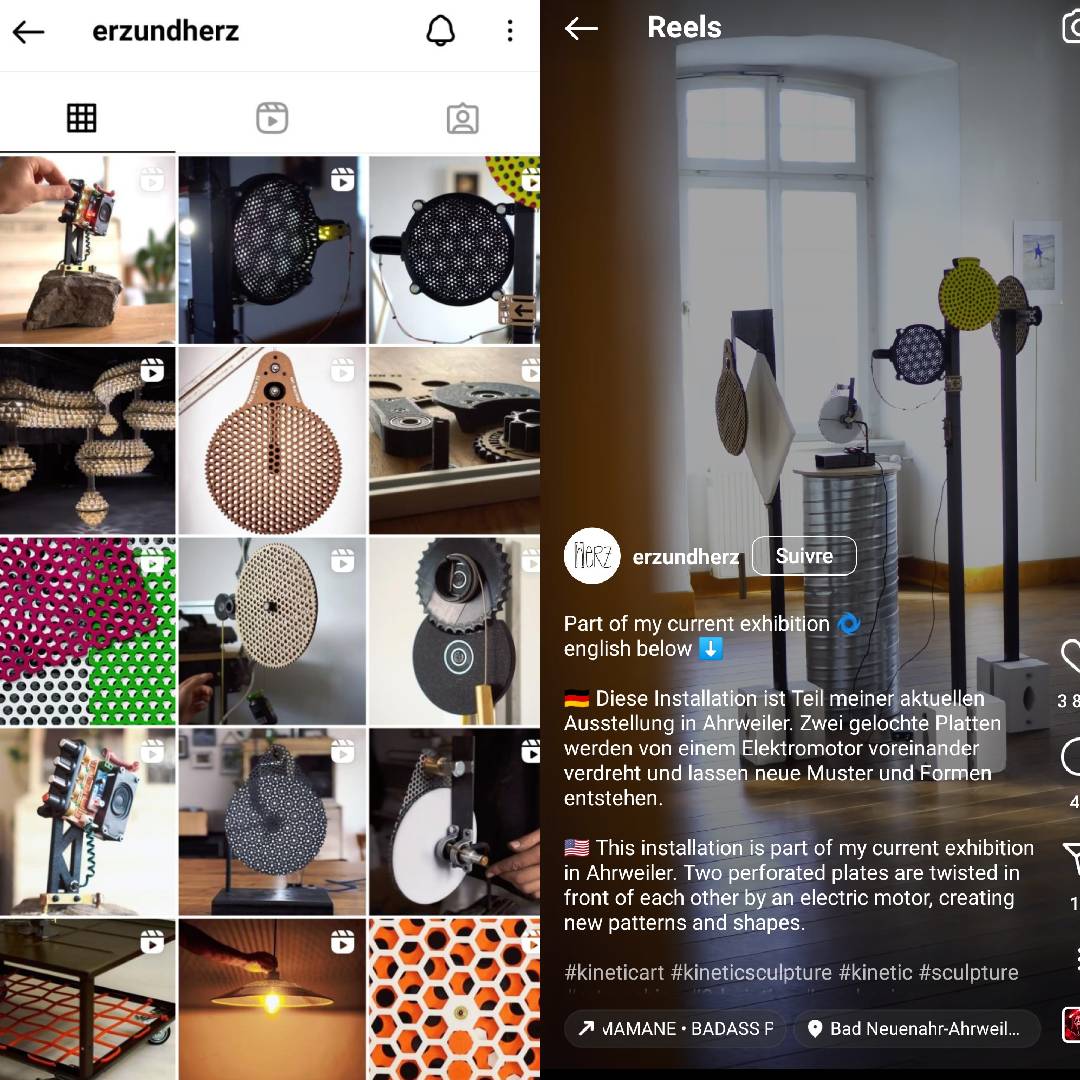
While discussing the week's theme, my husband shows me an artist who has created his machine for projecting perforated patterns using wood or metal plates!!!! Amazing!🤩🤩🤩🤩🤩
I found the work of Erzundherz-[h]erz, a great source of inspiration! Here are some screenshots from his Instagram.
It made me think of the Moiré pattern. I wanted to make a machine that allows you to create a multitude of patterns with one stencil.
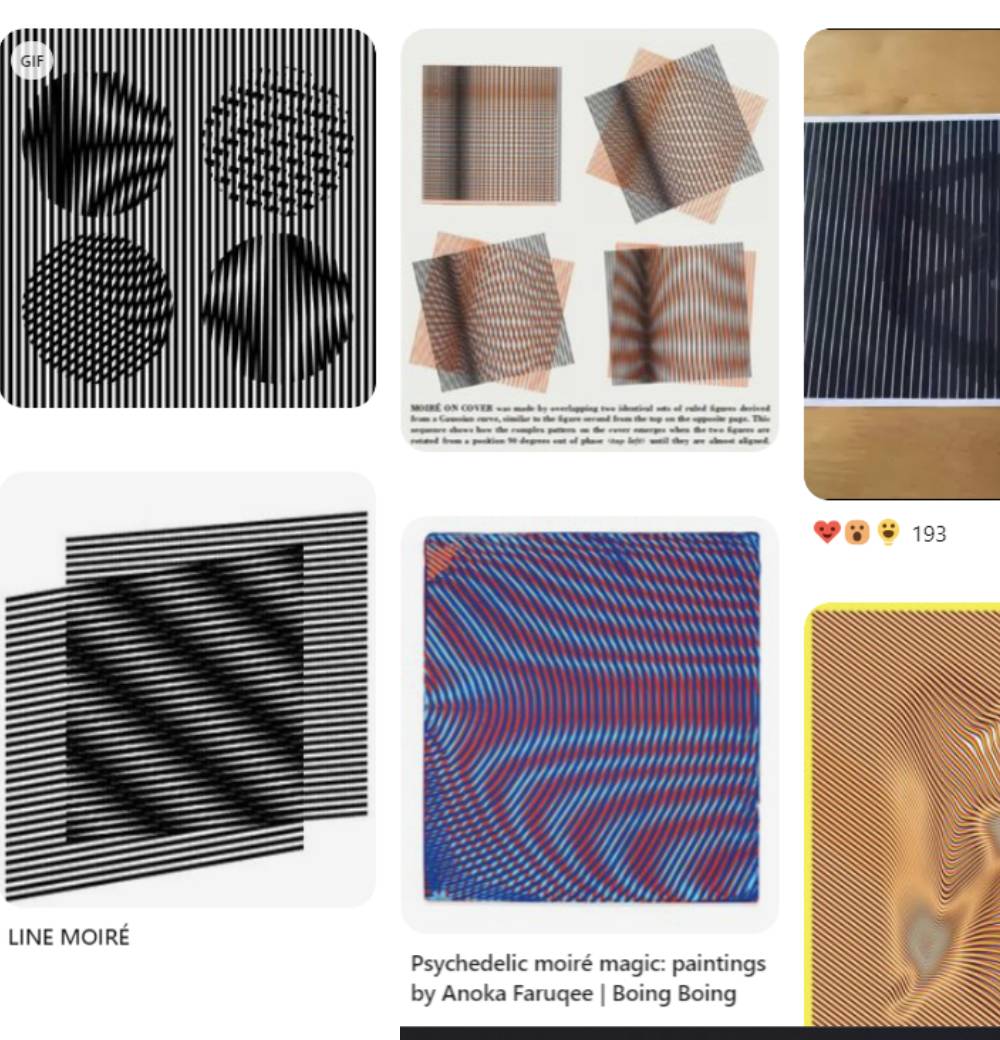
Screenshot from my Pinterest research
Another inspiration with the Poemotion book by Takahiro kurashima.
Poemotion / Takahiro Kurashima from SLANT_GALLERY on Vimeo.
I was also interested by the Dancheong pattern, the traditional patterns and coloring on wooden buildings like temples, houses or artefacts in Korea. It symbolically uses five colors inspired by the Taoist concept of yin and yang: blue, white, red, black and yellow.
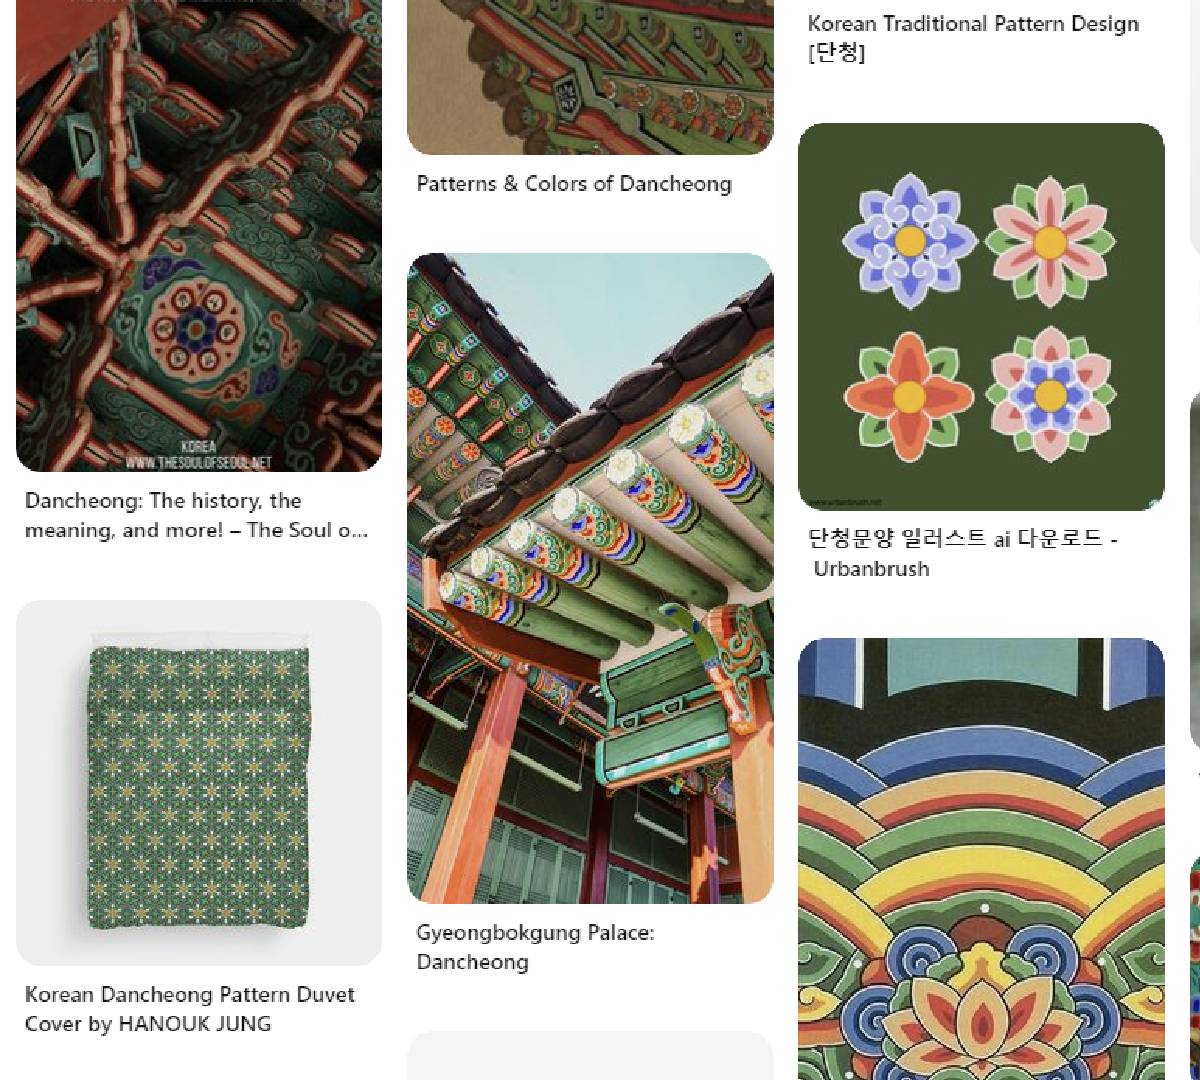
Screenshot from my Pinterest research
🧰 Tools
- Rhino
- Adobe Illustrator
- Rayjet R400
Research & Ideation
Living in Lyon, the city of silk, I wanted to take up the idea of silk prints and silkscreen work. That's why I wanted to build a machine that would enable me to print patterns on fabrics using stencils. I needed a flexible material, but at the same time, one that would withstand the passage of inks and be cleaned for reuse. My husband then suggested that I use digital x-rays (which are made of a plastic support).
Here is the sketch I made for the machine.
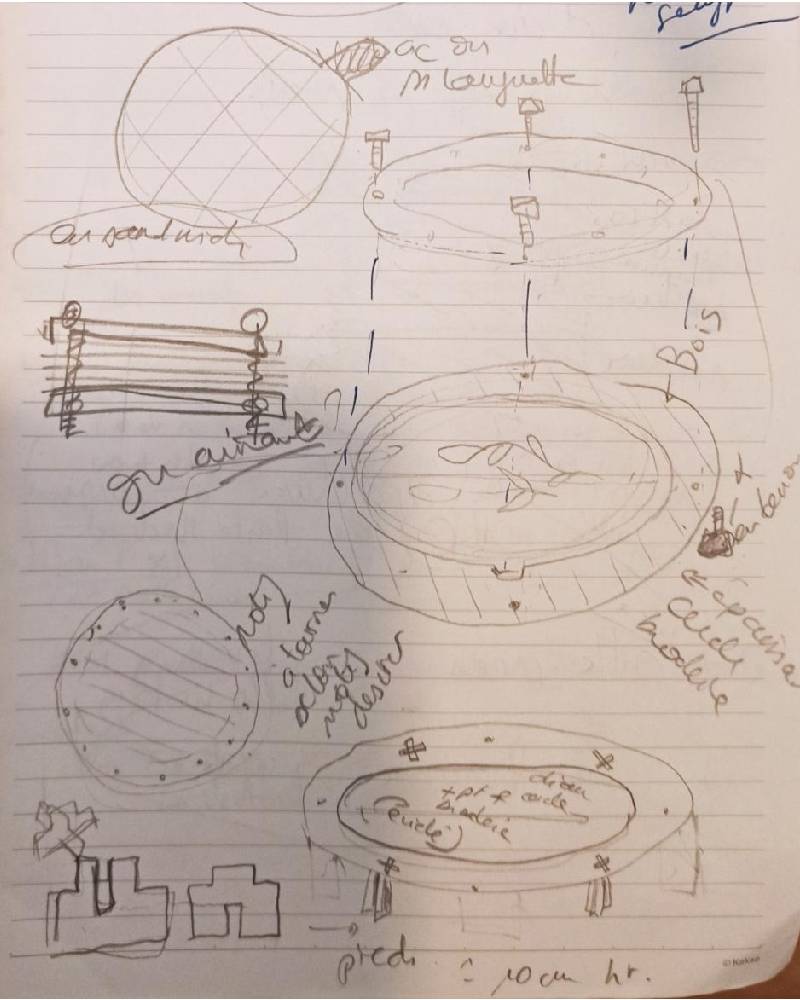
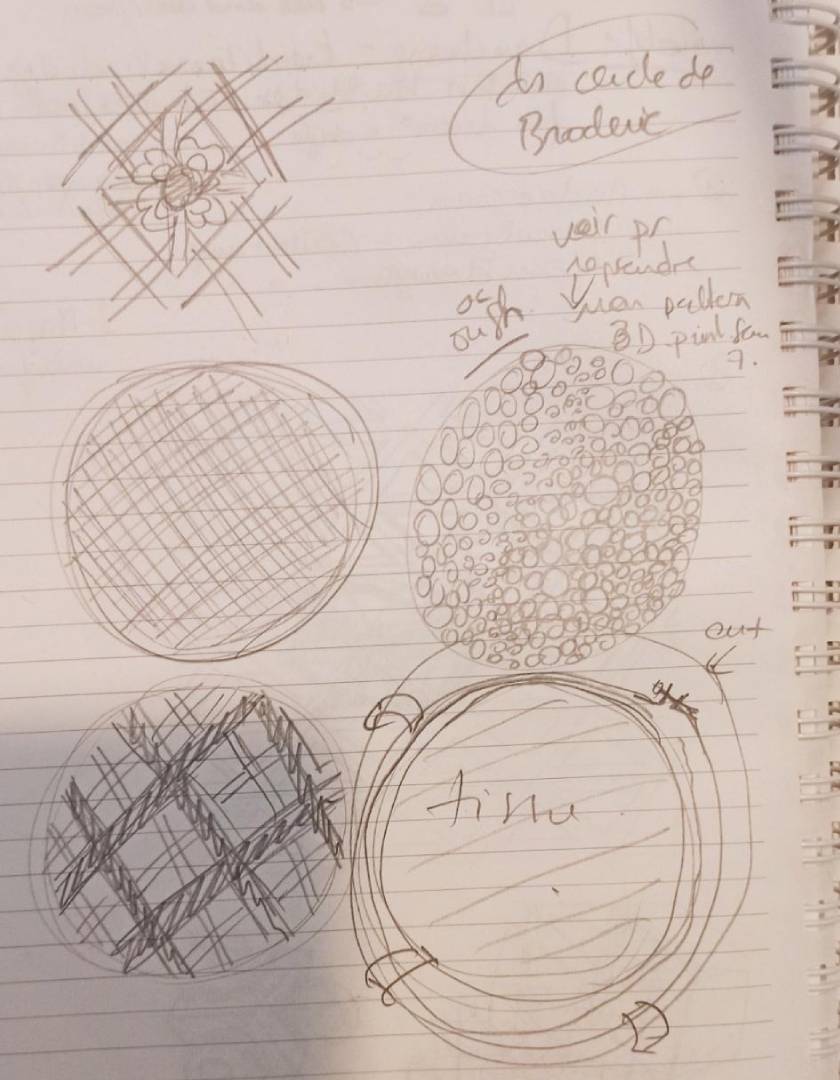
And my sketch for the pattern research.
Process
First, I conceptualized the model of my machine on Rhino in order to clearly distinguish all the parts I was going to need to assemble the machine. The next step will be to carry out laser cutting tests to find out if the radios can be cut. Otherwise I will have to find another material to use.
Secondly, I wanted to test color printings on fabrics with inks and printing pastes.
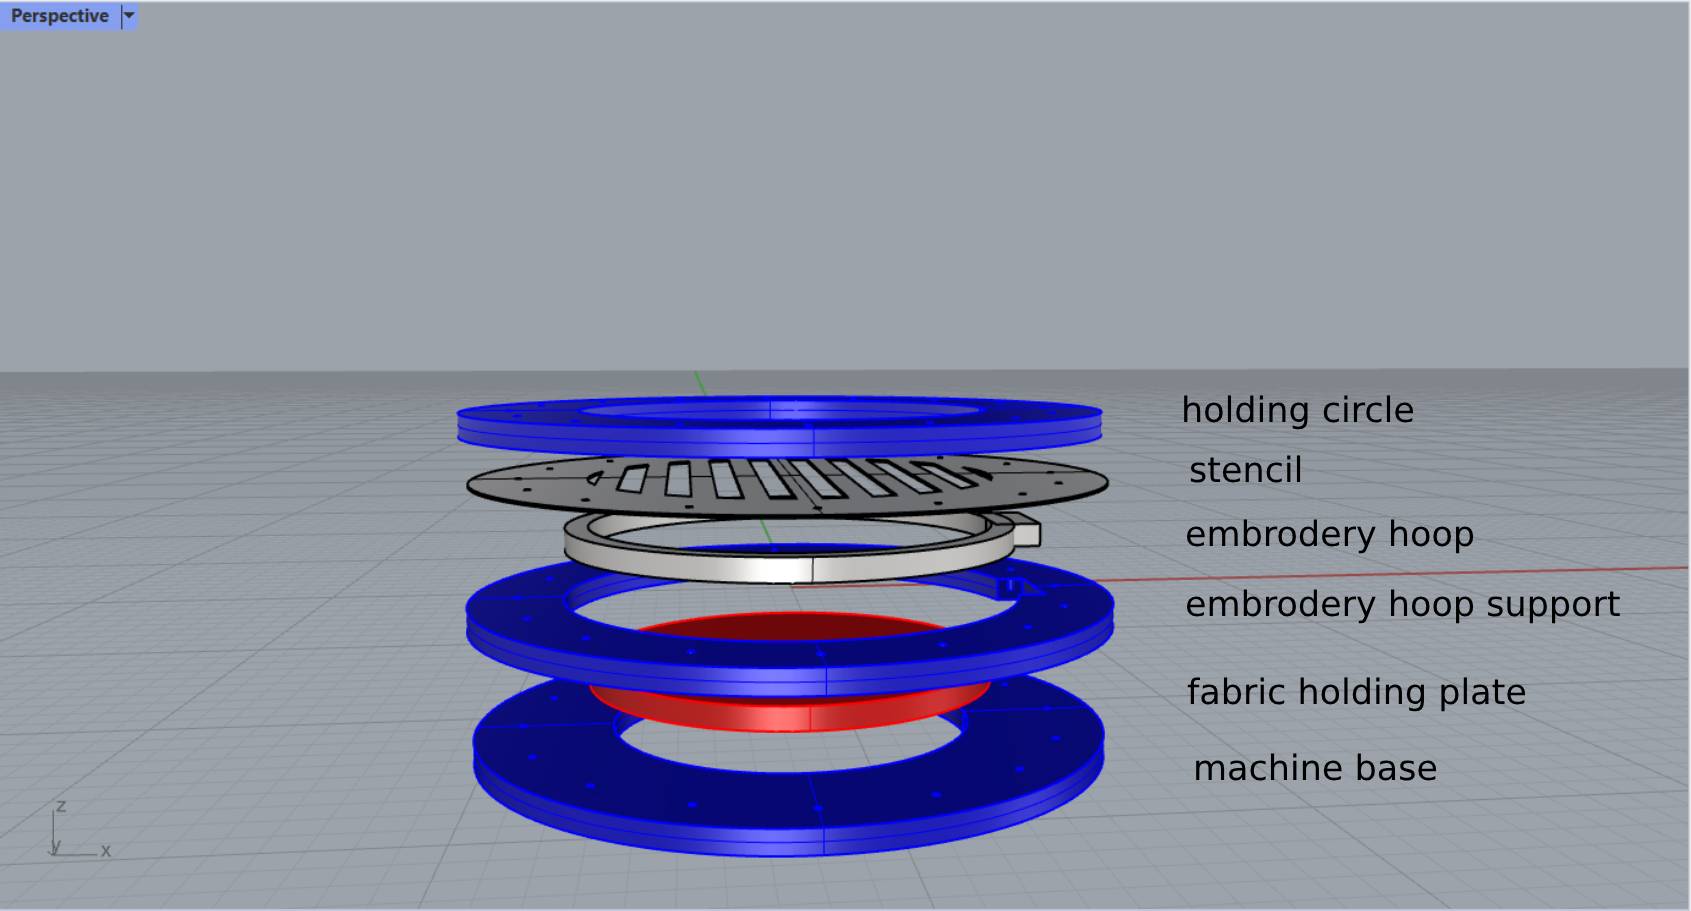
Step 1: Prototype the machine
A first attempt at prototyping the machine on Rhino.
Step 2: Laser cutting test
Plastic can be cut with laser cutting. It was first necessary to carry out cutting tests on the x-rays to have the right parameters.
Here are the paramters I tested with Diane.
X-Ray cutting and Laser cutting parameters
1st test (Power=95/Speed=50) unfinished cuts
2nd test (Power=70/Speed=60) cuts plus engraving
3rd test (Power=95/Speed=40) cuts ok!
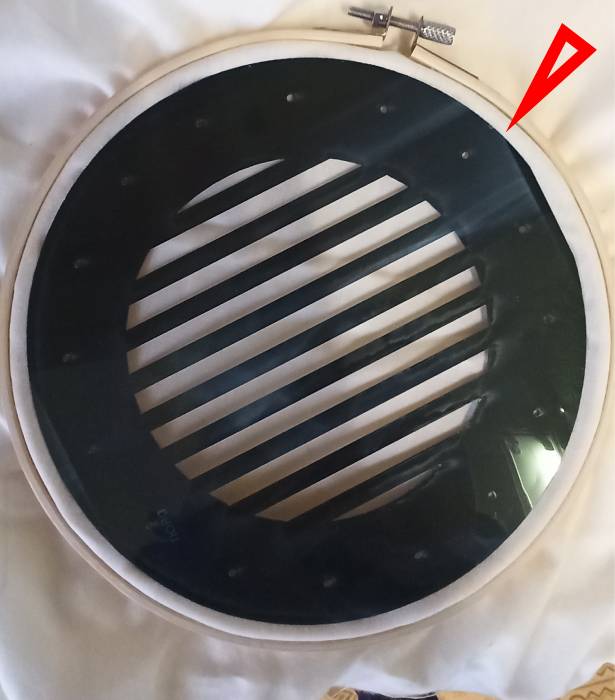
I made a first attempt at cutting a radio but I made a mistake with the scale and measures of the hoop. The stencil was too small.😩 Need to pay attention to the scale settings and file size to be cut before starting laser cutting.
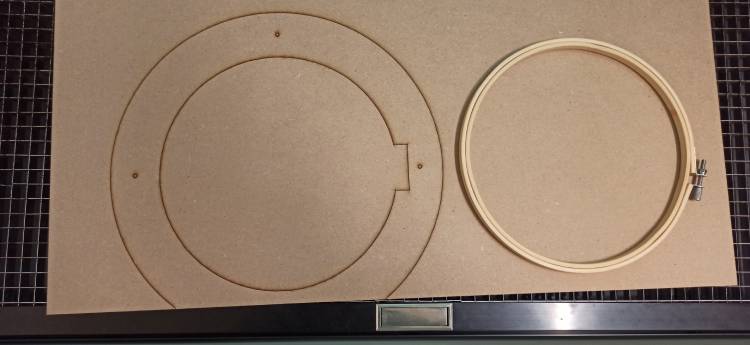
MDF Cutting
I cutted out the support for the embroidery hoop but made a mistake. The diameter is too small and the departure of the nozzle has shifted. The cut was not made in the right place on the board. It would be necessary to add 2 mm on each side.
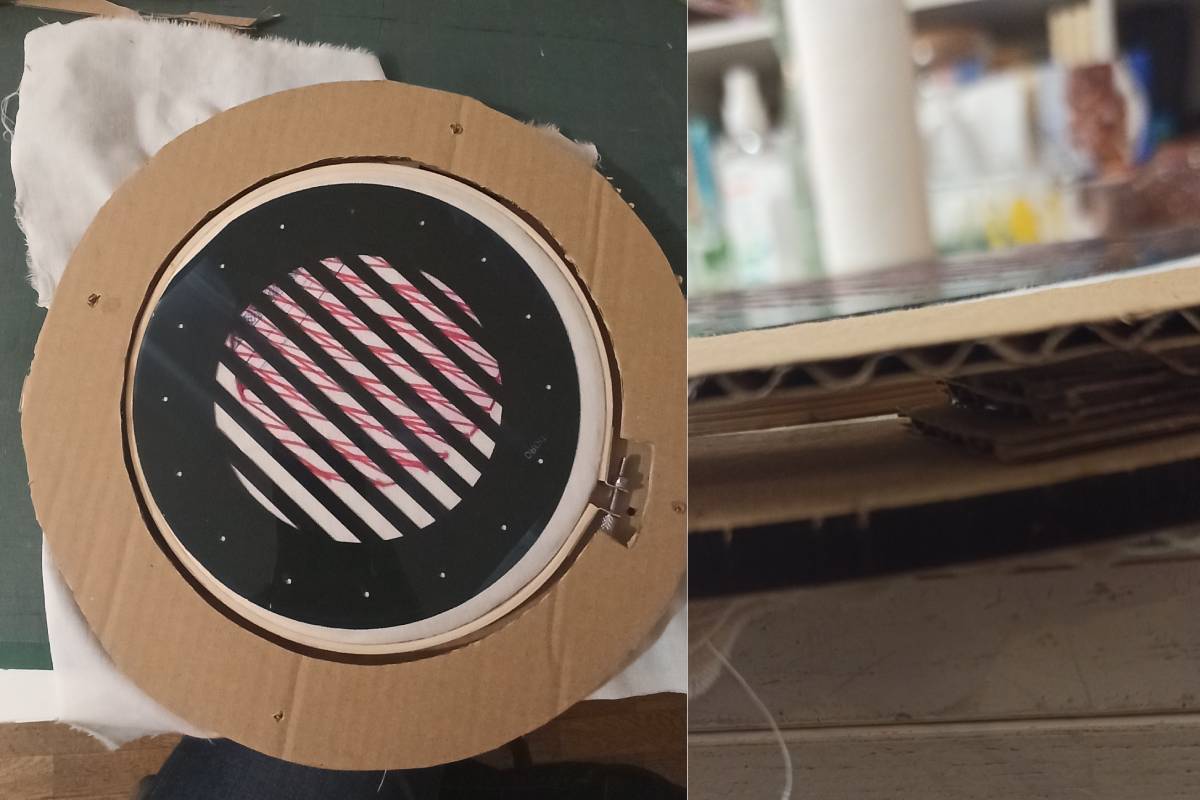
Cardboard Manual cutting
Before cutting any more pieces, I tried out a cardboard model (which I should have done first). Then I modified my file in Illustrator to get the correct measurements for the diameters of the machine's inner circles.
MDF, MRI and X-rays cutting
There have been power problems at the lab (several blackouts) this week. I had to optimize the time available to launch the laser cutting without interruption.
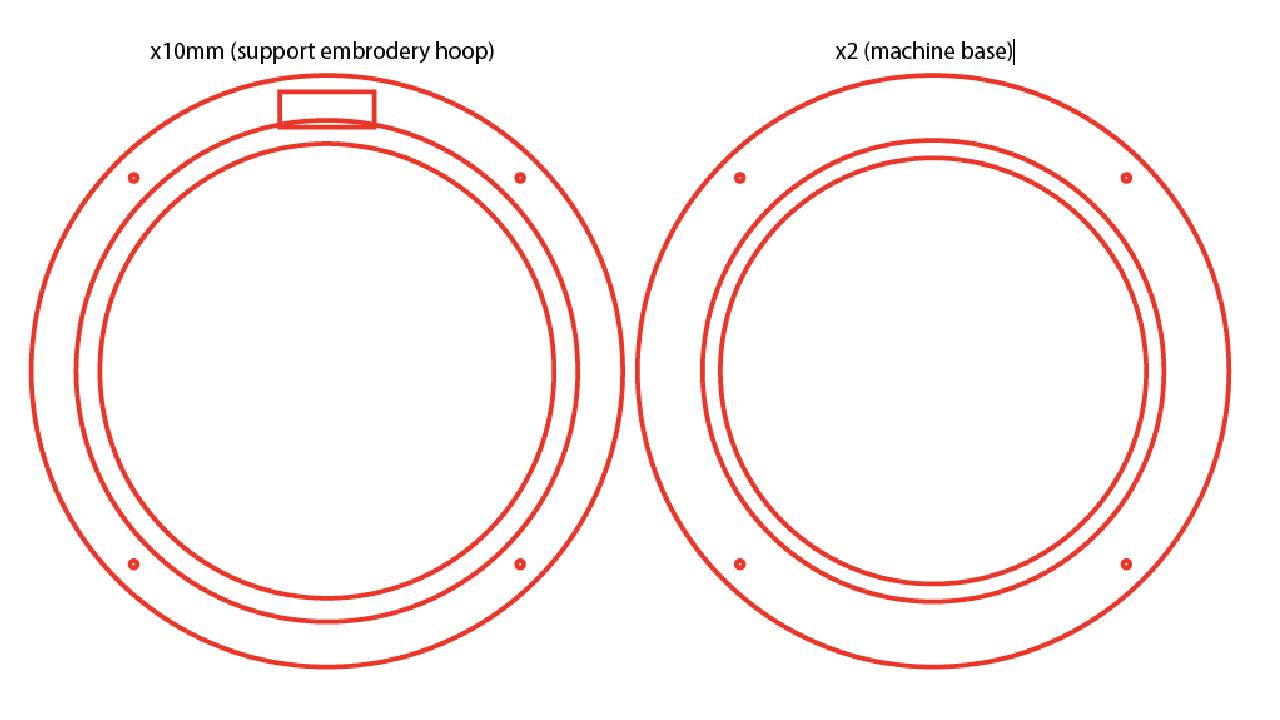
The thickness of the embroidery hoop being 10mm, I had to cut the machine parts from 10mm thick MDF. I only had 6mm or 3mm boards. I cut both boards and glued the cuttings.
Here's the model of the machine reviewed for the final cut. All models are available and downloadable in the "files" section (either in .stl or .ai format).
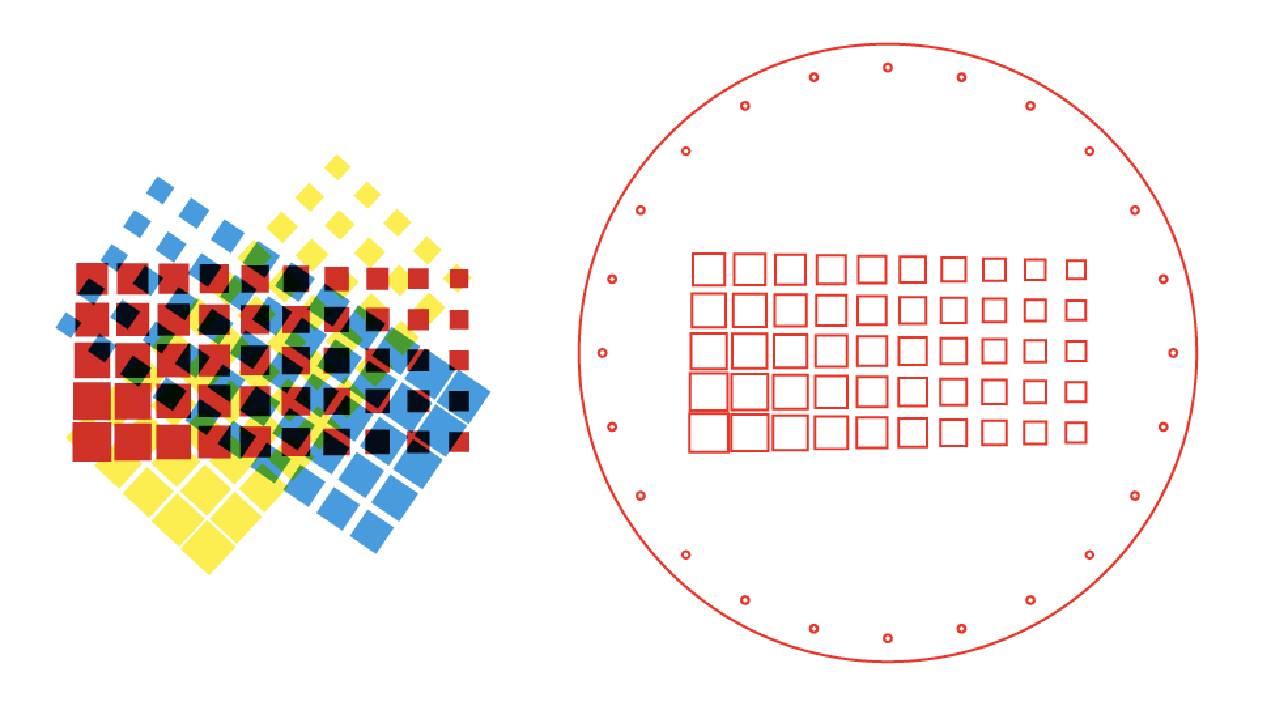
Here's the model of the square stencil.

Here's the model of the diagonal stencil.
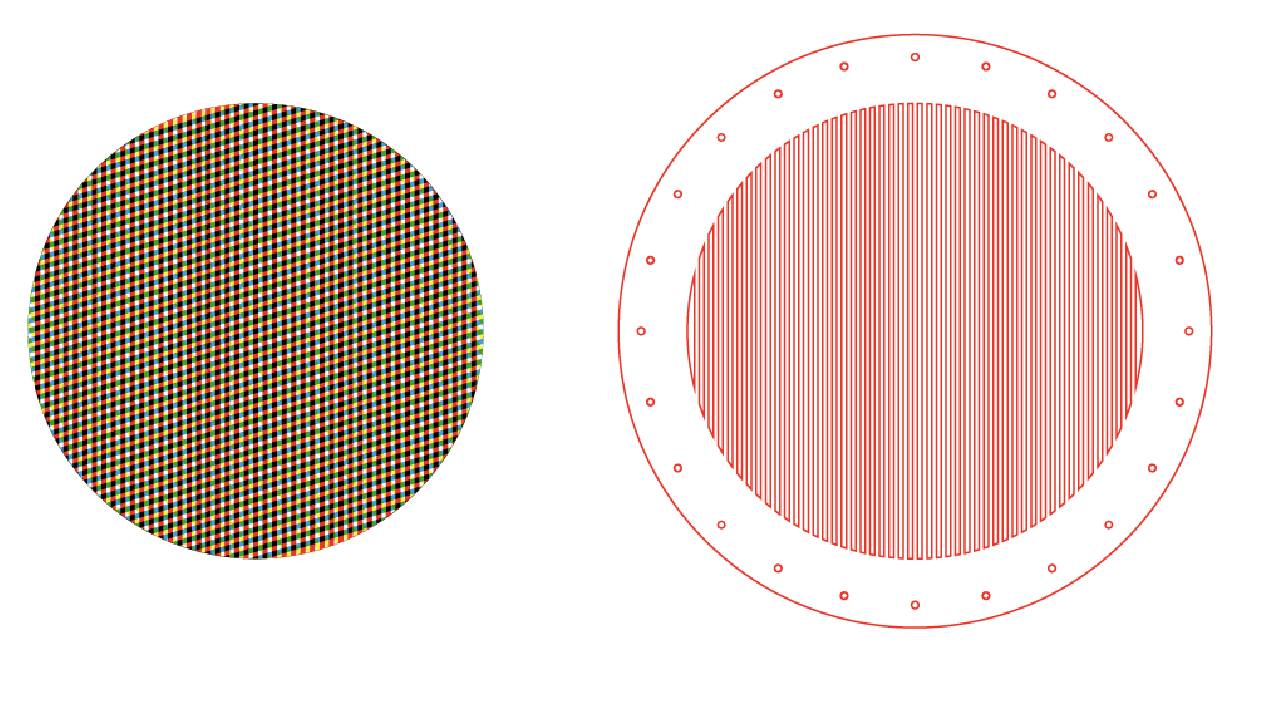

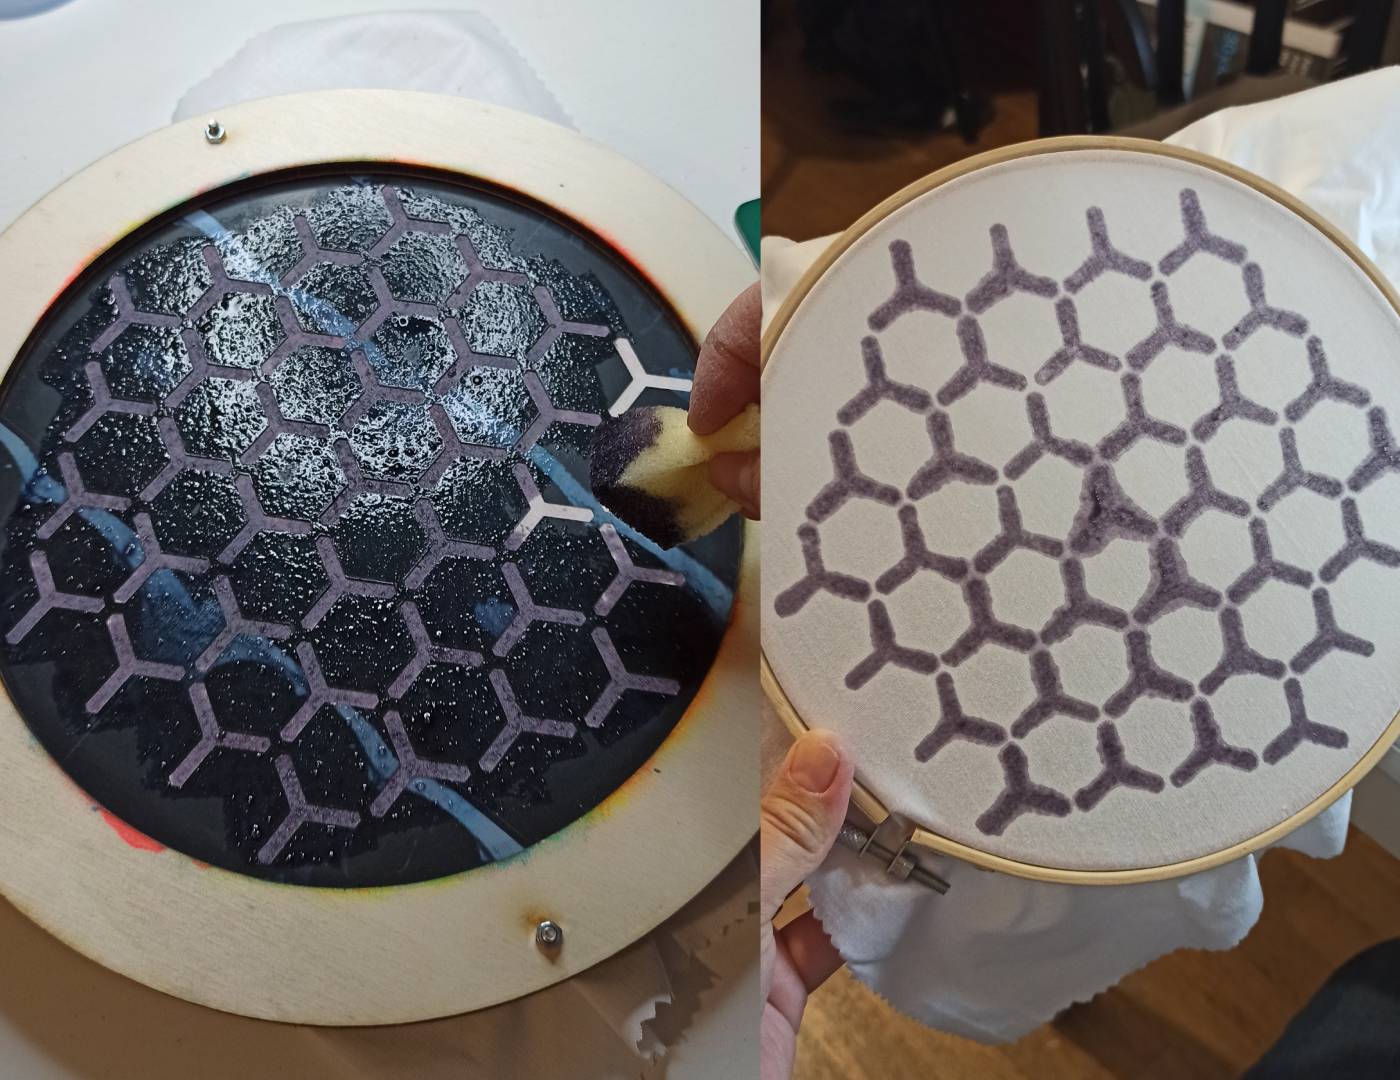
Here's the model of the hexagon stencil.

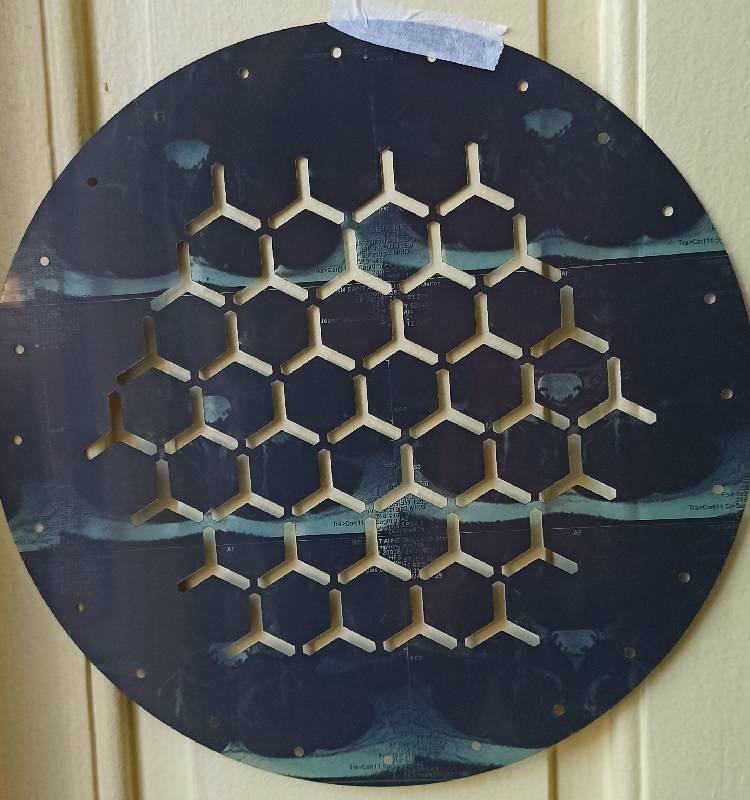
It worked pretty well.
Step 3: Assembly machine
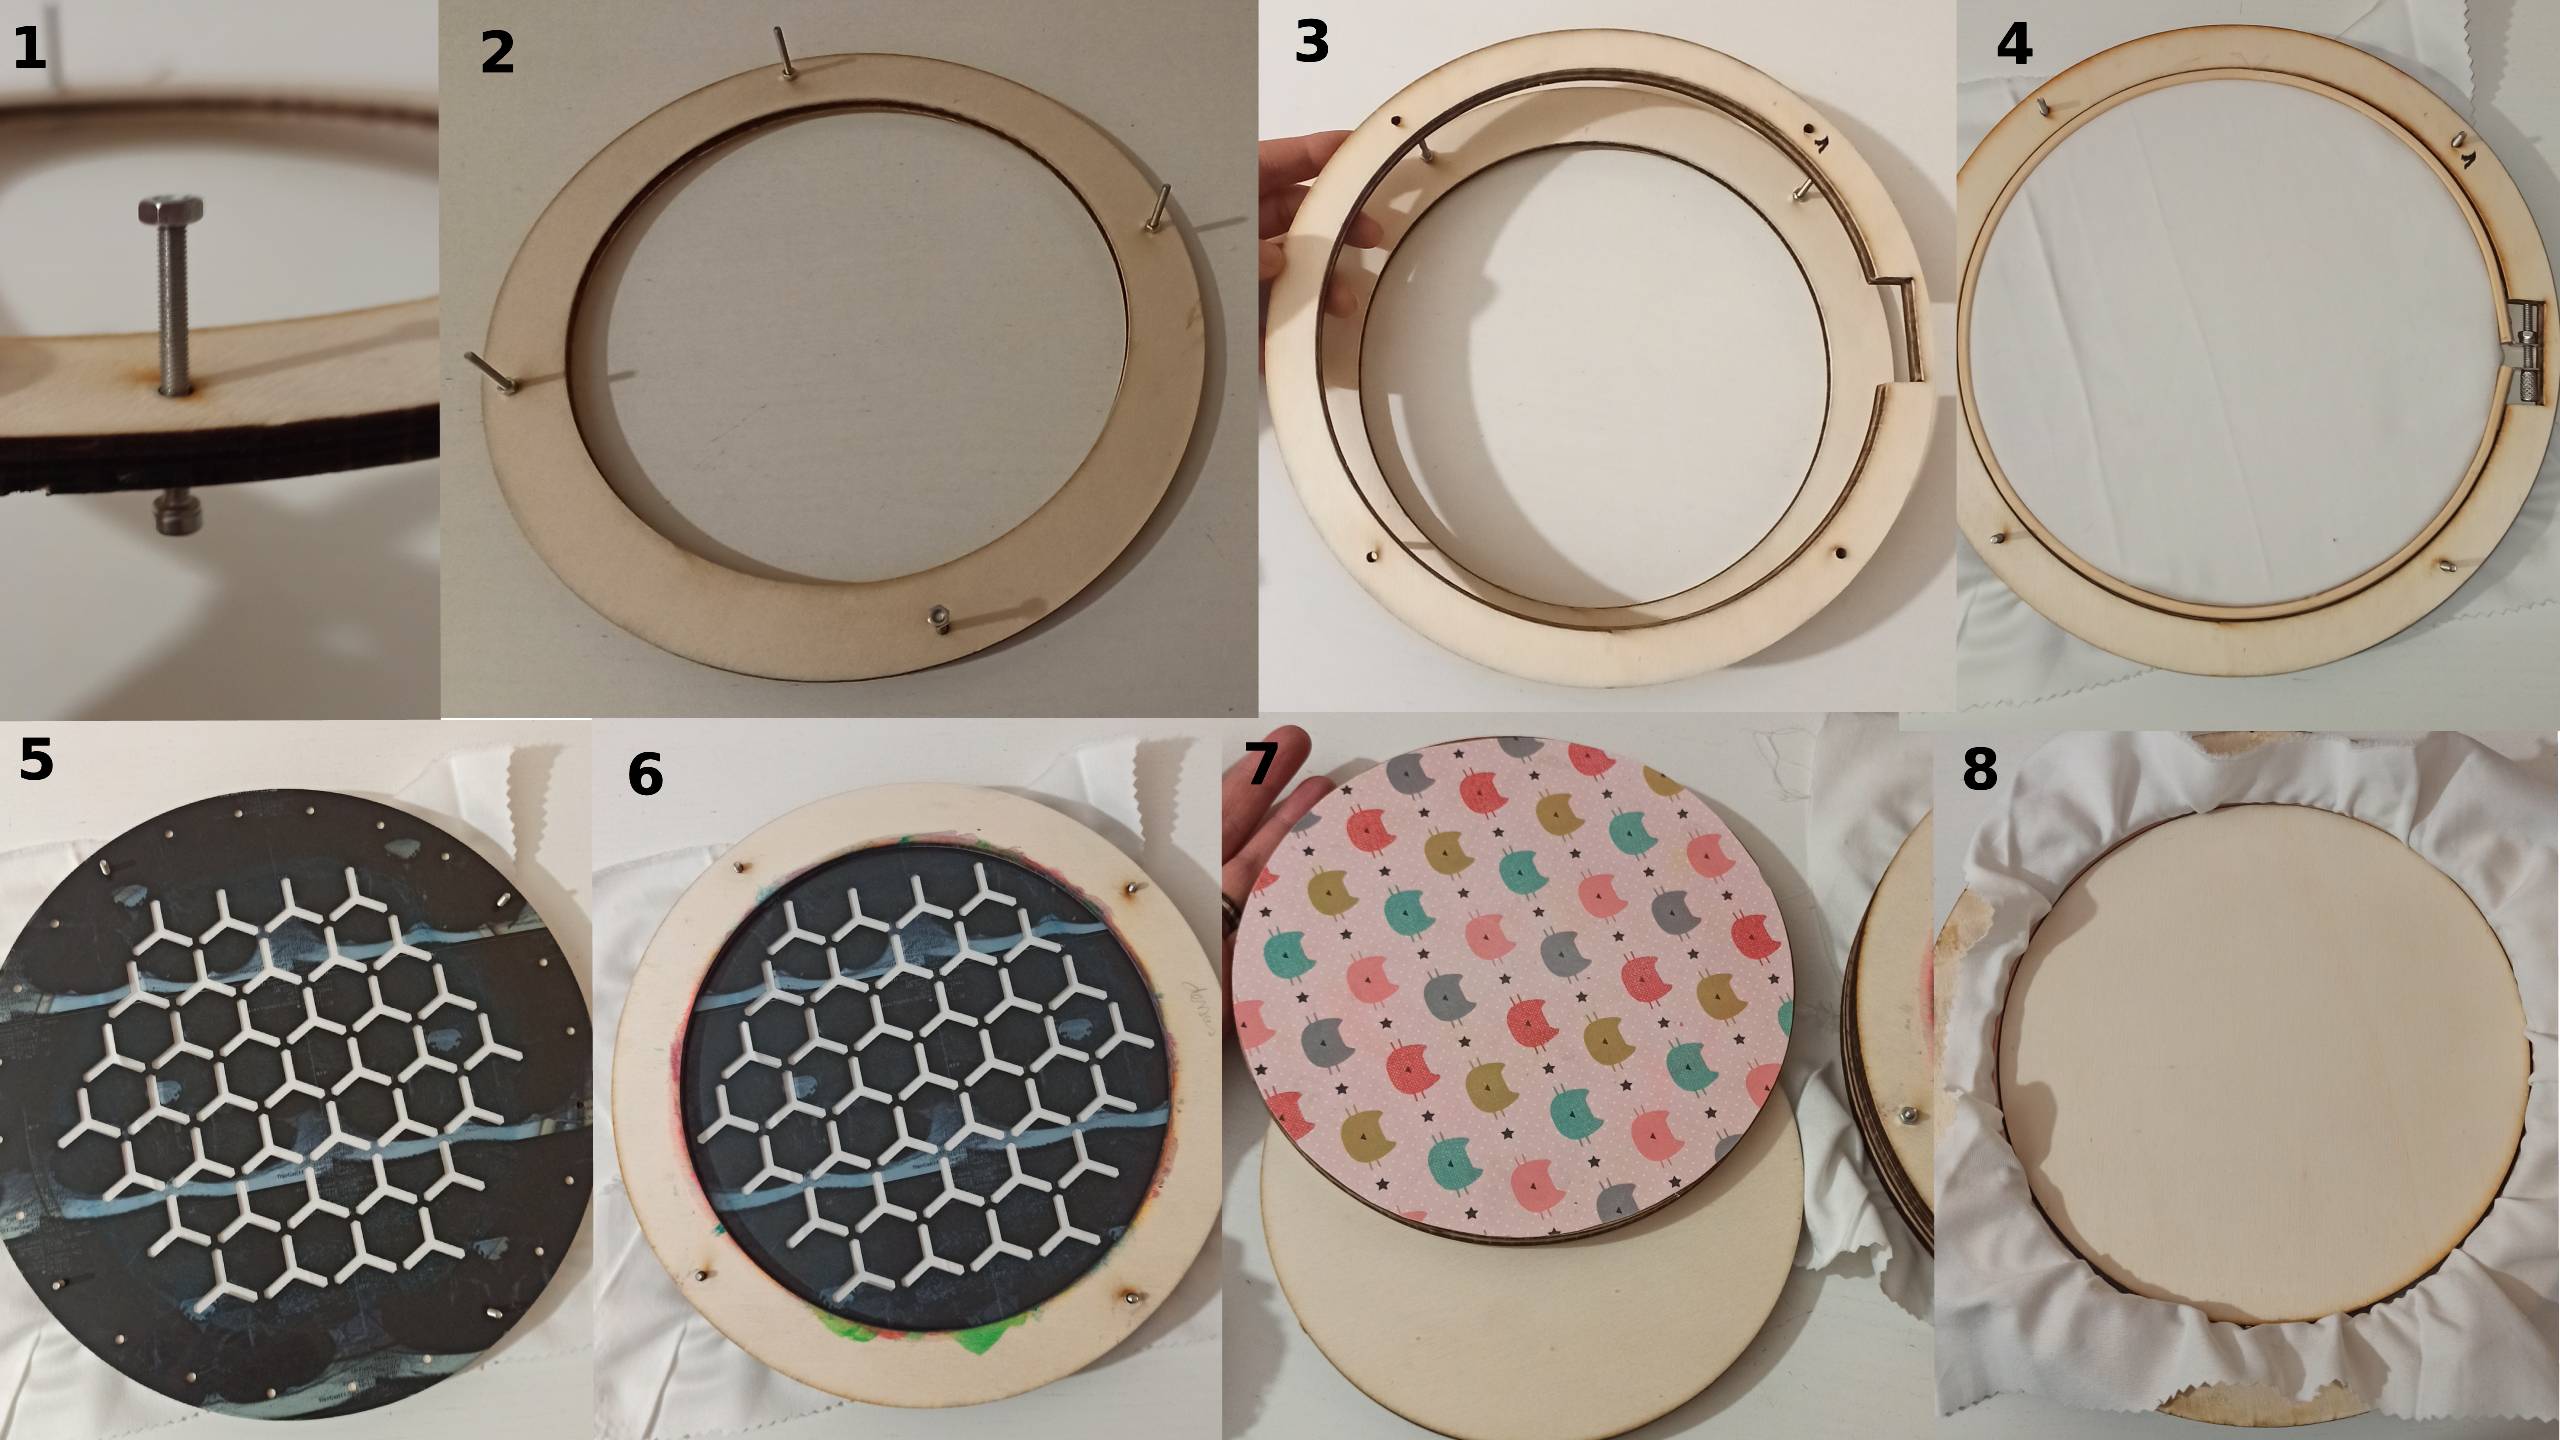
1. Fit the screw with a nut so that the screw fits on the base of the machine
2. Repeat on the other 3 holes
3. Put the support for the embroidery hoop
4. Put the embroidery hoop with the fabric
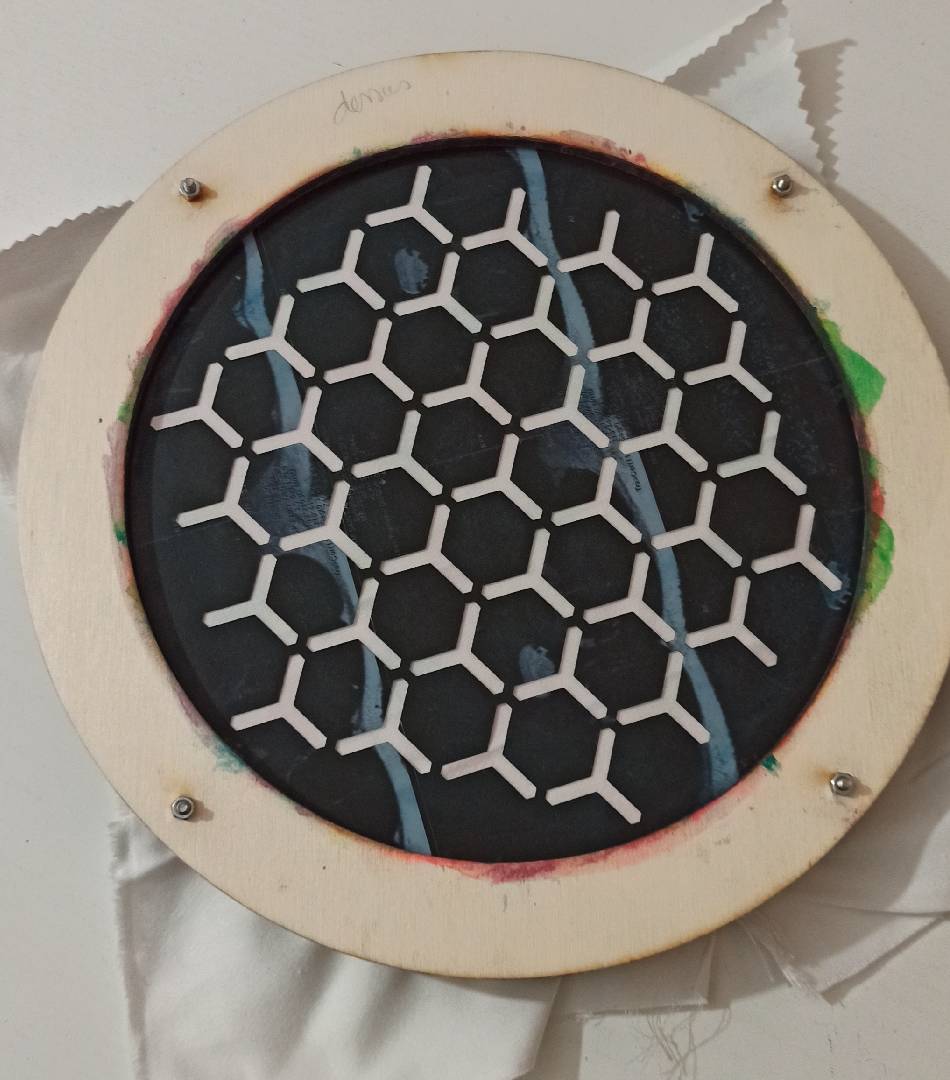
5. Position the stencil
6. Put on the holding circle and put the nuts so that the machine is closed
7 and 8. Put the fabric holding plate that goes under the embroidery hoop
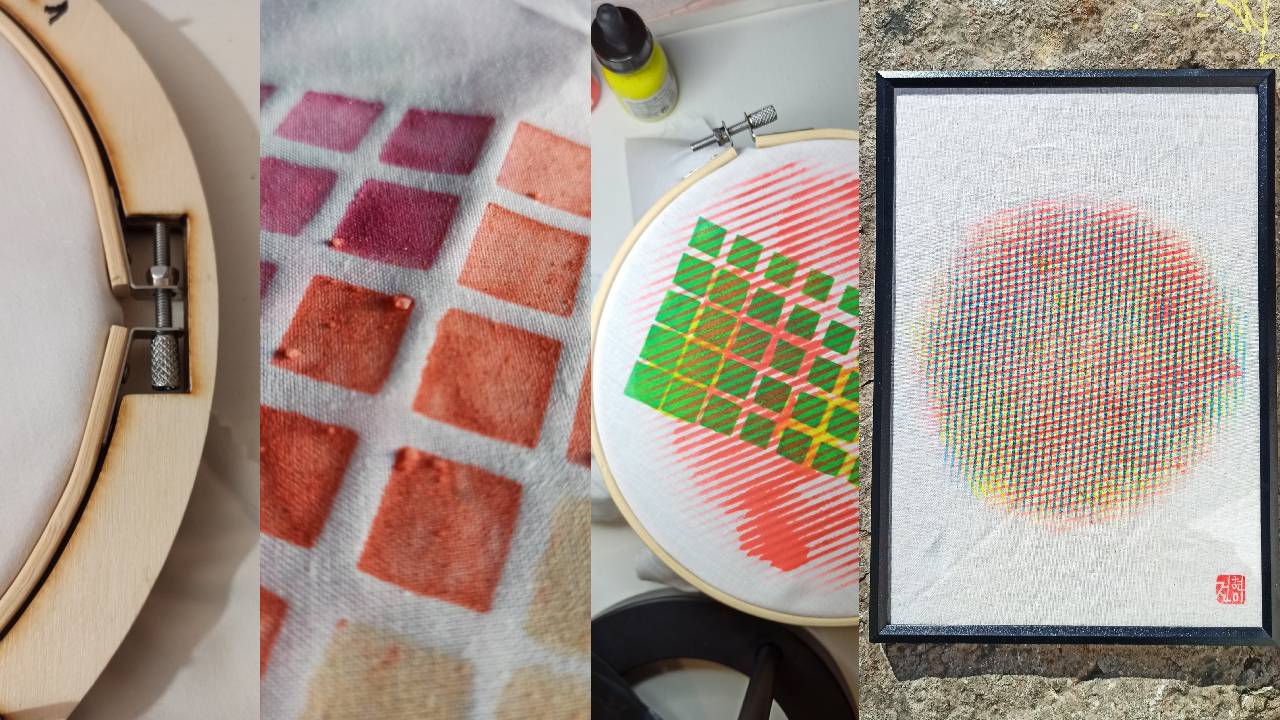
The pattern machine is ready to print!
Here are the different possibilities for using the machine with stencils.
One stencil for one pattern
I used one stencil to make one pattern.
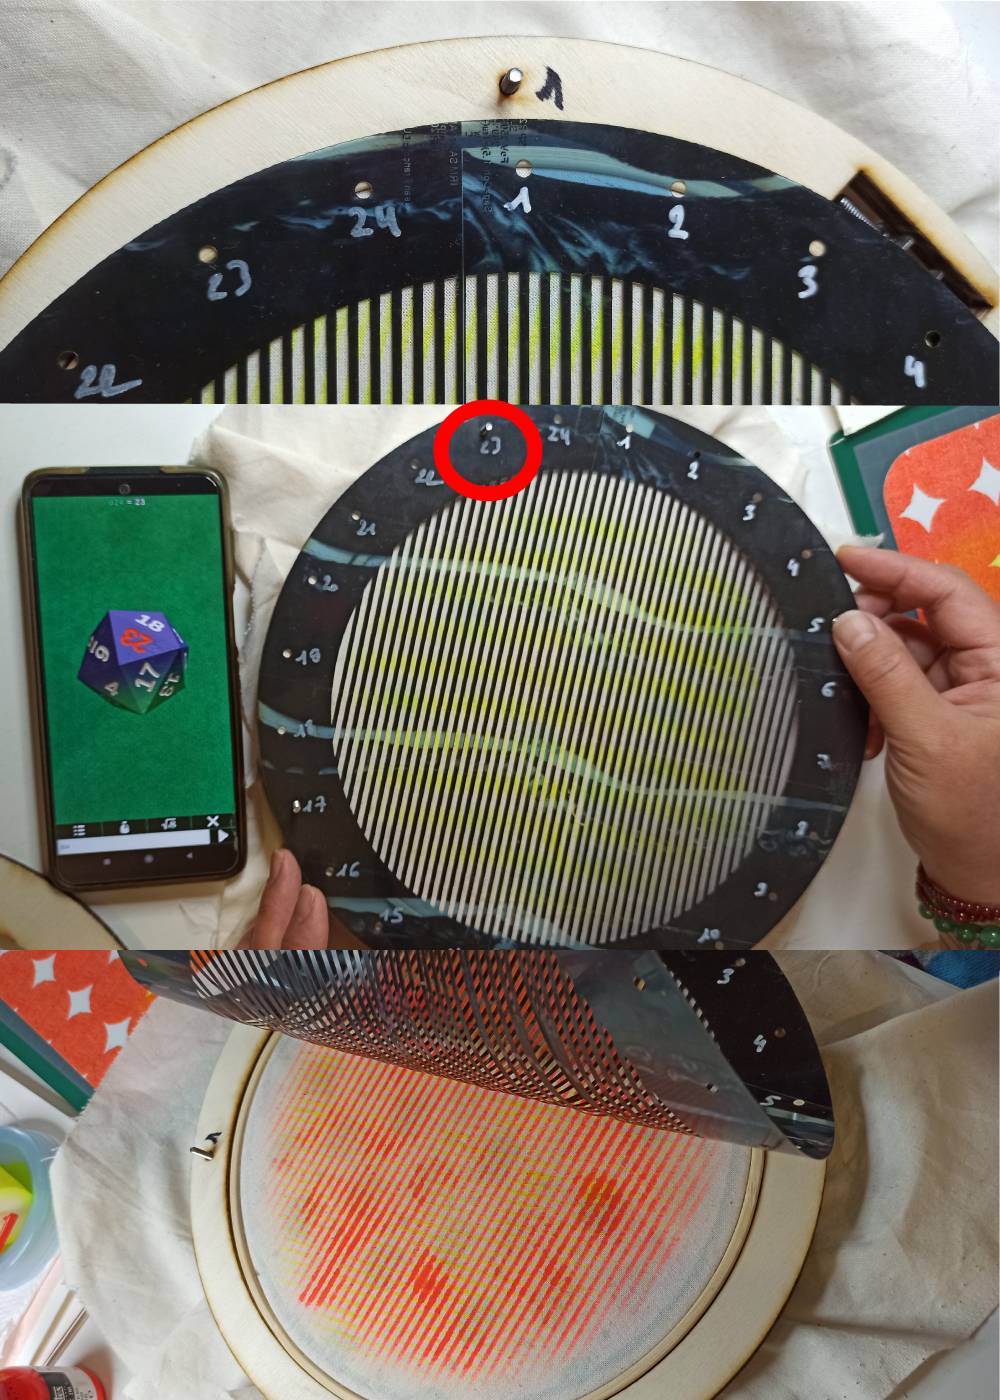
One stencil for rotated pattern
I used generative approach like I did on week 3. The die indicated on which angle I had to position my stencil at mark 1. There are 24 rotation possibilities.
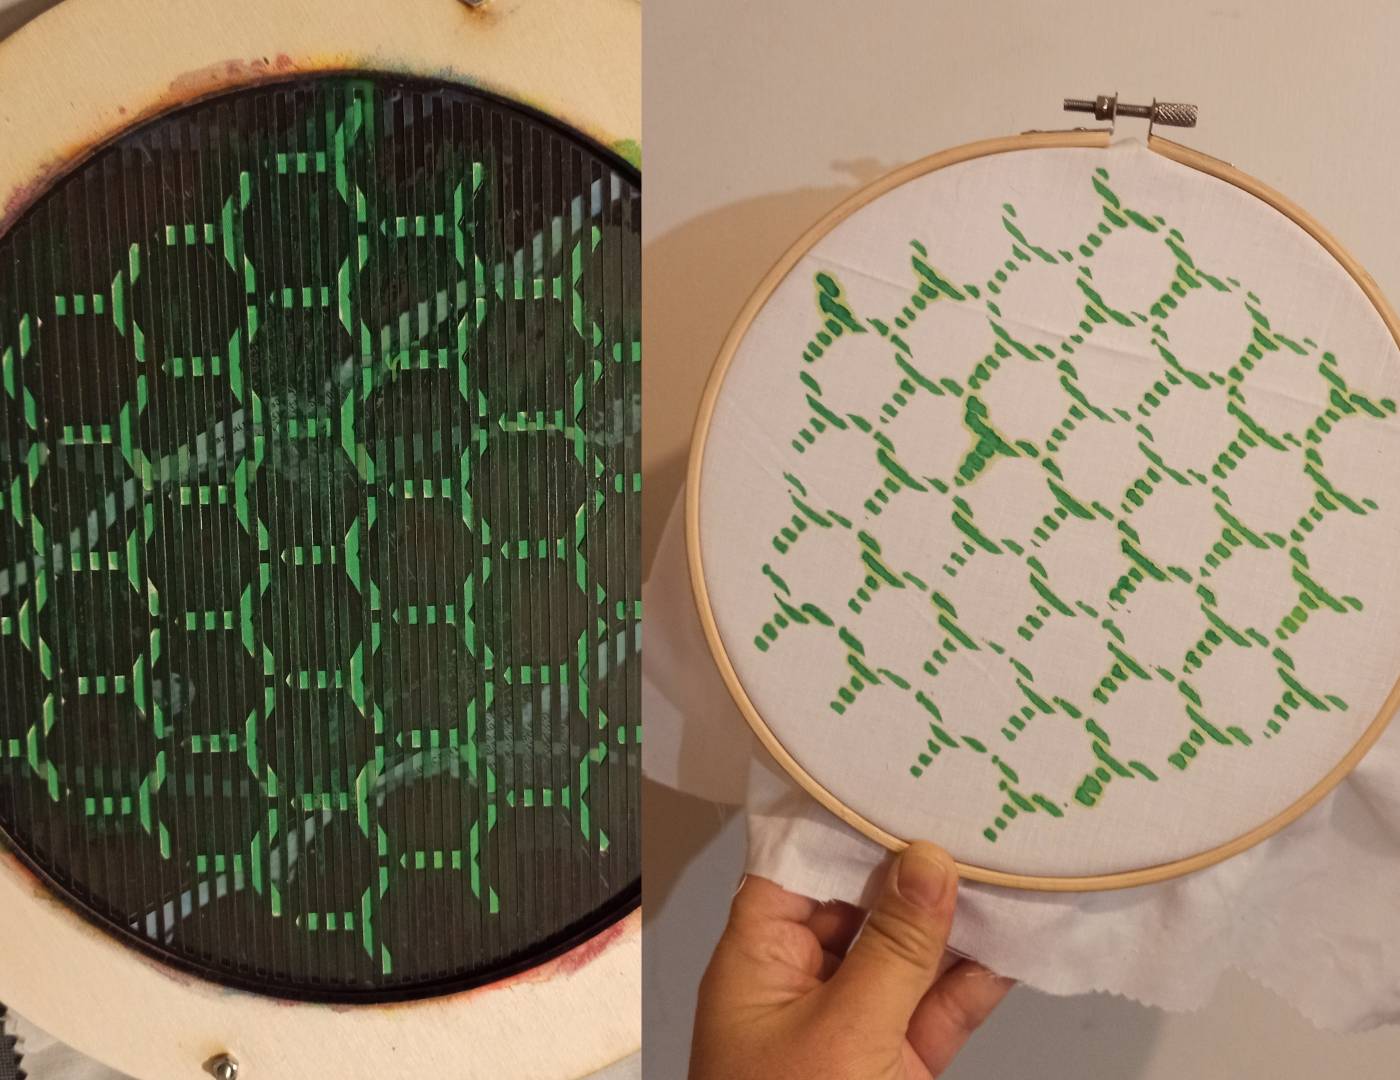
Layered stencils for a blended pattern
Taking inspiration from the moiré pattern, I tried combining 2 stencils and applying the ink on them.
Step 4: Colors
To match the tests I had done on Illustrator, I bought fluorescent acrylic inks to test before testing with vegetable dye printing pastes.
Fluorescent acrylic inks
A first test is made on paper to see if the color combination works. The red ink spilled over a little, but the test with the foam rollers worked well.
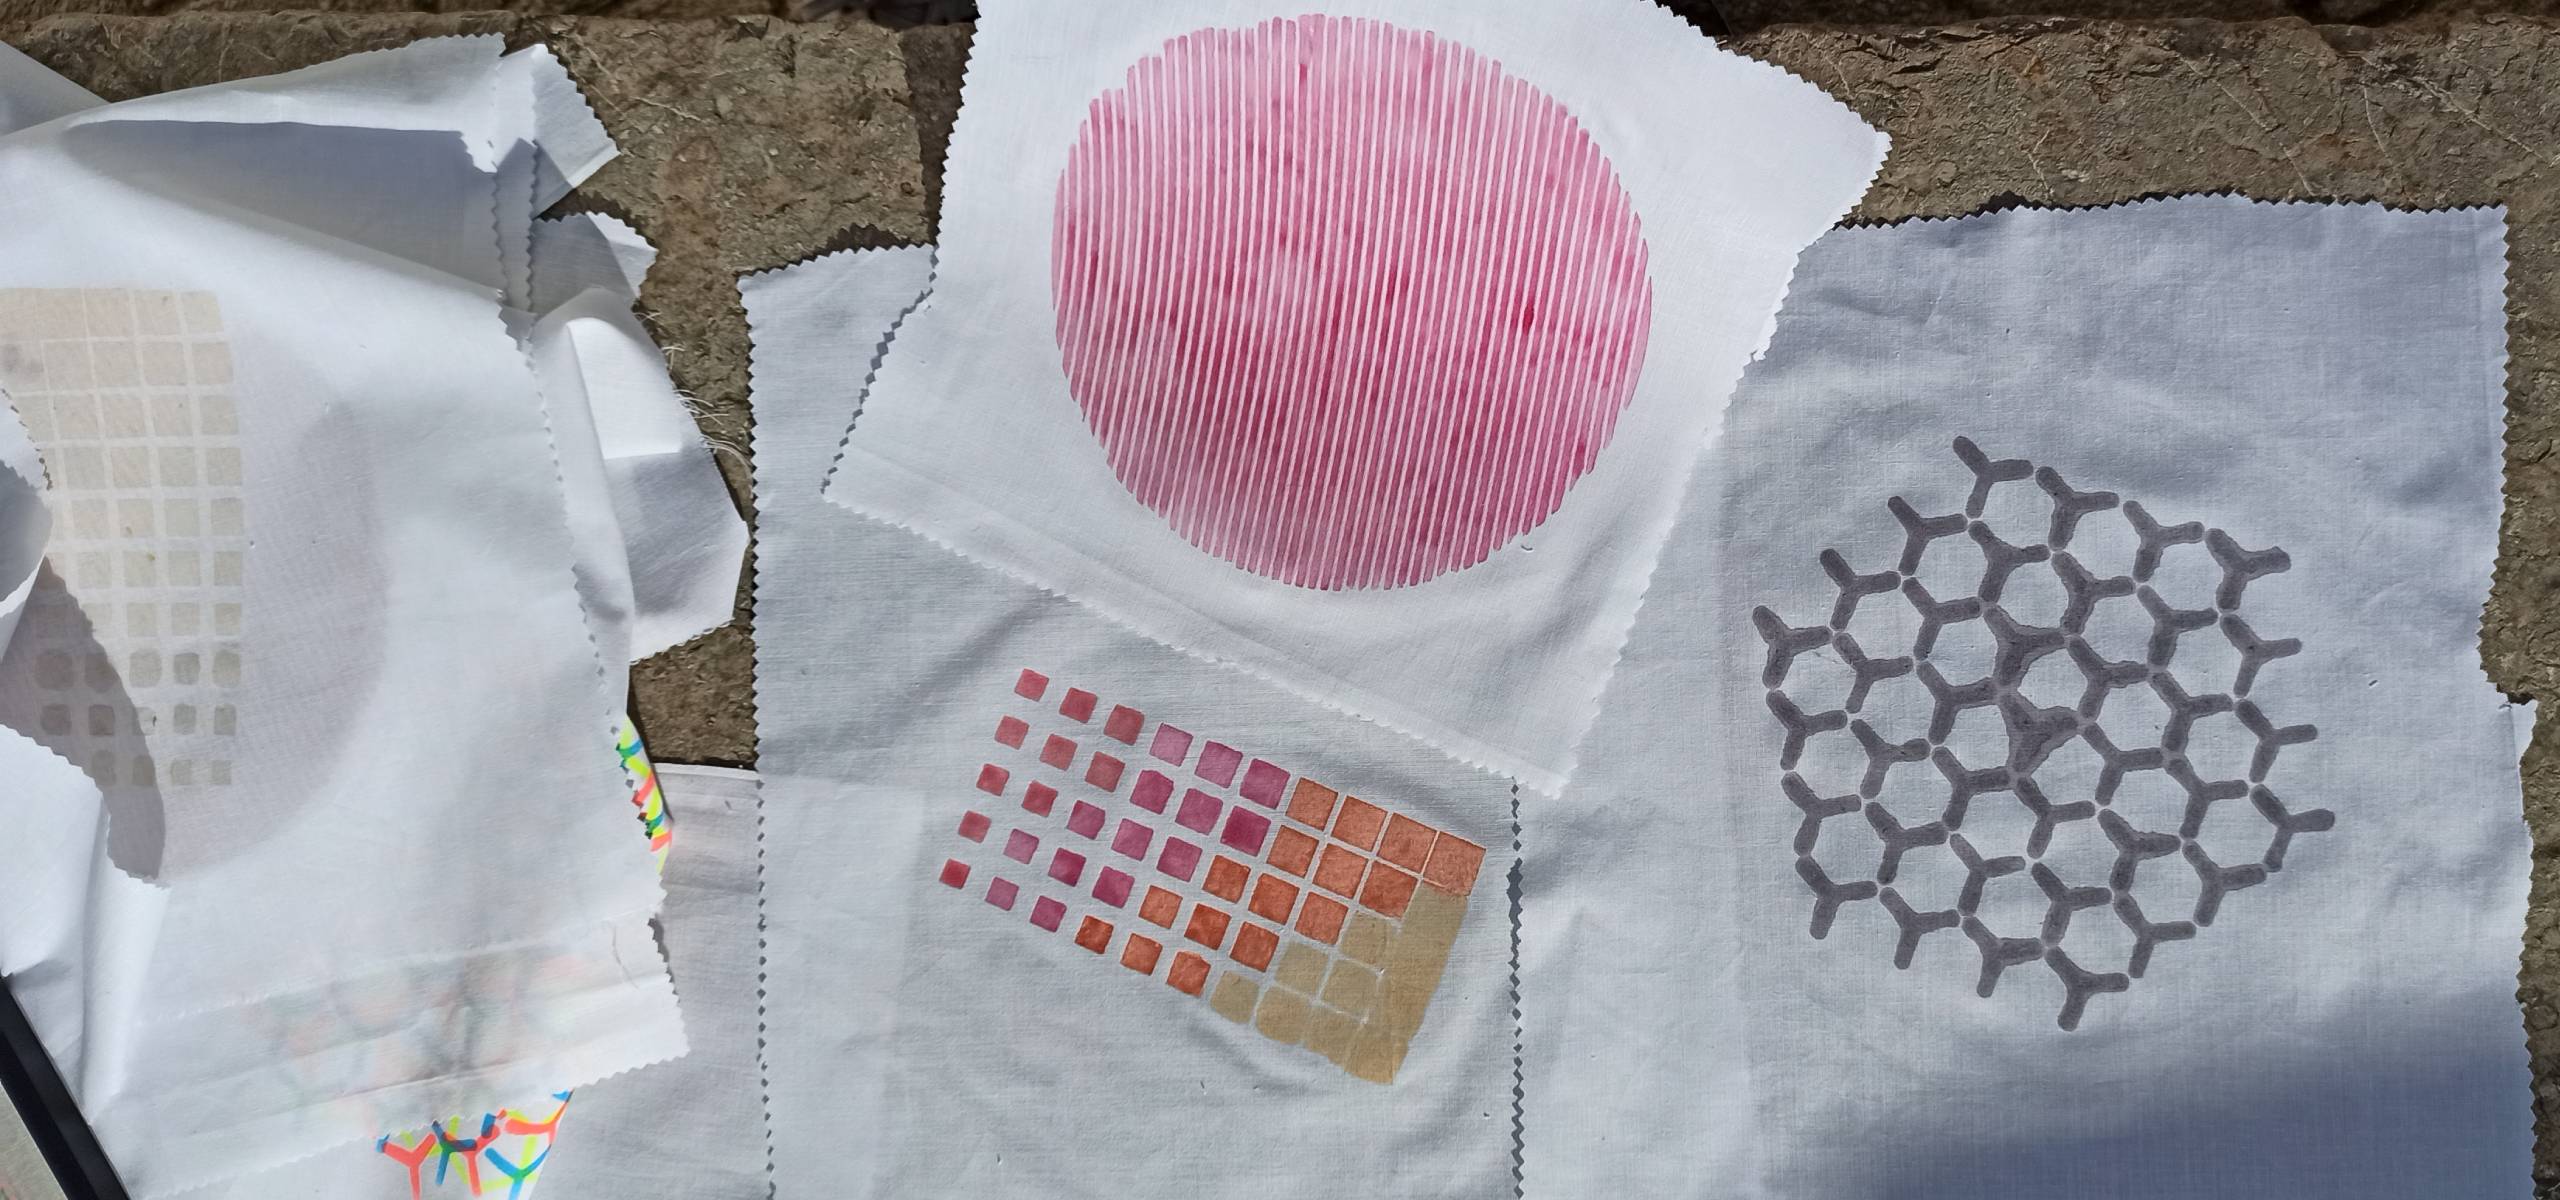
Then I made test on fabric.
Yellow Ink test
Red ink test
Blue ink test
Results

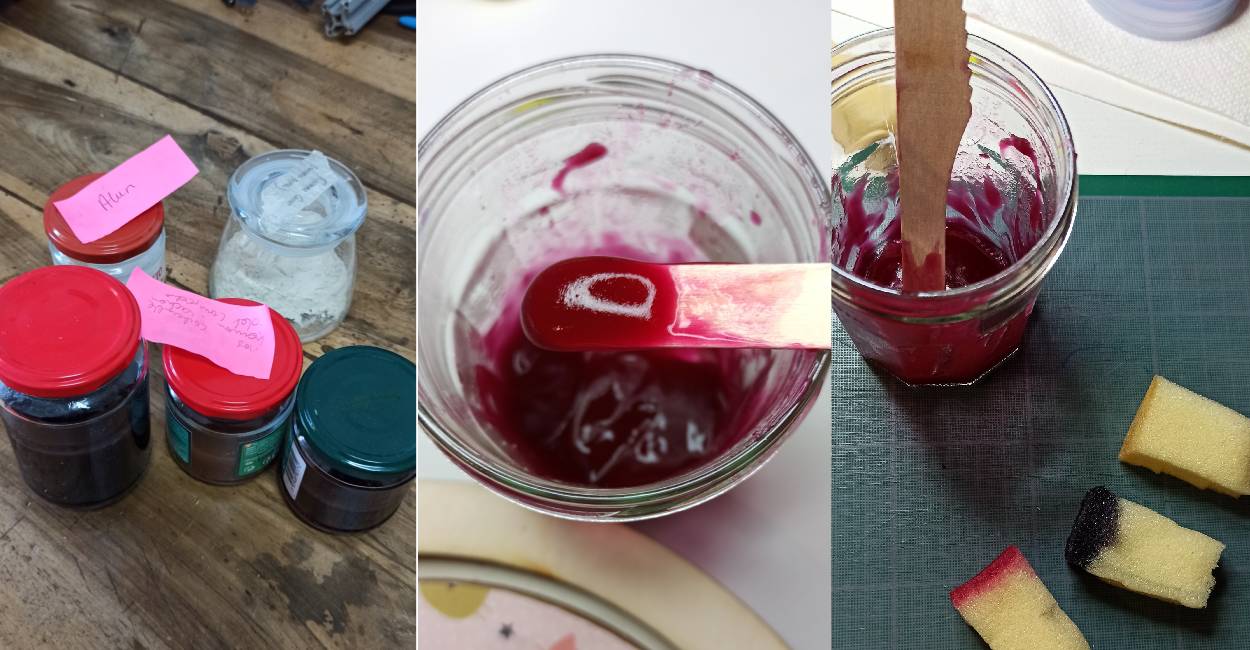
Biochrome inks
Trying to make inks with a base of dye baths recovered from the last workshop on the theme of plant dyes held at Le Textile Lab (catechu, cochineal, logwood tree)+ madder from my week of biochromes.
I used the recipe in Marion's documentation Alumna fabricademy 2022 but the result was not conclusive. The mixture foamed a lot and looked "overcooked". Perhaps I made a mistake in my dosage?
I also made printing paste with the catechu dye, but the preparation was too pasty and there were still lots of lumps of guar gum. I tried another way of making my printing pastes.
* 60 gr dyeing juice
* 1 tbs alun
* a pinch of guar gum
* Kitchen scale
* Spoon
* Pot
* Microwave
* Measure each ingredient
* Mix the dyeing juice and alun together
* Heat for 10 seconds in the microwave
* Mix well to finish melting the alum
* Add the guar gum and mix gently to avoid lumps
* Heat for 10 seconds in the microwave
* Mix weel, the texture has thickened enough and resembles jam jelly
Texture works well with pattern cut-outs, either using foam squares (for dabbing) or a flat brush.
Results
Fabric result
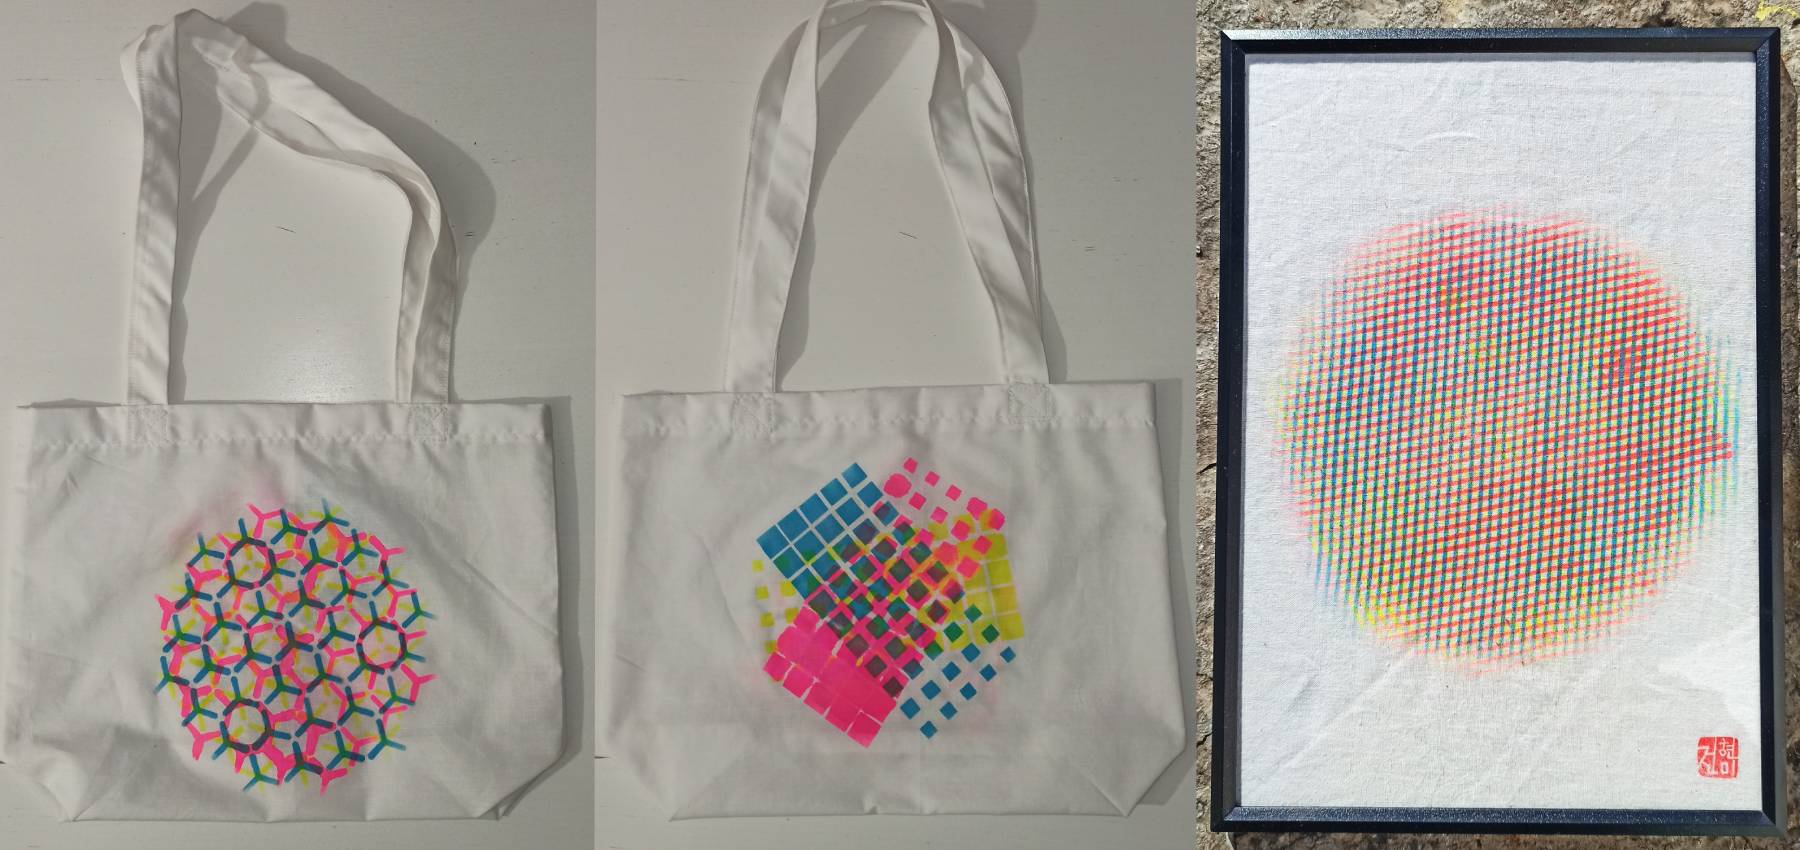
I made a totebag with two printings and another was framed with my korean seal.
When I showed my work to Pauline, it made her think of the work of an artist designer Evelin Kasikov and her colorful embroderies! 😍 Amazing!!!
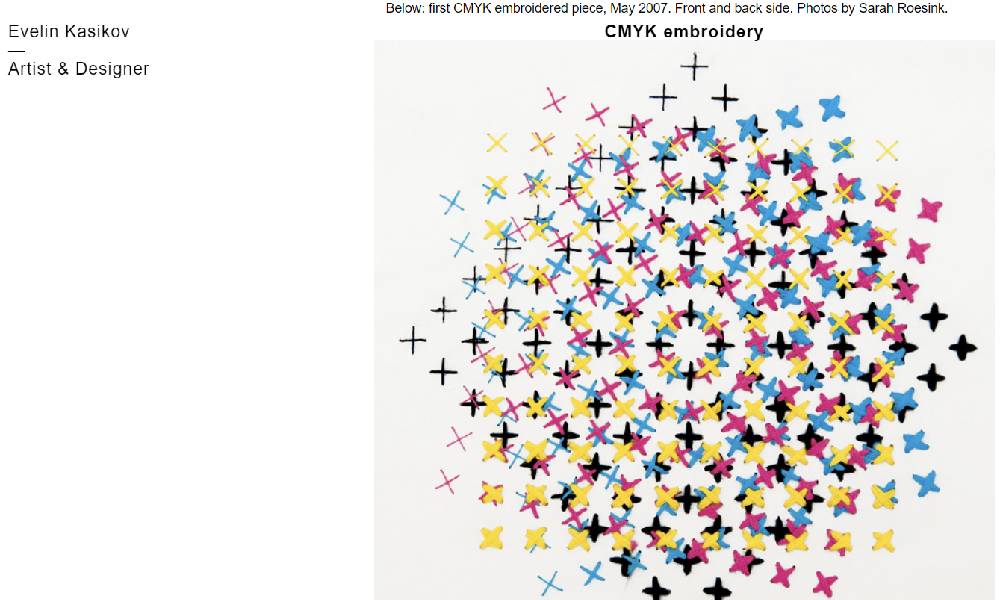
Screenshot of her website
🚀 Going further
It would be interesting to see how I can integrate motors to rotate the stencils by connecting to an Arduino. The idea would be to program a code, which would make it possible to rotate the stencils (randomly, using the generative approach)...⚙️⚙️⚙️
Or find a manual system to rotate the stencils without moving the machine circles.
Another path to explore with Benice’s binary fractal trees
🗂️ Fabrication files
Prototype machine
Cutting machine
Square stencil
Hexagon stencil
Diagonal stencil
Bills of Materials
| Qty | Description | Price | Link | Notes |
|---|---|---|---|---|
| 1 | MDF board 6mm | 11.75€ | Castorama Website | use MDF scraps if possible. 600x1000mm is needed |
| 1 | MDF board 3mm | 6.50€ | Castorama Website | use MDF scraps if possible. 300x300mm is needed |
| 1 | MRI (Magnetic Resonance Imaging) and X-rays | free | NA | used old ones (If you don't have one, you can use heat-sealed laminator sheets) |
| 1 | Wood glue | 3.95€ | Leroy Merlin Website | use a bottle already opened |
| 4 | Cylindrical head steel bolts 3mm | 10€/box | Amazon Website | use those available in the screw locker |
| 4 | Steel nuts 3mm | - | - | use those available in the screw locker |
| 1 | Embrodery Hoop | 2€ | Amazon Website | used old ones |
| Pieces of Fabrics | - | - | use fabric scraps (like cotton from old sheets) |
Materials if you wanted to try with inks
| Qty | Description | Price | Link | Notes |
|---|---|---|---|---|
| 3 | Acrylic Ink | 8.95 €/Ink | Géant des Beaux-Arts Website | - |
| 3 | Foam paint rollers | 1.15 €/roller | Géant des Beaux-Arts Website | or used old ones, flat brushes |