9. E-Textiles and Wearables II#
assignment#
- Create a swatch using an attiny with one input and one output of your choice
- Create 2 actuator swatches. Test them with the Arduino or ATtiny.
- Document your swatches including your code and a schematic of your components
- Record a small video of your circuit working
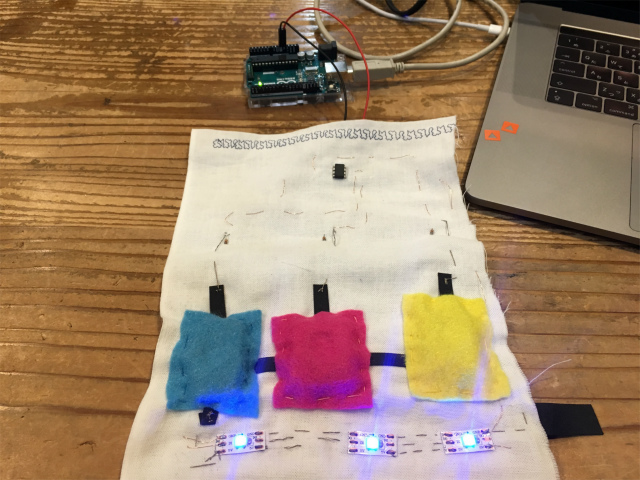
a swatch with an attiny#
In week05, I made a swatch with an arduino, but wirings were terrible. In this week, I made it neat with an attiny(attiny85) and thin conductive wires.

programming attiny85 with Arduino#
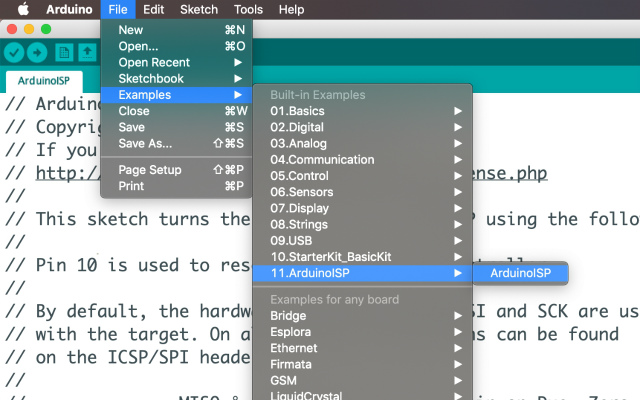
I used Arduino IDE and Arduino as ISP(In-system Programmer)). Before using Before using an attiny from Arduino IDE, you have to install attiny board support. I have installed it following this instruction before.
First, I uploaded a sketch, ArduinoISP, to a arduino to use it as an ISP.
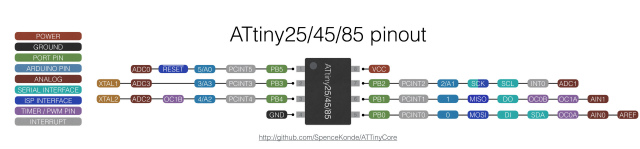
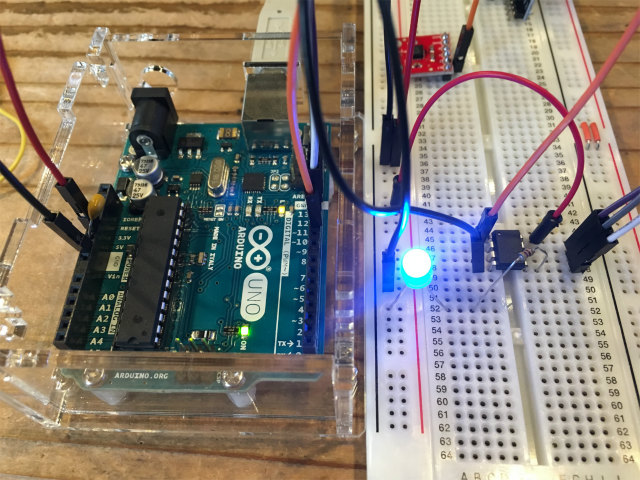
I uploaded “Blink” skecth to an attiny85 to see if arduino ISP worked properly. I connected an attiny85 with arduino ISP according to this tutorial, and also connected an led and a resistor(470 ohm) between pin 0 and GND.
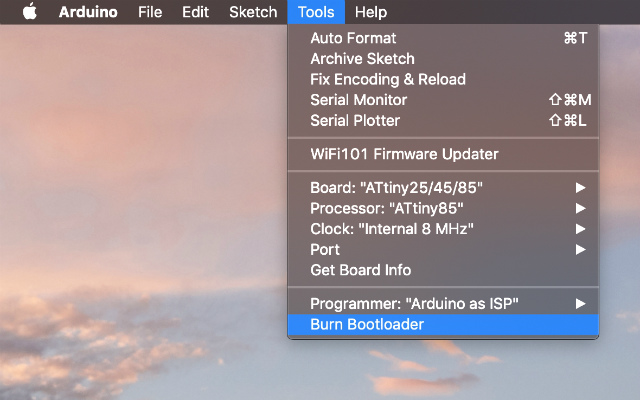
Before uploading blink program, burning bootloader is neccessary.
Then, I could upload blink program successfully.
making wirings neat#
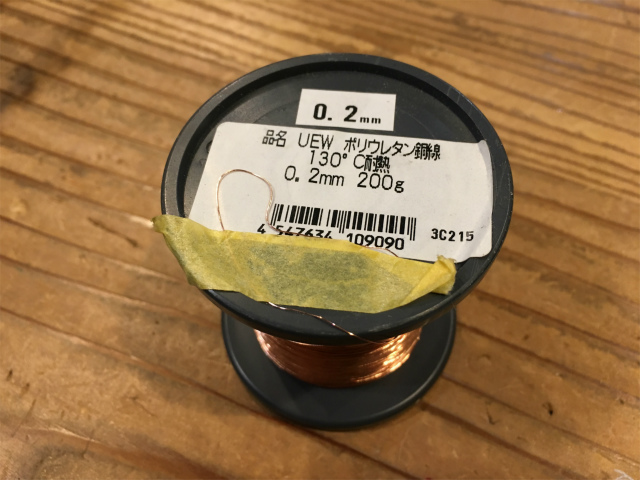
I think a conductive thread I used is less reliable, so I used a polyurethan insulated wire instead. Its thickness is 0.2 mm.
I pushed an attiny’s legs through a fabric and soldered them with wires.
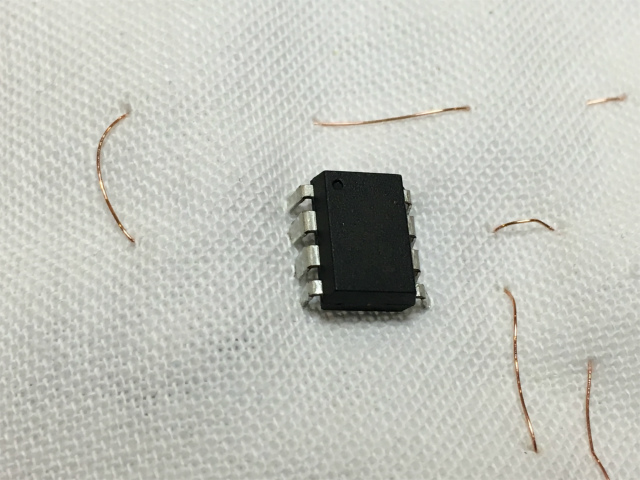
No crocodile clips. Arduino is for only power supply and ground to ATtiny85.
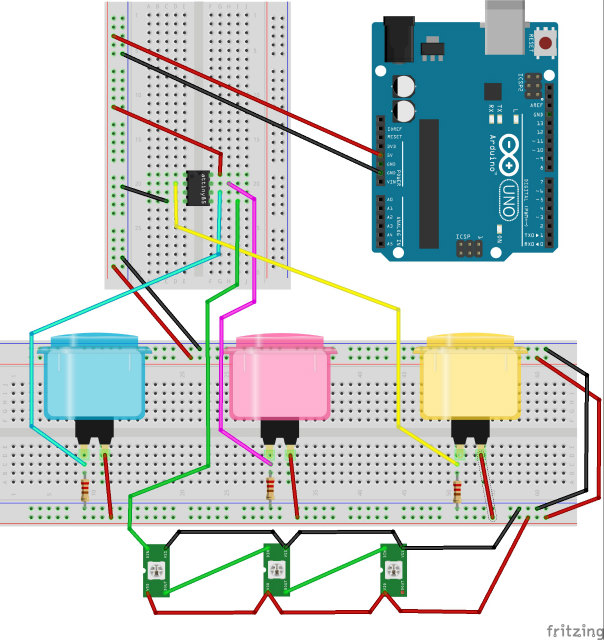
Schematics is as follows.
Here is how it works.
SwirLED skirt#
introduction#
I wanted to make a swatch with leds responsive to the movement.
prototyping#
I made a prototype with MPU-6050(Accelerometer, Gyroscope) and a neopixel ring. LED rotates clockwise or counter-clockwise depending on the movement of a gyroscope.
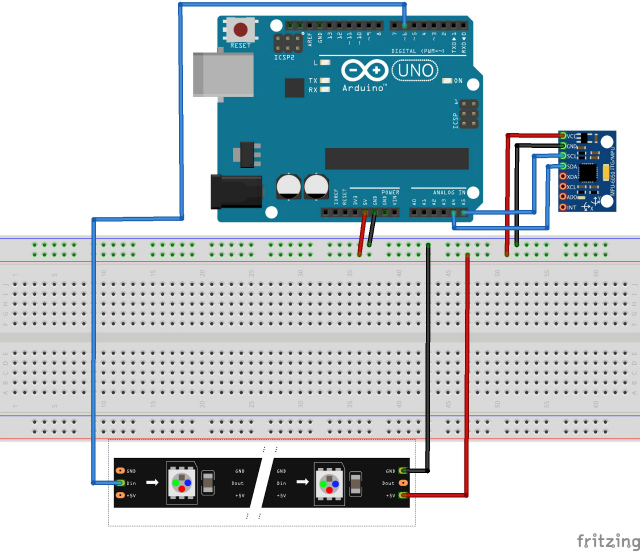
Schematic is as follows.

implementation#
I ripped off the waterproof sheathing of a NeoPixel strip which had 138 pixels. Its length and weight was about 220 cm and 32 g, respectively.
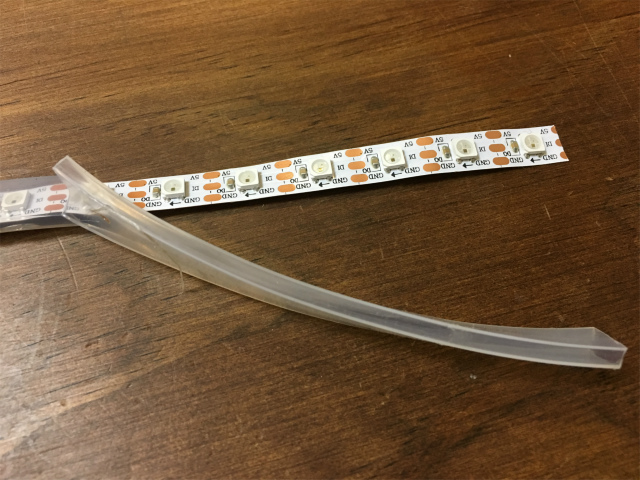
I stitched the strip along all around the hem of a skirt. I also soldered three long polyurethan-insulated wires to 5V, GND, and DI(data input).

Schematic is almost the same as described above except using a long LED strip(138 LEDs).
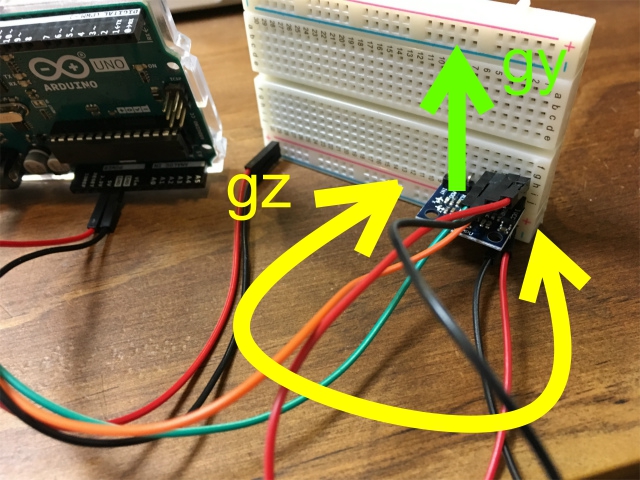
I strapped (actually, I hold) an arduino and a gyro/accelerometer around my waist. A gyro/accelerometer, GY-521(an MPU-6050 breakout board) is DOF6 3-axis gyroscope and a 3-axis accelerometer. I wrote a code to detect angular velocities along the z and y(or x) axes.
Here is an essential part of a sketch which command how an LED strip glows depending on angular velocities.
  if (gzRaw > 15000){ // when I rotate toward clockwise.
    knightRider1(1, 5, 2, 0xFFFFFF); // Cycles, Speed, Width, RGB Color (white)
     delay(duration) ;
    }
   if (gzRaw < -15000){ // when I rotate toward counter-clockwise.
   knightRider2(1, 5, 2, 0xFFFFFF); // Cycles, Speed, Width, RGB Color (white)
     delay(duration) ;
   }
  if (gyRaw > 3000 ) { // when I jump
      static uint8_t hue;
  for(int i = 0; i < NUM_PIXELS/2; i++) {
    // fade everything out
    leds.fadeToBlackBy(40);

    // let's set an led value
    leds[i] = CHSV(hue++,255,255);

    // now, let's first 20 leds to the top 20 leds,
    leds(NUM_PIXELS/2,NUM_PIXELS-1) = leds(NUM_PIXELS/2 - 1 ,0);
    FastLED.delay(33);

  }
    FastLED.clear();
    }
This is how it works. Unintentionally, light projection on the wall was beautiful.