Final Project#
FORWARD
This page consist the detailed documentation of the process taken during my final project. First it will explain the vision and ethos behind combining technology and fashion to make smart garments. After there is a discussion on the state of the art and the current and future movement in the wearable world. From there you will find a description and inspiration behind the project then go into the proces of bring the project to fruition. This process includes exploring the creation of “wire-free” heating elements (pads), garment fabtioncation and the integration of electronics into cloths.
CHAPTER 1: HISTORY
“Clothing is a collective term for items worn on the body.” - Wiki
This main definition of clothing stays true to this day. The main function of clothing is to protoect the wearer from the elements of the world. In hot weather, clothing provides protection from sunburn or wind damage. In cold weather it creates warmth. At the beginning clothing was made from the animals and different natural materials but as technology advanced so did the fabrics used to make clothing. New materials emerged that gaving clothing greater prototection capabilities and became something that could protect the wear in extremely hazardous settings such as space.
Clothing is not limited to being a tool of protection though. Clothing performs a range of social and cultural functions, such as occupational differentiations. Different occupations have taken clothing and created garments that not only protected them but also allowed them to surpass the wearers normal limits. Think fishermen vest, hikers’ trecking pants and police bulletproof vest. From these creation a new genre of clothing was birth called Functional clothing.
“Functional garments are garments that can perform multiple functions apart from just their aesthetics and basic protection of the wearer.” - Medium Corpo
Besides the occupations that use them, functional garments have seen a rise in use by the everyday user. There are two subcultures leading this movement have been “TechWear” and “Wearable Technology”
“Techwear is clothing for everyday life with special fabric, construction and properties that allow for breathability, movement, water-resistance and comfort. There’s way too much to unpack about techwear in this space alone, so consider this an introduction to the essentials.” - Grailed
“Wearable technology, wearables, fashion technology, tech togs, or fashion electronics are smart electronic devices (electronic device with micro-controllers) that can be incorporated into clothing or worn on the body as implants or accessories” - wiki
TechWear and Wearable Tech are simliar but different in a very interesting ways. First off Techwear contrary to the name has minimal “technology” or electronics incorporated into it. The tech in Techwear focuses more on the technical design of the garments. Techwear garments are design with high functionality at the fore front. Multiple zippers, multiple wearing configurations and high tech materials are the key aspects of tech wear. As for wearble technology is highly technology (electronics) driven. The approach with wearable technology is to increase the wearers life by giving them access to data and capabilities through electronics. Imagine a jacket that can heat you up during extremely cold conditions.
Both concepts deal with forward thinking clothes that provide both utility and comfort to increase the wearers quality of life.
Clothing now of days have grown a tremendous amount since its birth and it continues to morph.
CHAPTER 2: STATE OF THE ART

1. TECHWEAR: FUTURE + FUNCTION
2. WEARABLE TECH: FUTURE + FUTURISTIC
1. TECHWEAR: FUTURE + FUNCTION
The influence of techwear withing the greater fashion industry is growing each year but it has been around as a subculture for quite some time. The appeal of foward-thinking clothes that provide both utility and comfort is obvious. While most contemporary fashion is content to riff on the past, techwear forgoes the familiar in fabor of function. Function is usually the first word that comes to mind when thinking of ethos of techwear. The usual bright, nylon anorkas become shine-resistant jet black shells or the standard cotton trousers become high-stretch ripstop cargos. Techwear aims to upgrade every piece of clothing on the wearer’s body ranging from t-shirts to boots to bags.
"WATER RESISTANCE"
"HIGH QUALITY MATERIALS"
"RANGE OF MOTION"
"CARRYING CAPACITY"
"COMFORT"

The main appeal of techwear clothing and gear is that it can make life easier, wether it’s being able to carry more stuff on a weekend trip or stay dry in a downpour. Techwear aims to give the wearer various advantages.
KEY PLAYERS: ACRONYM


KEY PLAYERS: Y-3


KEY PLAYERS: STONE ISLAND

2. WEARABLE TECH: FUTURE + FUTURISTIC
Wearable technology can be said to have existed since eyeglasses but moder wearable technology is defined as a device that incorporates a microprocessor and can be worn on the body. This type of device has become a more common part of the tech world and fashion world as ccompanies have started to evolve more type of devices that are small enough to wear and that include a powerful sensor. A common intorudction to wearable tech is smartwatches. Think fitbit, apple watches and other fitness tracking deveices. Or think about the revolutionary Google Glasses, the first device of its kind. At the moment majority of wearble technology is focused on the health benefitsa as they often track the user’s vital signs or piece of data related to health and fitness.
Health care applications are not the only benefits that come with wearable technology. Companies are beggining to experiement with wearable technology for performance benefits. Think of a basketball player that doesnt have to worry about adjusting his shoes while he is playing or on the bench. Think of the hiker that doesnt have to carry extra layers because the jacket they are wearing has a heating system. Similar to techwear there is a growing appeal of wearable technology making life easier through enhancements to what the normal fashion is.
KEY PLAYERS: NIKE
KEY PLAYERS: MINISTRY OF SUPPLY

KEY PLAYERS: IRIS VAN HERPEN
CHAPTER 3: PROJEX
PROJEX is a study of the intersection of technology and fashion to make function first garments that help improve everyday life for the wearer. The brand PROJEX aims to approach this goal using the same ethos from both techwear and wearable technology. On top of this the brand takes ques from streetwear and create garments that are not only functionally sound but also aestethically appealing.
The first project of PROJEX is creating smart pants with wearable technology that not only monitors the wearer’s body temperature but also heats up when the user’s core body warmth drops below the level of comfort. The heating system will be made wire-free by utilzing conductive thread and 3D knitting technology. Material research and selection wlil also be a key component in the constrction of the smart pants.
This is a proof of concept, an experiment to see if the idea is possible.
The following chapters will depict the process of creating the first prototype. It will cover the research and experimenting of heating elements, construction of the pants, design of the electronics and the integration of all three into one.
CHAPTER 4:HEATING ELELMENTS

Search for the best method to heat garments. When it comes to electronics in clothing there a few items that have to be met for it to be a suitable solution. The garment has to be safe, comfortable and machine washable and in the terms of a heated garment you want to pick the solution that gives you the best heat performance.
THEORY & CALCULATIONS
Ohm’s Law: V = I * R / Voltage = Current * Resistance
Joule’s Law: E + V * I / Energy = Voltage * Current
Resistance of same value in Parallel : Rto = 1/n*R
Variables that affect Resistance:
- Material
- Length + Width
- Number of Parallel Wires
TESTING WHAT IS ON THE MARKET
In my previous prototype I used heating pads from Sparkfun as the heating element in my smart vest. For this I plan to use the heated pads as the standard for heating elements. After researching a few methods I decided to order a few different heating elements that were on the market and compare them to each other to see which one is superior.
METHOD Power each heating element at 3.5V, 5V, 7.5V, 9V & 12V using power supply or battery. Record the measured current and temperature emitted at each voltage.
MEASURE: + Rest temperature + Heating Temperature + Time it take for temperature to rise + Cooling Time + Resistance + Current
WHAT I AM LOOKING FOR + Power Consumption + Temperature + Comfortability + Machine Washability
10cm x 5cm HEATING PAD (SparkFun)
Construction - mesh of Polyester Filament and Micro Metal Conductive Fiber folding into a protective Polyimide Film
https://www.sparkfun.com/products/11289

| VOLTAGE | Current (AMPS) | TEMPERATUR (F) |
|---|---|---|
| 3 | .43ohms | 103.4 |
| 5 | .68Oohms | 131.3 |
| 9 | 1.09ohms | 219 |
| 12 | 1.28ohms | 294 |
WOVEN CONDUCTIVE FABRIC(AdaFruit)
Construction - Silver colored Copper + Nickel - plated nylon
https://www.adafruit.com/product/1168


| VOLTAGE | Current (AMPS) | TEMPERATUR (F) |
|---|---|---|
| 0.7V | 3.20amps | - |
Surprisingly the woven conductive fabric did not work. Out of the bunch I was expecting this to have a high level of heat generation but that was not that case. I think this might be due to high resistance in the sheet. Further research is needed for sure.
CARBON FIBER FLEX HEATING TAPE(Amazon)
https://www.amazon.com/Carbon-heater-tape-length-width/dp/B077CBFVLB/ref=sr_1_7?keywords=CarbonHeater&qid=1557116376&s=gateway&sr=8-7

| VOLTAGE | Current (AMPS) | TEMPERATUR (F) |
|---|---|---|
| 3 | 1.14ohms | 102.6 |
| 5 | 1.96ohms | 107.7 |
| 9 | 3.20ohms | 324 |
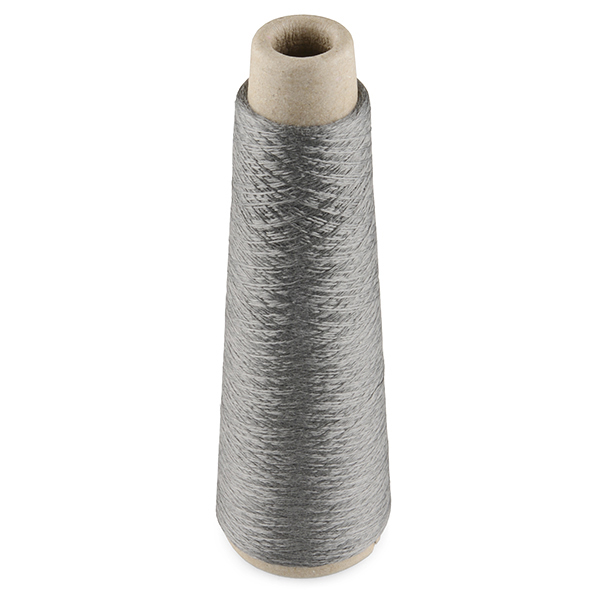
CONDUCTIVE THREAD - STAINLESS STEEL (Sparkfun)
Construction - Spun from stainless steel fiber and wound on a spool.
https://www.sparkfun.com/products/11791
| VOLTAGE | Current (AMPS) | TEMPERATUR (F) |
|---|---|---|
| 3 | .07ohms | - |
| 5 | .12ohms | - |
| 9 | 0.25ohms | very light heat |
| 12 | 0.36ohms | light heat |
CONDUNCTIVE THREAD - SILVER PLATED NYLON (Jameco)
Construction - laced with a plated silver type thread
https://www.jameco.com/z/260151023534H-Conductive-Sewing-Thread-Size-92_2144489.html


| VOLTAGE | Current (AMPS) | TEMPERATUR (F) |
|---|---|---|
| 3 | .0.6ohms | - |
| 5 | .12ohms | - |
| 9 | 0.24ohms | very light heat |
| 12 | 0.34ohms | light heat |
CHAPTER 5: CONDUCTIVE THREAD + 3D KNITTING
METAL FIBERS VS POLYMADE
METAL FIBERS - thread made out of small metal fibers like stainless-steel or
Wire-Free Heating
Benefits of Conductive Thread over Wire: Comfort Customizable Size Aesthetics No shape constrictions Washability
Things to consider: Conductivity problems because of bending. After completing the testing I made the decision to pursue creating a heating element with only conductive thread. For me the idea seemed like a tall order but I felt like there were added benefits if I was able to pull it off.
First step was testing out different threads and patterns
Conductive Thread Meshes.
Connecting the fabric evenly at plus and minus sides ( strips) is of utmost importance. If there is a spot with slightly higher resistance, the heat will be produced at this spot. It can quickly burn even with low temperature.
3D Knitting a Heating Pad
Doing more research on heating garments out their I stumbled upon a company called SkiinCore that drew my interest. SkiinCore claim to fame is creating “The first ever wire-free heated base layer with knitted tech”. This was very interesting to me because I just happen to be working for a company called MInistry of Supply and now have access to 3D knitting machine.
Sample 1: Sample 2: Sample 3:
Findings: At the beginning of testing my theory was that for heat to be produced, I would have to connect the thread from one point to another point. Similar to how you connect to a wire or so. This theory quickly proved to be wrong. In earlier test I just connected conductive thread and applied voltage, it either did nothing or smoked broke apart. I assumed that the yarn breaks after to much current is thrown through it. . A matrix with two “connecting docks” is the best way to produce heat using conductive thread.
I tested the new theory with using The best way to produce heat using conductive thread
References:
Embroidery with Conductive Thread https://v2.nl/lab/blog/embroidering-conductive-thread/?searchterm=conductive%20thread https://www.instructables.com/id/Warming-up/
Knitting https://www.kobakant.at/DIY/?p=4855 http://www.knitmelbourne.com/history/introduction-to-sds-one-apex-r/
INTERESTING POINTS OF EXPLORATION:
Explore the break point of conductive thread via current Best Way to connect to conductive thread
ELECTRONICS#
The main electronics
MATERIAL SELECTION
Key Features: breathability water repellent comfort ( range of motion)
PANTS CONSTRUCTION
Brainstorming + Inspiration Reverse engineering Pattern Making Prototype #1 Pattern Adjustments Digitizing Patterns Prototype #2
CHAPTER 6: DESIGN
There is one thing that I wanted to highlight in terms of the design ethos of the pants.
"INVISIBLE TECHNOLOGY"
Invisible technology is the practice of design where the technology is fully integrated into the aesthetics of the garment to the point where the design of the garment is as impressive as the tech.
One thing I noticed in the wearable clothes out there, is that majority lack in aesthetics. I believe this is due to the simple fact that the technology becomes the selling point and not the actual clothes. I want to change this. My design ethos is to make both the technology and aesthetics the selling point of my clothes. “When two partners (technology + aesthetics> have equal confidence workign together, the levels of innovation that occur are unstopable.” Every aspect of PROJEX is to combine tech and aesthetics and form new a type of garment that cares about functions as much as looks.


.jpg)


CHAPTER 7: CUT + SEW
.JPG)
.jpg)
REVERSE ENGINEERING
Instead of creating pant patterns from scratch, I chose to reverse engineer a pair of pants I previously owned to create reference patterns. Going this route elimenates a good amount of work needed to create patterns from scratch. The pants I chose to use were Levi’s Straight Leg pants.
The process of reverse engineering a garment is straight forward. The first step before deconstructing the pants is putting on the them on and makring key locations like ankle, knee, waste and hem. Marking these locations will come in handy later especially if you choose to do some adjustments like I plan on doing.
When deconstructing the pants use a seam ripper to keep the fabric from ripping. I disassembled the left leg of the pants only because both sides are a mirror of each other and so I can have a side of the pants assembled as a refrerence for later.


PATTERN MAKING
Next step is to create patterns from the pants we deconstructed using tracing paper. This is my first time creating pants so my approach was somewhat unique. I knew the first time I make the pants they were not going to be good. So i planned to make multiple iterations as I went on. The internet is a great resource to have at our fingertips. These
. The goal is to make two patterns, one for the front of the leg and one for the back. At this point of the process I technically had patterns that I can use to make new pants out of but tracing the deconstructed patterns is not the most accurate approach. For the best accuracy, I first traced the patterns to tracing paper so I could have patterns that I can edit based on what I envisioned.
Once the traces were done the first thing I wanted to change was the fit of the pants. The original pants have an inseam of 36/38, which for me is to long. To shorten the pants I took out 2”/4” making the inseam 34”.
Pictures of Traces with markings
The next change was purely aesthetic driven. For this collection I’ve been playing with the idea of panels as a visual representation of my work. As mentioned above my inspiration comes from technical gear which uses similar aesthetics as well. In my design I incorporated panels 3 areas. 2 on the front and one on the back.
Pictures of Marking for Panels
Satisfied with my edits to the pattern i was ready to cut and sew the first pants sample. For the first sample I used cotton muslin as the sample fabric. The thought behind this was that muslins is a great fabric to sample with since it is easy to handle while sewing.
CUT + SEW#

1. CUT OUT THE PATTERN
Lay the fabric straight on a table and pin the tracing paper to the fabric with straight pins, place a pin every 3-4 inches from each other. I folded the fabric in half to save some time. This way when I cut out the two pieces I would have one for the right and left leg.
2. SEW TOGETHER THE PANELS
There are three locations where the pants panel at. The front of both left and right legs and the back pattern of the left leg. Sew these at a ½” seam allowance.
3. SEW FRONT AND BACK PIECE @ A ½” SEAM ALLOWANCE
Take the front and back piece for the right leg, match them and pin them together along the outseam (outside leg seam) from the top to the ankle. After pinning sew the entire seam at a ½” seam allowance. Make sure the orientation of both pieces are correct before sewing together.

4. CONSTRUCT HEATING PATCH
The heating patch consists of 3 layers, the inside insulant layer, heating layer and the outside fashion fabric layer. The outside layer will be the biggest out of all three. First step is to center the heating layer on top of the outer layer and sew together at a ⅛” seam allowance. After sandwich the heating layer between the outside and inside and sew together at a ½” seam allowance.
5. SEW HEATING PATCH OVER THE SEAM OF FRONT AND BACK PIECE @ ⅛” SEAM ALLOWANCE
Open the front and back piece and sew the heating patch at a ⅛” seam allowance halfway between waist and knee.
6. REPEAT STEPS 3 + 4 FOR OTHER LEG
7. SANDWICH BOTH LEGS AND SEW AT CROTCH SEAMS @ ½” SEAM ALLOWANCE
Sandwich the two leg pieces together, pin down the front and back crotch seams together and sew them at a @ ½” seam allowance.
8. SEW CROTCH + INSEAM @ ½” ALLOWANCE
Pull apart the two sides and pin the crotch seam and inner seam together. Sew them at a ½” seam allowance.


9. CUT WAISTBAND OUT OF FABRIC
10. MARK DRAWCORD EXIT PLACEMENT + CONSTRUCT EXIT HOLES
11. THREAD DRAWCORD INTO WAISTBAND CHANNEL. SAFTY STITCH (OR PIN) TO SECURE DRAWCORD
12. STITCH PANT, ATTACHING WB