................................................
4. Biofabricating Dyes and Materials#
Little bit of background infos here : I discovered about Fabricademy just before it started in September. I couldn’t immediately join because I was doing my internship where I asked to finish earlier and told them about Fabricademy. I could stop 2 weeks earlier but not more, so I joined the Fabtextile mid October and missed a total of 4 Weeks..
This assignment has been done on weekends or during my spare-time. Either with help of the other students of the Fabricademy Amsterdam, or I just tested here and there with the recipes.
Natural Dyes#
As I missed the ‘Natural Dyes class’, I was lucky to be able to catch up the assignment with Irene’s help, who generally really enjoys the practice of dying with natural methods. She introduced me to different pigments one can use and explained well how to proceed.
Pigments extracted from :
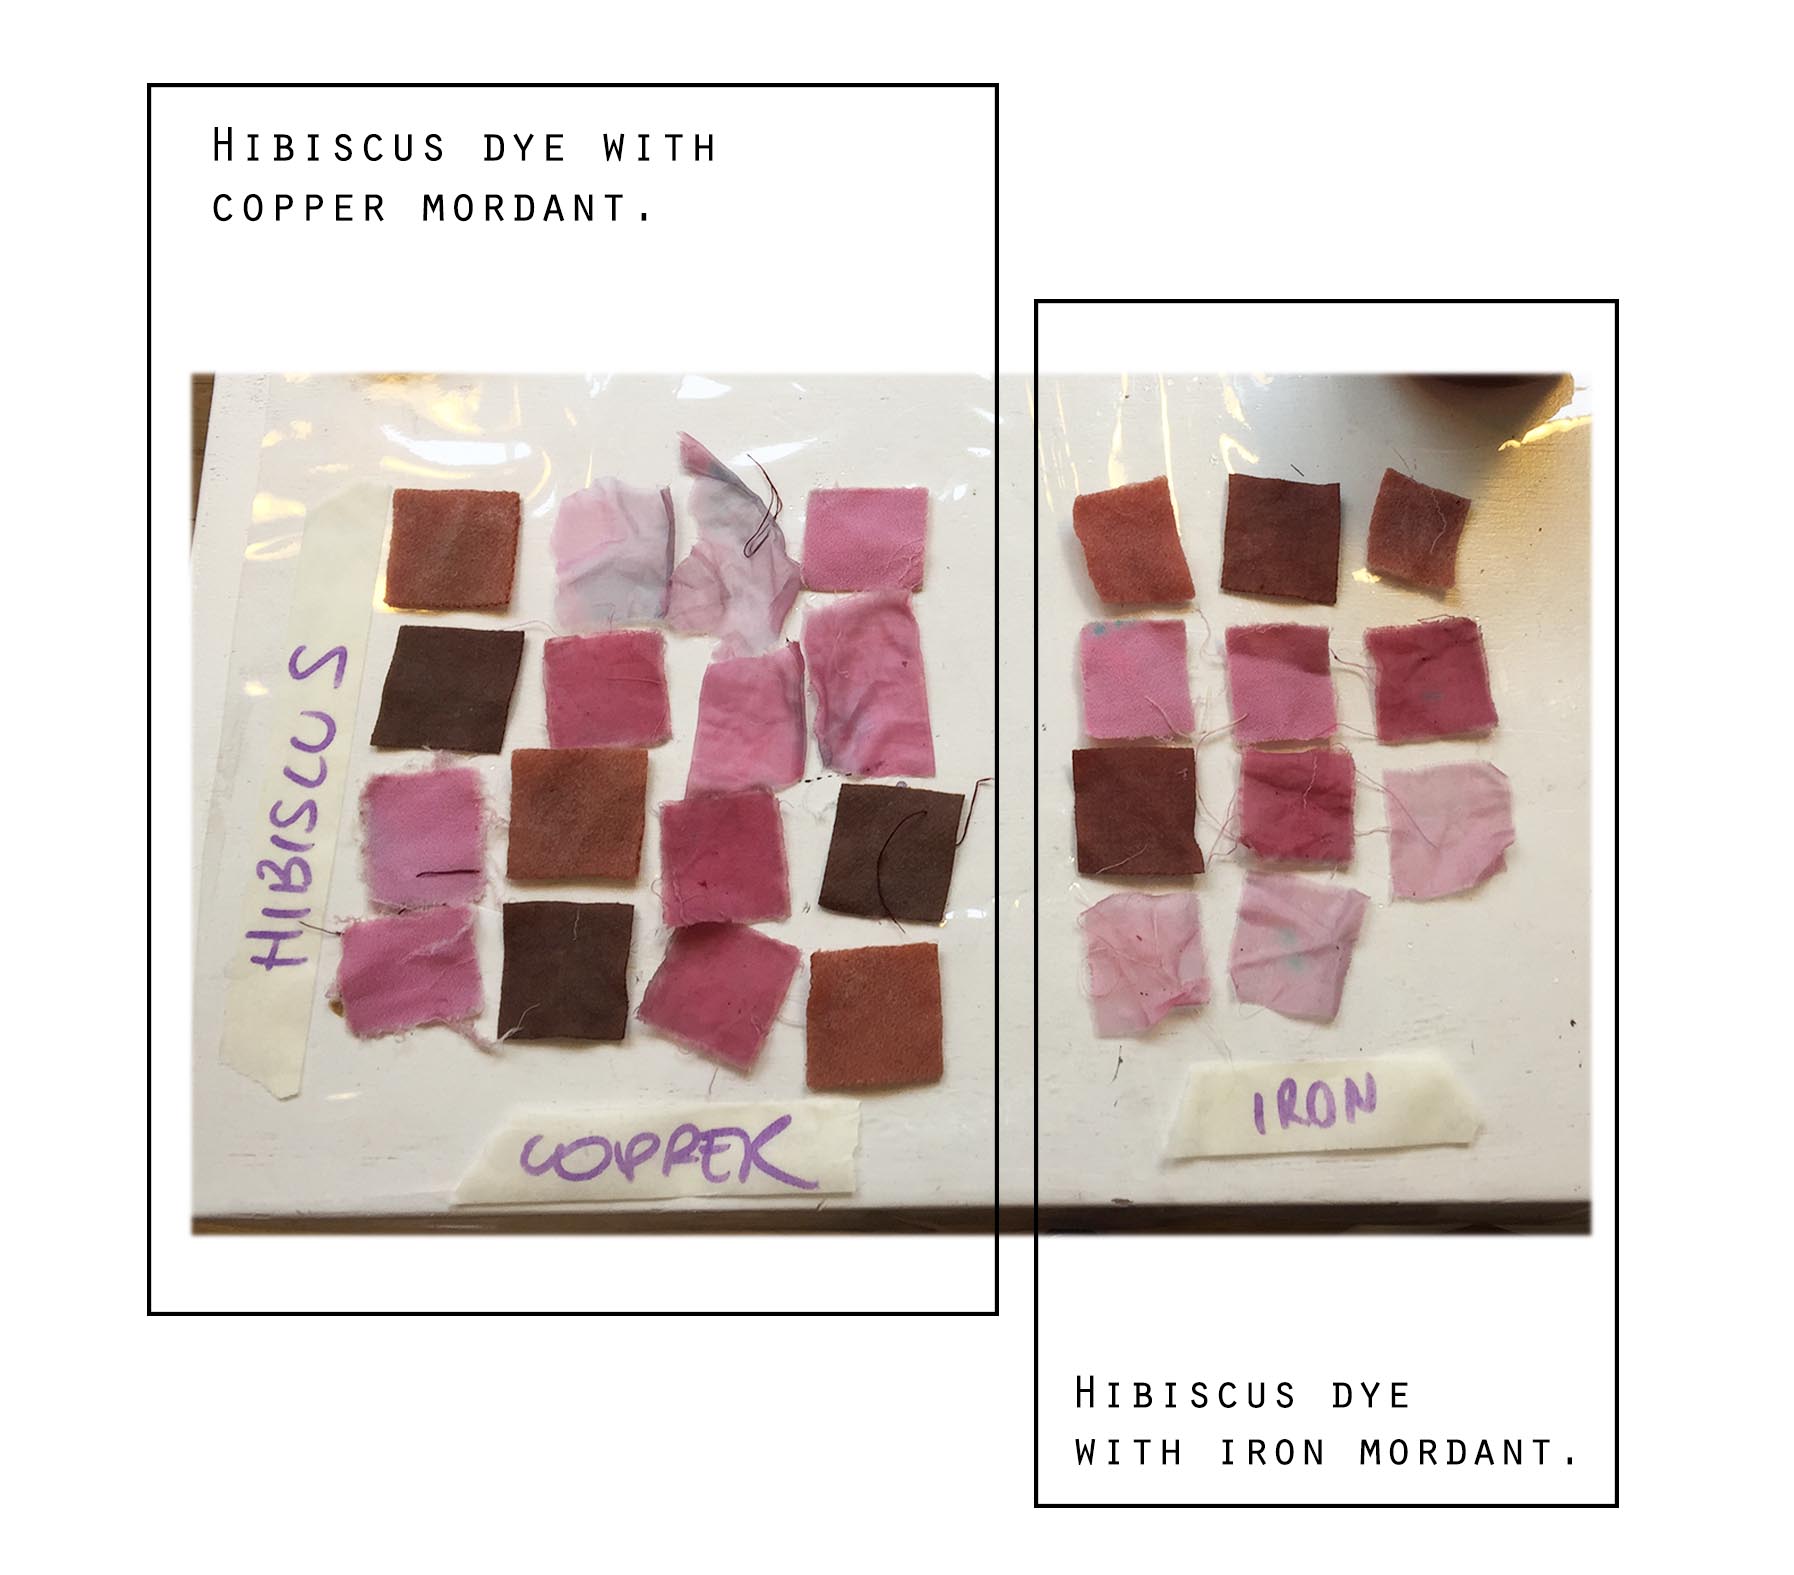
- Hibiscus
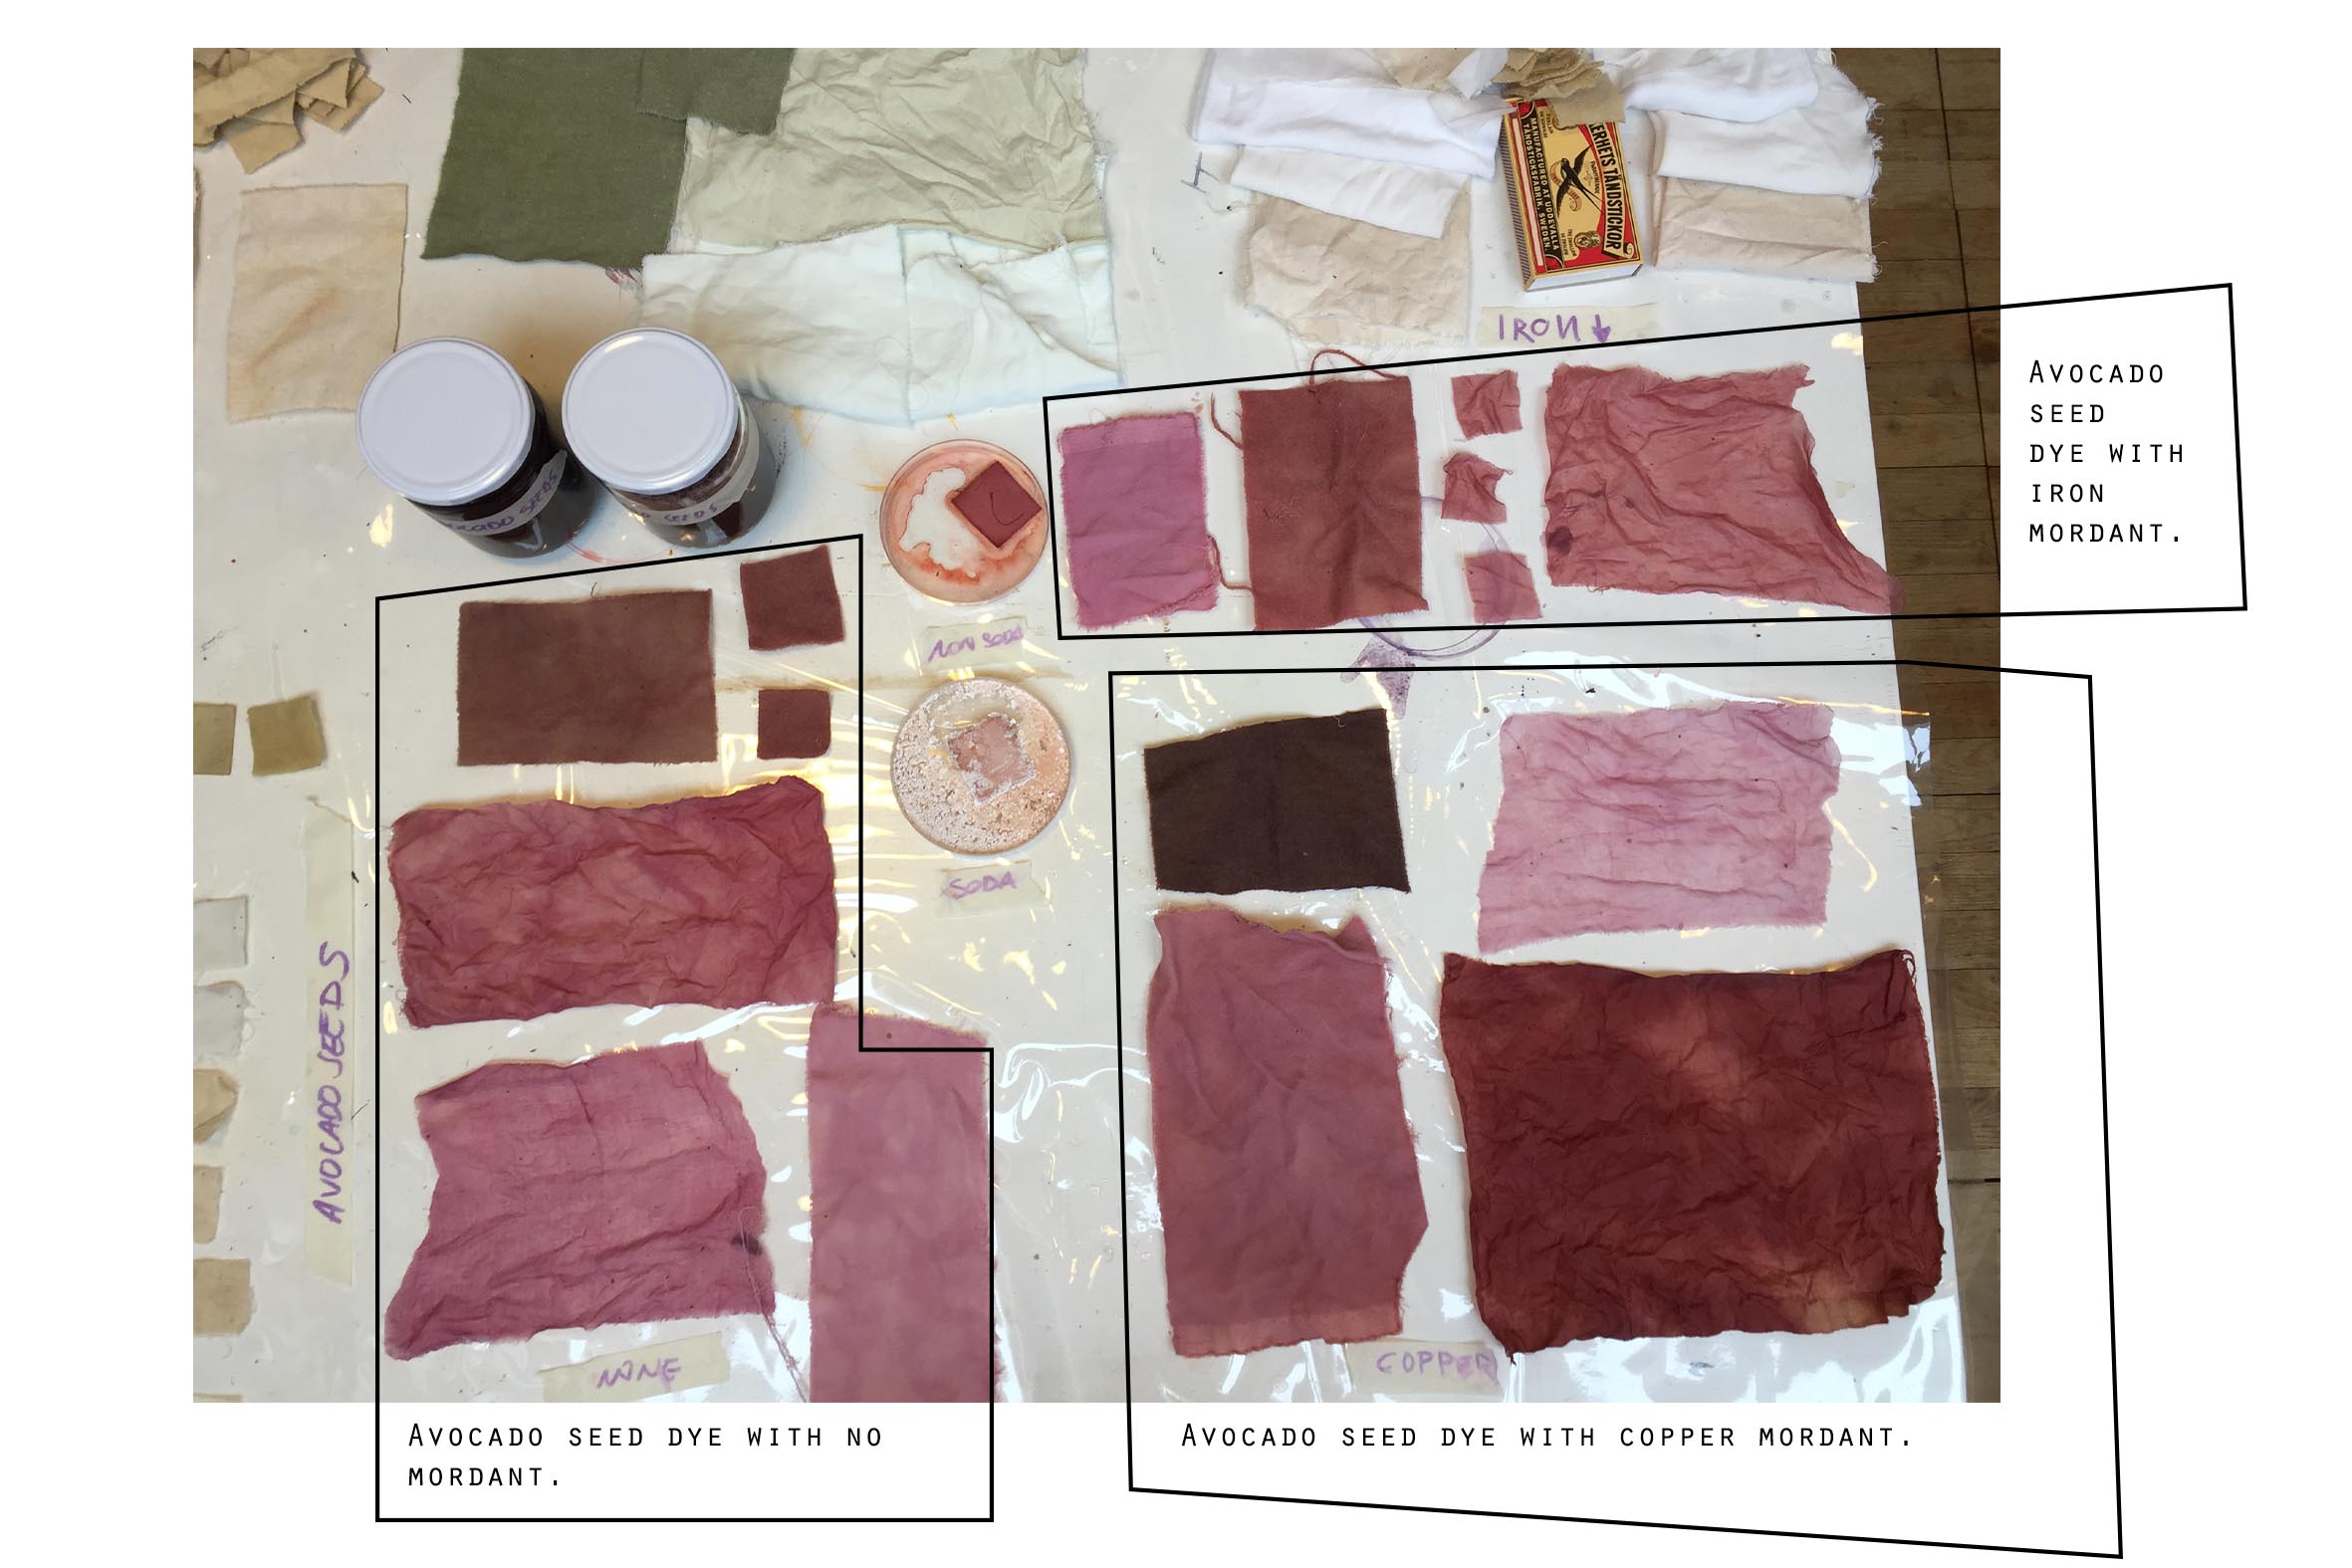
- Avocado seeds
- Mushrooms
And this is how you proceed :
There are 3 main steps :
- Weigh & Scour
- Mordant
- Dye (and modify)
If you need to extract the pigments first, then put your ingredients in a pot and let it boil for 30min or so.

Irene was so excited here to finally boil her avocado seeds she has been collecting for several weeks!
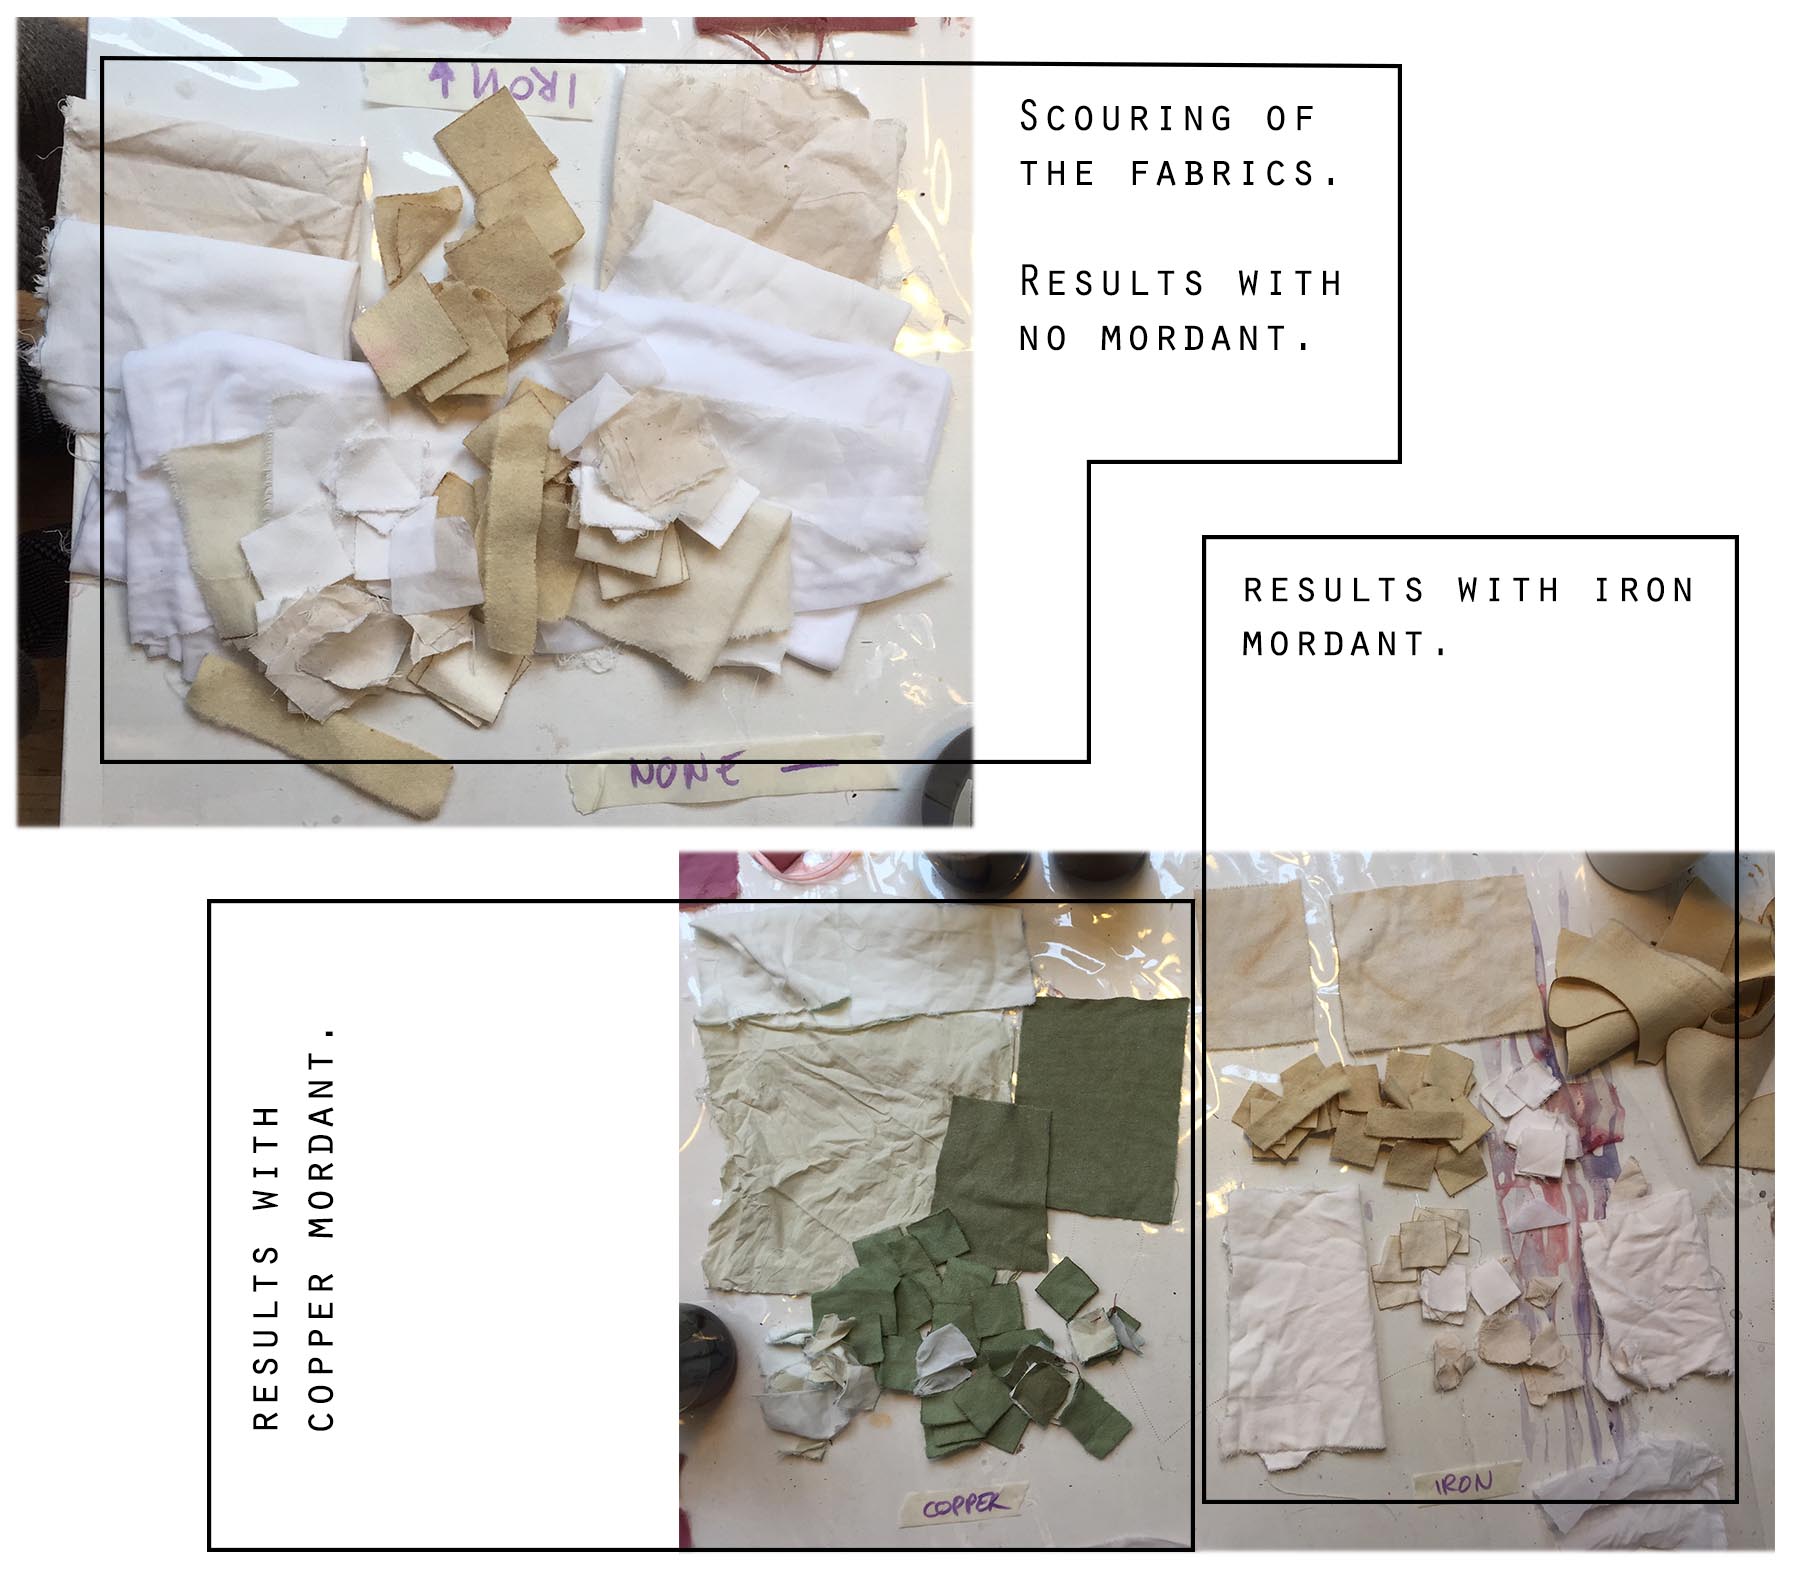
Preparation & Scouring#
We started by cutting squares out of different fabrics ( Wool/Cotton/Organza Polyester ), and weighed everything ( important to know the dry weight of the material for the next steps ). Separate the fibers between : animal fibers and plant based fibers ( we put the polyester with the plant based fibers )
Next, we washed and cleaned the fabrics like the following :
Animal fibers :the fibers must be wash with luke warm water and soap. Avoid sudden temperature changes and too much heat. Vegetable fibers : wash the fibers for one hour in water and sodium carbonate(soda) using 2 spoons for 4 liter water. The process can be repeated twice.
Mordant#
A Mordant or dye fixative is a substance used to set (i.e. bind) dyes on fabrics by forming a coordination complex with the dye, which then attaches to the fabric (or tissue).
We wanted to use three different mordants but we ran out of alum.. so we used the following two only : Iron | Copper.
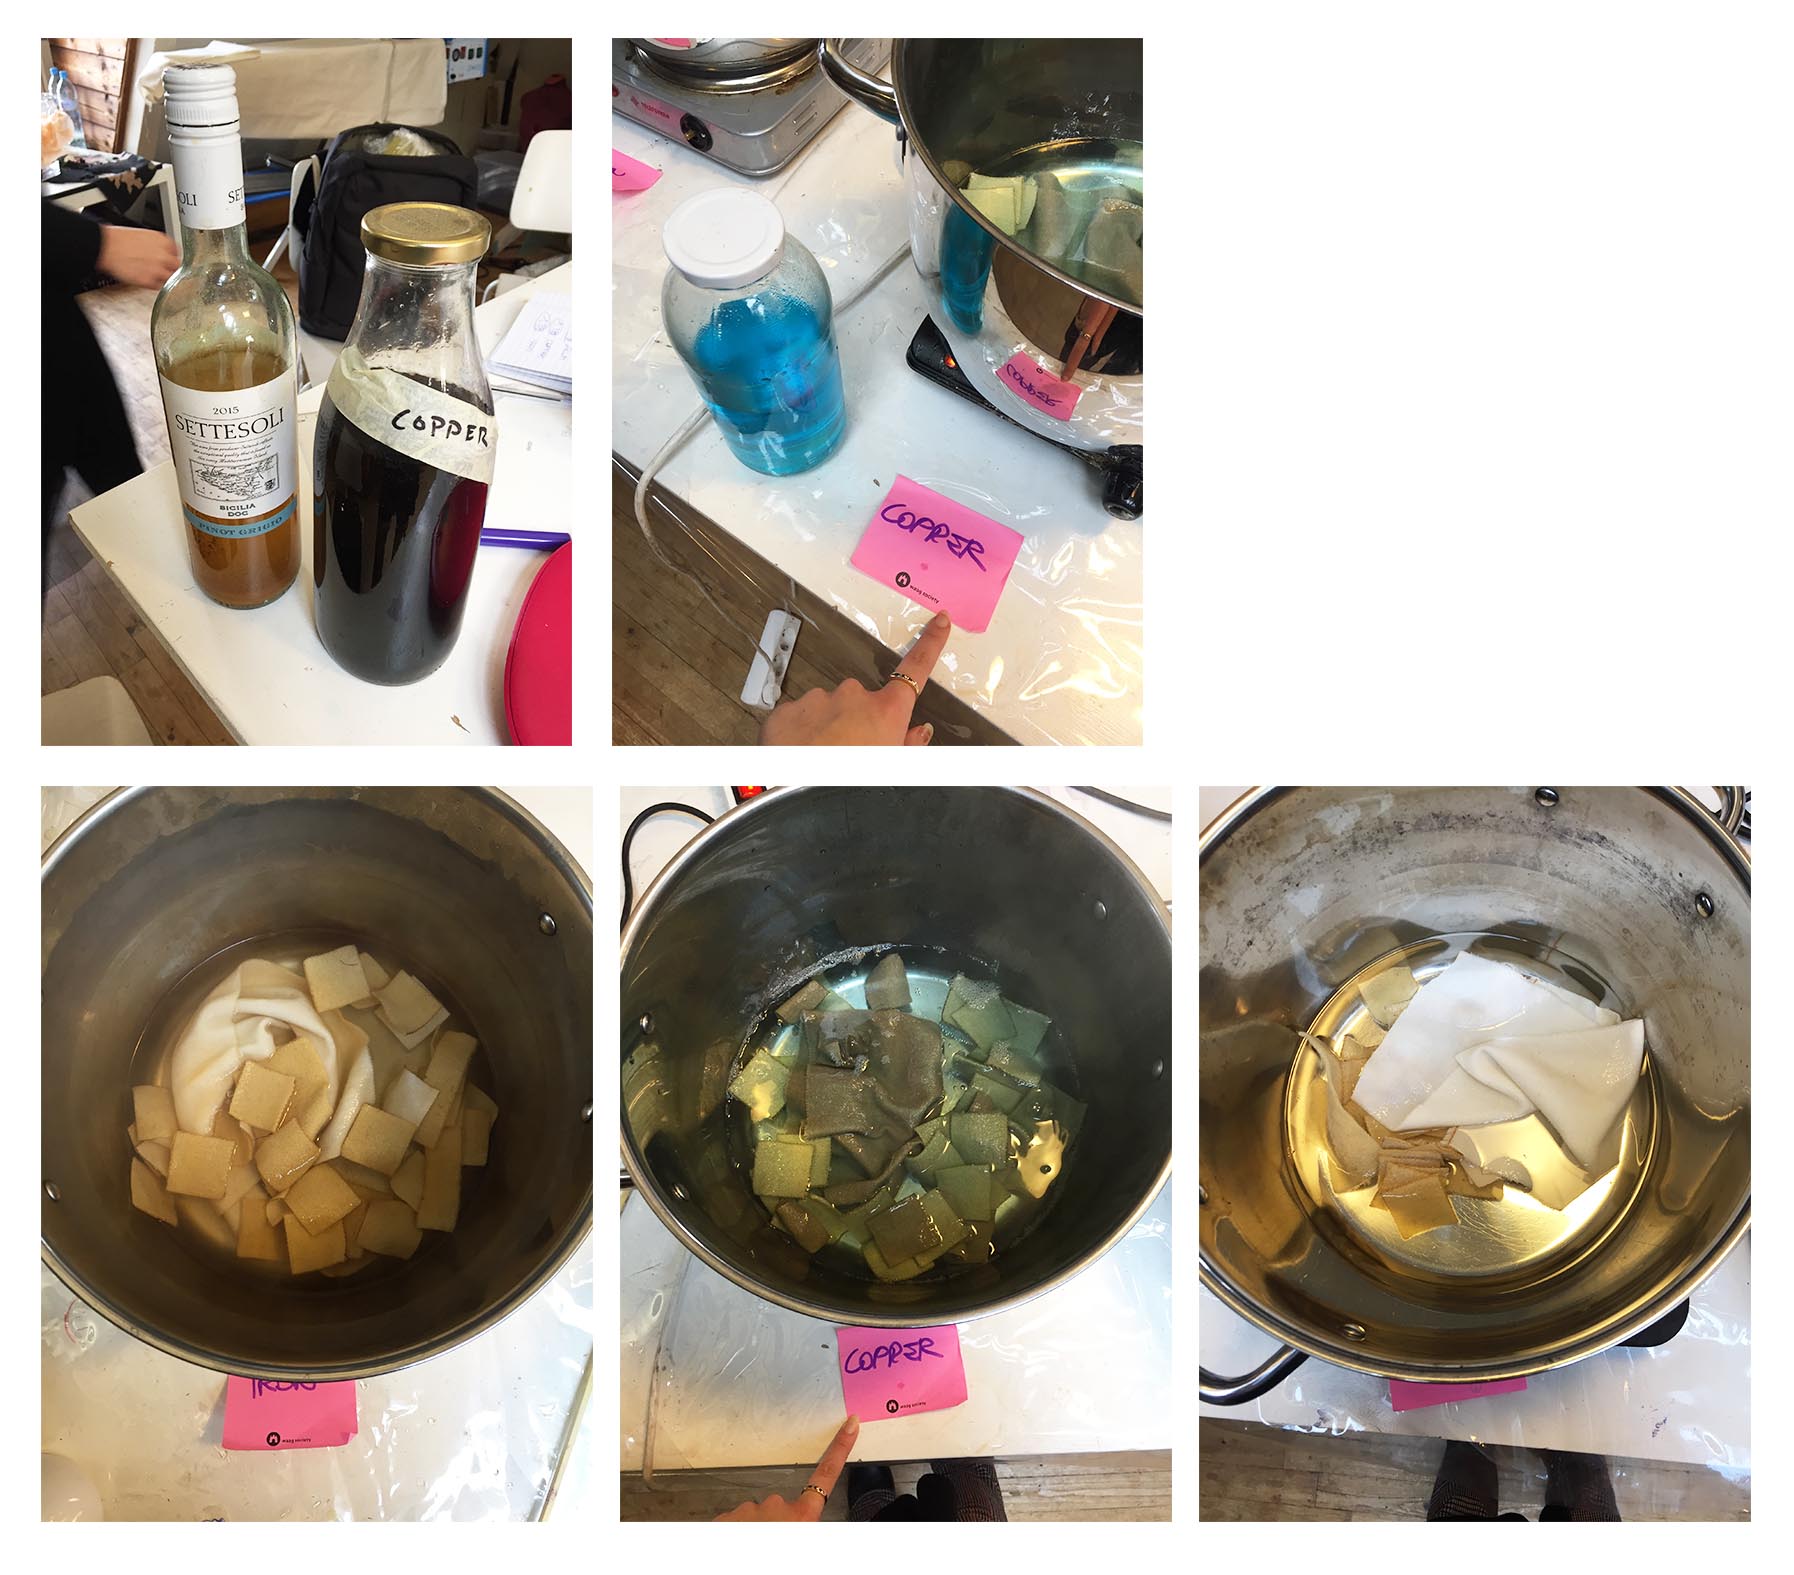
Pot 1 : Iron mordant (you can make this by getting some rusty nails and leaving them to steep in a bottle with water and vinegar) Pot 2 : Copper mordant (this you can make by collecting pieces of copper pipe and soaking them in vinegar for several weeks) Pot 3 : No mordant
( I took here some of Jessica’s notes because they were more in detail than my little course with Irene ^^ )
The fibers after scouring and mordanting :
Finally : Dying#
So for that part, we just used the amount of pigment we could have and put the fibers in the dye bath and let it stay over night.
Here are the different dyes results :
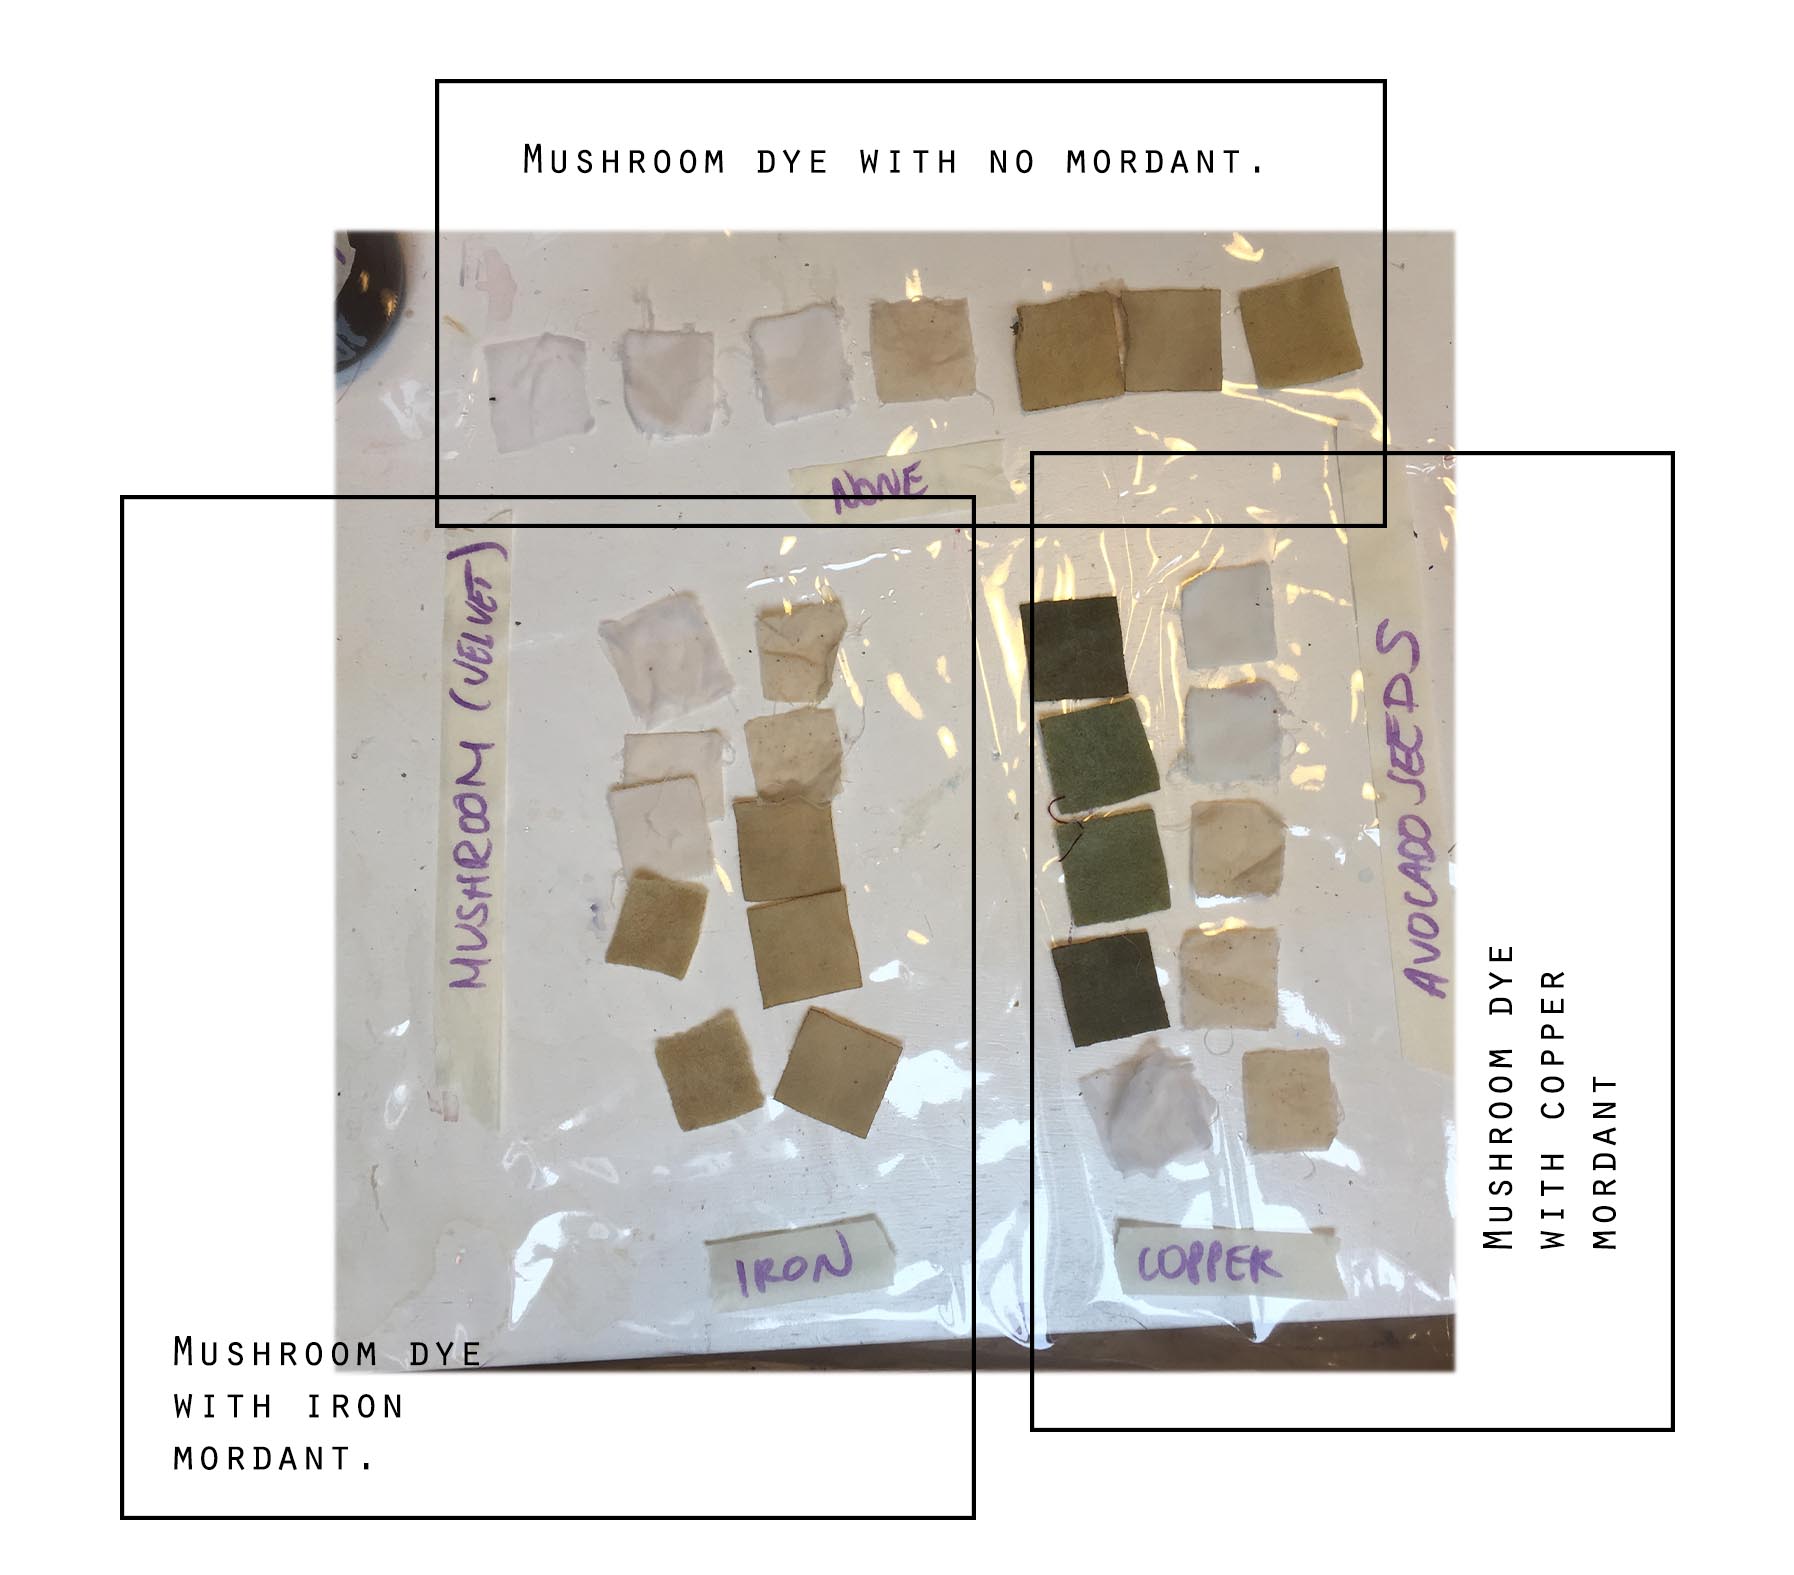 (As you may have noticed, the mushroom dye has a very weak - to no effect..)
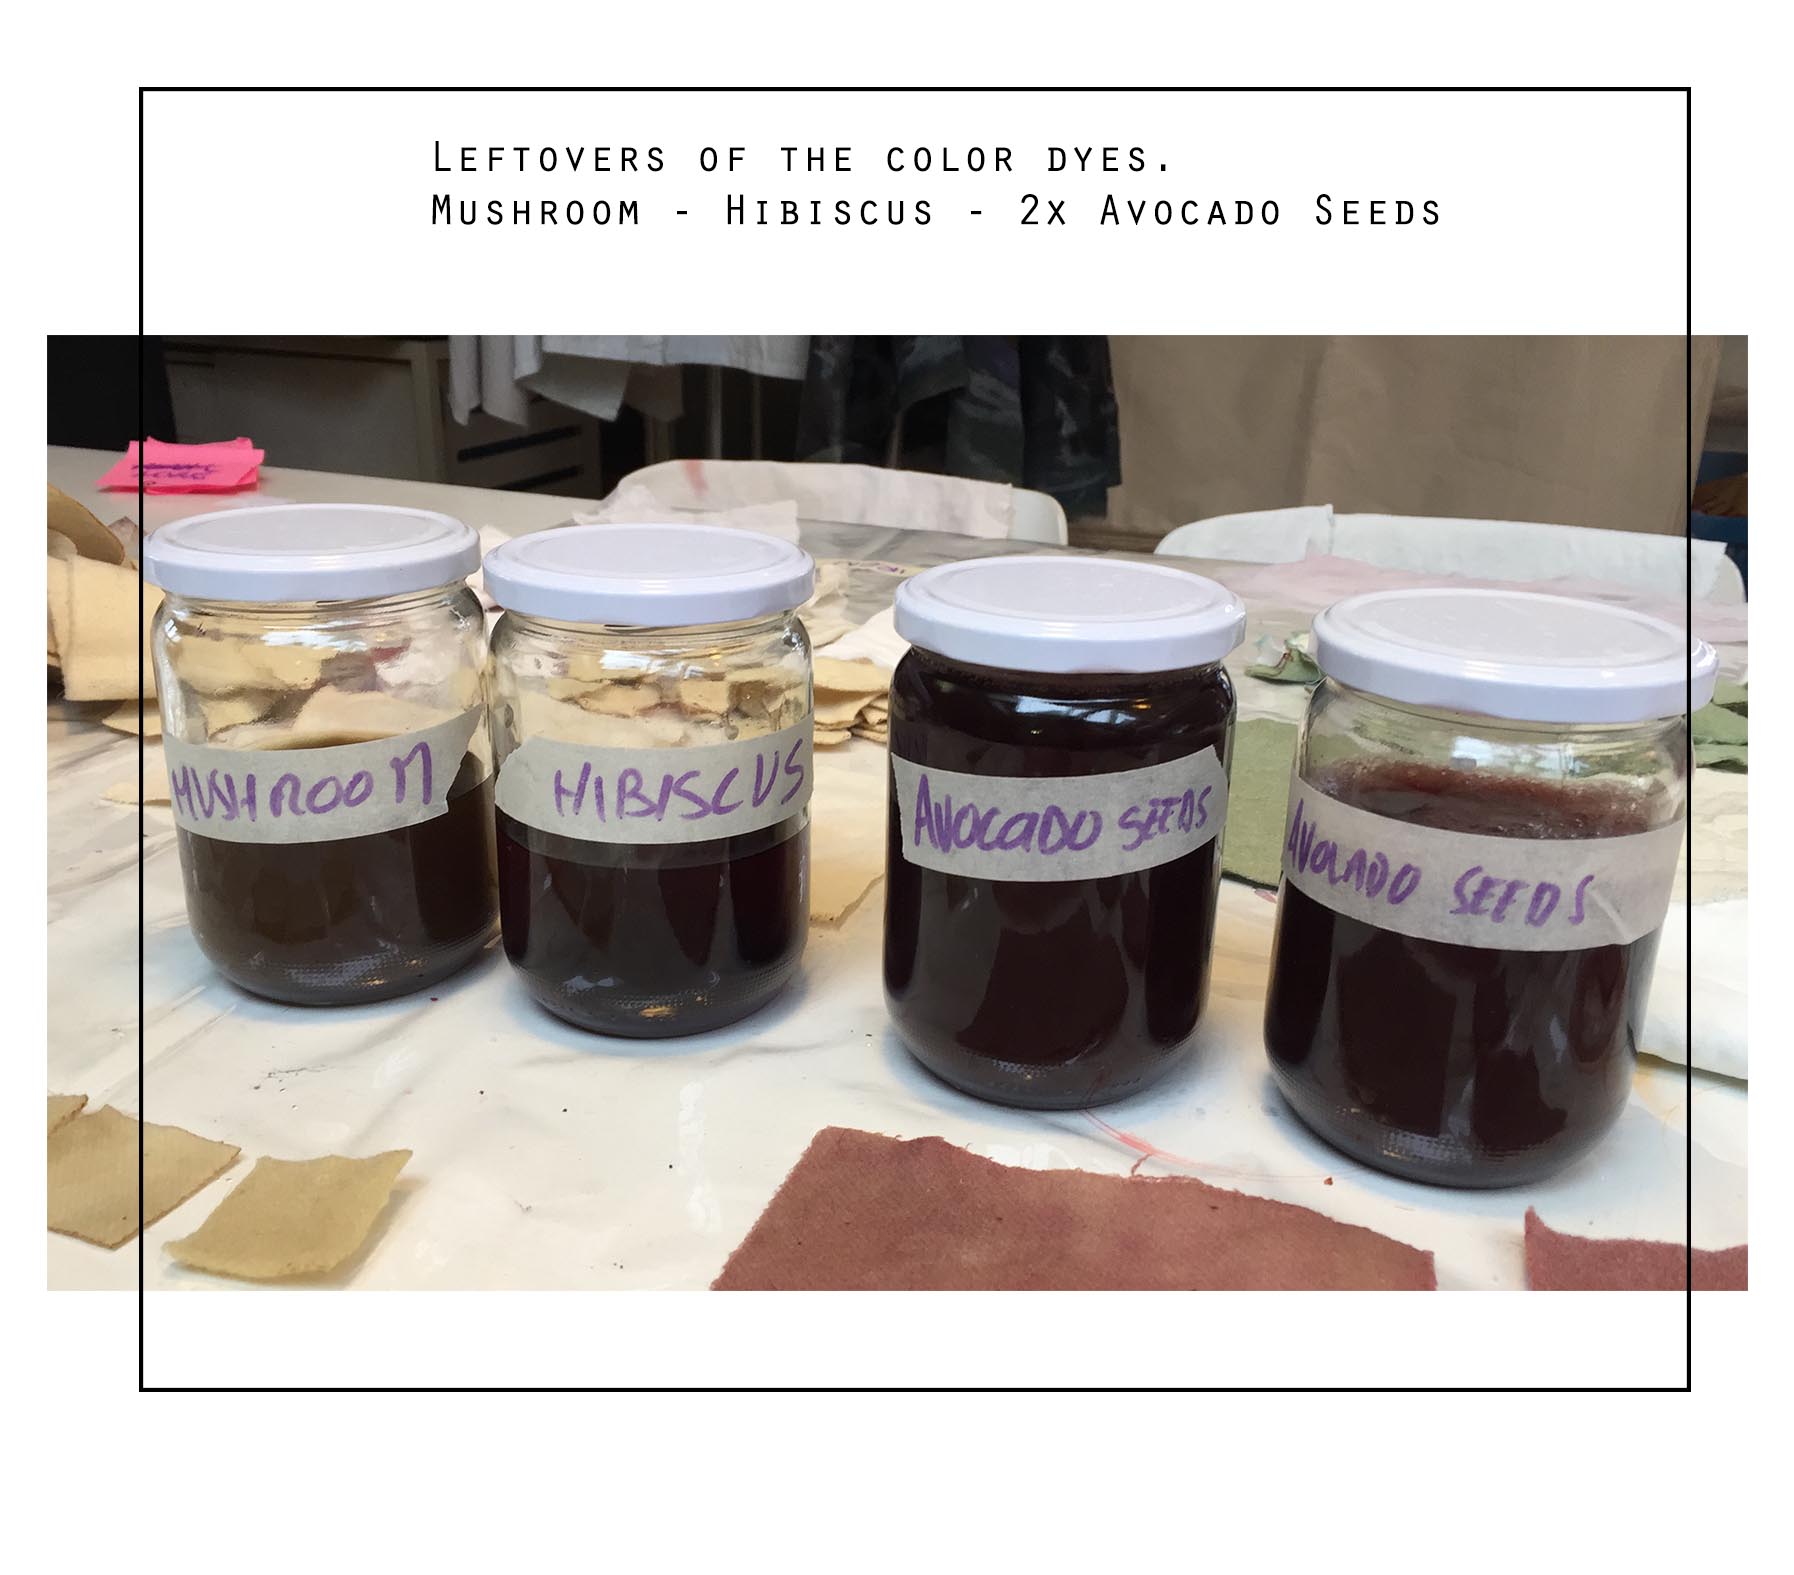 We collected the rest of the liquid pigmentation to reuse it !
Bacterial Dye#
This part was so exciting! It is amazing to use micro-organisms that naturaly produce pigment dying fabric while growing on it.
For our beacterial dye we used the organism Janthinobacterium lividum. Interesting fact : Pigment in microbes can have multiple functions. For example, it can be used for photosynthesis or for protections against UV light. However, this Janthinobacterium lividum bacterium uses its purple pigment as protection against other microbes. And this is not only useful for bacterium’s own survival, but also for animals working with him, like the red-backed salamander.
To start you’ll need the following things :
( I used again some of Jessica’s notes as they are complete and she knows all the terms and names of the material we used. Thank you Jessica for your amazing documentation ! )
You will need:
A clean environment, preferably a wet lab A living sample of janthinobacterium lividum An autoclave or pressure cooker Plastic gloves A lab coat or similar over-garment to keep dirt on your clothes from contaminating your work A small gas burner, e.g. a bunsen burner or a camping flame A nutrient broth to feed the bacteria. e.g. LB broth and a sealable glass bottle to contain it An innoculation loop - if you don’t have one of these and don’t want to buy one, there are lots of tutorials online for making your own out of cheap materials A plastic petri dish Autoclave bags - plastic bags for sterilising objects in the autoclave Alcohol in a spray / squeeze bottle, for sterilising your working area and cleaning your hands A hot plate or small cooker Parafilm to seal your petri dish - you can probably get away without using this, but it’s handy! An incubator to keep your bacteria warm and happy so they grow. Or somewhere that’s warm if you don’t have an incubator, but preferably somewhere that can be sealed off, unless you want it to smell :) A pair of long metal tweezers or tongs Autoclave tape
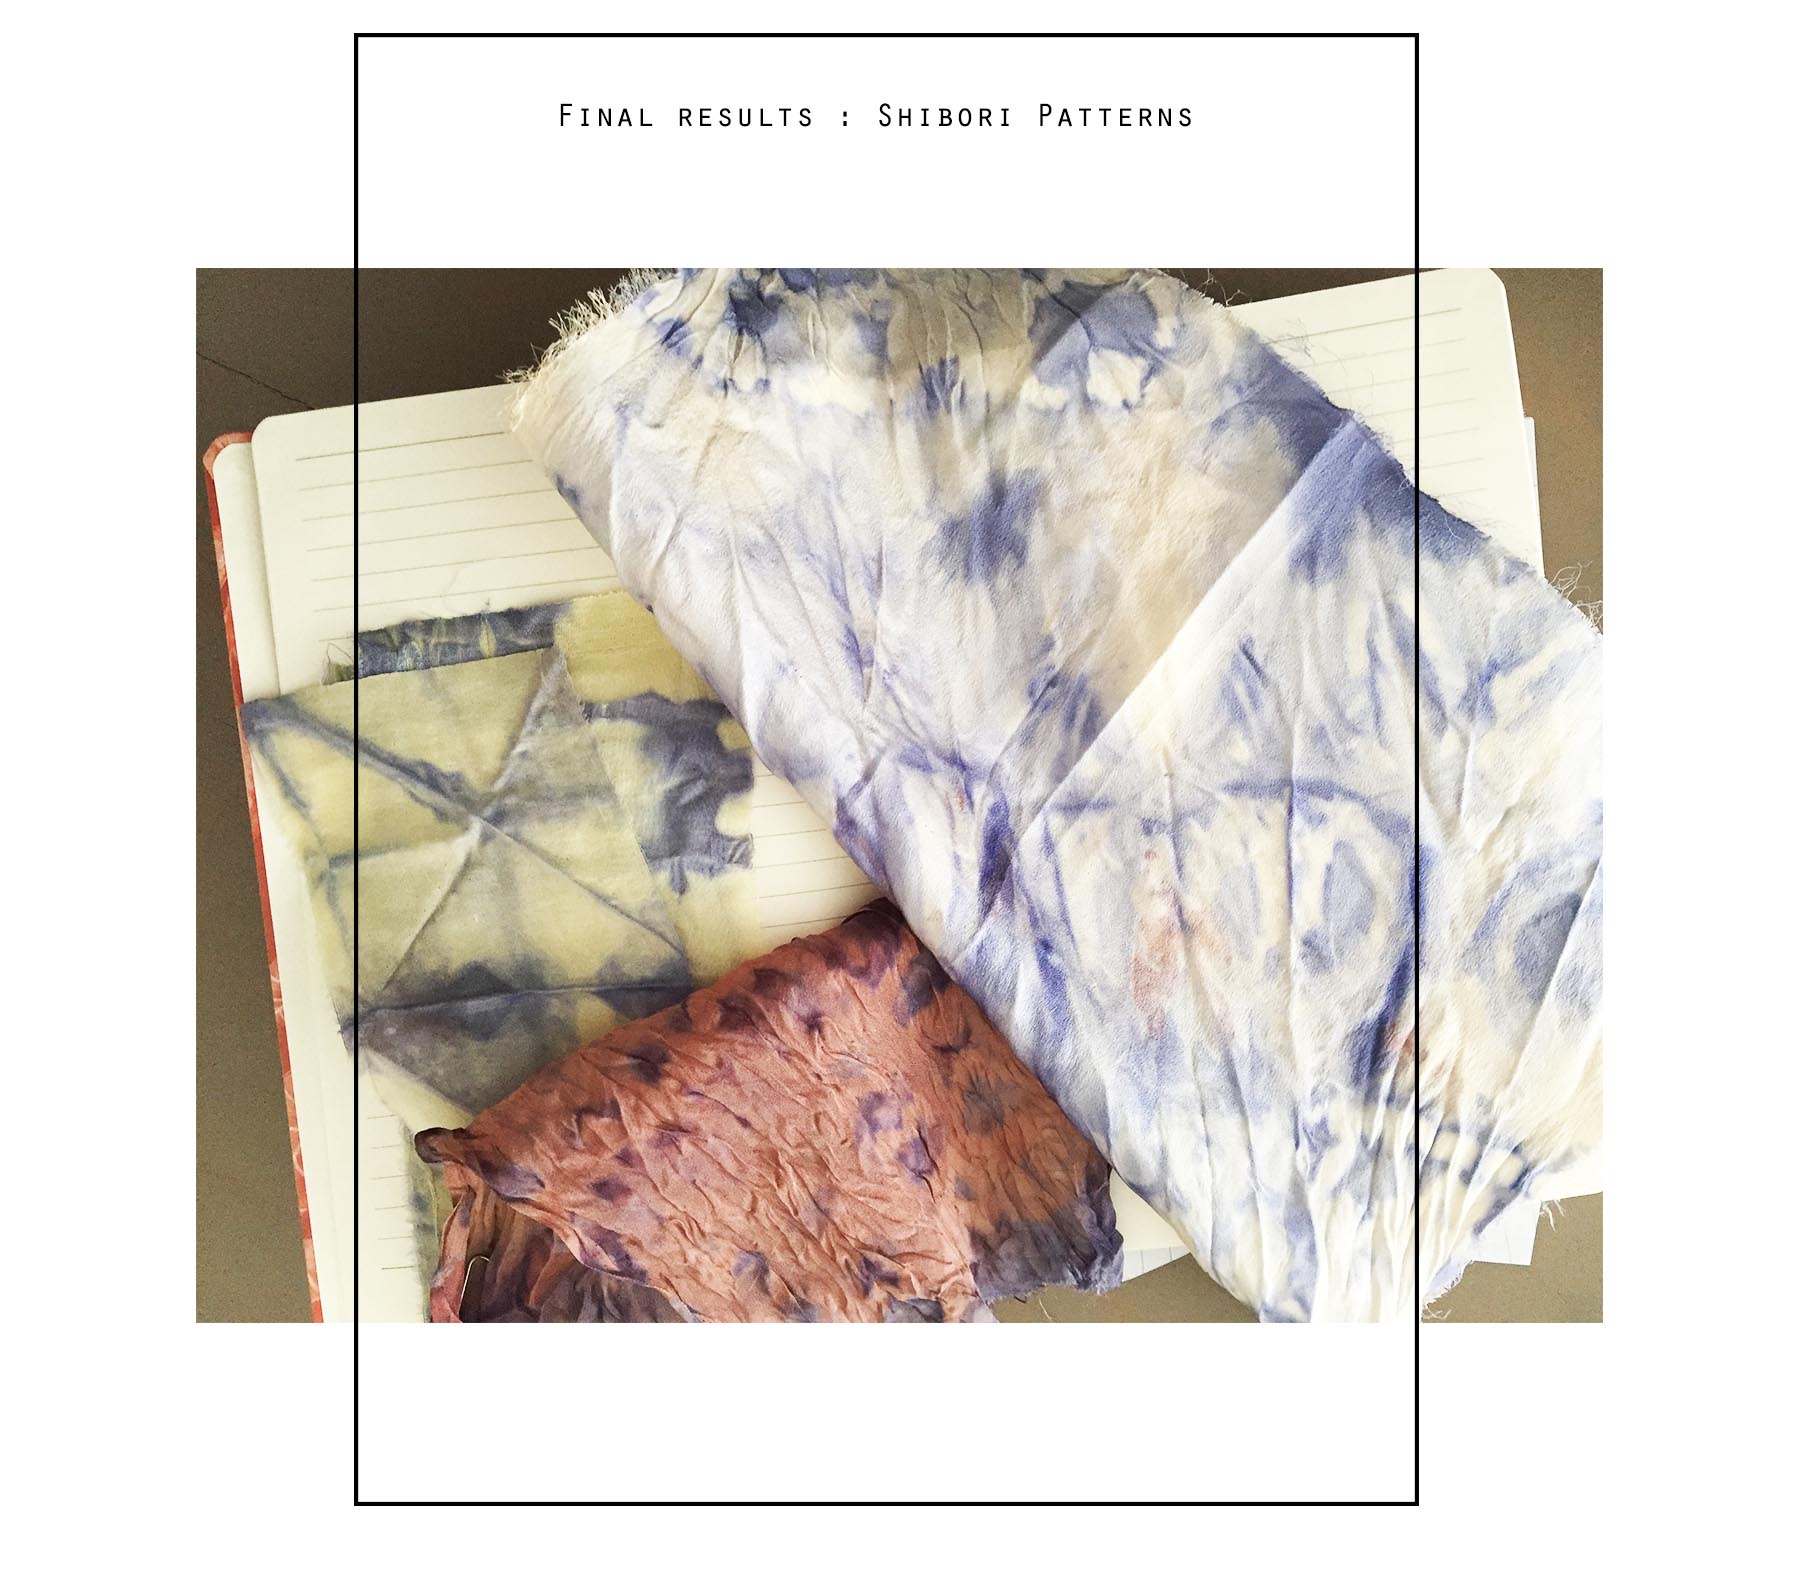
Prepare your fabrics by using folding techniques to get Shibori patterns with the dye technique.
In the lab :
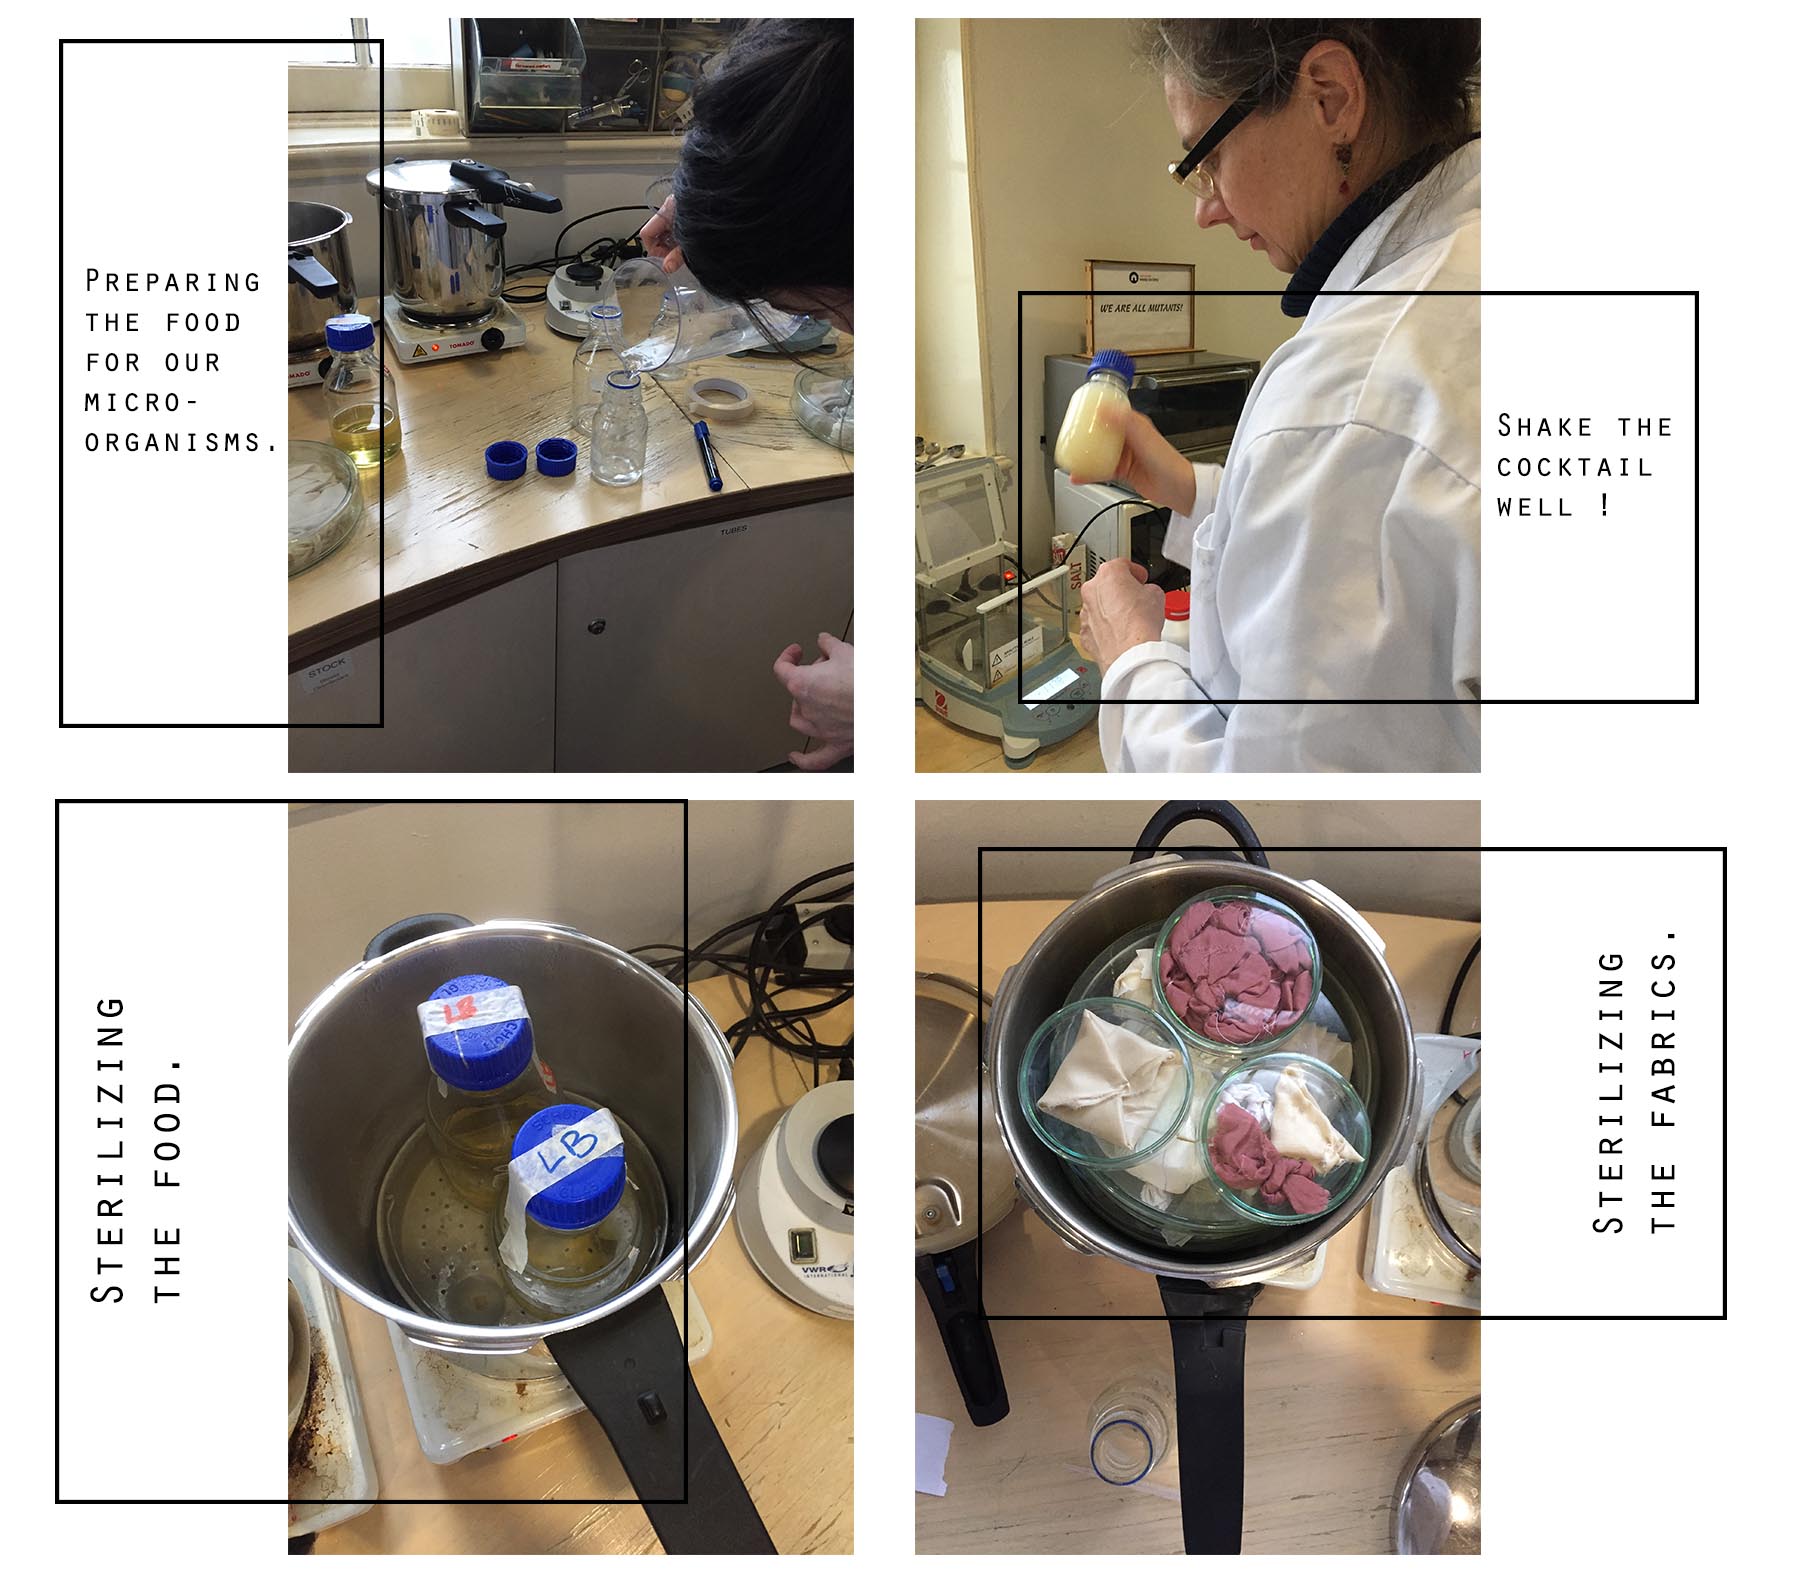
Before adding bacteria to the fabric, we first need to sterilise it, as well as the growth medium, to make sure that we’re only growing the right kind of bacteria on our fabric! To do this, all the fabric samples go into a plastic autoclave bag, which is then loosely knotted and placed in the autoclave, and water is added. Autoclaving creates a high pressure environment with lots of steam, at 120 Celsius, which is very effective at breaking down bacteria.
We autoclaved a bottle of LB broth and a bottle of agar - for this it’s important that the caps of the bottles are loose, and that the water level doesn’t come up higher than the level of the liquid in the bottles (so that nothing explodes out of the bottles.). We also taped over the lids with a strip of autoclave tape - this is tape that turns a different colour when the right temperature has been reached, so you know that you’ve successfully sterilised the contents of the autoclave.
Next take a new (and therefore clean!) petri dish. Set up a space where you can work, and turn it into a sterile space by lighting your gas burner, and cleaning the area around the burner with alcohol.
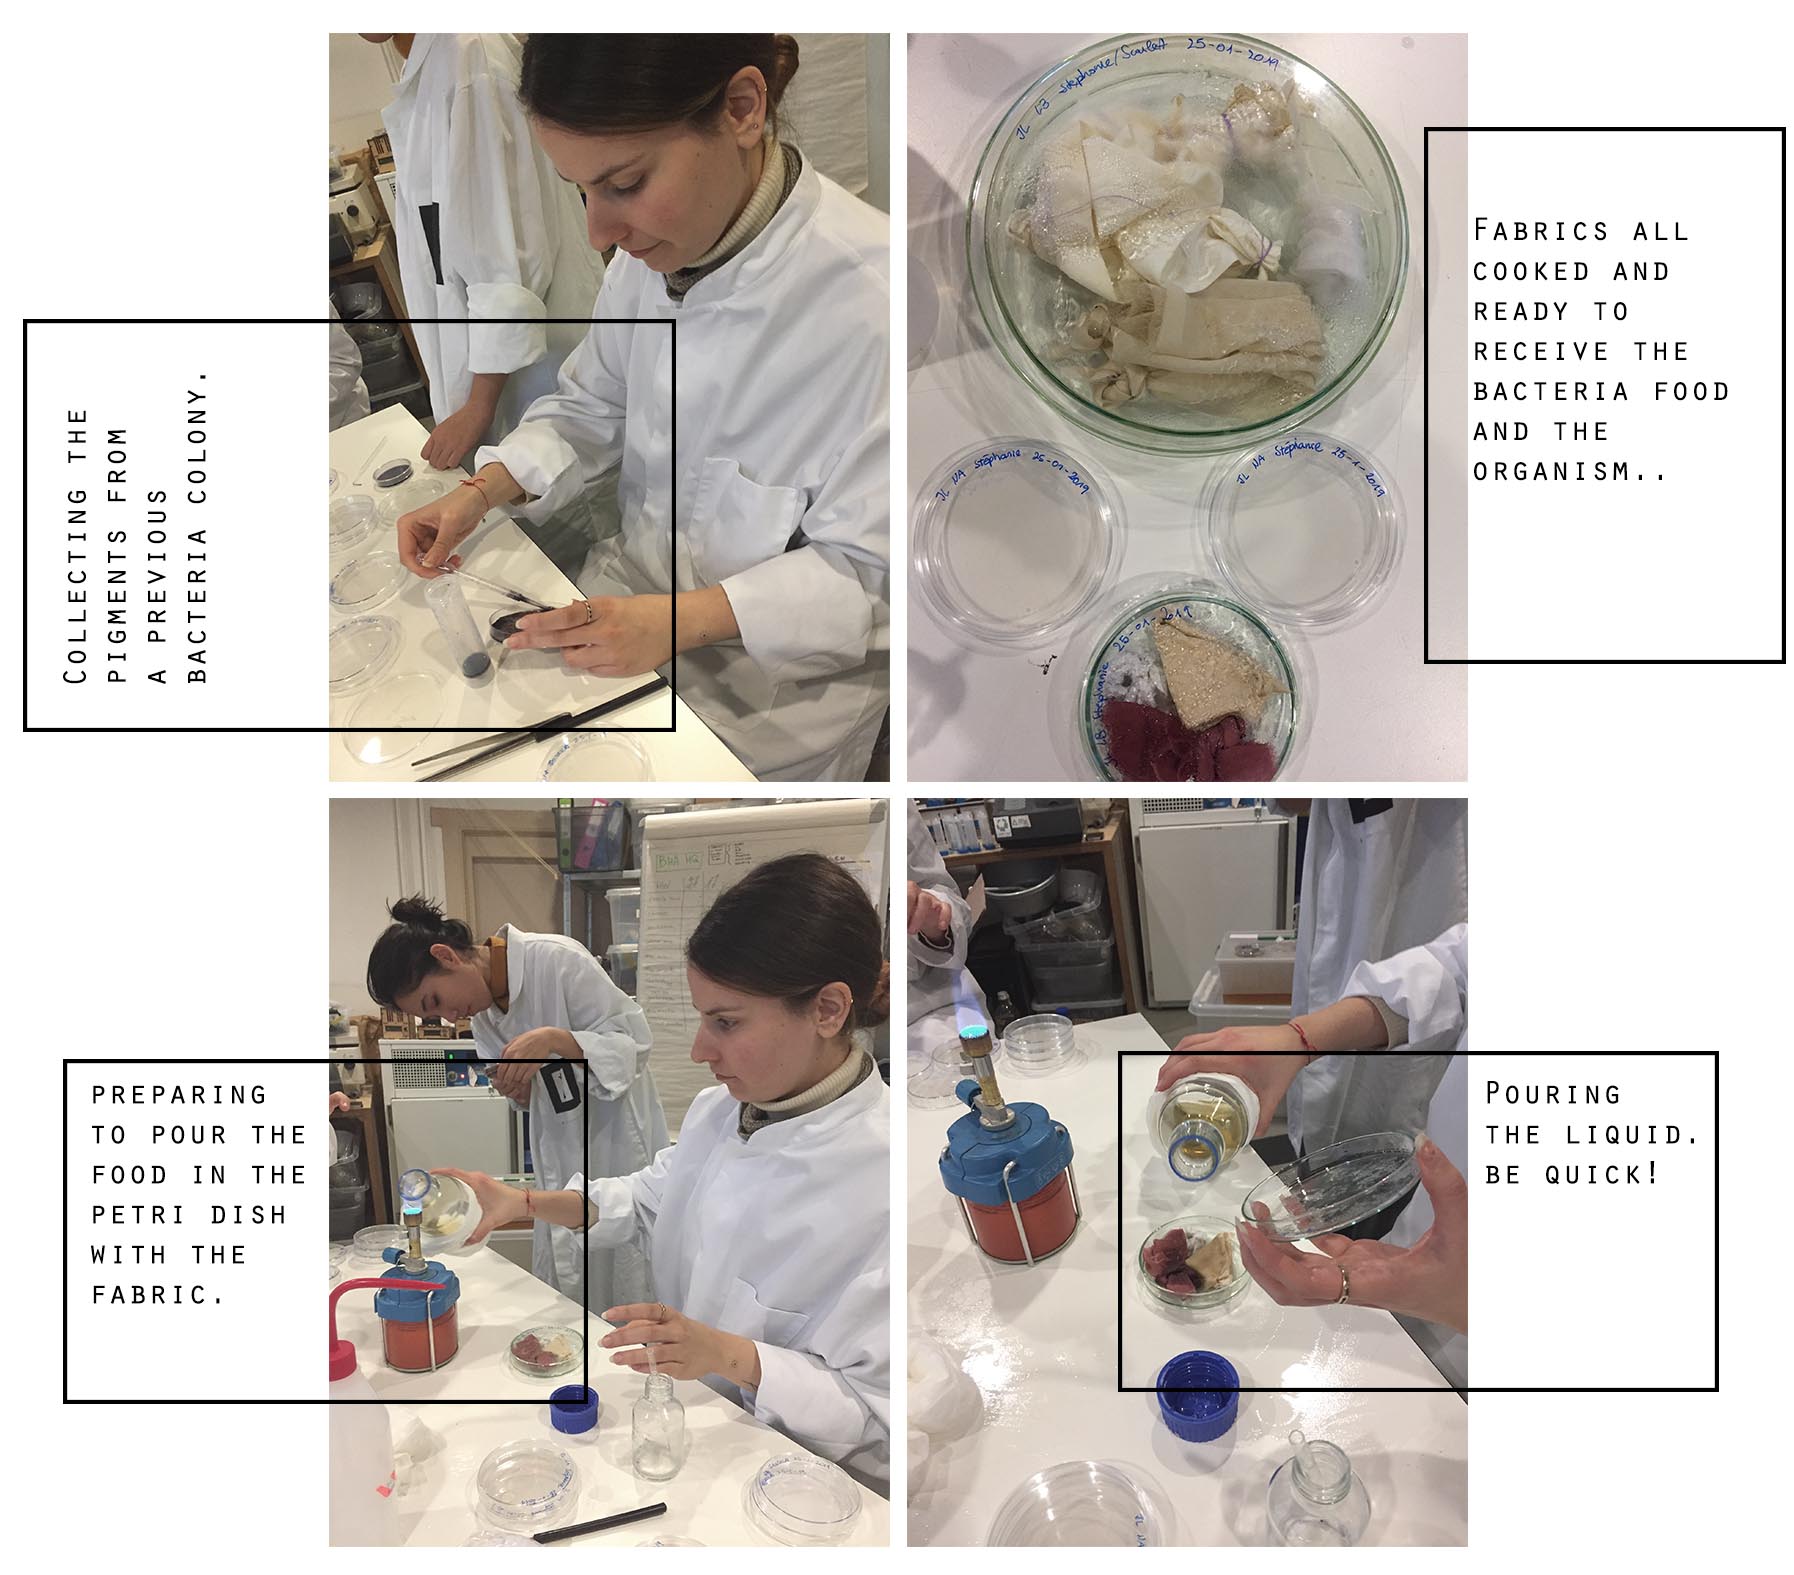
Get your tongs, and pass them through the flame of the gas burner a few times to sterilise. then reach inside the autoclave with the tongs, wait a second for the tongs to cool down a little, and then grab your fabric and put it straight into the petri dish, lifting the lid of the petri dish off for just long enough to place the fabric inside.
Finally, get the growth medium, take off the bottle cap, and pass the opening of the bottle through the flame quickly. Lift the lid of the petri dish (get someone else to do this for you if you need both hands to lift the bottle of broth) and pour the broth into the petri dish so that it is about half full, and the fabric is saturated. Quickly replace the lid of the petri dish.
Make sure that your work area is still clean - add some more alcohol and clean your work surface to be sure! Now get the petri dish with the bacteria, as well as the one with your fabric in it, and keep them close to the gas burner. Get the inoculation loop, and pass it through the flame to sterilise. Open the petri dish with the bacteria, and first tap the innoculation loop in a part of the dish where there is no bacteria - this is to cool down the innoculation loop, so that it stays sterile but isn’t so hot that it’ll kill the bacteria.
Gently scrape the bacteria a few times so that it transfers to the innoculation loop, then open the petri dish with the fabric, and dab and wipe the innoculation loop onto the fabric, as well as the broth around the fabric, to transfer the bacteria. Do this twice, then sterilise the innoculation loop again by passing it through the flame for a few seconds.

Demonstration by Cecilia Raspanti.
You can also extract the pigments of a dead colony my using ethanol and gently scraping the colored part without going through the agar bed.

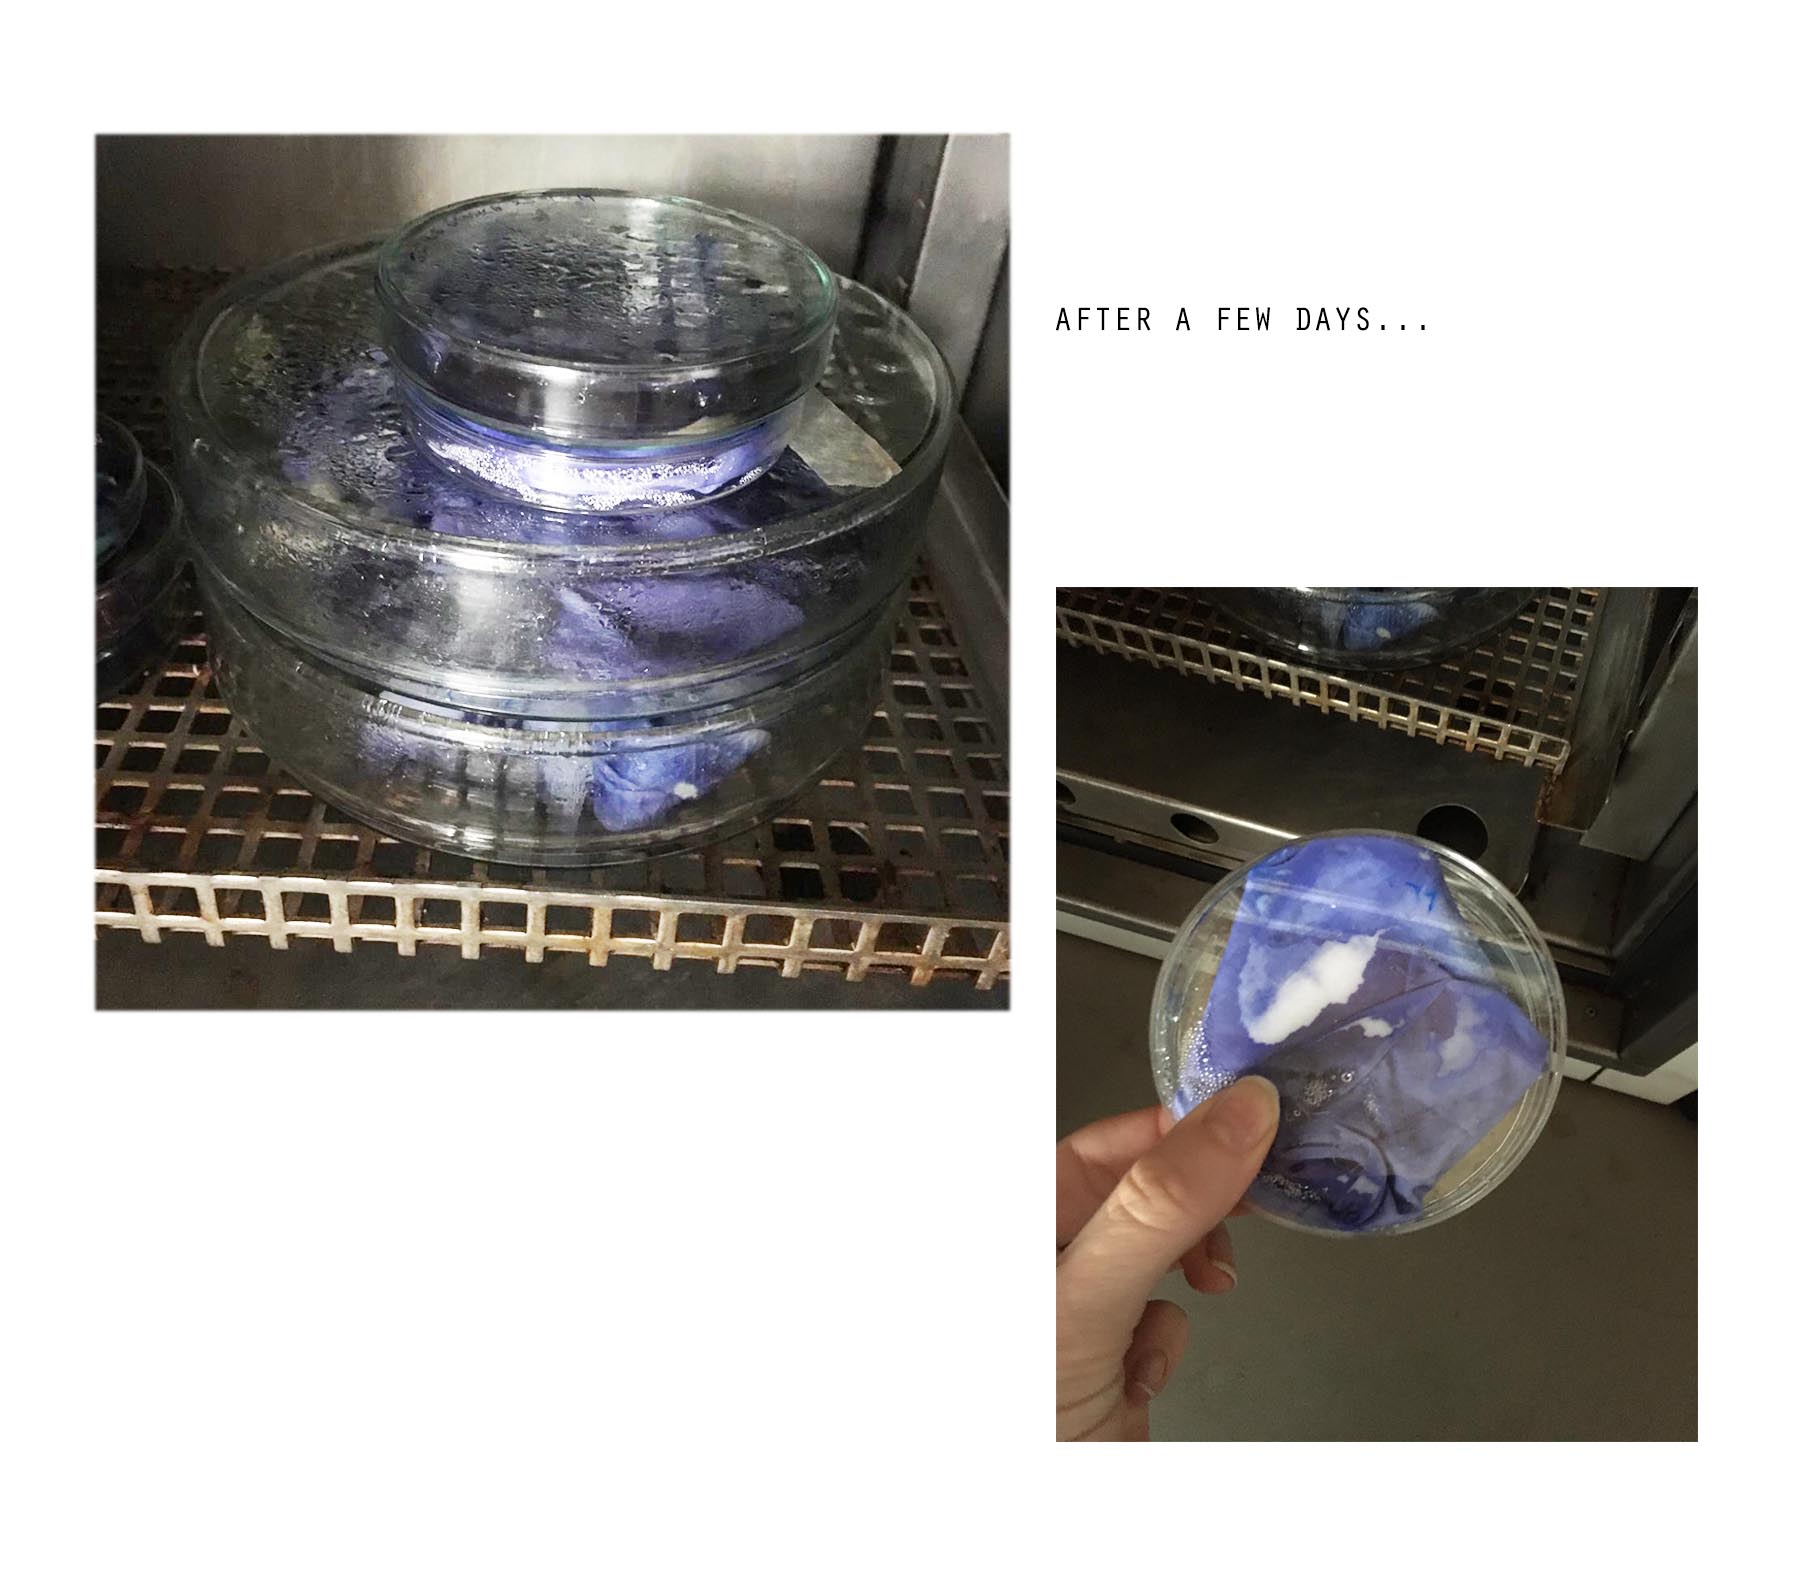
Finally :
Bioplastics#
I think bioplastics are one of my favorite discoveries during these weeks. I love cooking in general and I love biodegradable material. This was just the perfect combo during the course. I didn’t know where to go with the recipes at first. Eventually, I just started cooking and mixed the warm liquid with stuff lol .................................. Here are my first tests :
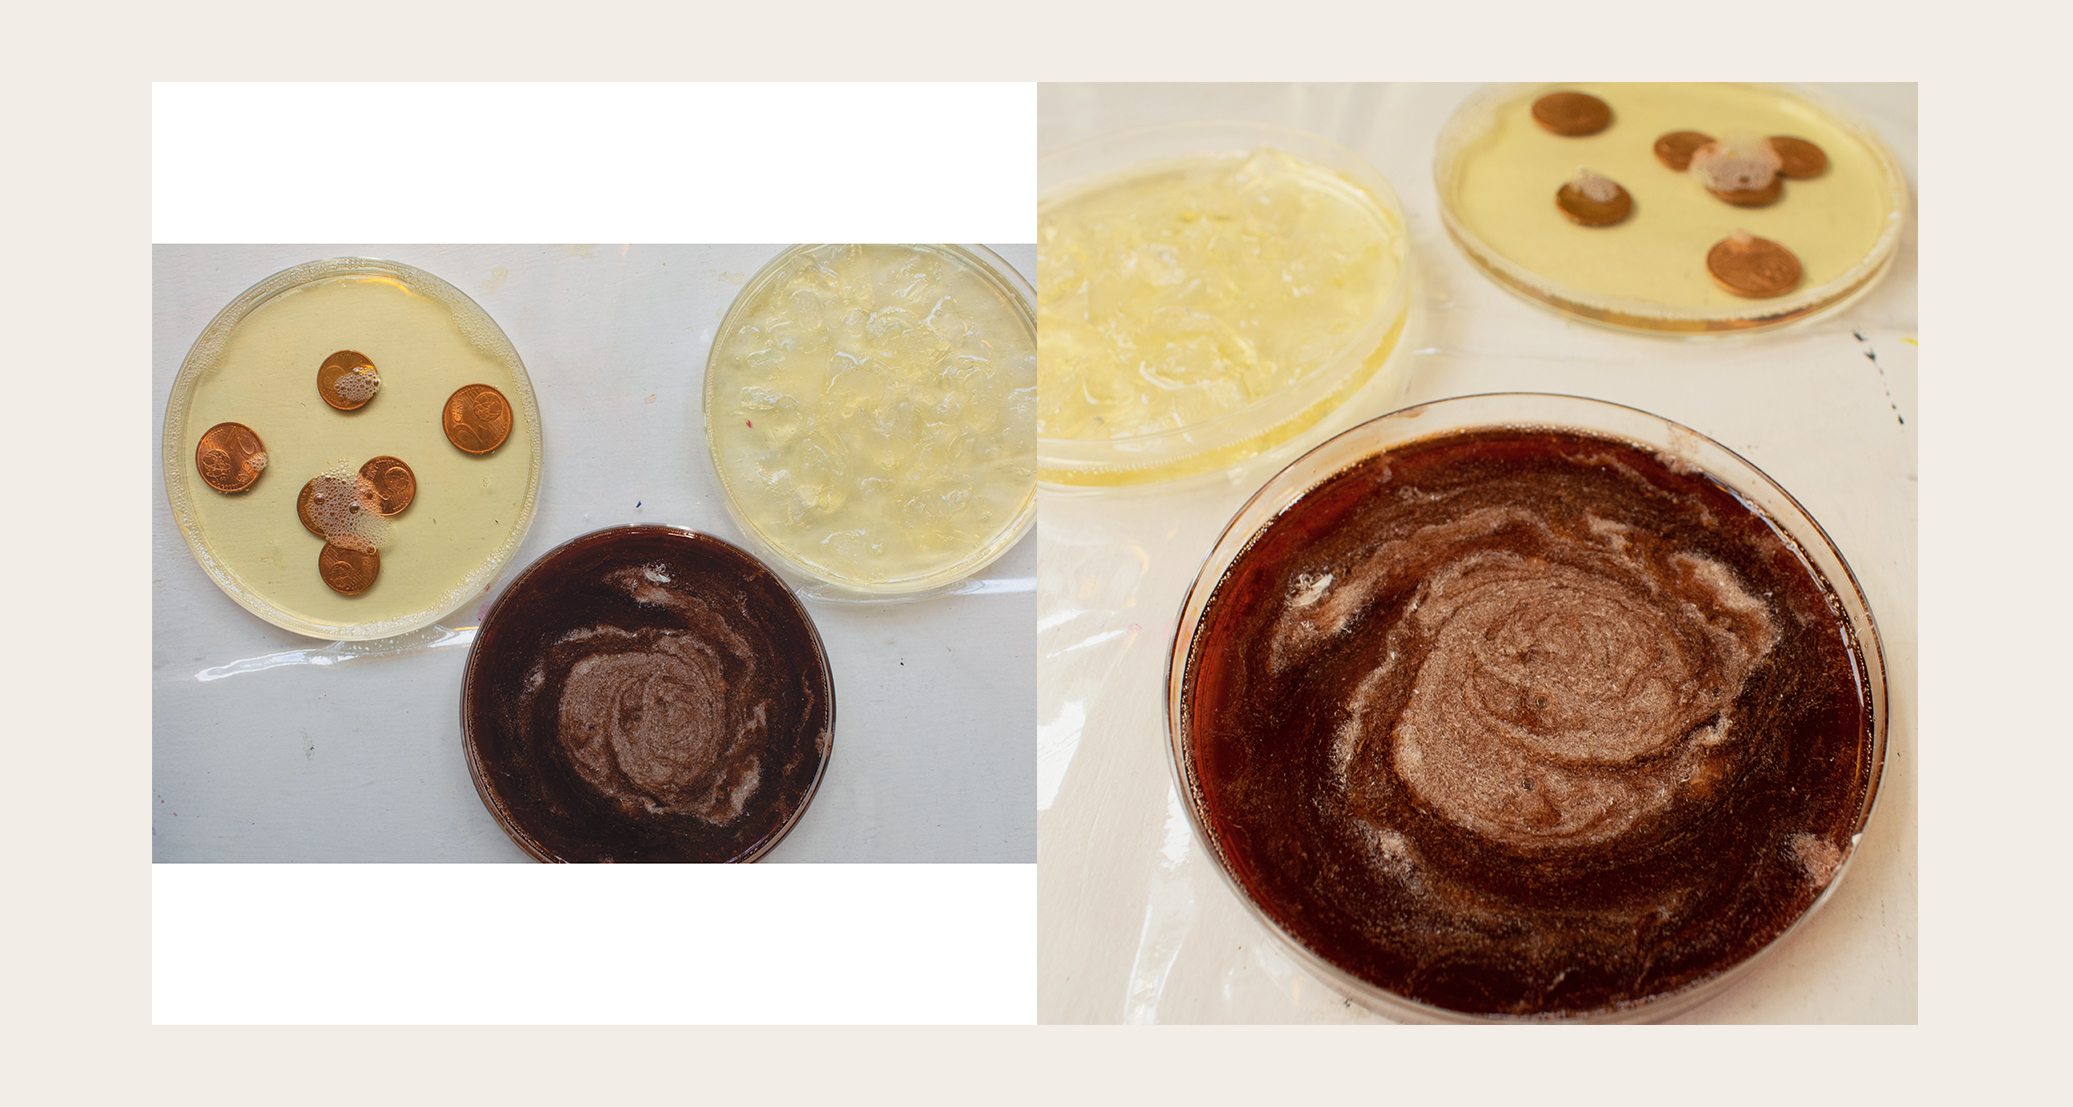 All three are the ‘bio-resin’ recipe mixed with :
(First photo : left -> right)
copper cents | hibiscus dye and white acrylique paint | Agar bioplastic pieces
All three are the ‘bio-resin’ recipe mixed with :
(First photo : left -> right)
copper cents | hibiscus dye and white acrylique paint | Agar bioplastic pieces
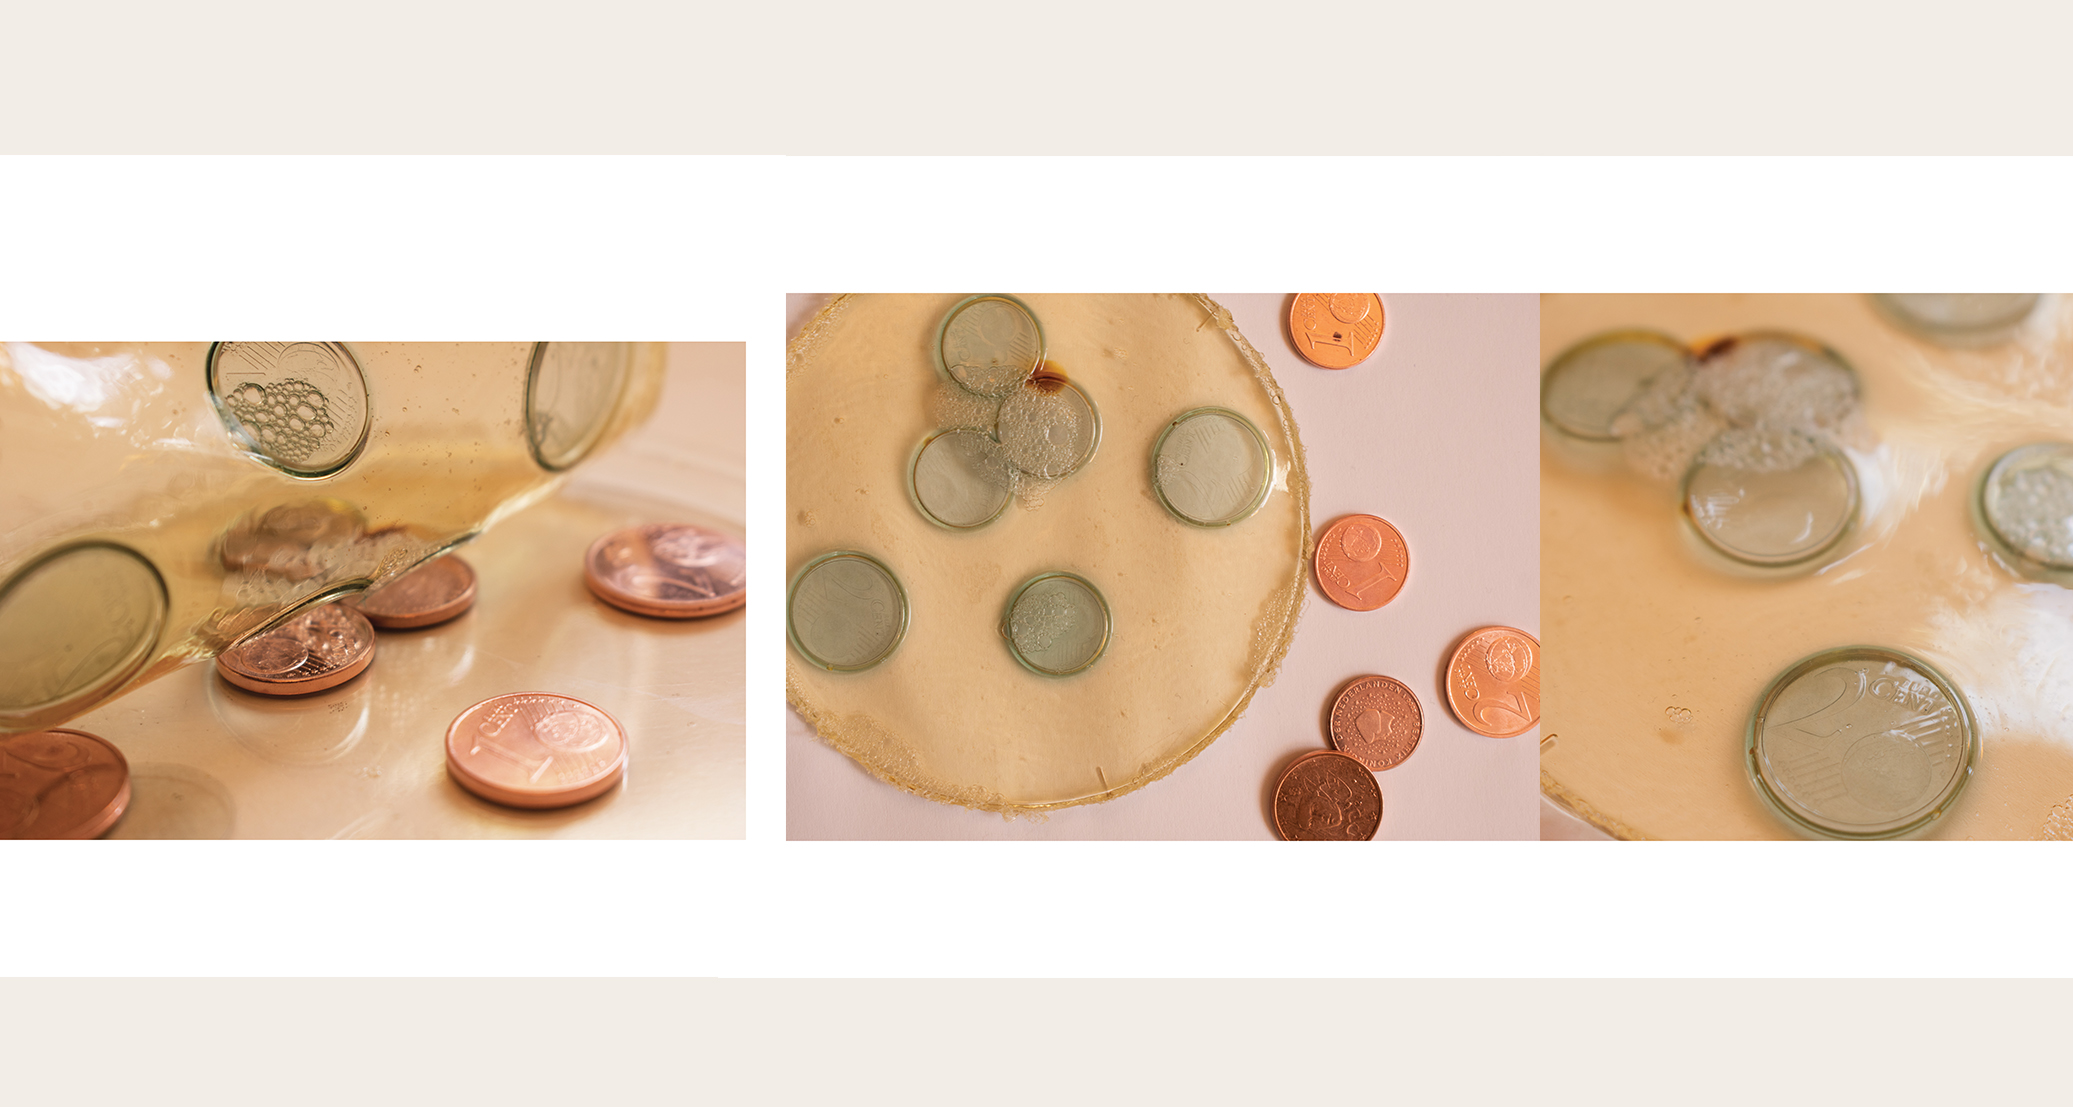 It was interesting to see the copper cents had oxydized and left tinted prints on the bioplastic :
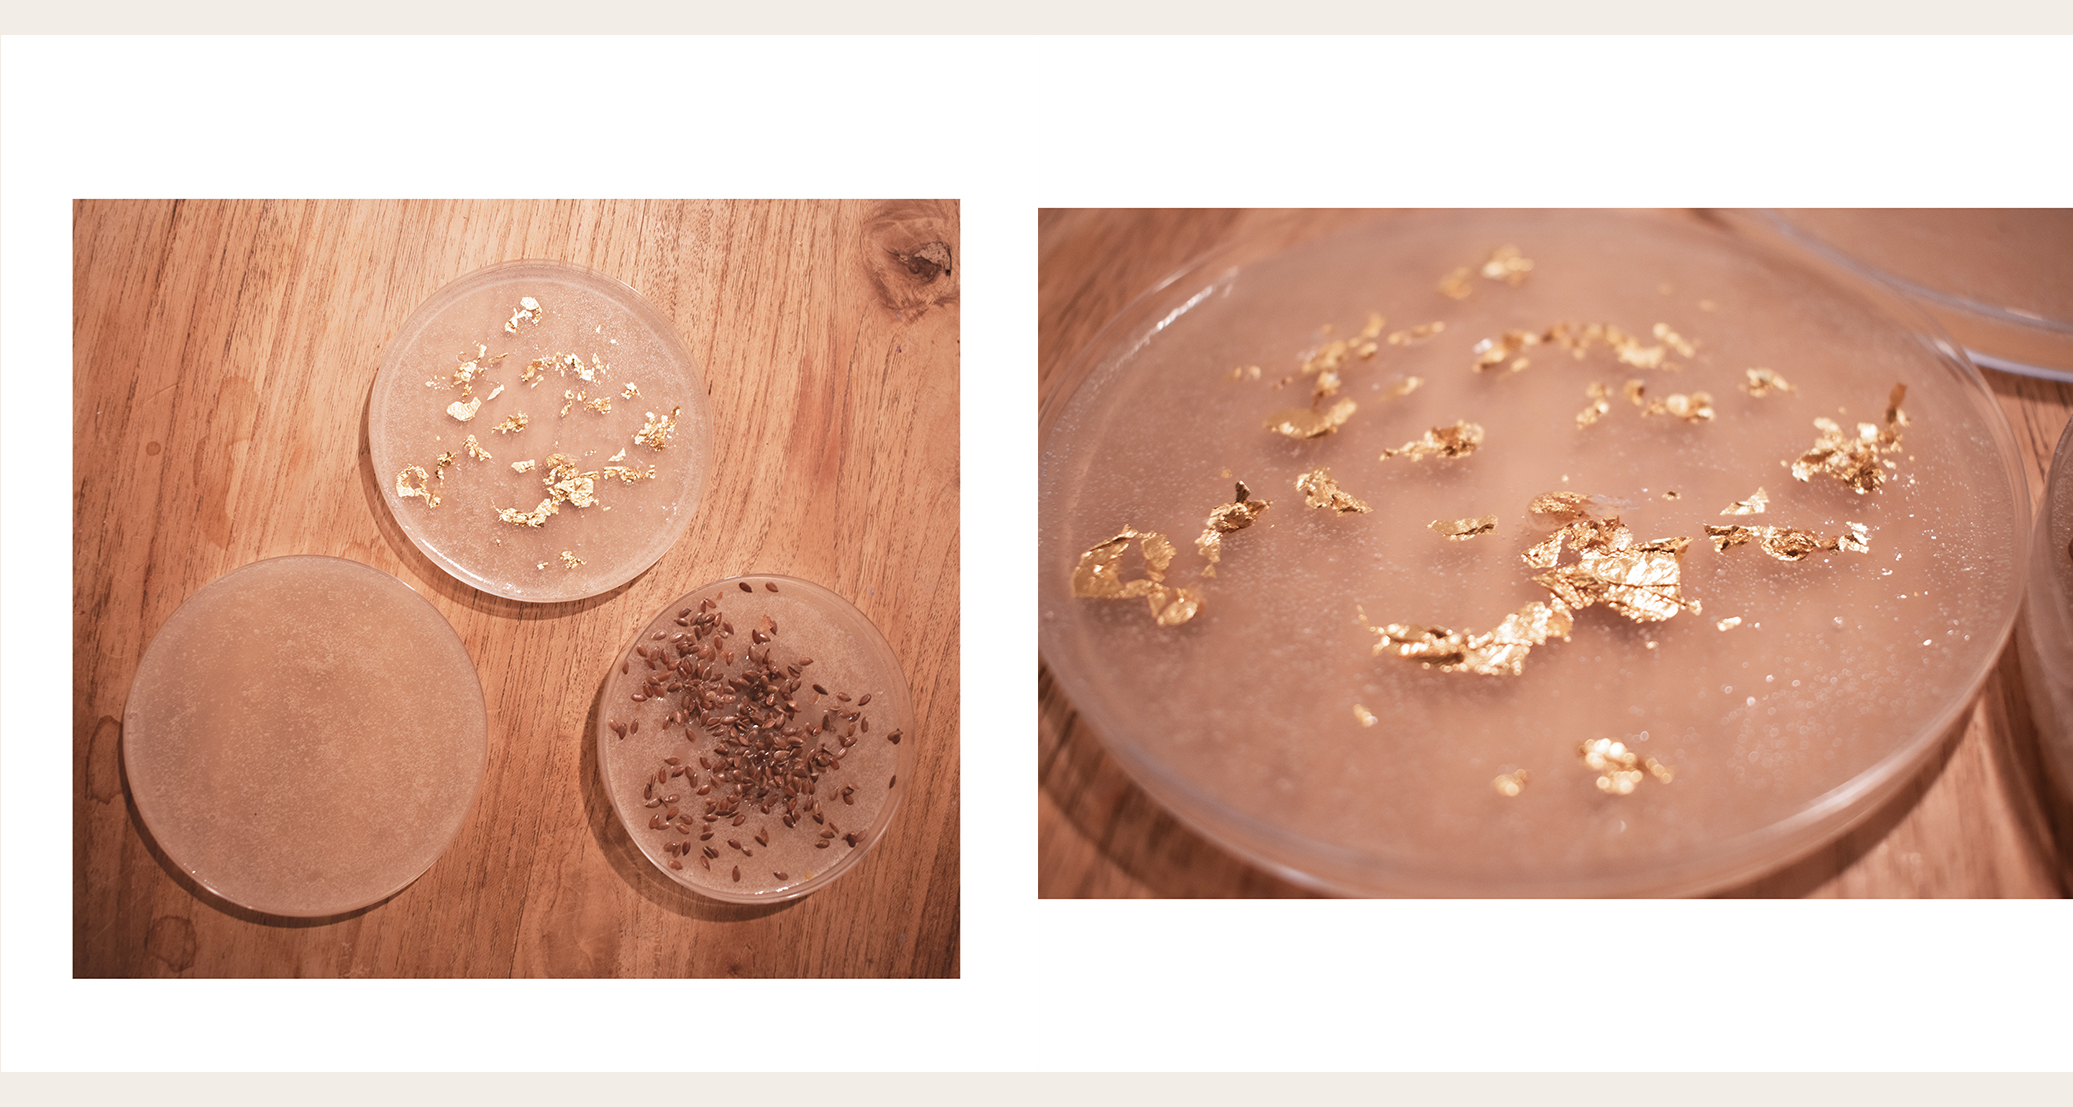 These are the Agar foil bioplastic recipe including different elements :
(First photo : left -> right)
plain | 24K gold flakes | linen seeds
Also, I cooked the formula for 40min at low temperature.
These are the Agar foil bioplastic recipe including different elements :
(First photo : left -> right)
plain | 24K gold flakes | linen seeds
Also, I cooked the formula for 40min at low temperature.
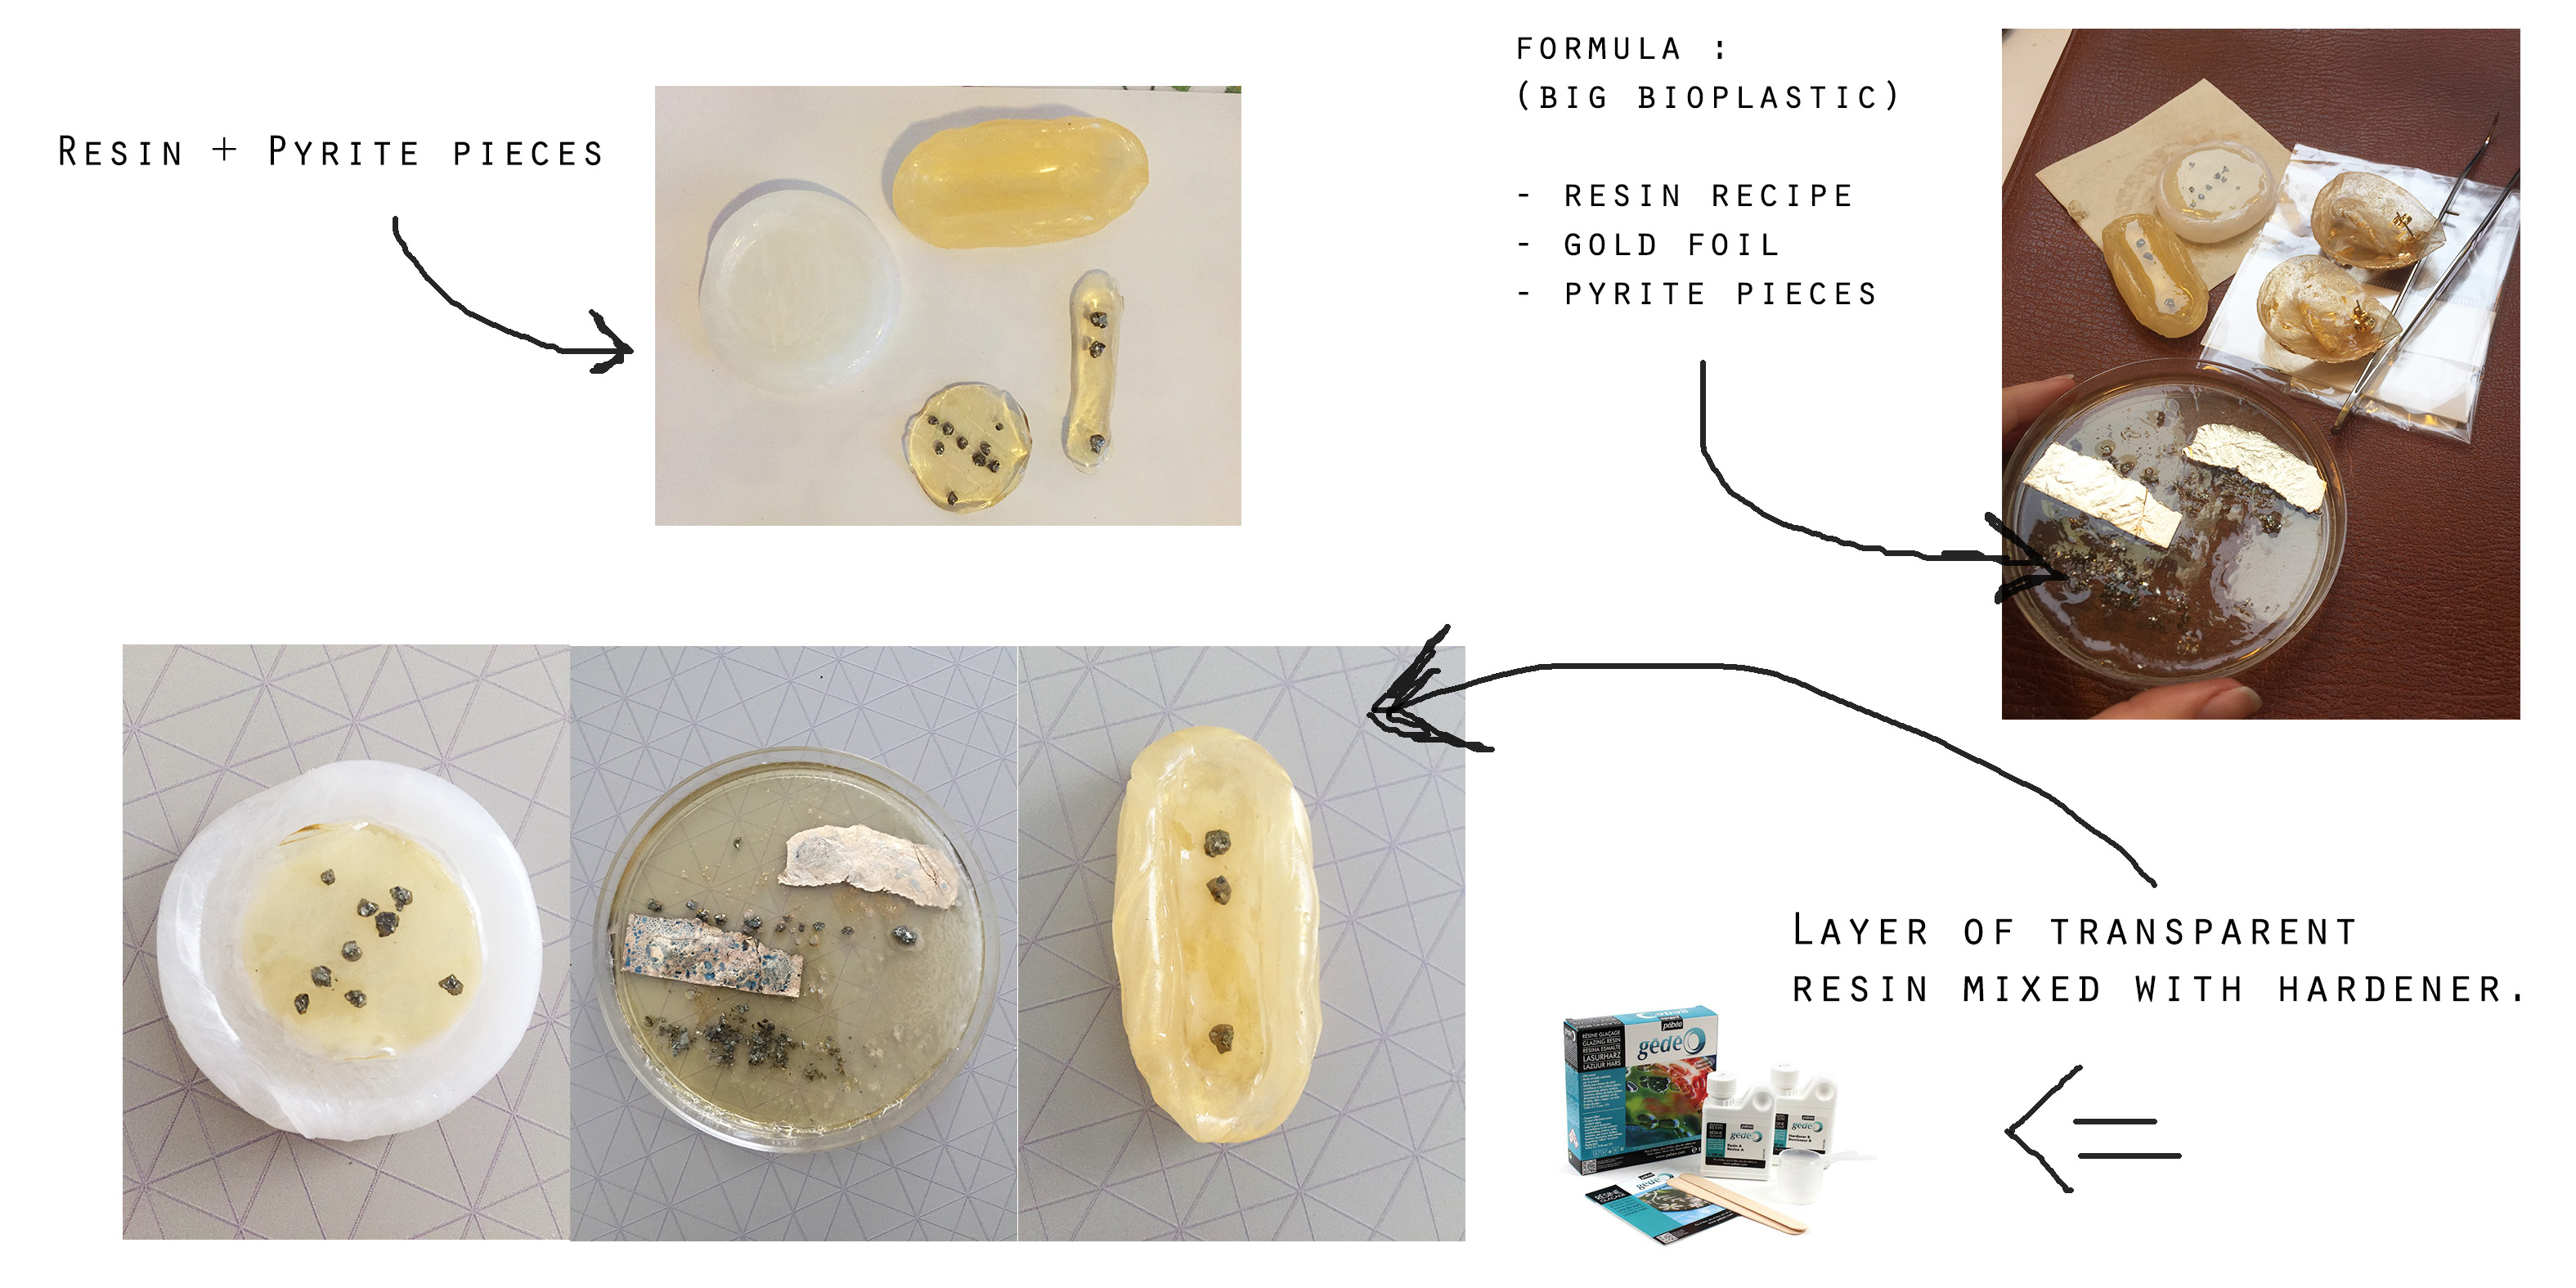 Here I did something a little extra. I started by cooking the bio-resin (for 25min), decorated it with some gold-flakes or/and Pyrite pieces and let it dry.
48h later I pourred some crystal resin on top and let it dry for some 48h more.
Eventually, I wanted to have different color layers and something hard to make jewelry .
Here I did something a little extra. I started by cooking the bio-resin (for 25min), decorated it with some gold-flakes or/and Pyrite pieces and let it dry.
48h later I pourred some crystal resin on top and let it dry for some 48h more.
Eventually, I wanted to have different color layers and something hard to make jewelry .
Recipes :

Bioplastic as a garment or an accessory#
I made a quarter of a corset for the assignment ‘Textile as Scaffold’ in bio-resin with gold flakes and a tulle base. Next I tried the same process with the Agar bioplastic recipes, and made a large waist belt, also with a tulle base and gold foil.
Useful links :