3. Circular fashion
Messing with some materials — my current bag is getting destroyed so I need a new one so I tried my hand at making one.
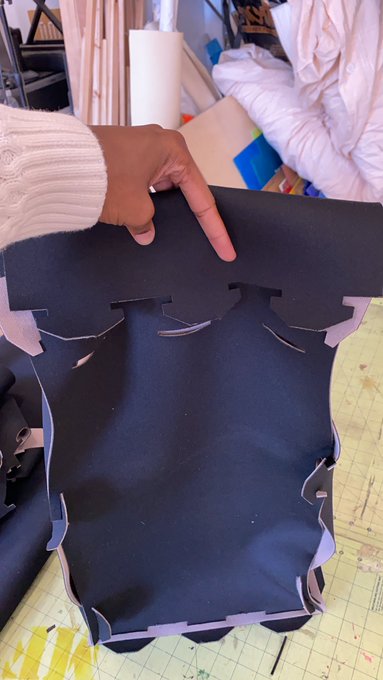
For a prototype, it’s got some legs in addressing modularity with a notch lock system—for practicality? It’s terrible lmao.
Messing with some materials — my current bag is getting destroyed so I need a new one so I tried my hand at making one.
— (BLVK) Vain (@vainpsn) October 9, 2020
For a prototype, it’s got some legs in addressing modularity with a notch lock system—for practicality? It’s terrible lmao. pic.twitter.com/qqD8VCQBKD
Early Testing
When I originally attempted the assignment, I wanted to create somewhat of a modular, transformative vest similar to a vest I saw from the designer Irina Dzhus. I realized quickly that my laser cutter was soo small to attempt to cut all the necessary pieces to create a vest without contributing to too much waste. Instead, I pivoted to a bag design as it was a little bit easier to get a functioning idea on how it could be modular, assembled without sewing or adhesive, and potentially wearable.
As you can tell by the logline above, that didn't necessarily work out.
Fetching Materials
For the first bag test, I had gotten 7 yards of Neoprene. The Laser cutter is only 29 x 17" so I figured that if anything, I could make a laptop bag or some tall backpack. Neoprene has enough sponginess to retain shape after forming, and is thick enough to where it can hold weight of a laptop. Just one problem...my laser cutter also didn't have the proper lens / laser configuration to cut Neoprene. IF I had attempted it, it could have spelled disaster not only for myself...but for the whole lab.
Back to the Drawing Board.
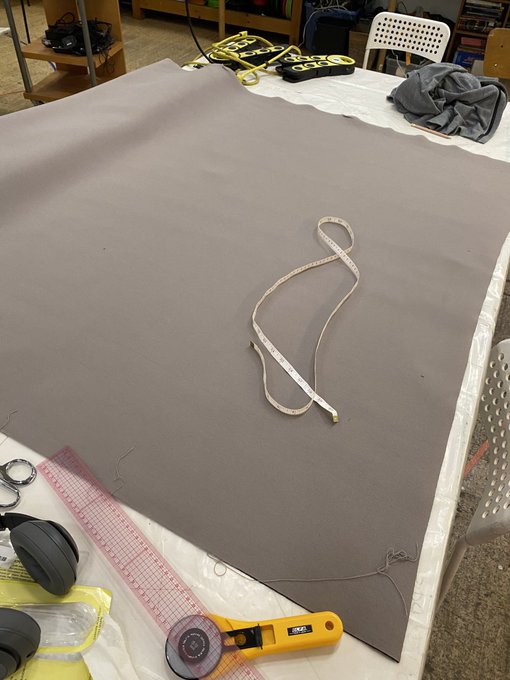
This was a PAINFUL revelation because I had spent of $150 on this material that I couldn't return nor use for this project. So I returned ot the fabric store and found a wool/polypropylene blend that could be useable for this project.

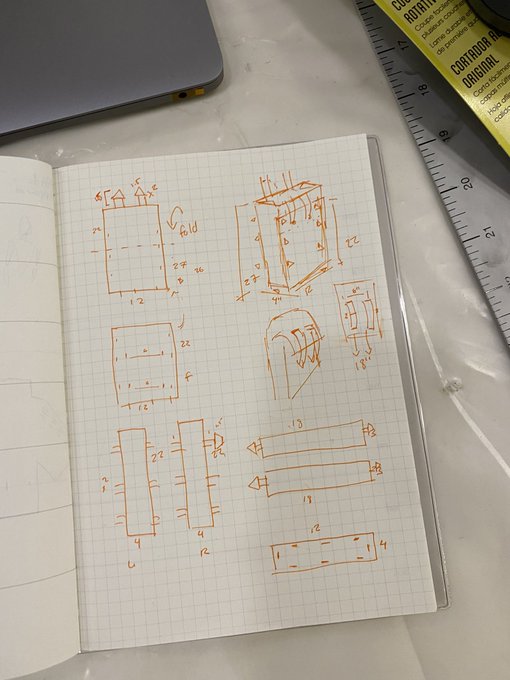
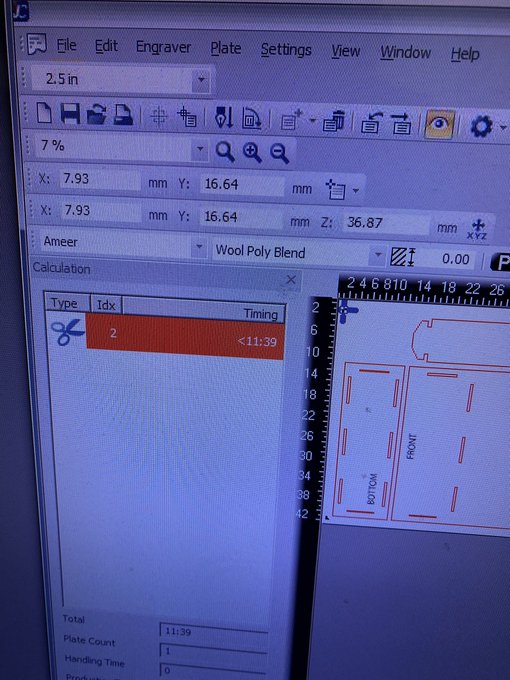
Test 1 - 6 (Assembly One)
So what I’m thinking is mass laser cutting 10 yards of this material to get the thickness necessary for a fabric only assembly without sewing or adhesive fusing. The problem...is that I’m using a fused wool / polypropylene blend and it’s EXPENSIVE as hell. So expensive, it cost me $105 just for the 3 yards I currently have. And it took roughly 1 yard to assemble the bag. At least that’s somewhat of a good thing, it doesn’t take much to make.
That might help me with yardage where I can cut my materials needs in half. More on this later!
— (BLVK) Vain (@vainpsn) October 9, 2020
After the first set of cuts, the bag was mostly finished, I had an erroneous cut on the front of the bag so the middle notches will not hold. But I think there’s two issues I can resolve:
1 adjust the size of the bag, I can get away with making it much smaller to fit my laptop and that could help me make more pieces to strengthen the bag itself and make more notches instead of the three bug ones—if my fabric was thicker it could probably work.

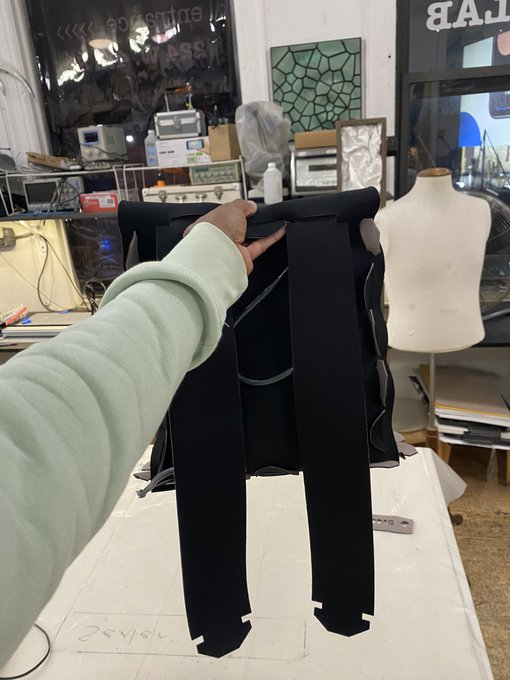
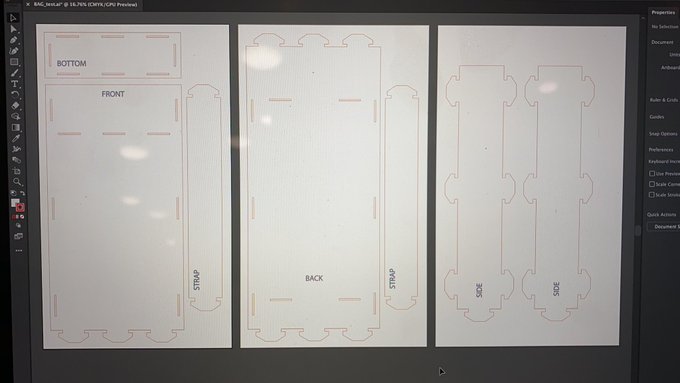
Test 7 - 13 (Assembly 2)
So I spent some time over the weekend coming up with a new tech to test out. Each panel has more notches to keep the shape of the bag more so it’s not super flimsy. My goal for this test is to: I can have it at 16 x 12 x 4” probably have 6 smaller notches on each side of the big panels, for the side panels I double up on those and the straps.

I’m hoping that with this, the reduction in size about 40% and doubled up in fabric should do the trick.
Here's a quick video where I discuss the assembly process for this particular test:
Some quick video on laser cutting my thought process on assembly. pic.twitter.com/vkbCCbENHG
— (BLVK) Vain (@vainpsn) October 13, 2020
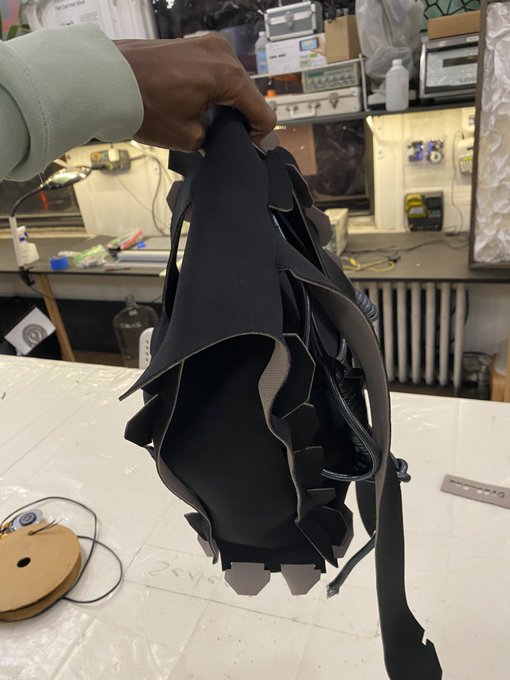
GOOD NEWS:
Making the bag smaller and with more notches was perfect. Doubling up on the assembled pieces makes it stronger as well.
BAD NEWS:
Bags require stitching and other methods of adhesive that I’m unable to solve with just a laser cutter.
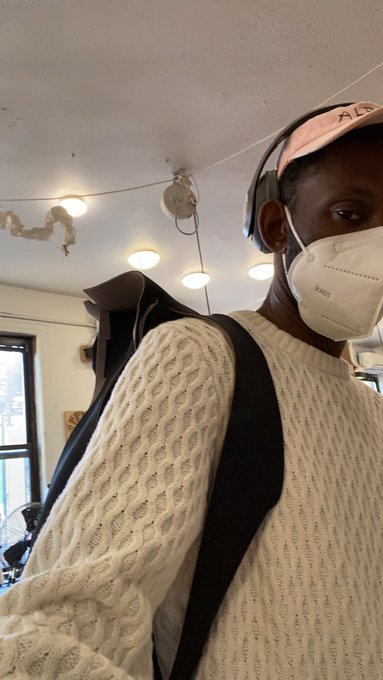
Because laser cutting is a subtractive method of design, I’m creating a good deal of waste that doesn’t actually help with bag assembly. With that said, I’m prepared to take this to the next level with real piping and stitching and stronger fabrics for round three. For now, enjoy these photos because DAMN IT LOOKS GOOD!
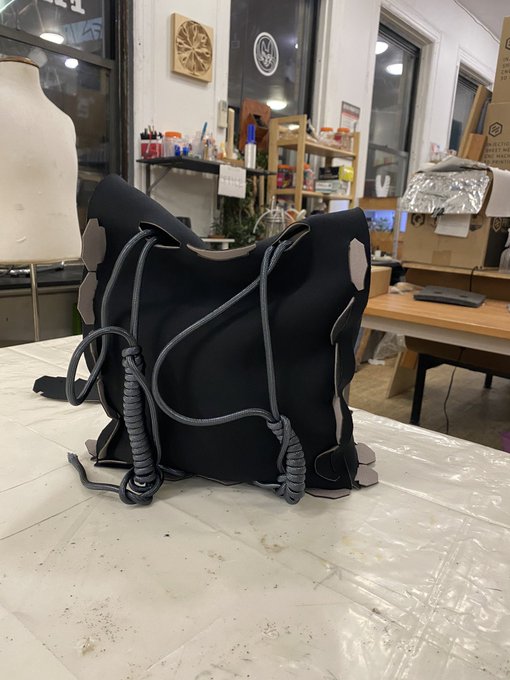
P R O T O B A G — Z E R O
This bag has a notch assembly for the front, back, side and bottom panels. The back panel is 3.125 in taller than the front panel for a fold closure system with a removable strap. I used drawcords for the sling in a hunter's knot that can be adjusted to either tighten or give more slack to the wearer. The original notch straps are added for comfort for the drawstrings to rest on—mainly to prevent fabric friction and tear in the notches.
To further push this design, I going to explore piping options to develop more of a boxy shape better.