5. E-textiles
This page is the documentation of the E-textiles project, week 5 (2020)
Objectives
Check List
- [ ] Build at least one digital and one analogue soft sensors, using different materials and techniques,
- [ ] Document the sensor project as well as the readings got using the AnalogRead of Arduino,
- [ ] Integrate the two soft sensors into one or two textile swatches using hard soft connections,
- [ ] Document the circuit and it’s schematic,
- [ ] Document your swatches,
- [ ] Upload a small video of the swatches functioning,
- [ ] EXTRA POINT Integrate the swatch into a project.
Assessment criteria
- References : tutorial , links, ideas
- Design : program your arduino sketch , design your circuit and schematic
- Fabrication : craft your soft sensors
- Documentation : Anyone can go through the process and understand
- Final outcome : Is the project assembled, functioning and complete
- Originality - Aesthetics : Has the design been thought through and elaborated
Main steps
- Looking for inspiration and usefull information,
- Design the idea of the whole project : an hybrid bricolage at the interaction of craft, computerized design and electronics,
- Design the sewing and stitch patterns,
- Design electronics circuits : simple digital output, simple analog output,
- Combine the design : fabric and electronic.
Inspiration & useful information
Inspiration
Kid's song about elephant...
Design inspiration
Drawing of the project
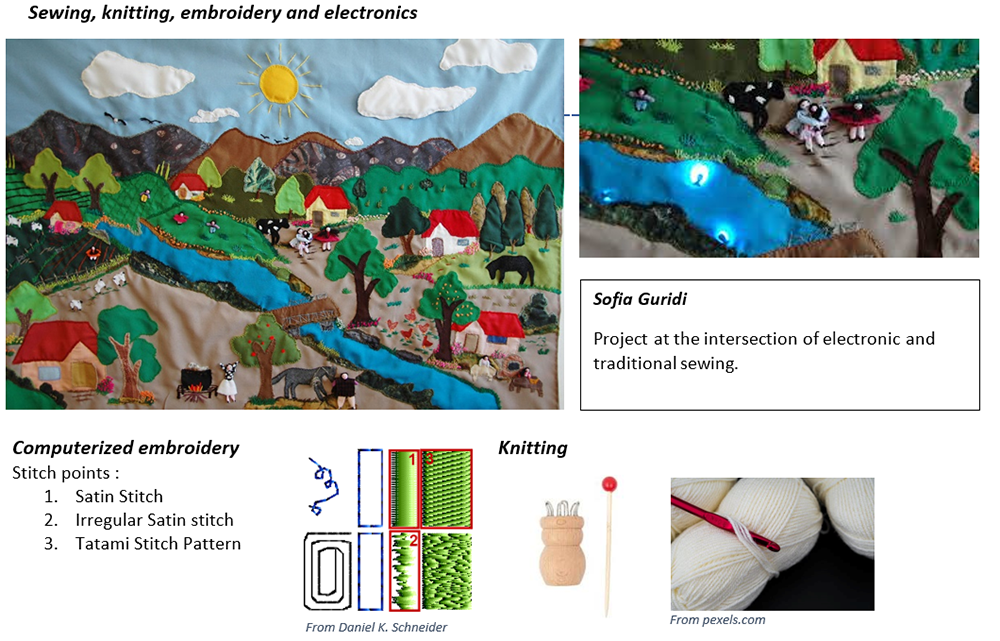
This is an hybrid bricolage at the intersection of craft (sewing, knitting), computerized design (embroidery machine) and electronics (Arduino).

Project purpose and target audience
This project is to create an interactive short song for children from 1 to 5-6 years old. We can distinguish 2 possible educational use according to the age range:
- For 0-2 years old children: sensory-motor development by pulling the yarn and put the elephant at the right place to make LED blinking.
- For 2-6 years old children : learning english words and song with a playful a mean
Design of the project
Step 1 : Sewing, knitting and embroidery
Embroidery
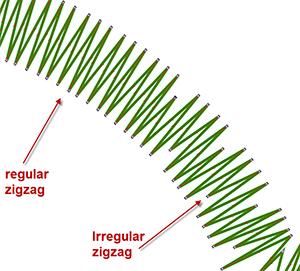
I used Inkscape and its extension Inkstitch to create the embroidery design. I used two types of stitches : pattern and irregular zigzag (manually made)

https://www.cabaneaidees.com/tricotin/
This is a preview of the design in Inkstitch

Sewing
Elephant
Schema + Picture of tools & fabric
Step 2 : electronics
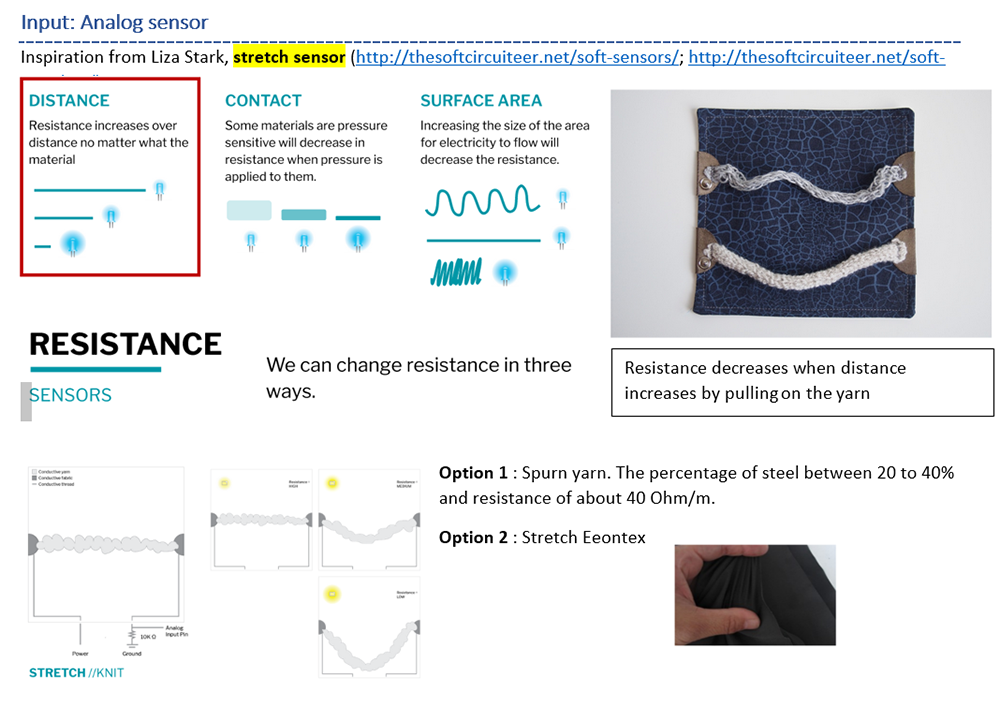
Analog sensor
- Drawing
- Schematic
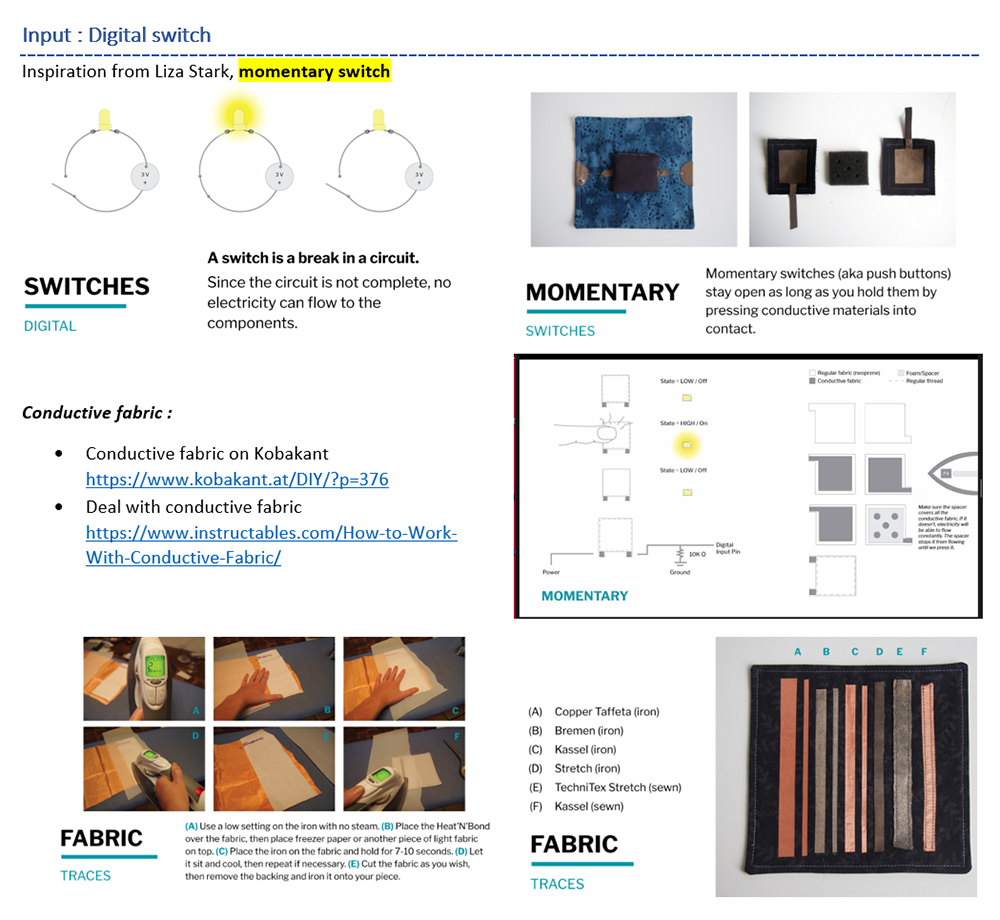
Digital sensor
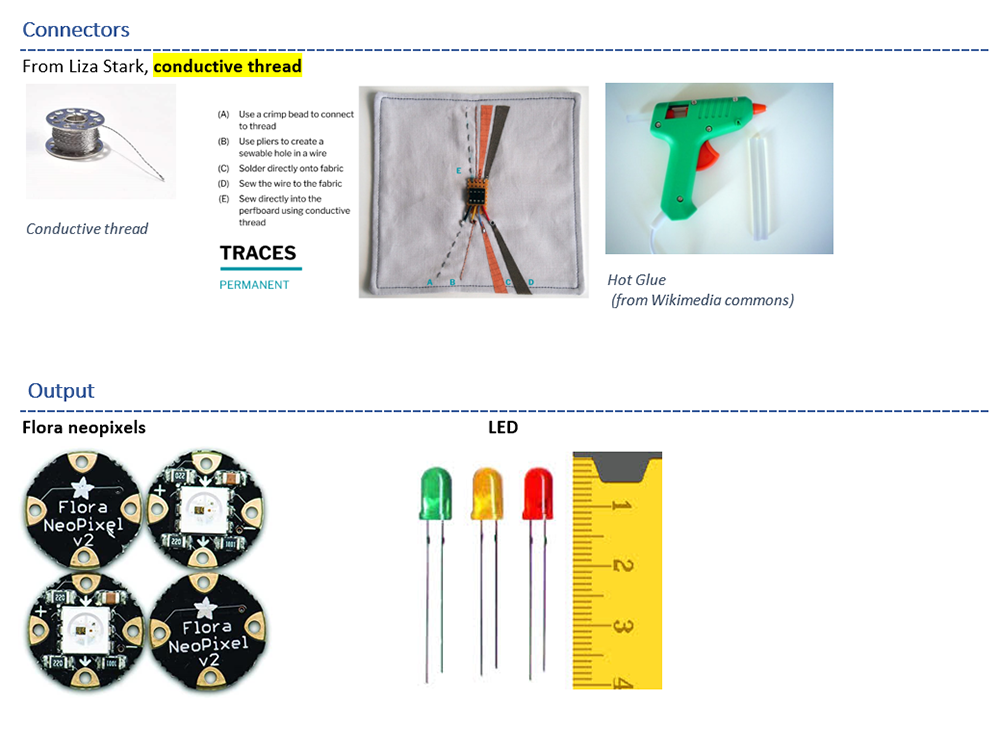
Tools
Picture of tool
Material
-
Non-conductive fabric
-
Feutrine
- Coton fabric
Project design
Objectives
Design a textile story card with combined technics multi-material swatch with Sewing, Embroidery, Knitting and electronics
Drawing
Schematic design
Tools : * Online Free software : https://www.circuit-diagram.org/
Use the three backticks to separate code.
// the setup function runs once when you press reset or power the board
void setup() {
  // initialize digital pin LED_BUILTIN as an output.
  pinMode(LED_BUILTIN, OUTPUT);
}

// the loop function runs over and over again forever
void loop() {
  digitalWrite(LED_BUILTIN, HIGH);   // turn the LED on (HIGH is the voltage level)
  delay(1000);                       // wait for a second
  digitalWrite(LED_BUILTIN, LOW);    // turn the LED off by making the voltage LOW
  delay(1000);                       // wait for a second
}
Result
Photo

Video
Project evaluation & Discussion
Licence
- *.svg file for embroidery
- *.svg file for elephant