12∙ Soft robotics
6th to 13th decemberr 2022
Update
- December, 2023
- July, 2023
Assignments
Ressources of the week
Research & Ideation
Adriana Cabrera and Lily Chambers was our instructor for this week.
References & Inspiration
- Adriana Cabrera
Knitting and soft robotics
Vinyl waffle
07/12/2022
Make a hot water bottle that would be shaped like waffles as an air path.
- Waffle iron
- Vinyl sheets
- Parchment paper
Inconclusive experimentation. The waffle iron heated up on all parts.
It would have been necessary to add parchment paper between the two sheets of vinyl.

Silicone drawing
07/12/2022
1- Making a file
With Marion, we decided to use one of my drawing to create the mold.
We opened it in Illustrator to vectorize the drawing.

After discussing with Capucine and Diane, she recommanded to affine the draw and resize it around 15cm.

2- Laser cutting
I used green plexi acrylic and glued the different layers to themselves.


3- Silicone
3.1- Mold silicone
Use gloves to manipulate silicone because it sticks to everything.
- 100g silicone RTV 181
- 5g PRO R30
- Cast in the mold
- Let dry 24 hour

- Unmolding

3.2- Make another layer of silicone for the fixation
- 33g silicone RTV 181
- 1,6g PRO R30
- Cast in the mold
- Let dry 24 hour


How to clean silicone?
Because silicone is a very complicated-use material, follow those steps to be as good as possible user :
- wait until it’s completely dry
- rub with fingers
- throw in a trashbin, not in the sink
Aloe qui vivra
08/12/2022
Testing with natural plant.
- empty aloe stalk
- inflate with the pump
Results
Holiday’s heat
With Lauriane et Laora, we wanted to use the 3D printer to test heating the plastic film. Folloing the waves we made during the week 10. We start from the file to modify and adapt it.
Tools & Materials
| Material | Details |
|---|---|
| Machine | Zmorph with no filament and normal buse (3D printer) |
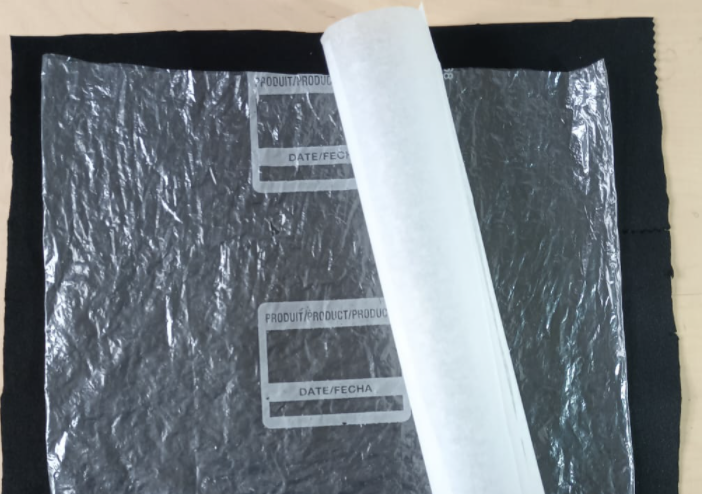
| Tools | USB card adaptator for SD card, Neoprene, Plastic bag, Parchment paper |
| Software | Illustrator, Rhinoceros 3D, Cura |
| Fabrication files | Vectorial sinus , 3D sinus DXF |
1- Preparation of the 3D printer.
- Remove the filament from the 3D printing nozzle
Remove the filament from the 3D printing nozzle Remove the filament from the 3D printing nozzle
- maintenance > load filament > custom temperature
2- Create and modify a file -
In Illustratror, Lauriane
Lauriane modifie the file for having a form who close and captured the air.
- Start with a 2D Illustrator file

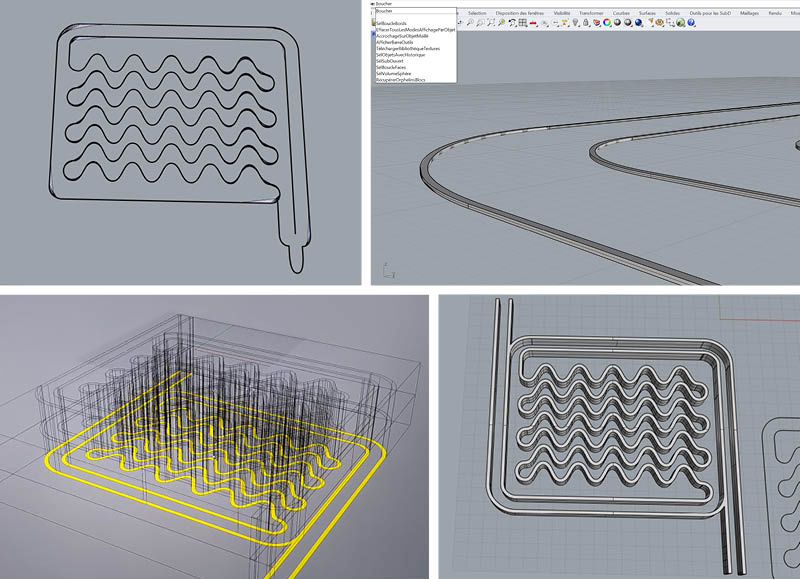
We need to change the thickness of the path in Illustrator to the desired 0.4mm in Rhino 3D.
We change the thickness of our path in Illustrator:
Preferences > units > mm

In Rhinocéros, Laora
- Select the surface > extrude the surface (extruder)
- Cap (Boucher) > select the surface

3- Set up 3D printer
Ressources :
[Zmorph - 3D printing](https://www.notion.so/Zmorph-3D-printing-b3947af5c2f6470590b085923c72cd26)
3.1- File in Cura
3.2- Set up the plate
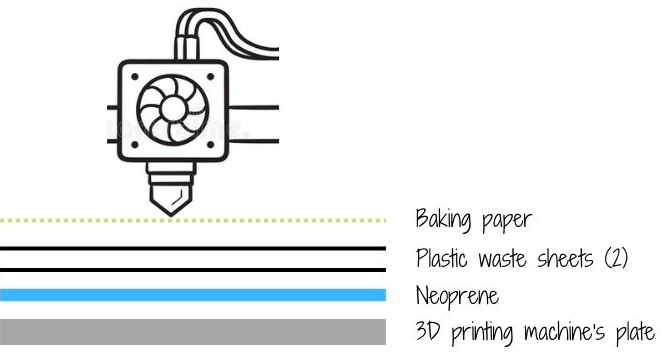
The layers 1- Neoprene 2- Plastic bag 3- Baking paper
3.3- Calibration of the machine
Maintenance > calibration > manual calibration
Define the new Z0.
3.4- Preheat the printer
Laora made a schema of the order of the layers:
Custom temperature > check that the parameters correspond to Cura = 190°C in this case.

3.5- Test
Test 1


Test 2

Test 3
Same parameters in cura but with trash bag (we don’t know the exact composition but we know it’s recycled).

Test 4


Results
