10. Open Source Hardware
References
Wool Testlab, Raw Color
Goldberd machines from Raw Color around wool.
Crafting Fashion with Robots
Crochet and basket weaving are the two textile technique that don’t have an automated mechanical device. This project uses a robotic arm to automatise basket weaving.
Pleating loom
améliorer métier à plisser de Dewi → dégradé gravure et/ou CNC
Dewi Brunet is an origami artist, he folds paper but also pleats textile. For his practice, he developed an open source pleating loom for embossing paper. This loom is a super interesting tool, but for the moment, it is designed only as plain lines. The engraving is done by lowering the power of the lasercutter. Therefore the grooves are really fine and the embossing tool has a hard time to go in. I wanted to make modifications this week to make the plain lines as gradient lines to be engraved as a valley and be able to have thicker engraved lines. But I didn't have the time to do that…
Hilo spinning machine
In the frame of the SheMakes project, we constructed at Green Fabric the Hilo spinning machine. It was quite challenging to build, but we finally managed to complete it. We figured that we need a drafting device to prepare a fiber top with a constant thickness, otherwise we would get only very random thicknesses. It worked much better with strips of paper which had all the same width as they were cut with a paper shredder.
PICTURES HILO
Live Loom, Alex Mc Lean
In 2020–21, I tried to build Alex Mc Lean's Live Loom. It is an open source machine to make jacquard weaving with patterns sent by a computer. Although Alex Mc Lean helped me with debugging it, the solenoids were not selecting the right threads. Meanwhile I had found another way to make jacquard weaving in my lab (see next section).

Previous work
knit-tink, a DIY jacquard loom on a knitting machine
In 2023, I worked on a way to have a jacquard loom in a lab. After failing with the Live Loom, I just used my hacked knitting machine to use its patterning function, and transform it into a warp-weighted weaving loom. The research is fully documented here.


Instagram post embedding not available.Watch it on Instagram
DIY speedweve
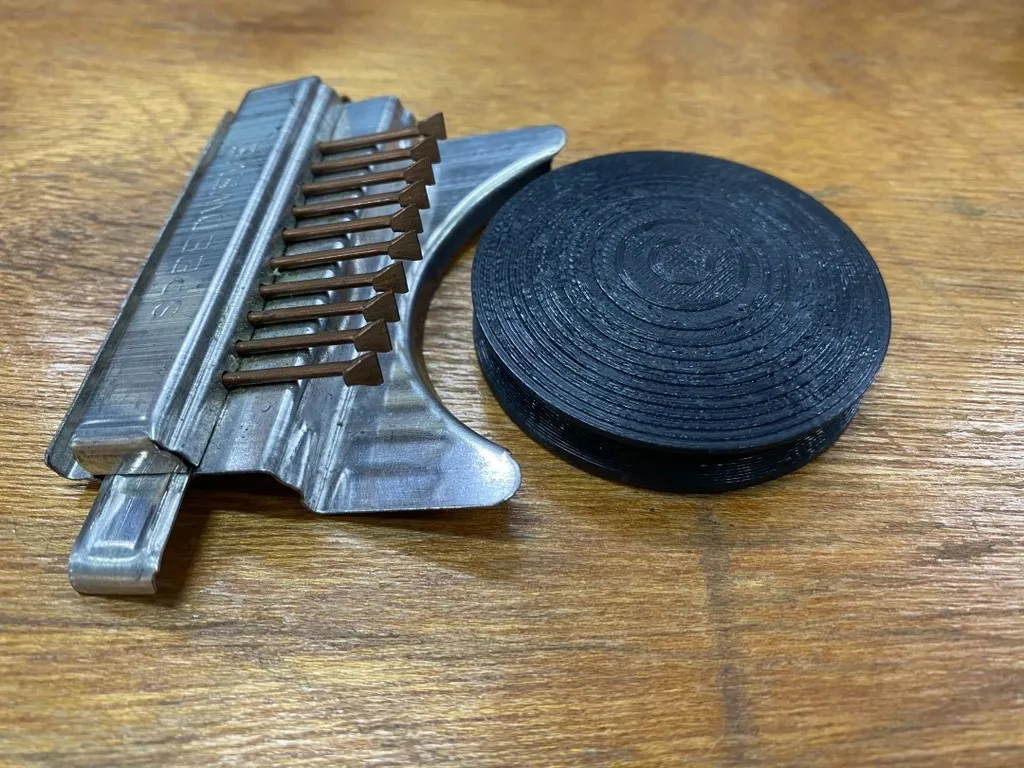
Repairing clothes is one of my favourite activity: it's useful and it repairs my soul at the same time… The Speedweve looms are really interesting tools to repair quickly with a weaving structure. I've never had one myself and I wanted to make one, rather than buying one, to have a very fine warp density as I love repairing with very fine threads.
I had bought the Lemon loom instructions but I found quite difficult to make the hooks. Miranda from Little Lemon Loom showed her process once in an Instagram story, but it's not available anymore. She has a wooden board with nails to be able to bend her hooks always the same way. It's indeed very difficult to do without that.
Although I find very elegant and comfy that the loom is made of fabric, I found it difficult to sew precise intervals and that everything stays right in place.

In conclusion, it's a good idea to buy it directly from the e-shop, or to make a digital fabricated loom.
I made a structure in 3mm plywood with the lasercutter, and 3D printed hooks. The wooden layers have ridges to help the hooks to stay aligned.
Instagram post embedding not available.Watch it on Instagram
What I missed so far is the darning disc to hold the fabric with the loom. I found this 3D file for the disc. I’d need to adapt the loom to fit the disc.

In the meantime, I also stumbled upon this 3D printed speedweve from That Darn Machine, but I find the hooks too thick to my liking, and the project seems down anyways:
Instagram post embedding not available.Watch it on Instagram
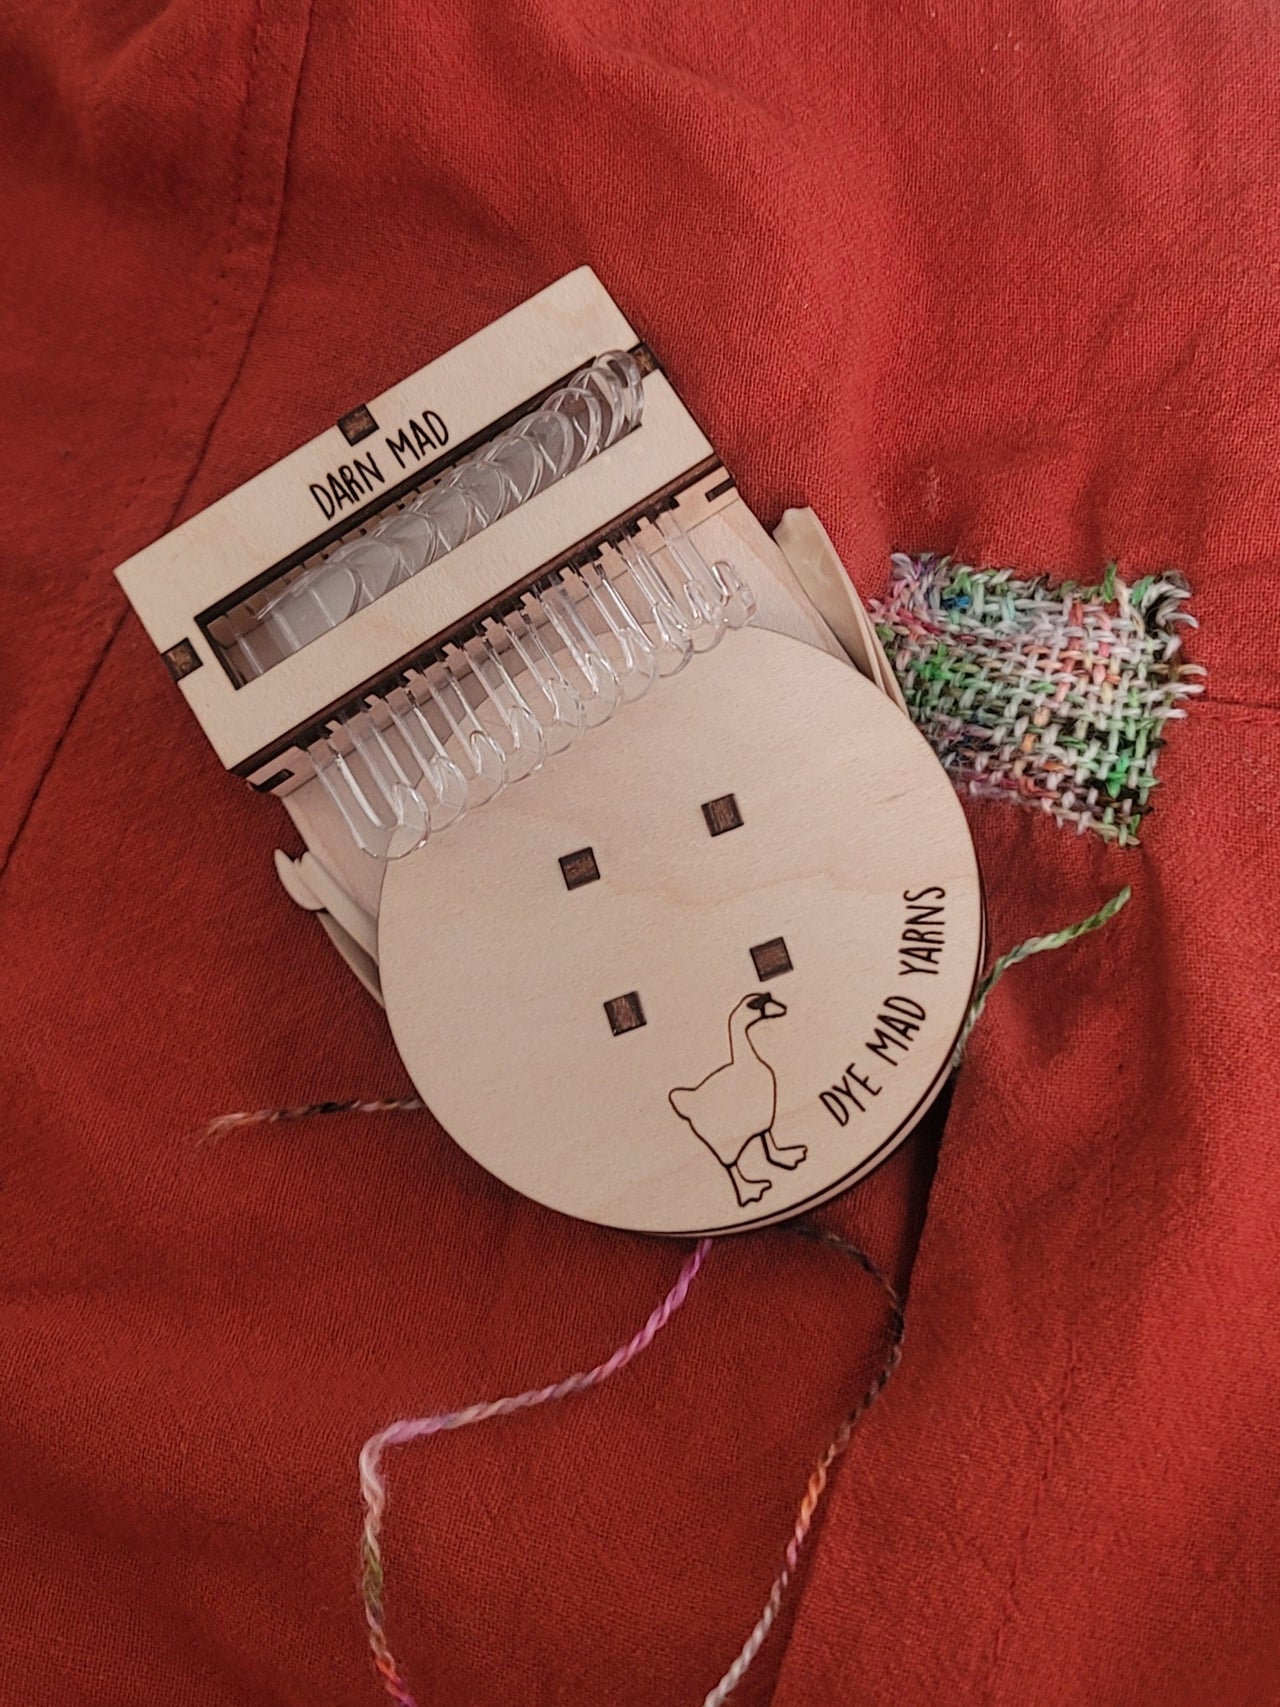
And there’s this one from Dye Mad Yarns, but it’s also a bit too thick to my liking:

Circular Sock Machine (CSM)
You probably know by now that I am obsessed with knitting. I’ve been wanting to build a CSM for a while, now is the perfect opportunity! Although you can knit socks on a flatbed domestic machine, it's not as smooth as a circular one. I make a pair of socks in 2 hours on a flatbed machine; you could make one pair in 40 minutes with a vintage metallic CSM.
Existing projects
There are many CSM on the Internet, it was a bit difficult to choose one project from another…
Circular Knitic, 2014
A project by artists Varvara Guljajeva & Mar Canet. It follows their project of a flatbed open-source knitting machine. This project is fully automated with a motor. I wanted to have a machine which you could manipulate with your hand to have more control on what can be done. Source files: https://www.instructables.com/Circular-Knitic/

Idda, 2014/2016
It is a very big gauge, but the files were made with openSCAD, so all the parameters should be "easy" to change. The big advantage of this project is that the knitting needles are also 3D printed. They are based on this 1976 patent. I've never seen needles without latches before. It looks super interesting as we don't know for how long metallic knitting needles will be produced…
Source files: https://github.com/jonnor/idda-knitting-machine

CSM plus ribber
This project is replicating a vintage metallic CSM (Legare, Auto Knitter, etc.). Later on, the author added a ribber attachment. I haven't chose this project because it is using the knitting needles from CSM which are more difficult to find, therefore more expensive. But the ribbing attachment is super interesting to have…
Source files:
CSM from Fablab Zurich
There are many Circular Sock Machine projects on the Internet. I’ve always been sceptical about 3D printed machines as I imagined they would not be very smooth to activate. But after visiting Fablab Zurich, I was quite convinced. I haven’t tried the machine with yarn, but I was convinced enough by the fluidity of the plastic mechanisms.


RKStar42's CSM
But I haven’t been able to find the plans of their specific machine. And they didn’t answer when I asked for it… So I found this quite new project from RKStar42 on Thingiverse (October 2023). What pleased me at first sight was that the author made some specific modifications compared to what was existing so far (we'll talk about that in the conclusion):
«There are 2 push-up cams, leaving the needles normally in the up position. They can be pushed down to do maintenance; eg. to pick up dropped stitches. This eliminates having to use mechanical "flippers" to push the needles up. (Usually the needles are pushed up (to clear the needle latches) just before the stitch is made. Here the needles are also pushed up right after the stitch is made. This makes no difference for the knitting, it just looks differently)»
Source files:
- https://www.thingiverse.com/thing:6273014
- More explanations from the author: https://www.knittingparadise.com/threads/new-diy-circular-knitting-machine-on-thingiverse.764261/
When you download the source files, there are more details on the spare parts to prepare and on the process of mounting than what you can read on Thingiverse. Nonetheless the assembly steps are not really described and there are not enough pictures to see the machine fully (no overview, no view from the back) which makes it a bit difficult to understand how to mount the machine. The author is quite available if you ask questions on Thingiverse, but it seems unlikely that he would add more pictures or a video of the machine running. We (with my Fabricademy fellows Charlotte and Eileen) hope that our documentations will help others to build the machine.
Materials
| Qty | Description | Price | Shop |
|---|---|---|---|
| ~500g | PLA | ~10€ | |
| 64 | KR830-KR850 machine knitting needles. | 40ct/needle = 25.60€ |
https://stecker.be |
| 1 | 114x3mm o-ring (or a thick rubber bands) | 0 | in stock |
| 1 | 760x6mm 2GT timing belt. (760mm is the minimum length) | 4.50€ (+ 7€ shipping) | https://www.tinytronics.nl/en/mechanics-and-actuators/parts/timing-belts/gt2-timing-belt-6mm-852mm-closed (search for timing belt 6mm, minimum 760mm length) |
| 1 | 30cm aluminium tubing (6mm) for the yarn brake/heel spring stand. → we used a 5.5mm knitting needle as the holes came out too small | in stock | |
| about 1m piano wire (between 0.8/1mm)→ we used 0.7mm as the holes came out too small | given | neighbour | |
| 106 | 4.5mm steel Ball Bearings (cal .177) (52 + 36 + 18 for each part) | 5€ (+ 5€ shipping) | https://www.airsoftstore.be/nl/steel-bb-45mm-bag-of-500rds.html (search for steel BB, often used for airguns) |
| 1 | 10cm smooth rod (3mm) (drill rod, styrene, etc) for yarn brake pivots → we used a 2nd hand 2.5mm knitting needle as the holes came out too small | deadstock | |
| 2 | 1.5mm nails or pins to secure yarn brake stand | in stock | |
| 1 | one ballpoint style spring to push the center cam up. | sacrifice a bic pen | |
| 1 | 8mm x 2mm screw hook to hang the heel spring weight | la Pièce Manquante | |
| 10 | M3x10mm flathead | la Pièce Manquante | |
| 6 | M3x16mm cylinder head | la Pièce Manquante | |
| 1 | M3x30mm | in stock | |
| 4 | M3 nuts | in stock | |
| 1 | M4x25mm + washer and 5mm bushing | in stock |

3D models
3D printing
All the parts can be 3D-printed without any supports, the 3D models are already including bridges that you sometimes need to break after the printing. This is really time saving.
This CSM version is a bit different from existing 3D printed CSM:
- it uses a timing belt and 106 ball bearings instead of 3D printed gears and less than 20 ball bearings: this allows less friction
- the cam leaves the needles in an upper position. According to the original maker, it is easier for stitch maintenance (on a flatbed knitting machine, this would be equivalent as the needles going back to D position)
3D printing settings for most parts
- if you're using metrics system, print the regular files and not the UNC versions
- NO SUPPORTS NEEDED: The 3D models are already designed with the mandatory supports which you need to remove afterwards. It is much appreciated!
- 0.4mm nozzle
- 0.2mm layer height (Quality preset from Prusa Slicer)
- top layers: 3
- bottom layers: 3
- infill: Adaptative Cubic 15%
- Combine infill every: 2 layers (reduces printing time, especially for tall parts)
3D printing settings for «main cylinder» and «main base»
- These parts are very long to print, the author suggests to increase the layer height to reduce printing time.
- 0.3mm layer height
- Combine infill every: 2 layers (reduces printing time)


On this video, we can see how the push cam (black) can move up/downwards to be able to change stitch size:


Assembly
See Charlotte’s documentation for an extensive viewing of where each part is going where.
!!! "Main process" - Cut and sand the needles (they should look like an "L") - Sand the 3D printed components - Assemble each main part - Assemble all the main parts together - Make a 10cm hole in a wooden board - Screw the machine on the board

Adding needles is super easy:


First test of the circular knitting machine after assembly of the base parts:


Specific assembly parts
Bearing balls This step was the most cumbersome. The assembly notes recommend to put all the bearings between the bearing shells, to spread them around and then to add the bearing cages with the holes pointing down. But this was a nightmare to do and we actually never succeeded this way. Instead, we put the ballcage between the bearing shells first, with the holes pointing up, and then inserted the bearings in each hole.


How to use a CSM

Now that the machine is ready, we need to learn how to use it. This CSM seller made a lot of video tutorials to learn how to use such a machine. Even if it's not the same machine, the principle remains the same:
- Dean and Bean
- Bear Valley Fibres
- 4 ways to knit heels, this channel has a lot of pretty advanced CSM videos
Cast on
- Cast on the first time without a setup bonnet
- Cast on the first time with an existing knitted tube
- Cast on with a setup bonnet
I decided to make the second version of these cast on, by making a temporary setup bonnet with my flatbed knitting machine. I knitted a tube, and at the base of the tube, I put a string through to tighten it up.


First test of knitting. The yarn feeder is too close to the needles. I had to hold it with my hand so that it doesn't collide with the needles head.
We re-printed the «guide_base.stl» and it seems to fix the yarn feeder getting too close to the needle heads.
