10. Open Source Hardware - From Fibers to Fabric
Research & Ideation
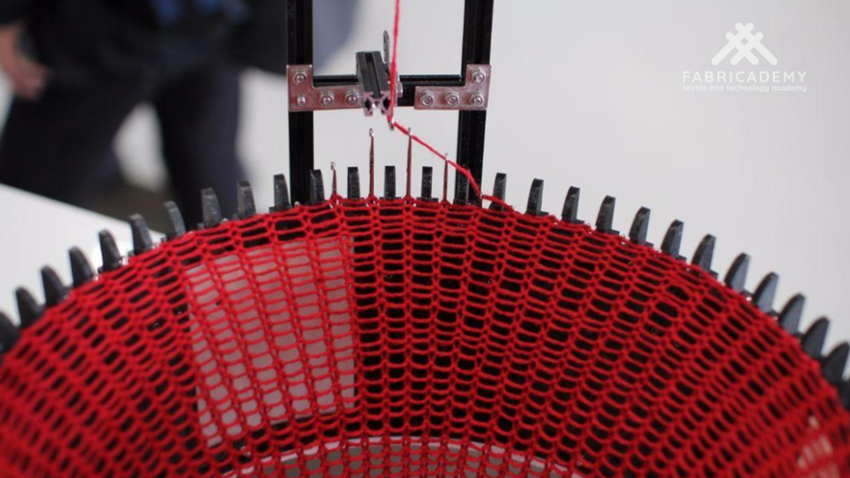
On Week 10, we focused on the Open Source Hardware theme, and started with a lecture from Sara Diaz Rodriguez. The week's programme was a collective exercise within each node. Stéphanie, Eileen and I decided to build a circular knitting machine, which was an interesting project to the Green Fabric workshop.
This machine allows to knit tubes much more quickly than flat knitting, and for example to produce socks.
our tutorial from Thingiverse
Check out the tutorial we followed to realize our machine : Circular Knitting Machine by RKStar42
some Alumni's inspirations
Process
-
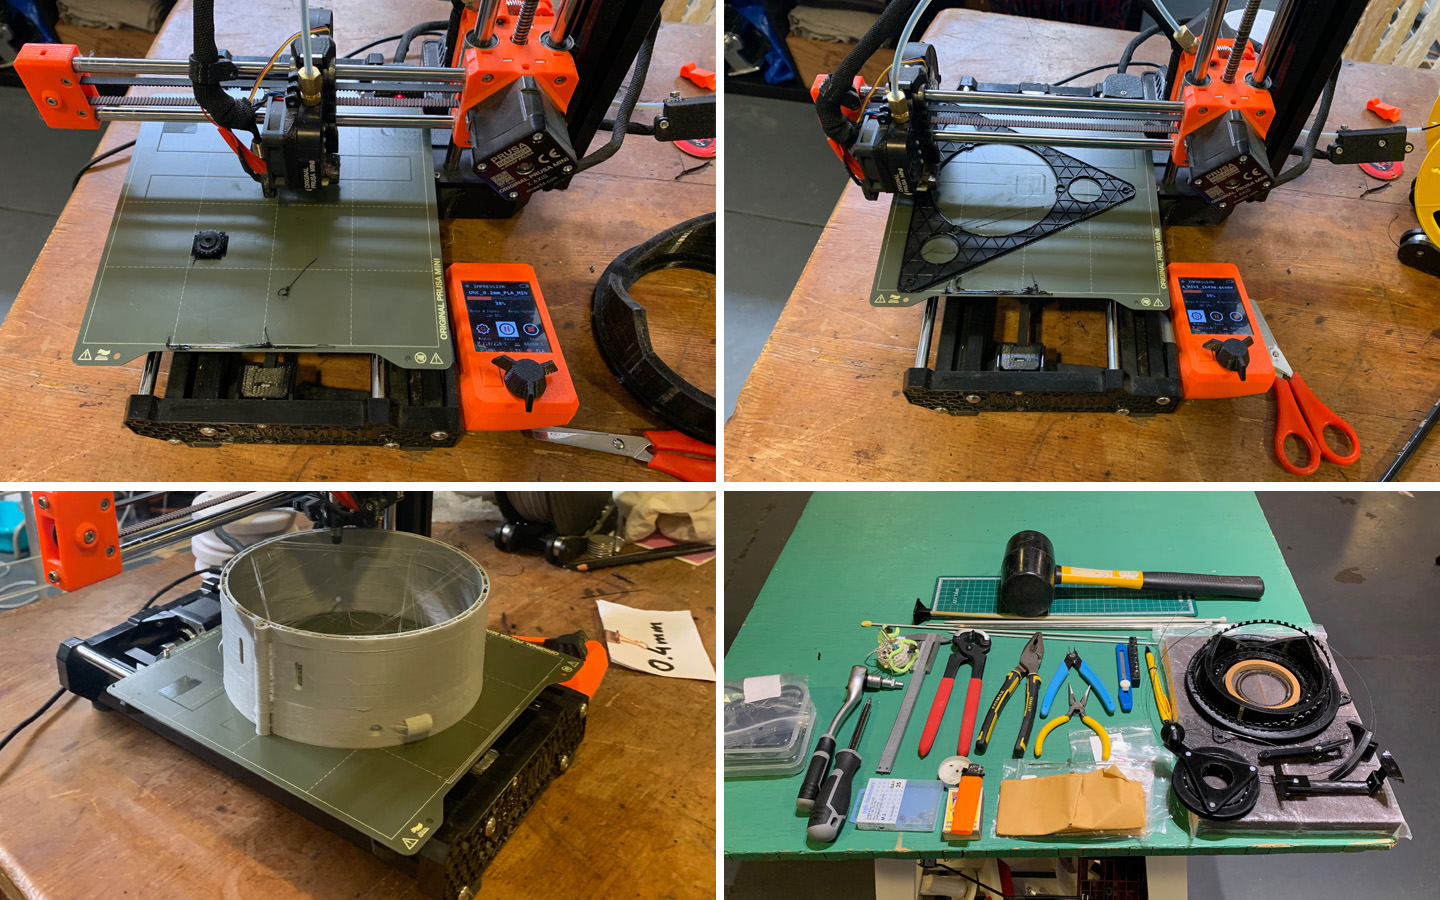
We started a little bit in advance (before the lecture) to select our tutorial and to launch 3D printings as it is a slow process. We used the Prusa printer of Green Fabric workshop.
-
From our tutorial, we only had to upload the different files here in STL format. Then we have imported them into the Prusa Slicer software , wich is a Prusa equivalent of Cura for Ultimaker printers. We prepared the printing parameters by selecting some faster options, like by increasing the printed layers thickness to 0.2 or 0.3 mm instead of 0.1, and by reducing density of internal meshes inside our parts. These solutions offer more rough finitions and can create fragility into mechanical parts, so we finetuned a little bit this process on each printing. The printing process we used, Fused Deposition Modeling is taking quite a lot of time (almost one day for our bigger parts) and it was important to optimise the parameters like this.
-
These STL documents are designed to be printed without supports, and sometimes include detachable elements directly in their 3D conception.
Task
The GCODE files to print our pieces, with a 0,4mm nozzle (standard dimension) and a standard PLA filament. Thickness of printed layers is 0.2mm or 0.3mm depending on files.
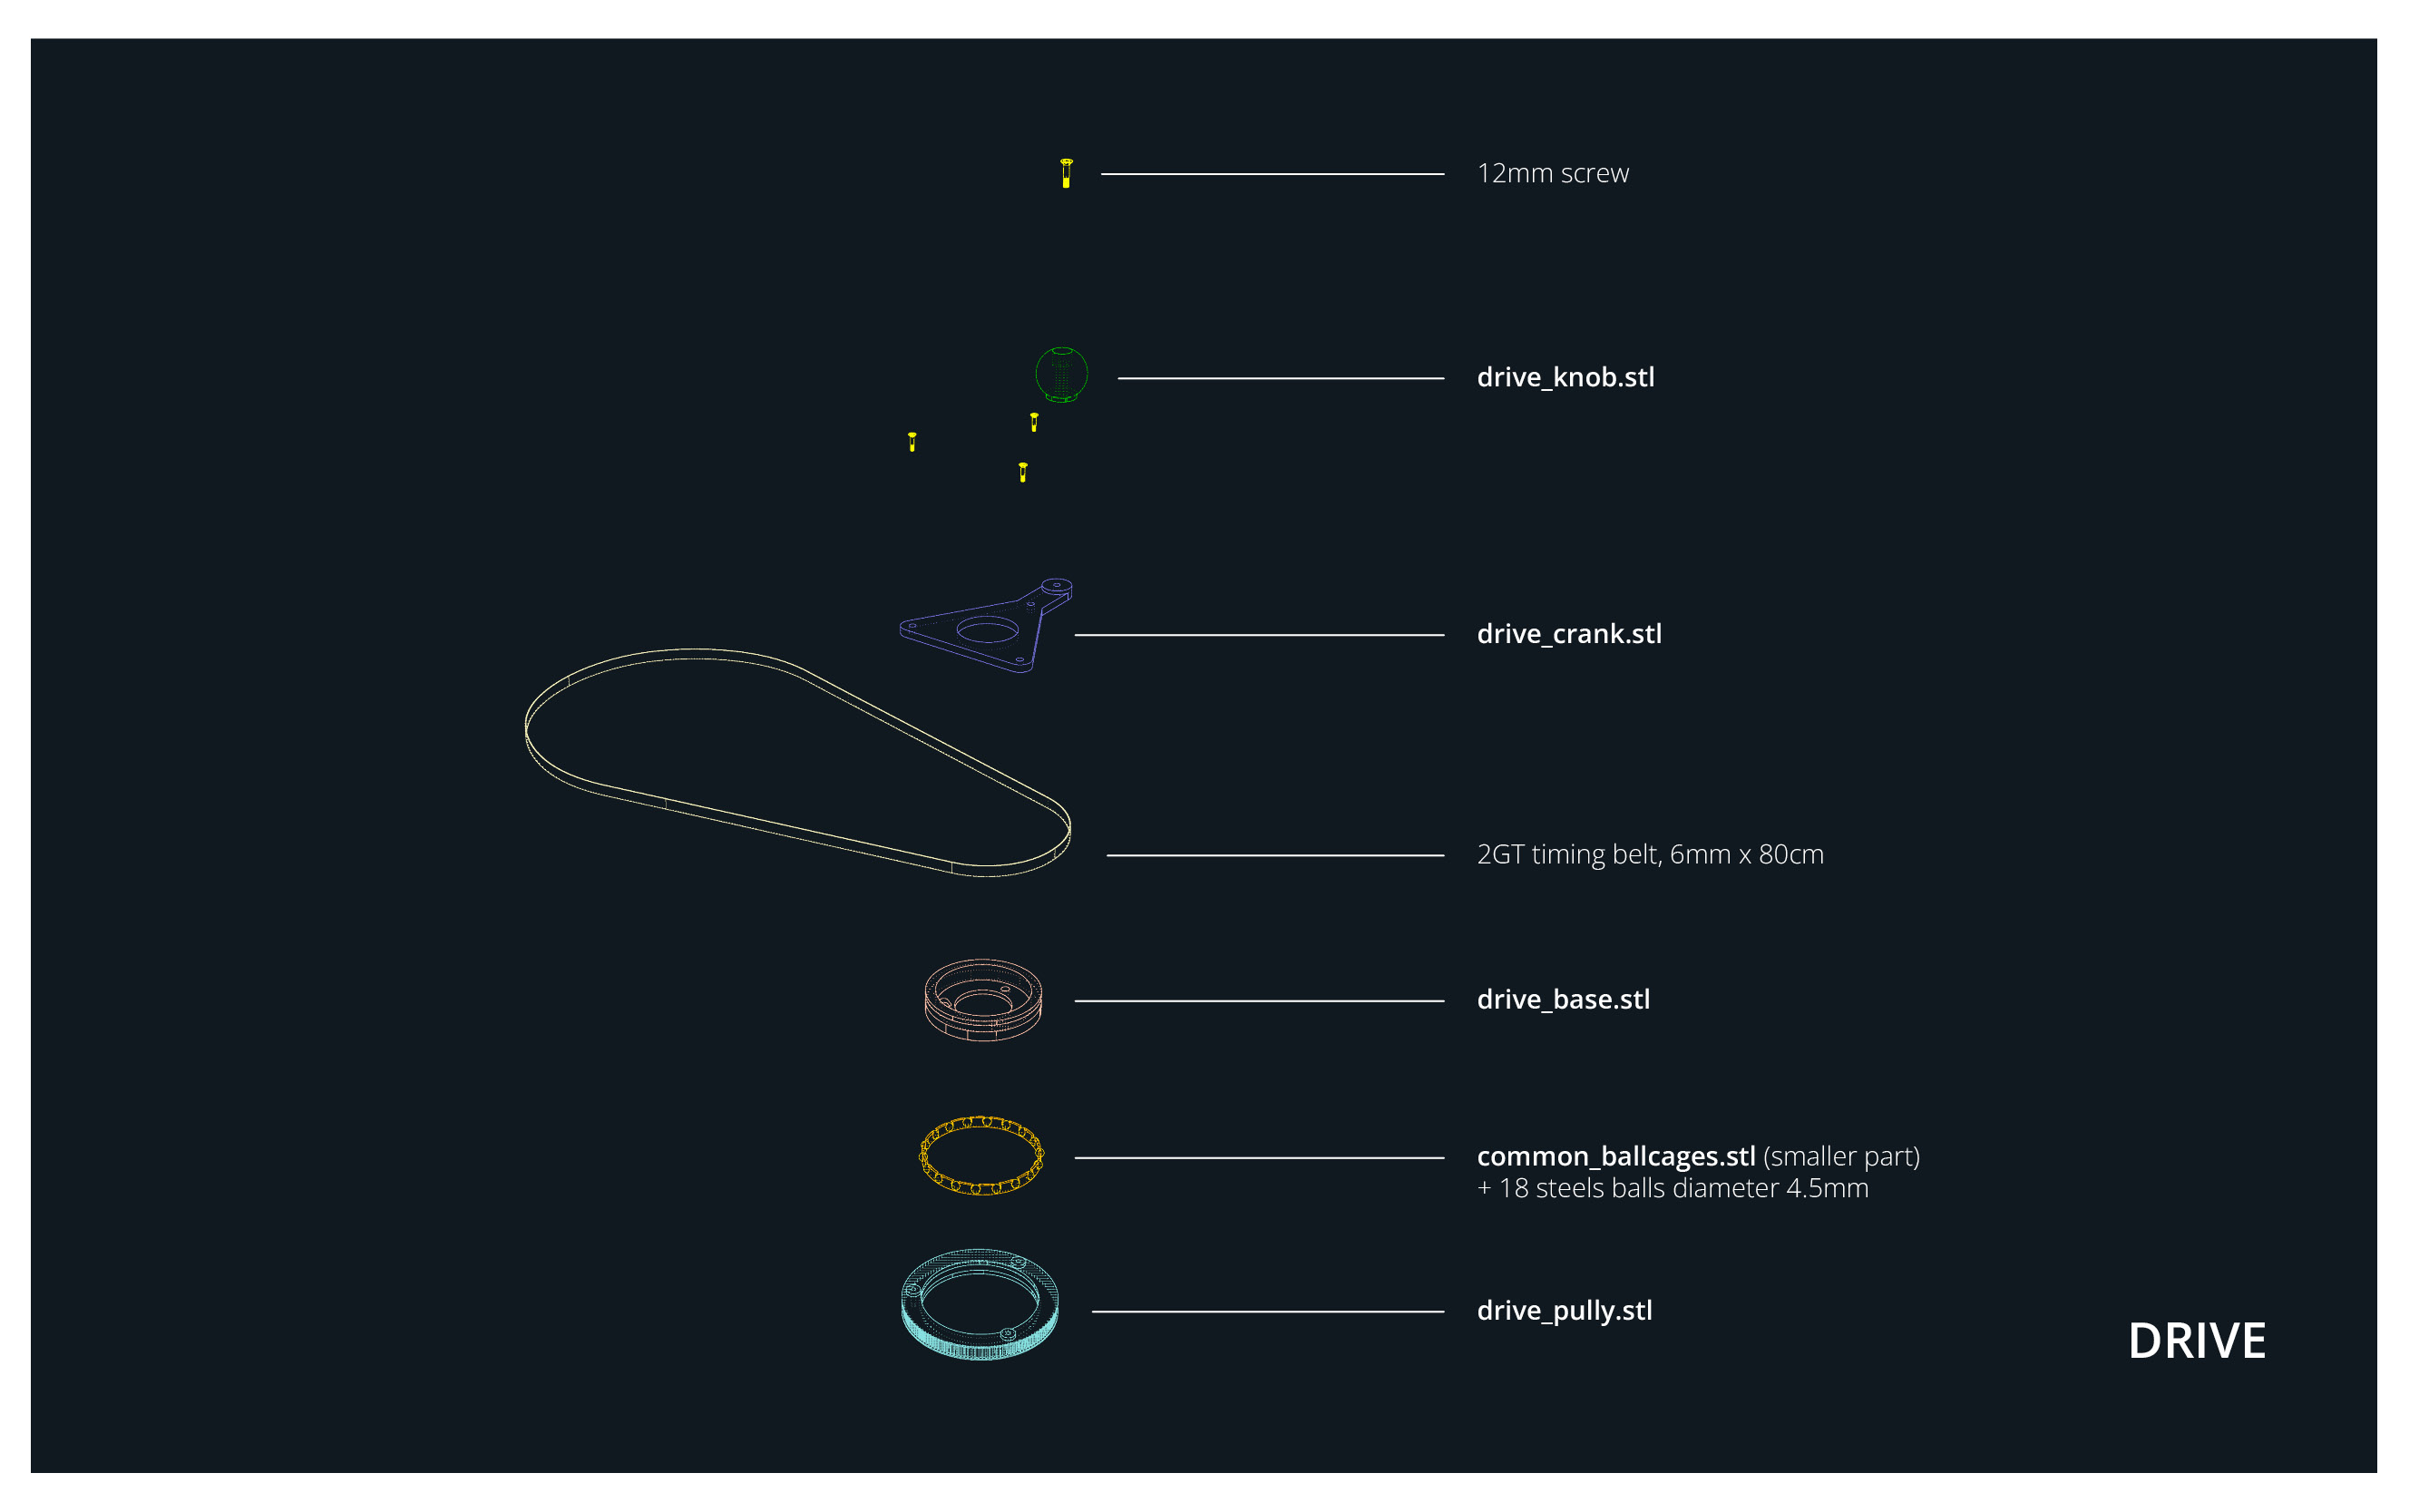
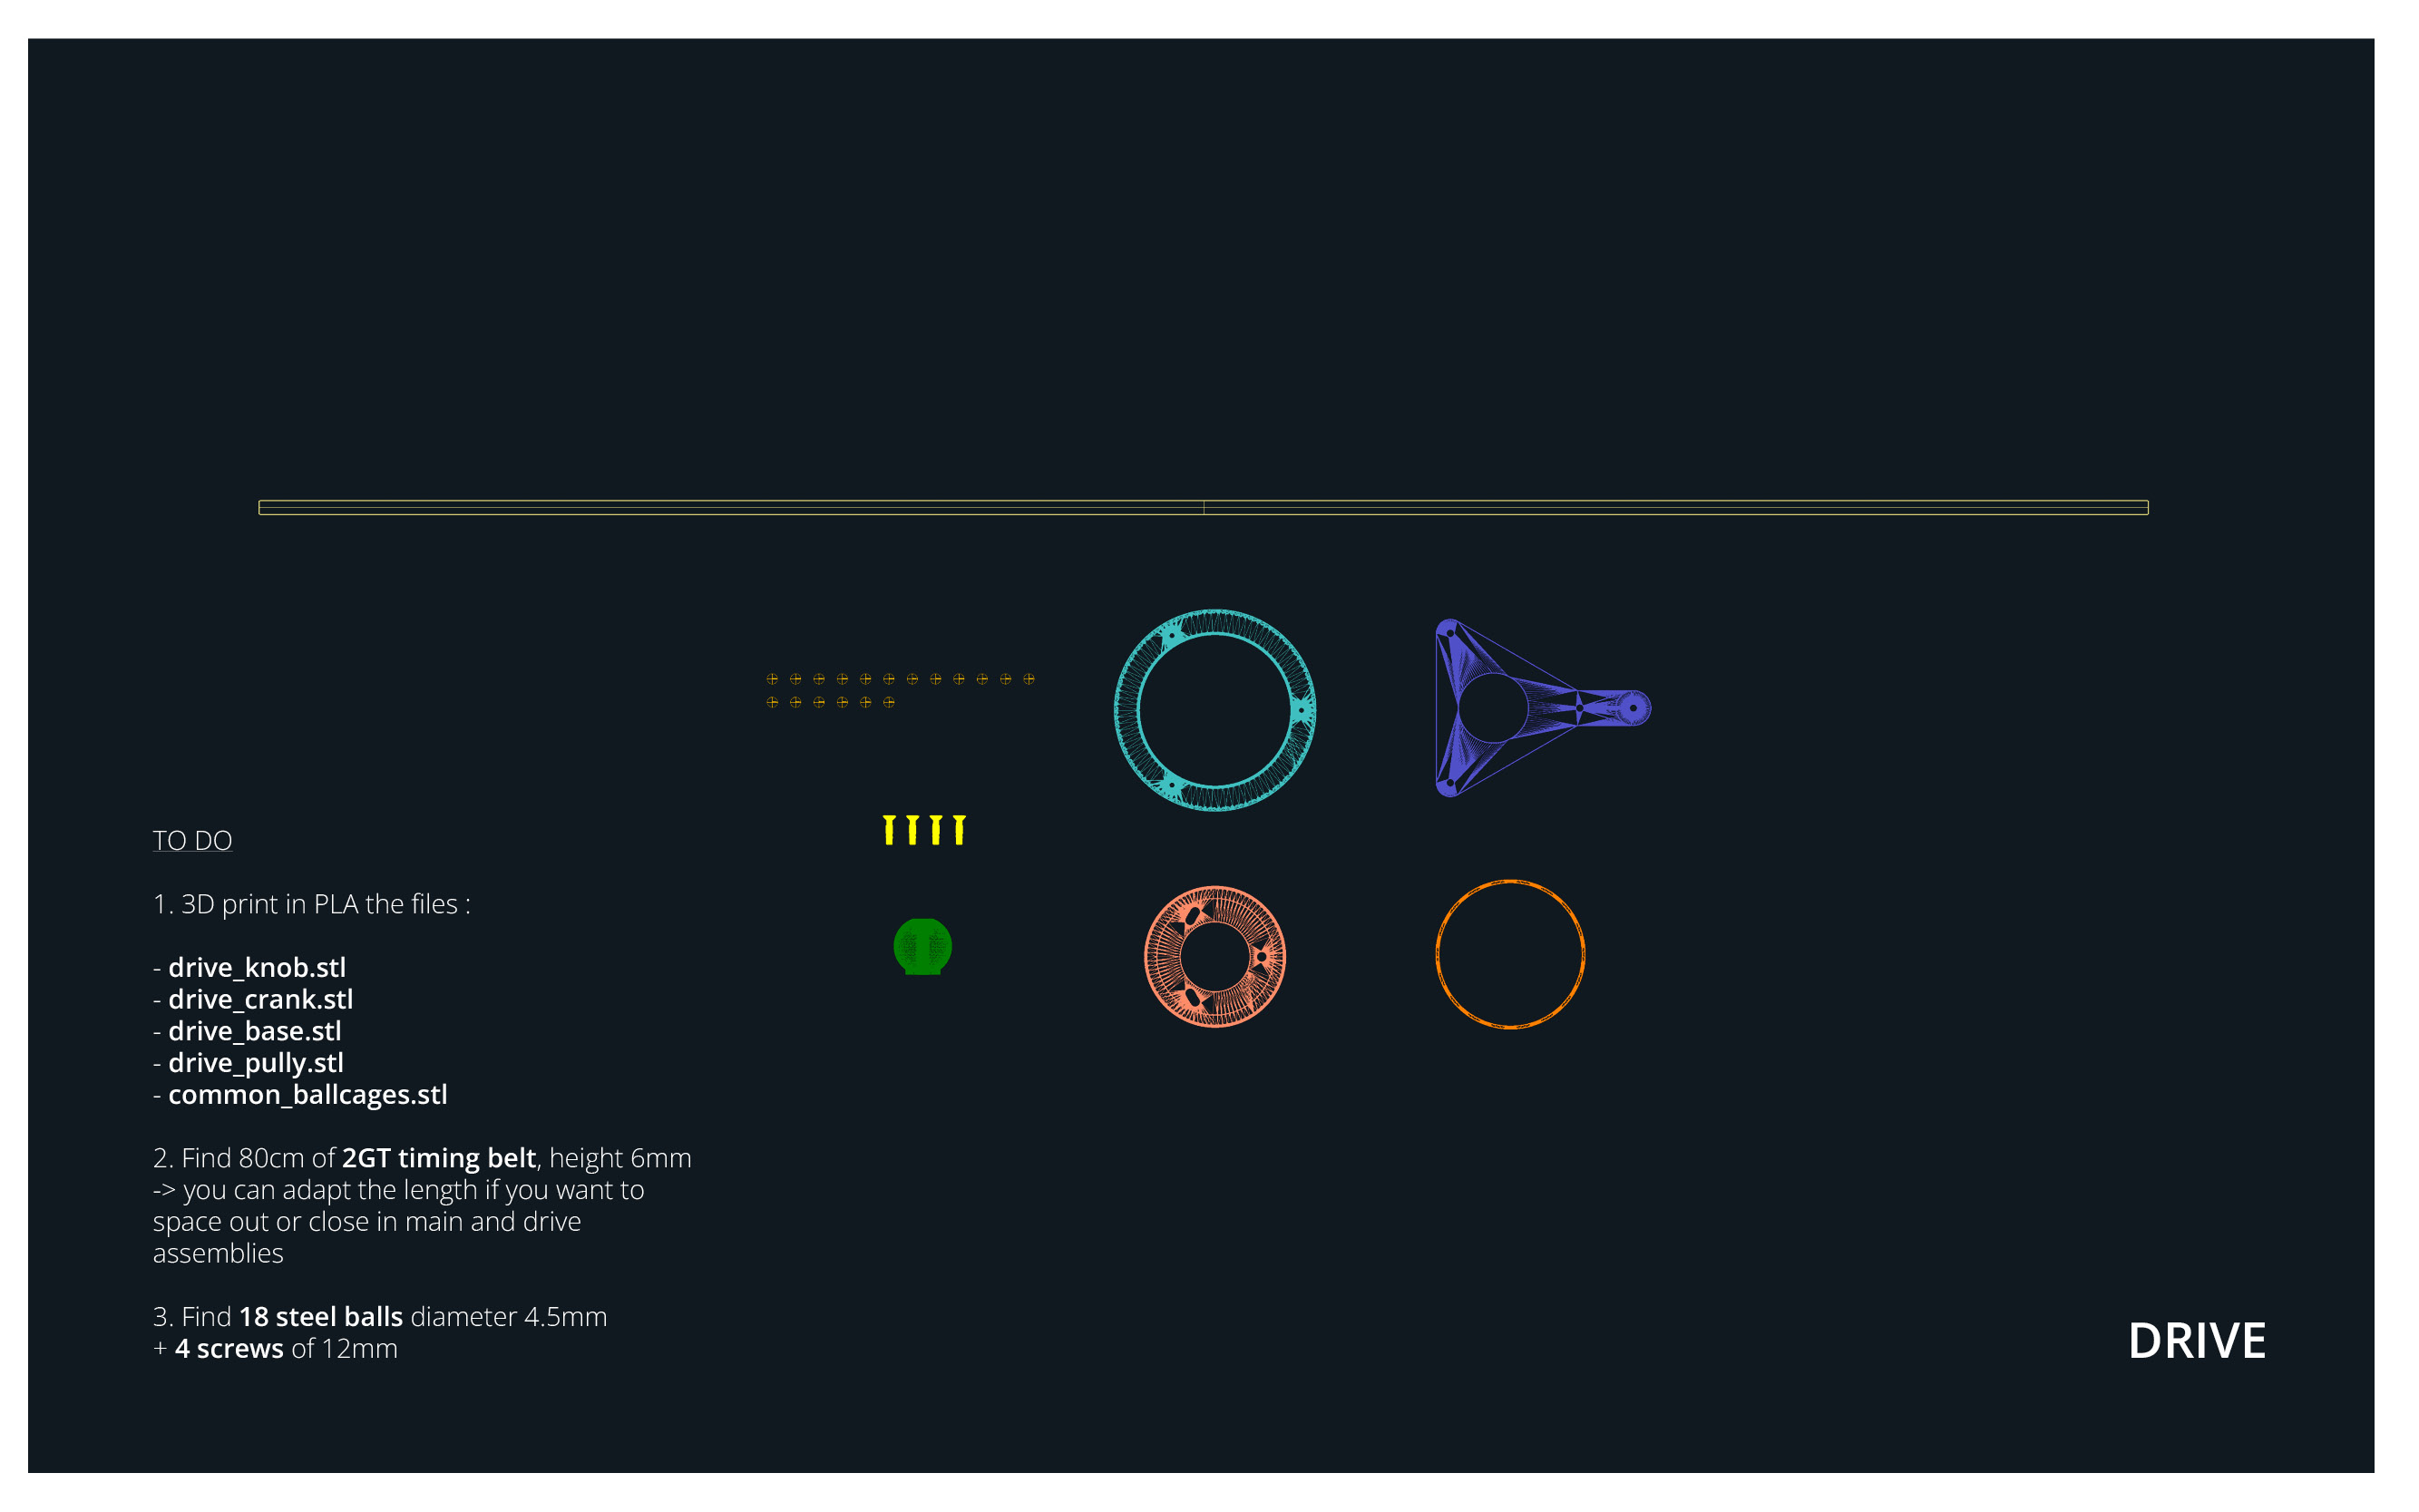
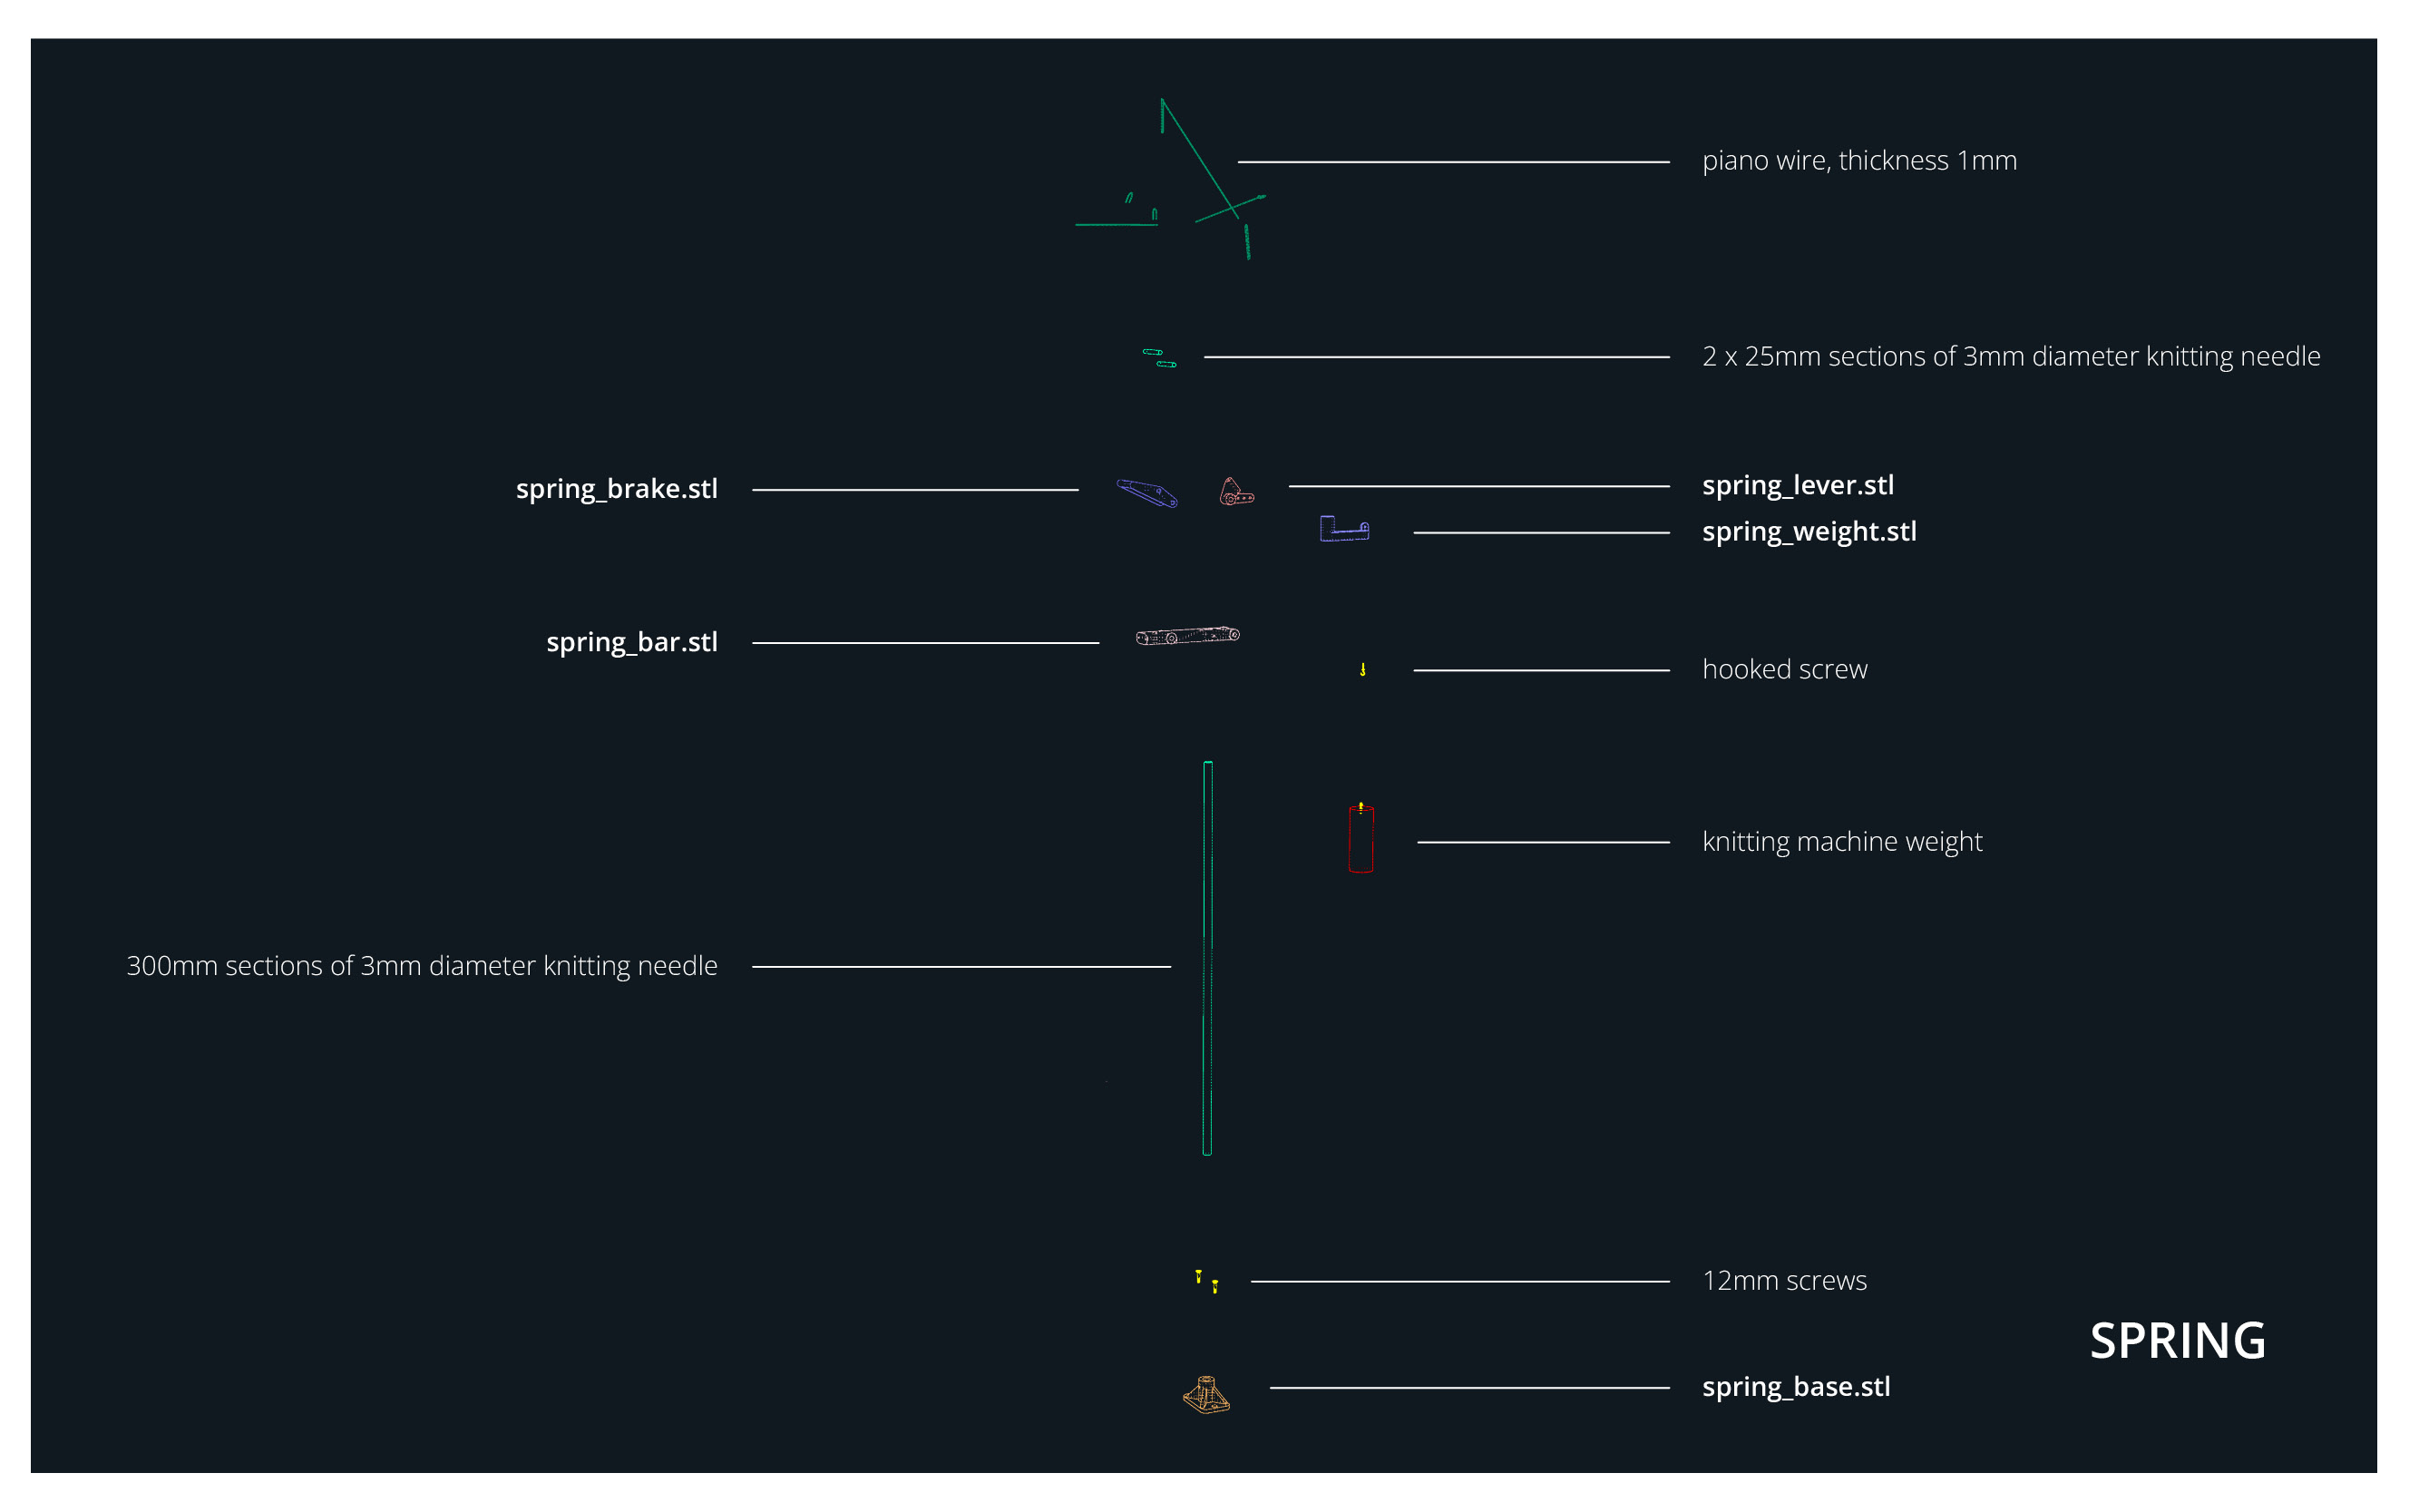
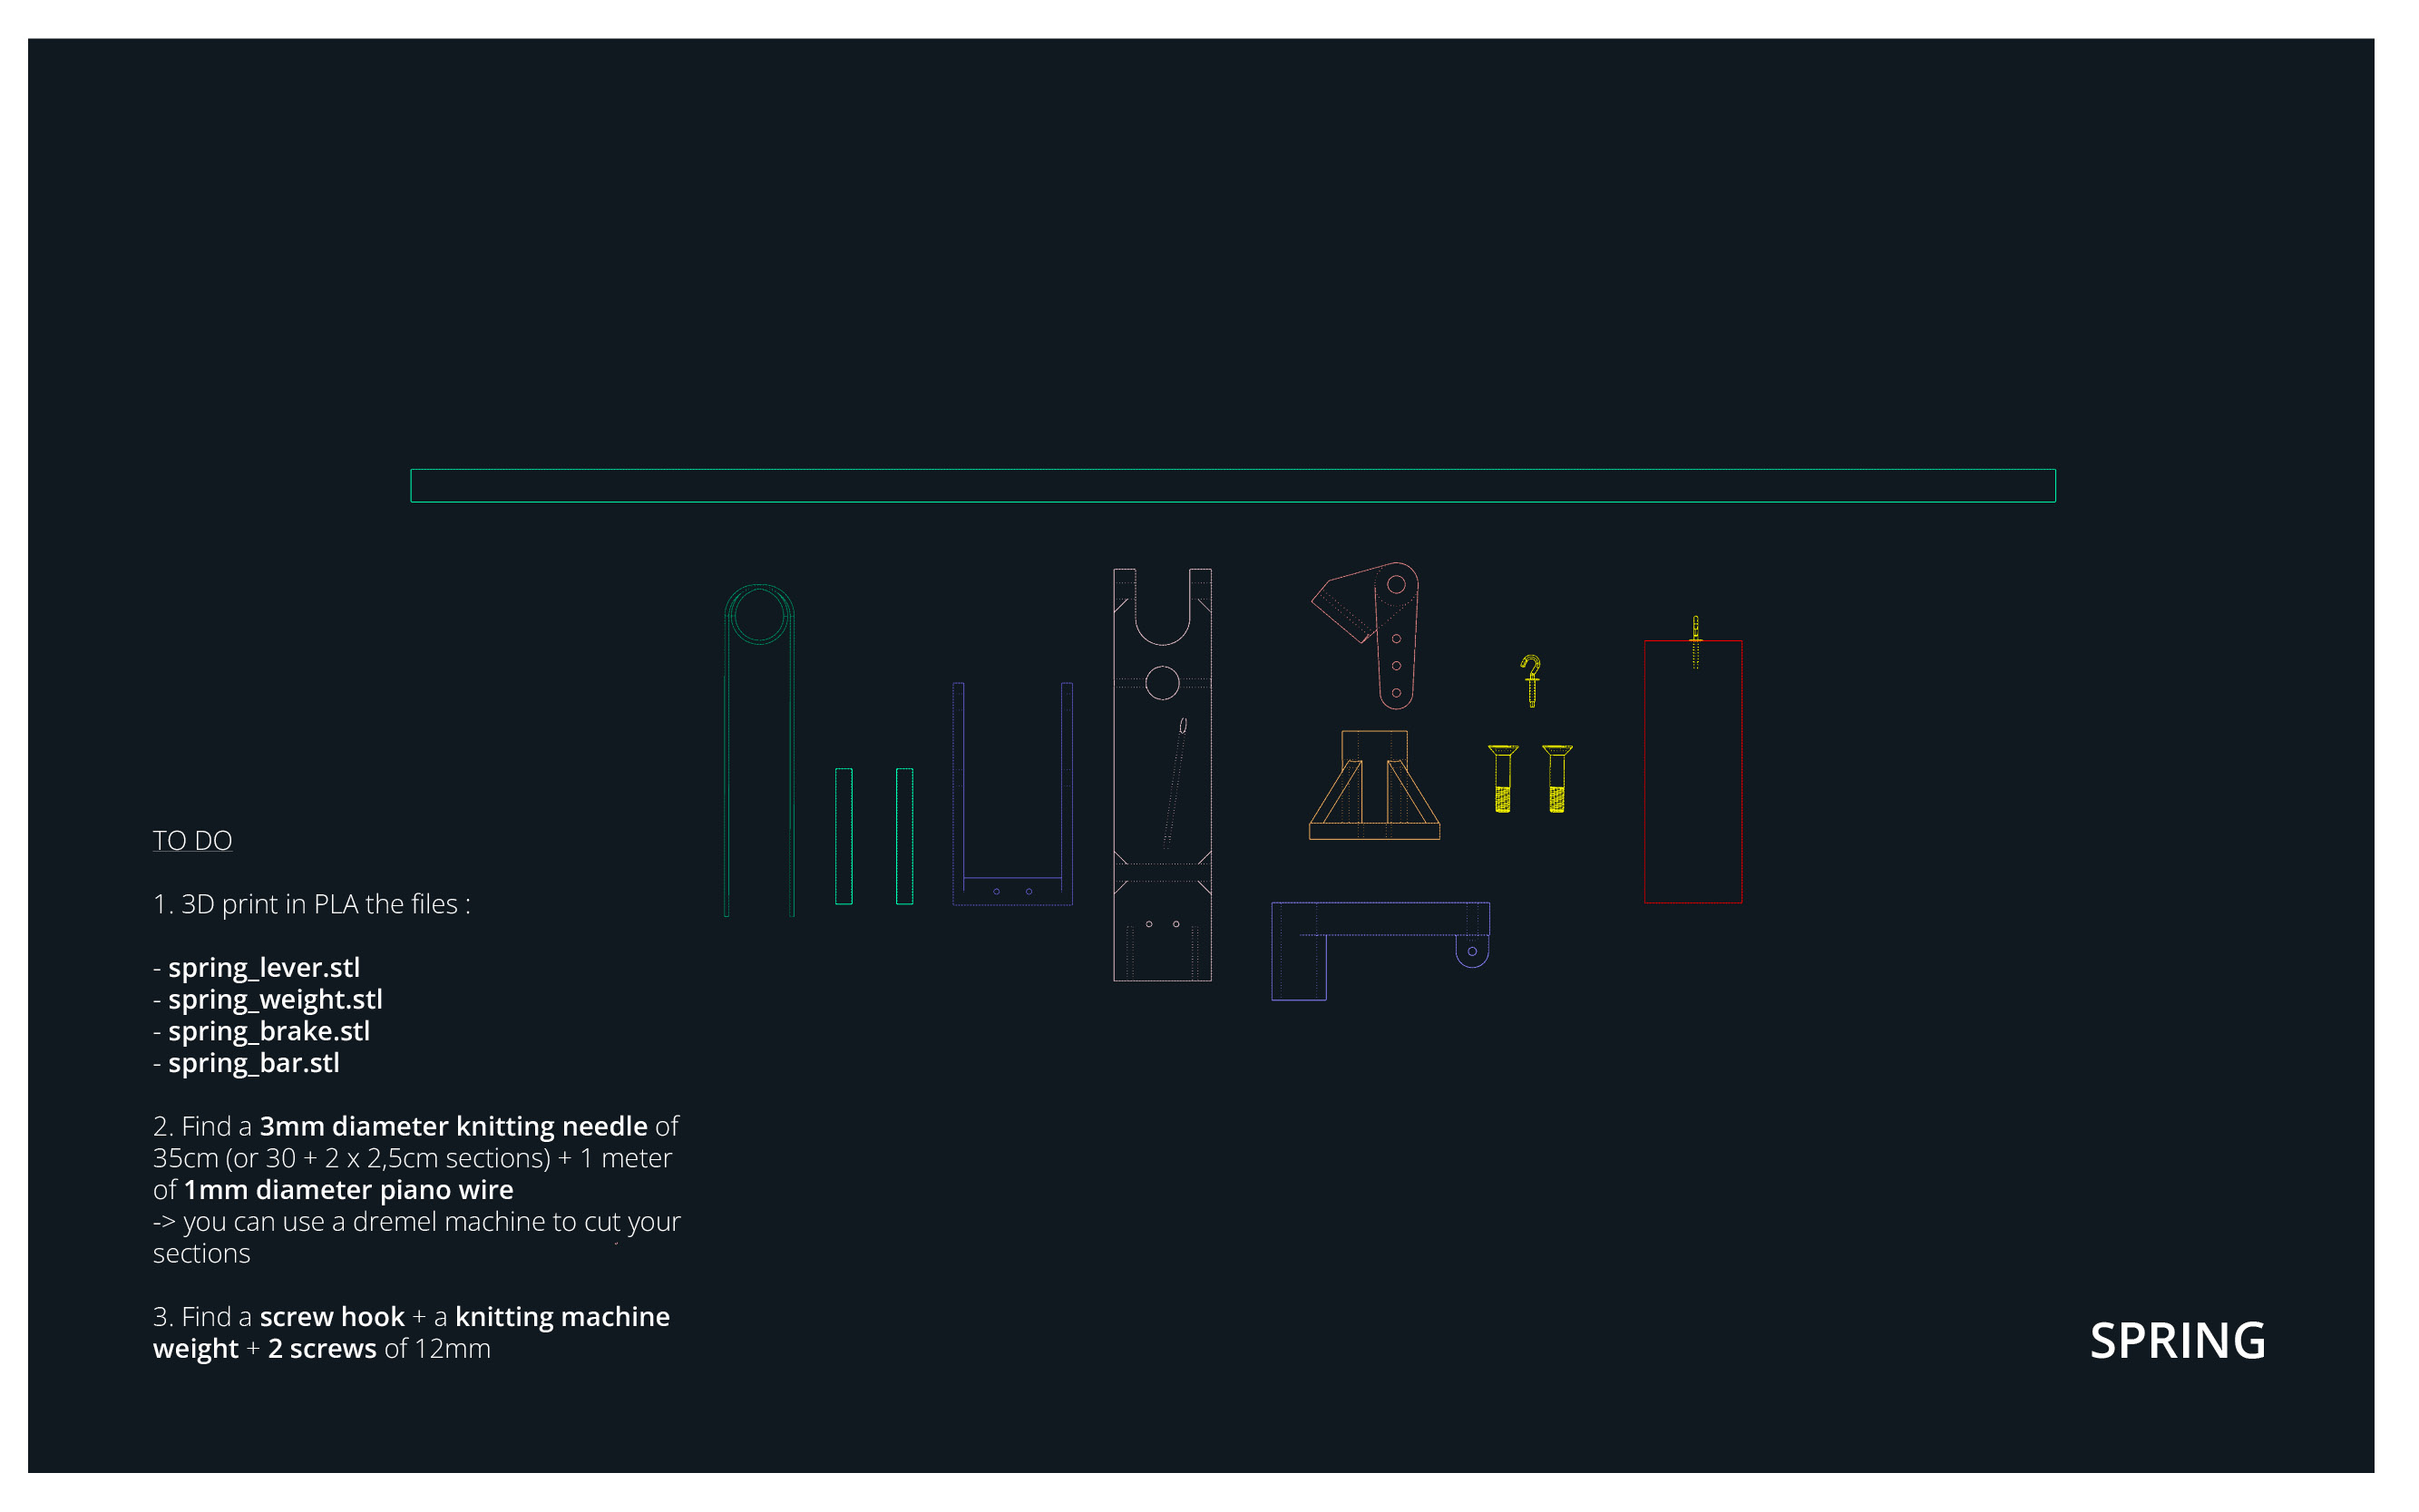
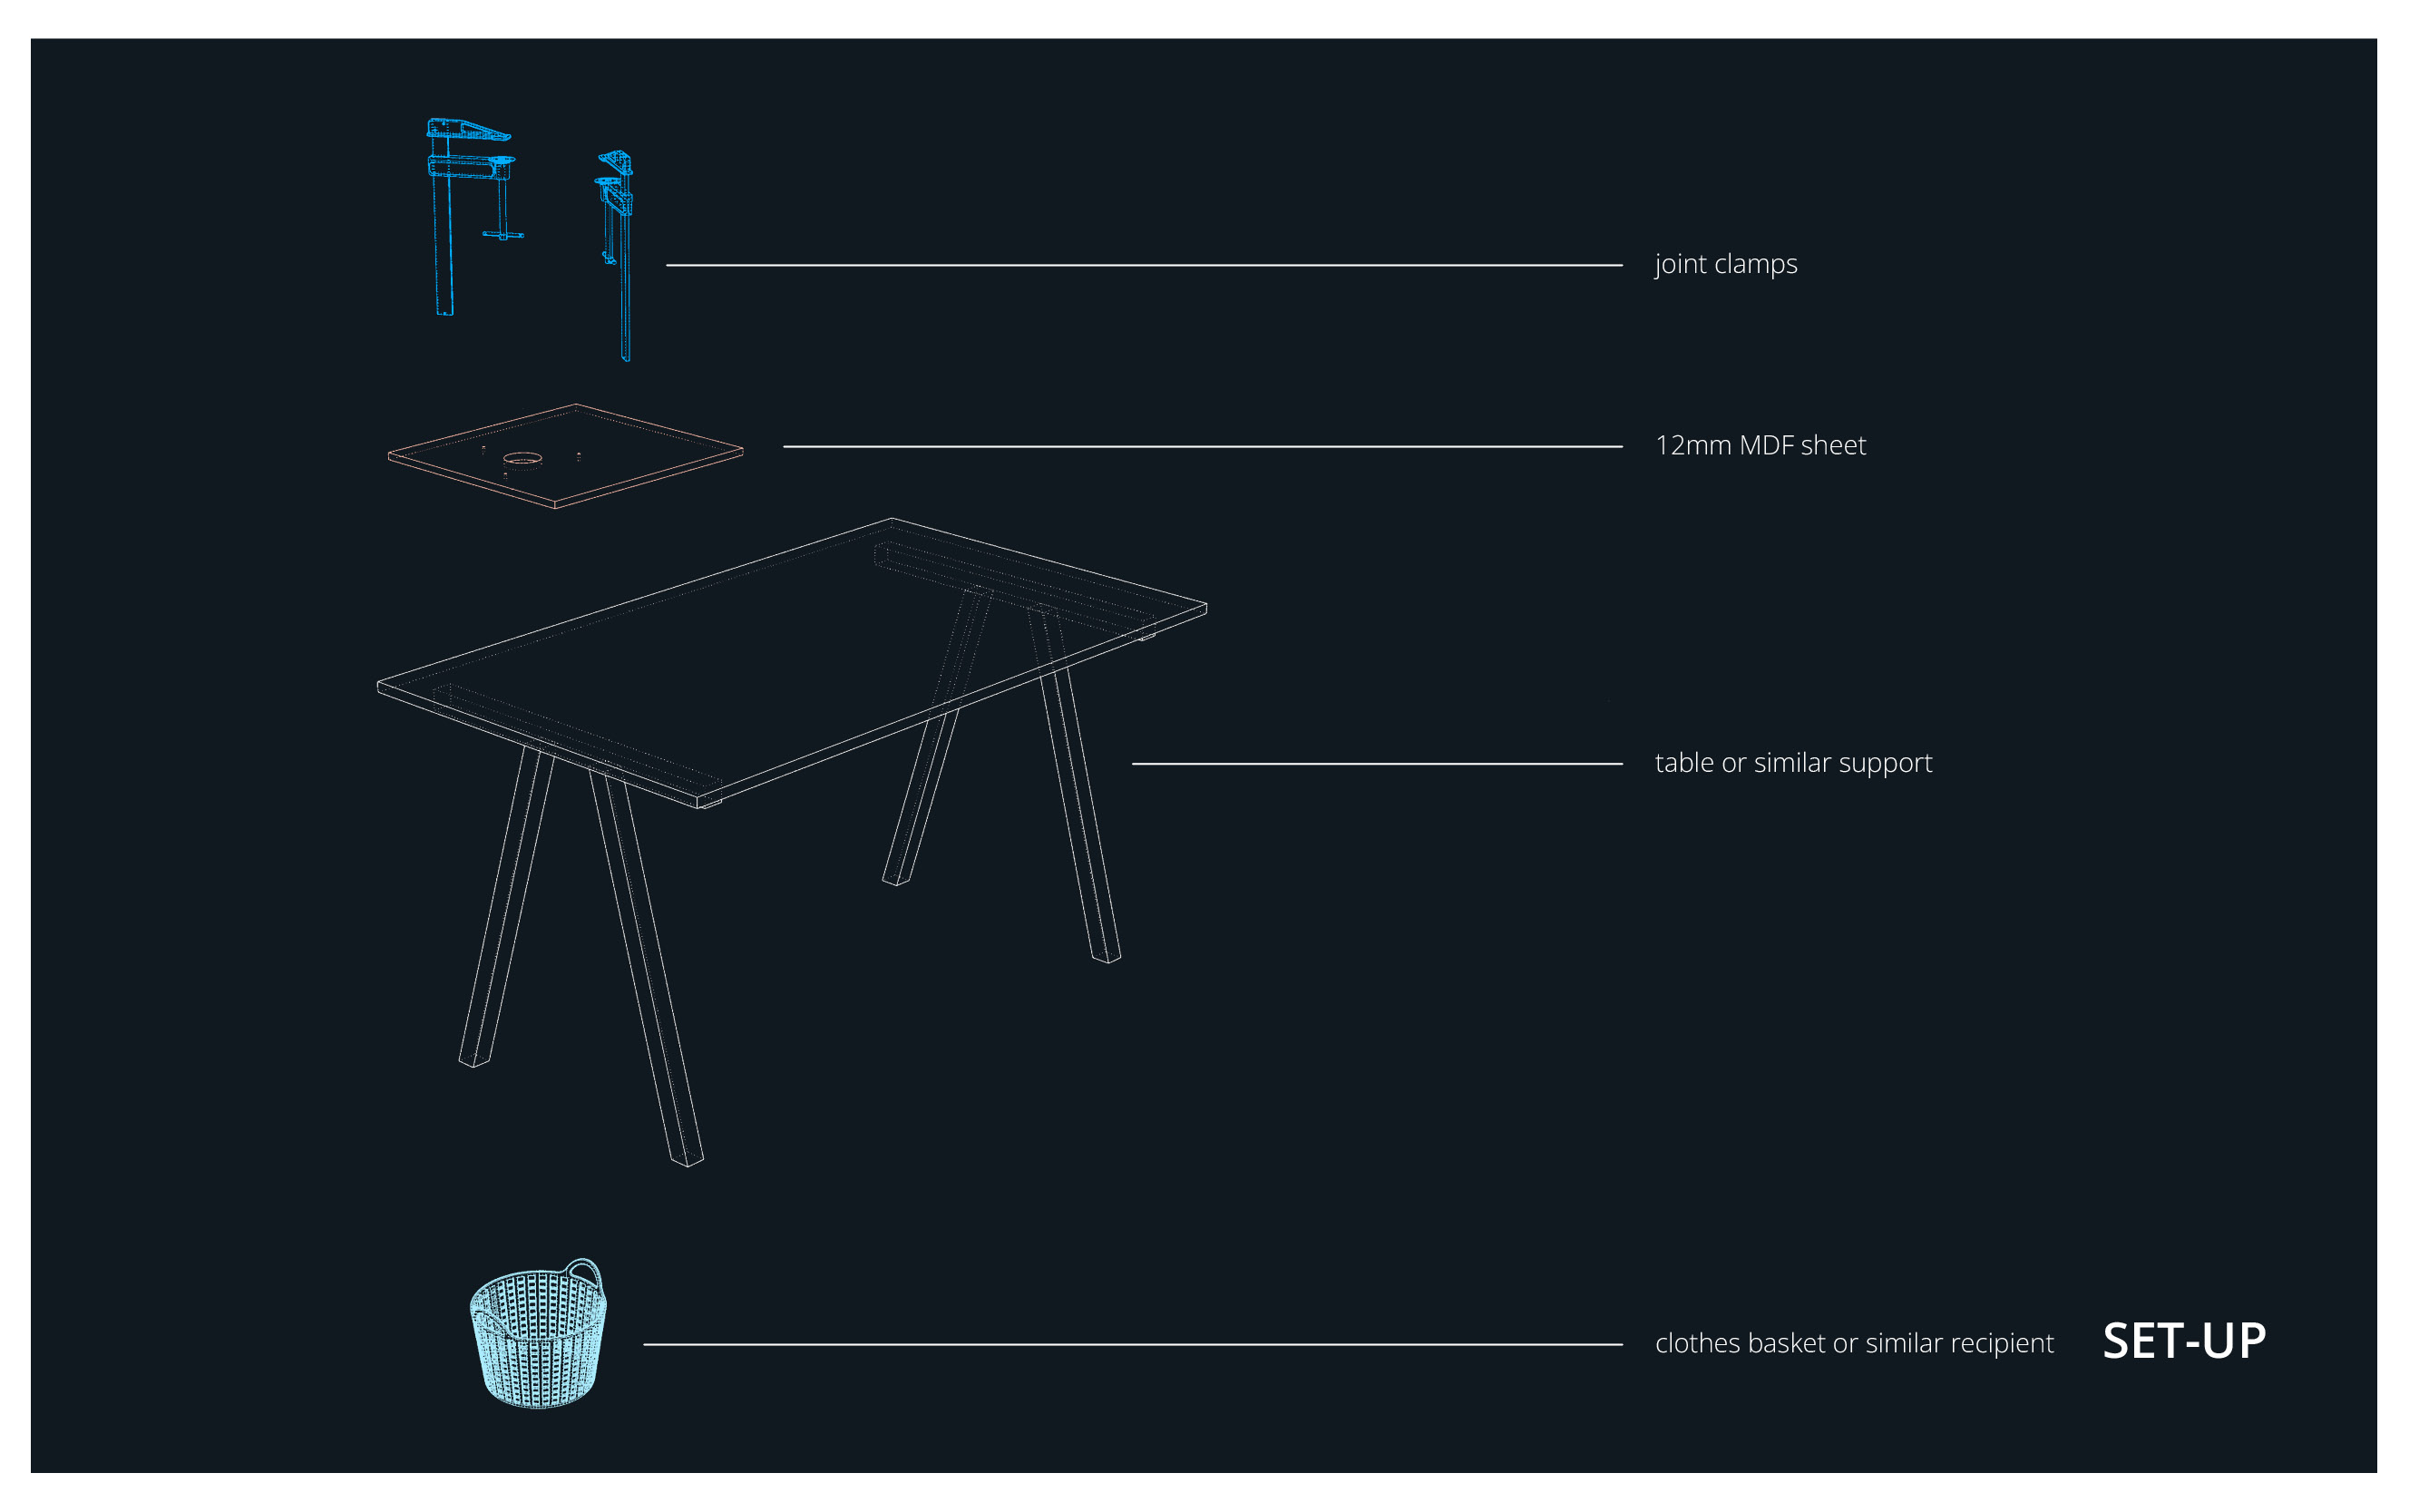
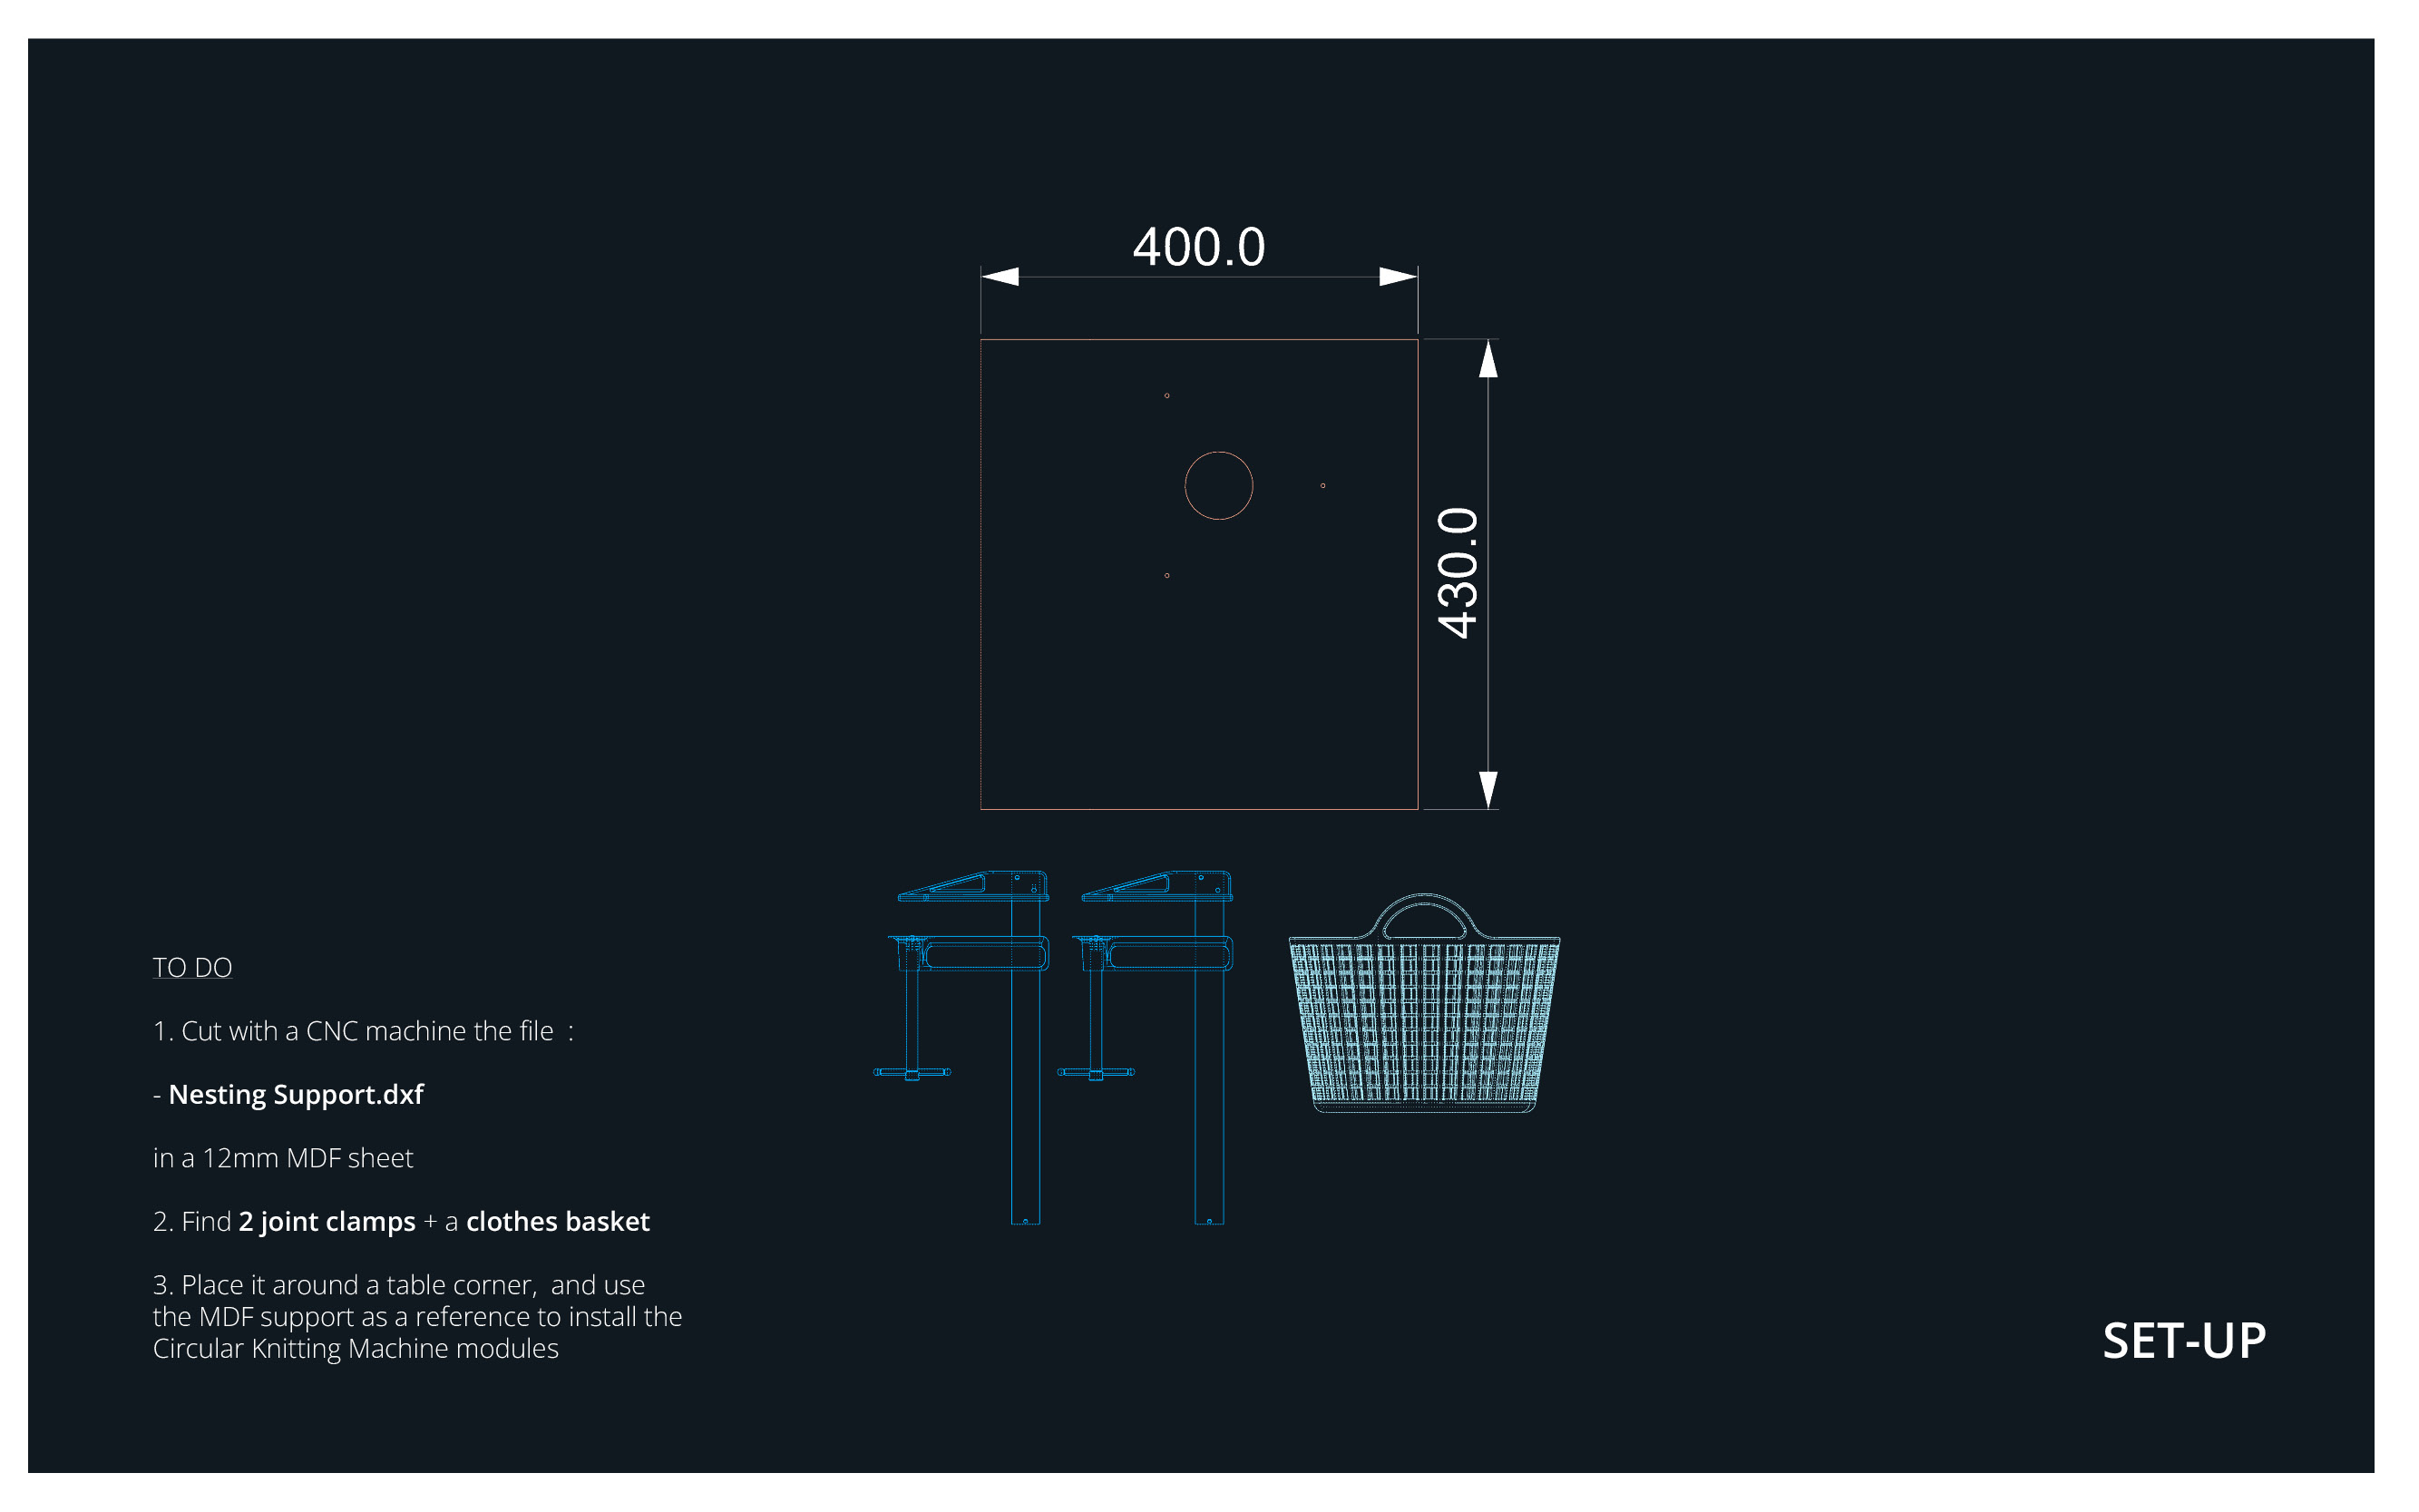
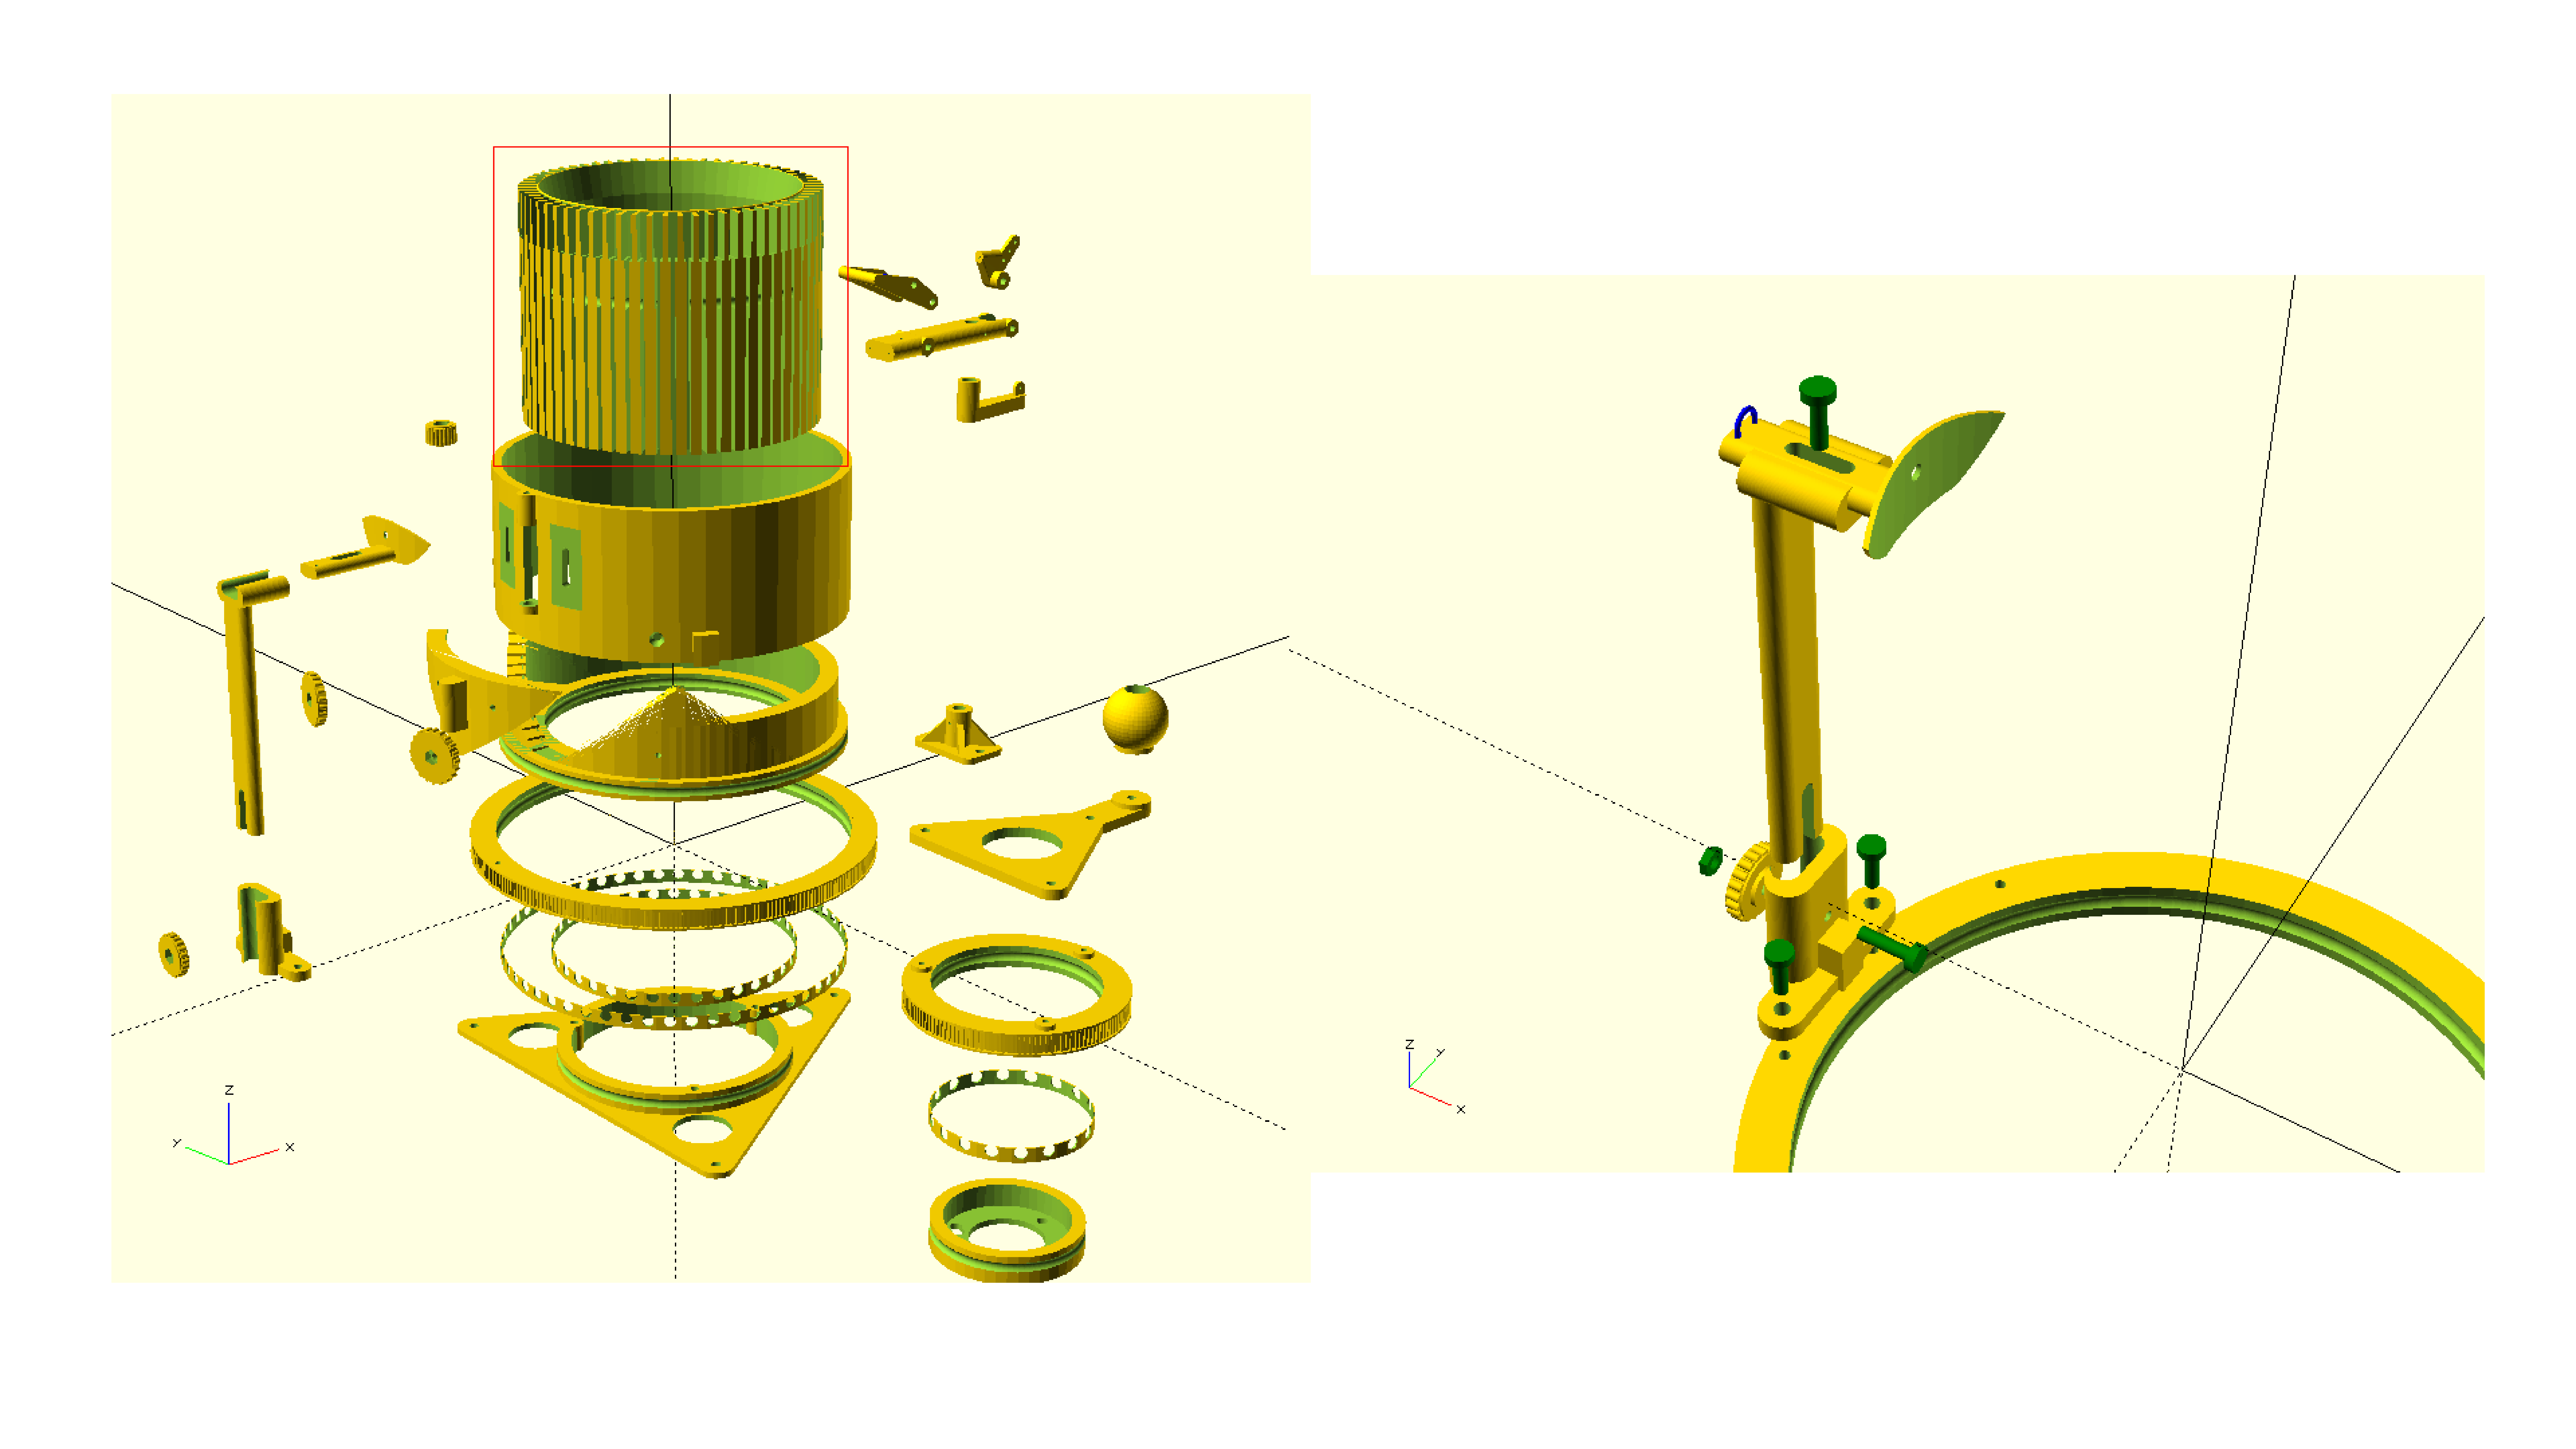
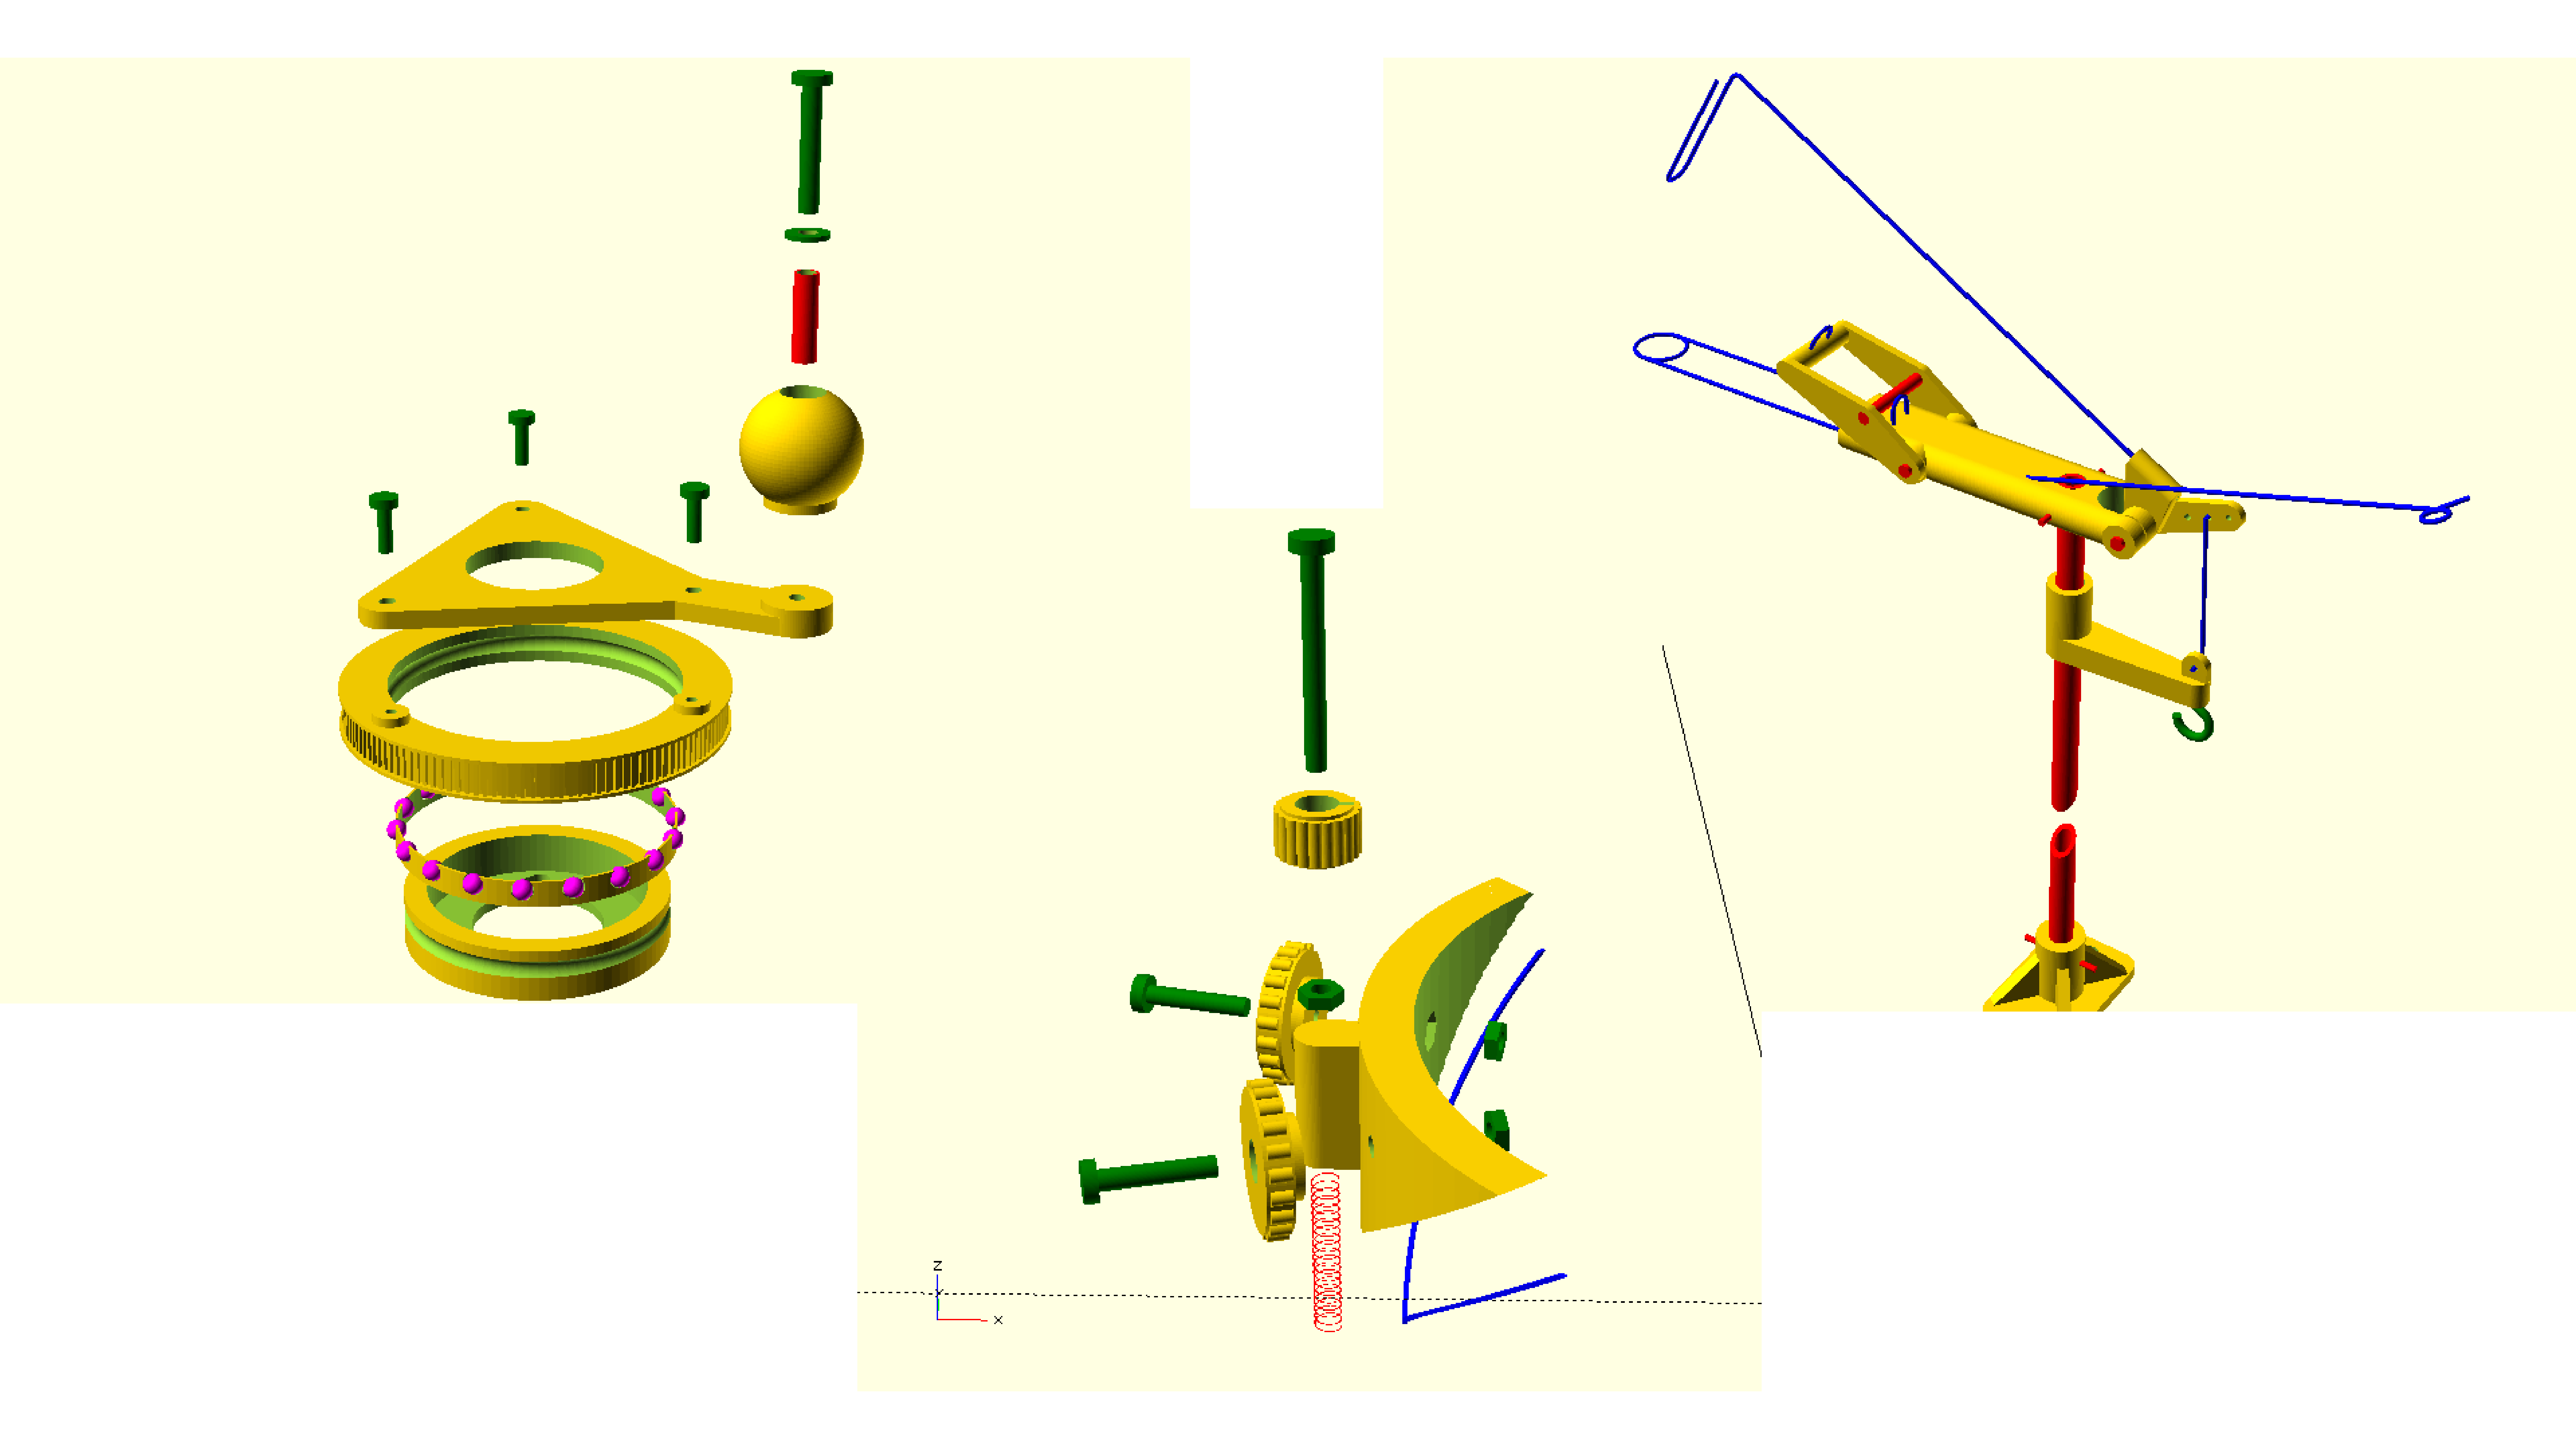
- Then we used these exploded views in our tutorial to list and group our different parts. We had to source some 3D printed parts + to buy or find additional materials in the workshop, e.g screws, hooks, piano wire, weight, a spring, metal balls.
Tip
La Pièce Manquante shop in Brussels, to find hardware materials by the piece
- And we started the assemblies. We did some DIY finetunings of internal holes in our 3D parts to make easier the piano wire passages. With a candle and a needle.
Gallery
-
We had these exploded views and independent renders of each 3D part in our Thingiverse tutorial, but no videos of the assemblies and not a lot of advices & comments on how to build our machine.
-
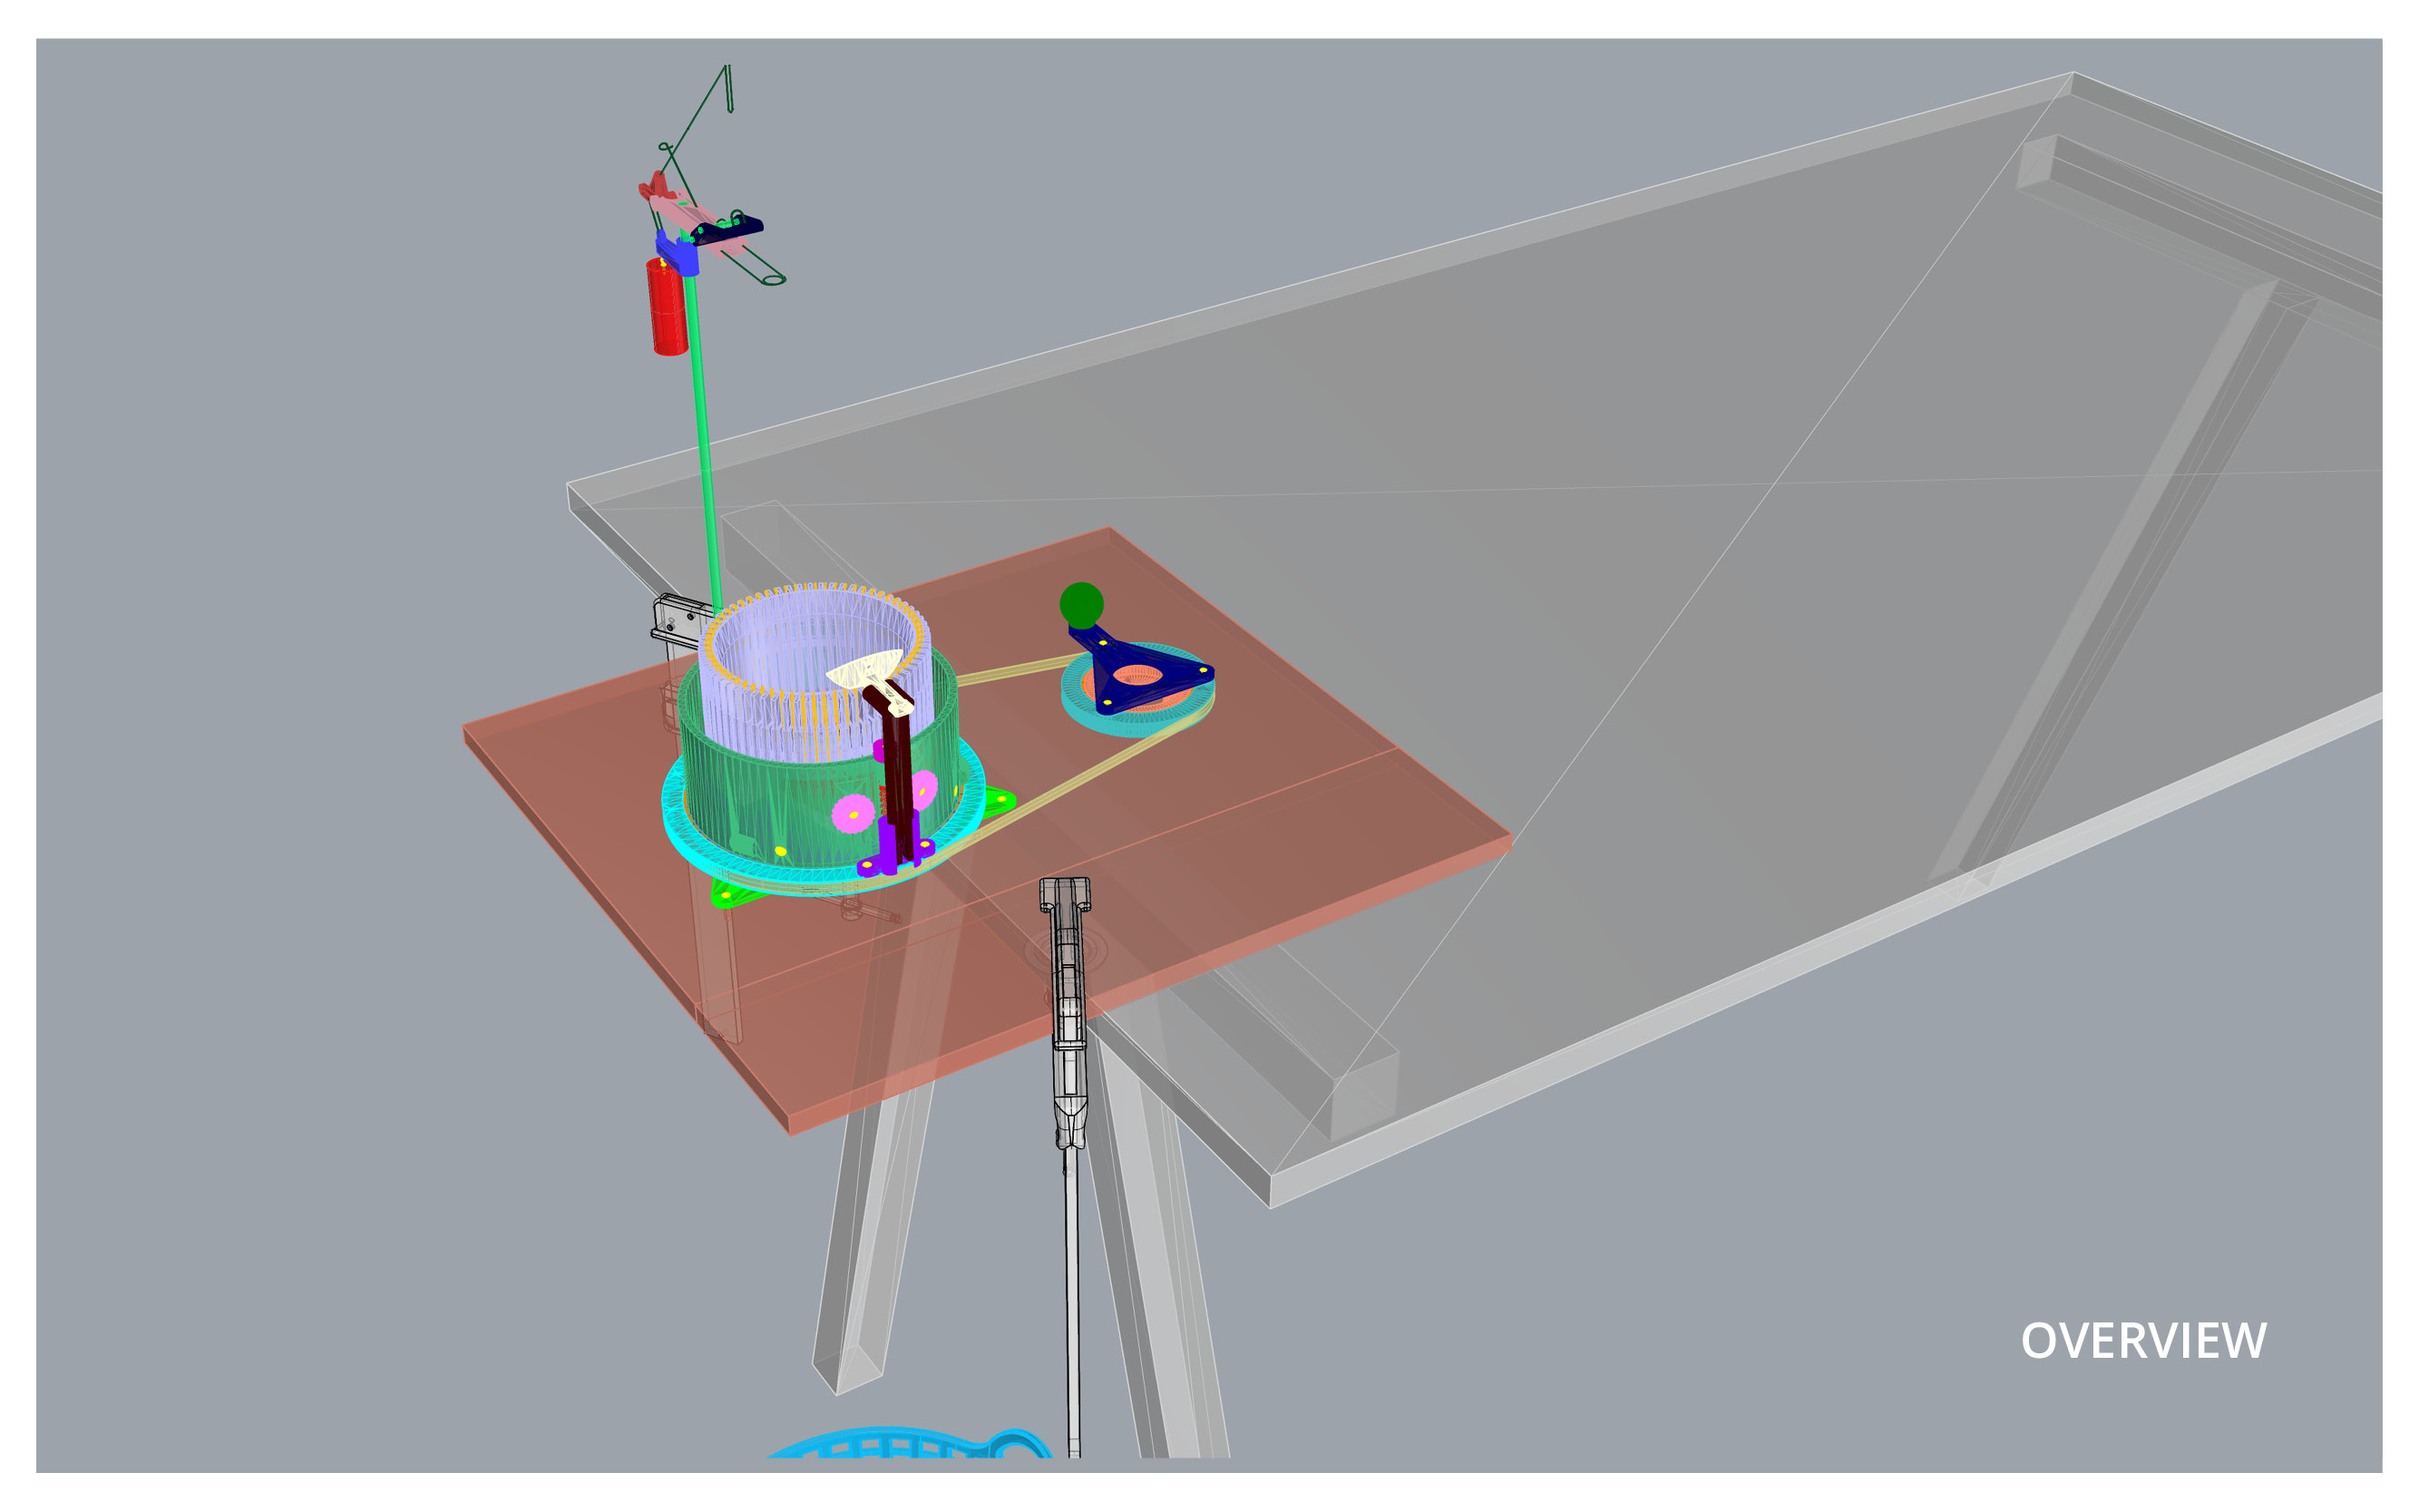
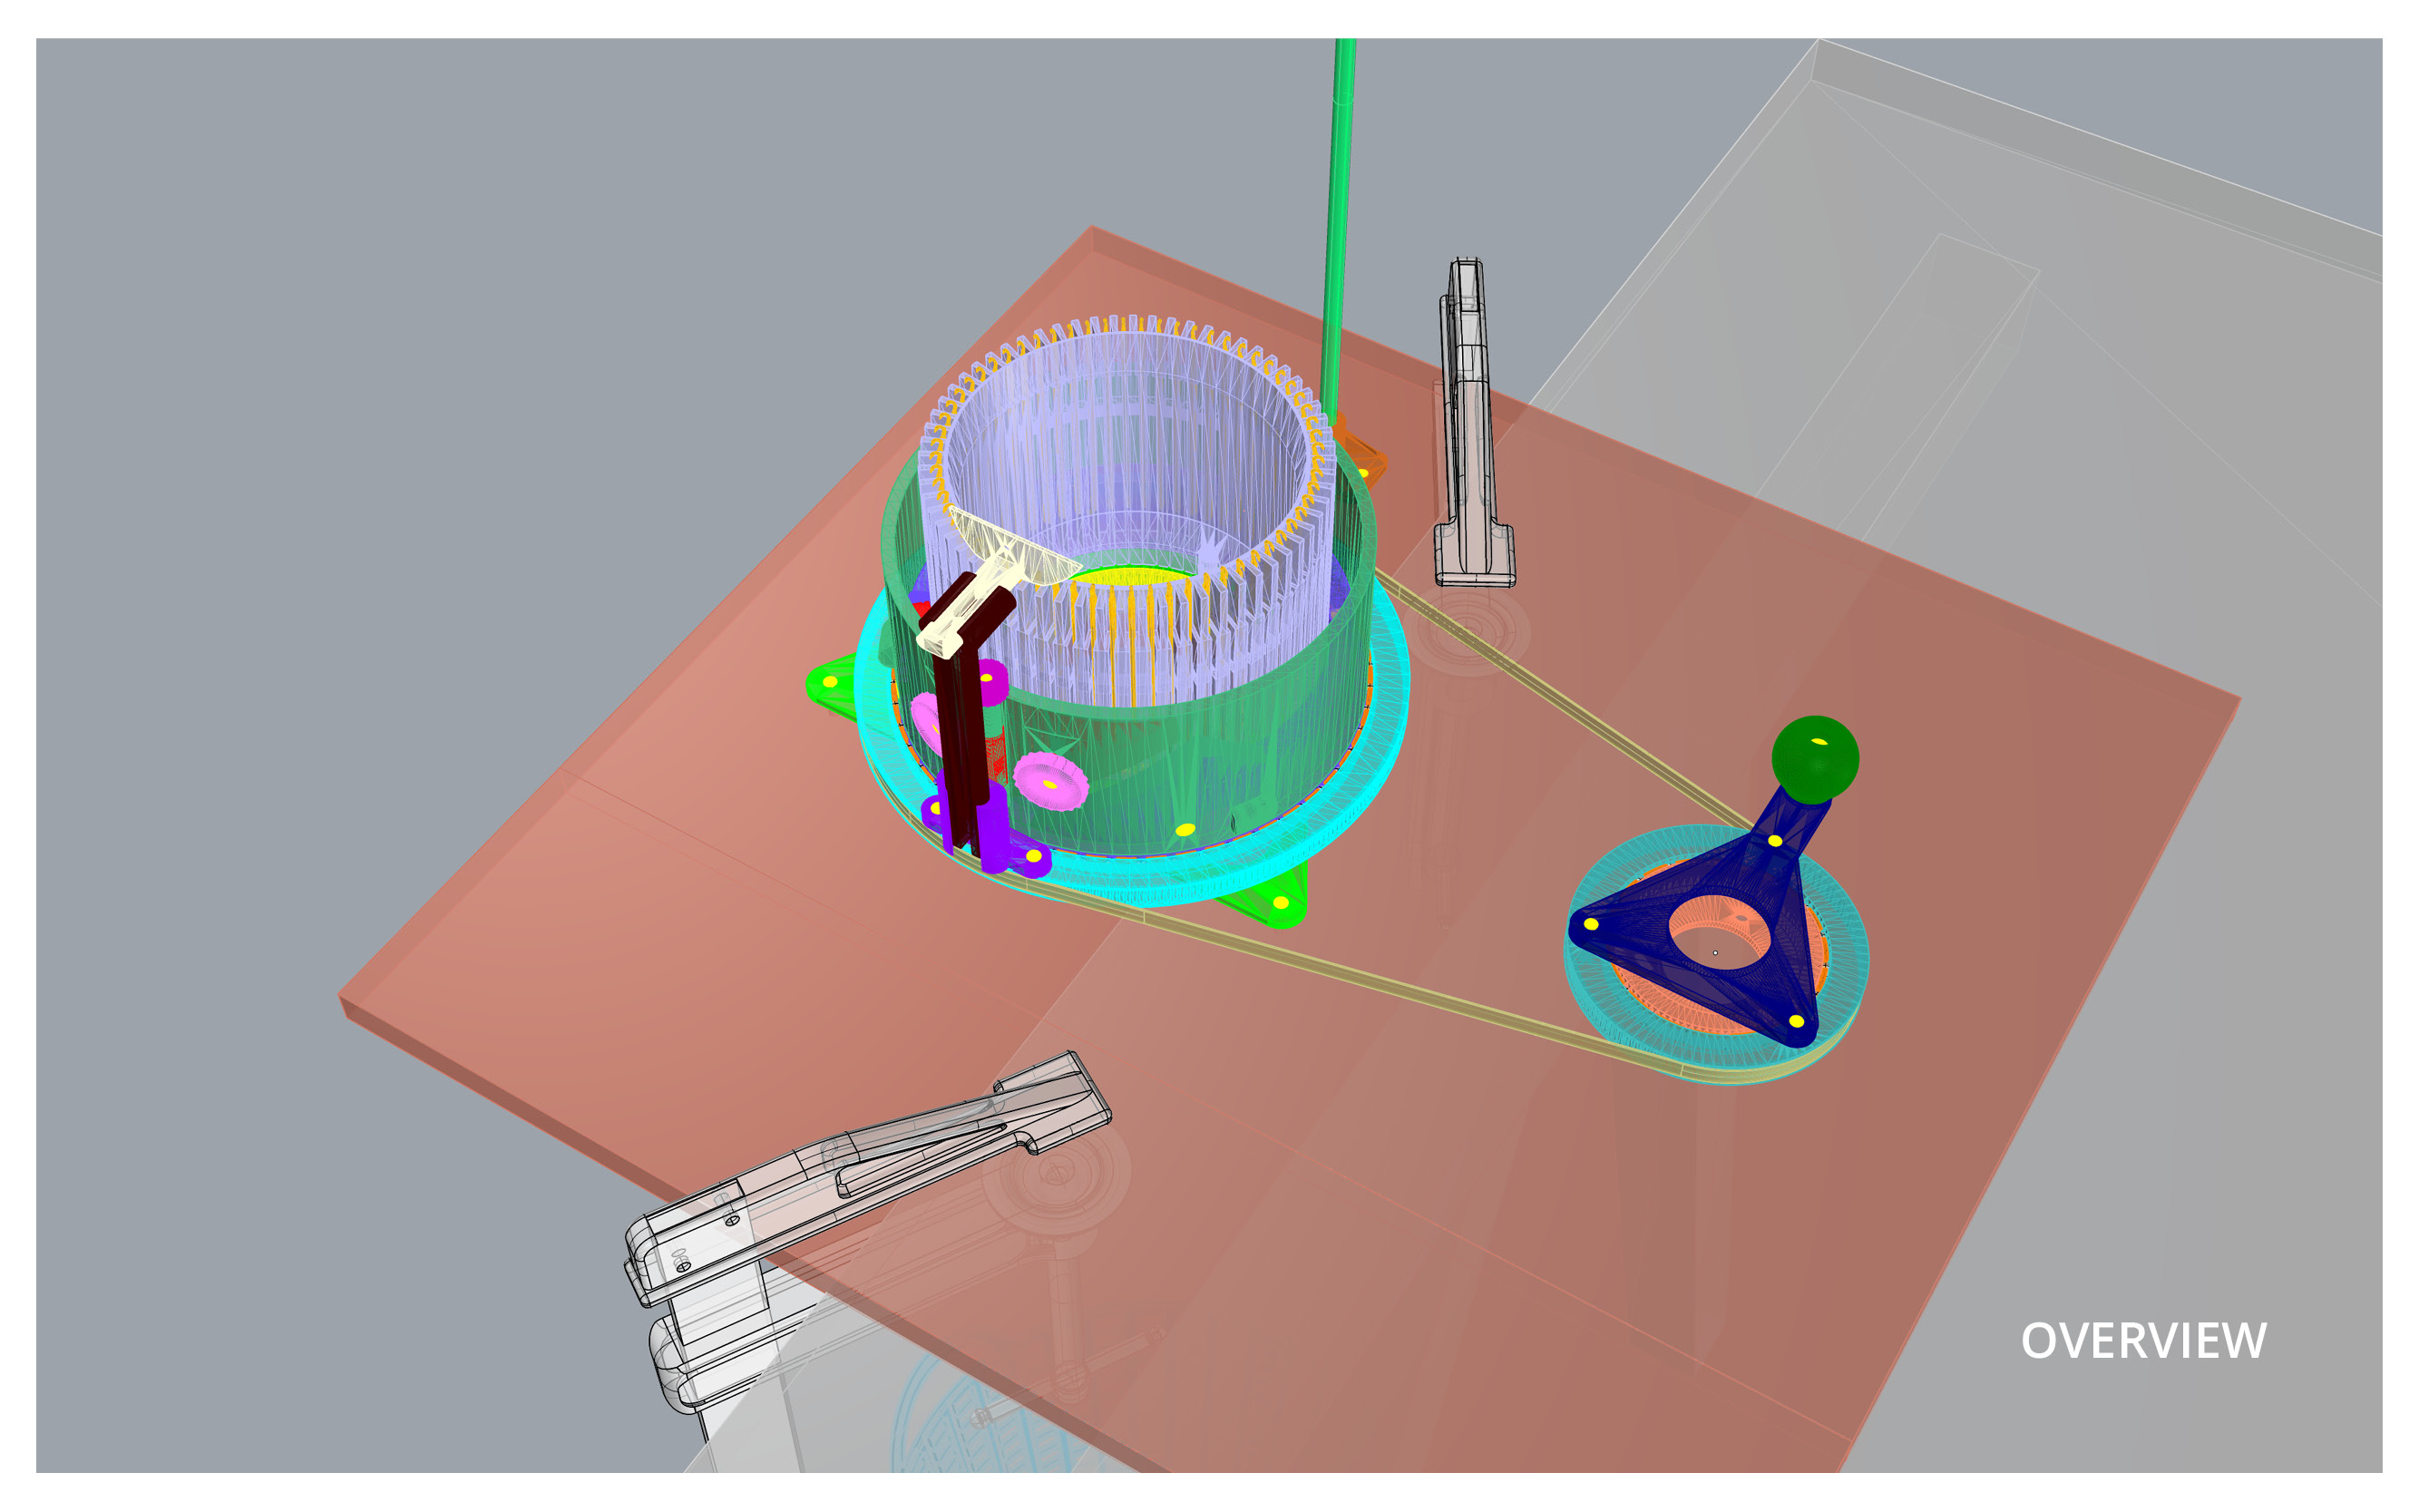
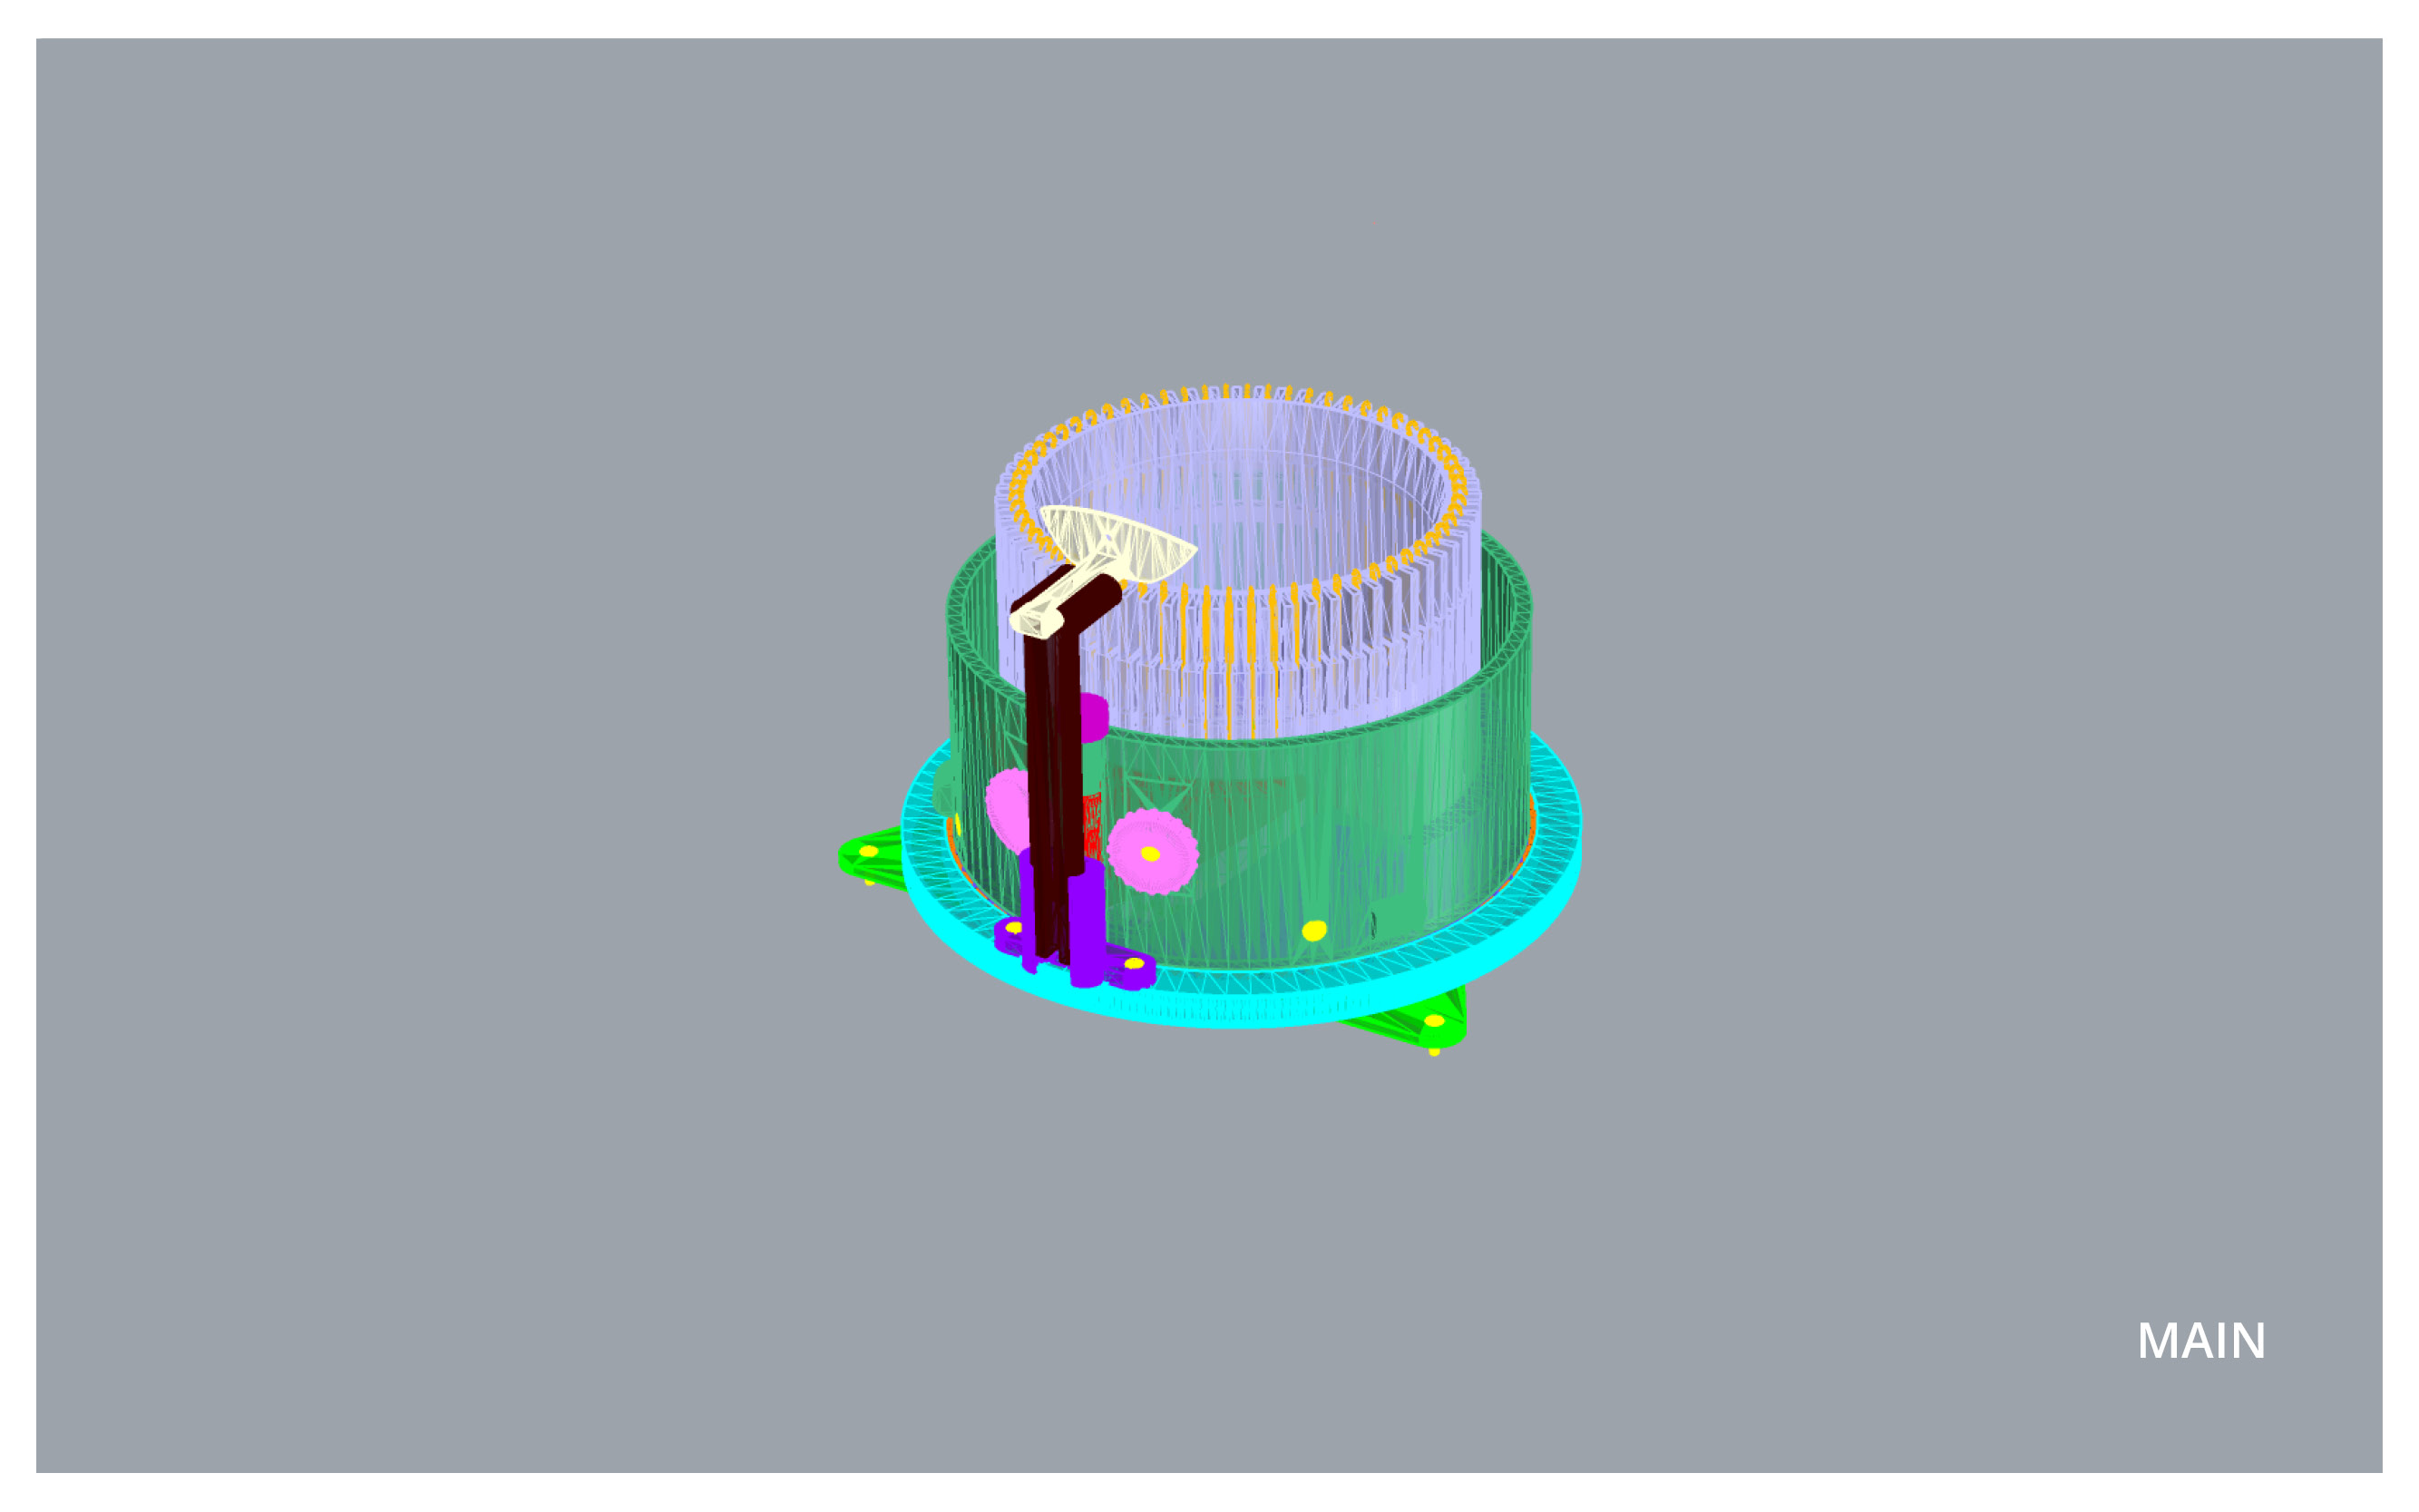
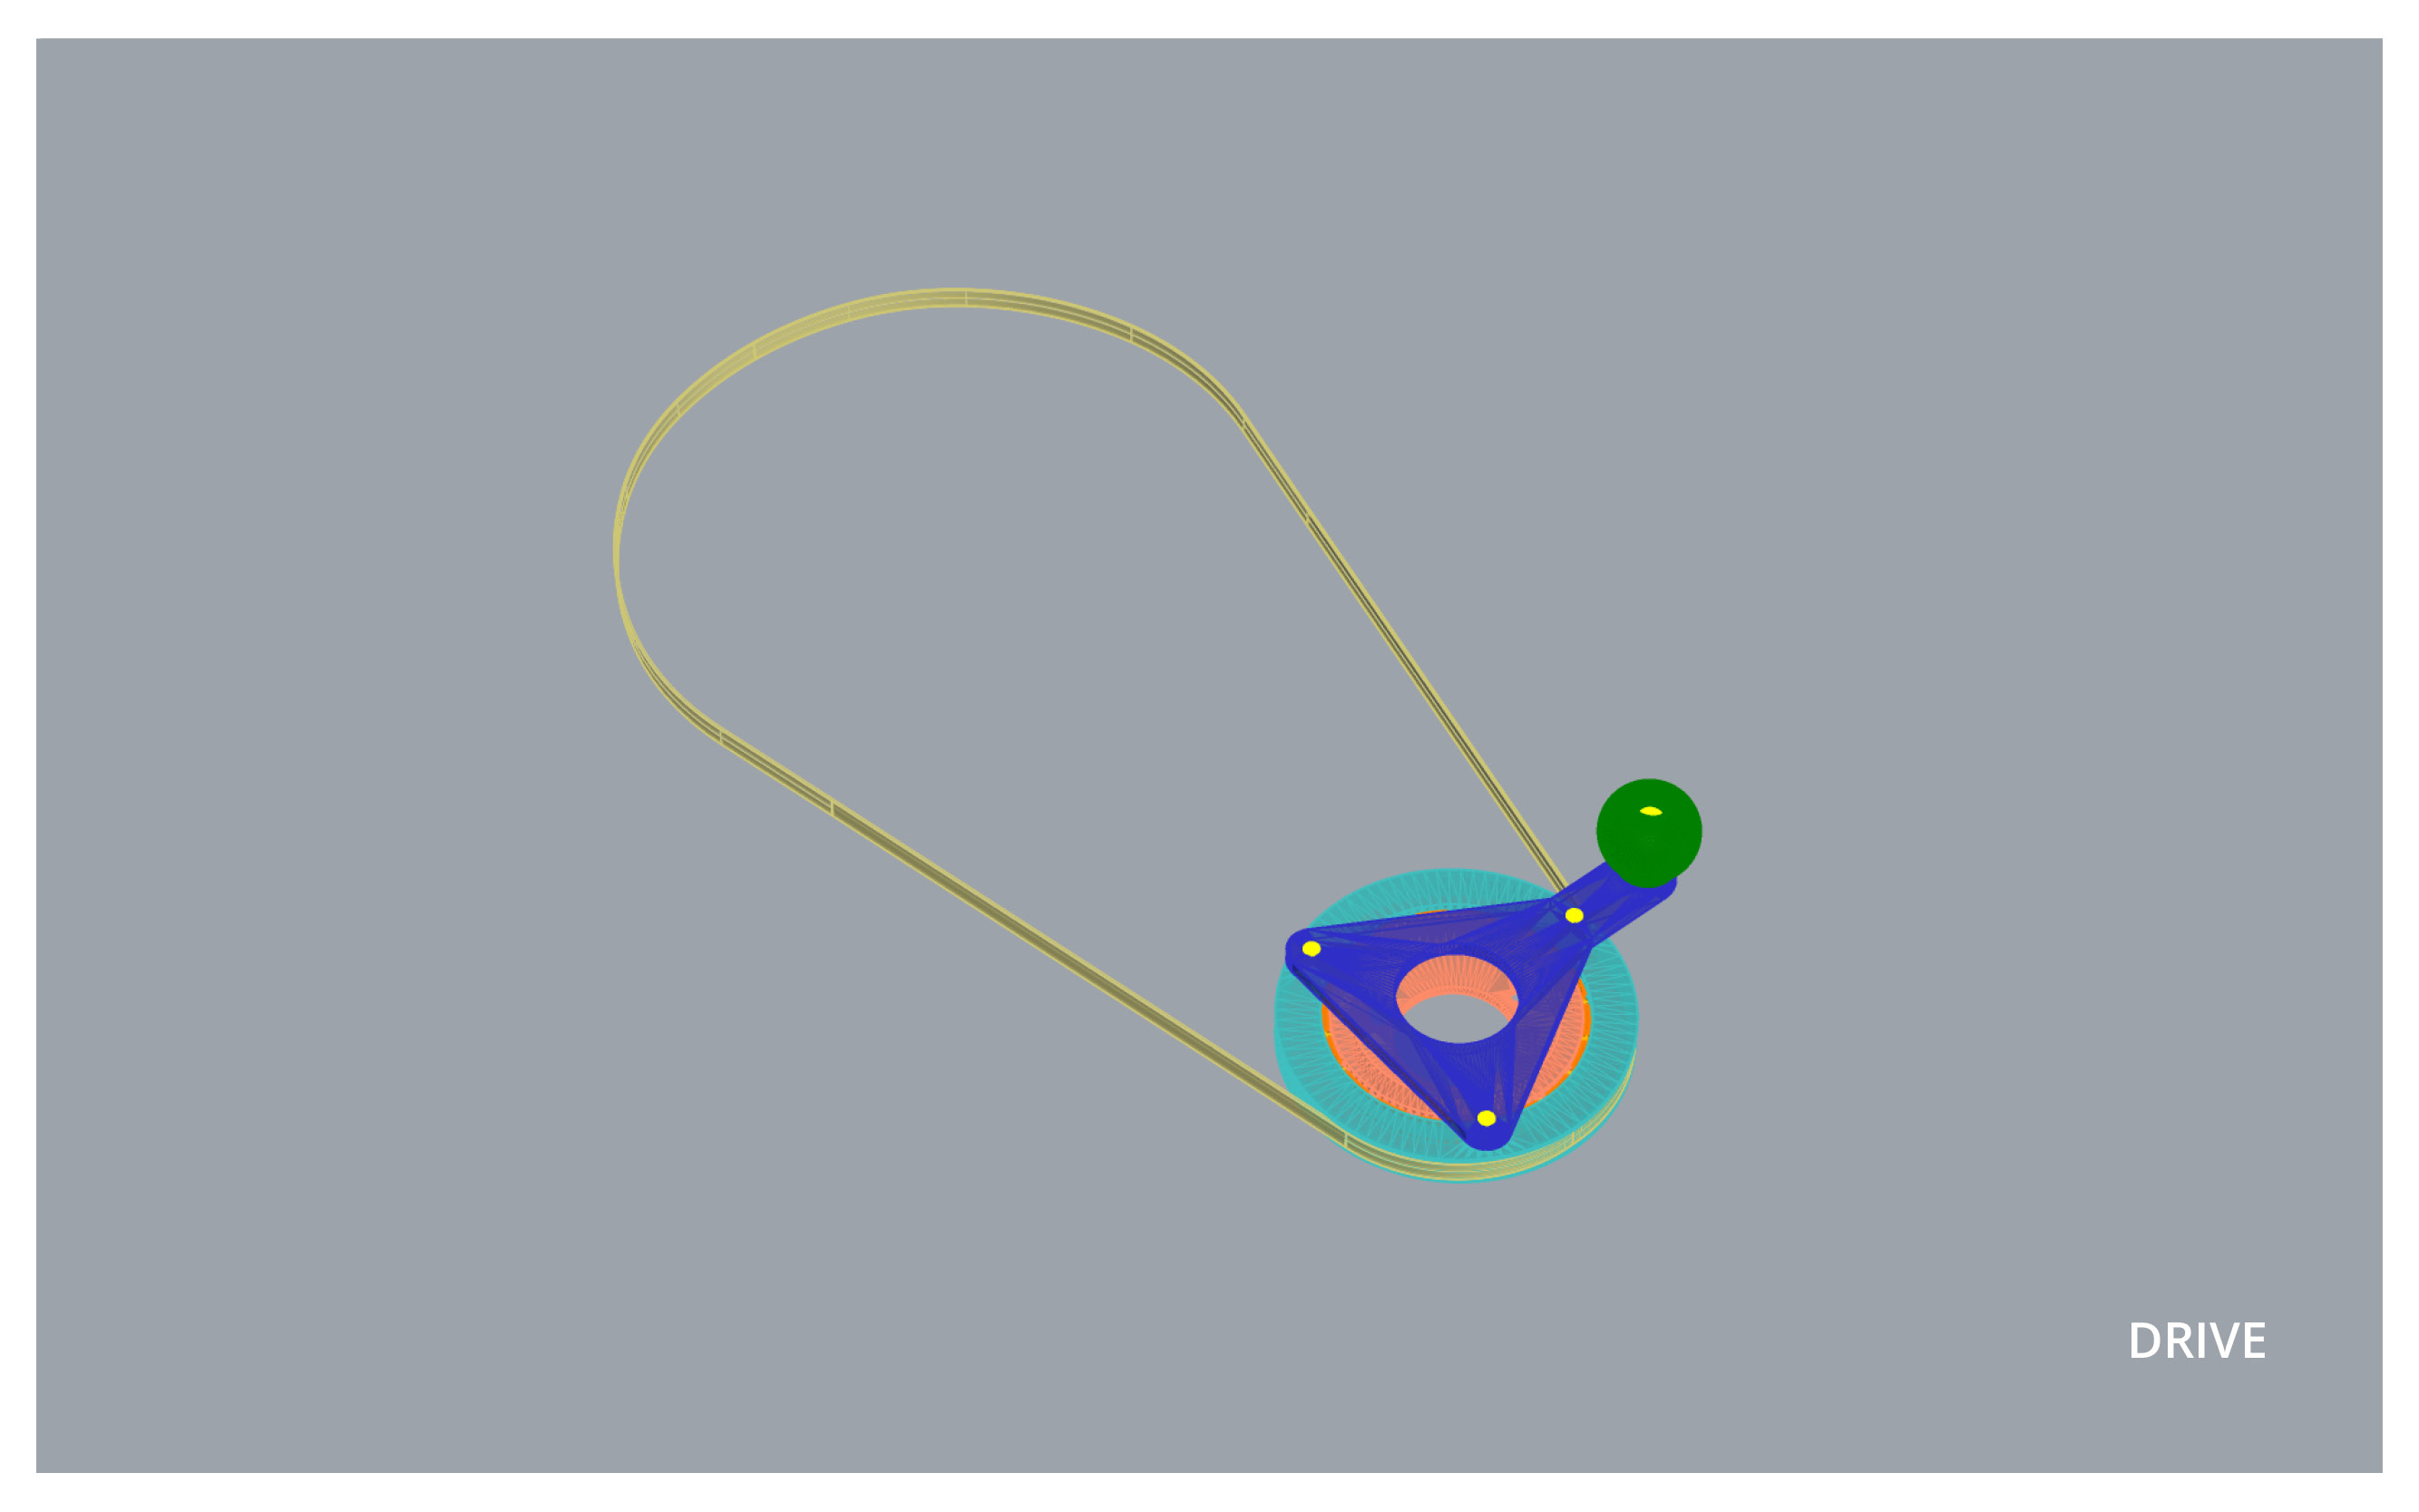
So I thought it might be interesting to start from these 3D STL files and **reassemble the whole machine on Rhinoceros 3D, to get a better idea for example of what needed to be screwed in and where the piano wire had to fit.
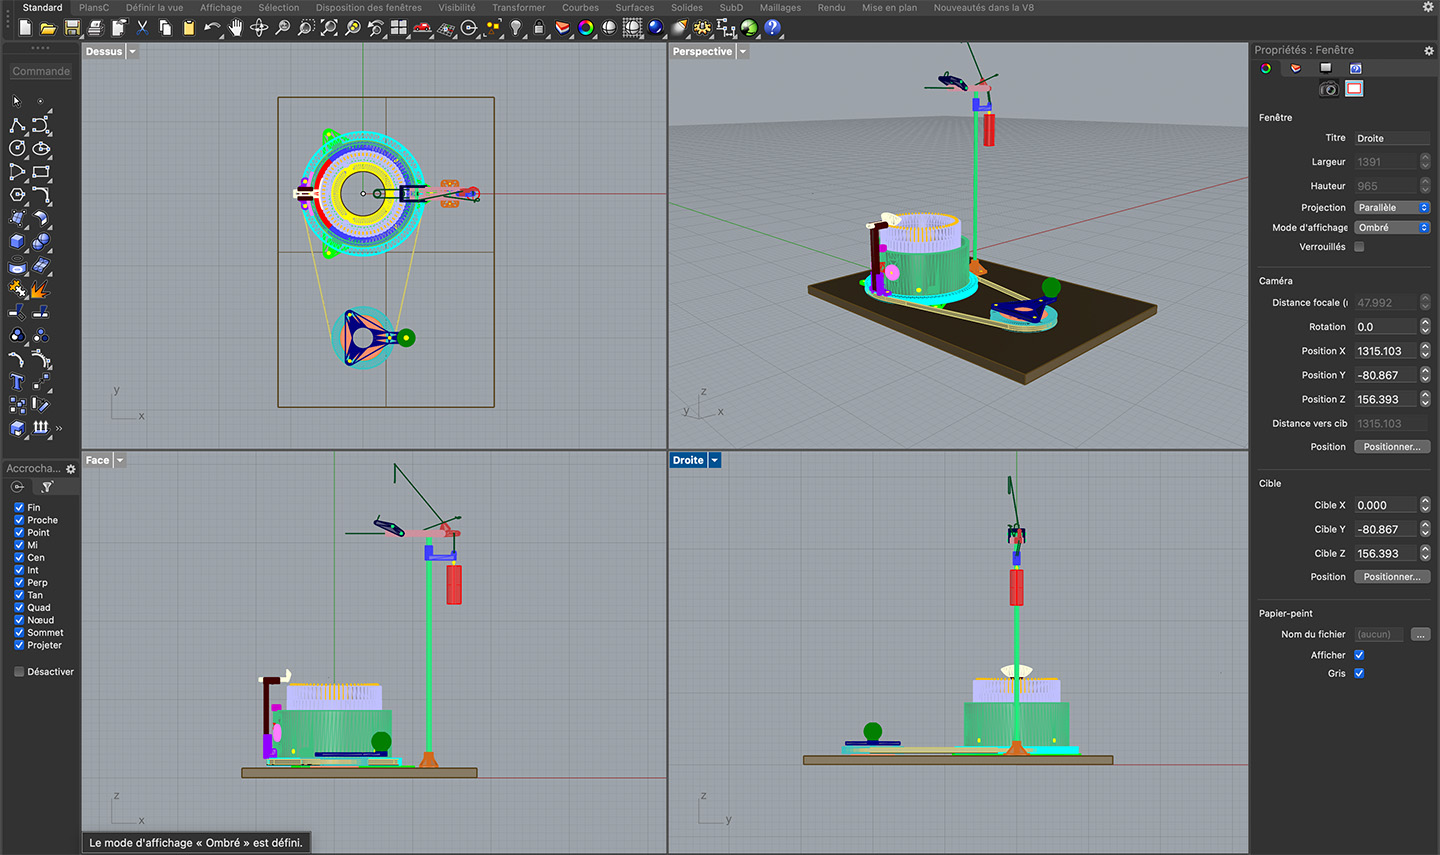
- From the original STL files assembled, I add some screws, hooks, weight, needle from GrabCad Library and I drew the piano wire. I think that this virtual construction could contribute to the original tutorial, which is already very good, by allowing other views to be made, enriching it with details & tips. I have assigned different colours to make it easier to distinguish them and understand the overall construction. And I explored shortly the viewer options of Rhinoceros 3D, using mainly the Semi-transparent & Technical Drawing viewer options.
3D Tutorial