Final Project Process#
Here we are in the month of February.. Dang it! The time goes by, way too fast !!
Quick view of the process : Final Project
What I intend to do..#
I would really love to create a mini collection (3-4 looks) by combining my favorite new skills I gathered in the past months, which are Biofabrication ( Dyes and Bioplastics ), Digital Fabrication ( Lasercut and 3D print ), as well as using computation softwares for form finding. My main inspiration will obviously come from the fungi kingdom and organic shapes. I’d like to create a collection that is elegant, soft, with a futuristic touch, and be as sustainable as possible.
How I’m gonna proceed :#
My goal : Collection of at least 3 looks (3-4 garments/look)
- Step 1 : Bioplastic -> Aromatherapy research + Tests / Collages
- Step 2 : Fungi effect / mimic research + Tests ( Lasercut )
- Step 3 : Start with draping corset base + looking for fabrics + prototype(s)
- Step 4 : Computational patterns -> fungi & cape shape = form finding/interlocking
- Step 5 : Start draping skirt/dress + prototype / 3D print gills
- Step 6 : Research for accessories : belts -> mycelium leather ? + tests & prototype(s)
- Step 7 : Start doing corsets finals + dyes tests
- Step 8 : Prototyping capes & do finals / 3D print gills
- Step 9 : Do final dress/skirt + Dyes prints on final fabrics
- Step 10 : Kimono with 3D printed gills
Inspirations and Moodboards#
The first weeks, contained a lot of research for inspiration, colors, forms, clothing design, etc.. Last week, I finally started to have an idea of what I want and at least now I sort of know in which direction I’ll need to go. I’m still not sure about the final results but I’m enjoying the process and research so far !
Attention : you’ll see A LOT of mushrooms all along my process of designs, form finding, and inspirations. If you don’t like fungi, this is a good opportunity to give them another chance and learn more about them !
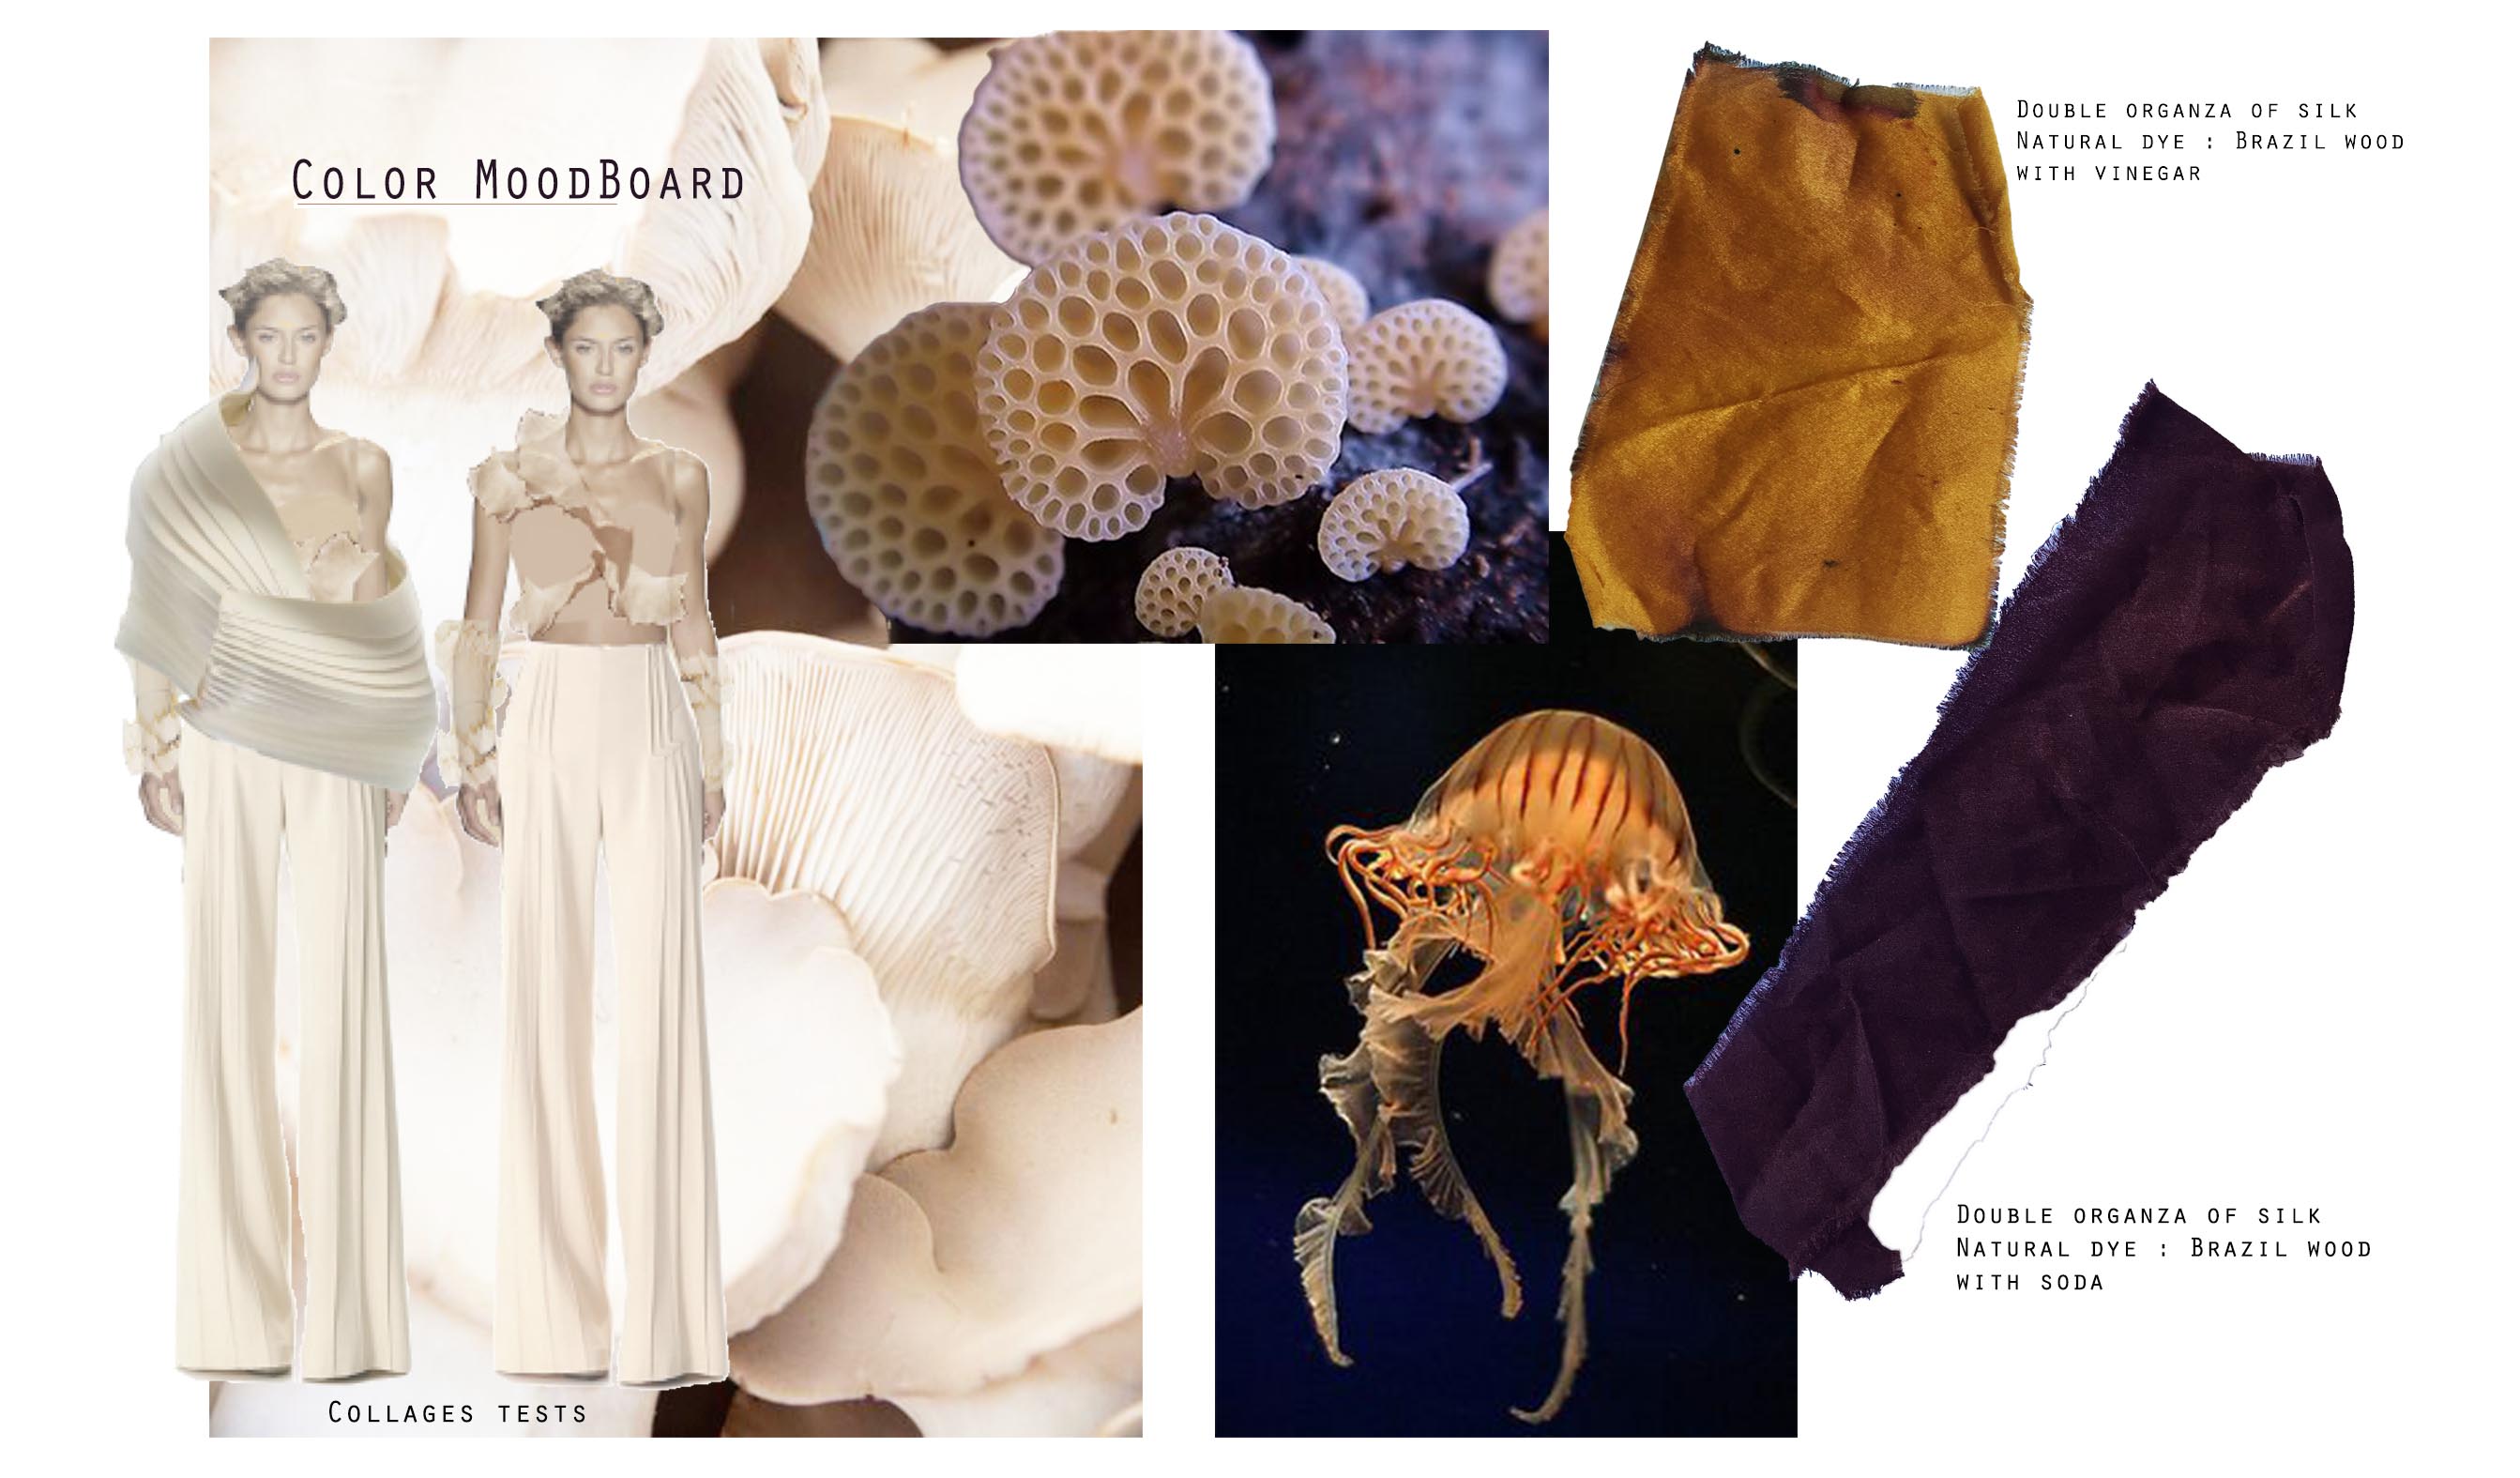
Color Moodboard#
I have to admit it was quite hard to choose the colors.. I was looking up the color variations that are found on fungus, but there are SO MANY !! If you got curious to look it up here are some links to discover a bit of the mushroom color palettes :
After looking that awesome stuff up, I asked Irene for some natural color advise.. I told her what kind of fabric I’d like to use and the color palettes I was interested in, and asked if it was possible to get them with natural dye and how. She helped me doing some tests on samples and I really liked the results of brazilwood dyes. With brazilwood you’ll obtain a range of red colors, but if you use an acid on the dye you’ll get orange -> yellow colors, and if you use a base you’ll obtain purple variations. So I’m gonna play with those colors and combine them with the main color, which is : cream.
Pantones ( Photoshop ):
Creams:
- Pantone EBE9E2
- Pantone EAE3CA
Orange - redish:
- Pantone D08207
- Pantone BE5A1E
Purple:
- Pantone 40163B
Fungus Moodboard & Bioplastic Research#
What I’d like to do basically, is to mimic the aspect of several species of fungi with different techniques and include them on the garments in different ways. First step was therefore to research on which mushrooms should become my muses and what kind of techniques can I find on Pinterest where artists immitated shrooms in their art. I found out there is already a lot of research in that aspect of artists working with wool felt.
Here’s what I found to get inspired by:

Research and tests:
I started researching with bioplastics that include essential oils for aroma diffusions and potential absorbtion by the skin, that could be beneficial.
I tried to work with the bioresin and agar-foil recipes in order to obtain a good formula of bioplastic to use as a ‘fabric’. So I included several layers of tulle where I pourred the warm liquid on. I also included some beeswax in some recipes to test and rigidify the formulas, but it got too hard, at least on the bioresin..
Here are some results:

-> bioresin + beeswax + tulle

-> agarfoil + tulle

-> agarfoil + beeswax + tulle
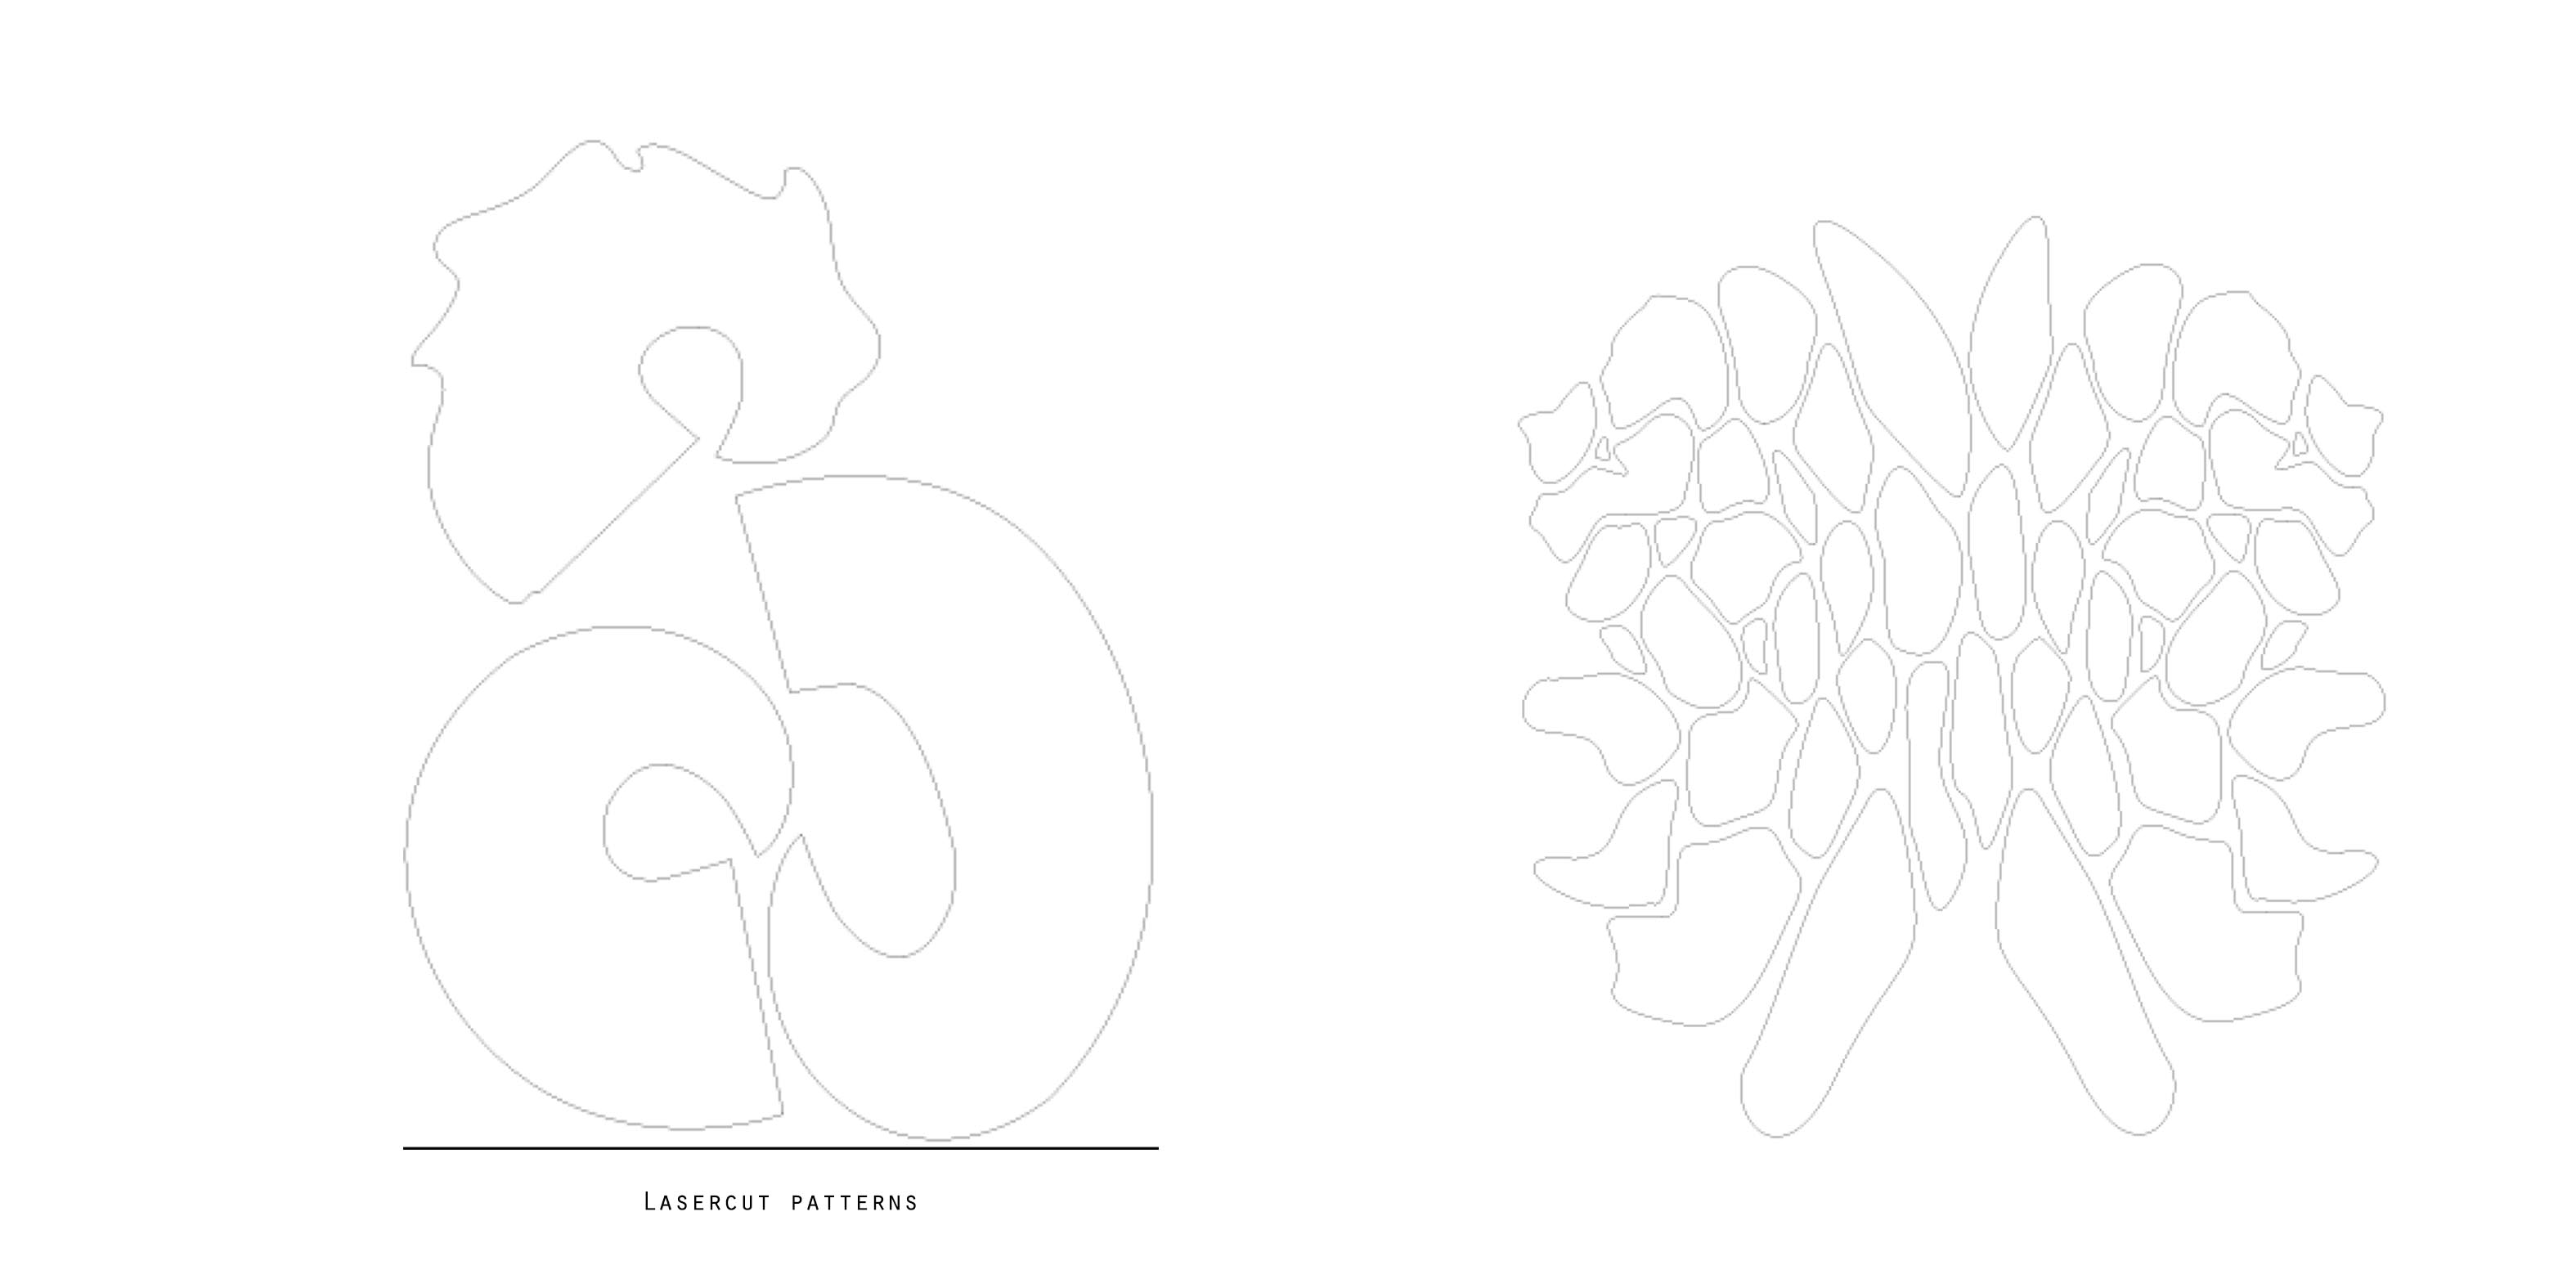
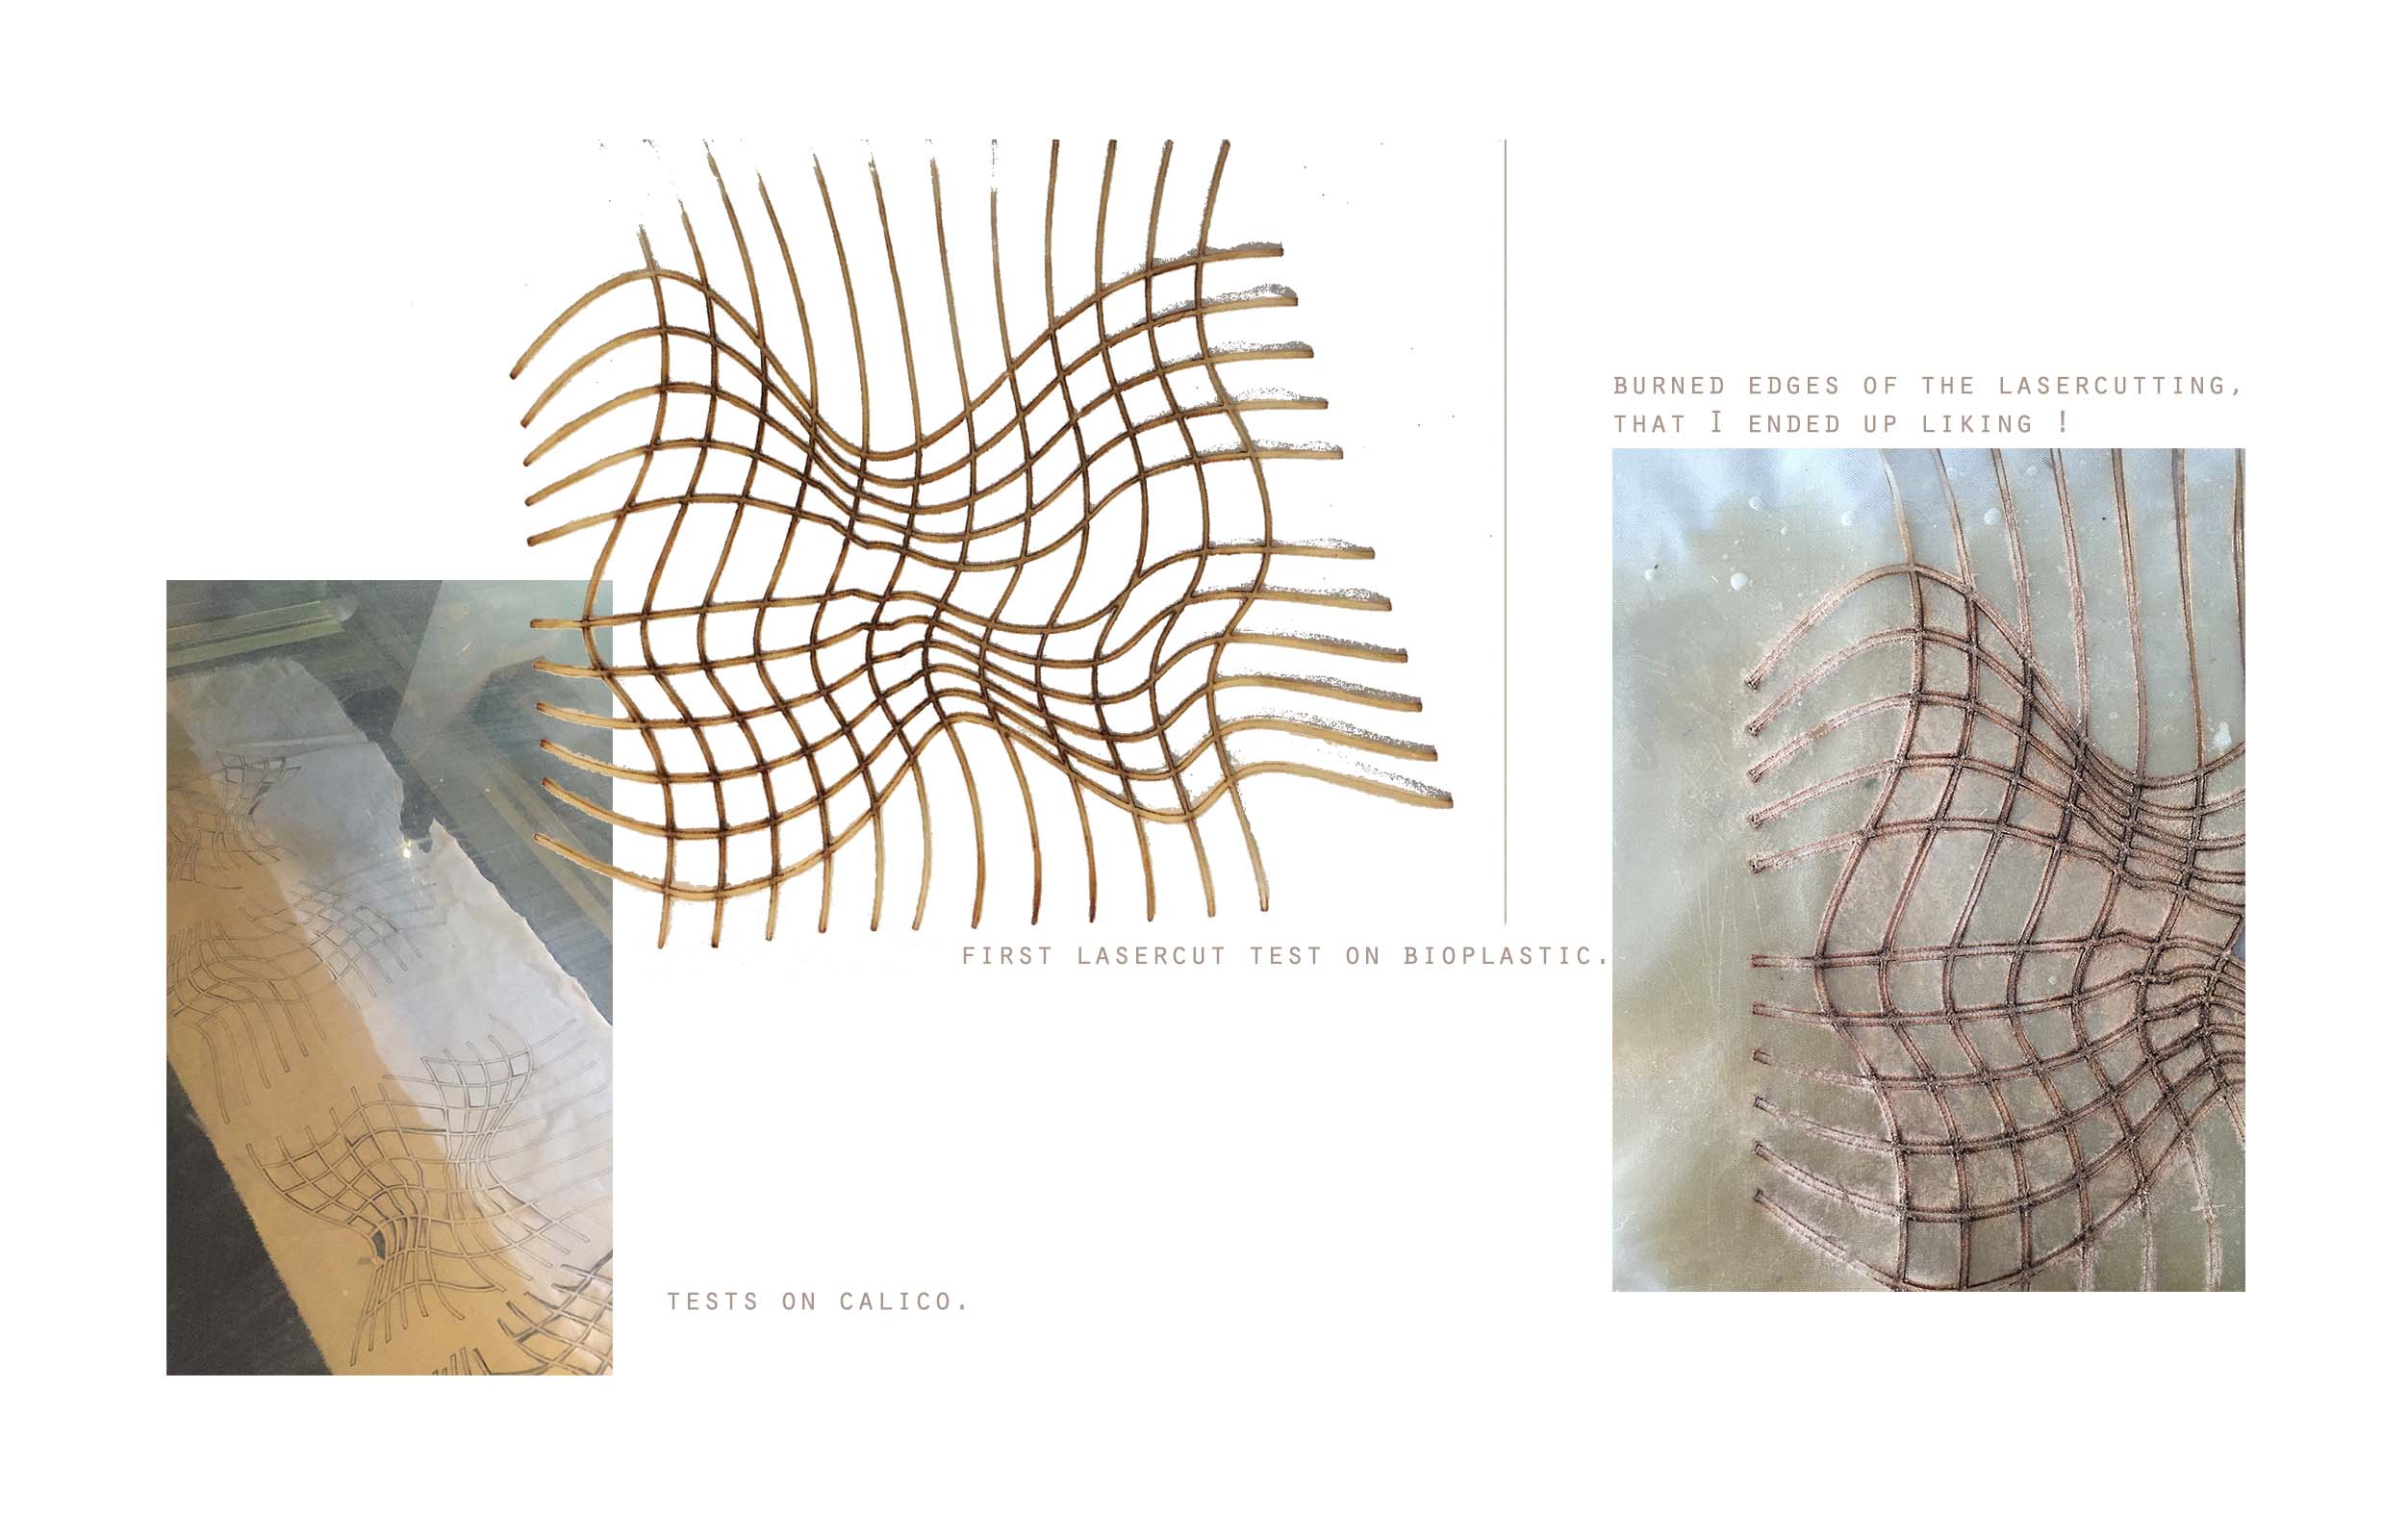
Some of the Agar/tulle-bioplastics had a really good texture, so I made bigger sheets and lasercutted them when dry to do my first mushroom-effects : I also burned the edges with a lighter, just to test the reaction.

-> burning the agarfoil/tulle
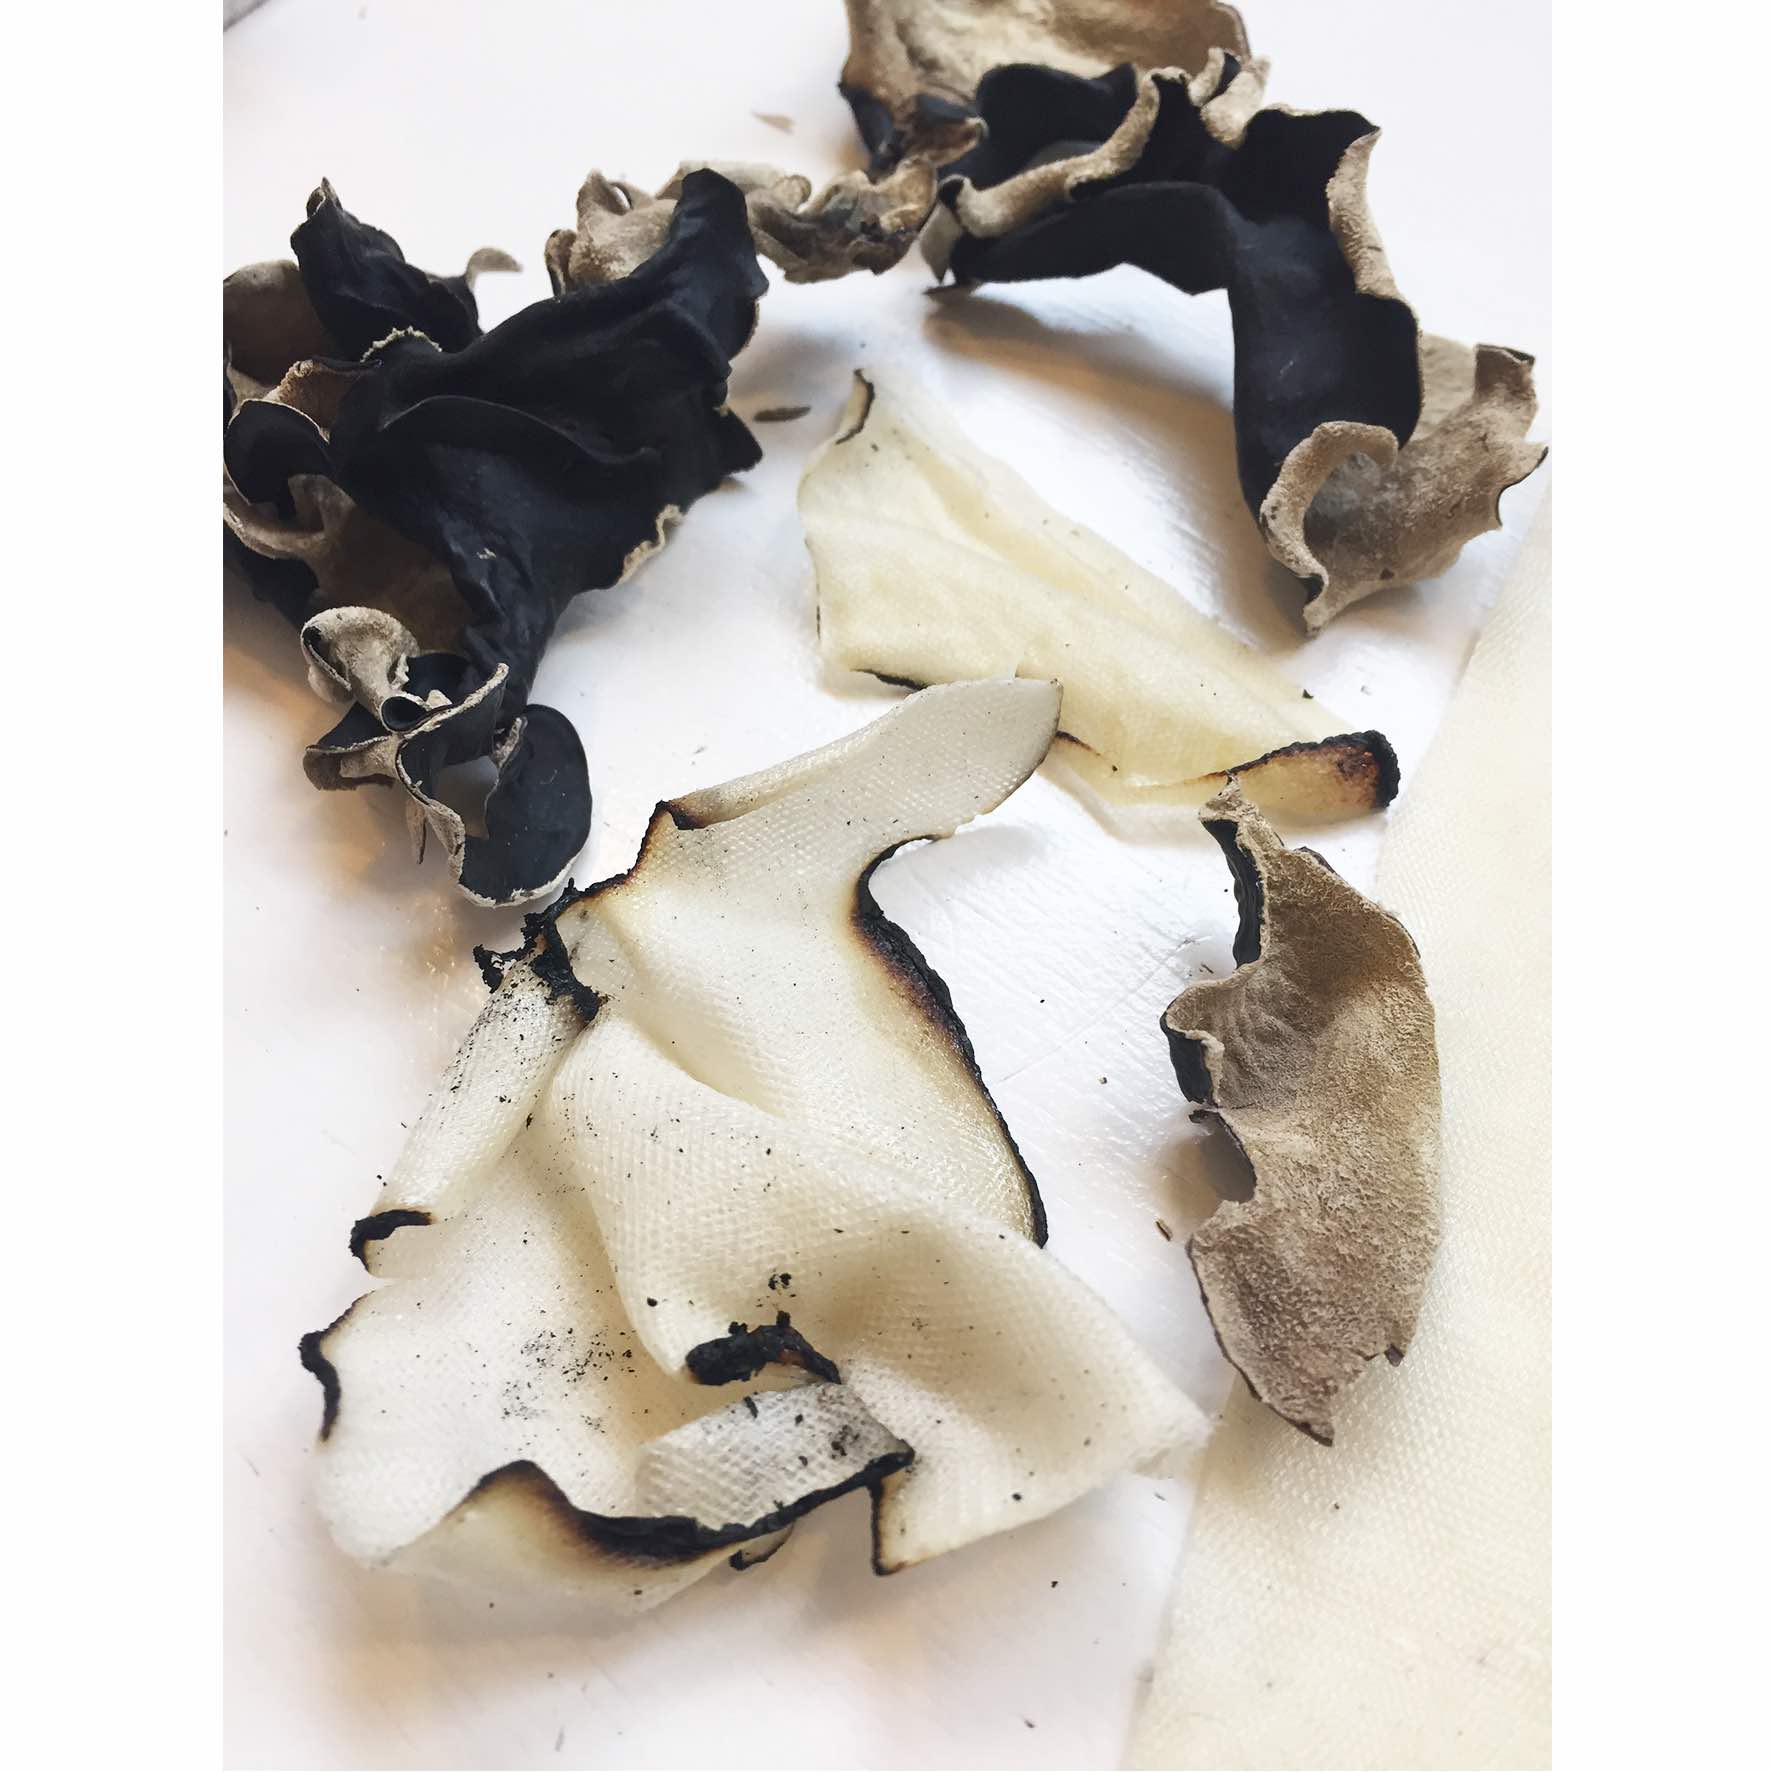
-> mimic of White Back Black fungus
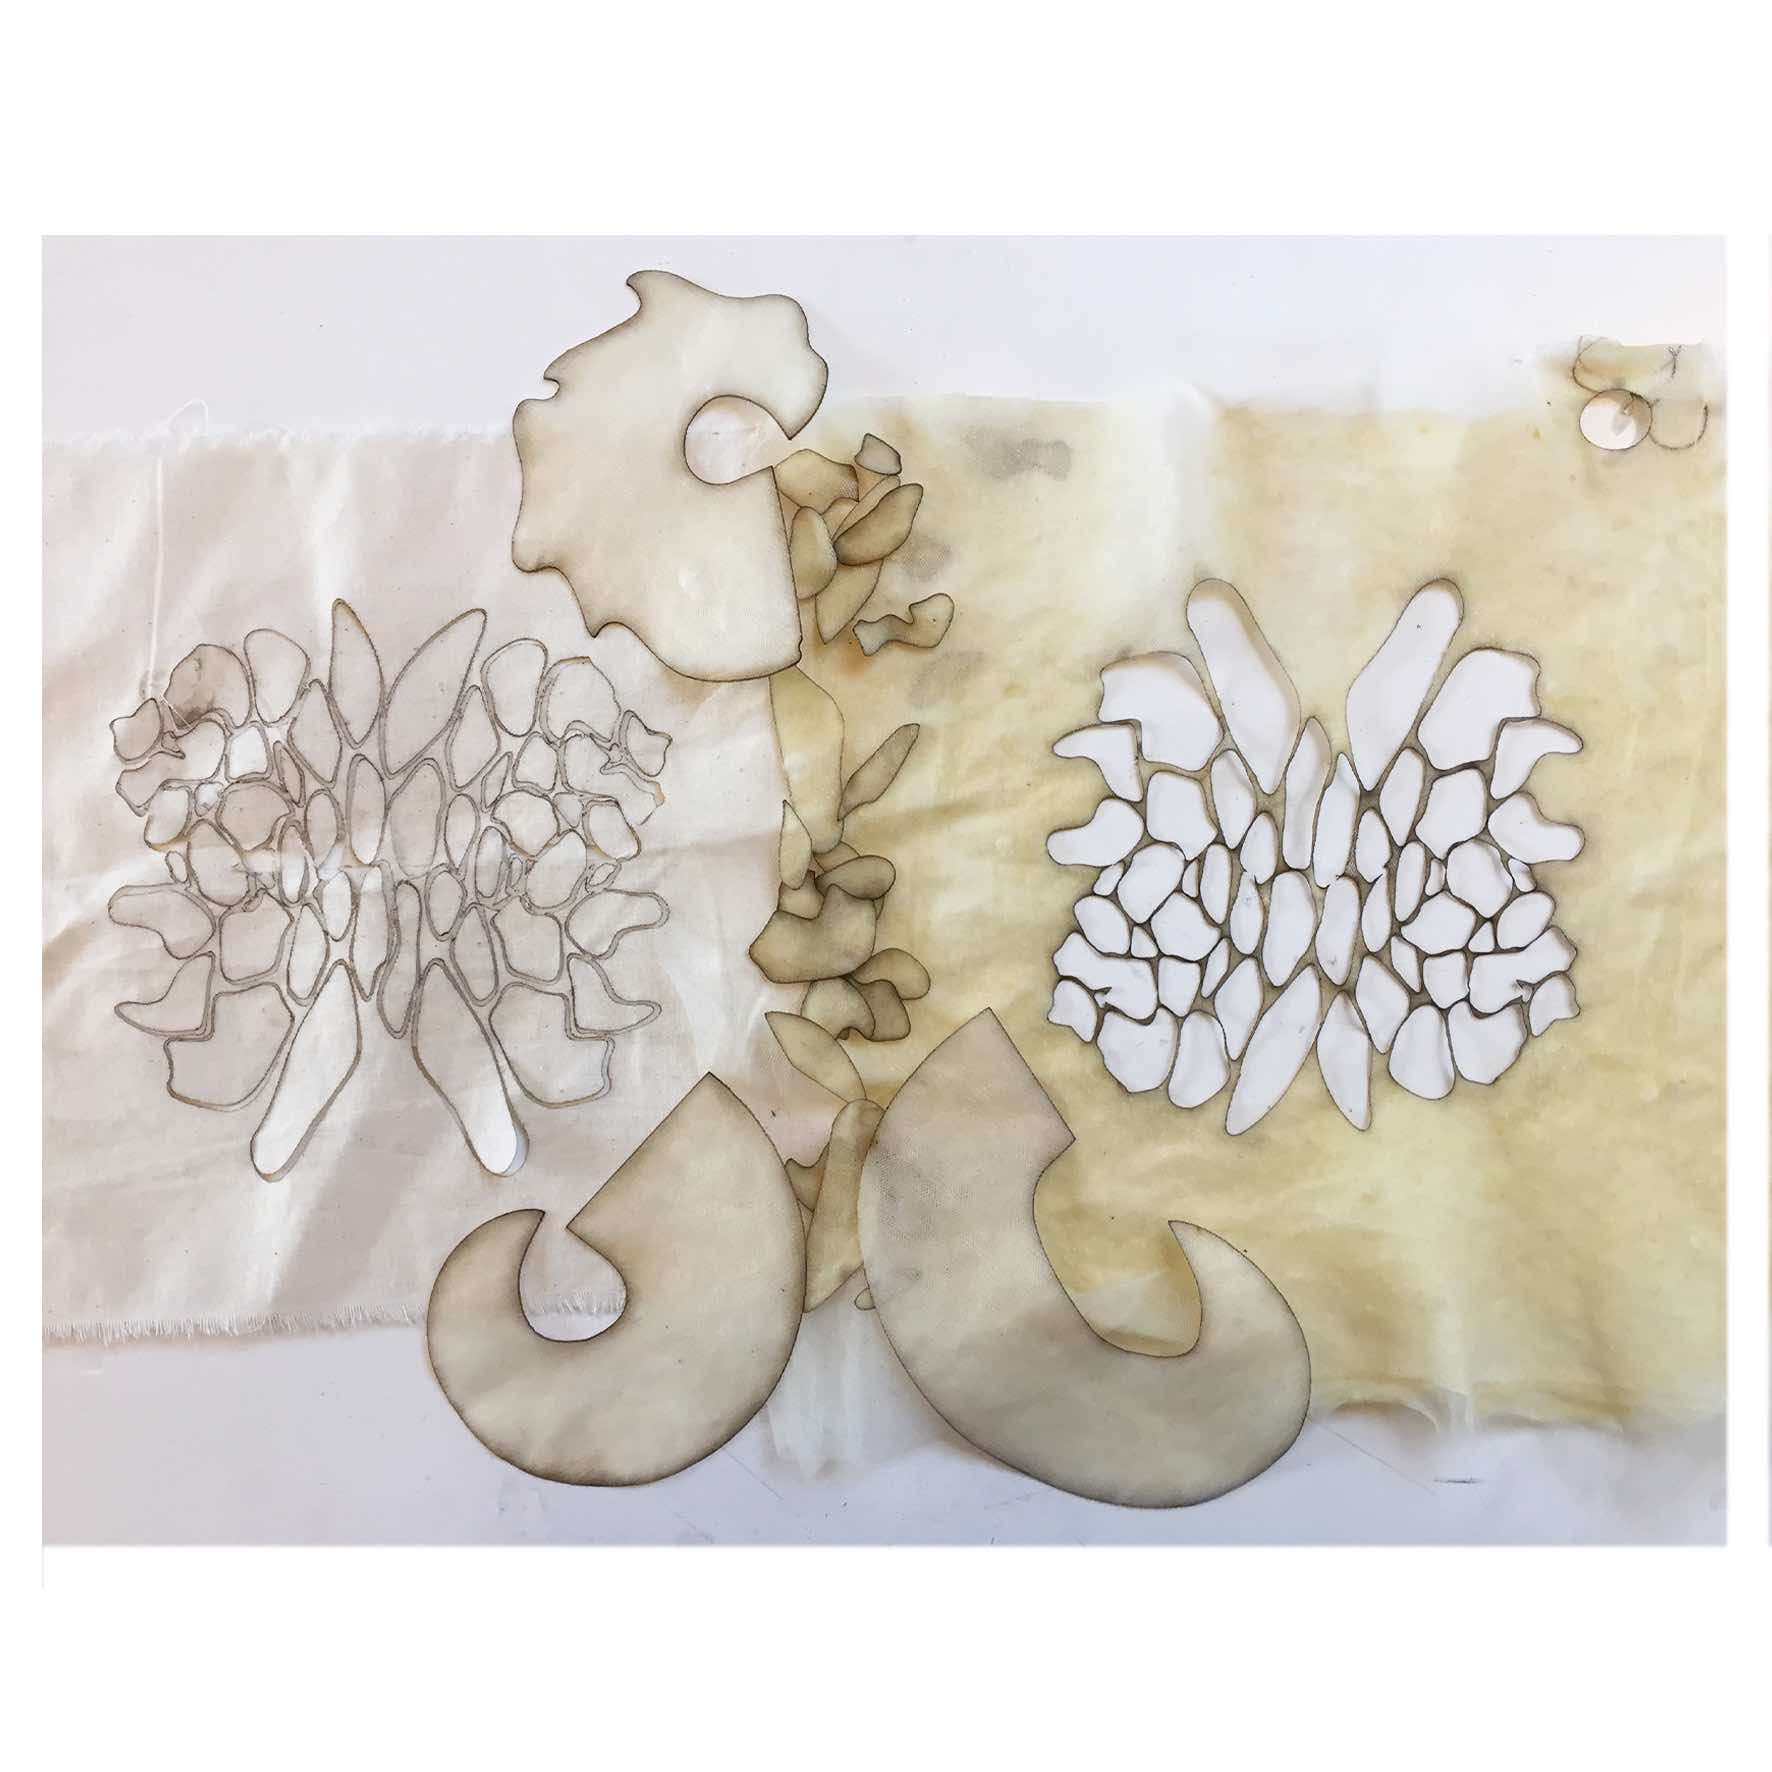
-> pattern mimic of a Rhodotus fungus

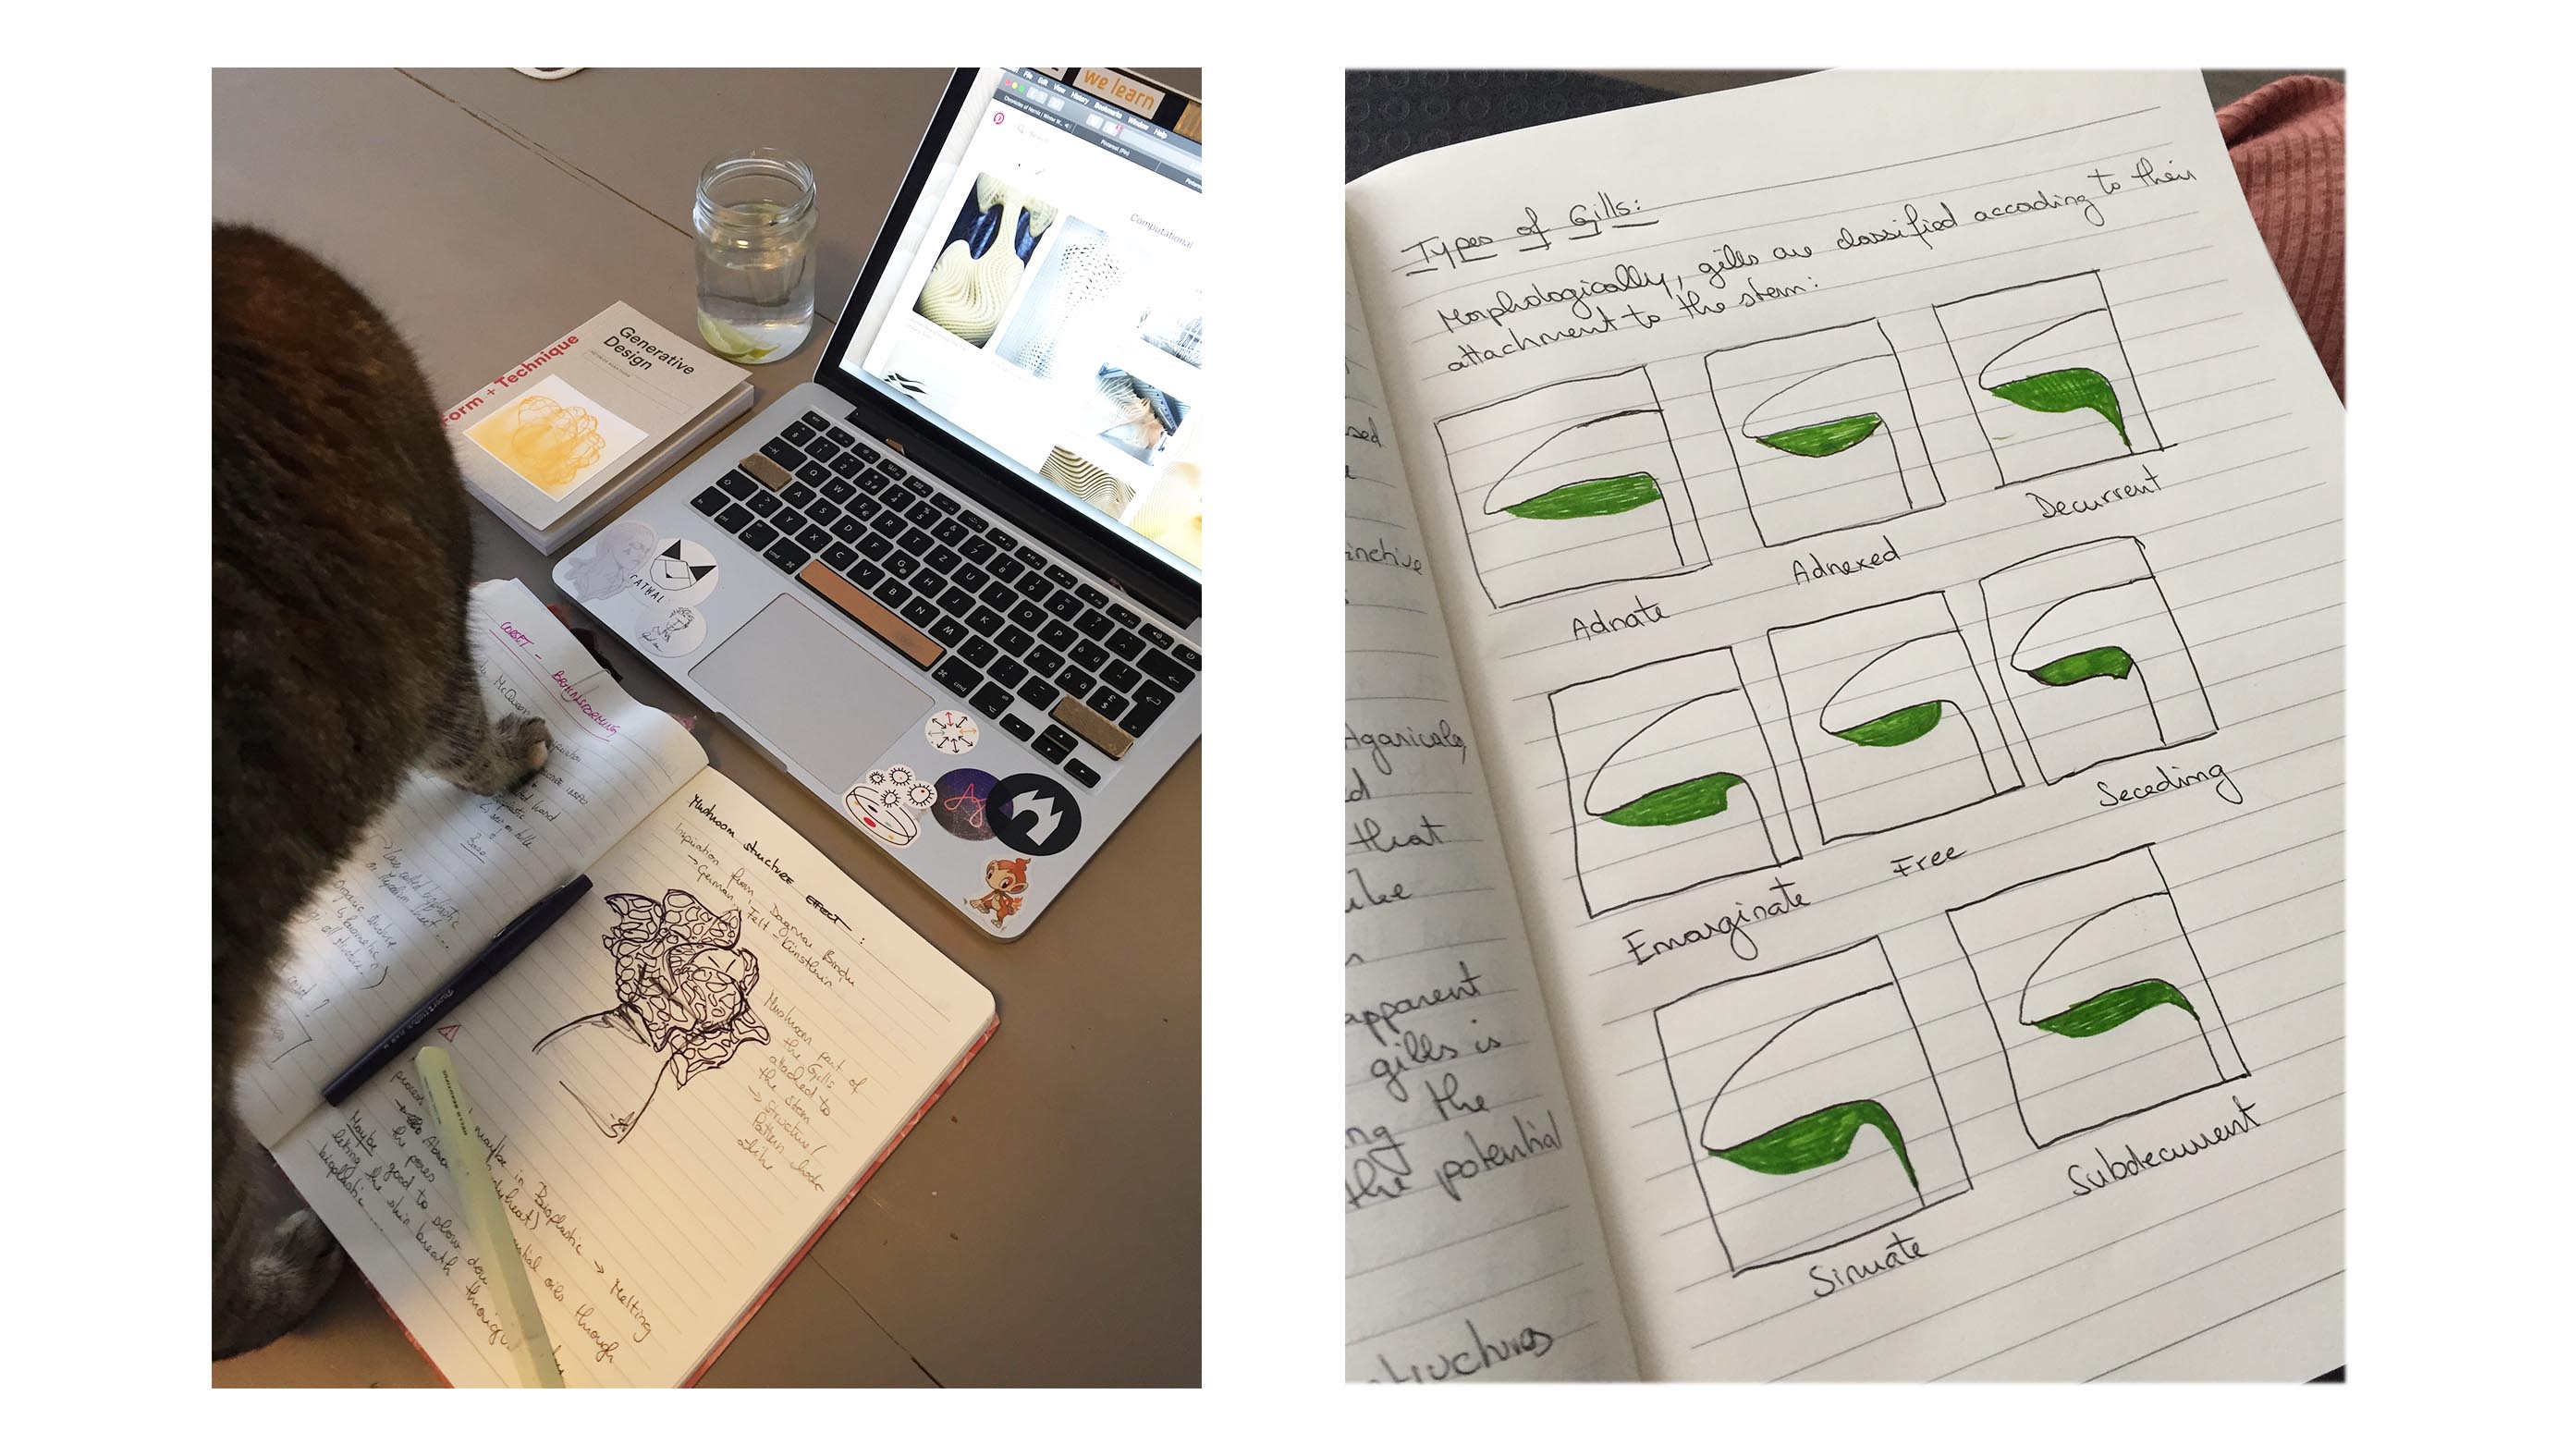
In the meantime, I thought it’s important to know more about fungi, their properties, species, and other elements..
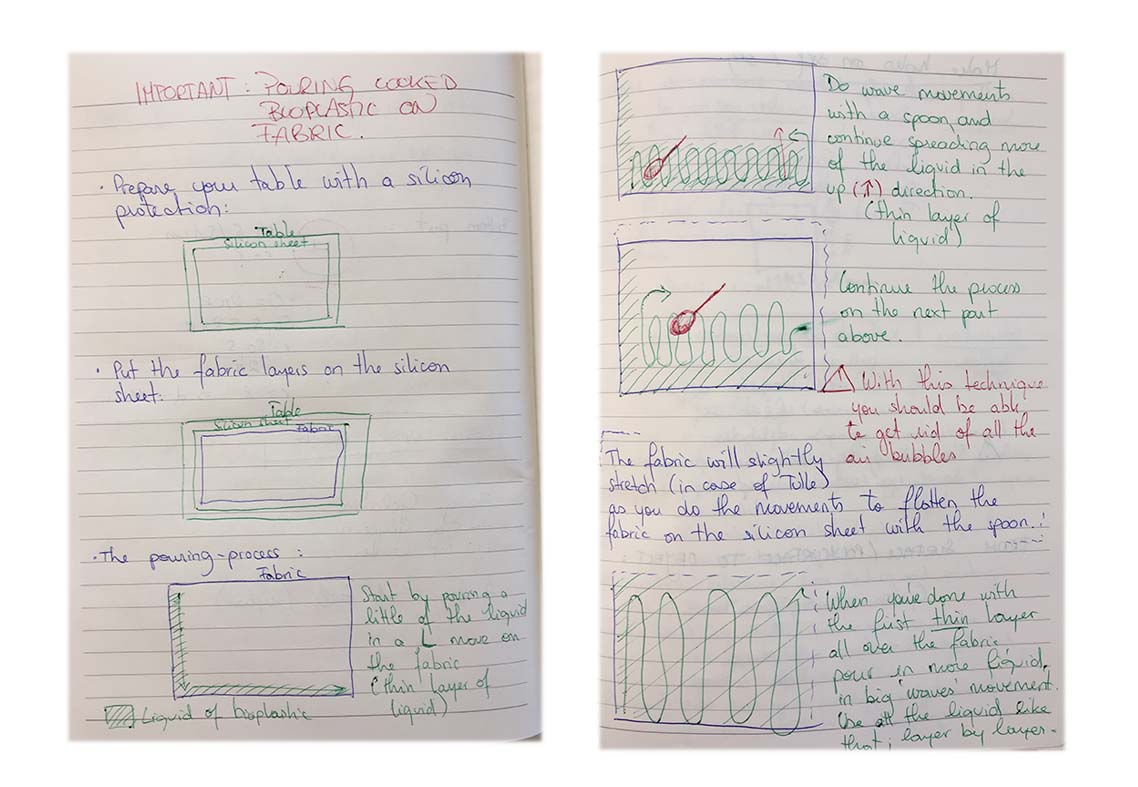
Pouring technique : Biolpastic on fabric#
Draping Corset#
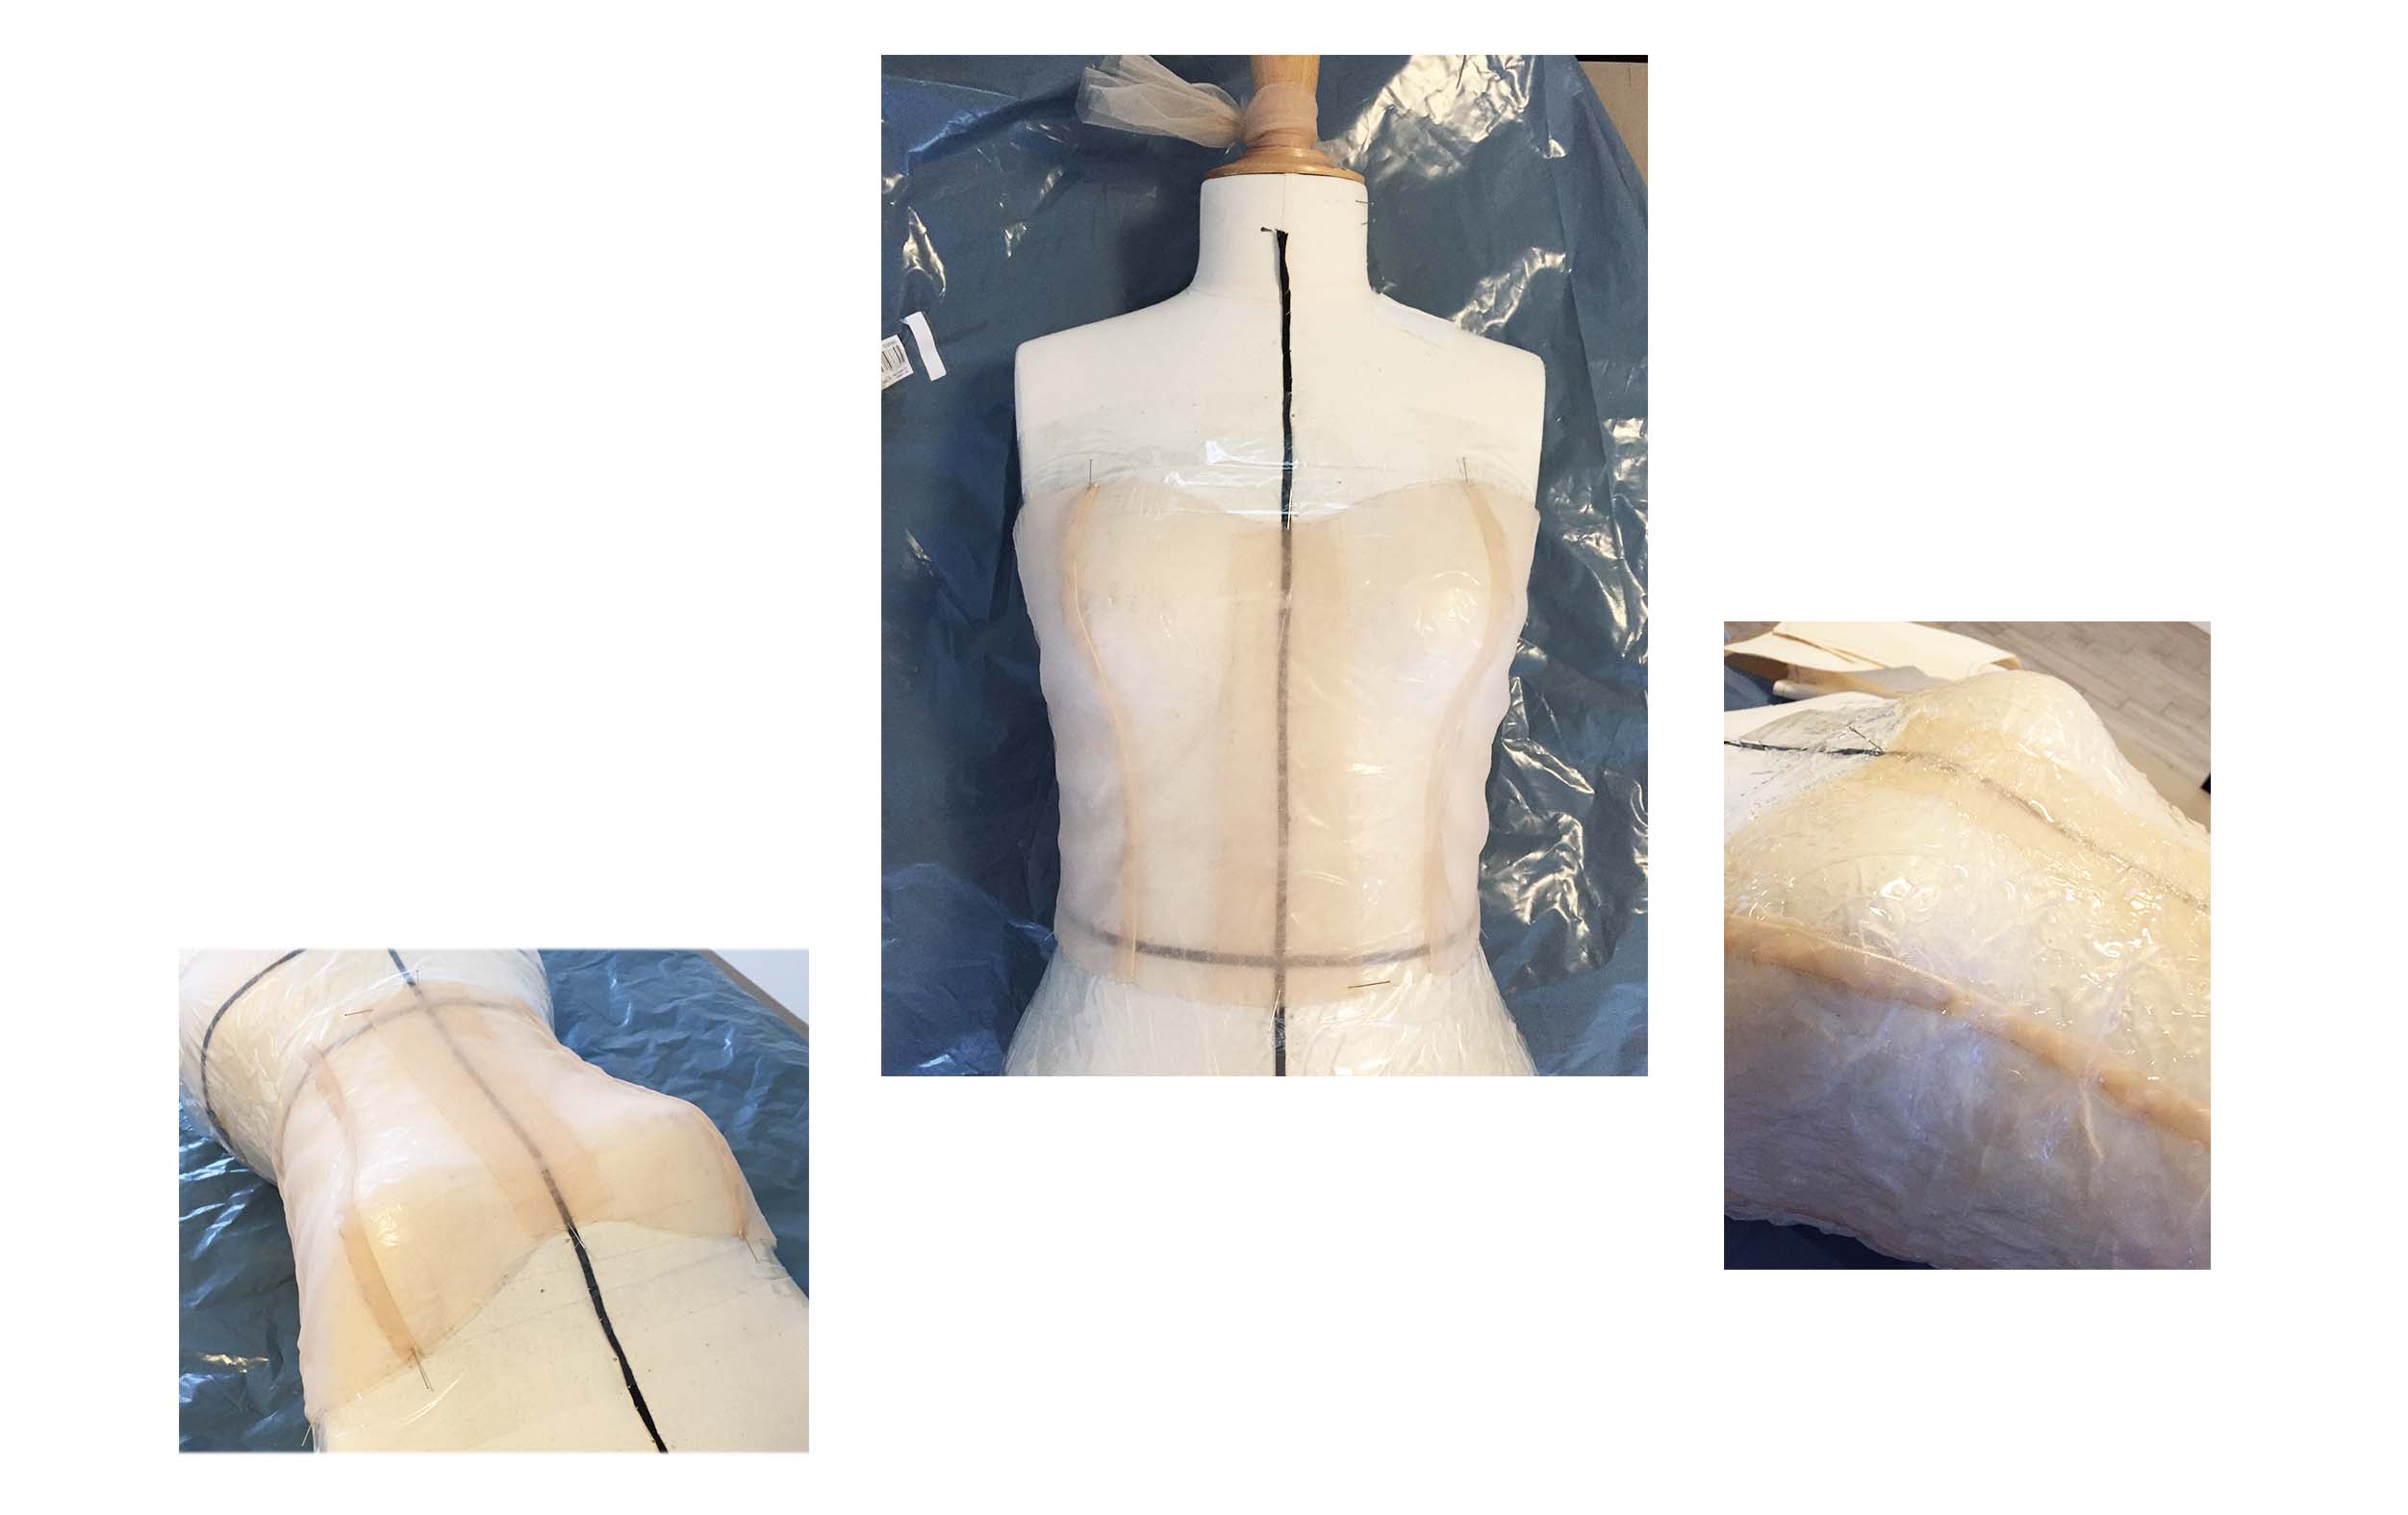
On the last week of January, I started draping the BASE of the corset on my mannequin. Even though I’d like to do bioplastic corsets, I will need a base stitched in tulle as I will cast the bioplastic directly on the tulle base, on my mannequin. I’m thinking of doing a two-layered bioplastic corset where the first layer is a soft and second layer hard ( structure - boning of the corset ), that’s why I need to types of bioplastic formulas. The hard one will be inspired by my previous Scaffold assignment :
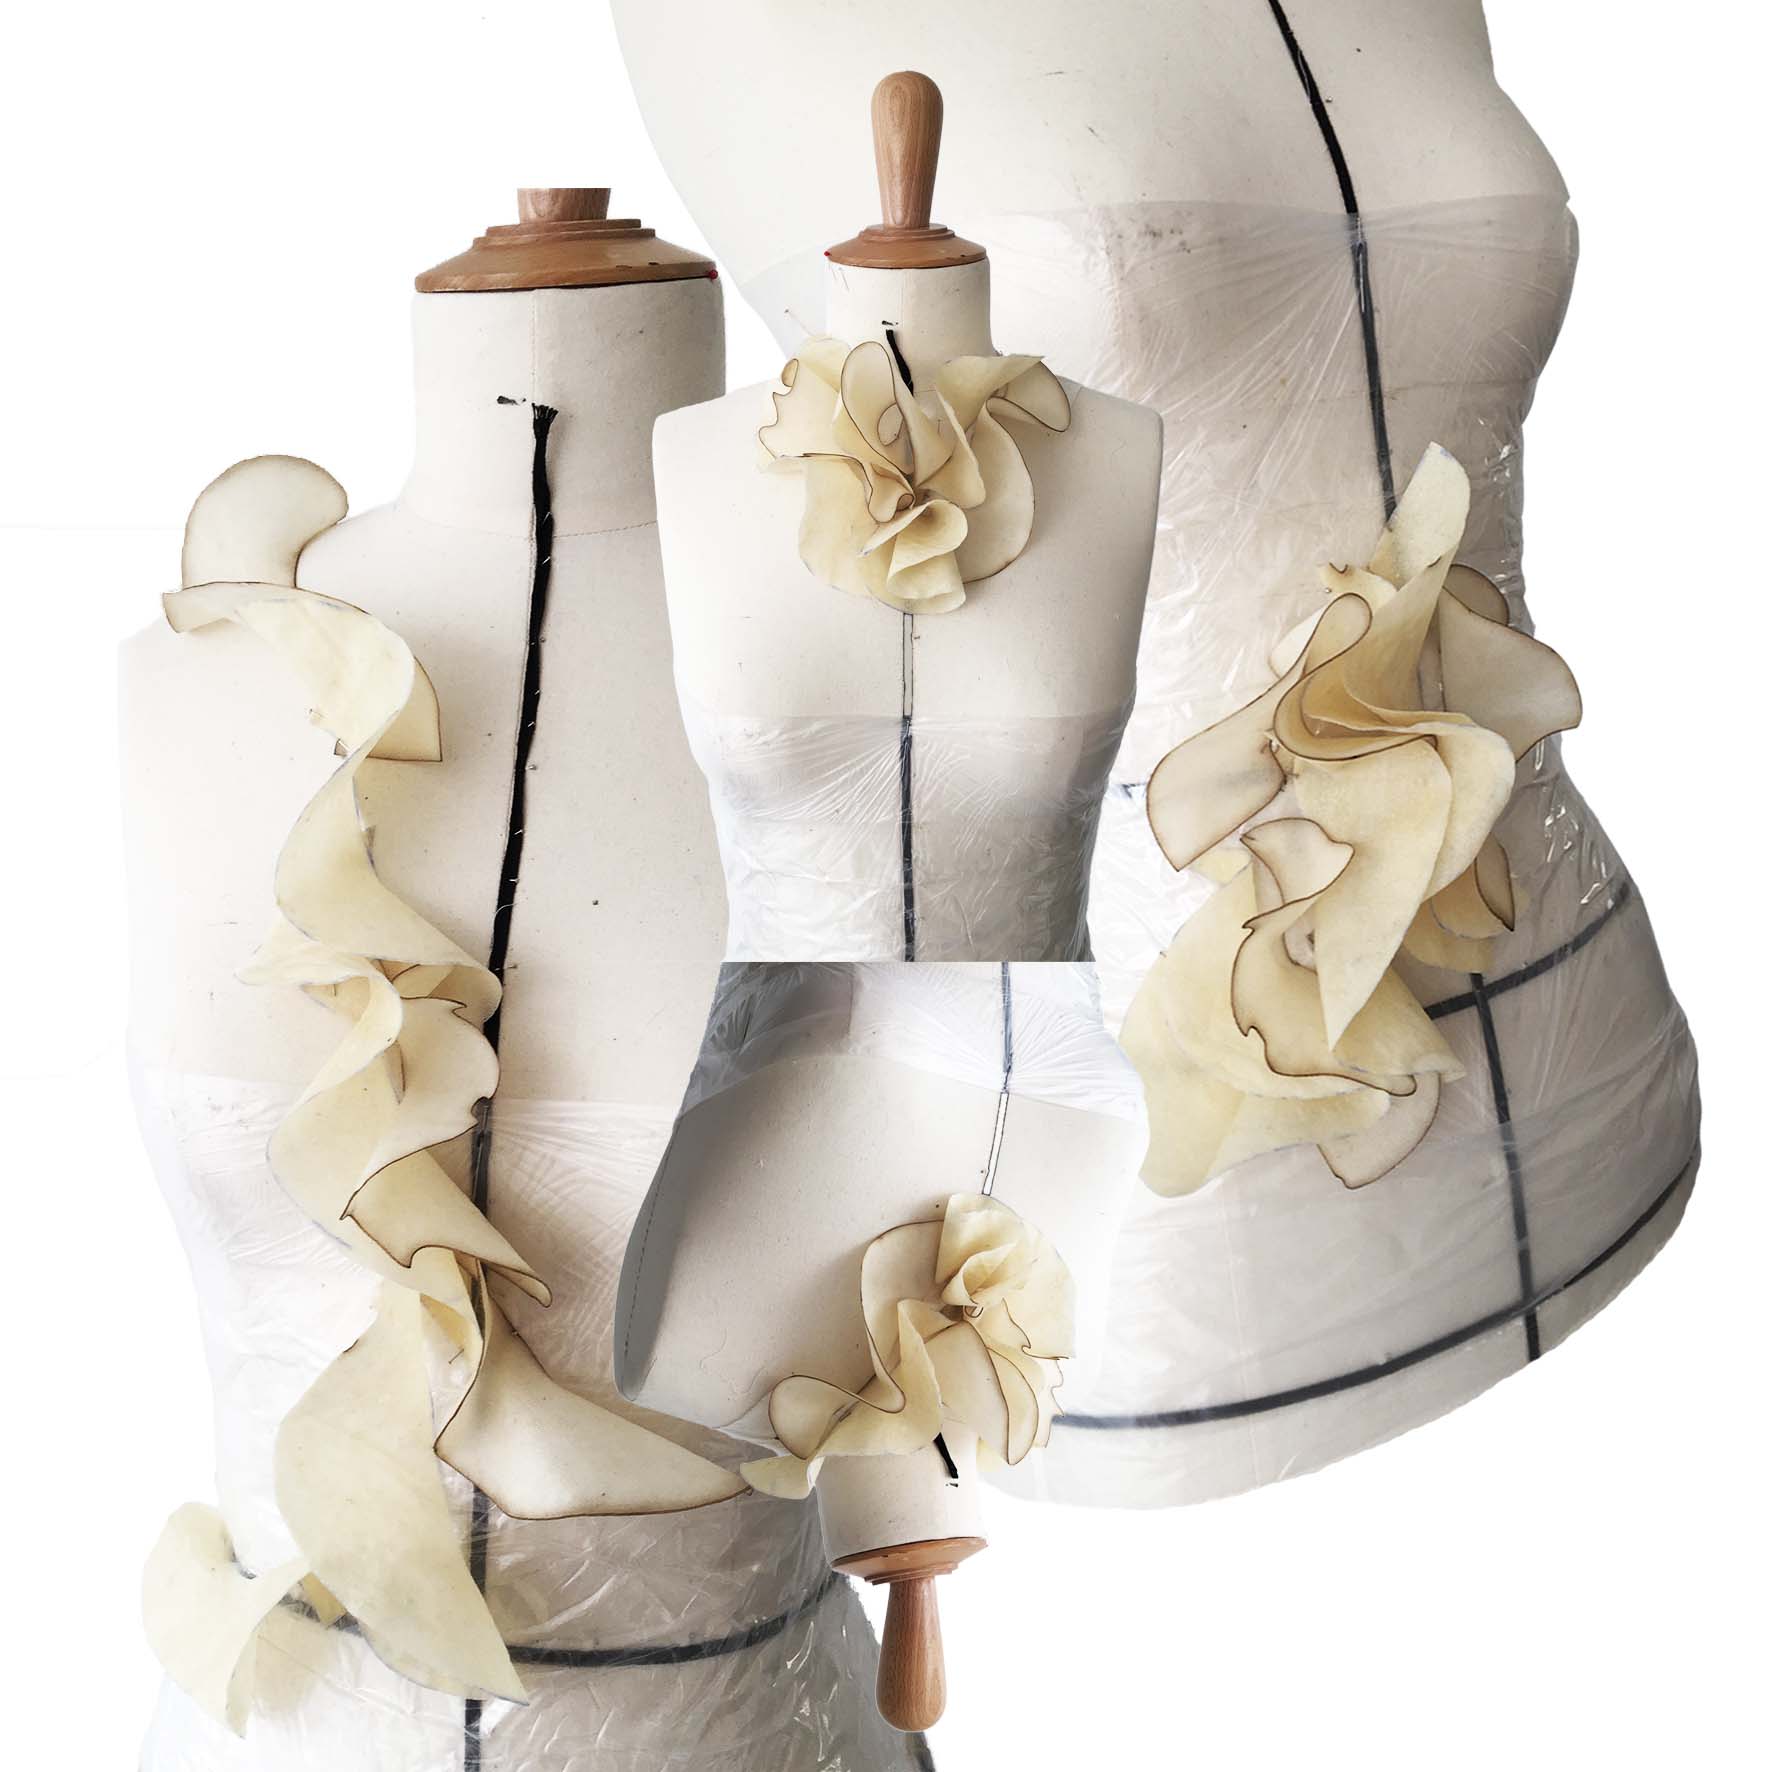
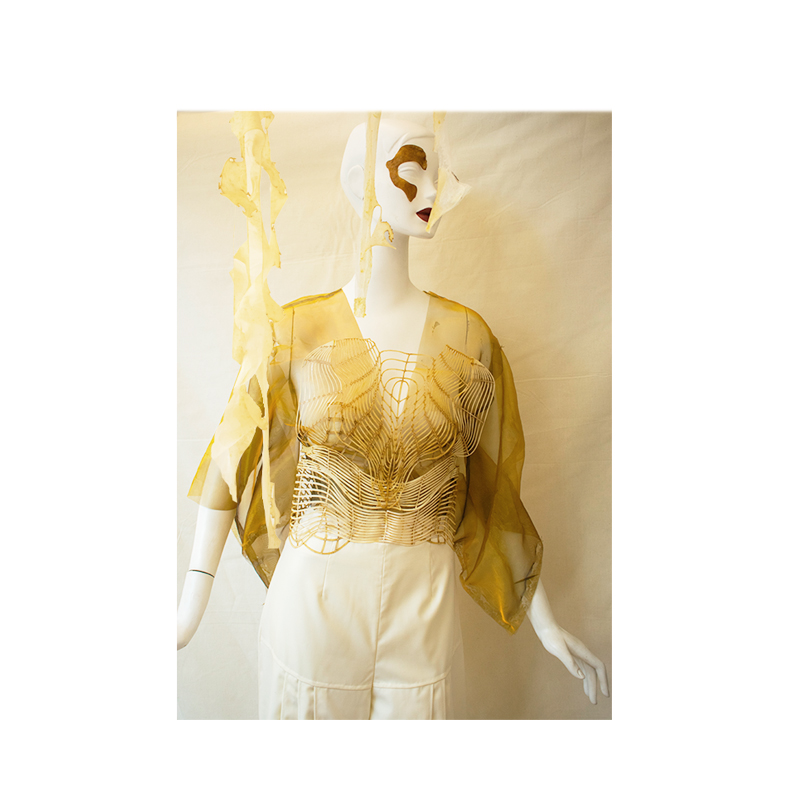
Bioplastic fungus draping#
Starting to drape some of the lasercutted bioplastic pieces to create fungus-like shapes/effects on the mannequin..
Next..#
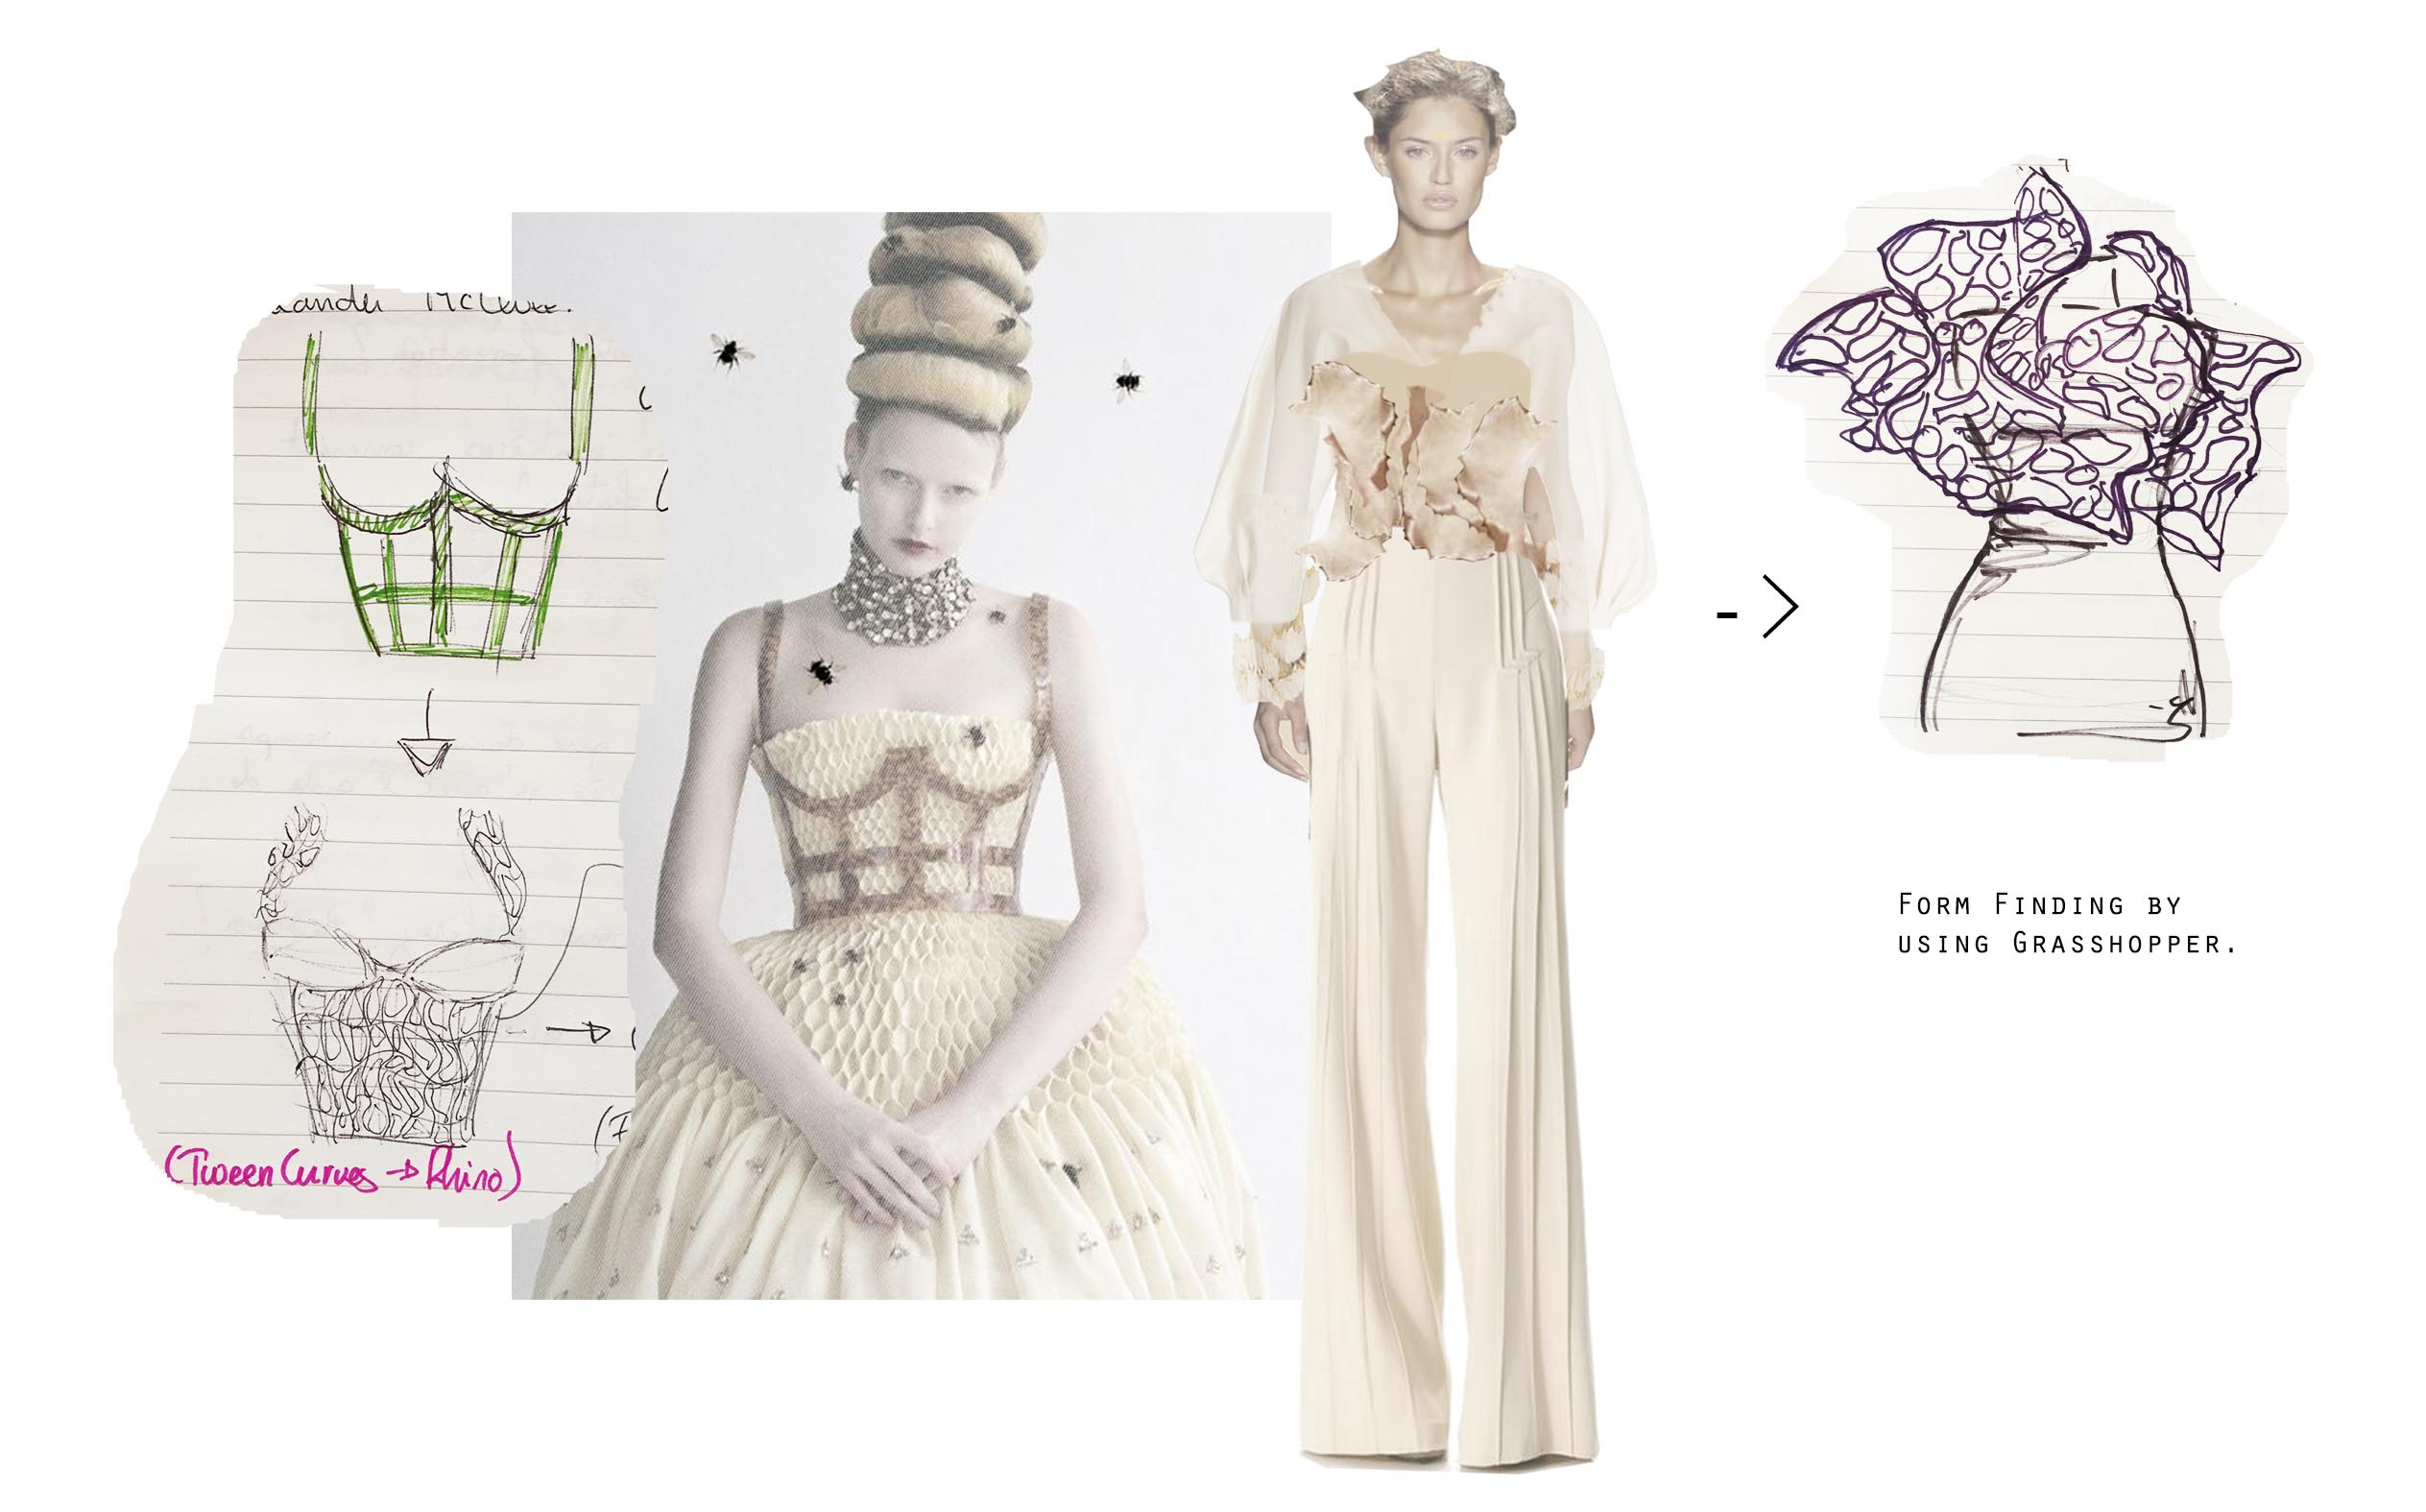
Next I will research on computational form finding for the mushroom designs and two of the garments that I’d like to have an interlocking assembling system.. I’m gonna do some exercises on Grasshopper and illustrator and do some tests this week and next week. A little preview of an idea i sketched previously:
I started by creating a pattern on illustrator of distorted lines. I want to try this pattern out as being the boneing of the corset. It’s made out of gelatine bioplastic, because this recipe get harder than the agar one. Recipe :
- 45g Gelatine
- 10g Glycerin
- 240ml water
After cooking it for 25mins, I poured it slowly on 4 layers of nylon tulle. Let it dry for 2-5 days and lasercutted the pattern.
Lasercut machine settings :
Speed Power Corner power
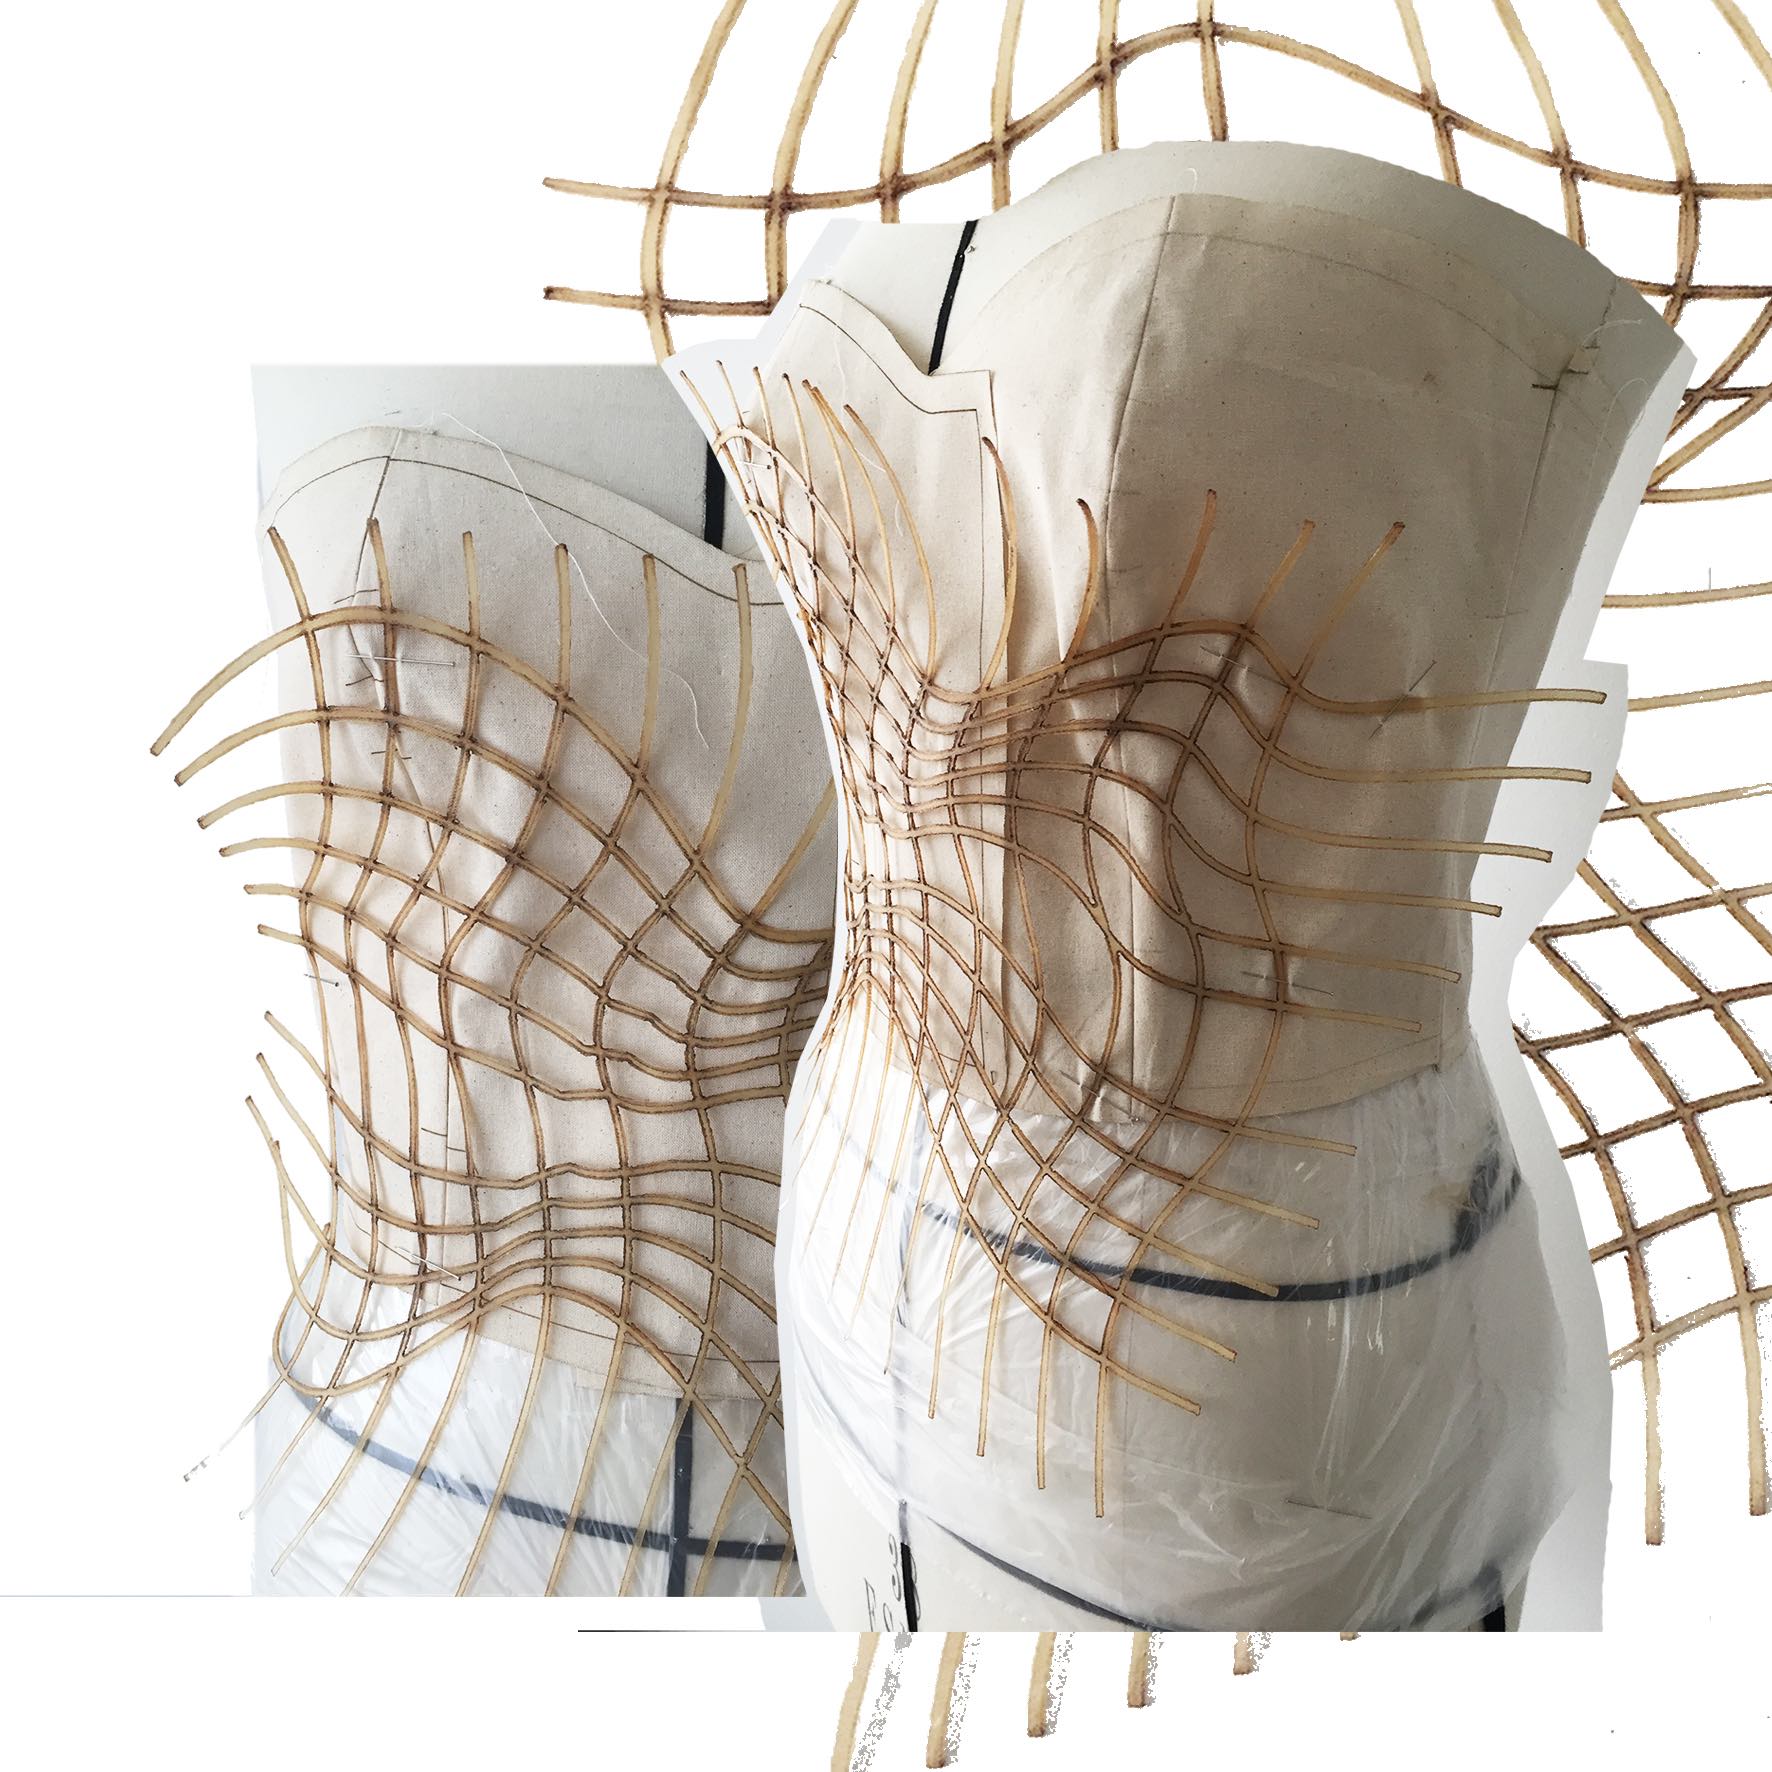
After, I placed the piece on the mannequin in different positions to find a suitable placement I could continue to work on.
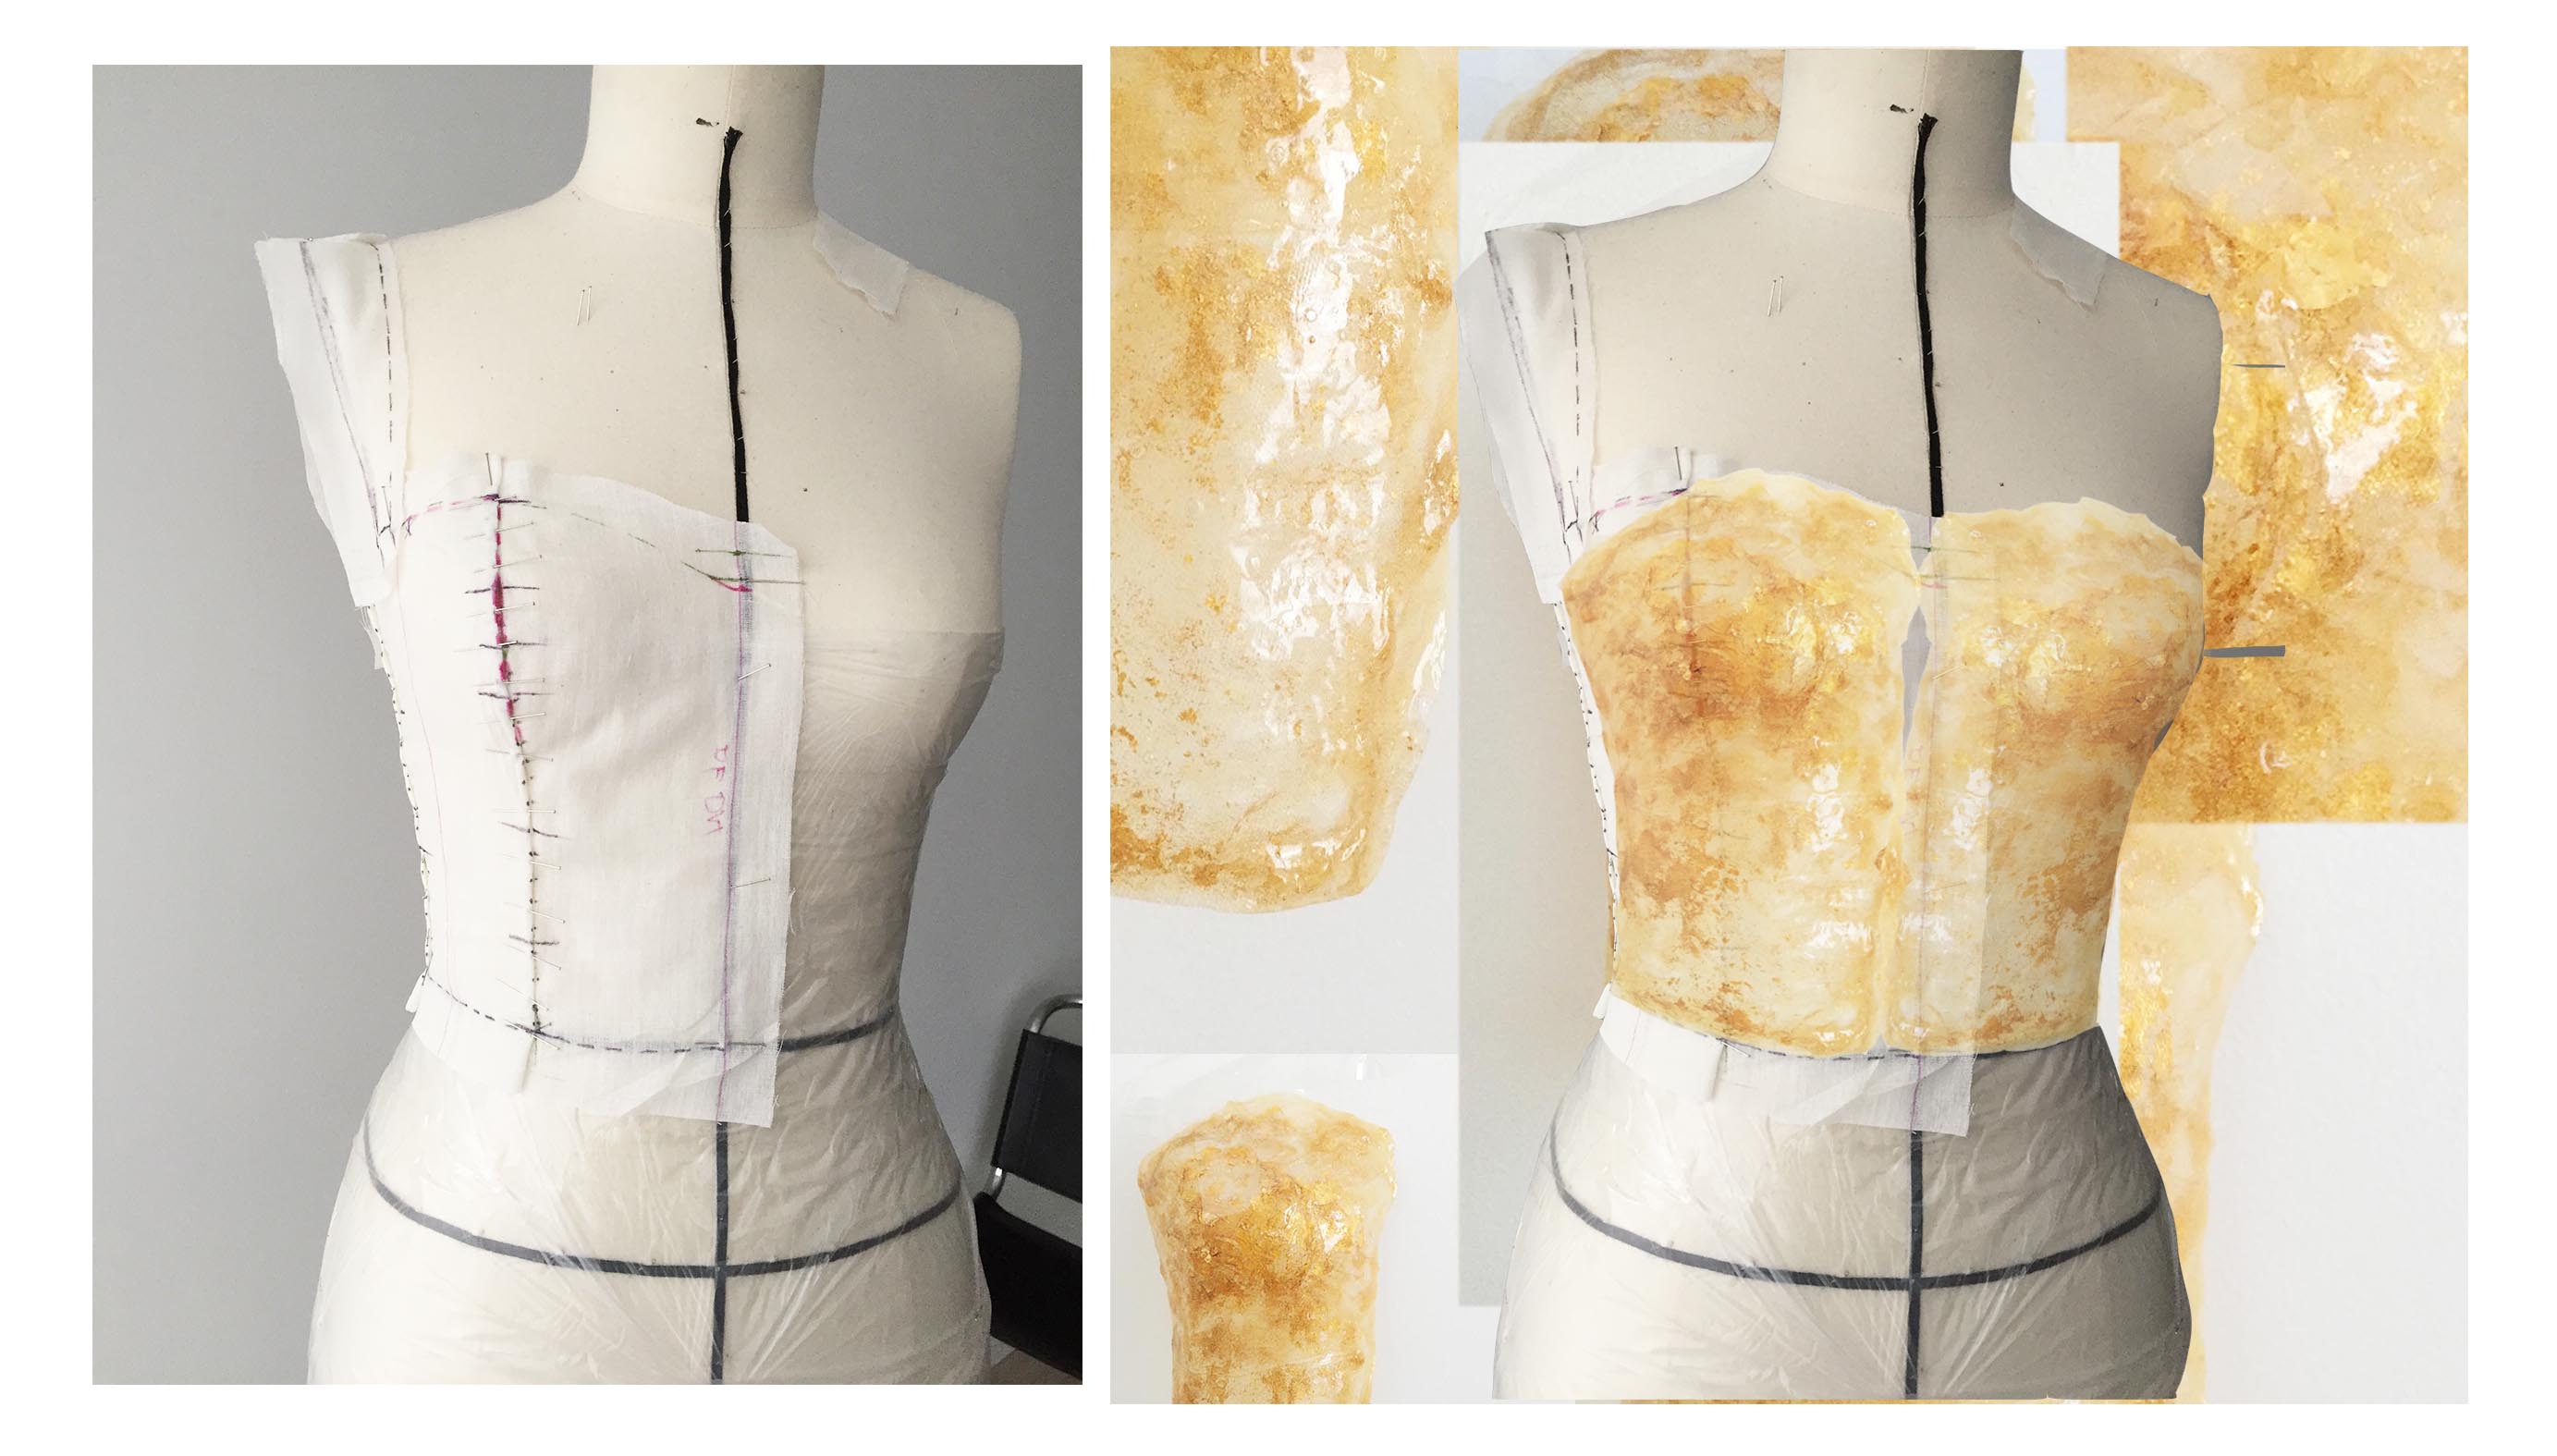
Garment : Corset|Bioplastic#
I finally started with the first bioplastic corset. I had to create the right templates first, and then I lasercutted the tulle pieces (2-3 layers stitched together as the base of the corset), before pouring the bioplastic.
Agar bioplastic recipe :
- 5g Agar powder
- 15g Glycerine
- 240ml water
- 10 drops of essential oil ( of your choice )
Of course, I could only do the front for now, as it needs to dry for a few days.. I actually did 3 layers of the recipe on the front part so far.
In the meantime, I continue researching for other patterns I could lasercut on the hard bioplastic as boneing. Currently trying out different Grasshopper codes in Rhino. Trying out a Voronoi pattern :

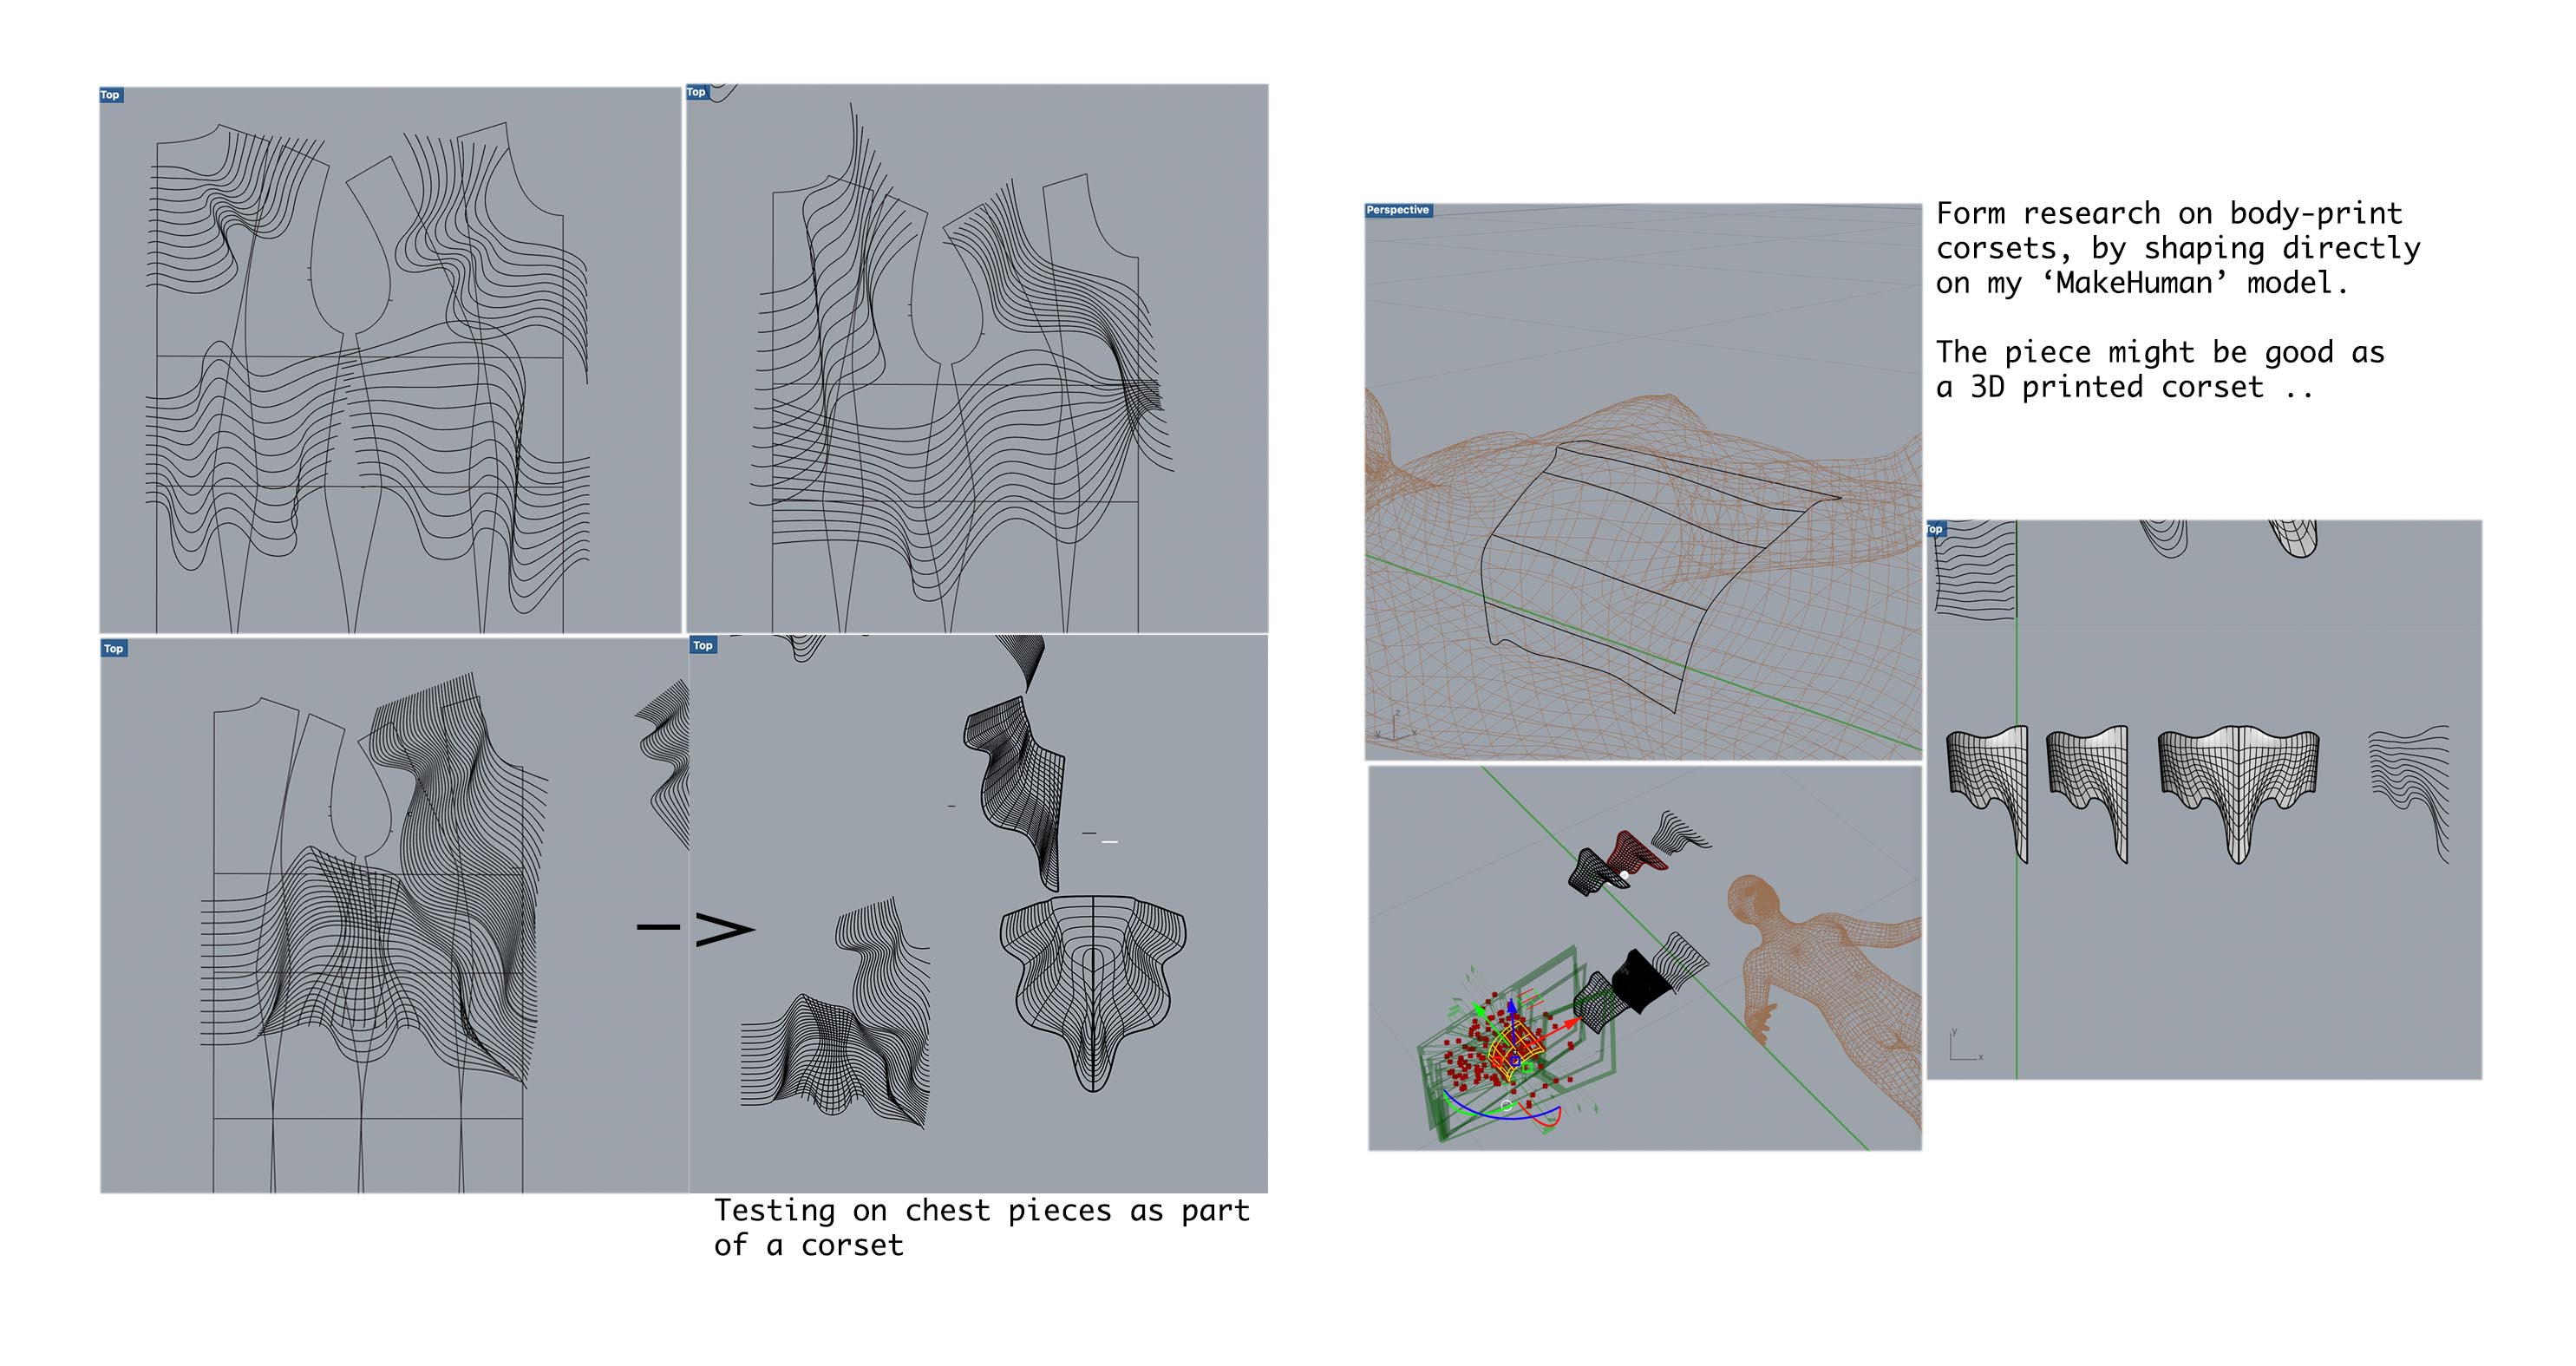
End of Fabruary : I start to do visual research on my ‘MakeHuman’-model in Rhino to see how I could play with the ‘game of distorted lines’. And I was thinking to go for a 3D printed corset as my next design. So I modeled a few things still on Rhino again on my ‘MakeHuman’. Next, I will try out patterns in 3D modeled examples, generated by Grasshopper.
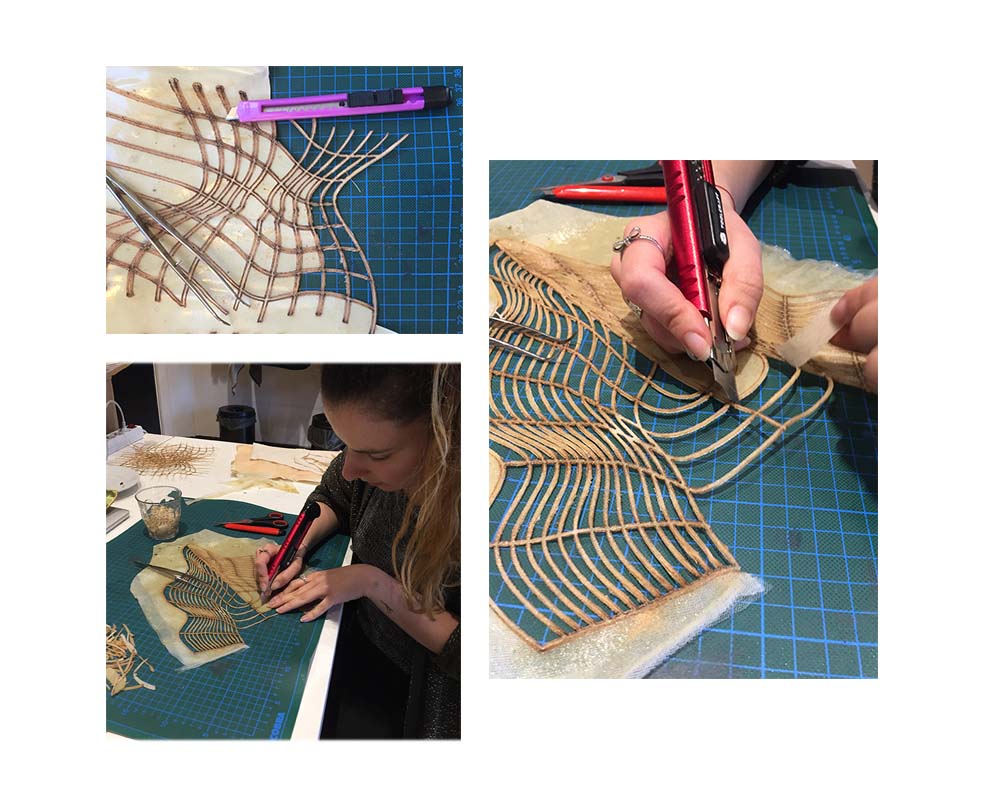
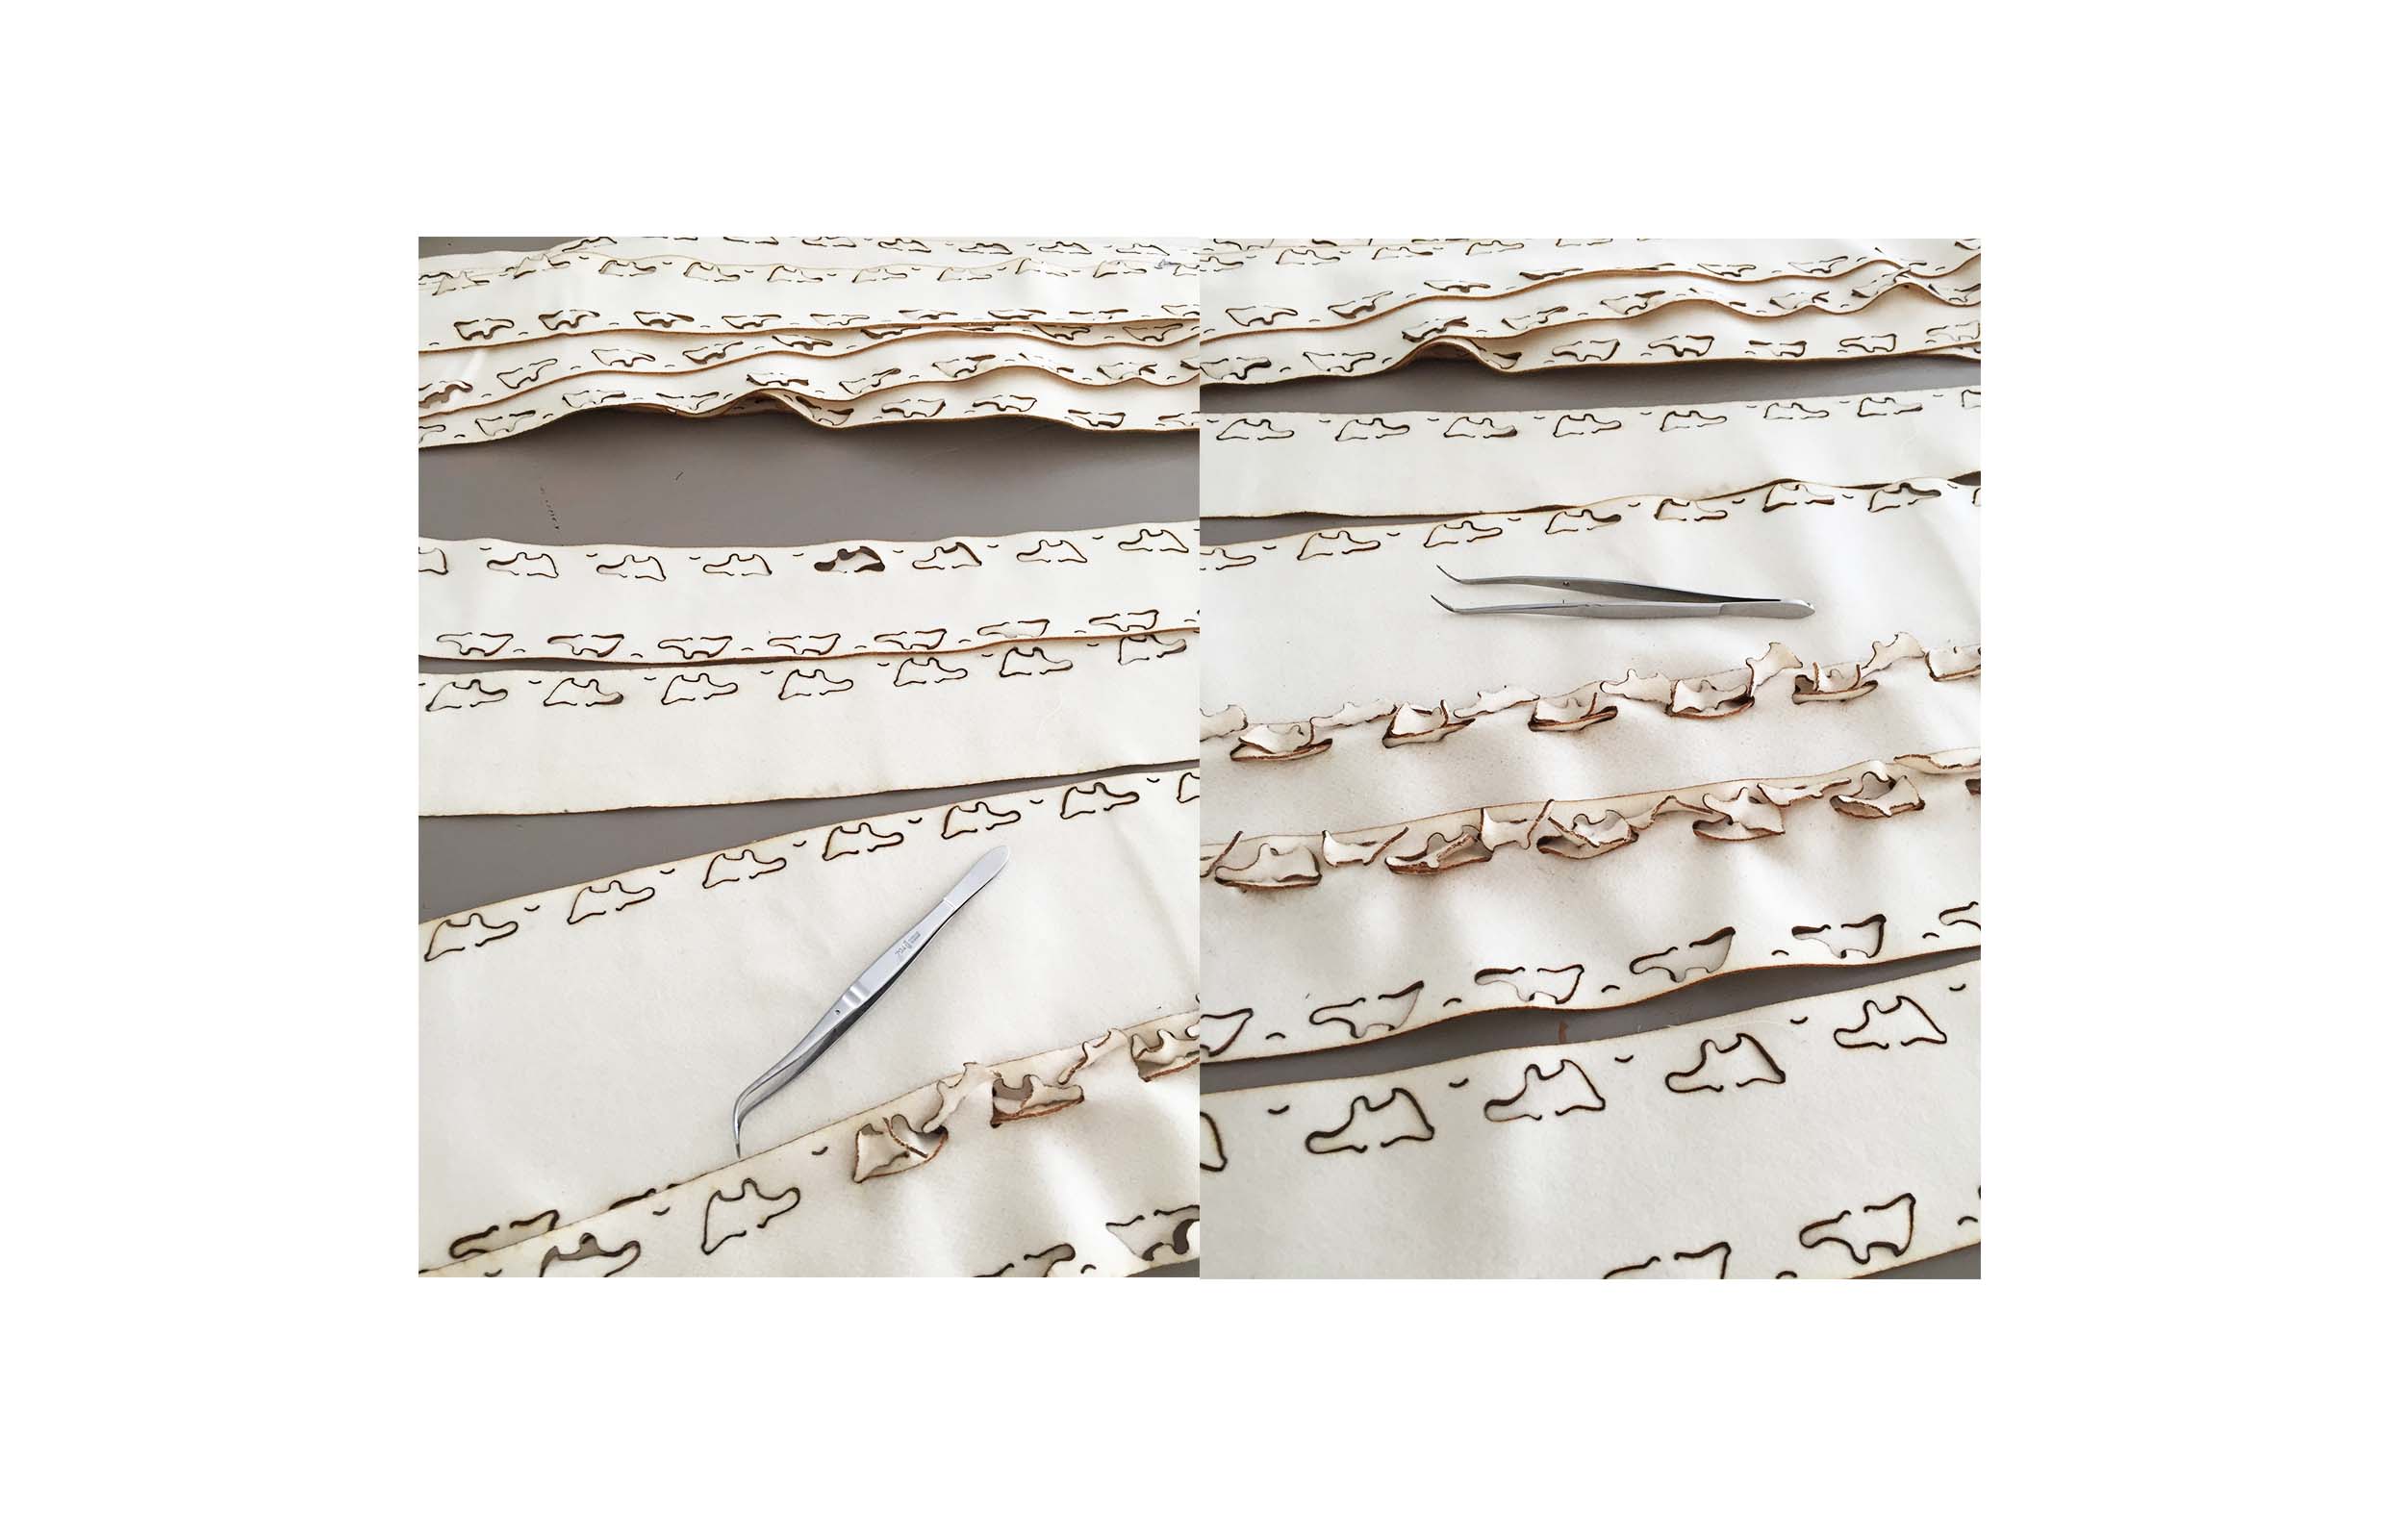
The lasercutted pieces had to be recut by hand. First, i found out that lasercutting on the side where the fabric is gives you less burn on the ‘clean’ side. But in order to not get too much of the bioplastic burned, it’s best to cut by hand the last thin layer of the lasercut path ( that is on the ‘clean’ side facing down when you lasercut ) It did takes a few hours to get it all done. I’d say 2-4 hrs/piece depending on the piece..
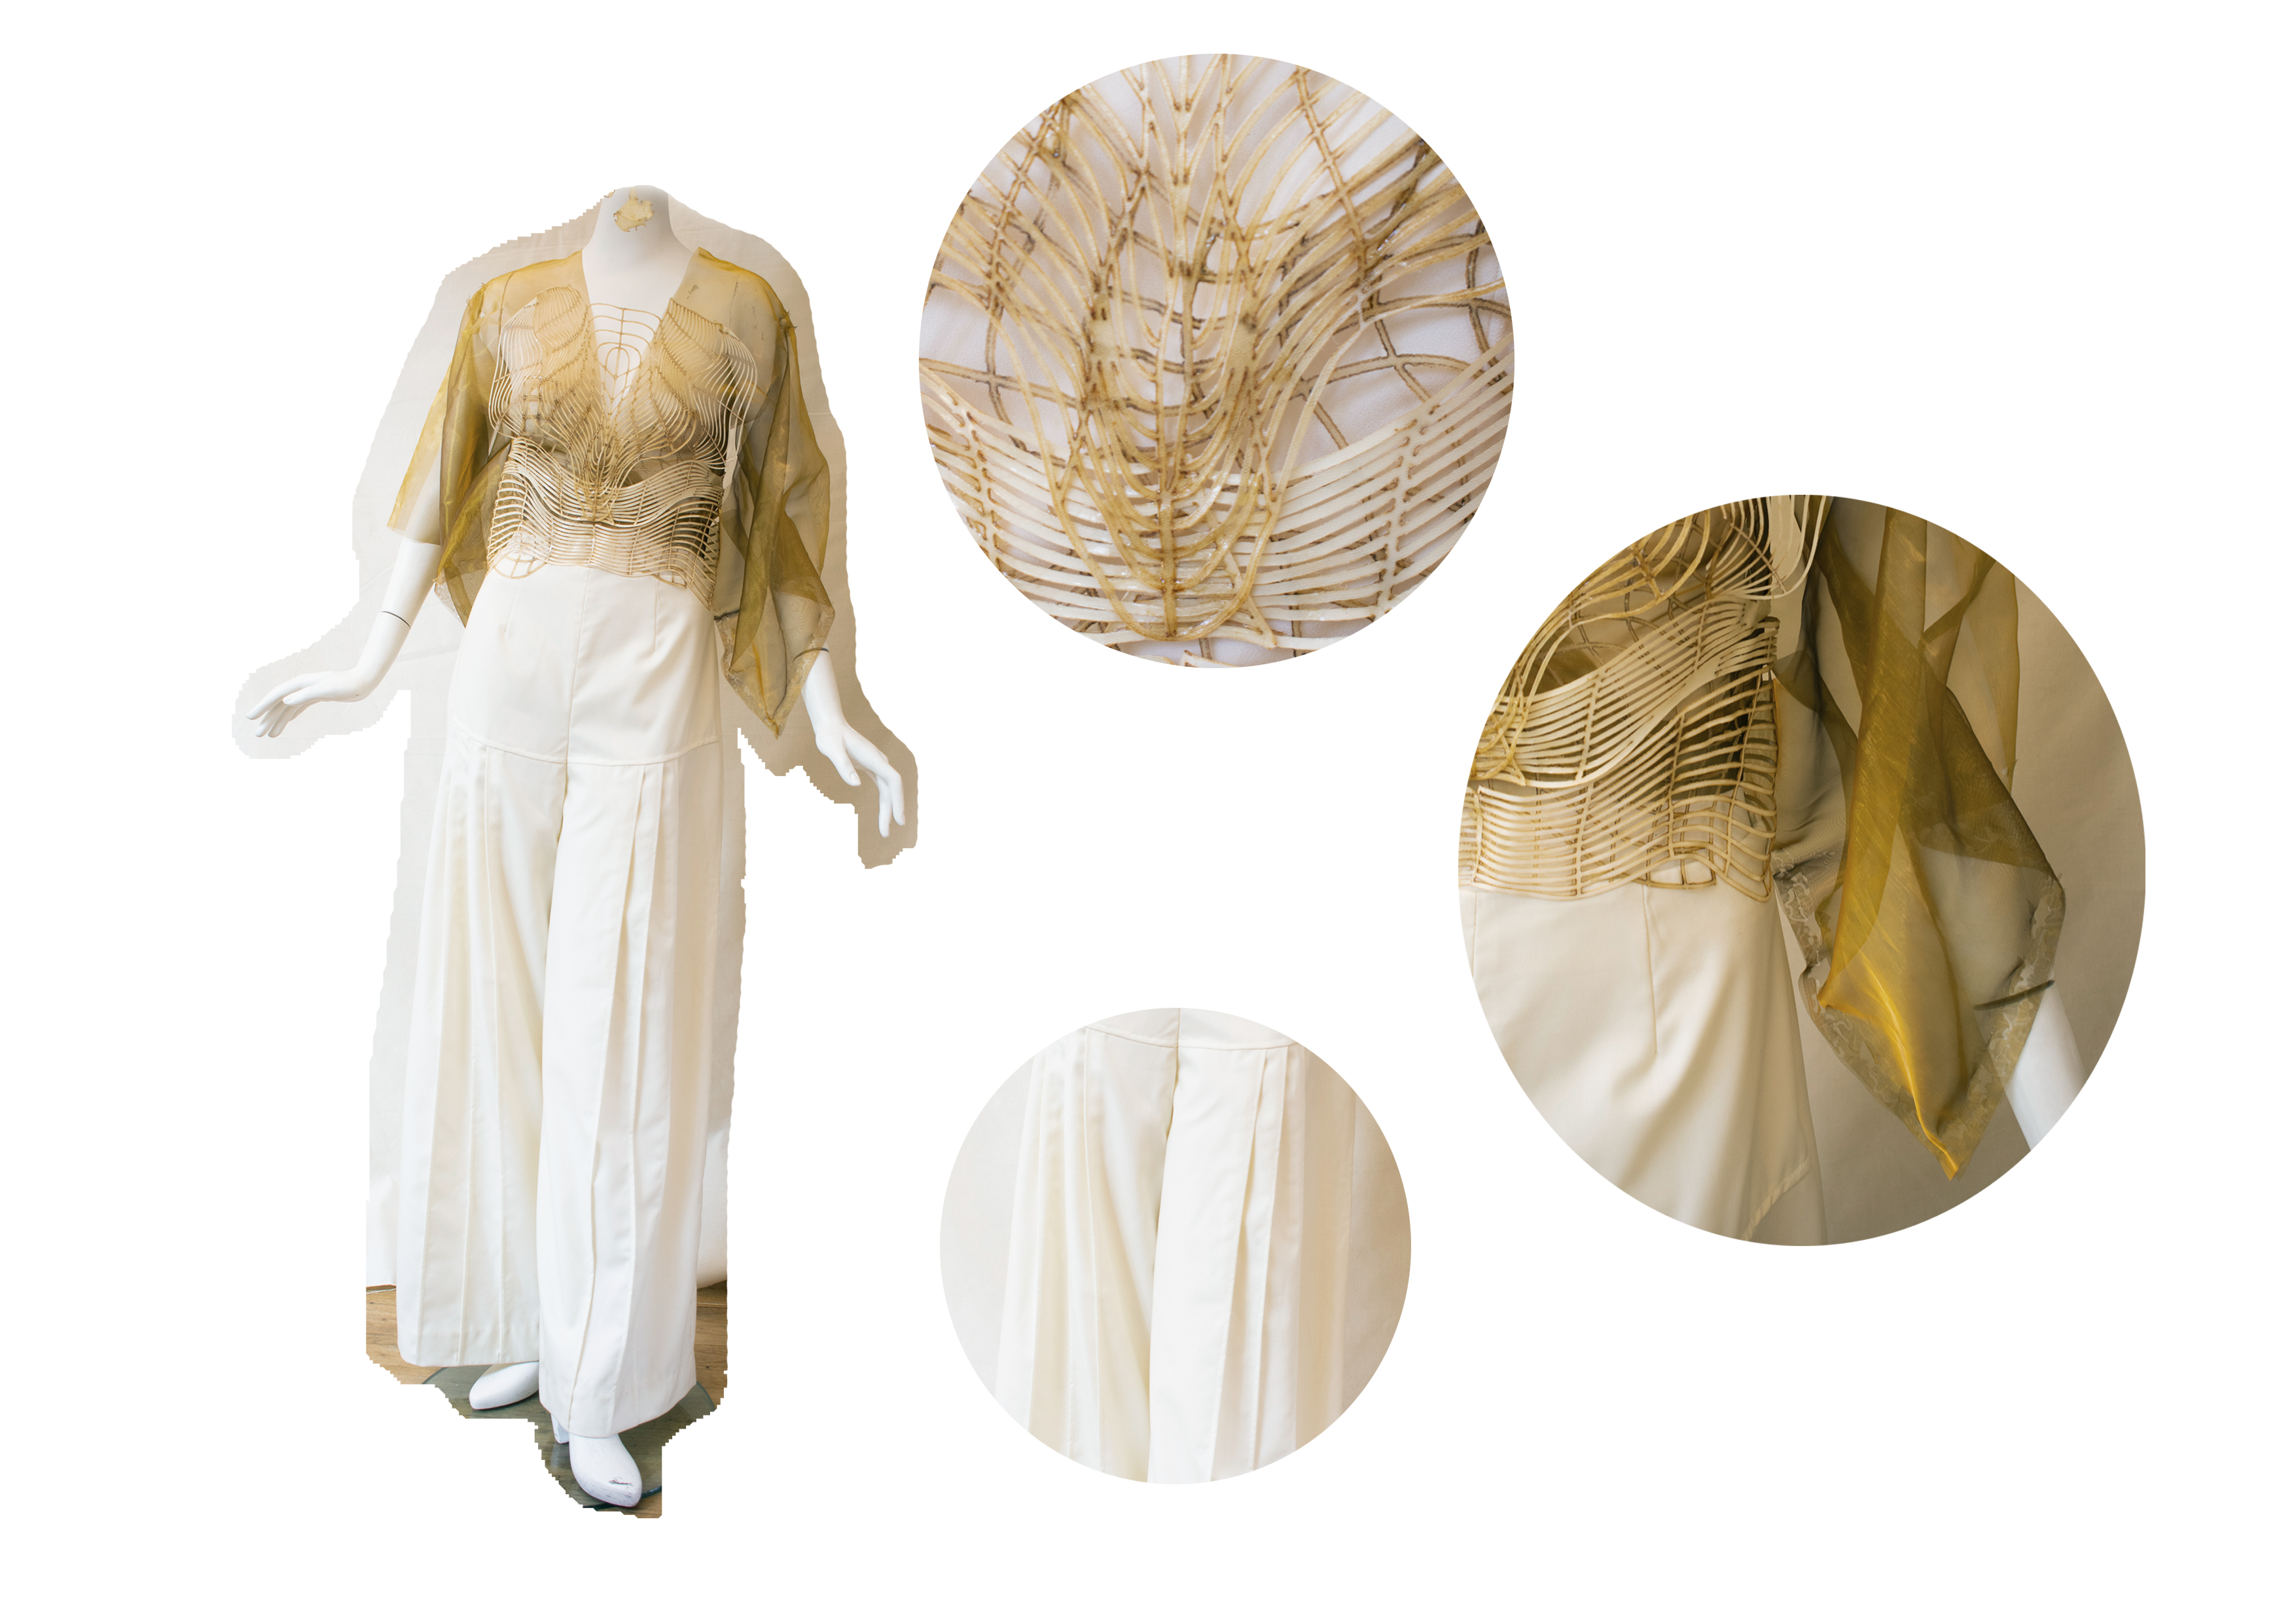
Lasercutted ‘distorted lines’ draping on mannequin :
I figured out the design of the corset by playing around on a 3D female body on Rhino 3D before the next steps.

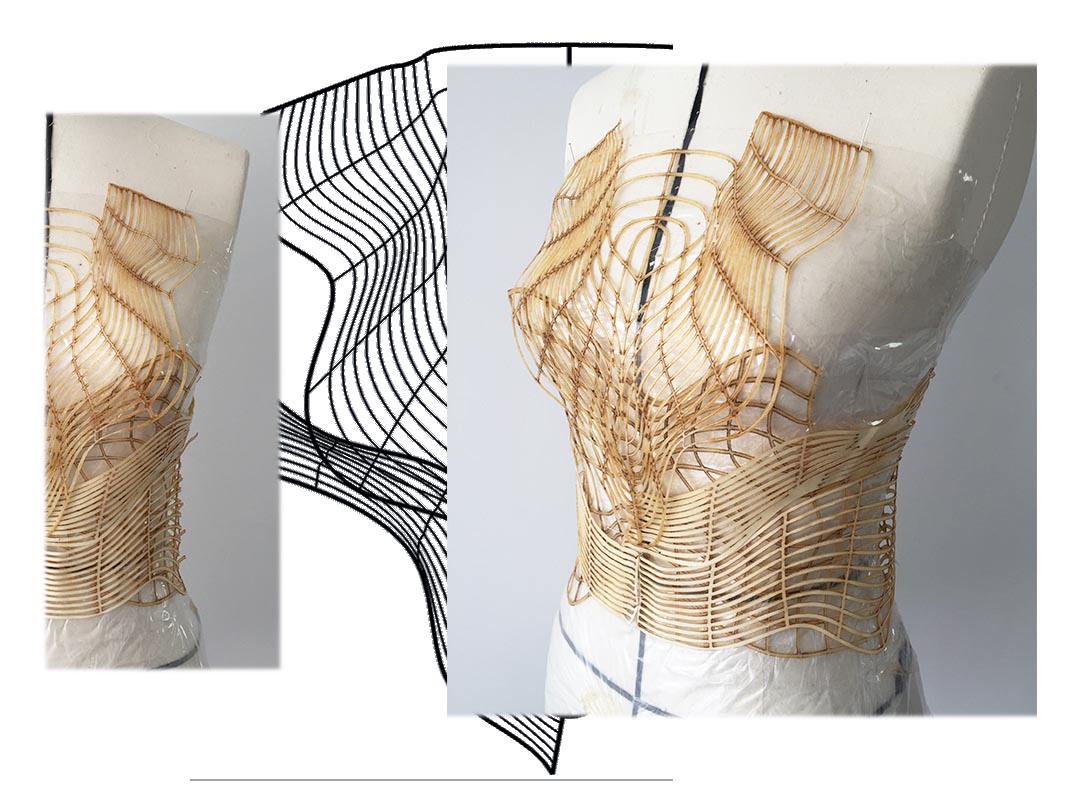
Finally, after draping them on mannequin I fixed the pieces with a few stitches and then glued everything together with warm liquid bioresin that I took from leftovers ( I microwaved the leftovers that I cut out).

Kimono modular top#
I got this golden fabric for 50 cents (2 meters of fabric ) at a Fleamarket ! I thought then to make a modular kimono-top out of it. I quickly made the digital files of the patterns and lasercutted it on the next day ( same modular technique and design as the modular bag ):
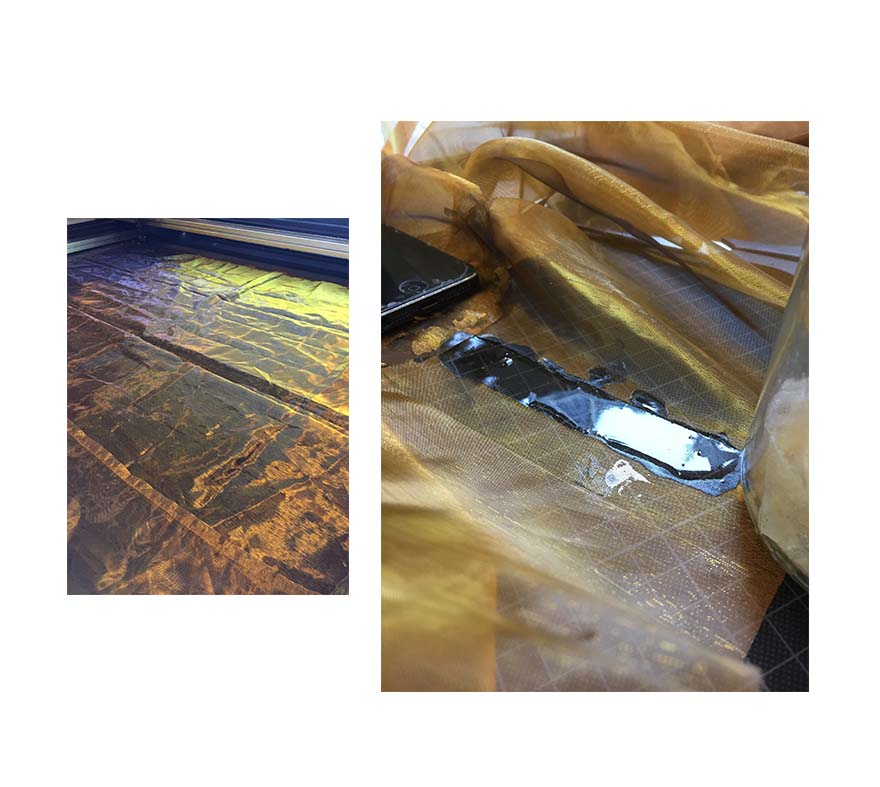
The shoulders seam is glued together with bioplastic leftover that I microwaved to get its liquid form and let it dry after pouring some on the fabric.
Final result :
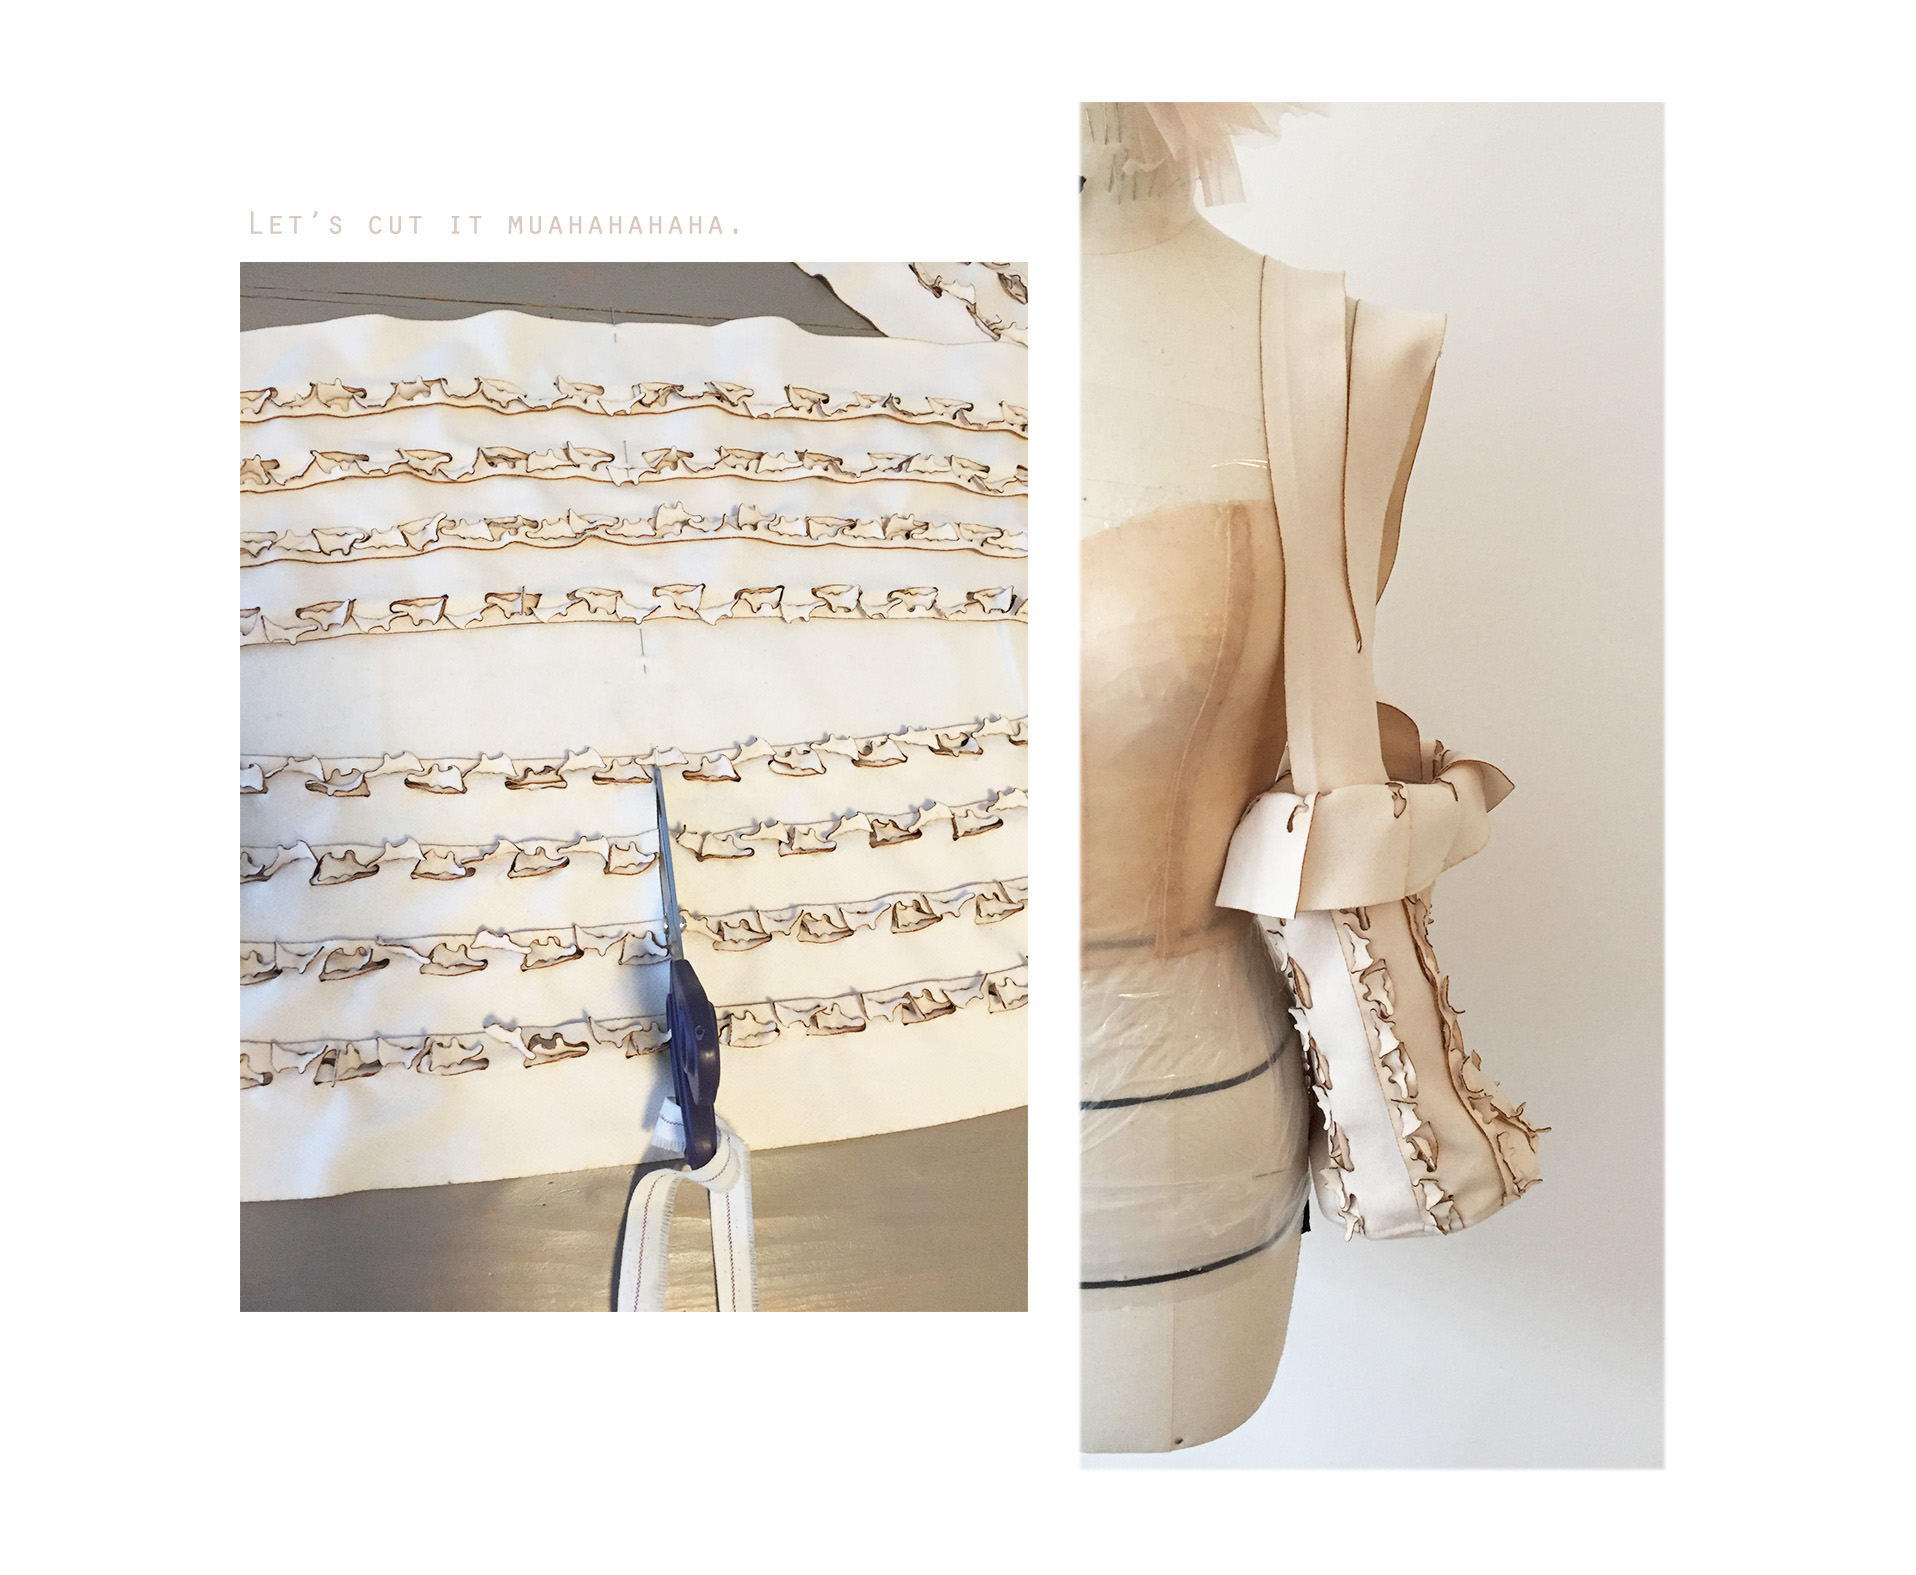
Garment : Modular Cape or bag..#
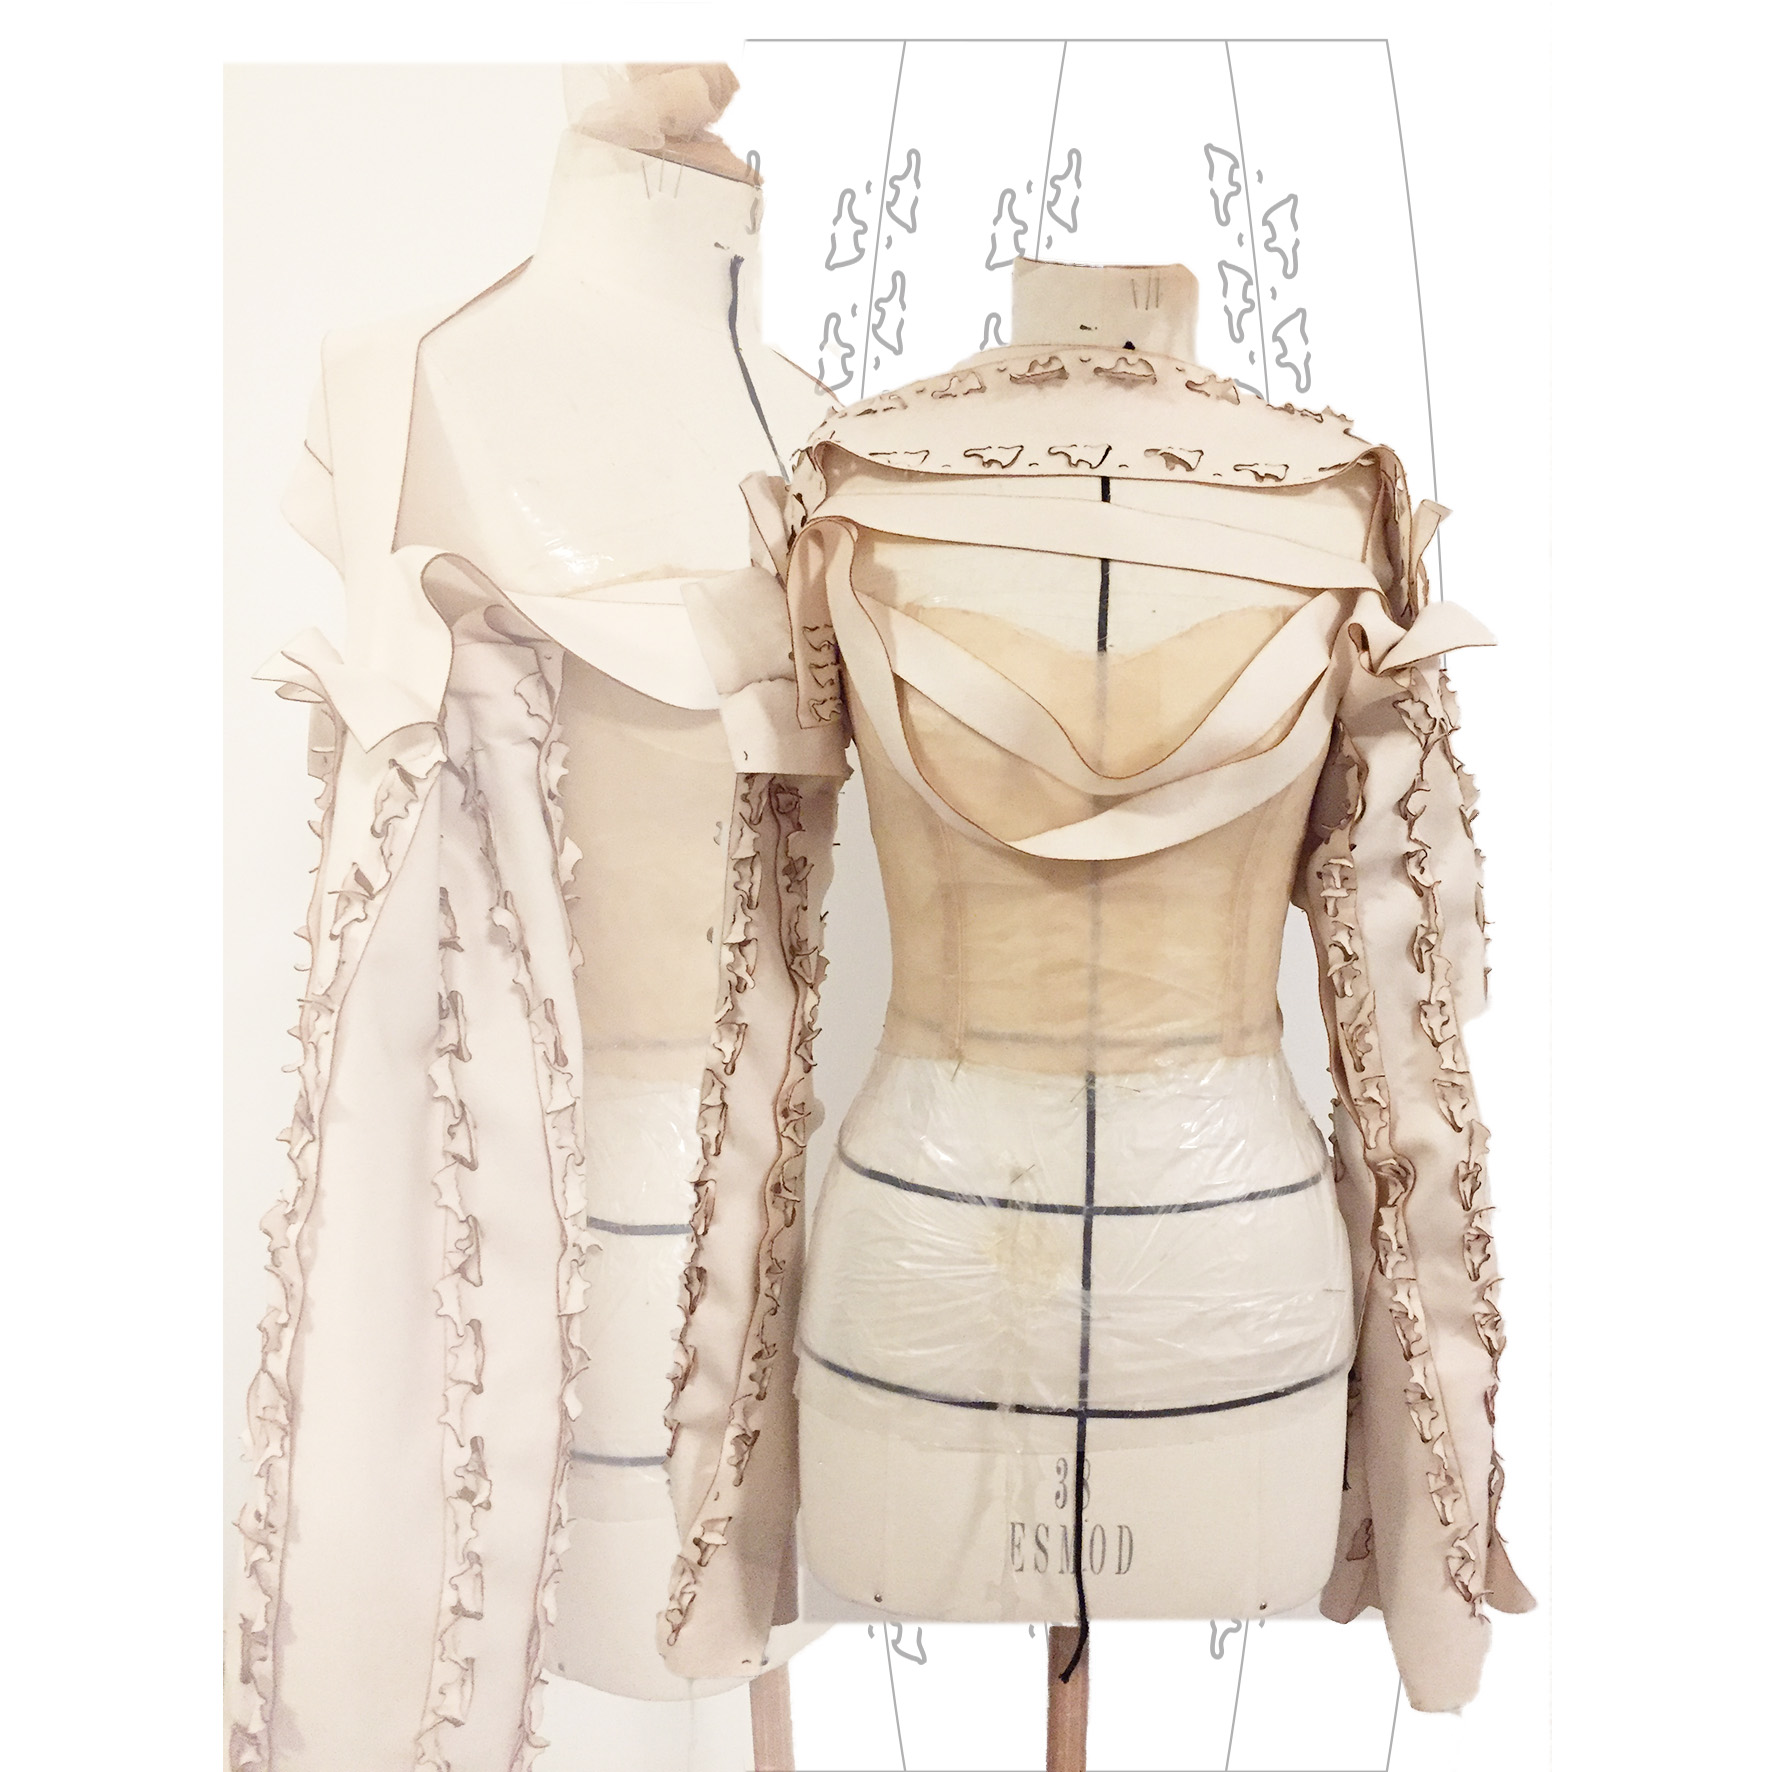
3rd week of Fabruary, I started with working on my second piece of the collection that is the ‘Modular Cape’. The inspiration of the interlockings comes from the shape of a species of fungus. So that, after the interlocking it would look like a linear invasion of little mushrooms all over the cape!
So.. the cape didn’t work out. I was hooping with the verticale lines of interlockings it would give a bit more stiffness to the wool, but naaah. The interlocked pieces were too slouchy on the mannequin. I didn’t want to just leave it there and waste all that fabric so I tried to apply it differently :
I think as sleeves it could work but then I would need a lot more fabric and time to make a proper garment out of it : like a coat or so.
So let’s move on..
Somehow, on a Sunday morning I got an idea, and knew what to do with the pieces :
Yes ! I made a cute bucket bag ! Obviously, if I had the intention of doing a bag from the start, I could have do different research and making the design maybe fully interlockable. Here I had to stitch the bottom part and the inside lining.

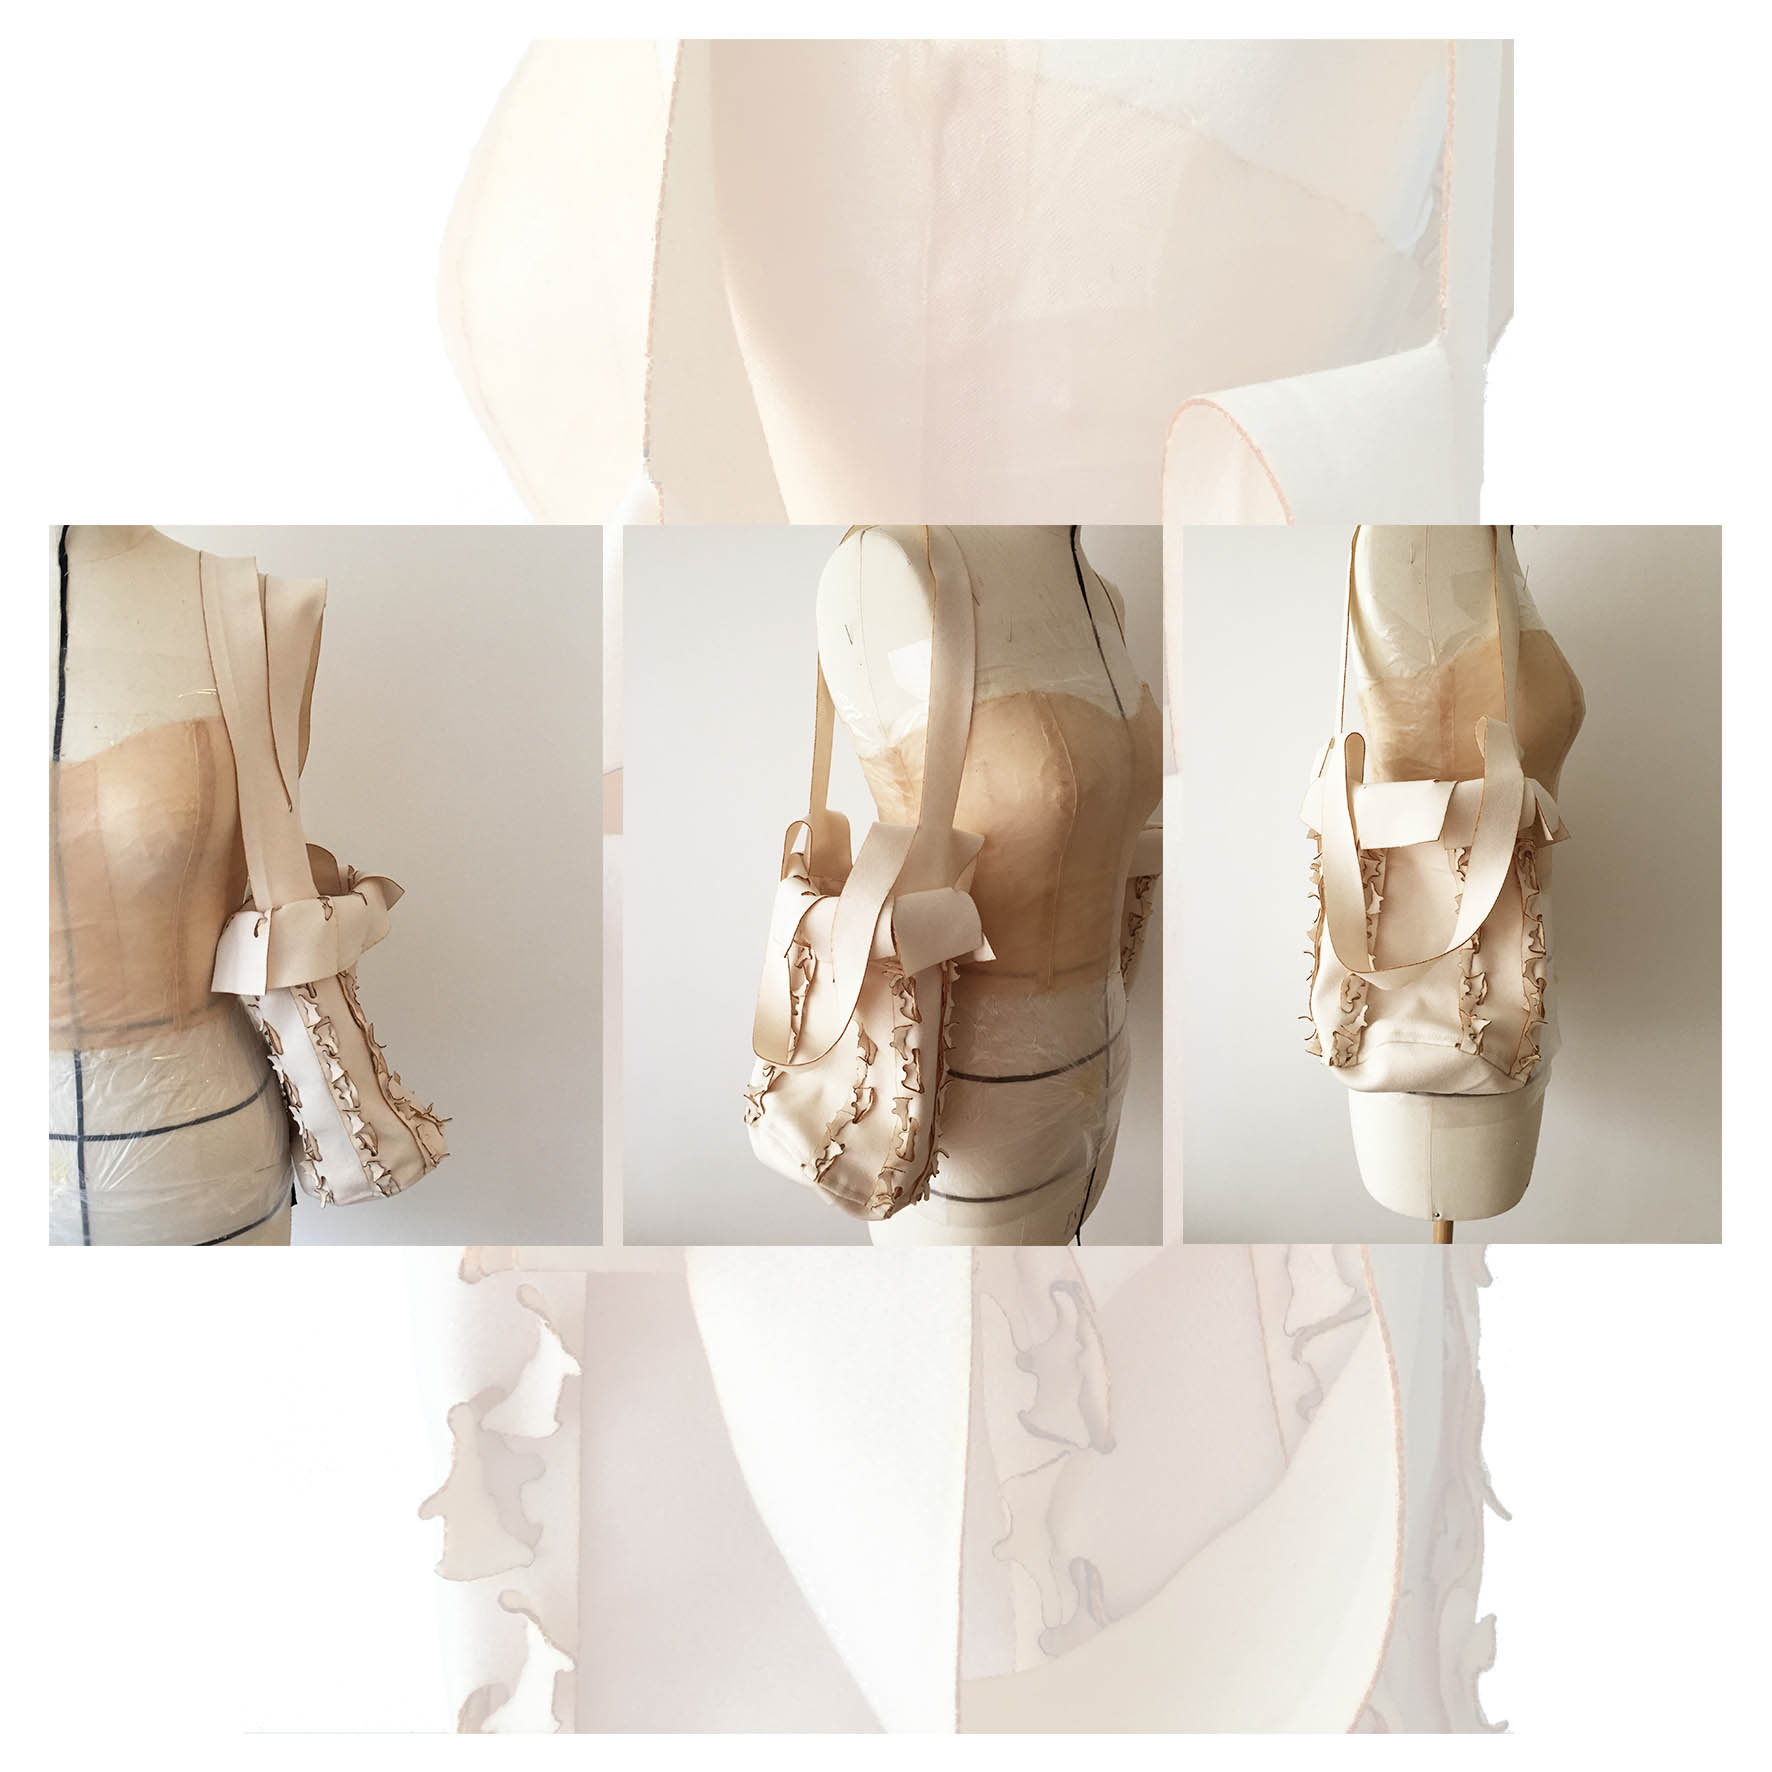
Final result :

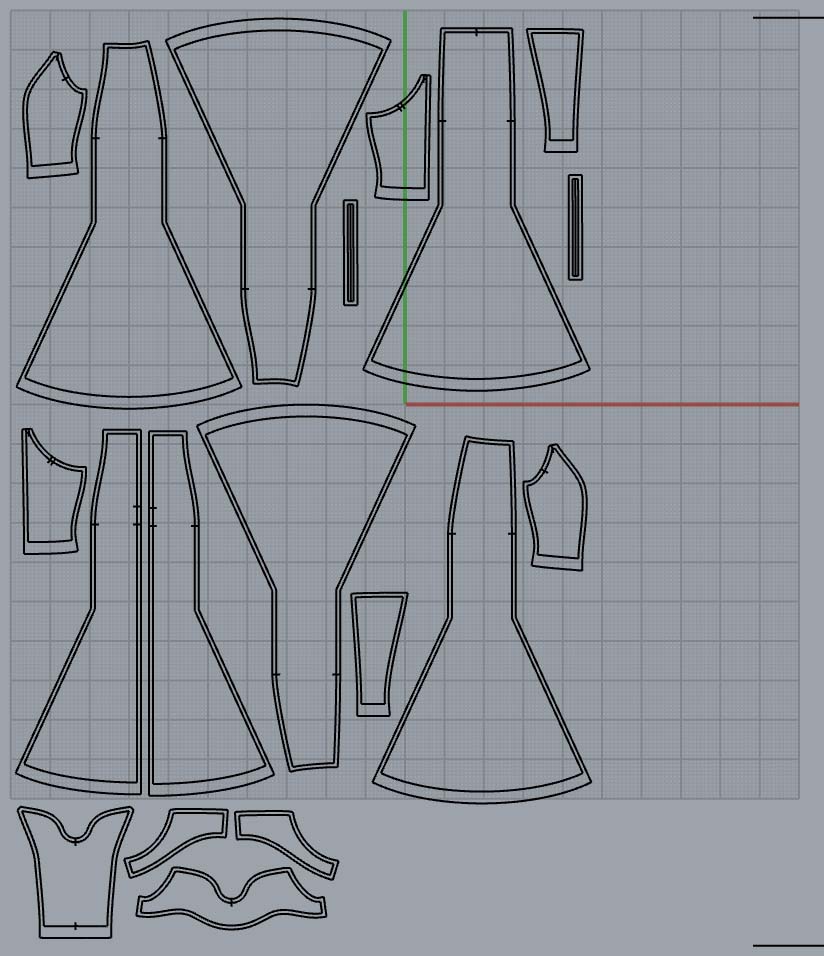
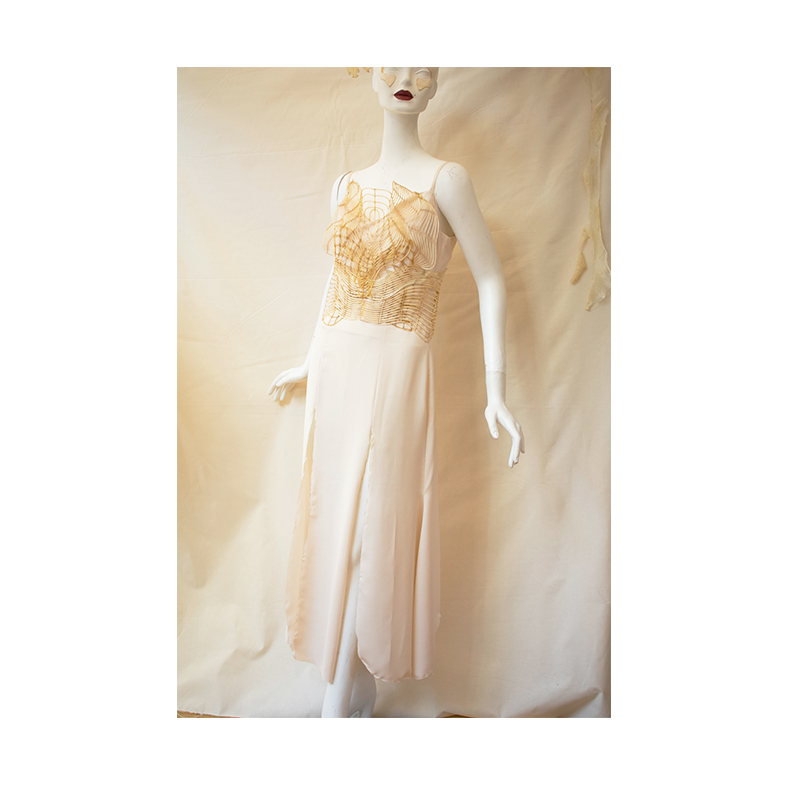
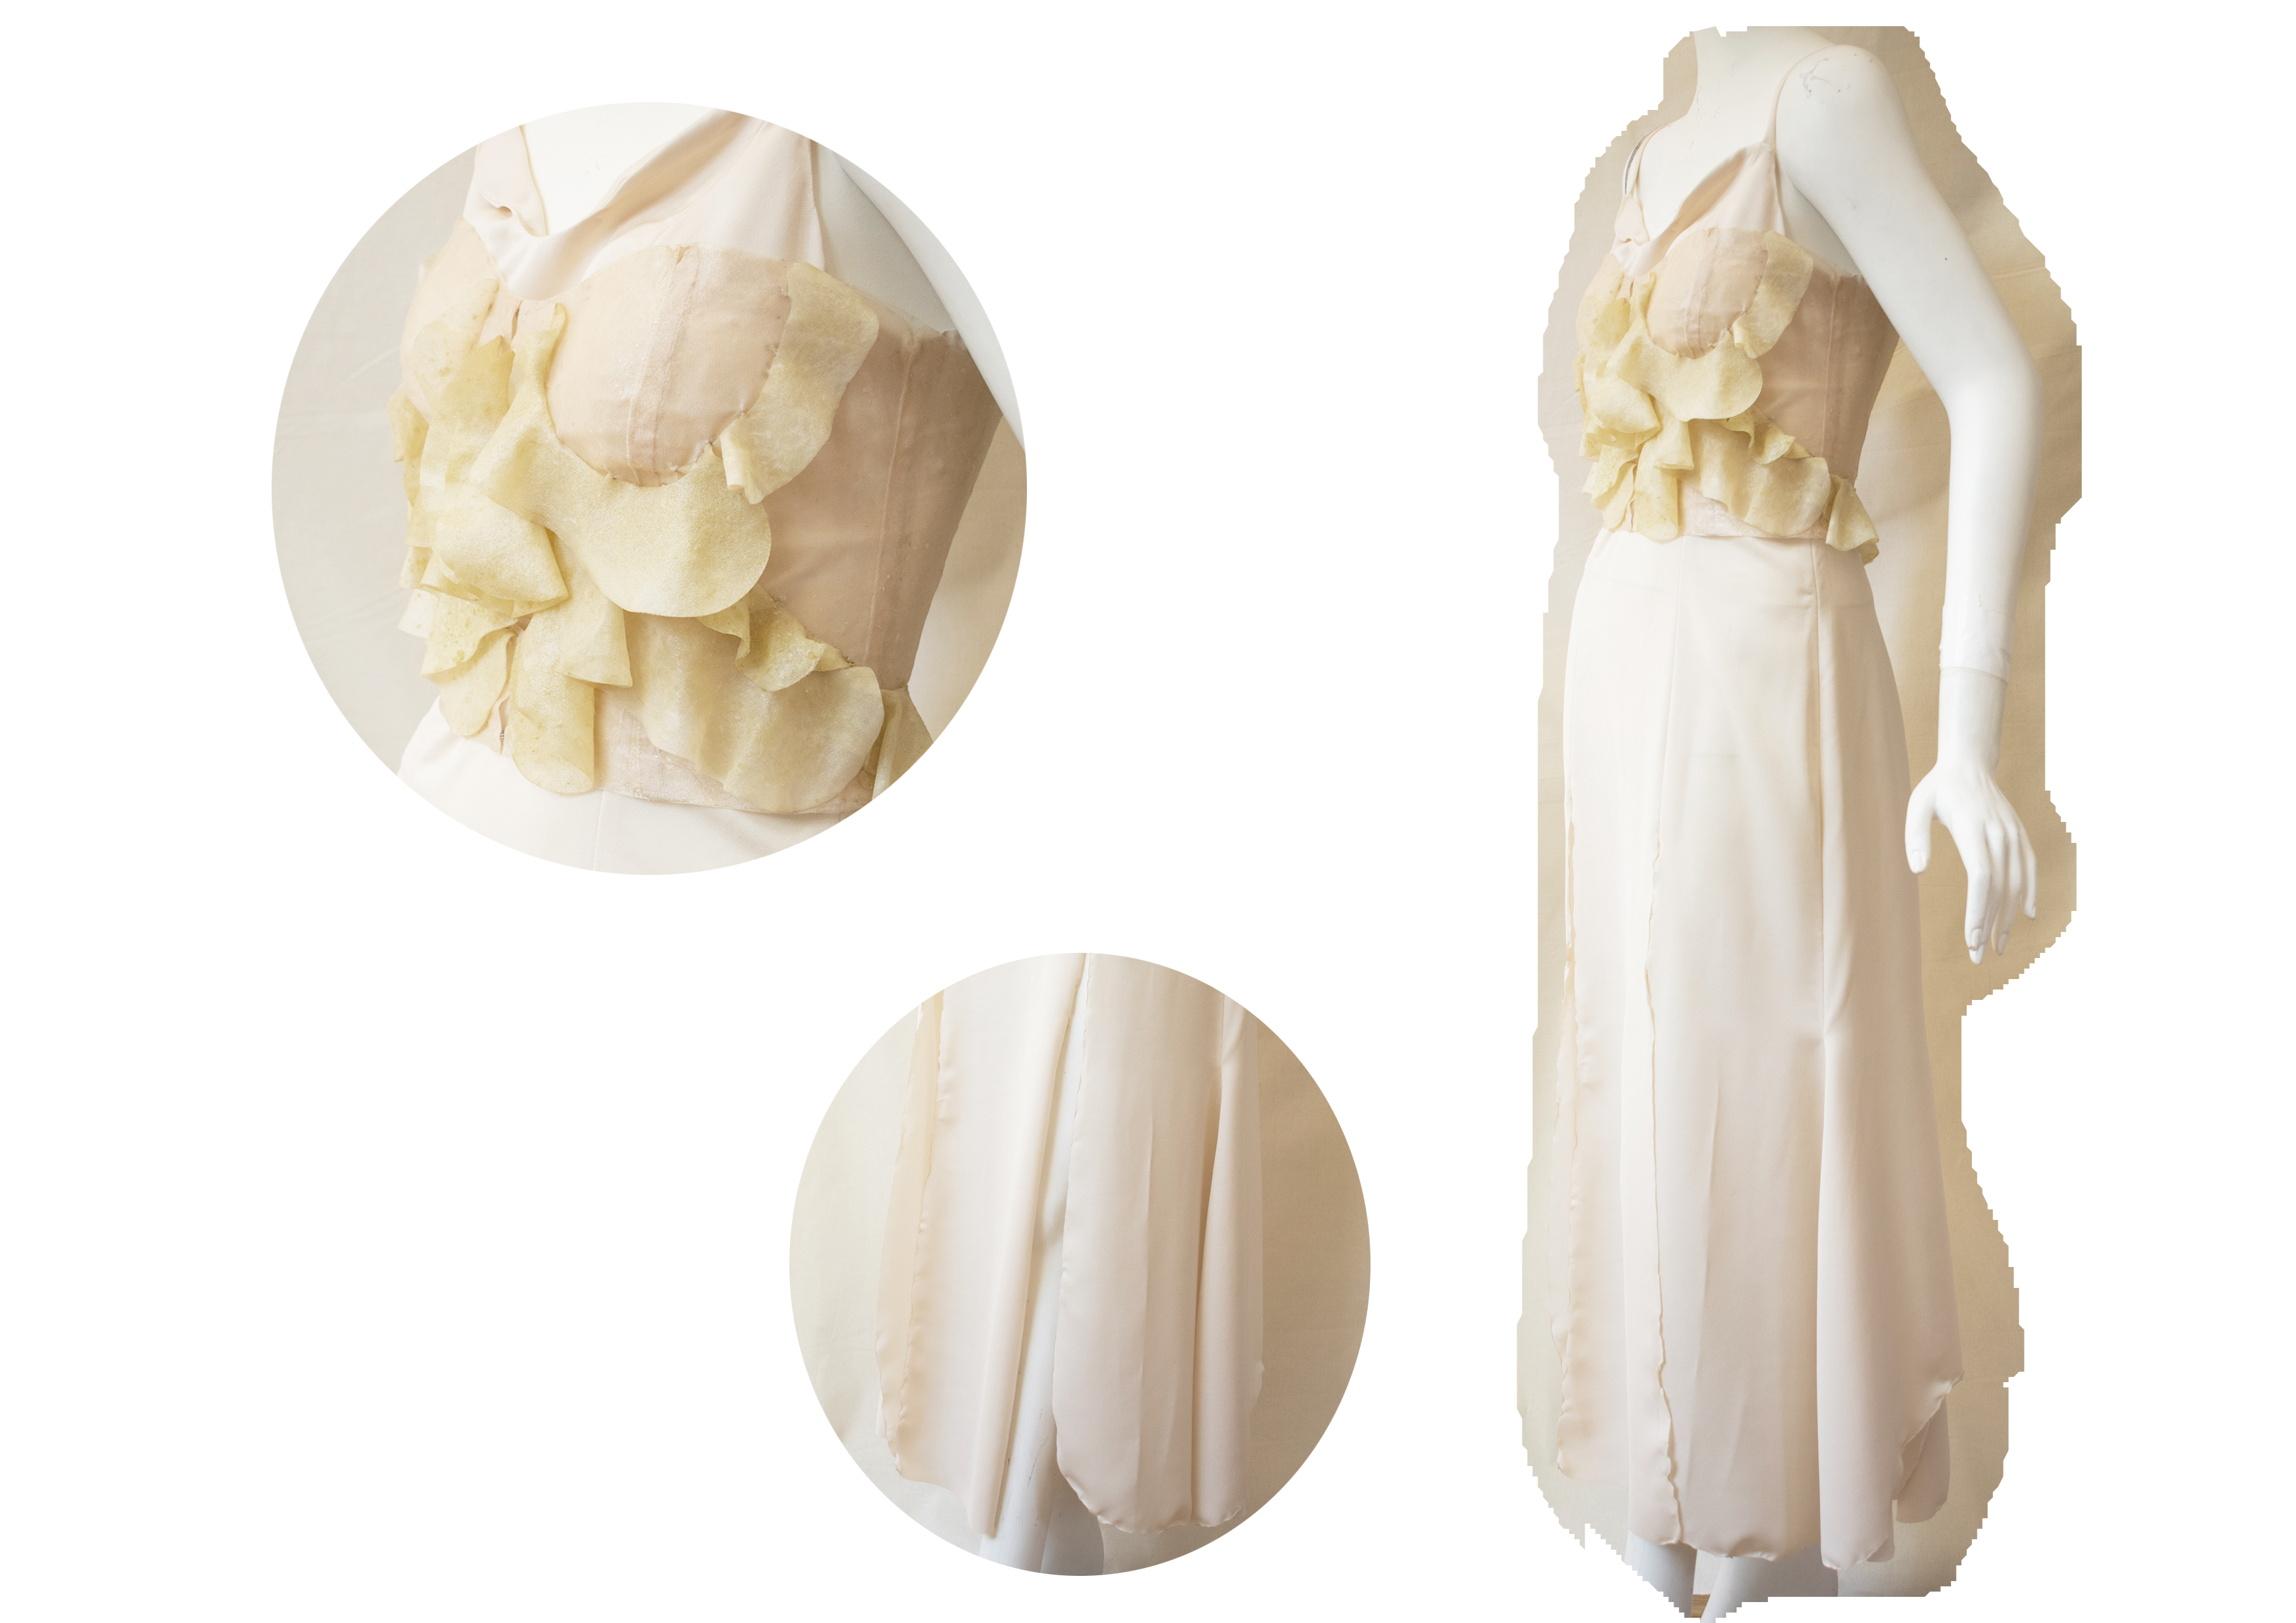
Garment dress :#
The collection will have a beautiful summer cocktail dress to go with one of the corsets. The design is minimalistic with a touch of botanical aesthetic.
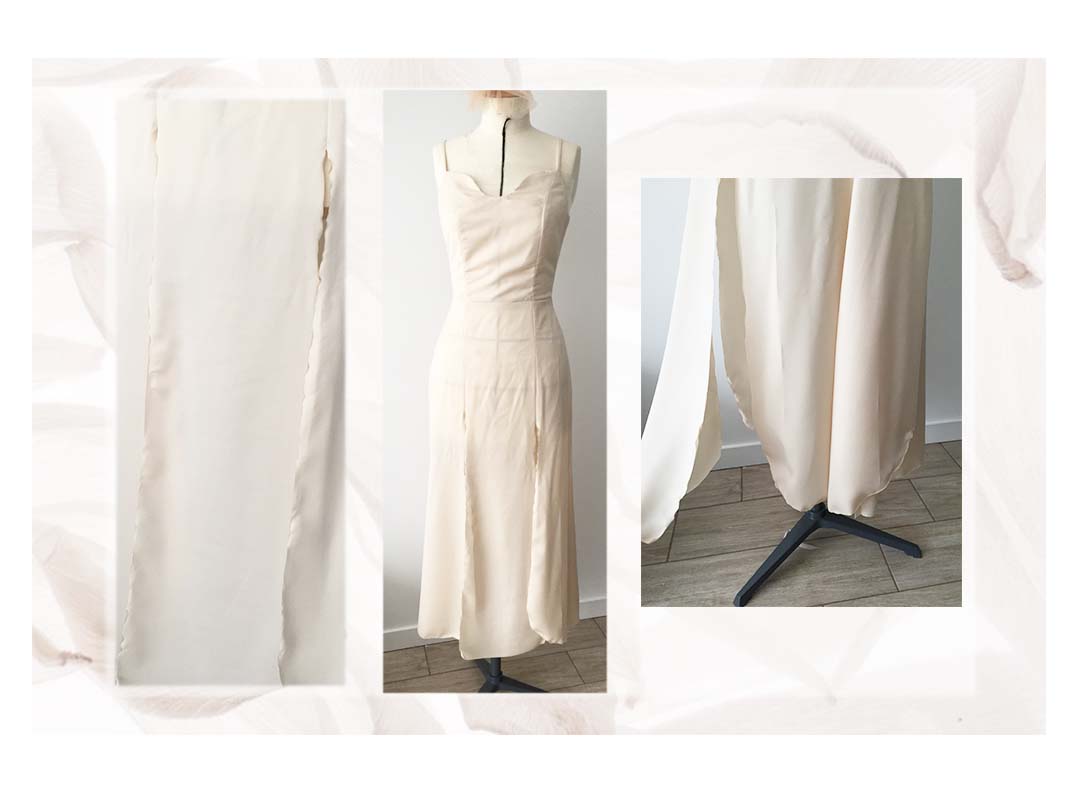
Digitale-made templates :
Final result :
Downloads#
Bag files : File 1 File 2 File 3
Corset base : Templates
Kimono-Top : Templates
Bioplastic ruffles : Ruffles
Distorted Lines Corset templates : DL Corset
Dress templates :