6. Textile as Scaffold#
This week I experimented with creating 3D origami patterns out of a bioplastic and fabric composite, used the byproducts of that to make a flexible material out of lycra and acrylic pieces, and as a group we grew crystals on fabric.
What I Made#

Top/left: bioplastic resin cast on lycra using a laser cut mould, and folded when dry into an origami pattern Bottom/right: acrylic parallelograms (leftover from the bioplastic mould) painted and glued to lycra
 Experiments with fabric crystallisation
My Flickr album of this week’s work ≖‿≖
Origami folded textile composite#
A couple of months ago I read this article on researchers studying origami structures from a physics angle, and learned about the Miura-ori pattern:
In 1970, an astrophysicist named Koryo Miura conceived what would become one of the most well-known and well-studied folds in origami: the Miura-ori. The pattern of creases forms a tessellation of parallelograms, and the whole structure collapses and unfolds in a single motion — providing an elegant way to fold a map. It also proved an efficient way to pack a solar panel for a spacecraft, an idea Miura proposed in 1985 and then launched into reality on Japan’s Space Flyer Unit satellite in 1995.


This really interested me because a) the Miura-ori is a tessellation that can change shape and become 3D, which is cool, and b) it means that folding the paper in this pattern changes the properties of the paper - that’s also cool! The Miura-ori folded paper gains a ‘negative poisson ratio’, meaning that when it’s compressed in one direction, it also compresses in another direction. Most materials don’t behave like this: for example, think of how you squeeze a tube of toothpaste (i.e. compressing the sides) to get toothpaste to come out (causing the ends of the tube to extend). If the tube of toothpaste had a negative poisson ratio, like the Miura-ori, squeezing the tube would make the toothpaste shrink further back into the tube. Which would clearly not be a useful property for a tube of toothpaste, but for other applications this is really interesting - like making foldable solar panels that can fold into small spaces to fit on a rocket, and unfold into a large area when in space ಠ.ಠ
Here’s some interesting reading on research into designing metamaterials with origami:
origami is being used as a framework for designing mechanical metamaterials- materials whose bulk properties emerge from the arrangement of smaller units. In the case of origami mechanical metamaterials, the underlying units are tessellated folding patterns.
Research and paper prototypes#
So, my goal was to make a Miura-ori pattern out of textile composites. I figured that for this I would need the faces of the pattern to be stiff, and the creases to be flexible. So if I laser cut a mould that allowed me to cast bioplastic on a fabric, but just on the faces of the pattern, that might work!
But first I wanted to make a paper prototype. I made the Miura-ori in Illustrator, and did the following things to the file so I could laser cut the pattern:
- Change the stroke weight of the lines to 0.001. If the lines are thicker than this, the laser cutter software will cut out the outlines of them, instead of just cutting a line (aka will double cut everything).
- Changed the stroke of the inner lines to a dashed line. My plan was that the laser would cut these as dashed lines, which would make the folds easier to…fold.
- Save the file as an Illustrator CS2 file, with all the optional boxes unchecked.
I have more information on how to laser cut in my documentation of weeks 2 and 3.
When I imported the file into the laser cutter software, the dashed lines had mysteriously disappeared. To fix this, I selected all the internal lines, and changed them to a different colour, as the laser software allows you to assign different settings to objects of different colours.
- For the outline of the shape, I used speed 100, power 25. This was a good setting for cutting through the paper.
- For the internal lines, I used speed 100, power 15. This engraved the paper without cutting through it. Next time I might try dropping the power even lower, or increasing the speed, because engraving the paper more lightly could also have worked well. But for the purposes of making a quick prototype, this setting was fine.
I folded the paper prototype, and was happy that it was a good size and shape (and that I hadn’t made any mistakes in replicating the design!). So I moved on to making a mould.
From paper design to mould making#
My next task was to design a mould that I could use to cast bioplastic on fabric in a miura-ori pattern.
I used the ‘outline stroke’ function to turn the line drawing of the Miura-ori into something I could cut into a mould:
Later on I figured out that the spaces I’d left for the creases of the fold were only about 1mm thick - way too thin! To edit the file and increase this distance, I used the ‘offset path’ function:
Laser cutting the mould#
I used a 2mm sheet of acrylic to cut out the mould, and this is where things got a bit messy. I tried a few different recommended power and speed settings for cutting 2mm acrylic, but the cut quality was poor, and I also learned that the lines in my design were too close together! I called in Cecilia to help me, and we eventually managed to get the material to cooperate, using speed 100, power 40.
I did have to spend some time prying some stuck pieces out of the mould before I could use it, as the acrylic ended up not cutting as well as we thought it was. Not the cleanest attempt at laser cutting acrylic, but I did get something that mostly worked at the end! I also learned that I should take more pictures when things go wrong - I was too busy being stressed about why things weren’t working ⊙▂⊙
Making the bioplastic#
I cooked up a basic bioplastic resin to cast in my mould. I chose the resin formula - which dries pretty stiff - because I figured the faces of the miura-ori would need to be pretty stiff in order for them to fold properly.
The bioresin recipe was: - 48g gelatin - 12g glycerine - 240 ml water
I cooked it for about 20 minutes, gently boiling. After that I removed it from the heat and added in green acrylic paint, stirring in the paint slowly until I had a good opaque green colour. I secured my mould on top of a piece of black lycra with clamps (with a plastic mat under all of that so that it wouldn’t stick to the table). then I used a syringe to squeeze blobs of bioplastic into the the mould.
At this point I realised that leakage was happening, as the acrylic I used was quite bendy and not clamped super tight on top of the fabric. This meant that bioplastic was able to leak into the parts that were supposed to be kept free of it, which would affect the flexibility of the final piece. But I decided to keep going and see how it turned out ヽ(☉‿⊙)ノ

Unmoulding and folding#
The following day I carefully unmoulded the bioplastic from its mould, using a craft knife to help release some of the edges. I then let it dry out for a further day, as it was still quite wet. The next day I gently pressed the faces together to form it into a kind-of-halfway Miura-ori.

Overall I think the final product is interesting, but if making it again (and aiming for a more foldable pattern), here’s what I’d try:
- Use a thicker acrylic to make the mould, so that it would hold its shape better and result in less leakage
- Try vinyl cutting a stencil instead of making a mould, spreading a thin layer of an even harder bioplastic over it, and peeling off the stencil to leave thin bioplastic faces on the fabric.
- Try just making a flat, thin layer of the bioplastic lycra composite, and then laser engraving the pattern on top of the composite, to create the creases needed for folding.


Acrylic and lycra composite#
After making my bioplastic lycra composite, I had a load of small acrylic parallelograms left over (56 to be exact) that had been cut out when I made my acrylic mould. I decided to glue these on to another piece of lycra to see if I could make another kind of composite Miura-ori. For this I stretched out the lycra, and taped it to a piece of cardboard to keep it flat.
Painting the acrylic pieces#
Before glueing the acrylic pieces onto the fabric, I painted them black with acrylic paint. I mainly did this because many of them had become yellow or charred around the edges when they were cut by the laser, and I wanted to cover this up.
I painted one side, and two edges, then left the pieces to dry. Then I painted the other two edges, and left them to dry again.
Glueing the pieces on fabric#
To attach the acrylic pieces to the fabric I used a cheap craft glue that I got at a local discount shop. I used a piece of cardboard to create a straight line to help my align the pieces, and then just glued each piece on to the fabric, applying glue to the back of each piece with a paintbrush.

When every piece was glued on, I placed three heavy books on top to press everything together securely. If doing this again, I would have put a plastic layer (or something else that doesn’t stick) on both the bottom and the top, as the piece ended up getting slightly (but not disasterously) stuck to both the book on top, and the cardboard underneath :)
The final piece has some flexibility, but isn’t able to fold fully into the miura-ori pattern. I think this is mainly because the pieces are very close together, and the glue on the lycra makes it less flexible.

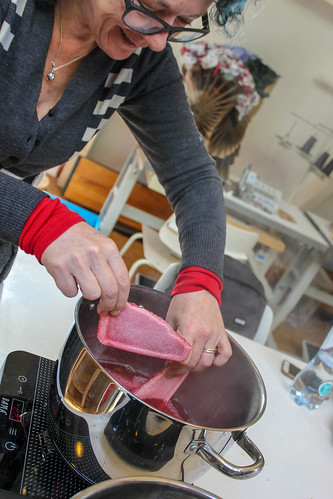
Crystallisation of fabric#
As a group we experimented with fabric crystallisation! To make crystals, you basically need water, and a salt. You can use table salt (sodium chloride) but also all kinds of other salts! We used alum (a double hydrated sulfate salt of aluminium), and epsom salts (aka magnesium sulfate).
- Heat the water in a large pan
- Add the salt to it, and keep adding until no more is able to dissolve (aka the liquid is saturated).
- Add more salt! This undissolved salt is what will clump together to form the crystals.
- Remove from the heat, add colour if desired (we used food colouring).
- Dip fabric strips in the crystal solution, and leave to grow!

Crystals began to appear within an hour. It’s a good idea to take the samples out and check them, as sometimes the crystals form in smooth clumps, instead of nice crystals! If this happens, you can rub away the undesirable crystals, let the fabric dry out, and then put it back in the crystal solution.
Here are a couple of examples of crystals that were dipped in solutions with red colouring, green colouring, and just the crystal solution with no colour. All of them were left in for about 24 hours:
Bonus experiments#
Experiments with paint and lycra#
I had some different kinds of paint at home, so as I had my mould there over the weekend, I decided to try and see if I could use paint to harden the fabric. The fabric I used for this is lycra.
A thin layer of gold acrylic paint made the fabric stiff enough that it can be folded and keep a pleated pattern, but the faces of the pattern aren’t stiff enough for it to be folded into the Miura-ori pattern.


I also tried a ‘concrete paint’ that I found in a local shop. This set within a day, but took a couple of weeks to dry out to the point where I could fold the pattern.

Additional tessellations#
In my initial research, I found a couple of other 3D origami tessellations that I really liked. I laser cut these on paper and folded them, but in the end didn’t have time to make textile composites out of all three patterns, so I focused on the Miura-ori (as it’s the simplest!). I really like these other patterns though, so I’m planning to incorporate them into the Computational Couture assignment.
Waterbomb pattern

Generalised Resch pattern
