7. Open Source hardware: from fibers to fabric
The class of this week focuses on exploring the open source hardware field and its potential in the area of textile. Through different project examples we had explored how to hack the idea of machines and create an open source machinery for the public.
Since creating machines from scratch demands a lot of work, most of us decided to get in pairs taking into account similar interests between the two parties. Gabriela Lotaif and I decided to work together and what a great partner I found!
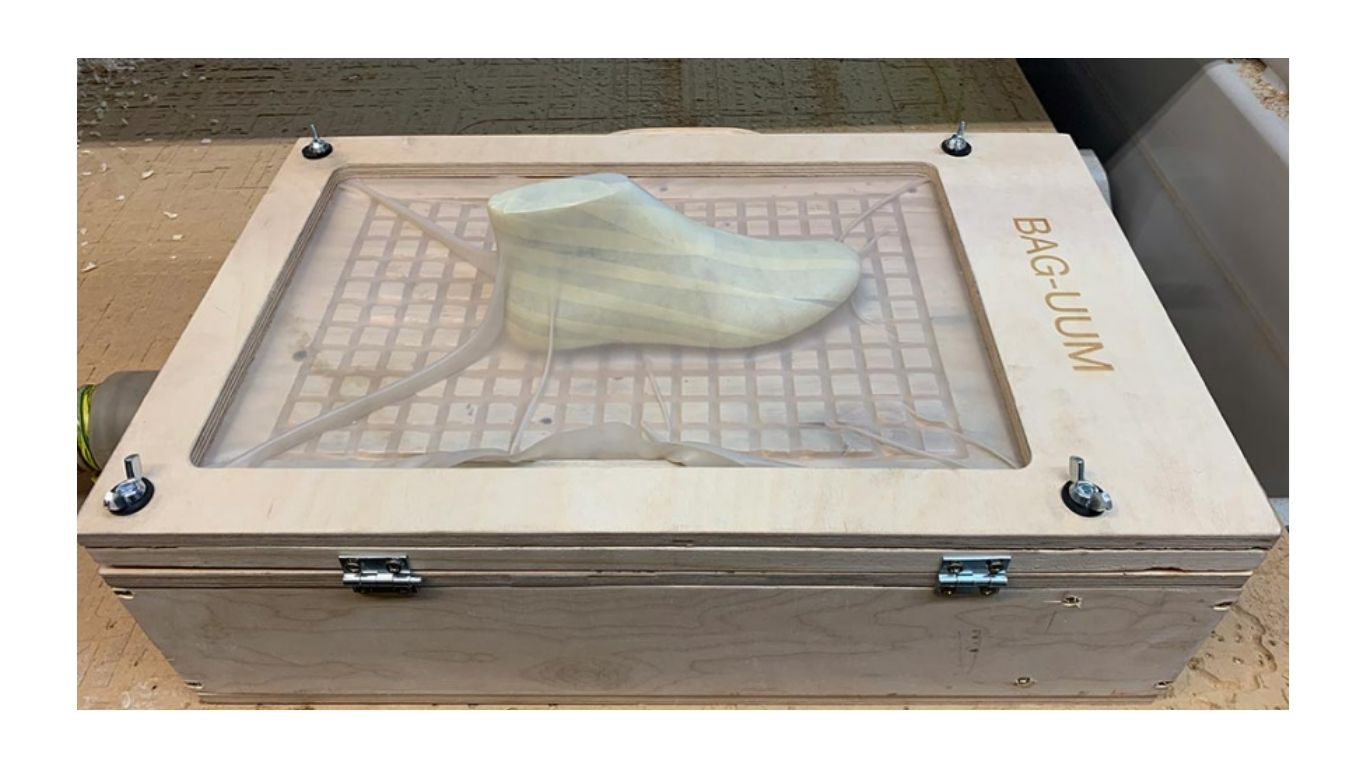
"Imagine take it with you, wherever and whenever you want, a vacuum machine¨. Perfect for designers and makers.
Useful links
Ideation

We got inspired from the small vacuum with leather molding purpose developed by Anastasia and Nico (mentor for this special class). We saw the necessity to developed a design more easy to carry and transport. Even more, the idea of creating a machine at a low cost and make it more accesible to us and to other designer really excited us.
After a though research we found common points from each vacuum machine: the closing method with stopped to get out the air but also help to maintain tense the material and the mold.
Creating the machine - Process
Tools
- Software: CAD / CAM
- Digital Sketch , 3D modeling skills, Parametric modeling skills
- Handmade Sketch
Machines
- Laser cutter
- Milling machine
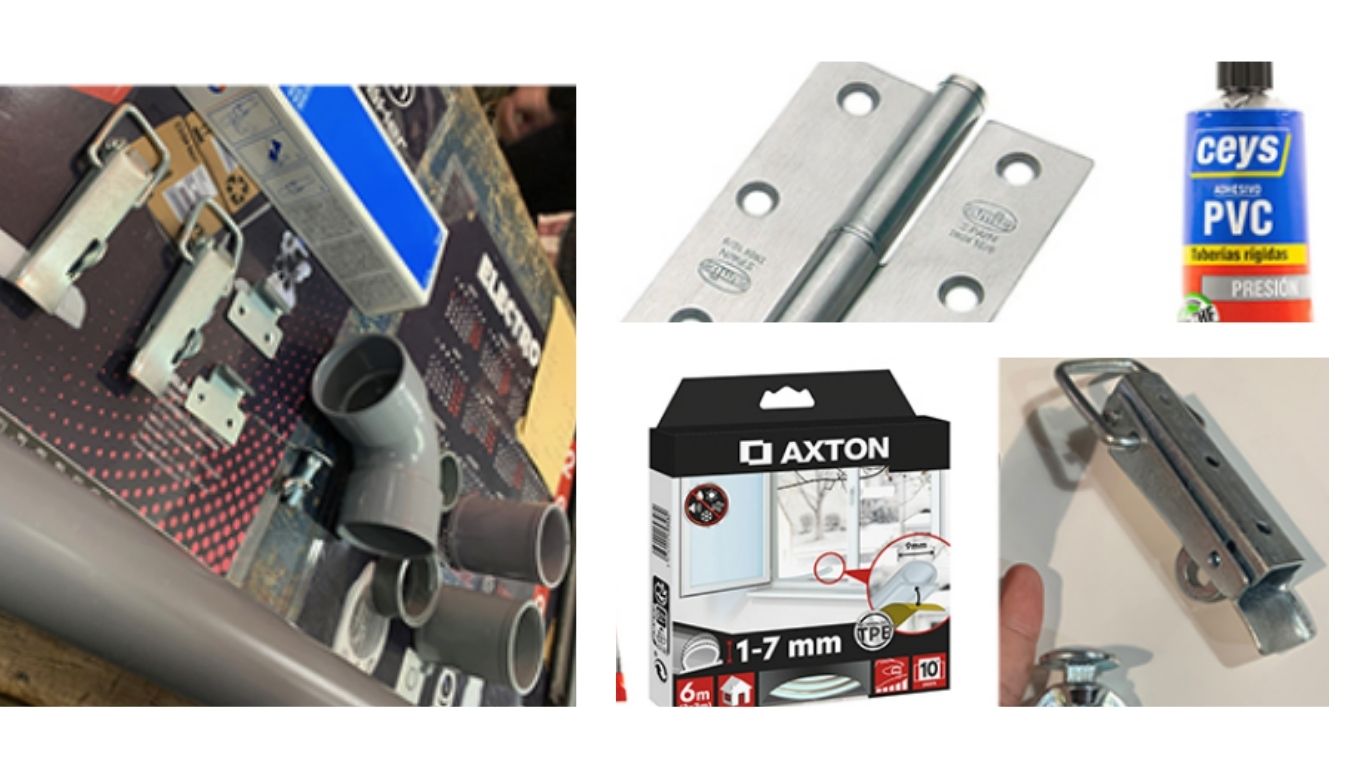
Materials
- Wood MDF
- 4 PCS Iron 4 Inch L Right Angle Bracket with Screws, 4" x 2" x 2" 90 Degree
- PVC Glue
- 1-7mm Axton sheet
- 2 small tubes and connections
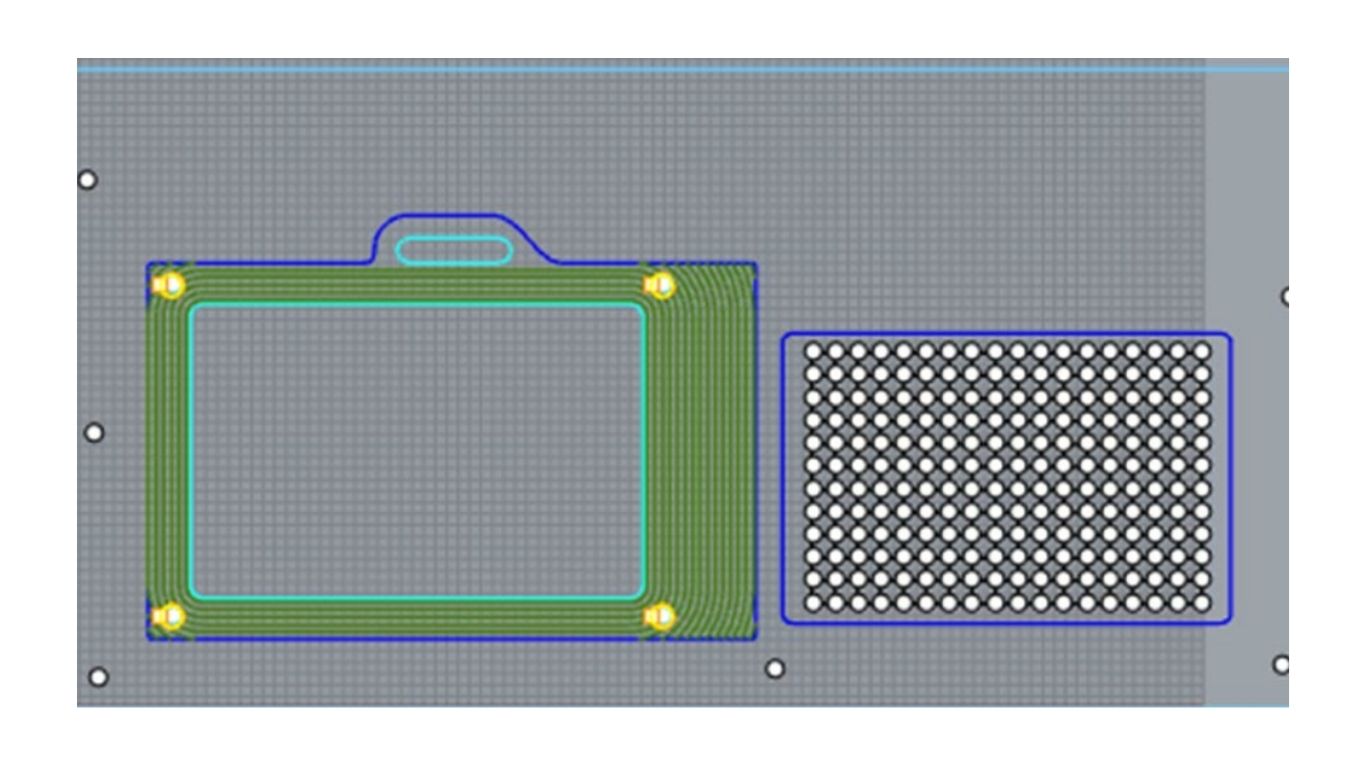
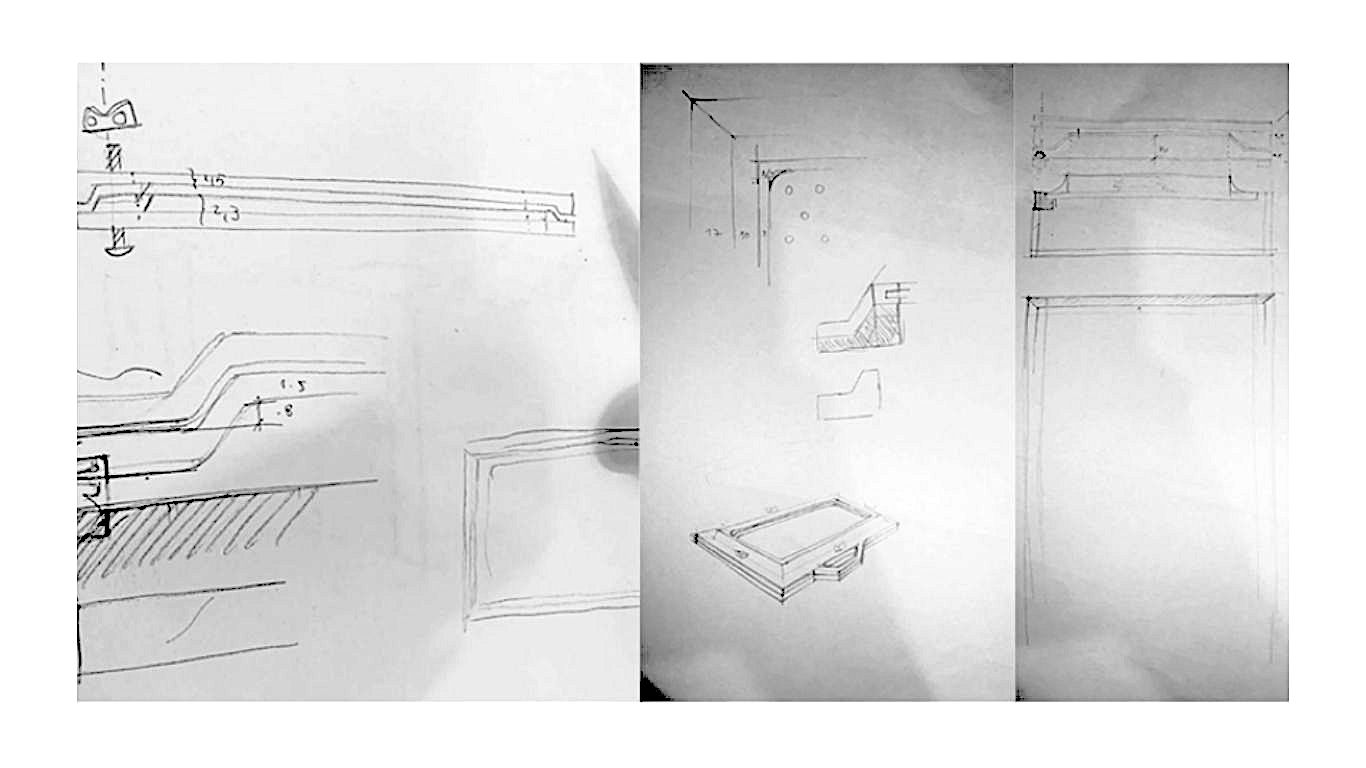
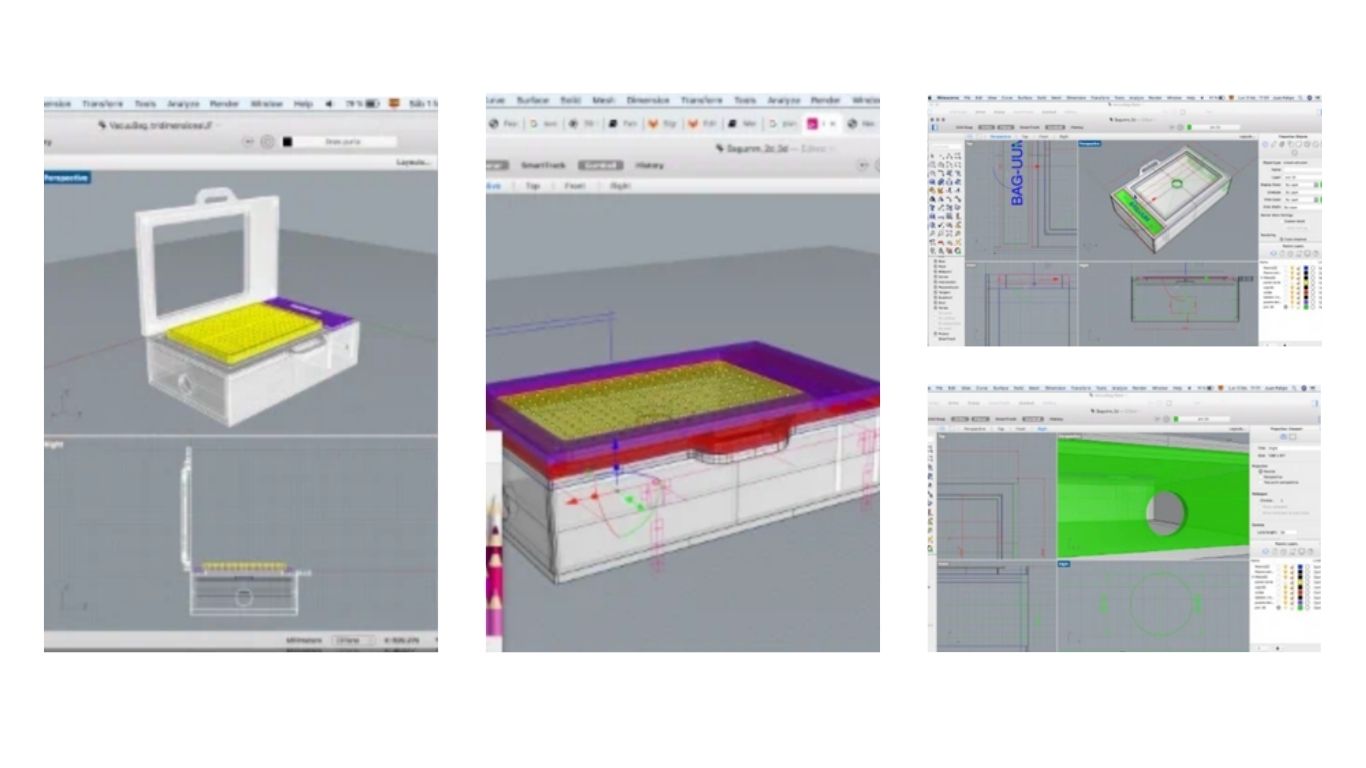
Modelation on Rhinoceros
From 2D to 3D model. After sketching the machine, we decided the size, dimensions and pieces needed. Using Rhinoceros we took into the second stage our design. The program not only allowed us to have the digital field to then cut it on the milling machine bust also gave us the 3D view to have an idea of the final product. I highly recommended use Rhinoceros for this type of modeling over other programs.
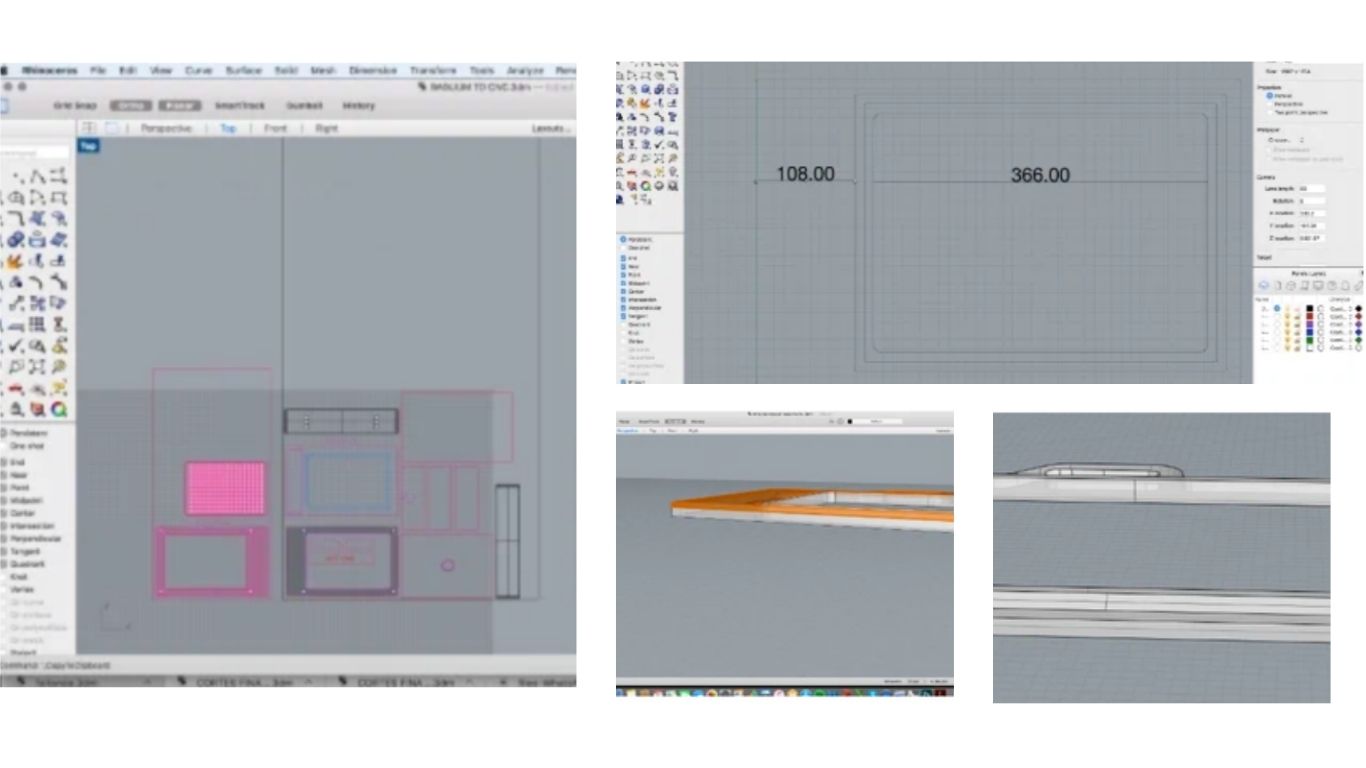

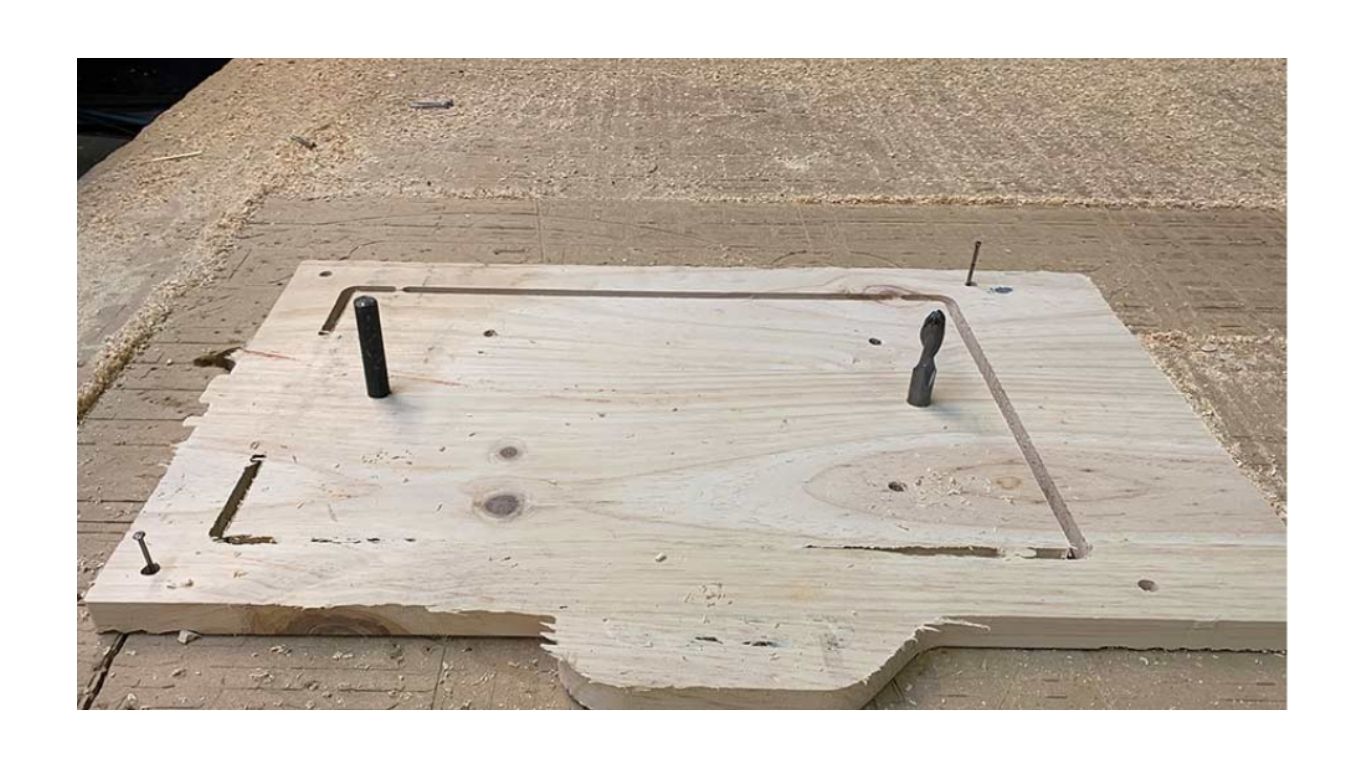
We decided to split the tasks to arrive to the deadlines settled for this class. Gabriela was on charge of the milling machine cutting of the 18mm thick and I was on charge of the 12mm thick wood's milling.
The first task, 18mm thick wood, demanded engraving the holes for the screws to fix the wood to the bed of the CNC machine.
For more information about on the milling machine cutting for the 12mm wood, please go to [Gabriela Lotaif documentation] (https://class.textile-academy.org/2020/gabriela.lotaif/assignments/week07/).She mastered the explanation of this process.
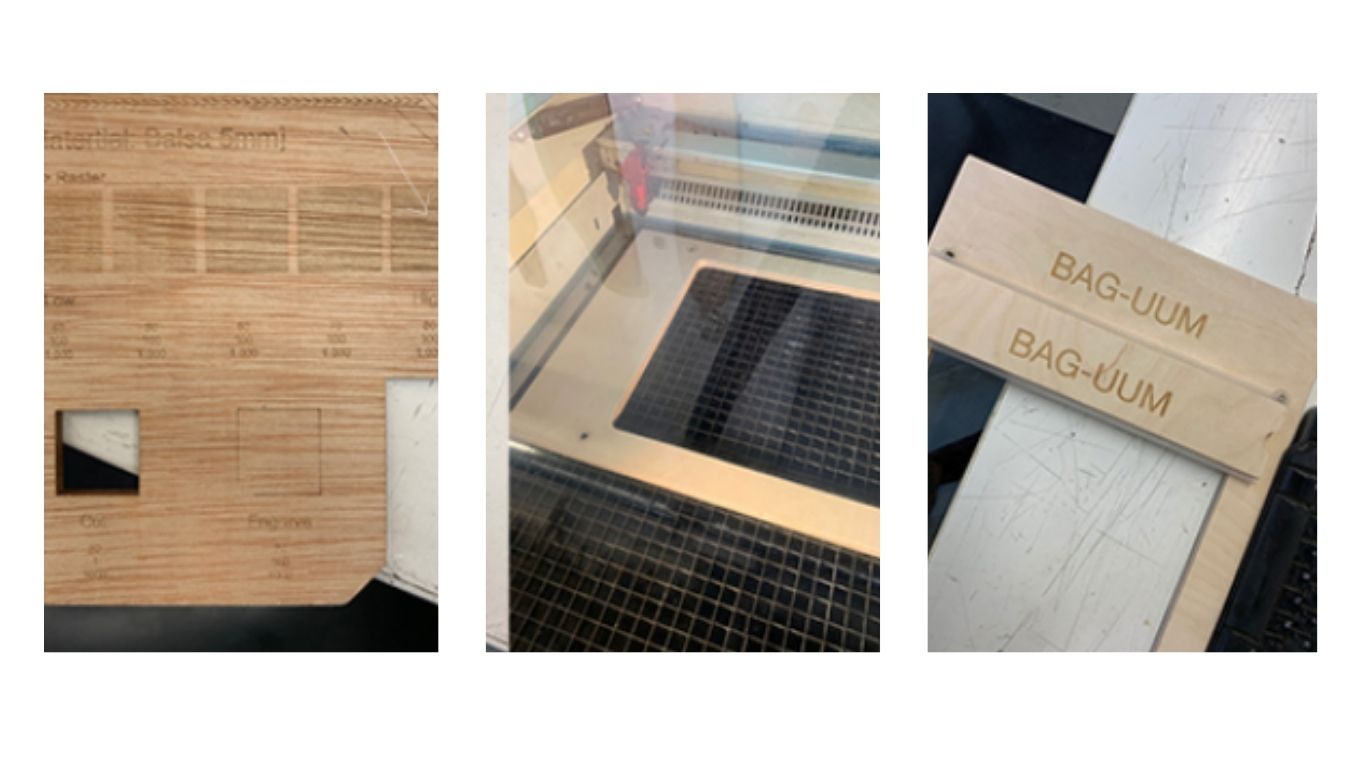
Engraving process
Setting used: 80, a speed of 100 and a PPI of 1000 Hz.
Assembling the vaccum machine
- First step, we need to trimming, filing and use the dremel to smoothen all surfaces after the milling cutting and engraving processes.
- Second step, we glue the unmoved pieces in order to seal it very well.
- Third step, fit the PVC Pipe inside to create the vacuum pathway between the inner part and the exterior one.
- Fourth step, we assembled the lid and nail the hinges to secure that the vacuum maintain hermetical.
- Fifth step, we glued the vacuum sealers on the surface.
- Last step, we cut the latex cover that will cover the mold and create the shape needed.

Project files
BAG-UUM to CNC BAG-UUM in 3D BAG-UUM's 18 mm thick wood CNC file with RhinoCAM BAG-UUM's 18 mm tchik wood gcode ready for Milling Machine