7. Computational Couture
Research & Ideation
For computational couture I will work with patterns from the rainforest.
First is a pattern based om the Rio Madeira frog belly
More information about this frog can be found in my final project.
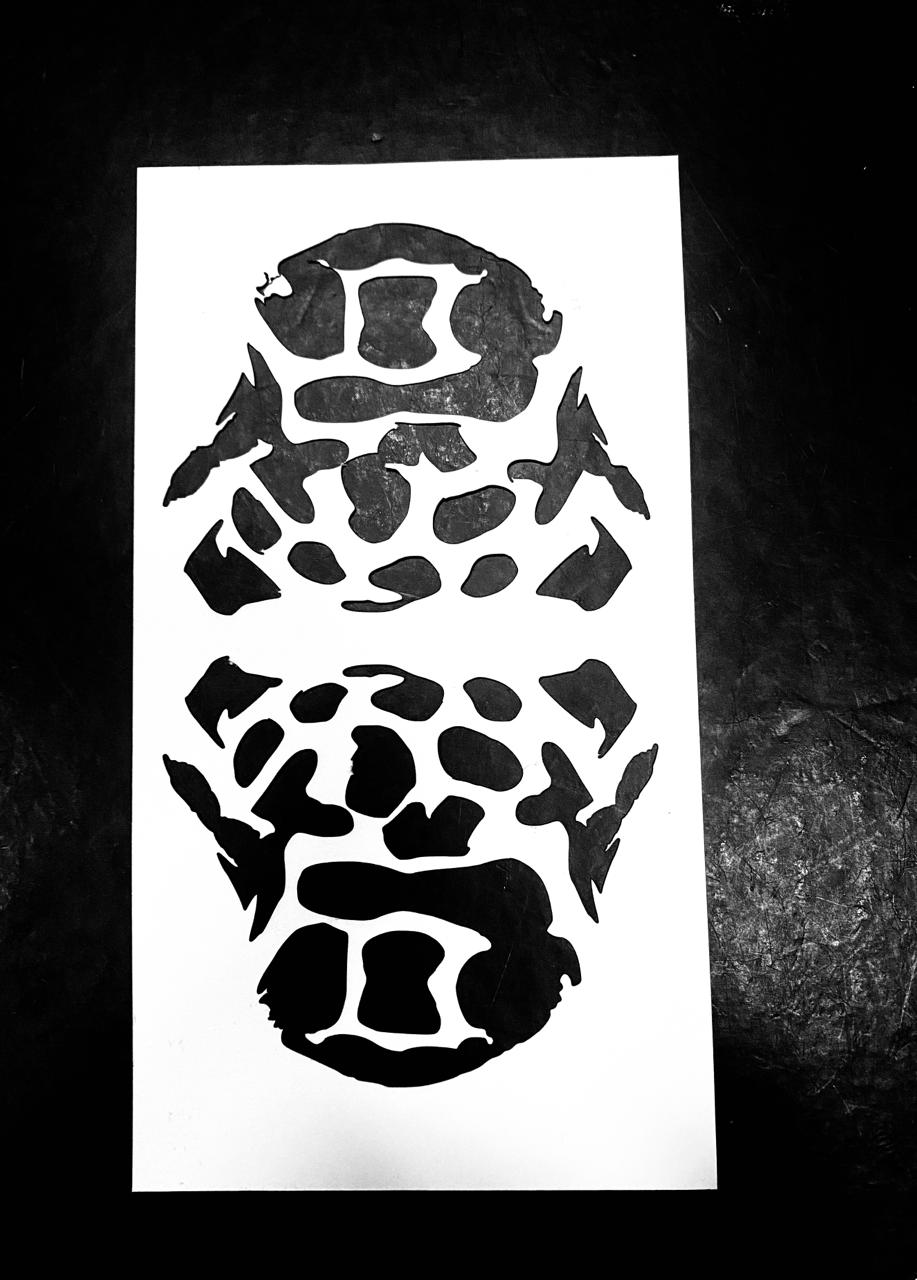
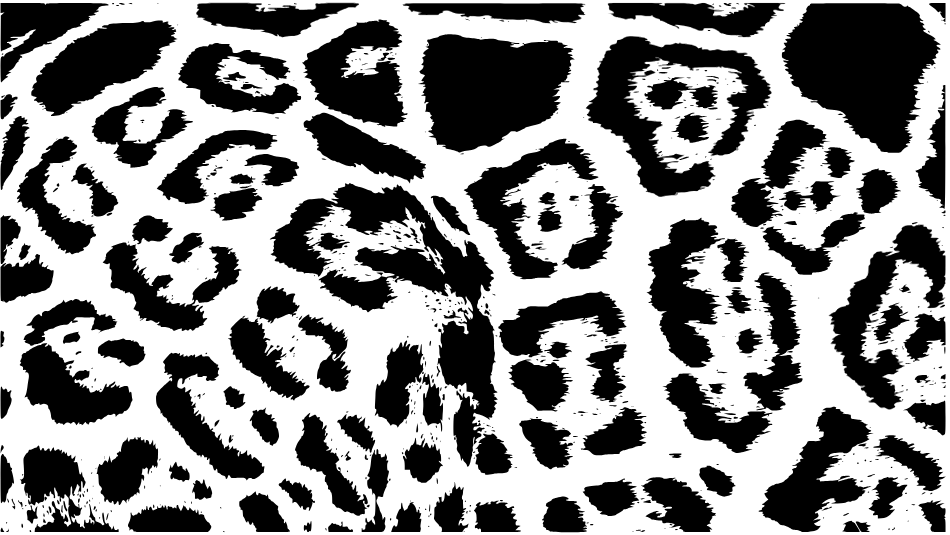
I also want to create something based on Jaguar spots.
Thirdly I created a pattern with circles in different heights, some full and some hollow.
Finally I got an pattern from thingiverse with crocodile scales.
Here are the initial patterns in 2D design I would like to explore for a 3D design model.
I will use several 3D design programs but Rhino and Grasshopper temporary license unfortunately expired. These programs have a high difficulty level and it will take me alot more time to get it, so in the future I will have to acquire a paid license. Trying out 3D and specifically parametric design in different open source programs and platforms will be part of my research here.
weekly assignment: Computational Couture
Learning outcomes
-
Research skills: the participant has acquired knowledge through references and Concept development
-
Design skills: the participant has acquired 3D modeling skills and explored parametric skills
-
Fabrication skills: the participant is capable of executing from file to production workflow, from 3D modelling to 3D printing
-
Process skills: Anyone can go through the process, understand it and reproduce it
-
Final outcome: Create samples/swatches of 3D printing as fabric or on fabrics and a 3D/parametric model
-
Originality: Has the design been thought through and elaborated?
Student checklist
-
Document the concept, sketches, references also to artistic and scientific publications on 3D printing and parametric modeling
-
Design a parametric model using Grasshopper3D (or alternative parametric software) and upload the 3Ddesign file + required parametric files
-
Learn how to use a 3D printer and document the step-by-step process and settings
-
Document the workflow for exporting your file and preparing the machine, Gcode and settings to be 3D printed
-
Print your file and document the outcomes
-
Upload your stl file
-
Submit some of your swatches to the analog material library of your lab. Size 20cm x 20cm approx (extra credit)
Reference Alumni pages
I'm leaving these student pages because they are excellent examples and guides.
* [Dinesh Kumar](https://class.textile-academy.org/2023/dineshkumar-gunasekaran/1.Assignments/week07/)
* [Margret Guttormsdottir](https://class.textile-academy.org/2023/margret-guttormsdottir/assignments/week07/)
* [Ala Janbek](https://class.textile-academy.org/2023/ala-janbek/assignments/week07/)
* [Laura Civetti](https://class.textile-academy.org/2019/laura.civetti/) Barcelona 2019-20_
* [Sara Alvarez](https://class.textile-academy.org/2021/sara_alvarez/) TextileLab Amsterdam 2020-21_
* [Loes Bogers](https://class.textile-academy.org/2020/loes.bogers/) TextileLab Amsterdam 2019-20_
* [Batoul Rashdan](https://class.textile-academy.org/2022/batoul-rashdan/) Techworks Amman 2021-22_
* [Haneem Jaafreh](https://class.textile-academy.org/2022/haneen-jaafreh/) Techworks Amman 2021-22_
* [Louise Massacrier](https://class.textile-academy.org/2022/louise-massacrier/Assignments/week07/) _Lyon TextileLab 2021-22_
* [Kate Reed](https://class.textile-academy.org/2021/kate.reed/)
References & Inspiration
My first reference and inspiration is the lecture Julia Koerner in Fabricademy Computational Couture. To get knowledge from someone who has done cutting edge work and has worked on a the Black Panther saga is out of this world!
I truly feel blessed!
So naturally the first thing I looked up is her webpresence. What I love most about her work is the way nature inspires the patterns and garments she creates. With the rainforest in mind this is a path to follow. I reference some of her work here and in the visuals. JK3D
Of equal importance for the technical skills are the Fabricademy Rhino tutorials as well as Grasshopper, Blender and Solidworks tutorials. In addition I also reference the 2022 Tutorial on 3D PRINTING on FABRICS by Ana Correa Again this is a very challenging assignment for me. But these are also references for me to fall back on later for practice and skill improvement, so I am grateful.
While researching I came across Garrett Gerson founder of Variant3D. A company creating 3D printed and woven custom wearable clothing as an answer to sustainability. The approach of the company is collaborative design. The platform is not opensource. Variant3D online platform
Another inspiring designer or design house is Nervous system. Both next designs are mention worthy.
VIP Tie was recognized by an online source as exceptional for the way they integrate 3D printing in men's wear. Their specialty is ties and bowties. Catering from affordable to high end. VIP Tie
The mechanical engineering at MIT shows here how the 3D printed sole was developed for Adidas's newly launched running shoe during Paris Fashionweek this January 2024.
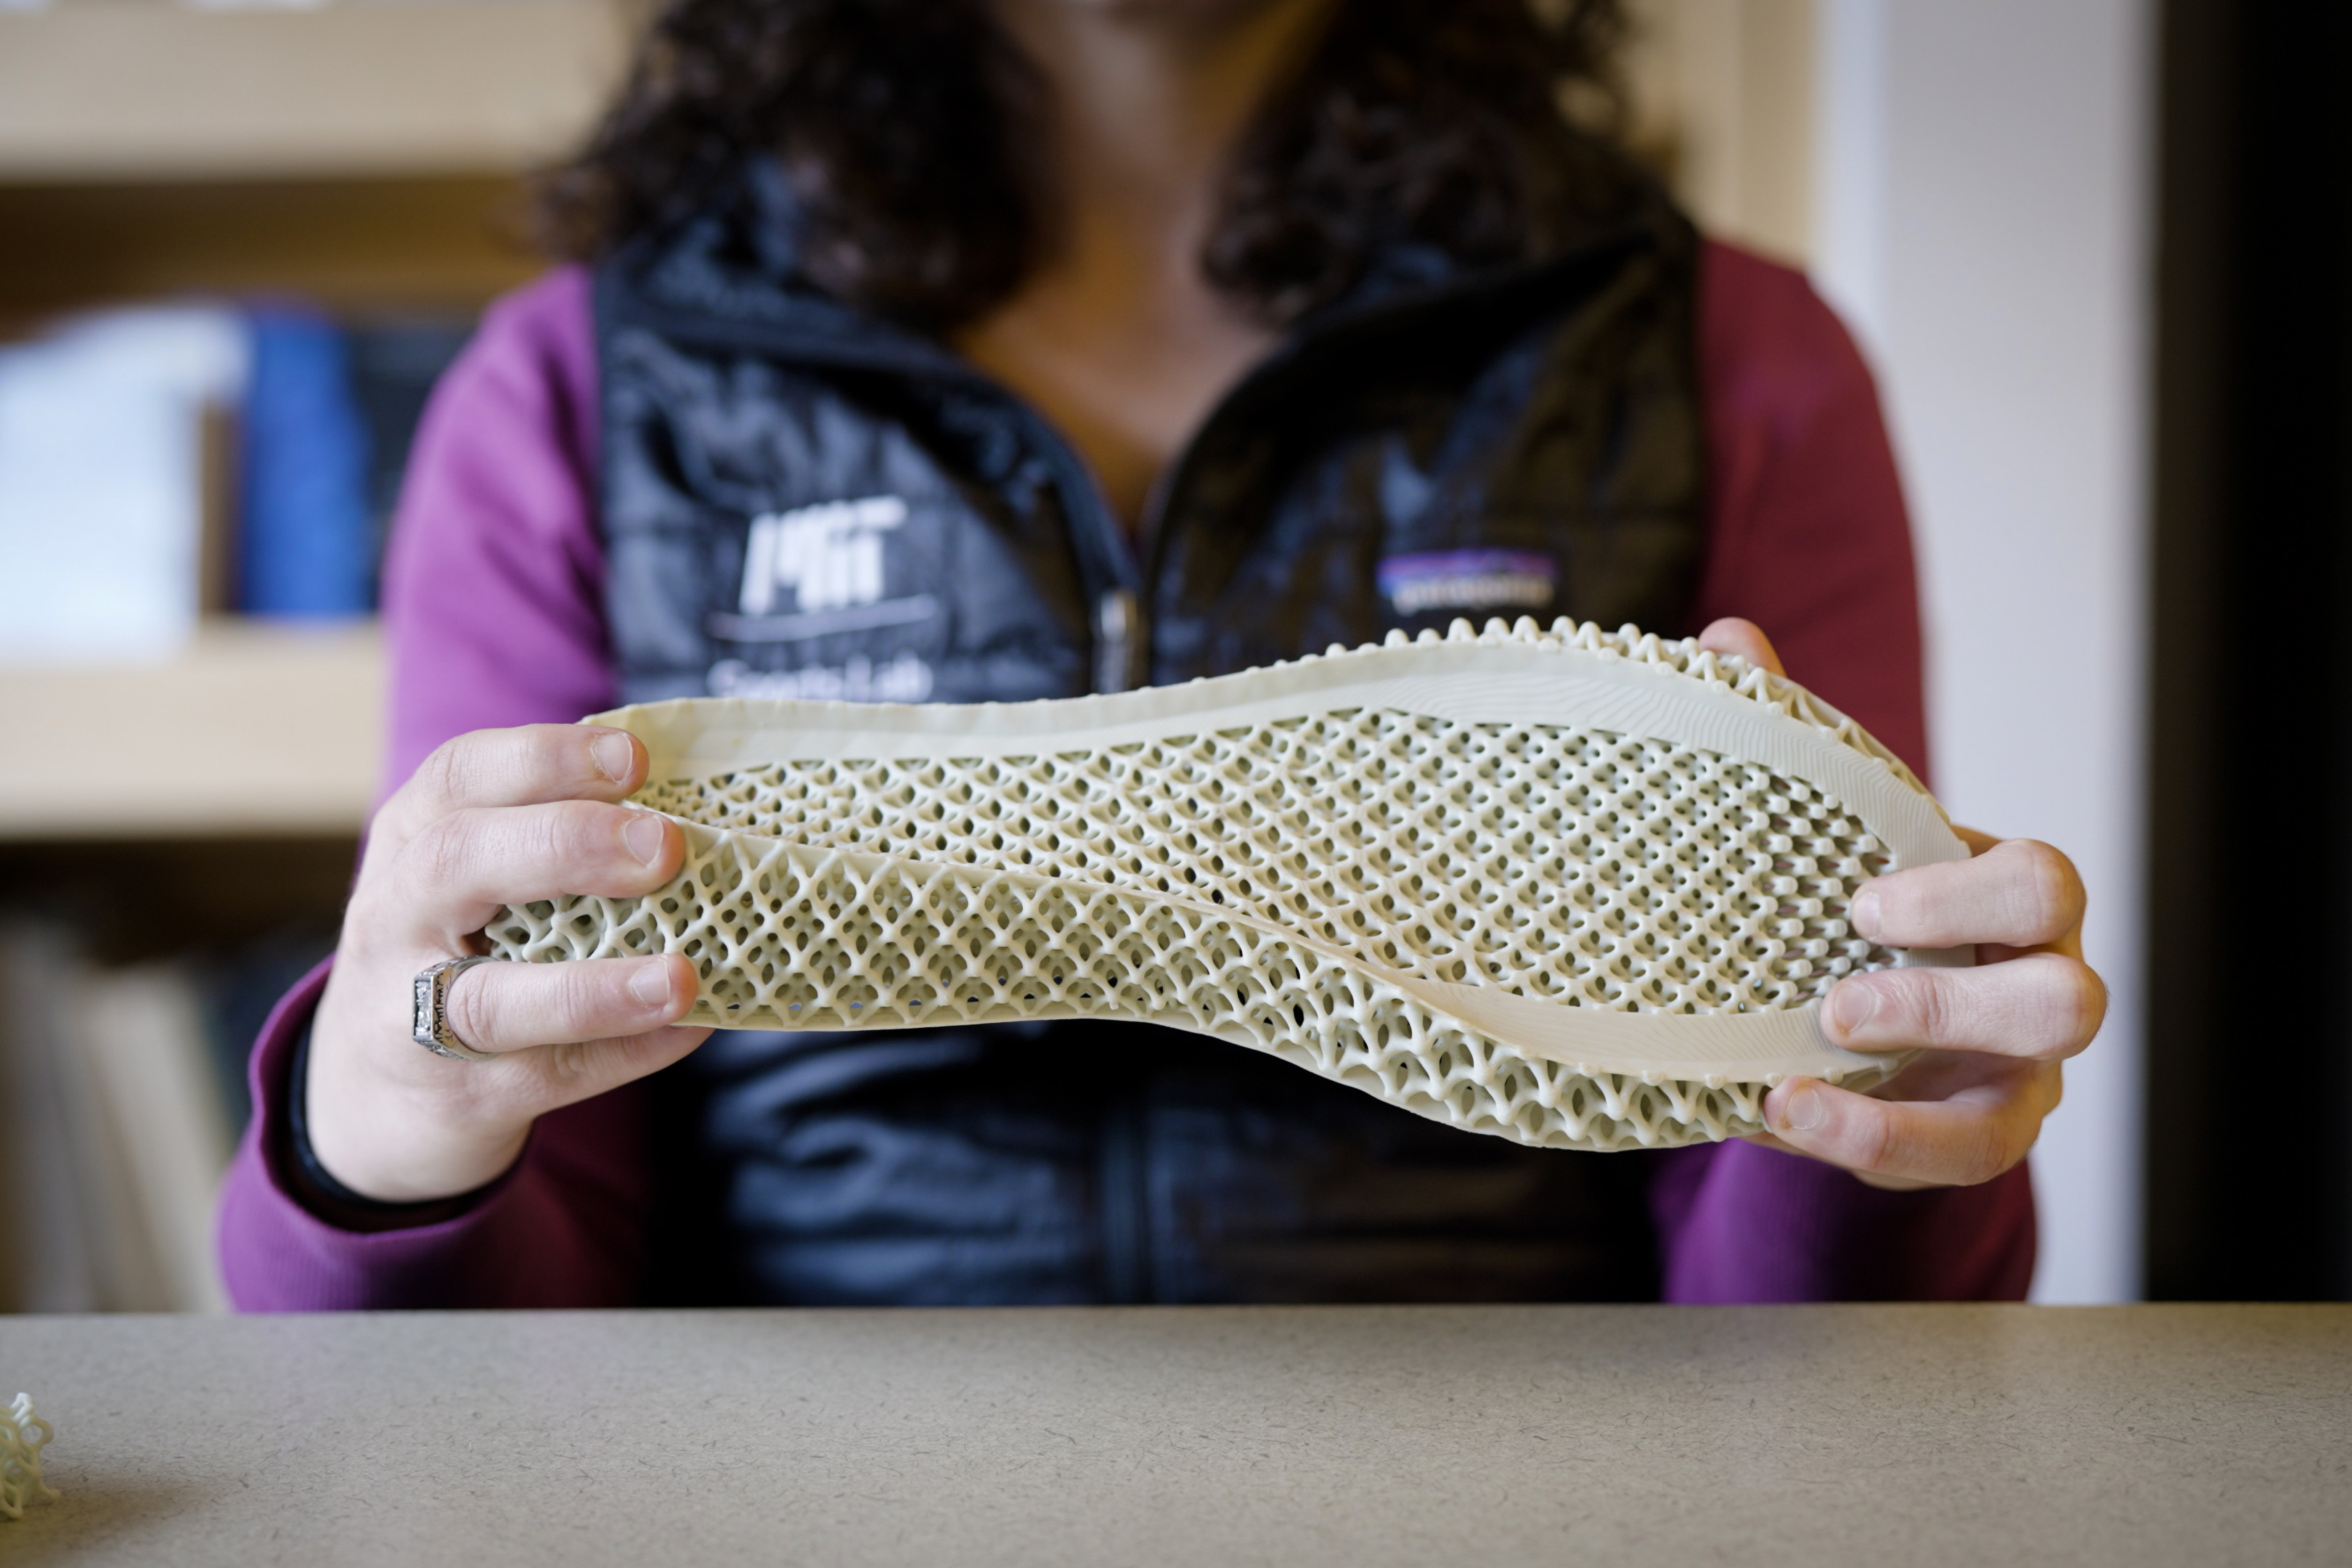
Article Modeling Running via Optimal Control for Shoe Design Sarah C. Fay, A. E. Hosoi
Here are some inspiring computational couture I found online. Amazingly the main source of inspiration is nature: flowers, animal skin, coral. Miraculous!
Radiolaria Tutu • 3D printed with biodegradable material by Reina Raveles
Alternative Opensource Parametric 3D CAD platforms and software
Apart from researching what is possible with parametric design, I've also researched some alternative open source software for 3D printing. User-friendly software that gives good designs is my most important requirement. My second requirement has to do with my strategy to use patterns from photos. The application must have an import function and menu steps to transform a jpg, png or svg file into an STL or OBJ basically from 2D to 3D. I downloaded a number but alot of the apps don't work or are not userfriendly for a beginner level with or without tutorial.
This article gives a top 18 opensource CAD sftware list. Article of sculpeo on opensource CAD
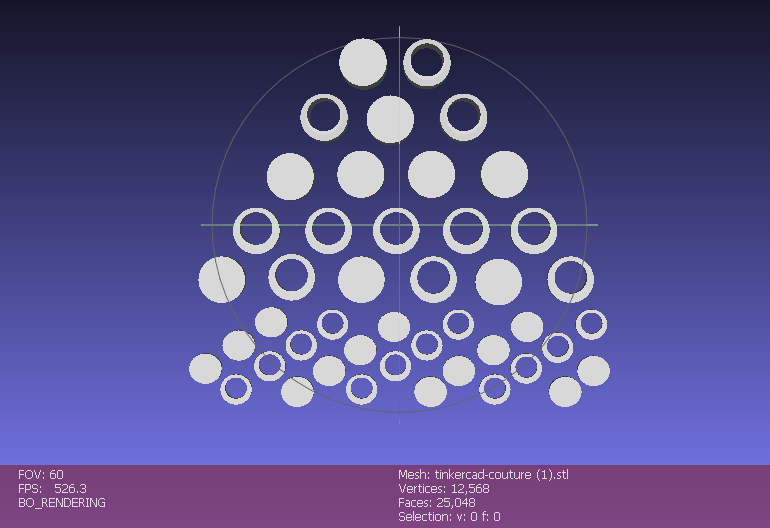
Tinkercad I used this before - a long time ago when I worked in the fablab. It is the most basic userfriendly 3D online platform that I know of. This pattern was a first try. The STL file can be found at the end of this page in 1
I screenfilmed the making of with the snipping tool but it crashed!
I imported the file into Meshlab an opensource 3D CAD program by Microsoft. Next I will make a 3D print on fabric.
Next I tried Blender 3.6.4 A slightly older version since it is now at version 4.1.1. But the good news is that once you've figured out how it works for the specific task you need (Use tutorials, from Blender, the community, on youtube and other sources, it gives good outputs for zero dollars. The not so good news: you won't find your way through this jungle by yourself, so you really need tutorials. And the instructors go through the steps so fast that you have to listen and stop and rewind alot.
I did a few tries. There were 2 options: First to import picture and turn that into an STL file which can then be 3D printed. Secondly to import an SVG file and transform that into an STL.
Both have very different methods. I used online tutorials.
After a few tries I decided to go for the SVG to STL.
Tutorial videos online can be found here: Blender Tutorial - Turn Any 2D Image to 3D Mode
The steps I took were to transfer a PNG picture file to an SVG in Inkspcape 2D program. Then to import the SVG into Blender and to transfer it to an STL. Jaguar Spots STL file 2
This is the result:
Jaguar Spots by Reina Raveles
New developments in 3D printing technology
On a consumer level 3D printing has some fun and interesting developments that are also applicable to the fashion industry.
-
Also manufacturers have been working on high speed 3D printers. The slow rate of 3D printing is definitely the single bigest hurdle for this technology. Apart from the nozzle clogging or the filament not sticking to the print base.
In this recent article from april 2024 Formlab launched its newest 3D printer with an impressive speed.
Techcrunch: formlabs speedy new 3D printer rivals injection molding
-
3D printing is expanding to more materials In another recent beakthrough MIT has found a way to 3D print aluminium in such a way that it keeps its strength and does not warp or crack. Techcrunch: 3D printing Aluminium
-
Prices of 3D printers are getting lower making them more accessible.
Research papers on 3D printing and (digital) fashion
Here are some research papers on 3D printing and fashion I found interesting.
Fashion From 3D Printing to Digital Fashion; Maria Victória Rocha
Tools
- Grasshopper
- Rhino3D
- Autodesk Meshmixer
- Tinkercad
- Freecad
- Blender
- Blender tutorials
- Youtube
- Thingiverse
-
Ultimaker 3 3D printer
- Filament ABS red
Process and workflow
Time to print!
The Fab community to the rescue again. I am getting help from Ramsay Mac Donald, assistant dean of the university of Suriname Technological Faculty, and also a Fab Lab enthousiast since he discovered 3D printing in Fablab Paramaribo 10 years ago. With limited resources he makes sure many students get their first 3D printing experience here.
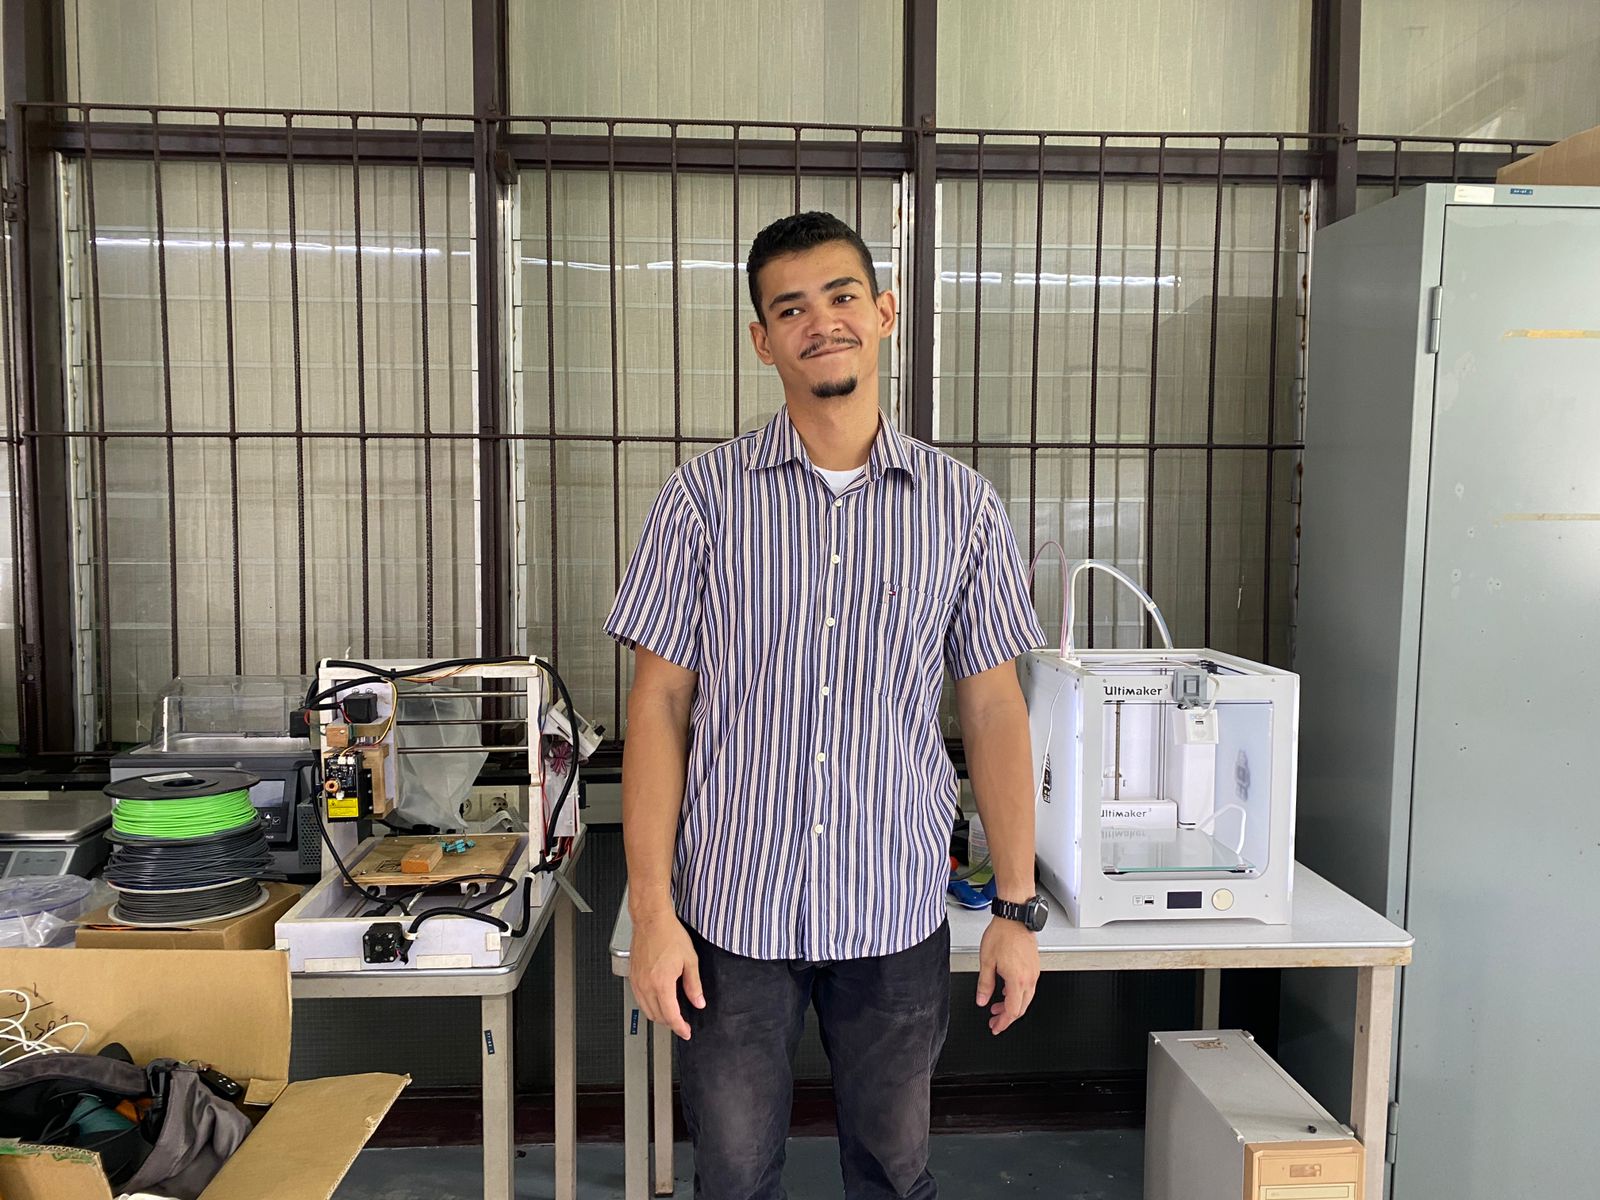
3D printer: Ultimaker S3
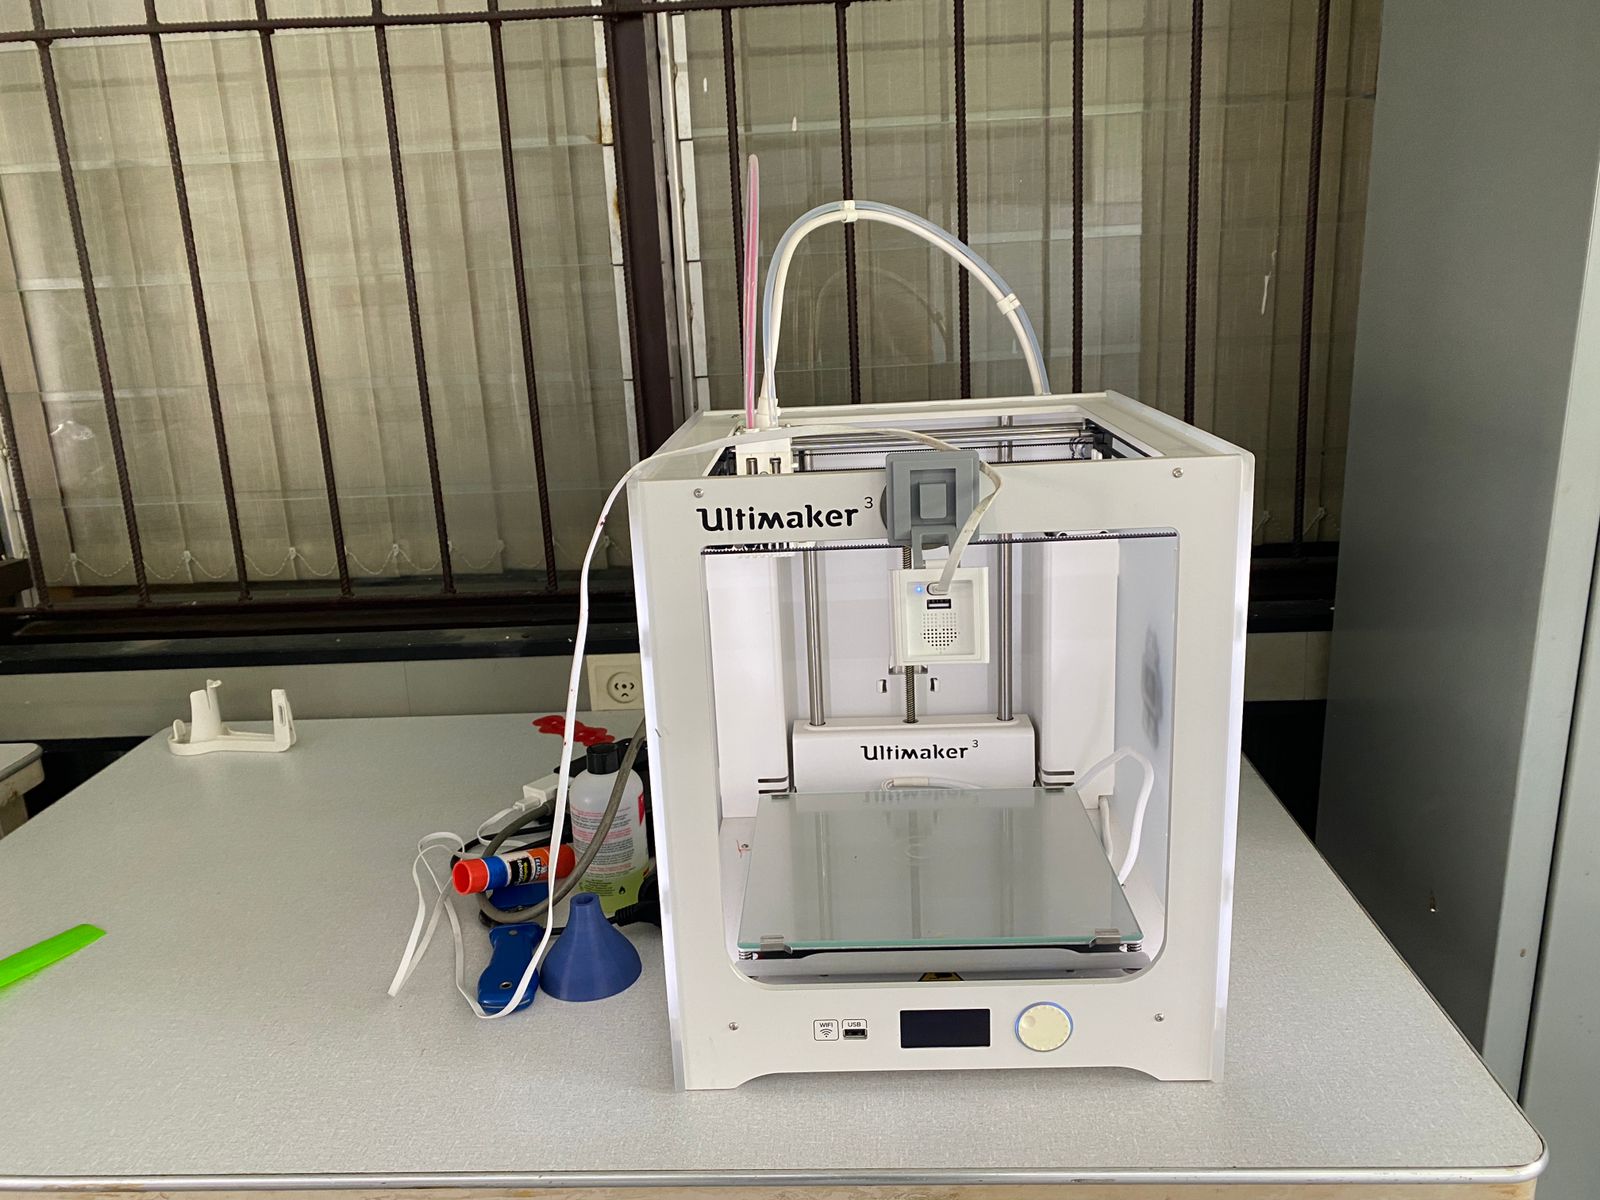
The lab has an Ultimaker S3 3D printer working. You can find the specs here: Specs
Unfortunately Murphy's Law was working because just that day the display burned so operating the printer was limited. We couldn't change the filament between jobs for instance. Other than that it was possible to do everything through wifi.
3D printing with ABS
The material I 3D printed with was a red ABS filement.
I personally prefer to 3D print with PLA because it is better for the environment. Unfortunately the 3D printer had an issue with the screen and as a result we could not change the filament.
ABS properties
ABS (acrylonitrile butadiene styrene) is a common filament used in 3D printing. It is especially valuable in strong plastic parts that must remain resilient in the face of temperature swings. It is mainly used in FDM (fused deposition modeling) 3D printers. ABS is a thermoplastic polymer composed of three monomers: acrylonitrile, butadiene, and styrene. ... Acrylonitrile gives it rigidity, chemical resistance, and strength. Styrene provides a smooth and shiny texture. And butadiene is the rubbery component that makes ABS tough.
The melting temperature of ABS filament is generally between 210-250°C.
This next table shows the specs for ABS.
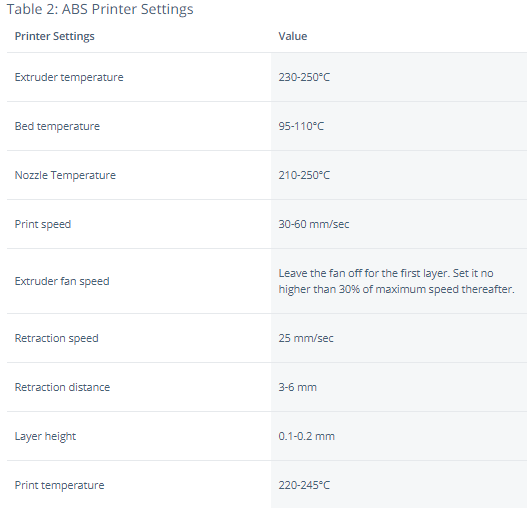
Source: XOmetry.com
Particularly for the Ultimake Cura the following property parameter settings for ABS are in the software:
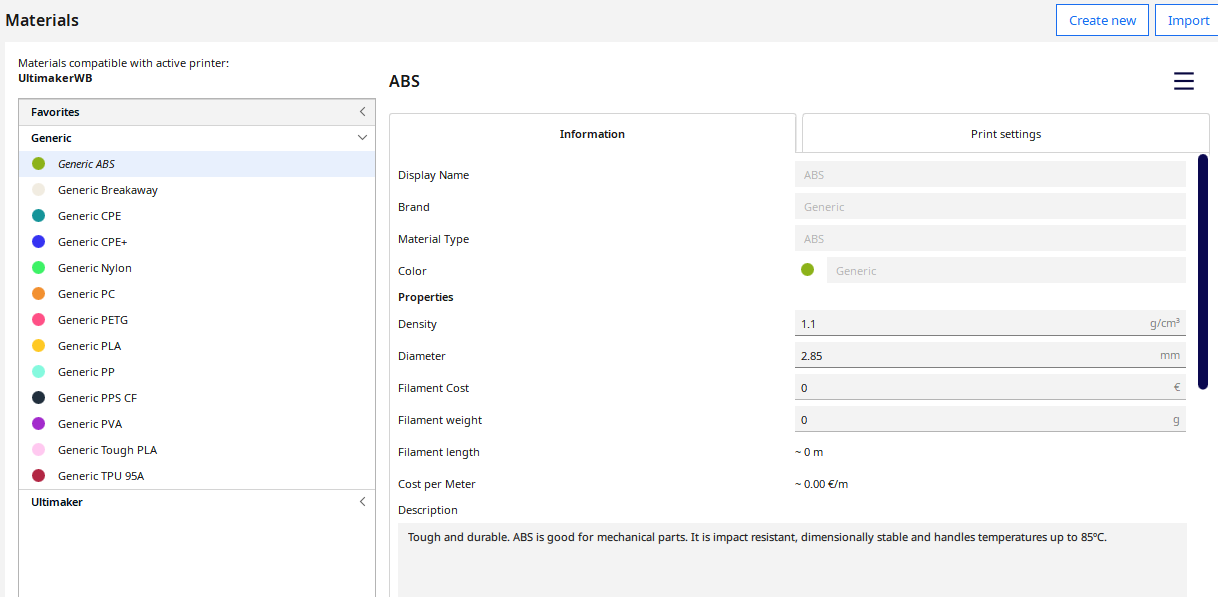
Based (partially) on these parameter settings I printed the ABS with these properties:
Speed: fast 0.2 mm/s Infill density : 30% Infill : Zig zag Shell thickness horizontal 0.7 mm Shell thickness vertical 1.0 mm No adhesion: this gives an extra support on the bottom
Here is the step by step process for the Tinkercad couture model
This model was 3D printed in ABS on organza. Click on the next presentation to see the step by step process.
Your paragraph text by Reina Raveles
Here is the step by step process for the Frog belly model
The Frog Belly model was 3D printed in ABS on Polyester netting. Click on the next presentation to see the step by step process.
3Dprinting FrogBelly Pattern on Polyester Netting by Reina Raveles
Here is the step by step process for the Crocodile scales model
This model is downloaded from thingiverse via this link: Crocodile scales 3D model from Thingiverse
This model was 3D printed in ABS on a mixed plastic mesh. This material melted during printing so it didn't turn out as neat as the other models.
3D print crocodile on Blue Mesh by Reina Raveles
Jaguar Spots making a design in Blender
UPDATE! My first few tries with extruding the Jaguar spots did not succeed in Blender. But after a few days I tried again and was able to extrude to 3 mm thickness.
I simulated a 3D print on the Ultimaker Cura and got this rendering video as a result. Click on the next picture for the youtube video:
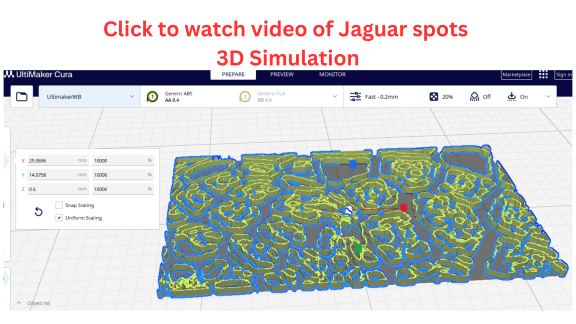
The steps where I made adjustments in the parametric design can be found here:
Jaguar Spots by Reina Raveles
I still have to 3D print but for now I added the rendering.
The model is uploaded in Sketchfab and can be found here:
UPDATE: Parametric Modelling in Blender
Based on the blender tutorial in this short Youtube film Model Parametric Design Blender Tutorial by Harish Lohar which I have watched over 20 times to "get it" I first recreated his parametric model with hexacons. Later I did the same with ball shapes.
The steps are:
Steps to Model a Parametric Design Blender Tutorial
1) Starting with a basic shape in Blender:
-
First press ‘A’ to select all shapes in the startup plane and then ‘delete’
-
Press "shift" "A" to add a new basic shape.
-
A menu below shows the vertices to adjust the shape
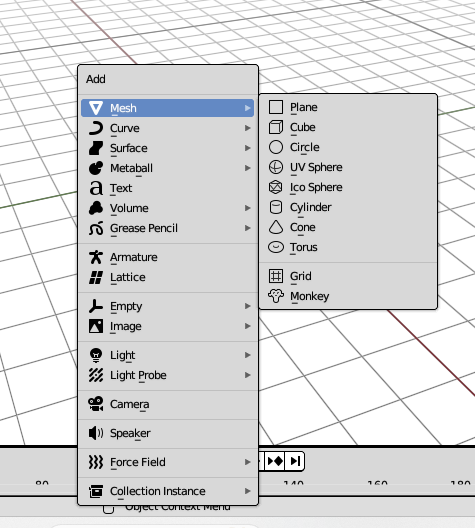
2) Adjusting the shape
- In edit mode you can further adjust the shape by pressing ‘e’ and/or scale in the left side menu
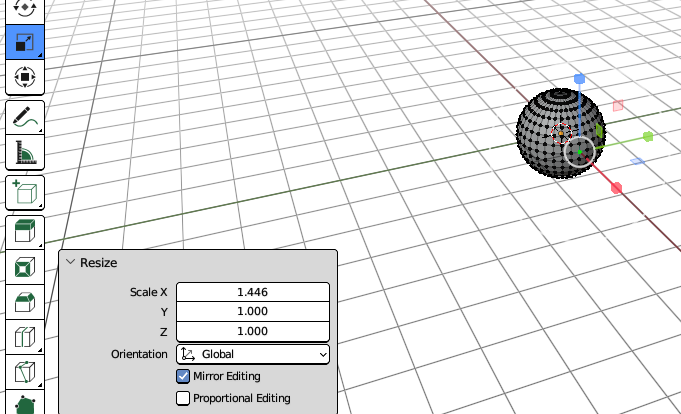
3) Prepare to multiply and group your shape
-
Select your shape
-
On the menu on the right side of the screen go to: Data (Data Object properties) -vertex group section - add a new vertex group.
-
Name it and press assign
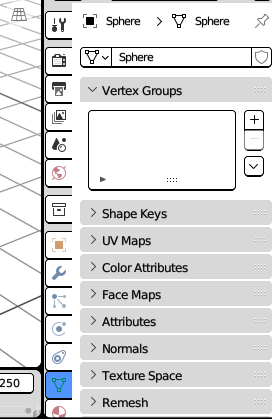
4) In object mode duplicate the shape as many times as you want.
- In the menu on the right side go to Modifier– add modifier – generate and then choose “Array ”.
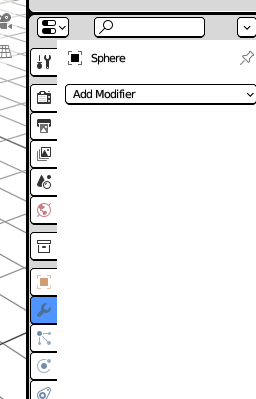
- Under fit type-count you can adjust the number to how many shapes you want in your first row Eg. 20, 50 etc
Make sure your shape is selected.
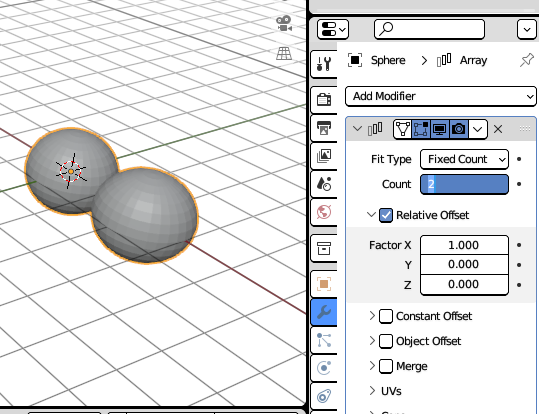

-
Then duplicate the first row by pressing “shift” “d”
-
Duplicate the second row and on by moving it where you want it.

- In the menu on top you can connect the rows and shapes with the “ snap” key.\
Choose Snap to “vertex”
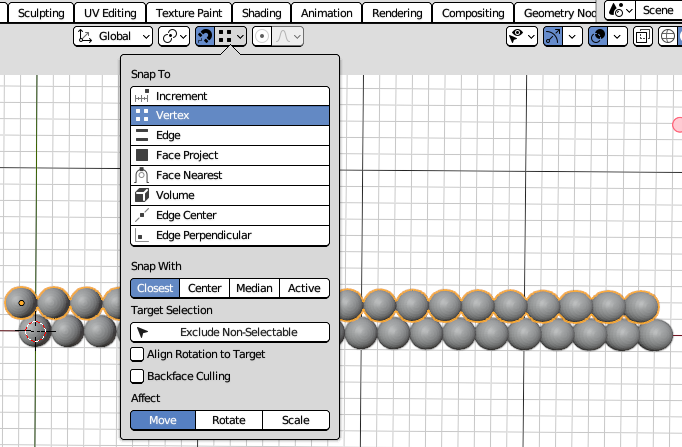
- Then to multiply quickly: press shift d and again shift until you have as many copies as you like.
5) Convert to Mesh and create one object from all shapes
-
In object mode Select all
-
In the menu on top go to “ object” – “convert” - “mesh” The modifier is applied now
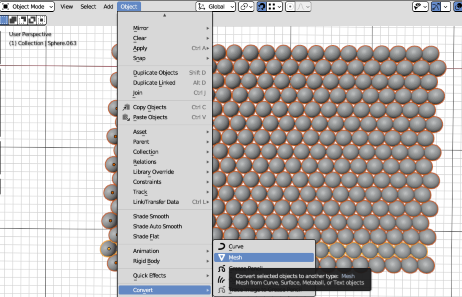
- To join all the shapes in one object: Select all and press ctrl j
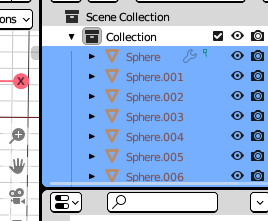

-
In object mode Select all
-
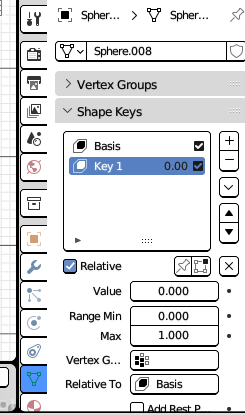
In the menu on the right side go to Data- Shape keys – add shape key (Basics)
-
Then add a second shape key (Key1)
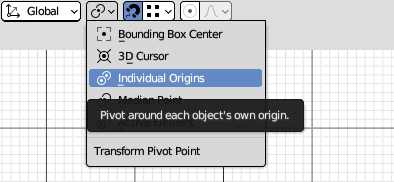
- In the menu on top go to: “ Transform pivot point” - individual origins.
Select and now you can scale it.
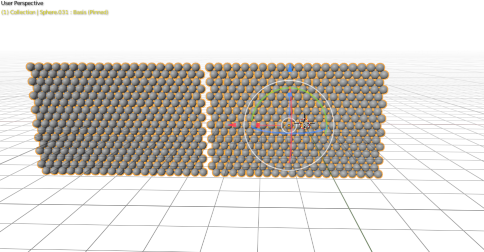
- Scale your model how you want. This can be done with the value button and or by dragging the arrows (which I still prefer!)
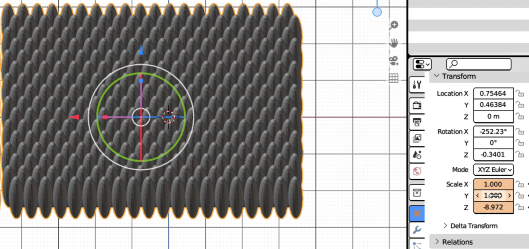
VIDEO
Here is a video scaling the different parametric models.
Testing Parametric Modelling in Blender by Reina Raveles
In this second video the scaling of the balls parametric model is done numerically.
Testing (2) Parametric Modelling in Blender with numbers by Reina Raveles
