5. E-Textiles and Wearables I#
I’ve never had a thing with electronics but I’d like to be able to integrate it into my projects. I did not have much time to experiment with it, but I followed some preparatory lessons at the Wemake (here in Milan) a few months ago.
For this assignment, I preferred to follow Kobakant’s tutorials and Liza Stark’s lessons enough to understand the mechanisms of electronics first.
Soft Potentiometer / Analog Tilt Sensor#
How suggest Liza i’ve followed this tutorial by Kobakant for create a soft potentiometer (analogic)
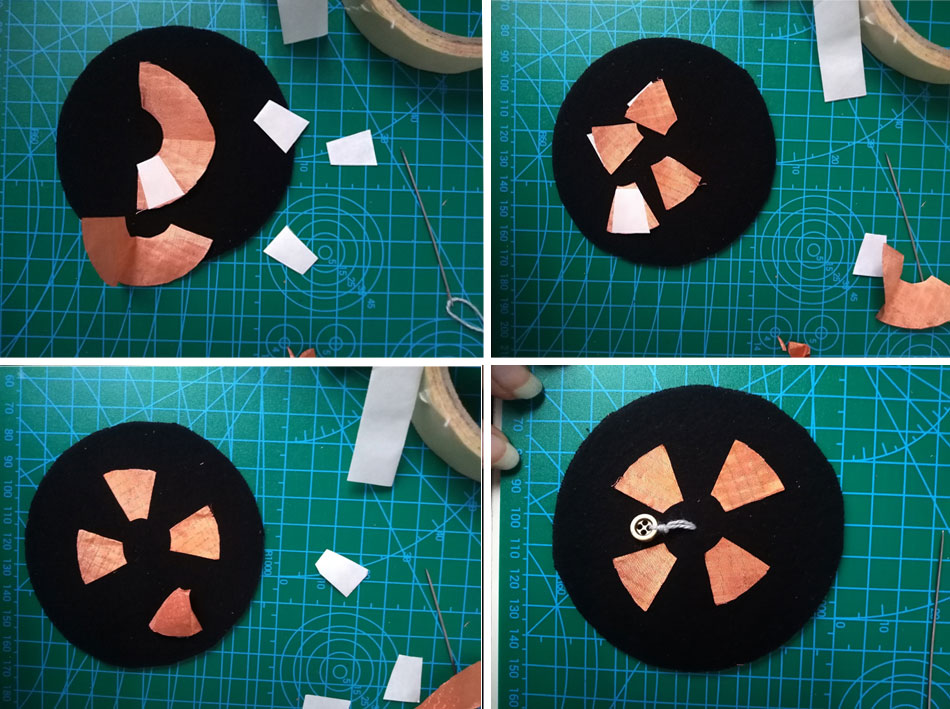
I started with 4 segments of conductive fabric, four sections of a concentric circle. These petals I joined them with a conductive thread isolating the contact with the velost (I understood only at the end of the exercise, after, that it was a resistive thread, really similar).
At the end I inserted in the center of the design a pendant formed by a metal button, conductive wire and adhesive tape to make it rigid.
Below you can find my phases for make a simple potentiometer with:
- a thin neoprene
- copper ripstop fabric shieldex kassel
- conductive Yarn
- a metal little button
- adhesive strip for fabrics (Flizeilne)
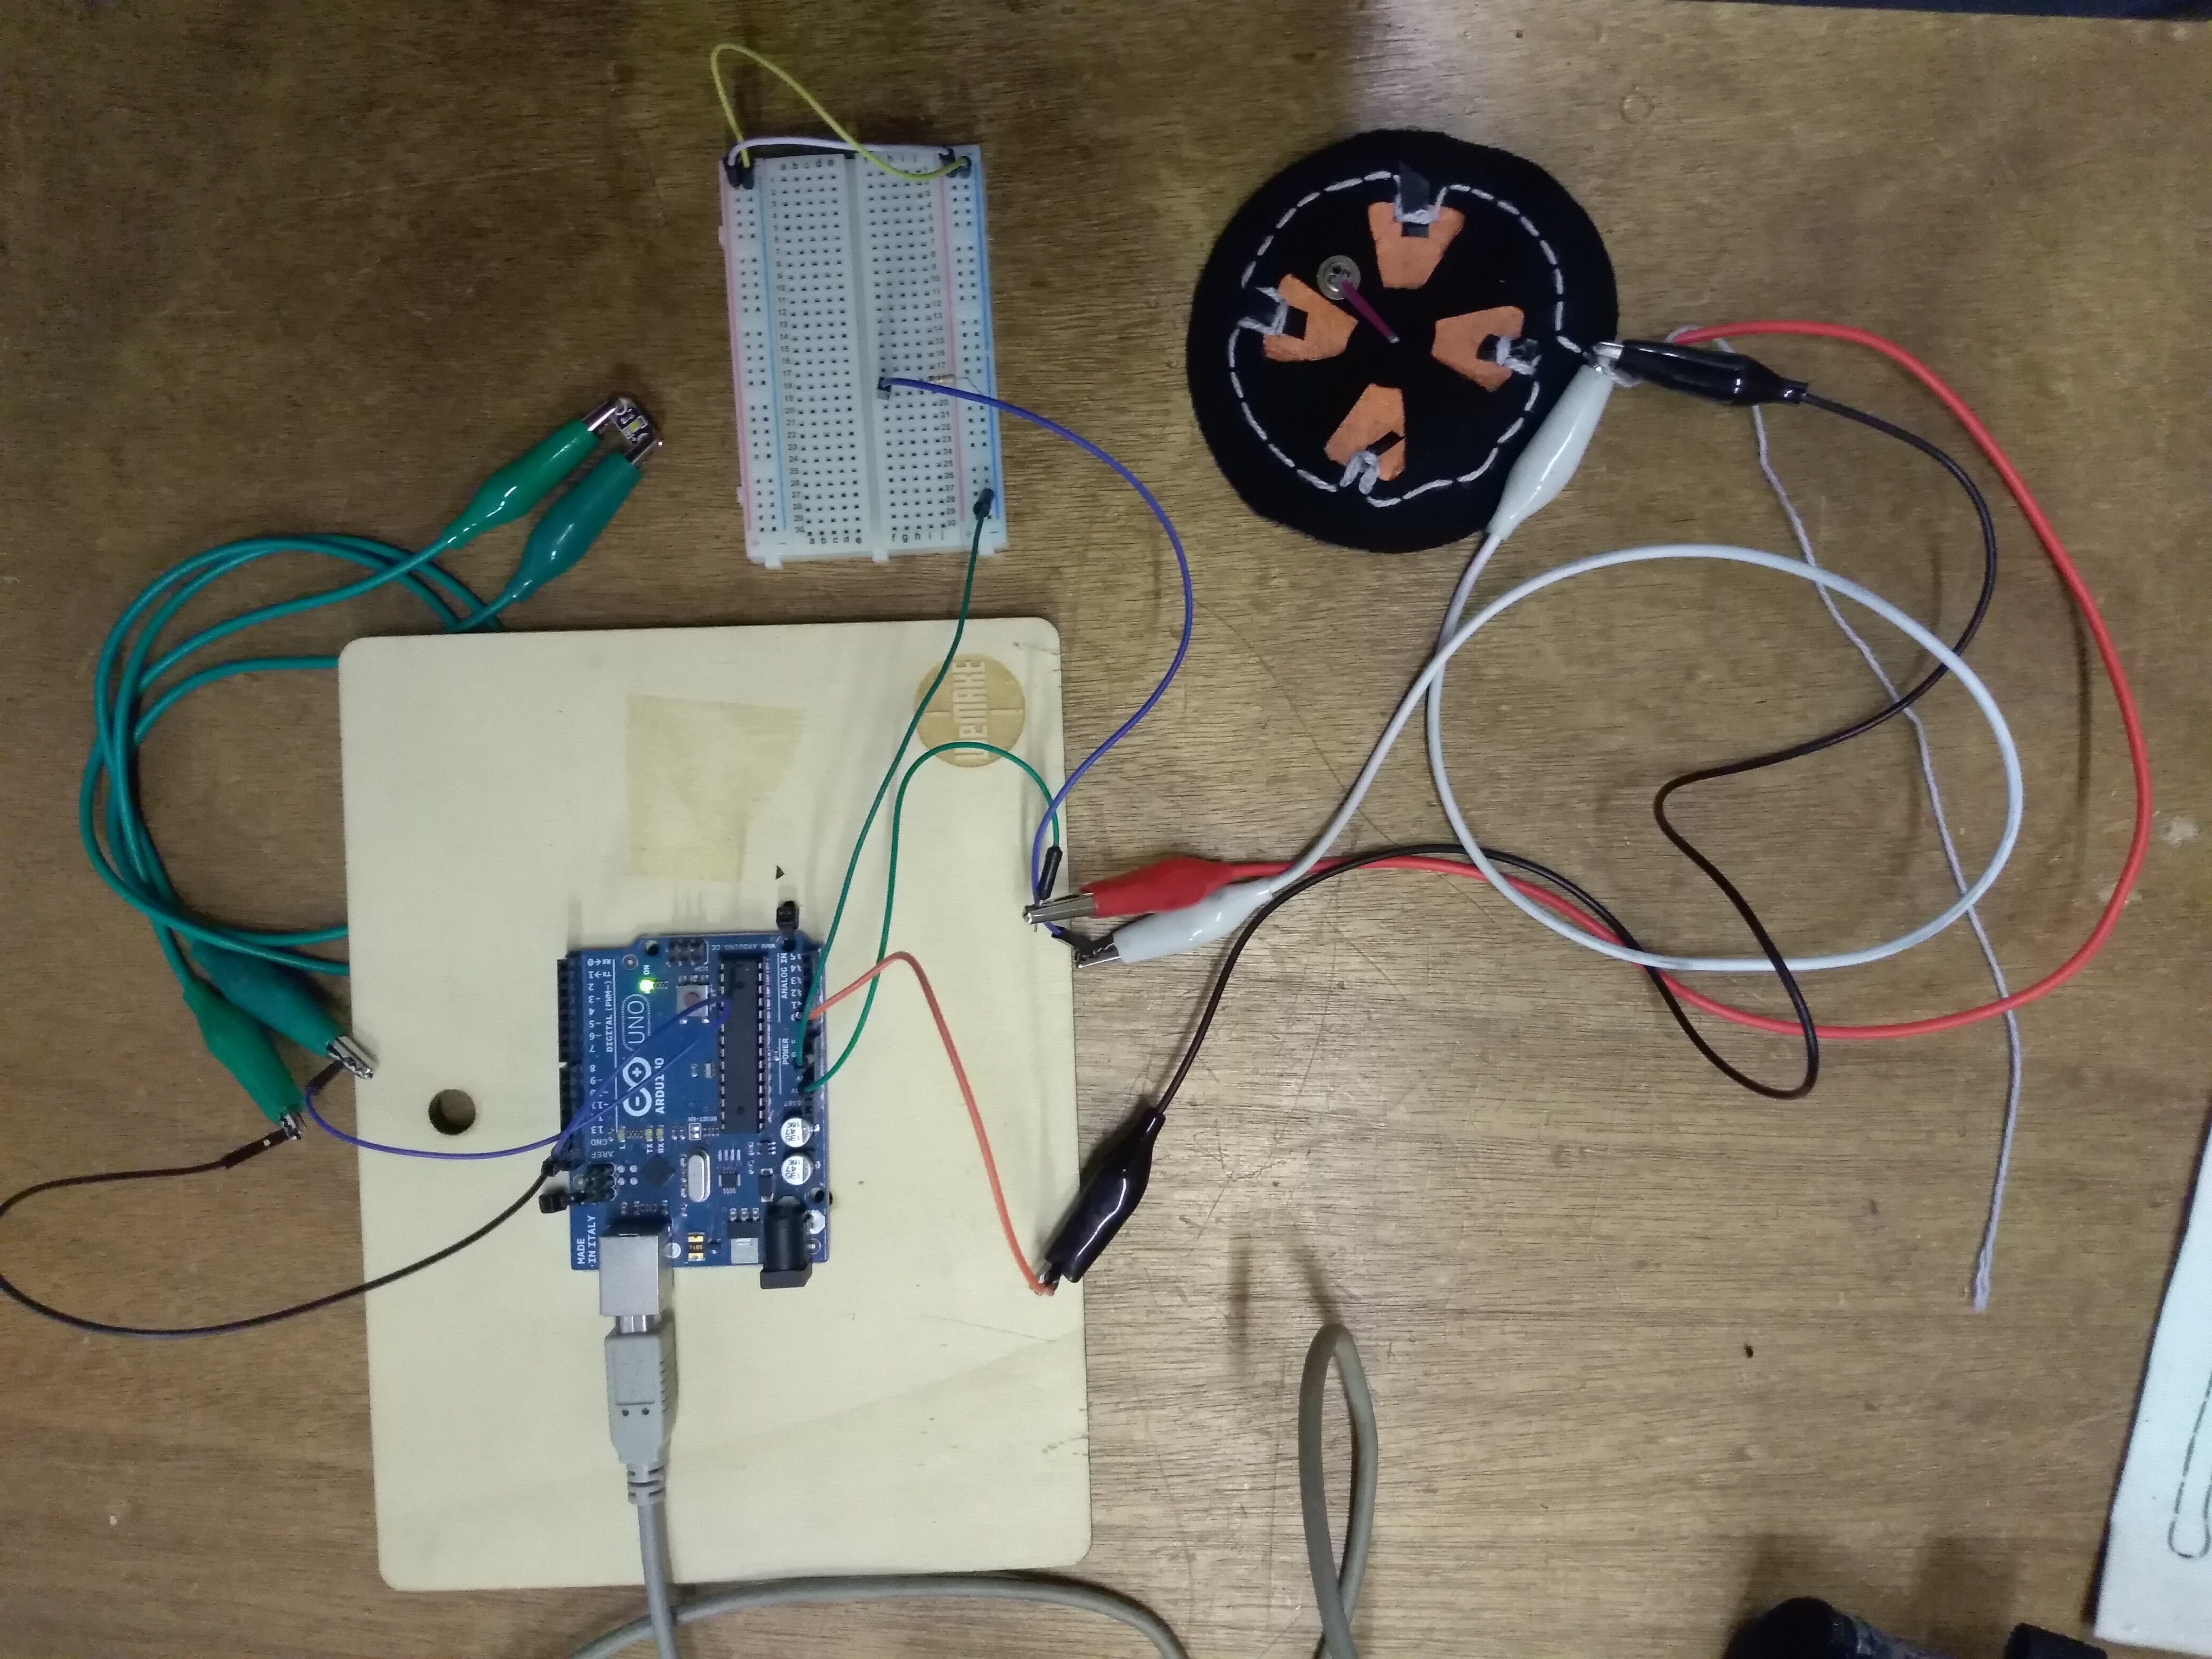
I tried to modify the code with the help of Giorgia in order to illuminate the LED in 4 different intensities. At first we tried with a classic LED but the difference was not noticed at all and anyway some petals more distant from the beginning of the circuit did not work. Giorgia advised me to use a Led for Lilipad because it is usually more sensitive. The circuit worked with both petals but I could not visually differentiate the lighting of the LED even if the values perceived by the code were proportionally less intense as one moved away from the board.
tiltsensor from Greta Dalessandro on Vimeo.
Code#
i’ve first of all see the Liza’s exemple from here
After some try i’ve sew the velostat to make a better resistence and try to make a different light for each petal. After that it works a litte better so i’ve documented with a short video. so i’ve draw a fabric circuit to sew olso the resistence and the Lilipad led.
/* code of tilt sensor (different petals > different intensity
 */
const int numReadings = 10;

int readings[numReadings];      // the readings from the analog input
int readIndex = 0;              // the index of the current reading
int total = 0;                  // the running total
int average = 0;                // the average

int inputPin = A1;
int ledPin = 13;     // select the pin for the LED
int ledPin2 = 10;     // select the pin for the LED
int ledPin3 = 11;    // select the pin for the LED

//LED brightness values
int padOne = 5;
int padTwo = 30;
int padThree = 90;
int padFour = 255;

void setup() {
  // initialize serial communication with computer:
  Serial.begin(9600);
  // initialize all the readings to 0:
  for (int thisReading = 0; thisReading < numReadings; thisReading++) {
    readings[thisReading] = 0;
  }
  pinMode(ledPin, OUTPUT);
  pinMode(ledPin2, OUTPUT);
  pinMode(ledPin3, OUTPUT);
}

void loop() {
  // subtract the last reading:
  total = total - readings[readIndex];
  // read from the sensor:
  readings[readIndex] = analogRead(inputPin);
  // add the reading to the total:
  total = total + readings[readIndex];
  // advance to the next position in the array:
  readIndex = readIndex + 1;

  // if we're at the end of the array...
  if (readIndex >= numReadings) {
    // ...wrap around to the beginning:
    readIndex = 0;
  }

  // calculate the average:
  average = total / numReadings;
  // send it to the computer as ASCII digits
  Serial.print("Unmapped readings = ");
  Serial.print(average);

  Serial.print("\t");

//these if statements determine which "pad" is activated
//change these numbers based on your own readings
  if (average >= 500 && average <= 725) {

    //write the new value to the LED
    analogWrite(ledPin,padOne );
//    analogWrite(ledPin2, padOne);
//    analogWrite(ledPin3, padOne);
    Serial.println("Pad 1 activated");

  } else if (average >= 730 && average <= 780) {

    //write the new value to the LED
   // analogWrite(ledPin, padTwo);
    analogWrite(ledPin, padTwo);
   // analogWrite(ledPin3, padTwo);
    Serial.println("Pad 2 activated");

  } else if (average >= 800 && average <= 880) {

    //write the new value to the LED
//    analogWrite(ledPin, padThree);
//    analogWrite(ledPin2, padThree);
    analogWrite(ledPin, padThree);
    Serial.println("Pad 3 activated");

  } else if (average >900) {

    //write the new value to the LED
//    analogWrite(ledPin, padFour);
//    analogWrite(ledPin2, padFour);
    analogWrite(ledPin, padFour);
    Serial.println("Pad 4 activated");

  } else {
    analogWrite(ledPin, LOW);
//    analogWrite(ledPin2, 0);
//    analogWrite(ledPin3, 0);
    Serial.println("Off");

  }
  delay(1);        // delay in between reads for stability

}
Pressure Sensor (Simple)#
For understand the code i’ve fistr of all copied the Liza’s from here ad I’ve test it with my sensor. I’ve changed something because I’had with me the Lily Pad board and and I wanted to use the board to make the sensor work
I’ve used: * Bekinox Thread * Velostat * medium grey neoprene
Code#
// initialize variable for pressure sensor reading
  int pressureSensorValue = 0;
  // initialize variable for pressure sensor pin
  int pressureSensorPin = A5;
  int ledPin = 11;


  void setup() {
  // initialize serial communication at 9600 bps
  pinMode(ledPin, OUTPUT);
  Serial.begin(9600);
  delay(300);
  }
  void loop() {
  // read pin and store value in a variable:
  pressureSensorValue = analogRead(pressureSensorPin); // print the light sensor value:
  Serial.println(pressureSensorValue);
  // delay between readings:
  delay(100);


  if (pressureSensorValue > 100)
  // if light sensor reads greater than 300
  {
  digitalWrite (ledPin, HIGH); // turn LED on
  } else
   // otherwise
  digitalWrite (ledPin, LOW); // turn LED off
  }
Pressure Sensor (Bike Brake)#
The second step was to make something useful.
In this mounths i’ve lived on my bike to follow the lessions and to go to work and obvusly i’ve thinked first of all about my bike. It will be great to make soft sensor to use in motion and pick it when the trip is ended. Form the pressure sensor I’ve think than maybe it will turn on a red led when the rider is curbing to help with the security, like a car.
I’ve used:
- Bekinox Thread
- Velostat
- medium purple neoprene
- 1 red Led
- 2 resistors
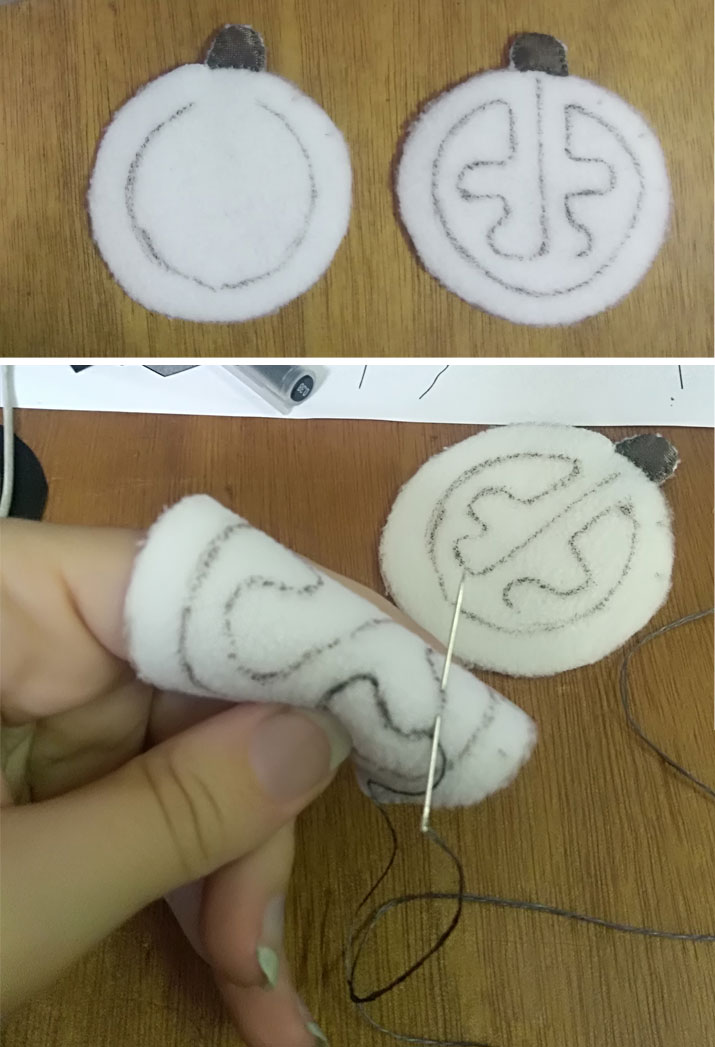
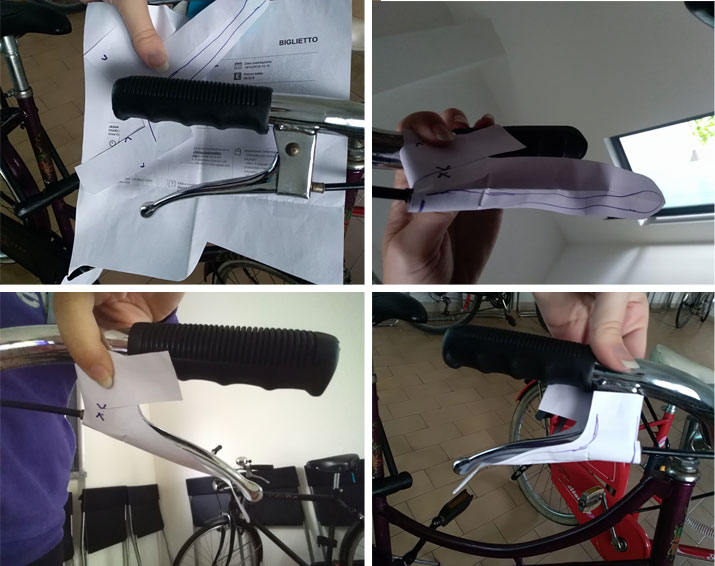
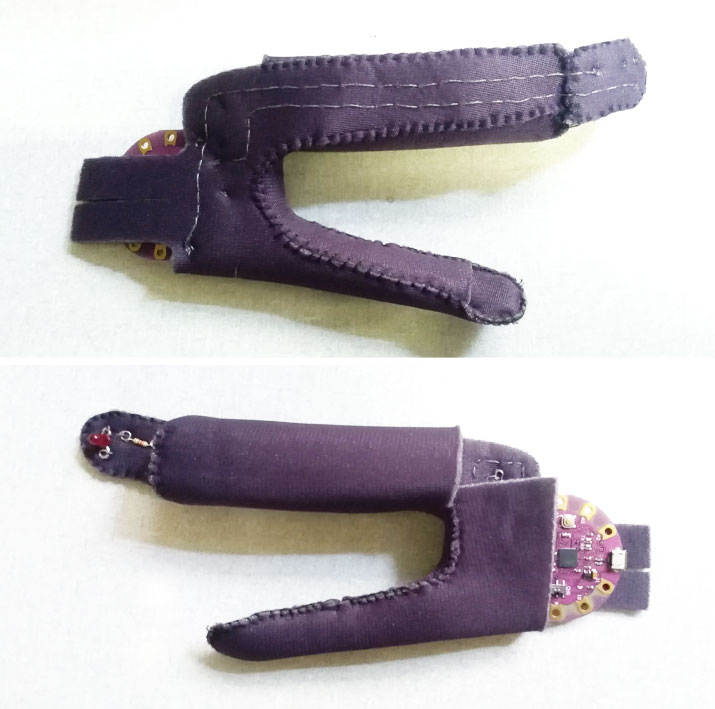
I’ve put the velostat in a zone on the brake lever. Normally the rider doesn’t touch it but when he want to brake the Led can turn on in a red light. More he brake and strong the light become.
I’ve studied the shape for put it and take it off fast. with elastics and a button it fit well and take a free point where is the Led is sewn.
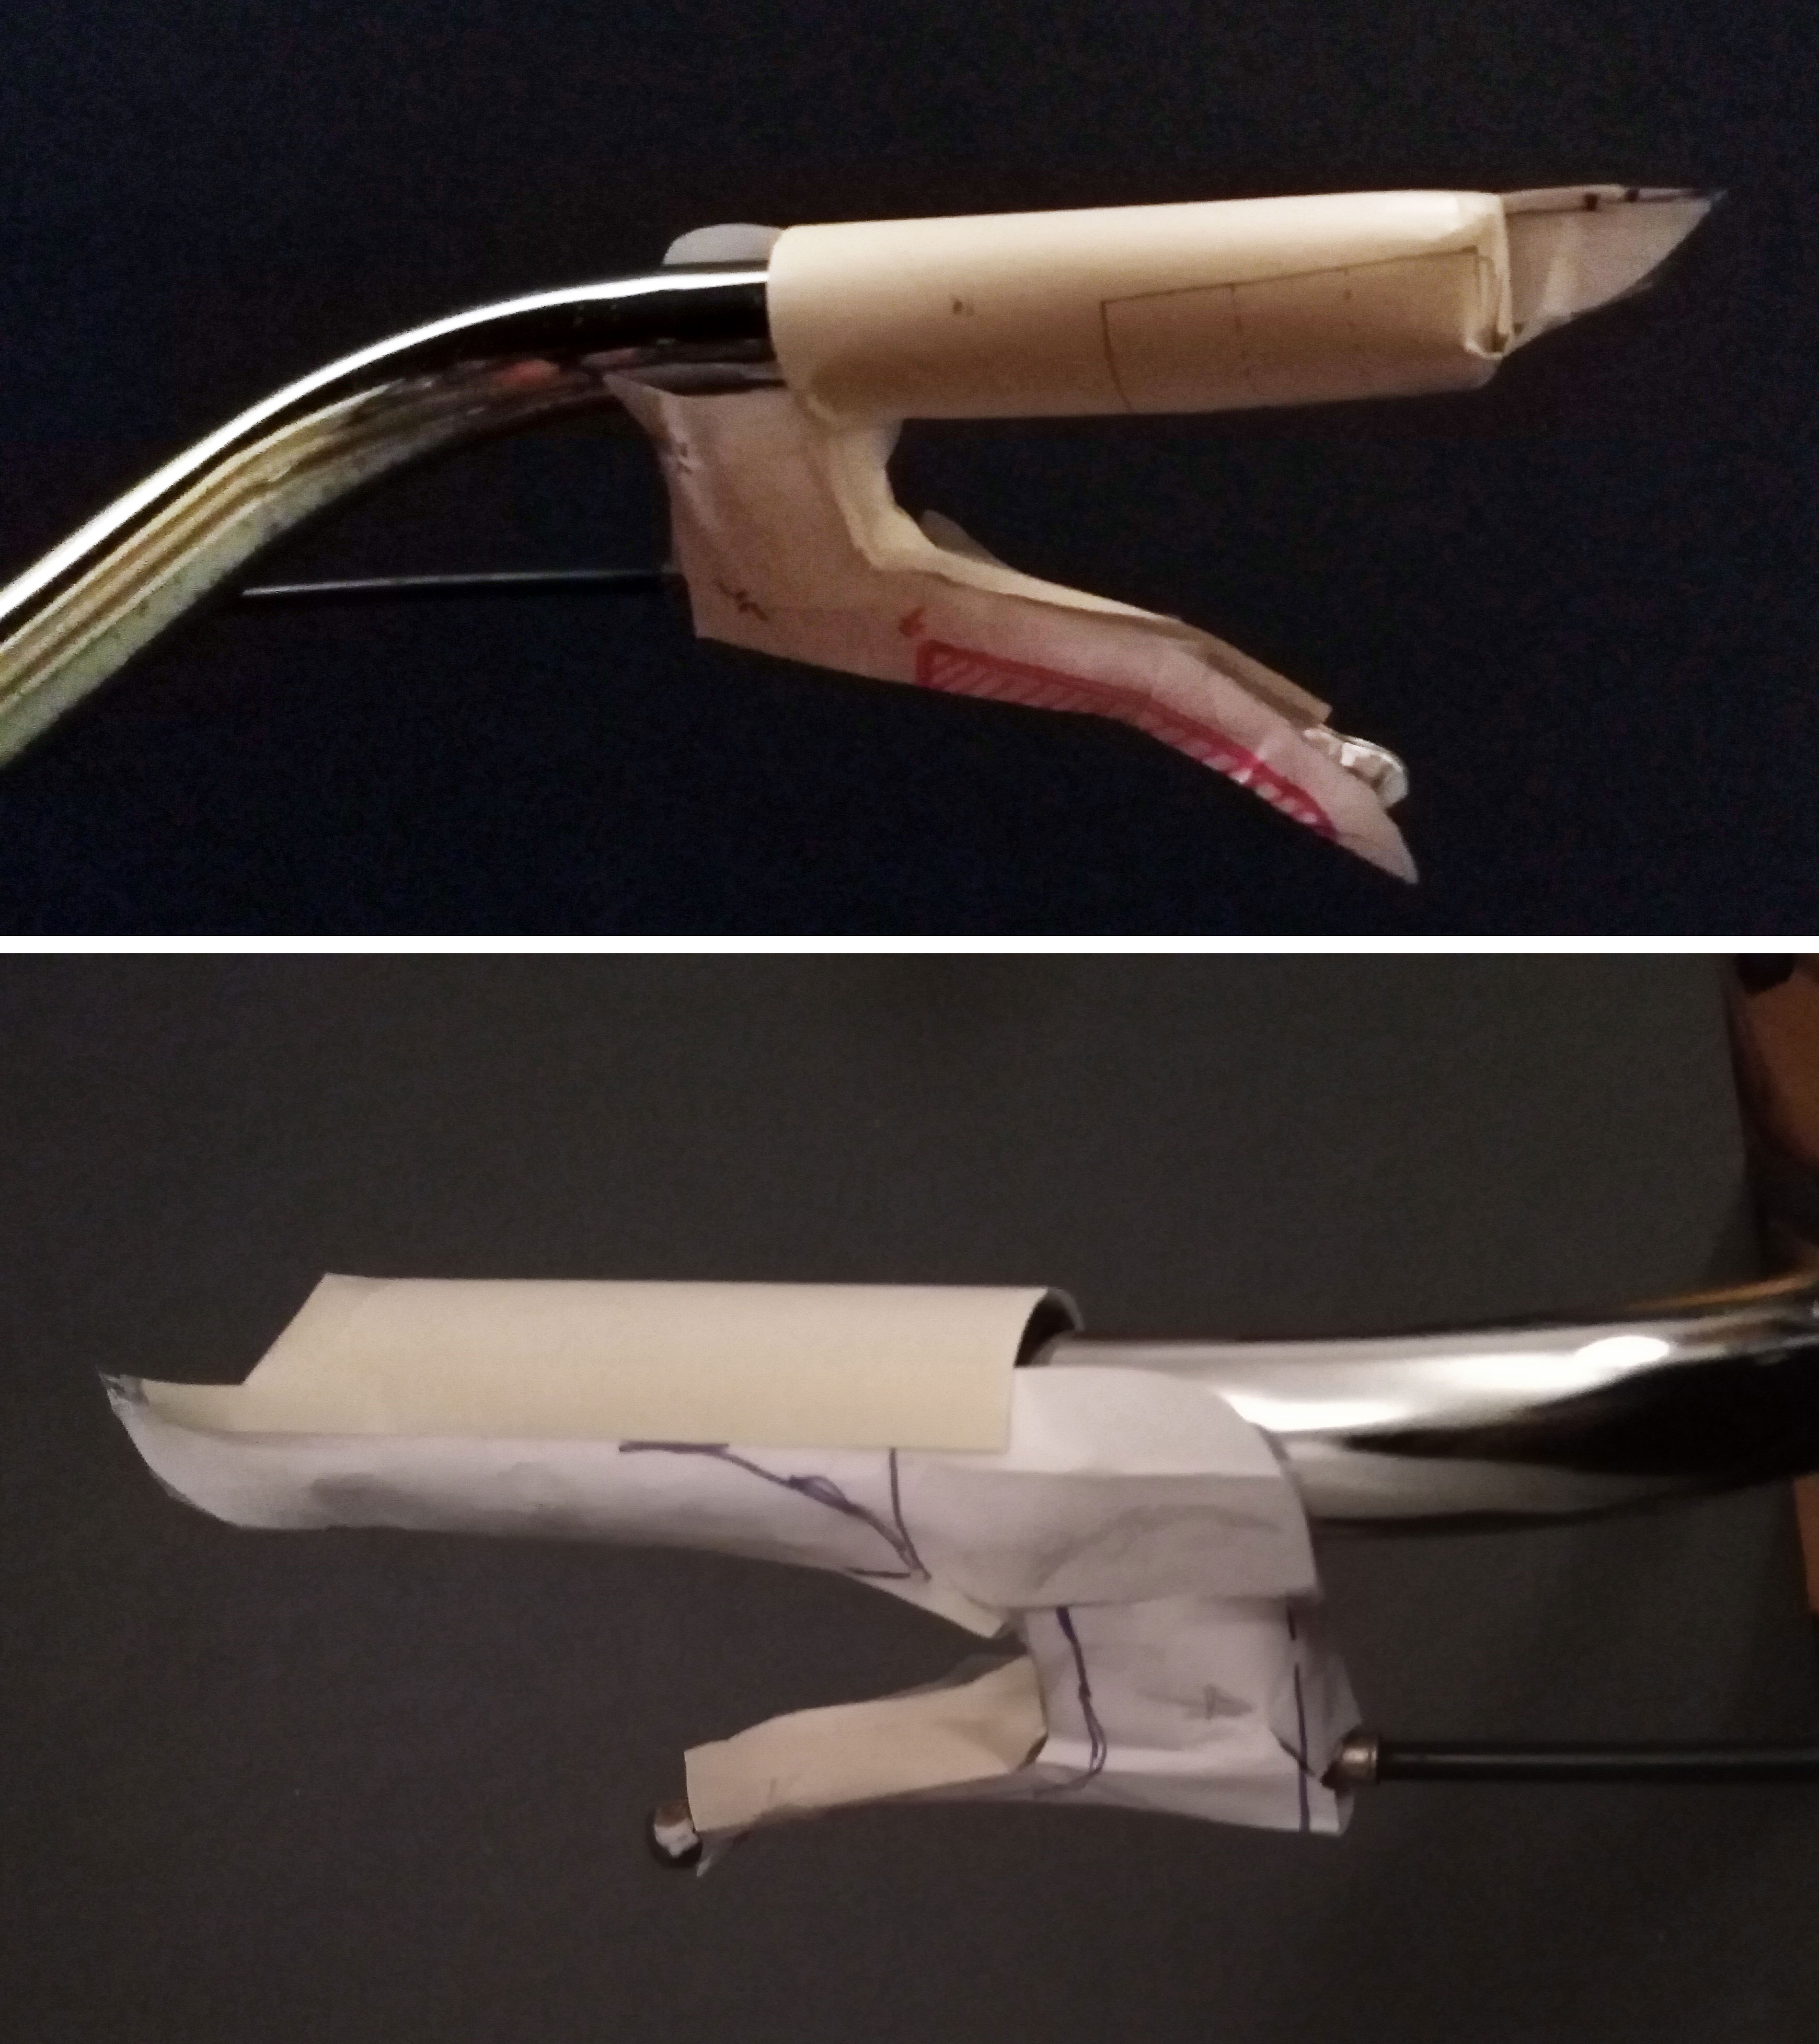

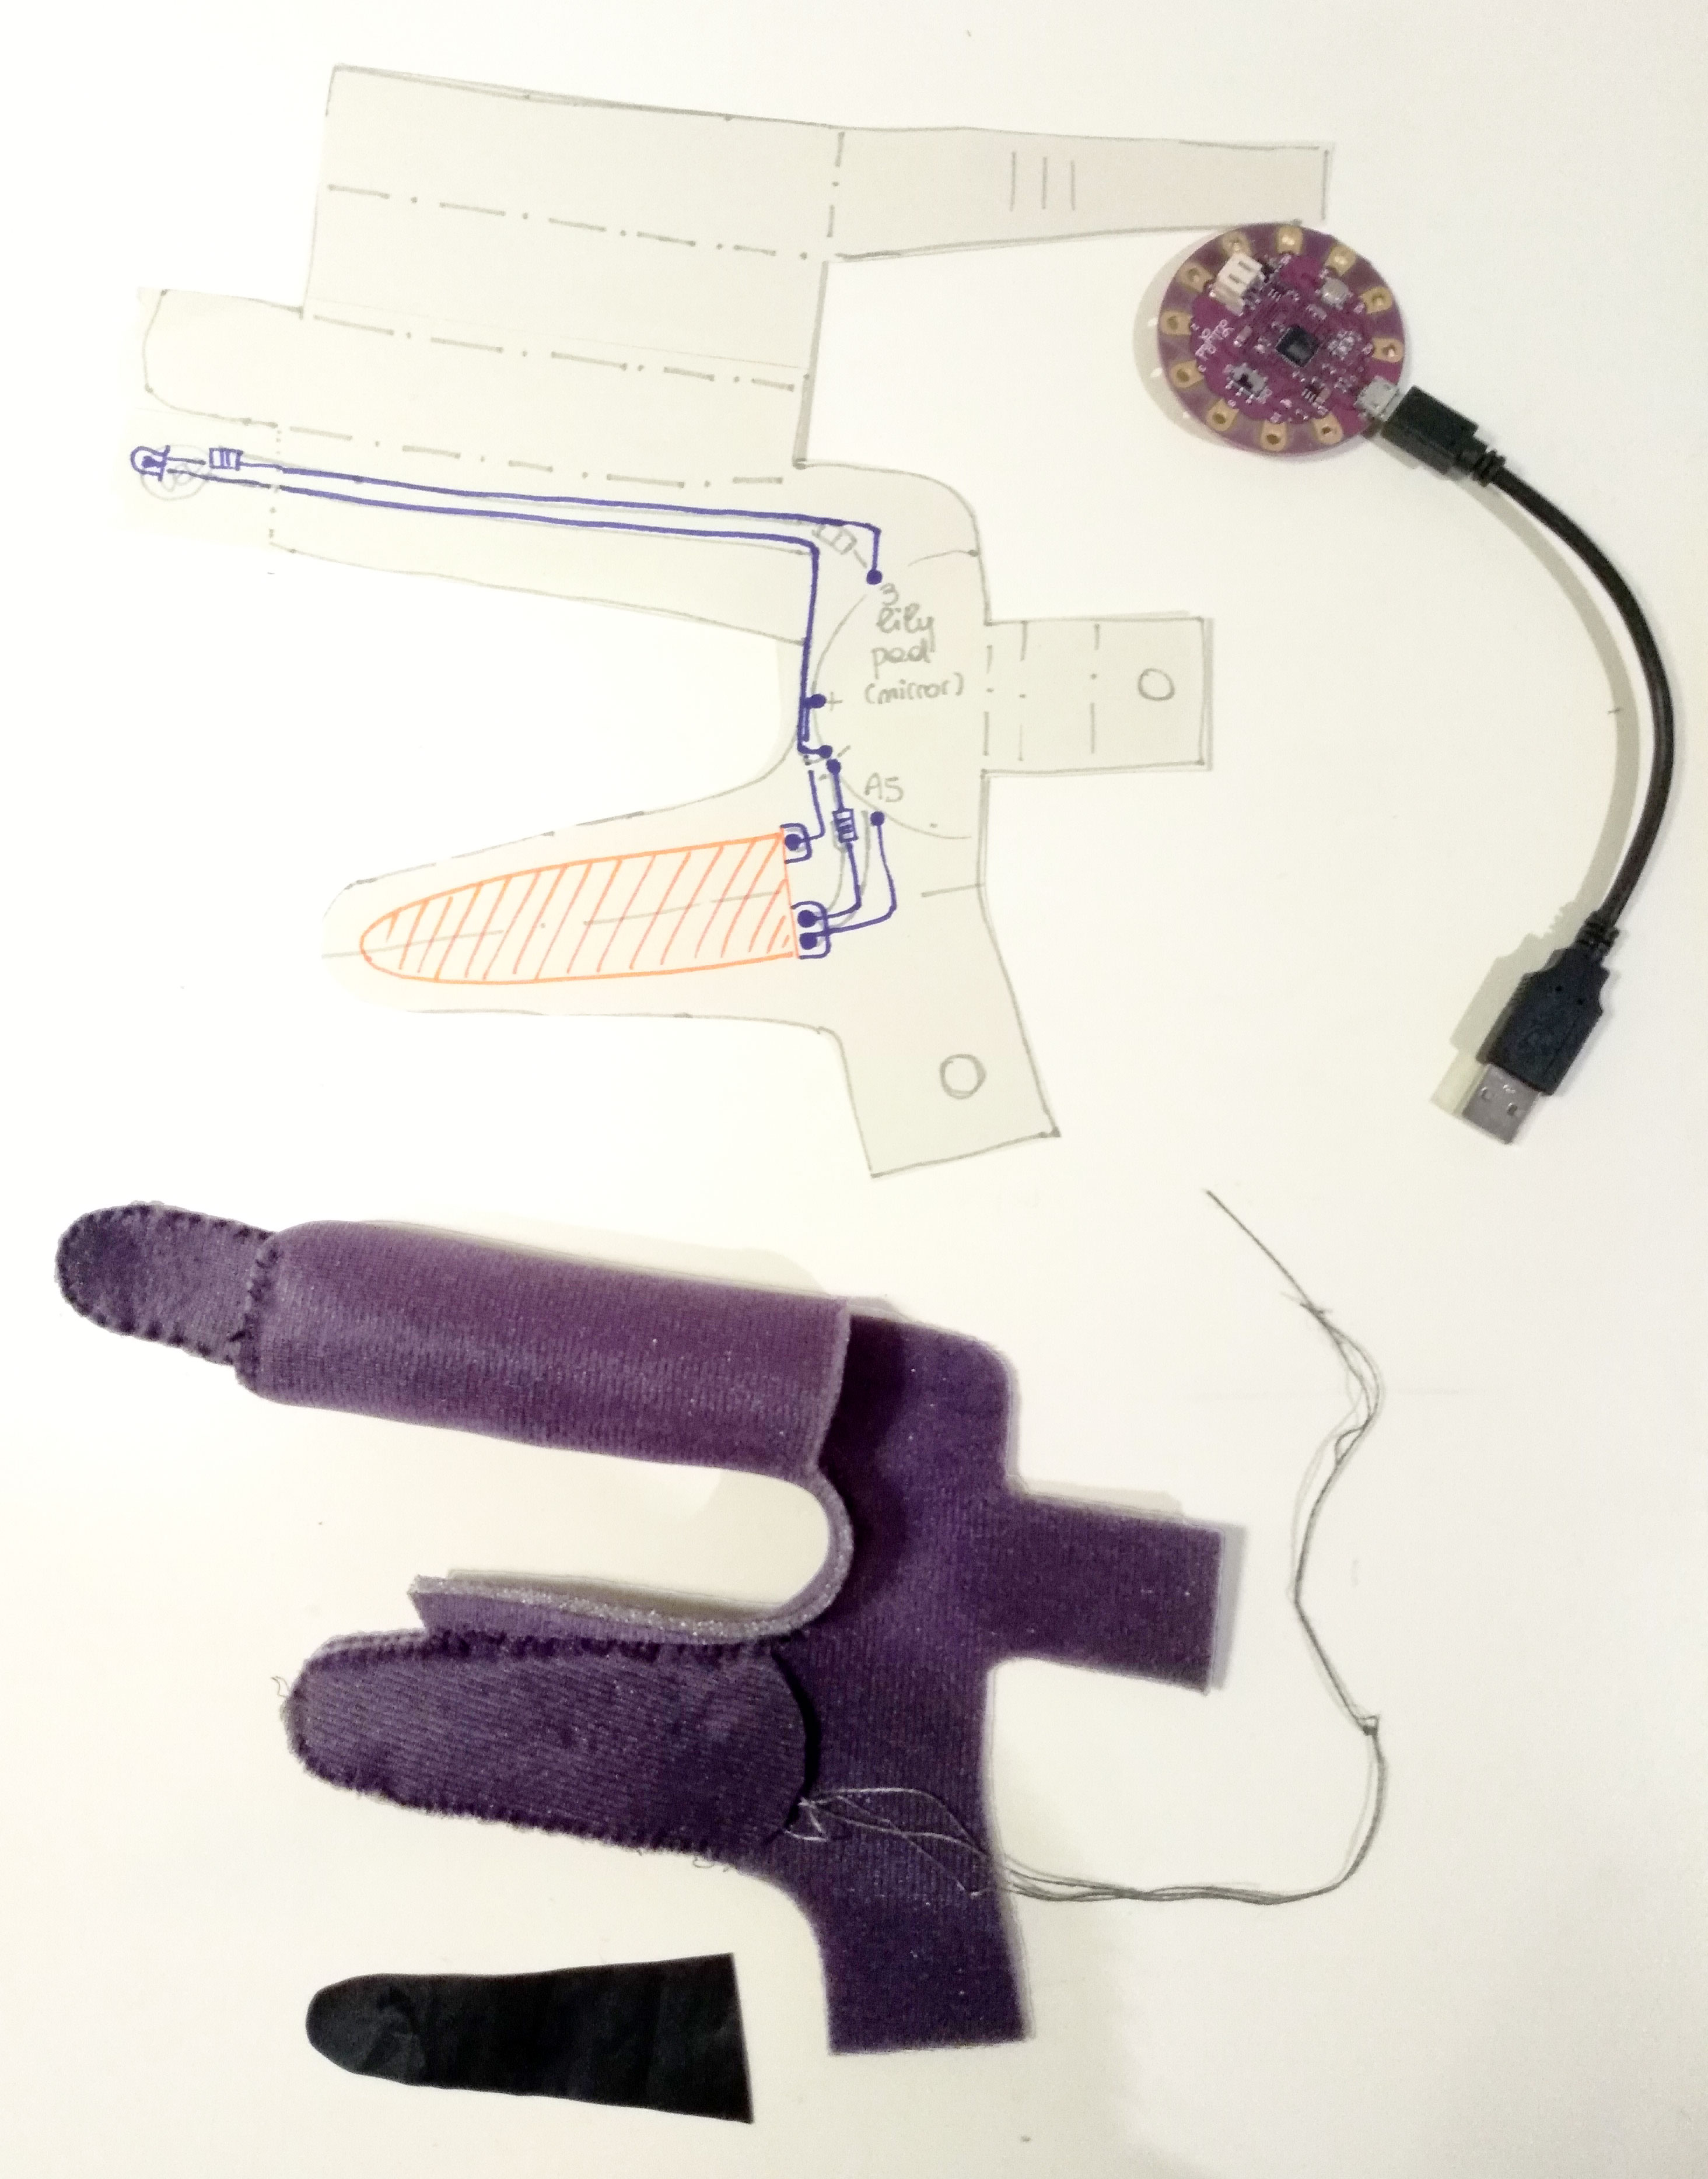
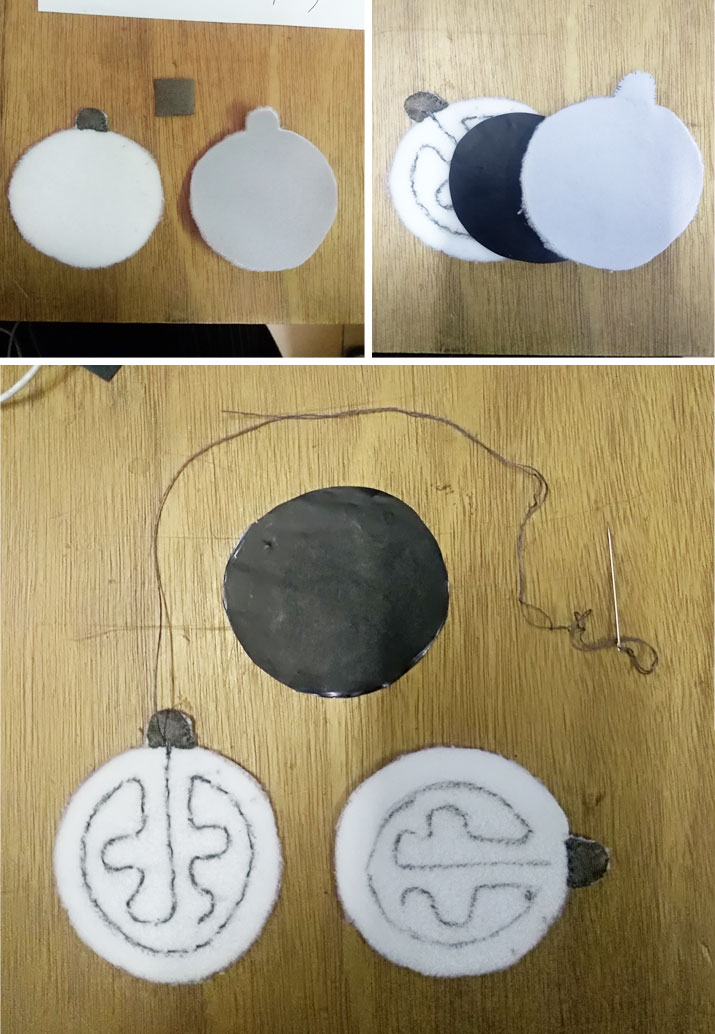
After having perfected the shape, I traced the circuit on the paper pattern to understand where it was convenient to position the resistances and the LED.
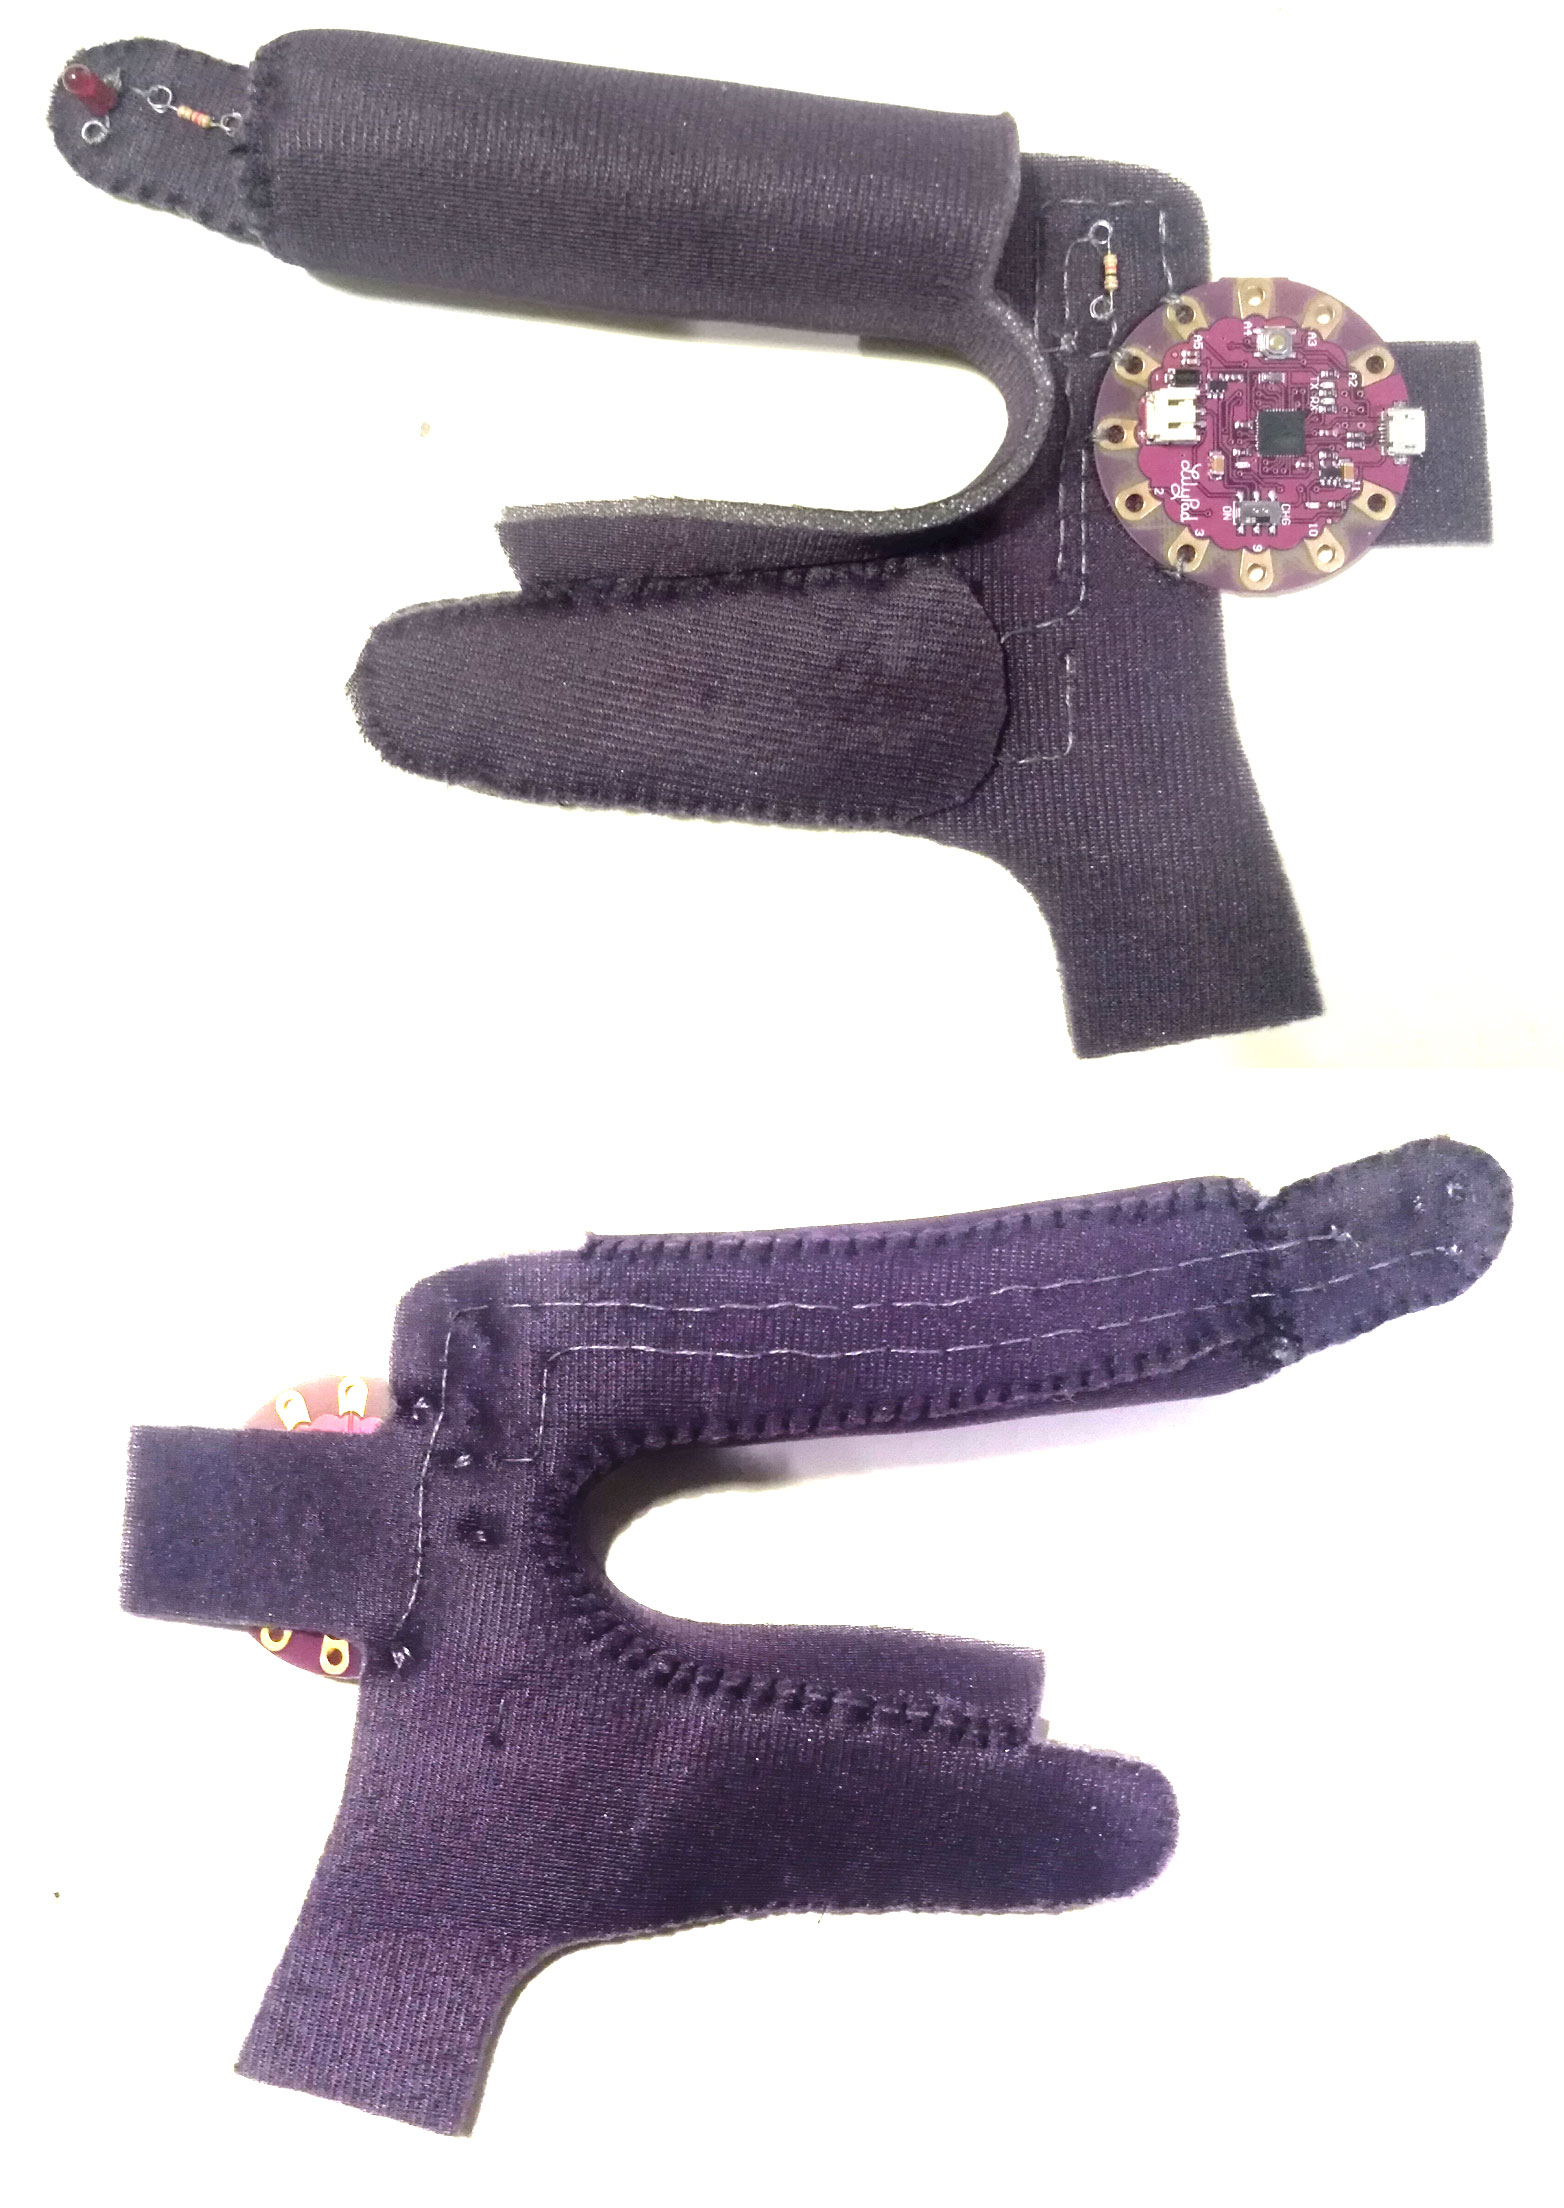
The last seam to be made was that of the brake lever with the resistive part in velostat. Before sewing that part the prototype worked. When I checked and then tried again after sewing the LED was on steady. Probably or the shape always in flexion of the fabric or having too tight the parts with the wire has made me become too sensitive the cover in neoprene.
Code#
Basically it’s very similar to the simple version. The significant difference is in the ledpin number used (there is no much space) so i’ve put it near the sensor pin, ground and power to the sensor pin at the same side of the lilipad board. Maybe next time with a little board than Lilipad…
// initialize variable for pressure sensor reading
  int pressureSensorValue = 0;
  // initialize variable for pressure sensor pin
  int pressureSensorPin = A5;
  int ledPin = 3;


  void setup() {
  // initialize serial communication at 9600 bps
  pinMode(ledPin, OUTPUT);
  Serial.begin(9600);
  delay(300);
  }
  void loop() {
  // read pin and store value in a variable:
  pressureSensorValue = analogRead(pressureSensorPin); // print the light sensor value:
  Serial.println(pressureSensorValue);
  // delay between readings:
  delay(300);


  if (pressureSensorValue > 100)
  // if light sensor reads greater than 300
  {
  digitalWrite (ledPin, HIGH); // turn LED on
  } else
   // otherwise
  digitalWrite (ledPin, LOW); // turn LED off
  }
When I closed the brake seam the circuit no longer worked properly. Probably the velostat is too compressed in this way and keeps the LED always on.