9. E-Textiles and Wearables II#
Integrated audio speaker#
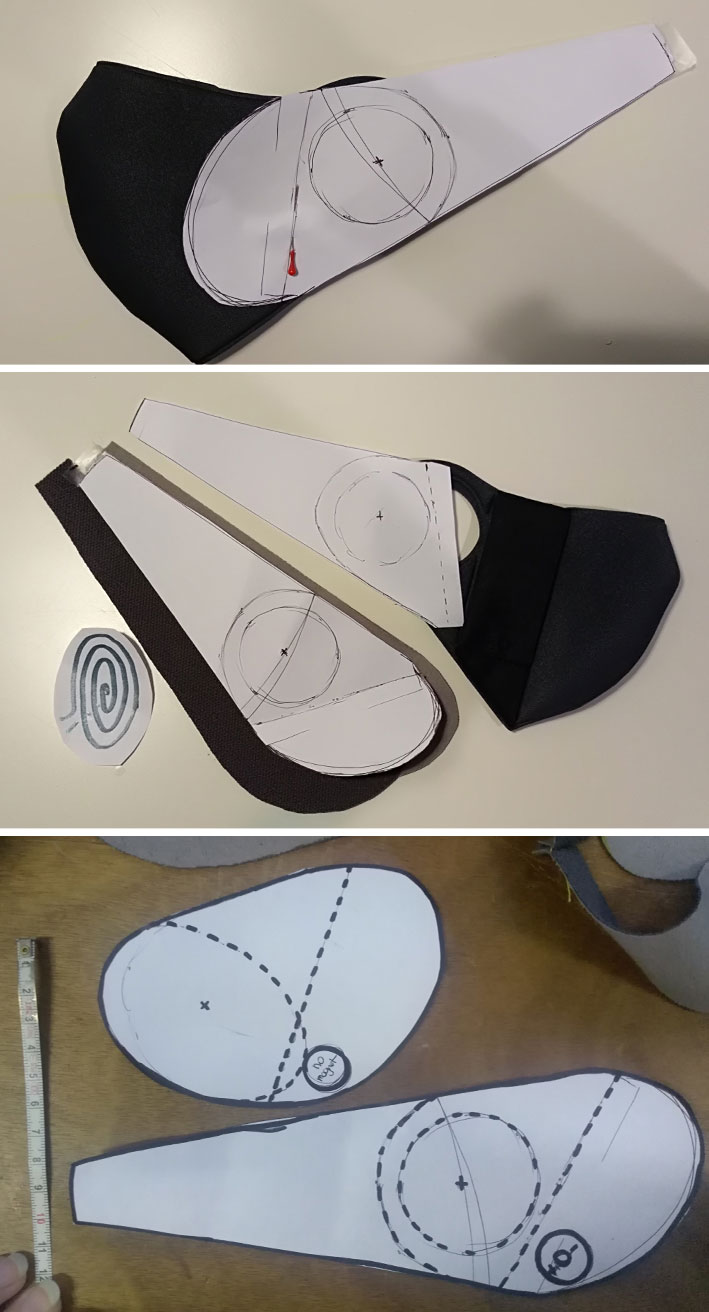
For the exercise of this week I wanted to experiment again on an bike accessory (using it daily is a good exercise as a user).
I integrated a band with speaker to an anti-pollution mask. The band closes with a magnetic button (which should make the speacker work in proximity).


soft speaker 1st test#
In this case I did not think that the position of the magnet is not correct, the magnetic button should be placed in the center of the speaker to work better. I had to think about a change by adding a piece of cloth that covers the ear, perhaps in a more spongy neoprene (as if it were a headphone speaker).

soft speaker 2nd test#
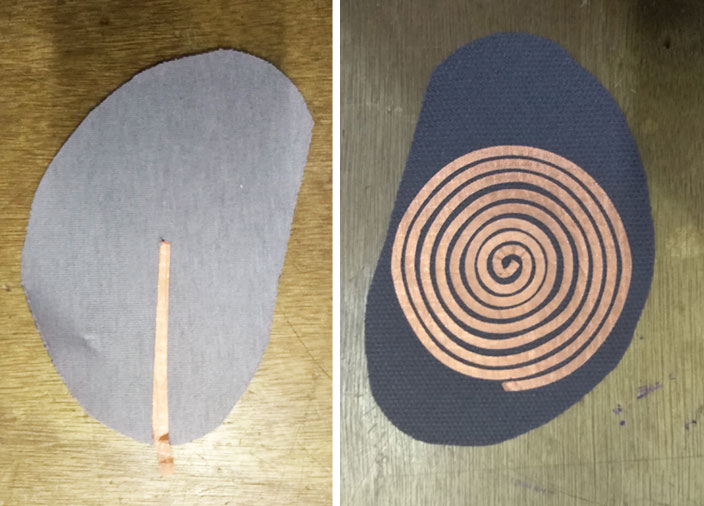
The second attempt I tried to create it with laser cutting. I prepared the file, I cut and glued the neoprene spiral with fabric glue.
Unfortunately it does not work
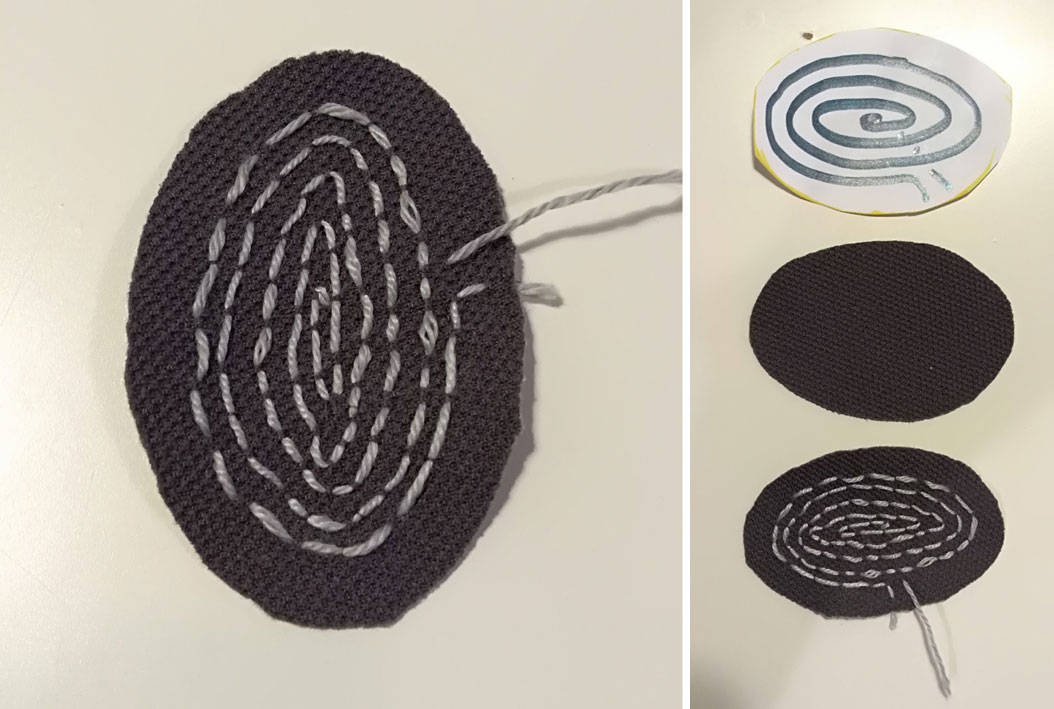
soft speaker 3th test#
Not working the second attempt I tried to embroider the spiral again by hand trying to make it as dense and precise as possible.
Wow! I’m doing it really well, right?
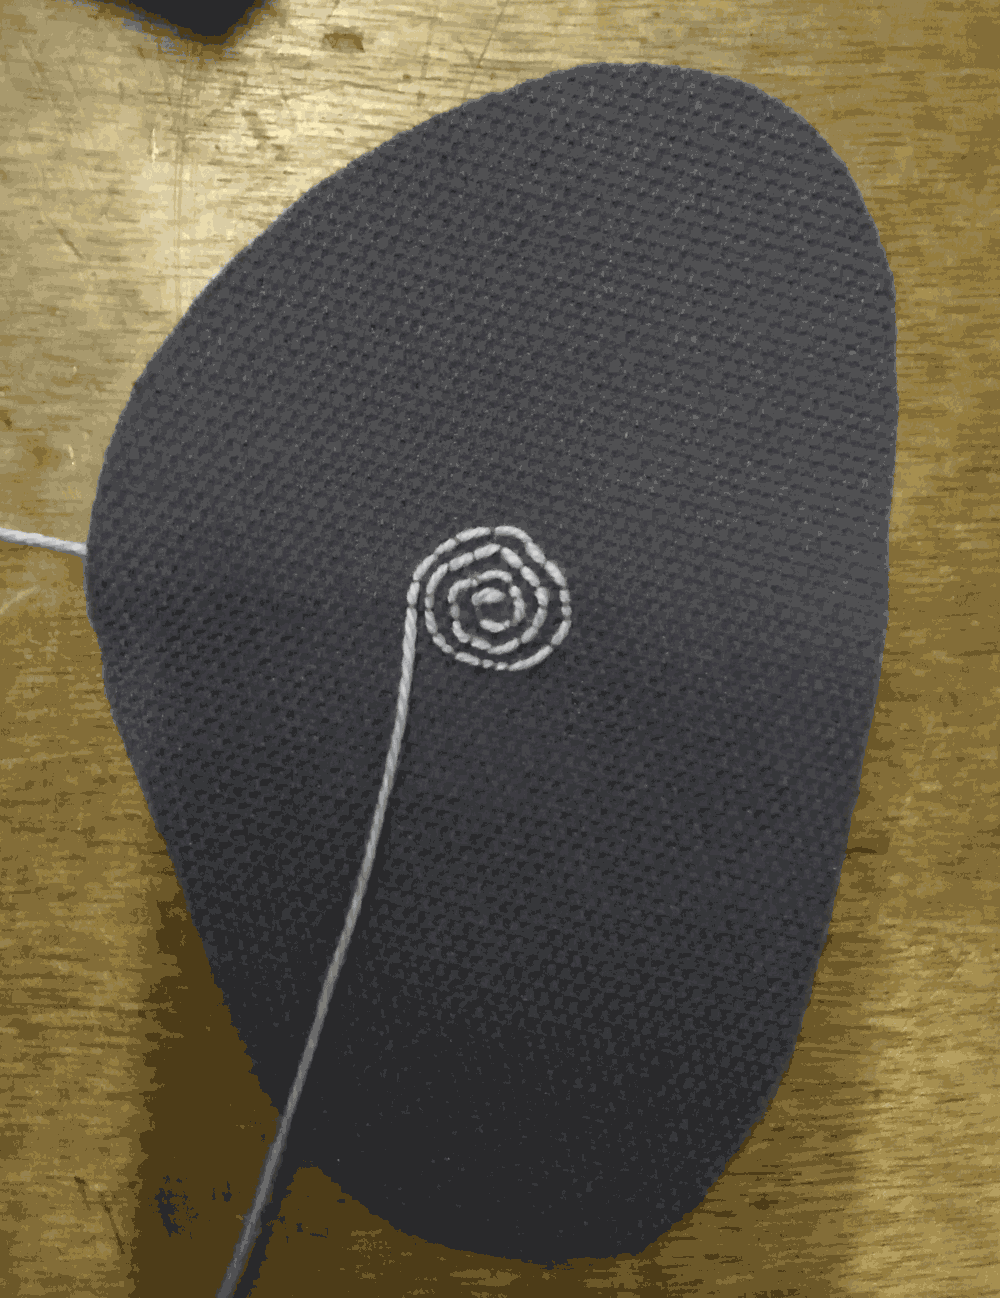
Only when I finished the embroidery, although I had done a lot of laps using a lot of thread, Zoe Romano pointed out to me that the thread was very similar to that available at the conductive one here in Wemake but it was very probably a resistive wire. In fact, by measuring it with the tester we had confirmation. What a pity!
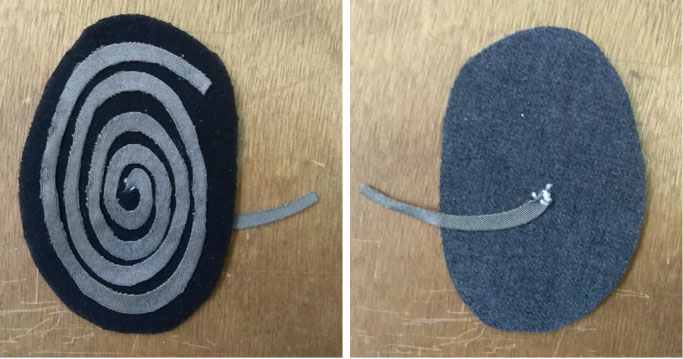
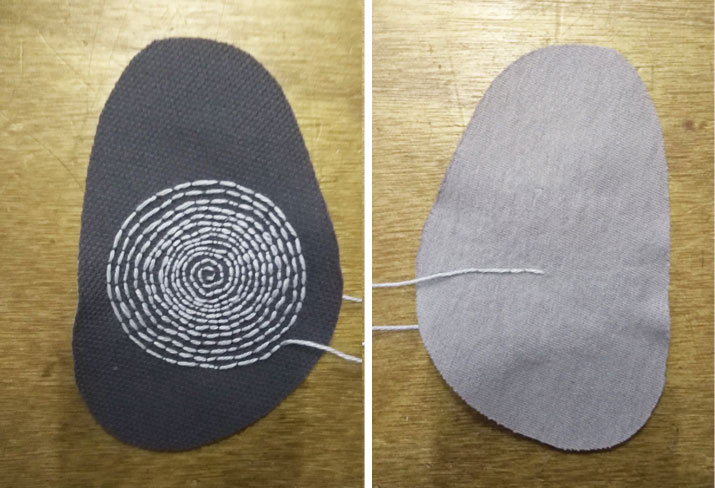
soft speaker 4th test#
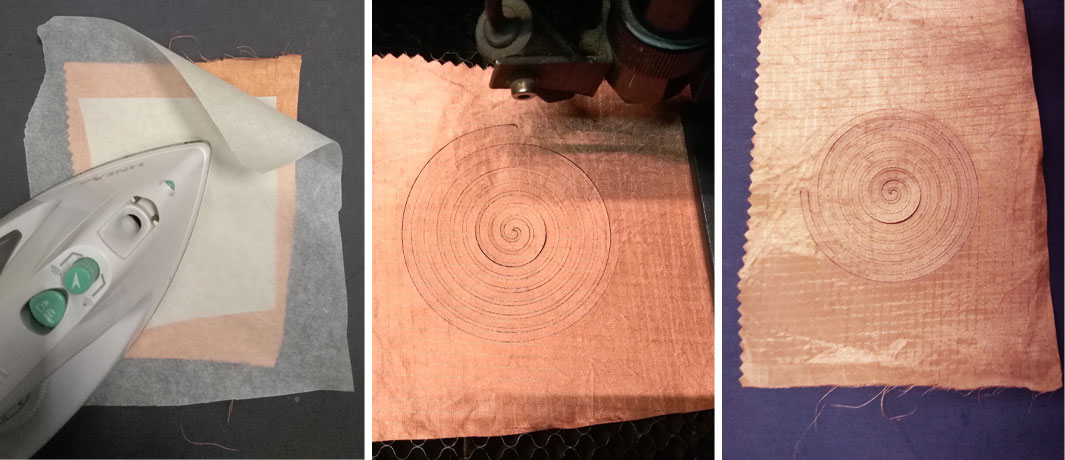
During the 4th attempt I confessed that I felt a little discouraged. After an hour spent to embroidering the circuit, creating as many laps as possible, I felt I had lost a lot of time. So I opted to draw a spiral to laser cut on conductive fabric with the correct measurements for my pollution mask.
Here the tutorial.
I prepared the fabric by applying the adhesive sheet before laser cutting the piece and then I used the iron to make it stick to my piece of neoprene.
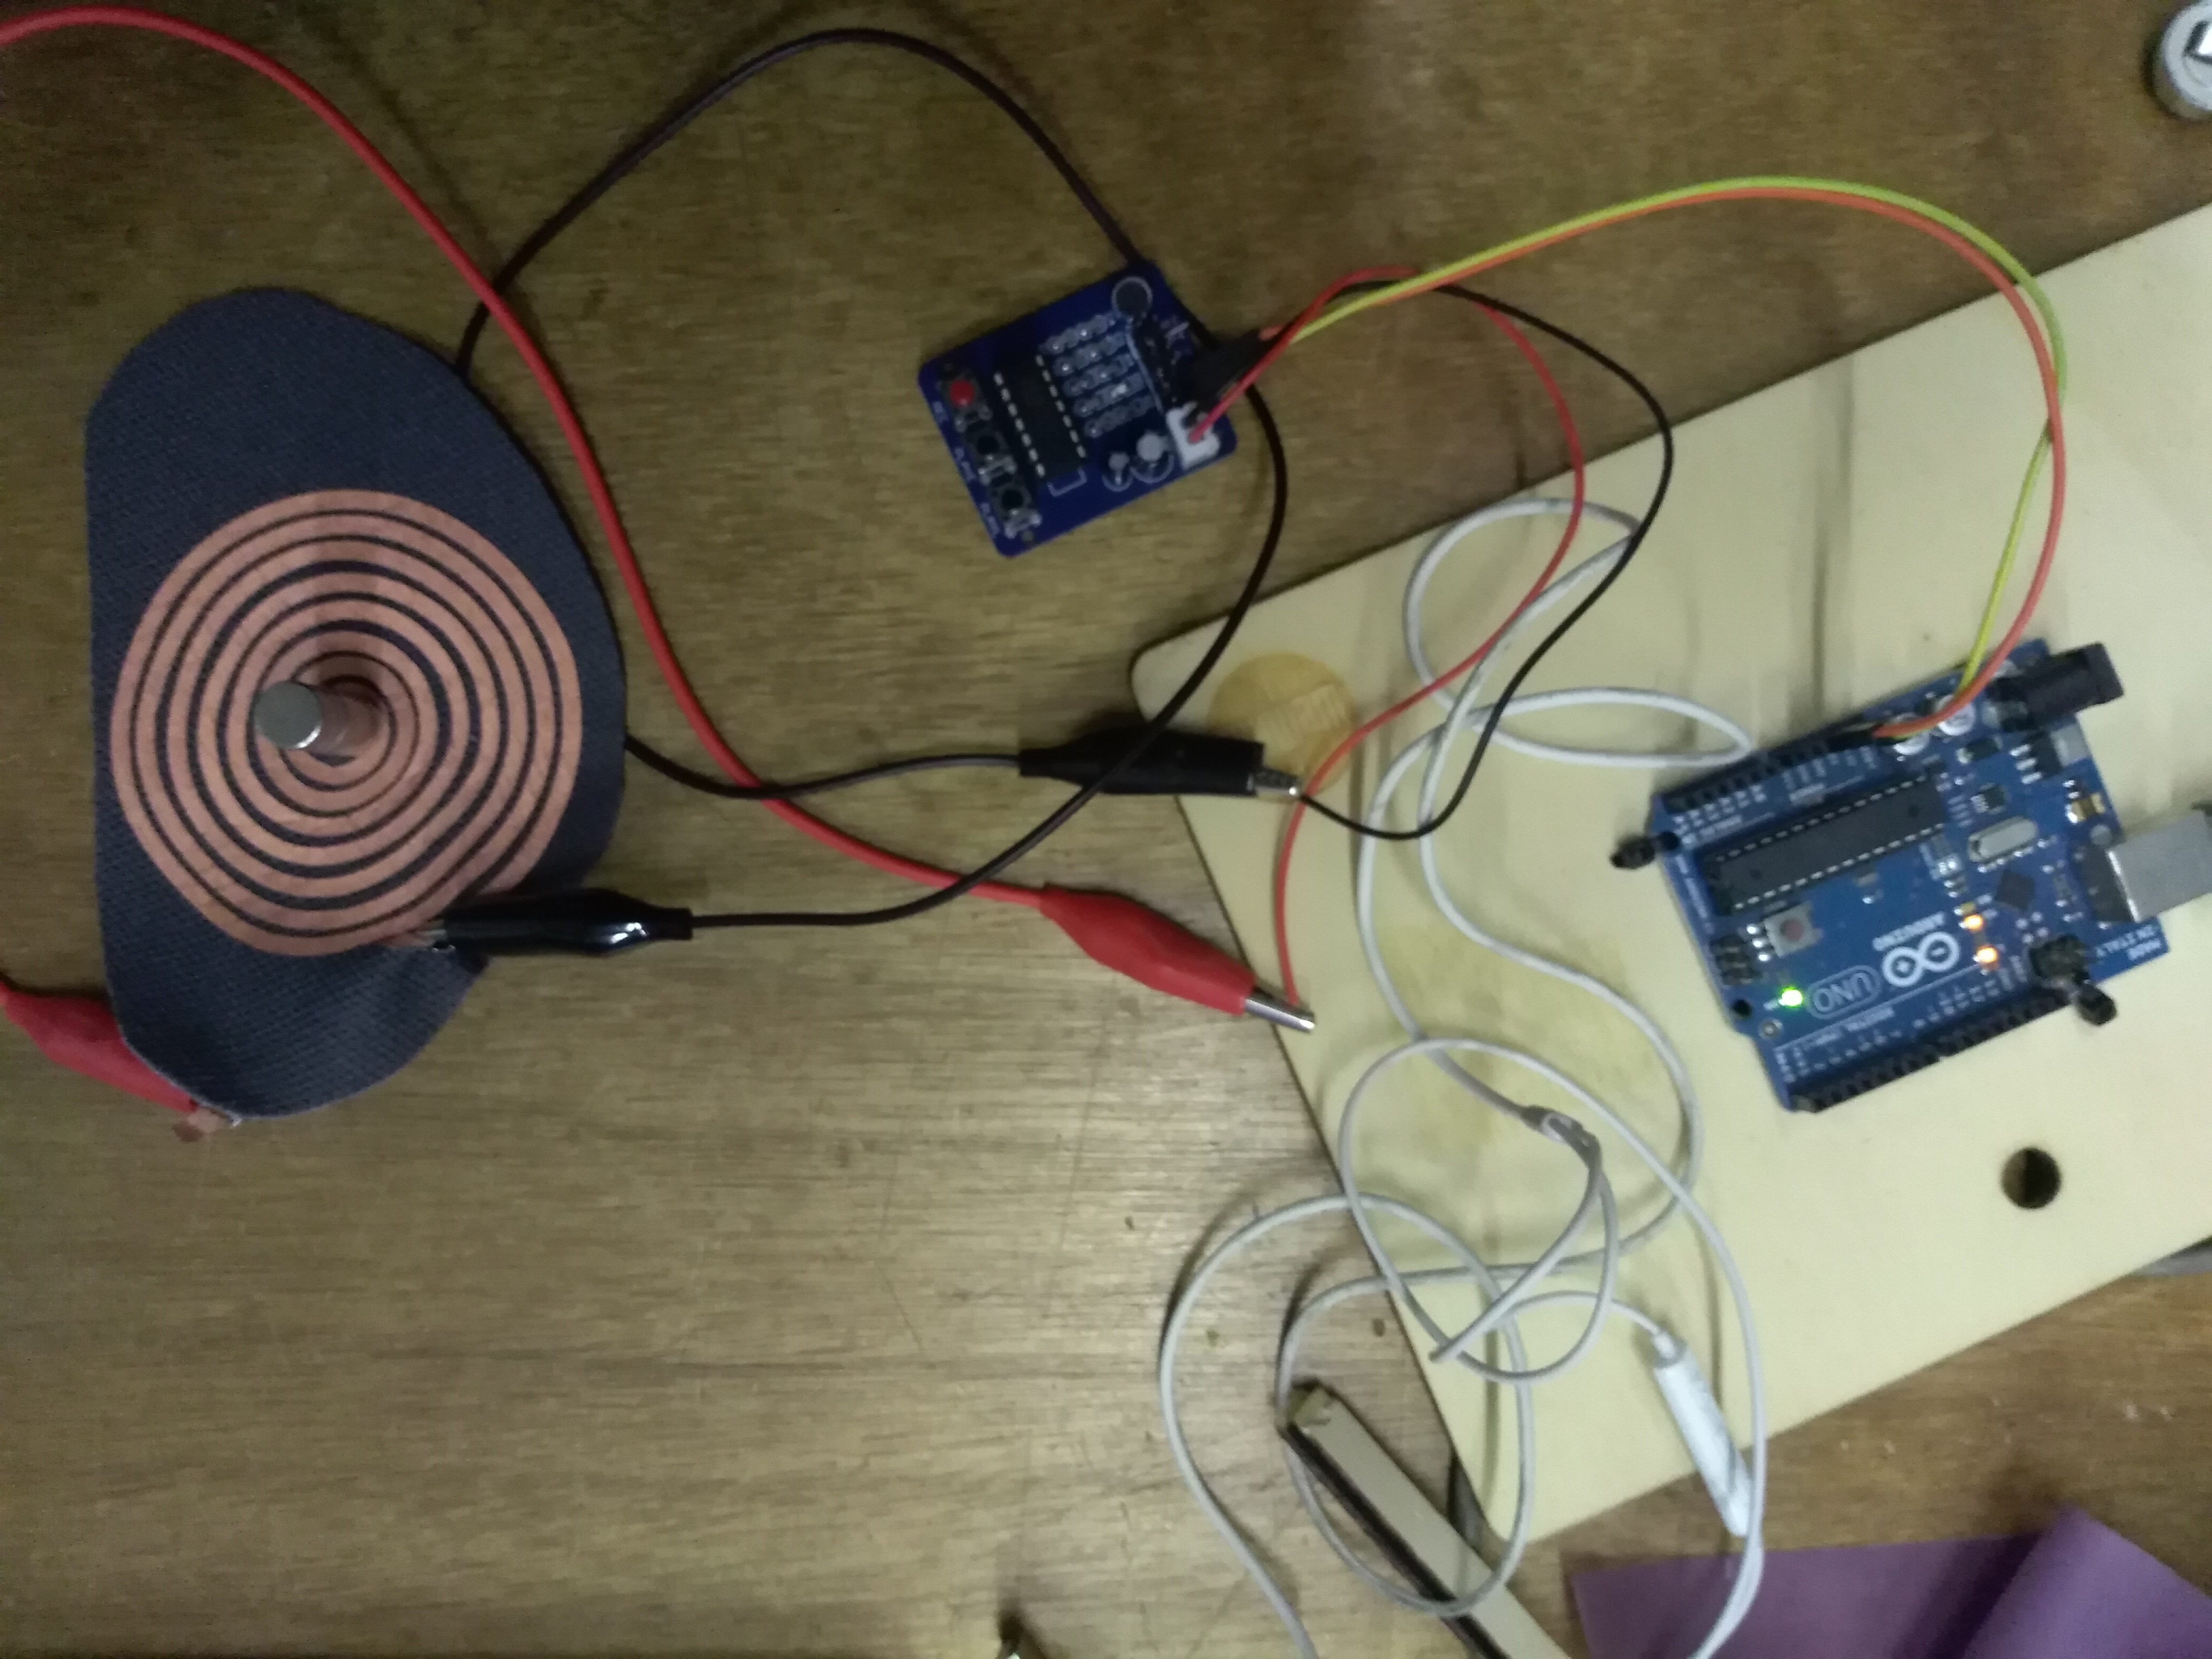
Finally it worked !! Honestly the sound is really very low but I would say that after 4 attempts I can feel satisfied.
In the video I try to capture the audio but I think it is a frequency only audible for me and some animals that pick up ultrasounds like dogs, dolphins …
In any case I should use a stronger magnet than my first solution. Here I use 5 stacked, much better than the magnetic button of the beginning
VID_20190131_192628 from Greta Dalessandro on Vimeo.
Components#
Wemake doesn’t have a second custom Mono Amp for Textile Speakers so I’ve use a different component for my speakers work, a ISD1820 Arduino Voice Record/Playback. How it works here.
This component is autonomous, it does not need a code on Ide to be programmed. But anyway I found a way to make a code useful.
Soft Speaker Code#
/* prova speaker
*/

#include "SoftwareSerial.h"
SoftwareSerial mySerial(8, 9);
char play[10] = { 0X7E, 0xFF, 0x06, 0X03, 00, 00, 0x01, 0xFE, 0xF7, 0XEF};
char setVolume[10] = { 0X7E, 0xFF, 0x06, 0X06, 00, 00, 0x1E, 0xFE, 0xD7, 0XEF};


void setup () {
  mySerial.begin (9600);
  delay(1000);

  Serial.begin(9600);

  Serial.println("Sending info");

  // Set volume to 30
  for (int count = 0; count < 10; count++) {
    mySerial.write(setVolume[count]);
    Serial.println("volume");
  }


  // Play file once
  for (int count = 0; count < 10; count++) {
    mySerial.write( play[count]);
    Serial.println("command");
  }
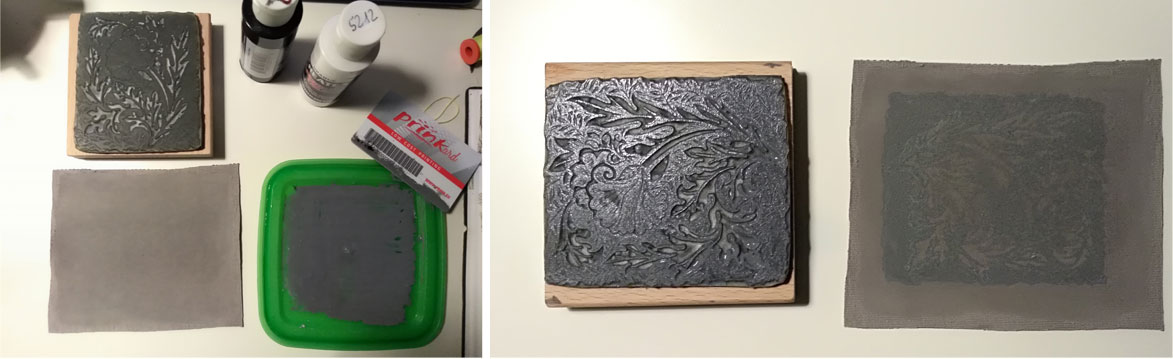
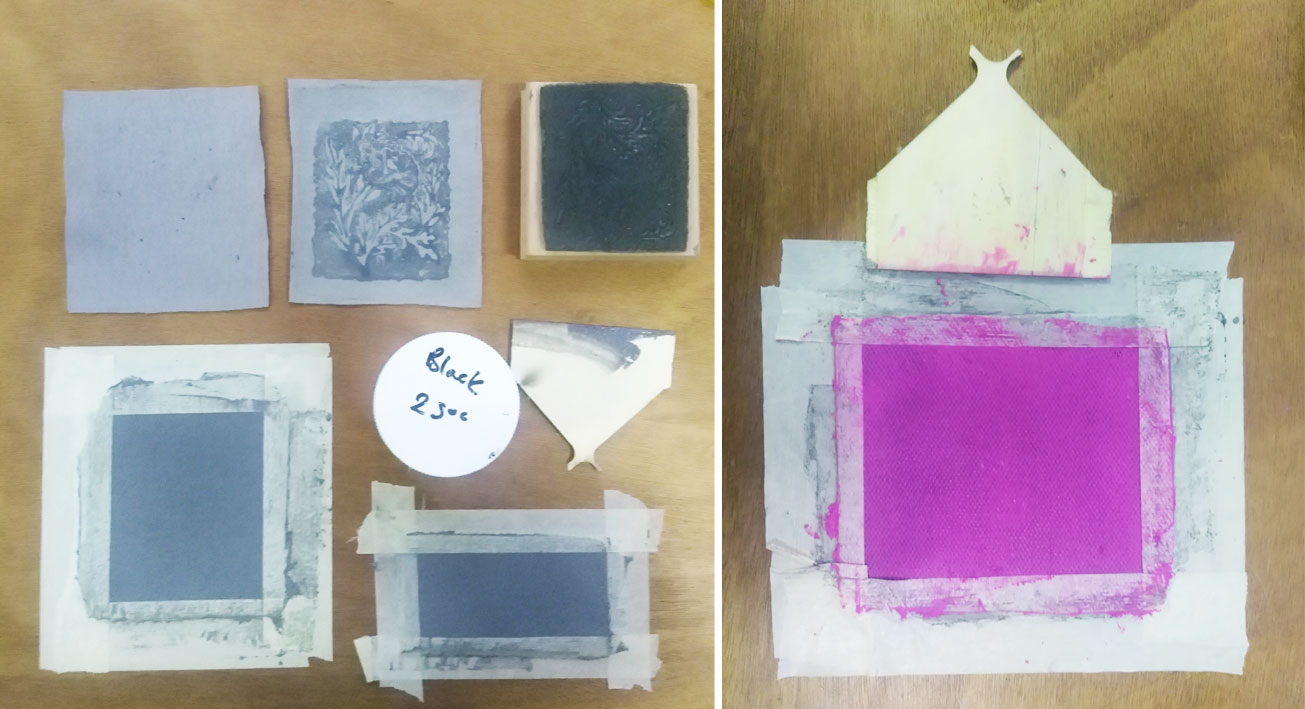
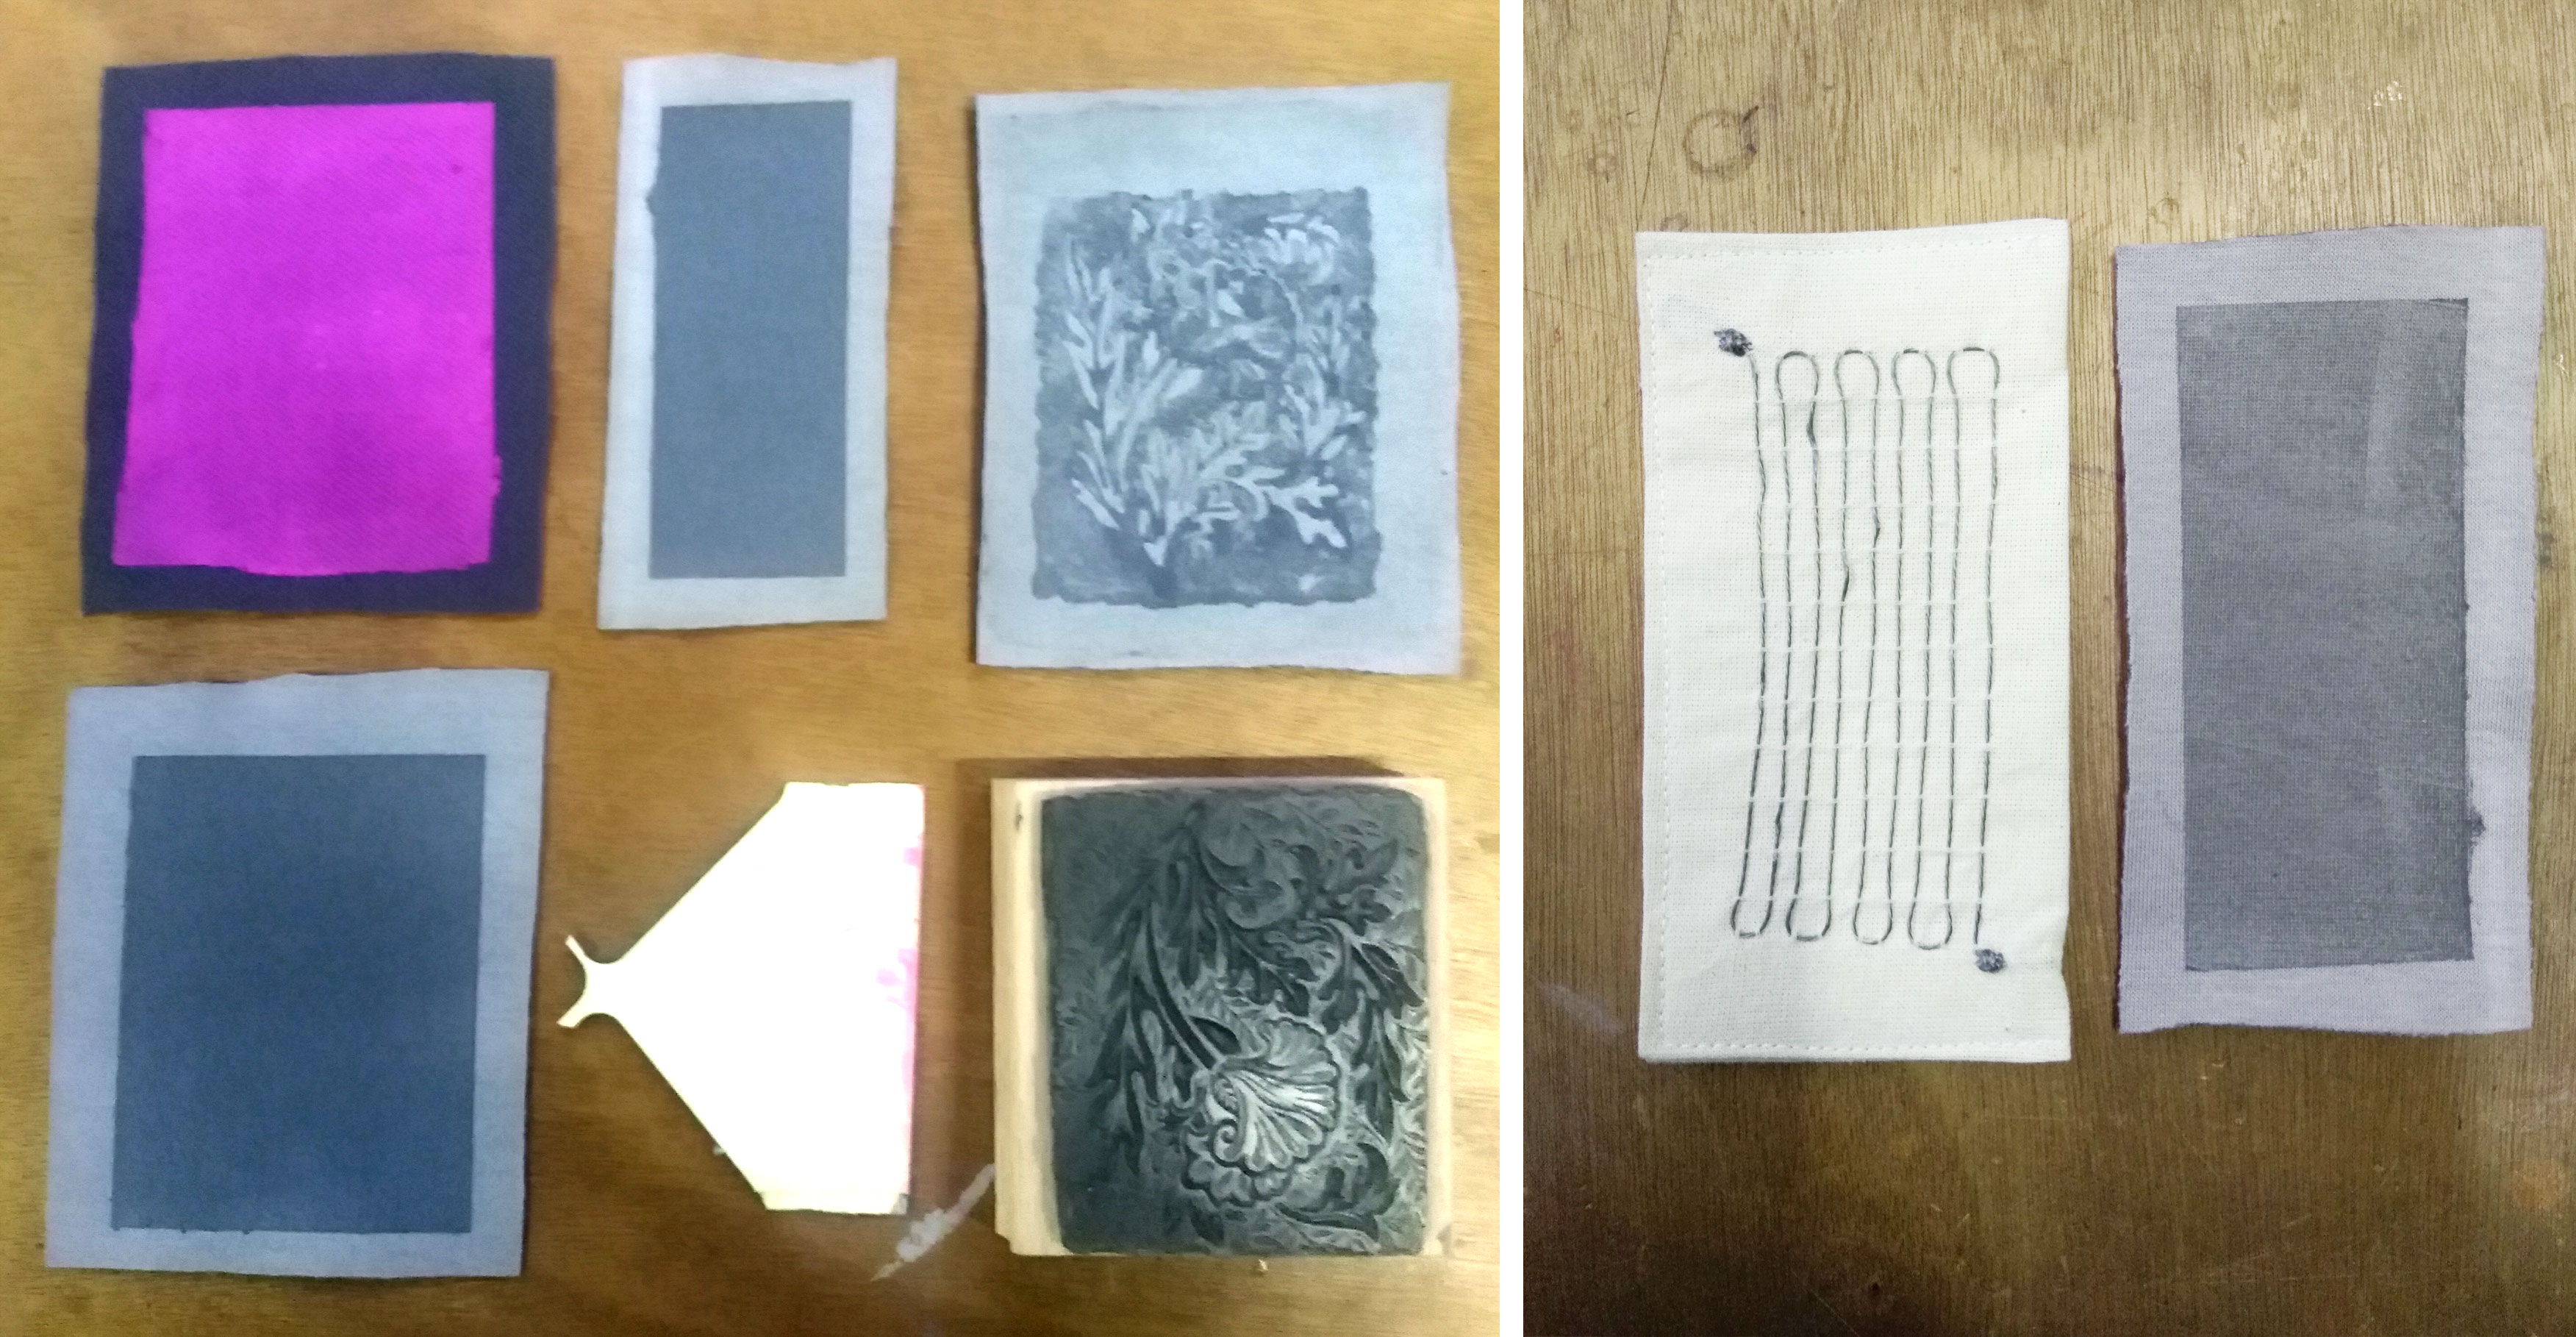
Thermochromic inks#
I have prepared these pieces of fabric with two thermochromic paints. A black that fades at 25 ° and a magenta that turns white at 40 °.
Liza’s link about the assignment. There’s a workshop here
First I tried to dye the fabrics by diluting the color a bit ‘in water to be able to print with the floral pattern that you see in the picture. Adding water the thermochromic effect fades and the color becomes grayer (but with less lumps).
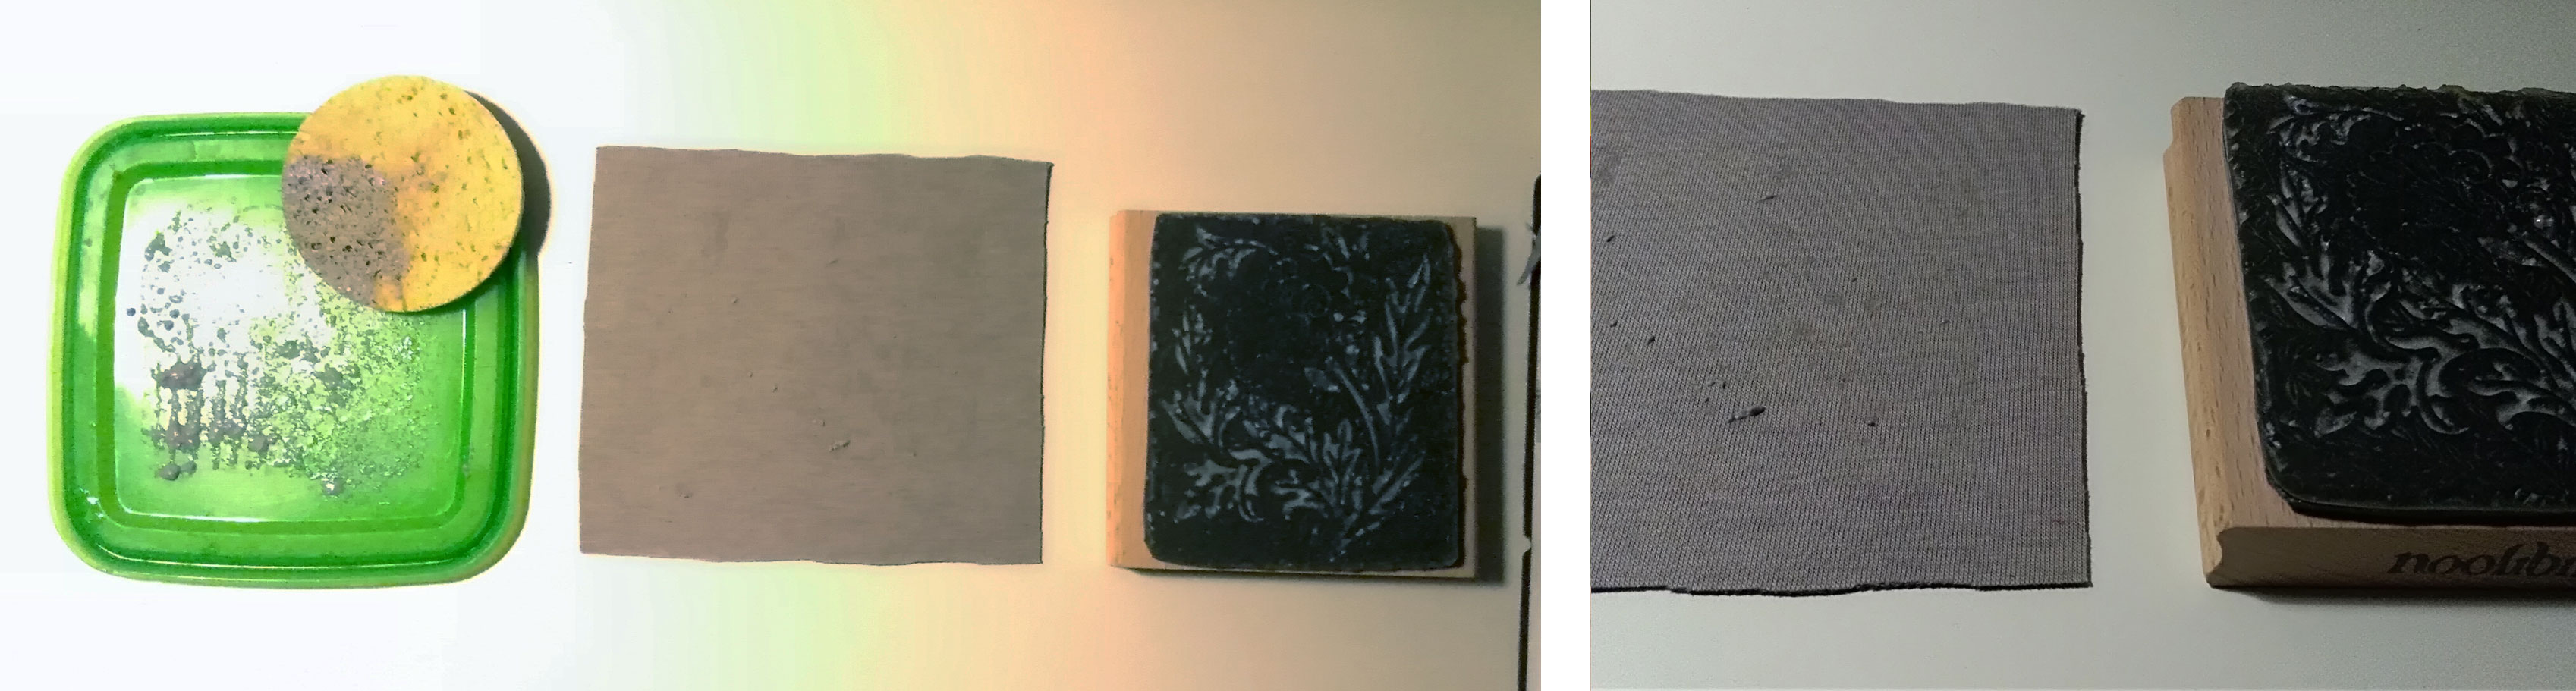
In the version using the liberty mold I also made a version by printing the motif in gray and keeping the black thermochromic background.
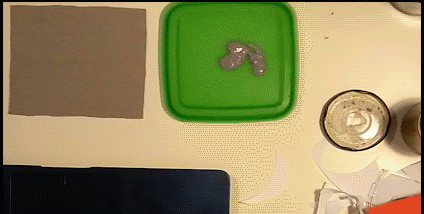
I wanted to try again adding pure color directly with a plastic spatula and creating frames with paper tape. I made three simples like that.
9_thermochromic results from Greta Dalessandro on Vimeo.
Code#
/*thermochromic
 *
 */

void setup() {
  // put your setup code here, to run once:

 pinMode(9, OUTPUT);
 Serial.begin(9600);
}

void loop() {
  // put your main code here, to run repeatedly:

 digitalWrite(9, HIGH);
 // 150 valore della corrente che passa nella serpentina
 Serial.println("ON");//stamp
 delay(8000);

 digitalWrite(9, LOW);
 // 150 valore della corrente che passa nella serpentina
 Serial.println("OFF");//no stamp
 delay(4000);
}
Attiny Touch + Pressure Sensor#
I find the Liza’s code here and a useful link to better understand.
With the suggestions of Giogia Petri an Zoe Romano’ve used a board made by Mauro Alfieri for this assignment. He describe how to assembly a kit for make simple programming with Attiny’s family products.
Mauro Alfieri’s tutorial step to step and video tutorial for welding the custom board.
Code#
/*
 * ATtiny Soft and Touch Sensor Circuit
 * February 18, 2017
 * Liza Stark
 *
 * Textile Academy Bootcamp
 * More info at softcircuiteer.net/bcn-attiny-workshop
 *
 * Adapted from Dave Mellis' ATtiny touch sketch
 * http://highlowtech.org/?p=1653
 *
 */


//                        attiny85/45
//                   reset -+---+- power
//       (touch LED) pin 3 -+*  +- pin A1 (reads sensor)
//       (reads touch) pb4 -+   +- pb1 (fading while touching)
//                  ground -+---+- pb0


int fadepin = 1; // the LED that fades when reading sensor values
int togglepin = 3; // the led that's toggled when you touch the input pin

int sensorpin = A1; // attach your sensor here
int sensorValue = 0;  // variable to store the value coming from the sensor
int newSensorValue;

int calibration = 0;
int previous;

int randomval = 0;
int fadeval = 0, fadestep = 1;
int togglestate = LOW;

void setup()
{
  pinMode(fadepin, OUTPUT);
  pinMode(togglepin, OUTPUT);
  pinMode(sensorpin, INPUT);

  delay(100);
  for (int i = 0; i < 8; i++) {
    calibration += chargeTime(PB4);
    delay(20);
  }
  calibration = (calibration + 4) / 8;
}

void loop()
{
  //TOUCH
  // read sensor value from touch sensor
  int n = chargeTime(PB4);

  if (previous <= calibration && n > calibration) {
    if (togglestate == LOW) togglestate = HIGH;
    else togglestate = LOW;

    digitalWrite(togglepin, togglestate);
  }

  previous = n;

  delayMicroseconds(500);

  // SENSOR
  // read the value from the sensor:
  sensorValue = analogRead(sensorpin);

  //map the values to something usable
  //map(value, fromLow, fromHigh, toLow, toHigh)
  newSensorValue = map(sensorValue, 0, 1023, 0, 255);

  //write the new value to the LED
  analogWrite(fadepin, newSensorValue);

}

byte chargeTime(byte pin)
{
  byte mask = (1 << pin);
  byte i;

  DDRB &= ~mask; // input
  PORTB |= mask; // pull-up on

  for (i = 0; i < 16; i++) {
    if (PINB & mask) break;
  }

  PORTB &= ~mask; // pull-up off
  DDRB |= mask; // discharge

  return i;