12. Soft Robotics
Research
I found myself very inspired by the Pnebotics. Their work is really exiting, and blew my mind when they actual y started picking up things with the pneumatic robots.

I also remembered this architect, Its also a proof of concept that the technology can be applied in a consumer space.
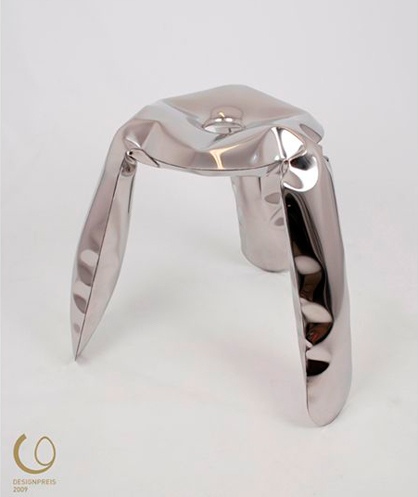
- Oskar Zieta
Long ago made a chair out of inflated metal. It seems the patterns was what gave it the shape, and not the air obstructions but it is non the less inspiring.
Useful links
Inflatable Textile Vinyl
Materials
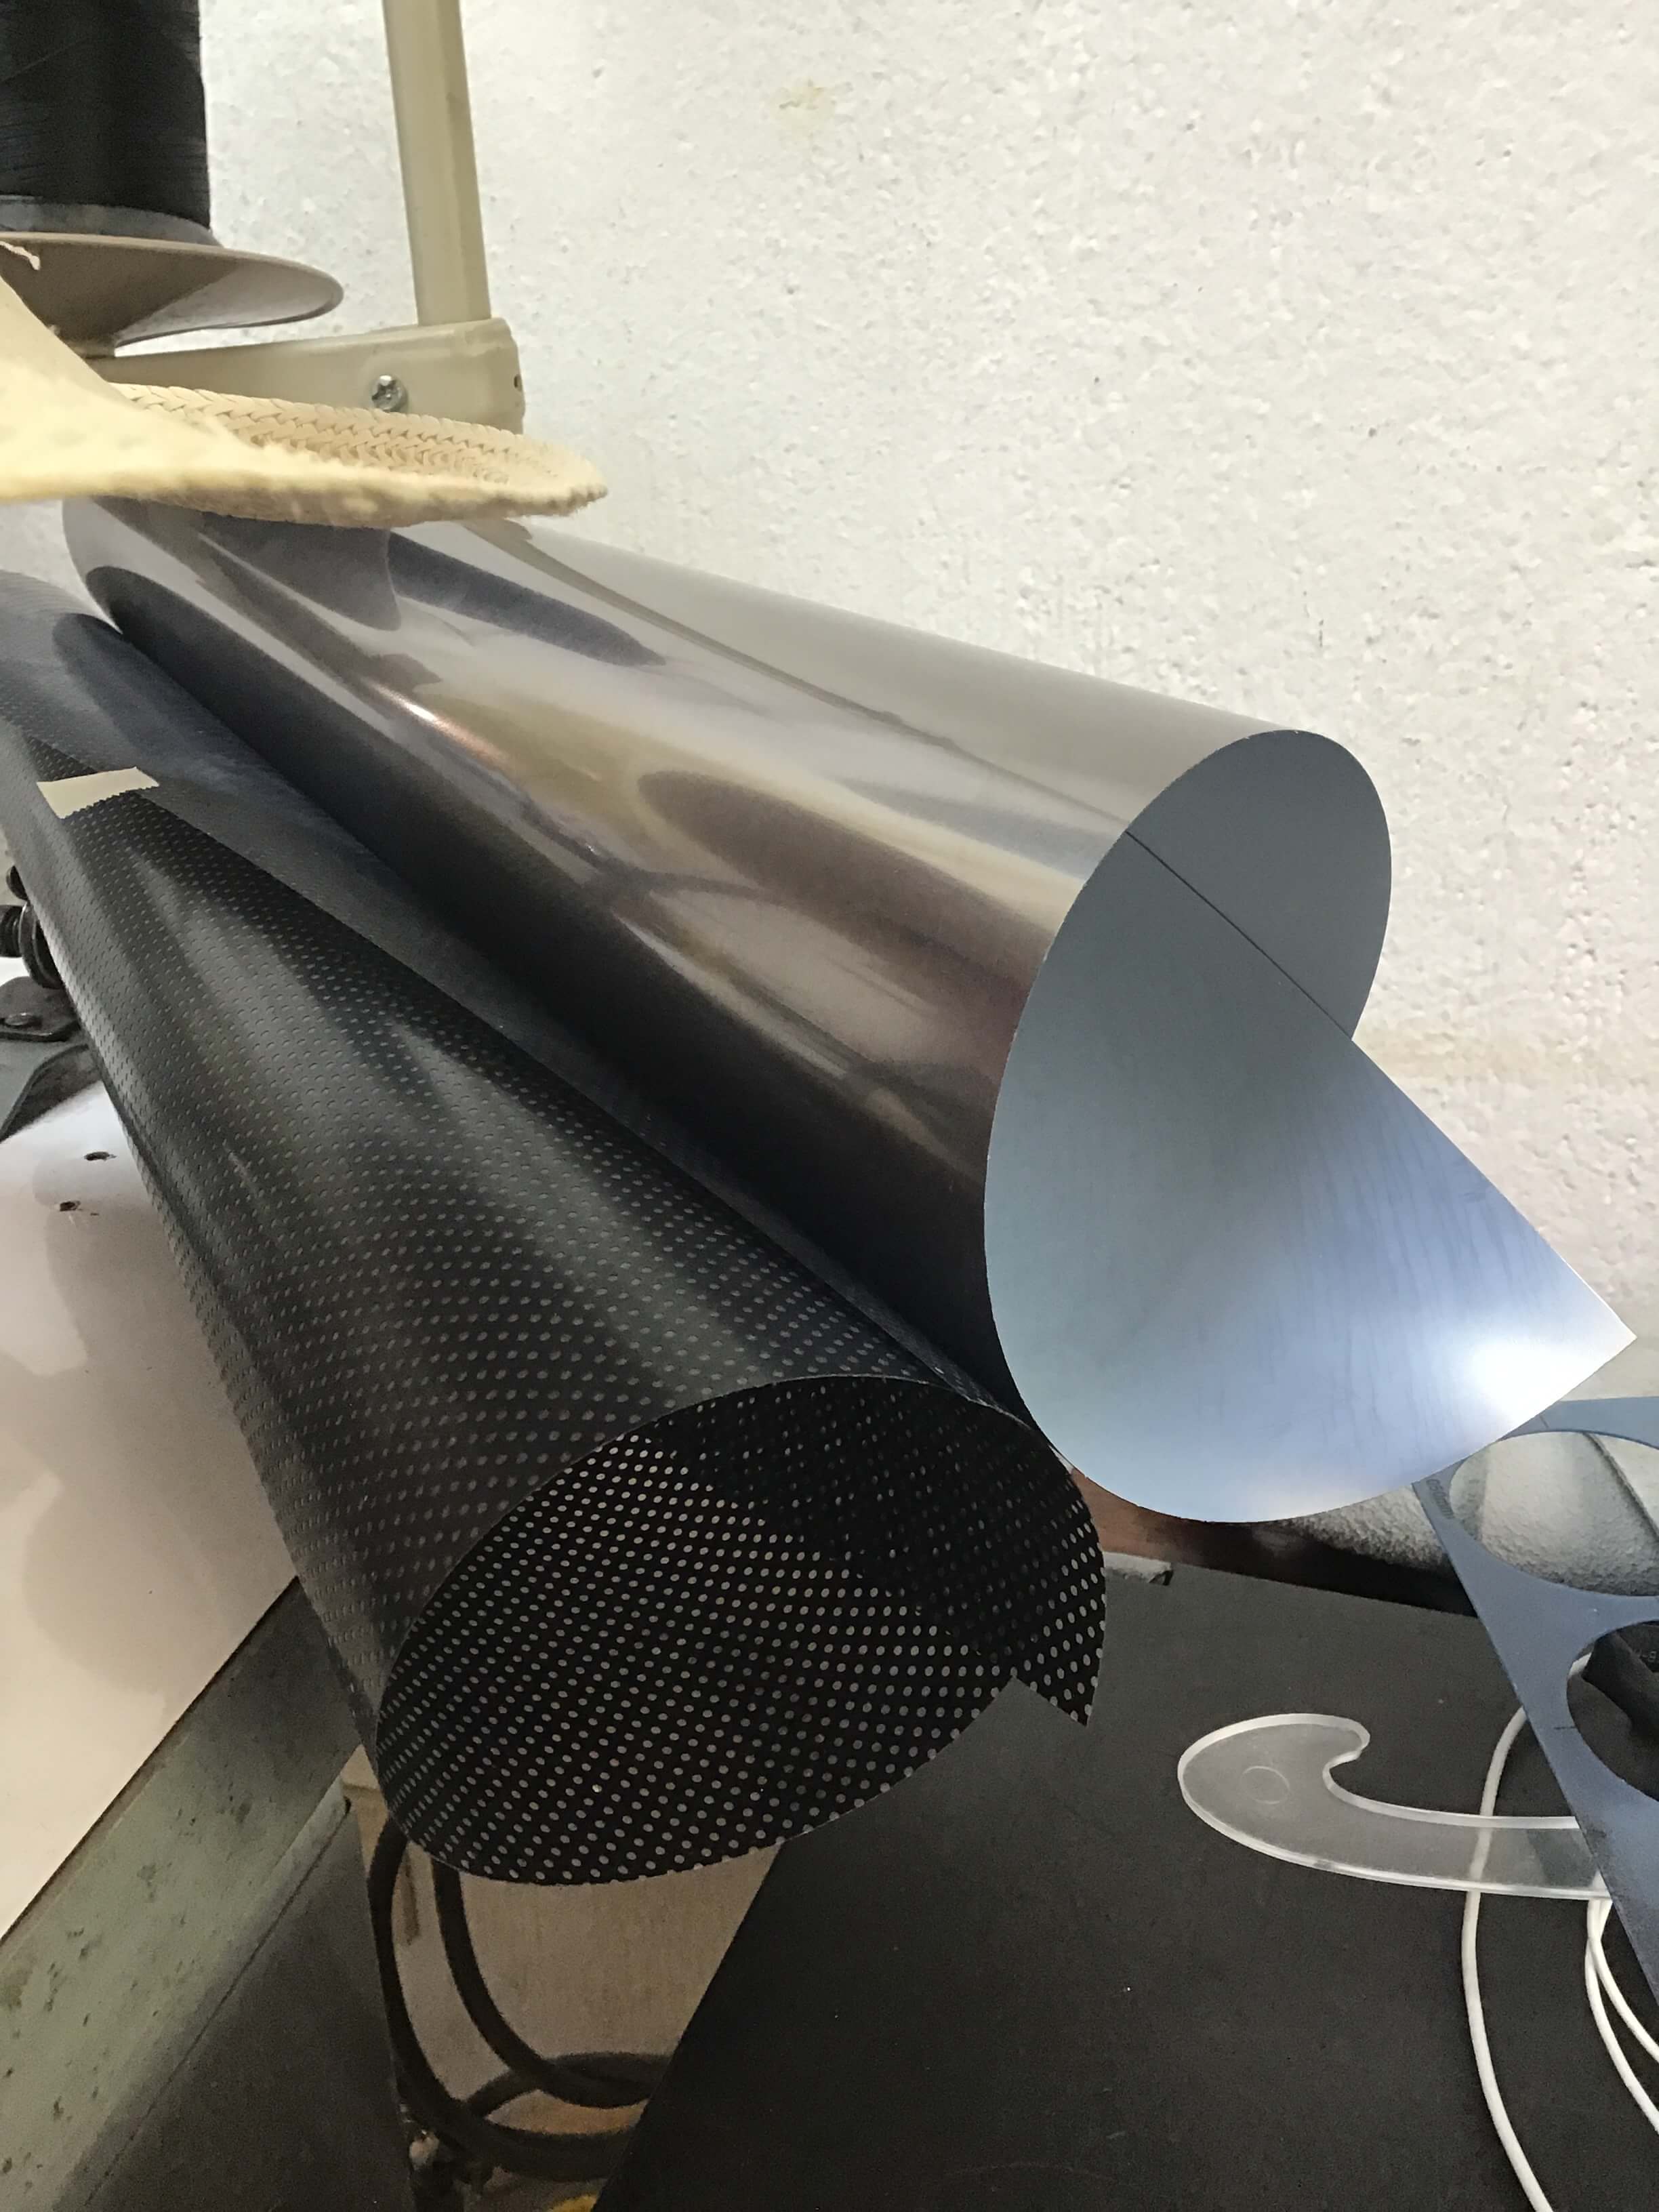
In order to work with this process, we acquired Textile Vinyl, commonly understood as stamping vinyl for t-shirts.
-
The Brand is Chemical US
-
The material specifically is Polyurethane Metallic 461 Super zinc, we tried with other materials with less success. There was also this cool perforated material, but it became counterproductive.
Recommendations for use: 293 F, 15s . Be careful as the material is thin.
The wax paper in my case was also sort of sticking, so I used double Wax Paper, wax side out.
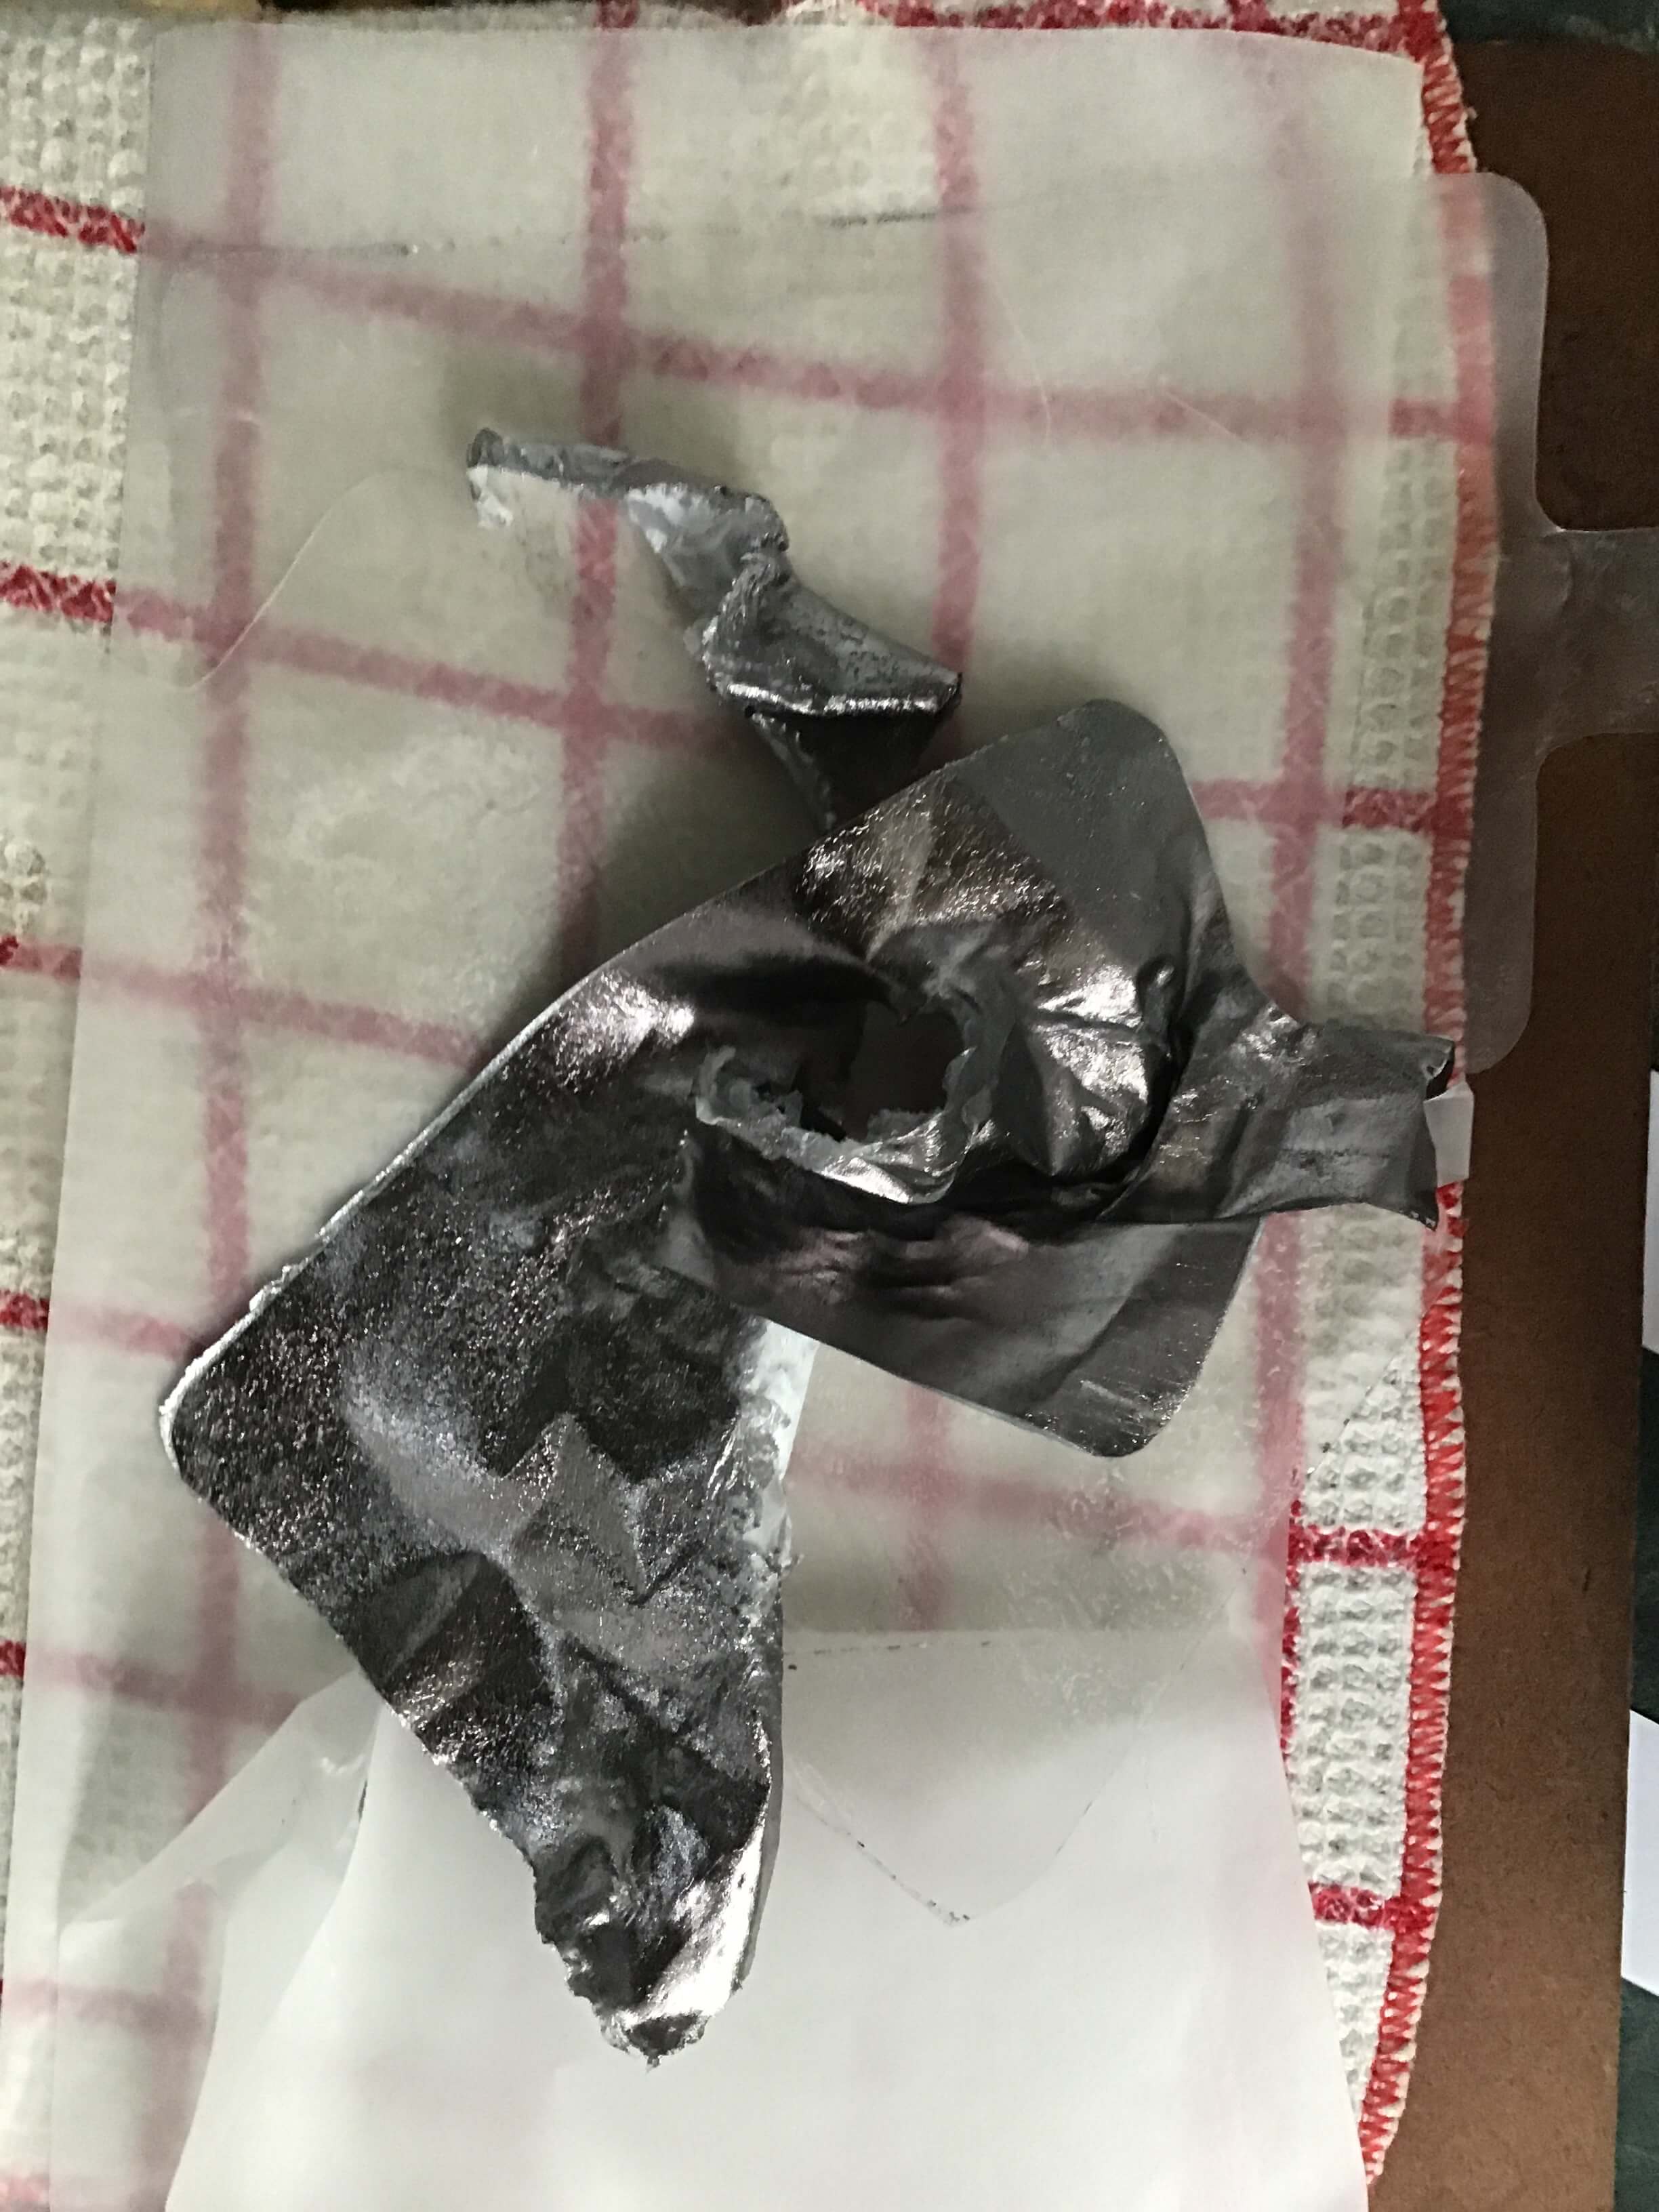
Impatient Attempt

The first trial, I left the material too in the iron and I later was not able to pull out.
My process
0.)Where to iron
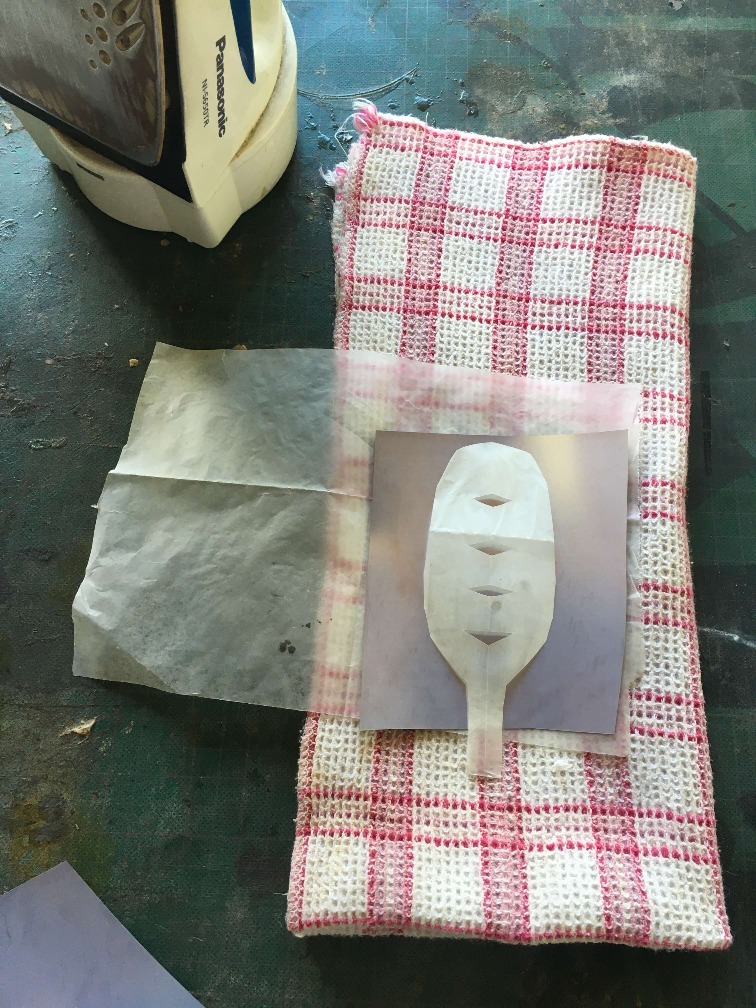
I place a cutting board to iron over, to protect my surface. Avoid direct heat (it will wrinkle it)
Use a thick cotton based cloth. This will apply pressure to the vynil from the other side. It became important to put some weight to the ironing, it helps with joining the center wax cutouts of the vynil.
1.)Define the temperature
Us Chemiclas recommends 150 degrees (material provider) and its a great start.
Doing trail and error with small swatches of the material until its aparent of proper union between the vynil sides.

Mark the temperature that is working in the iron, so you can get back to it.
In my case, I found the proper temperature was not 150, but 175 degrees. I think there is heat lose due to layering between the material wax paper and the vynil itself.
2.) Define the time
More trial and error. Make a setup where you have a timer next and use it every time you decide to join a patter.
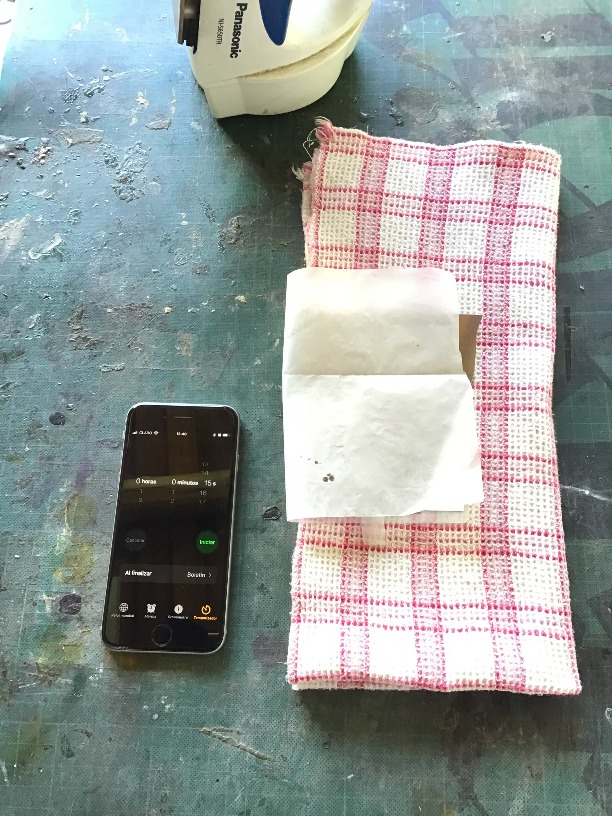
The provider's datasheet recommends 10s. I found out with the 175 temperature, 15s was a reliable time, so I had the timer set up to it.
3.) The ironing action
Wrap the patter with wax paper.
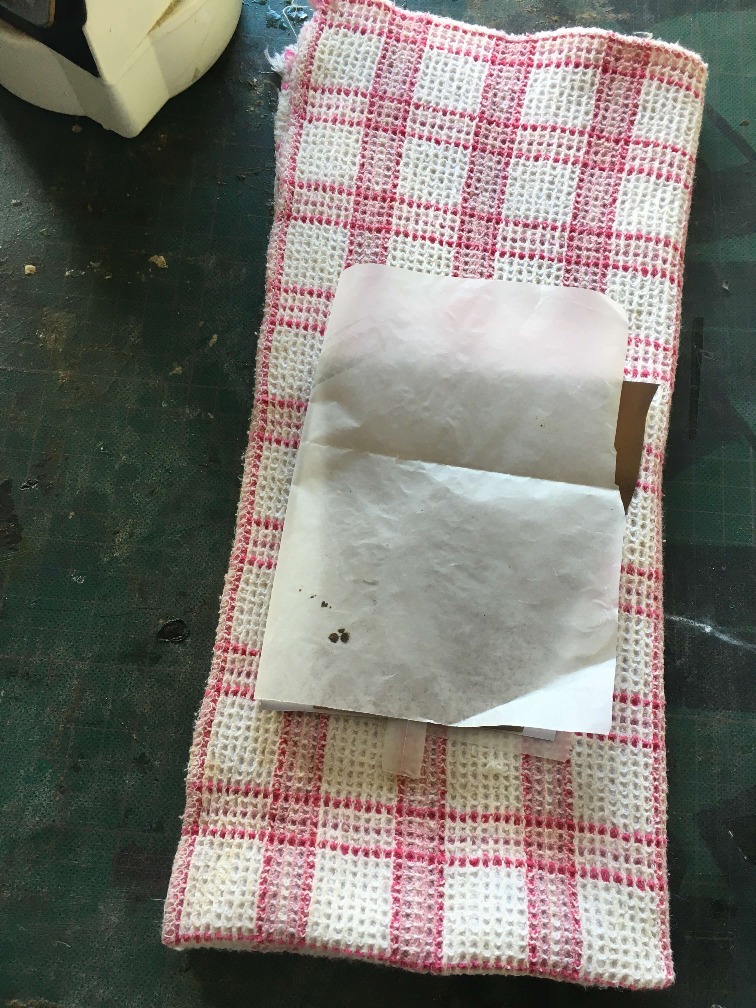
Make sure the iron is hot, start the timer.
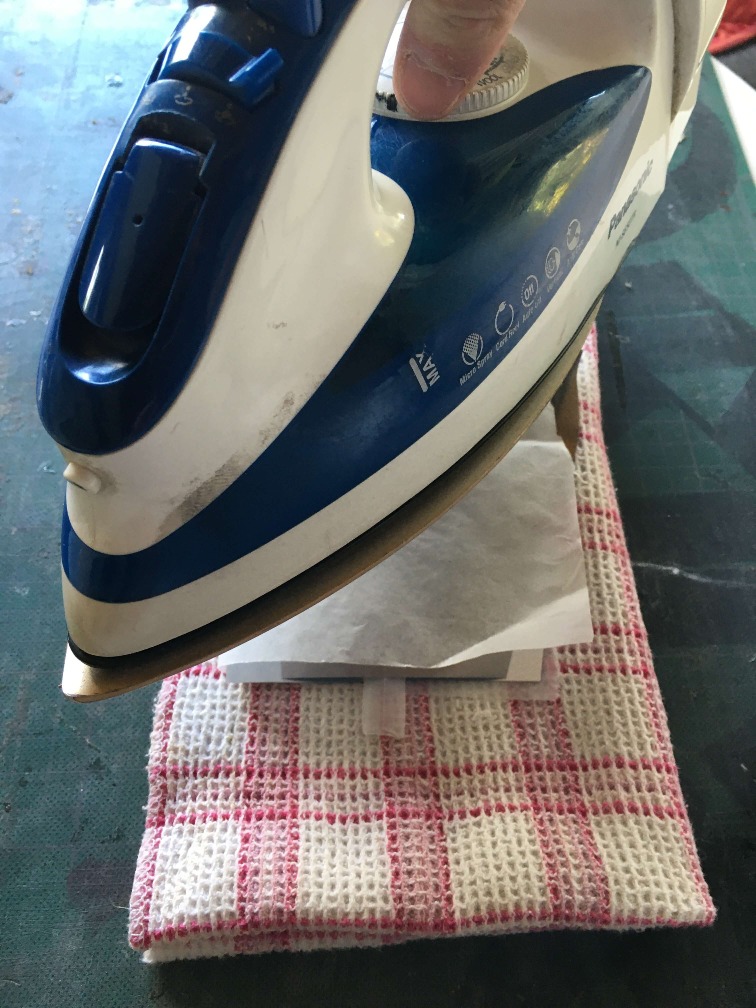
Apply as much pressure as you can, and respect the timer.
Results

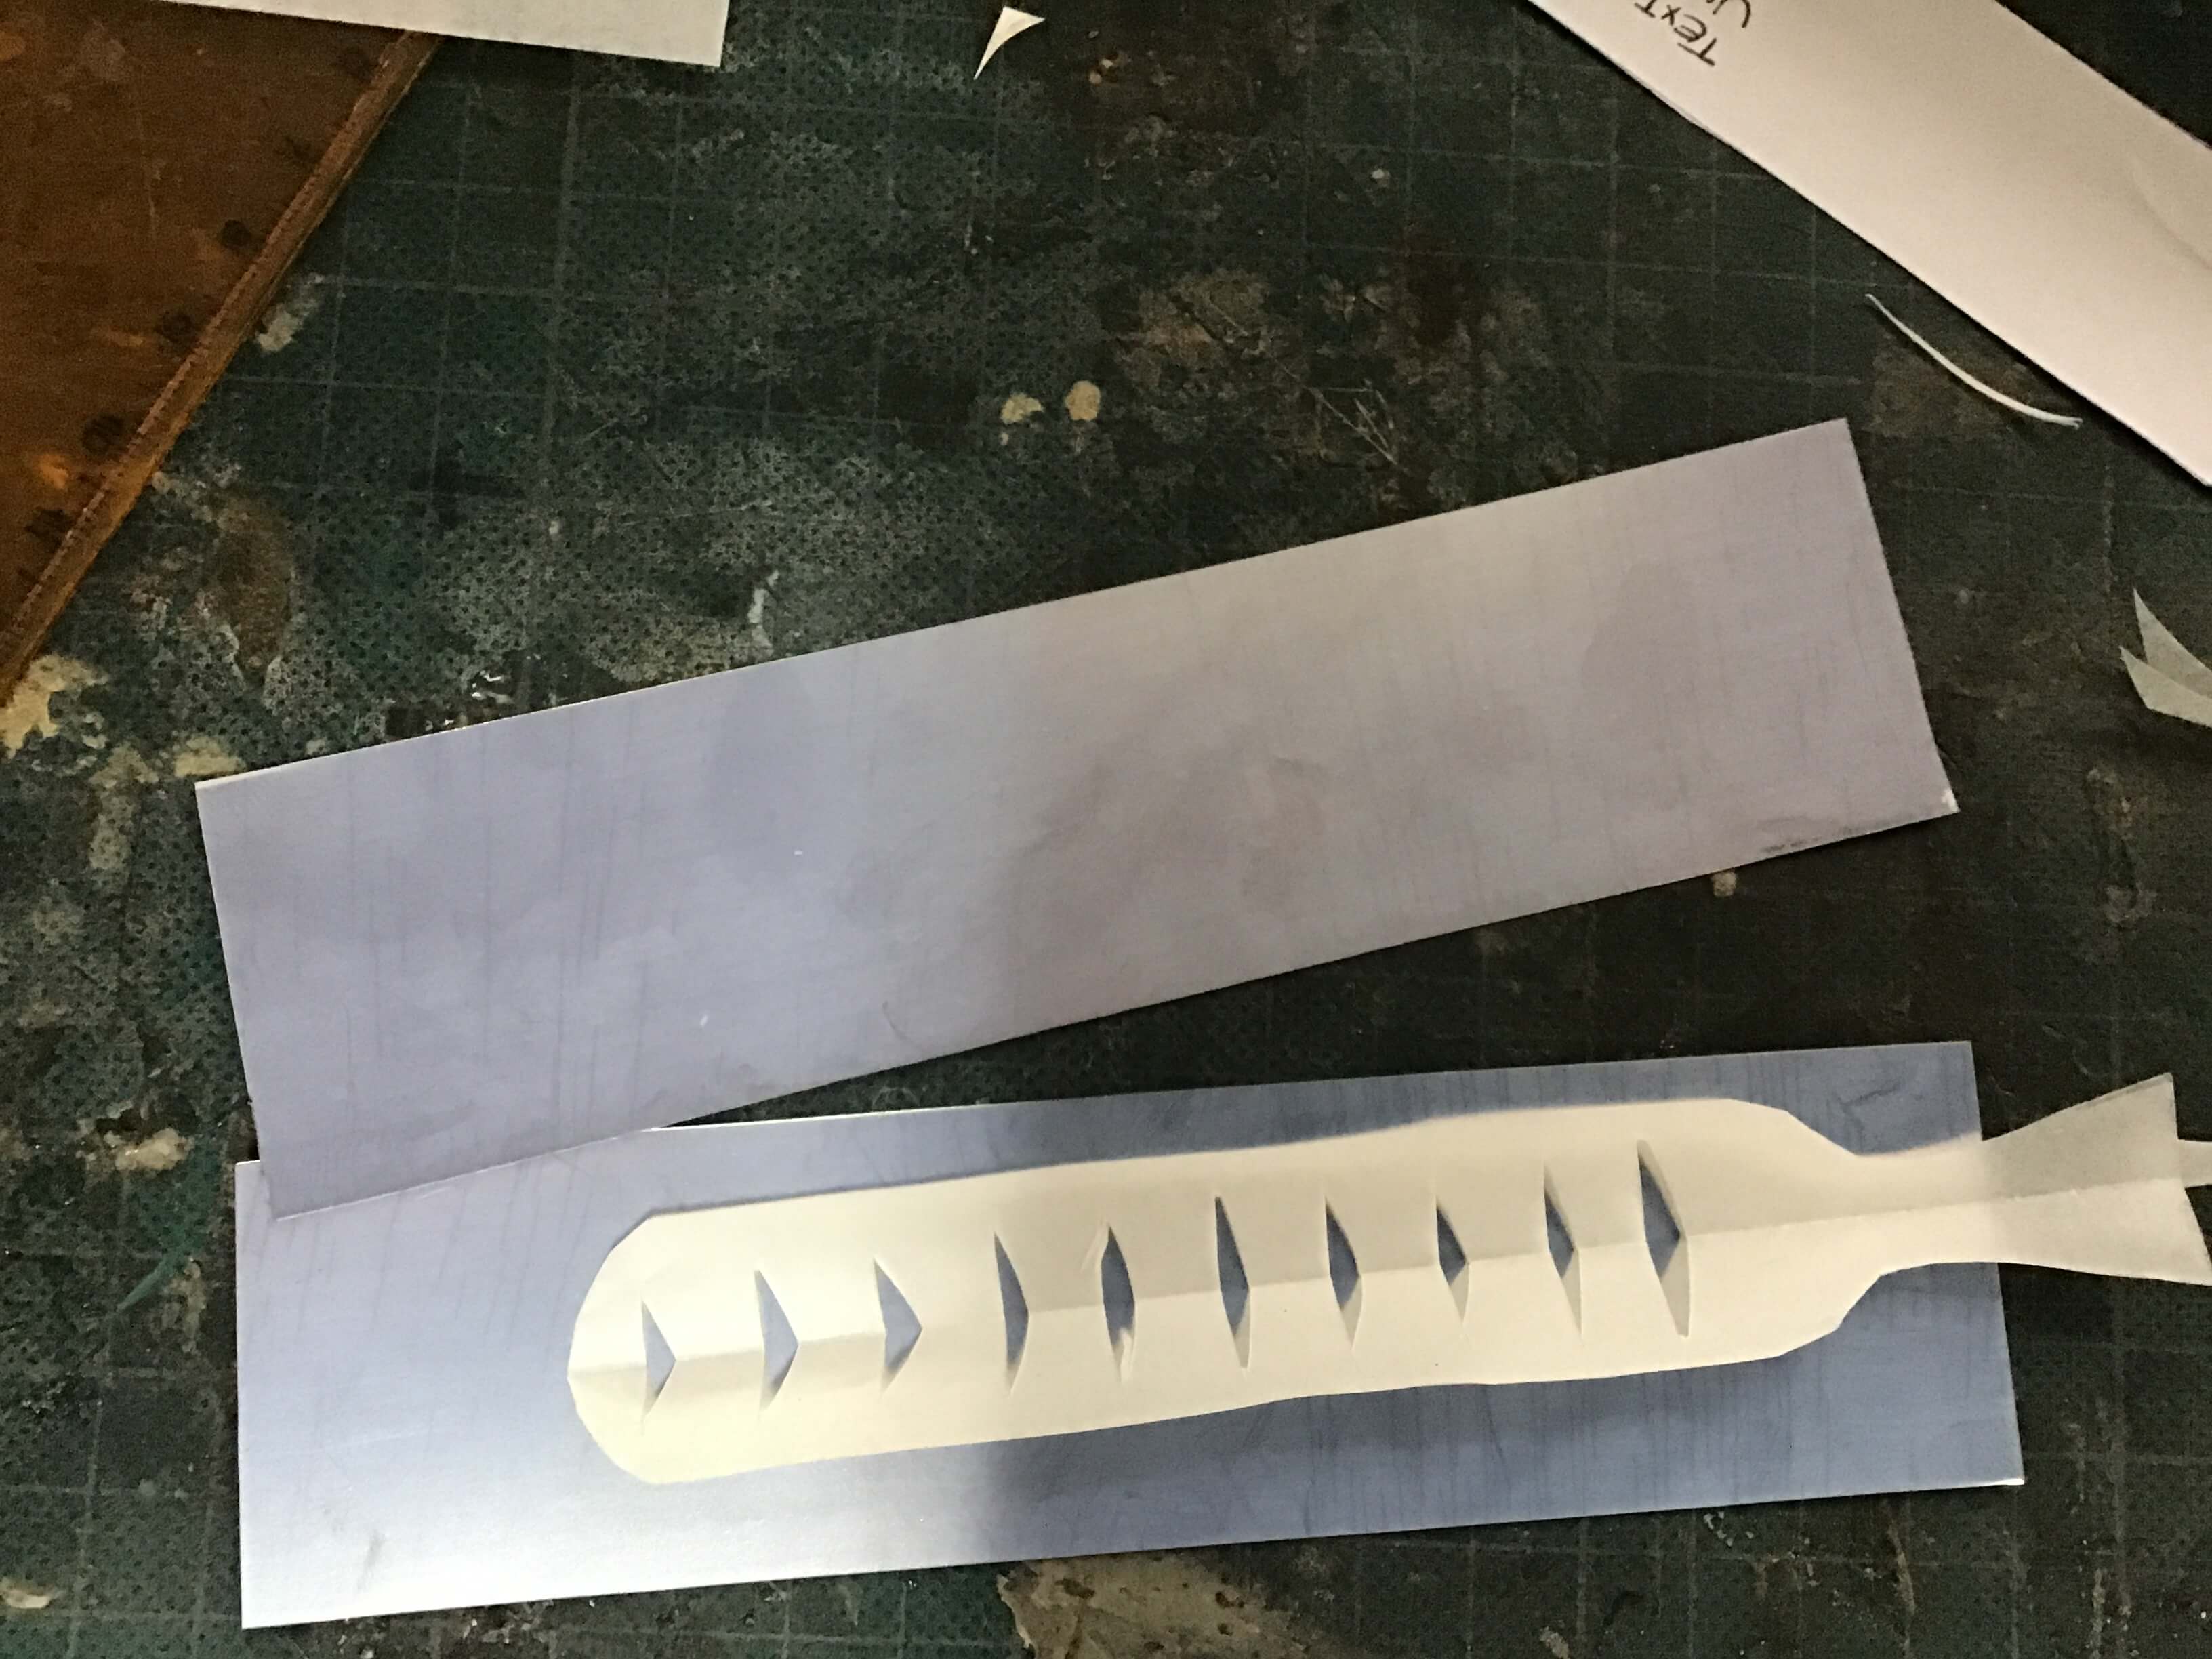
Fist Motion Pattern
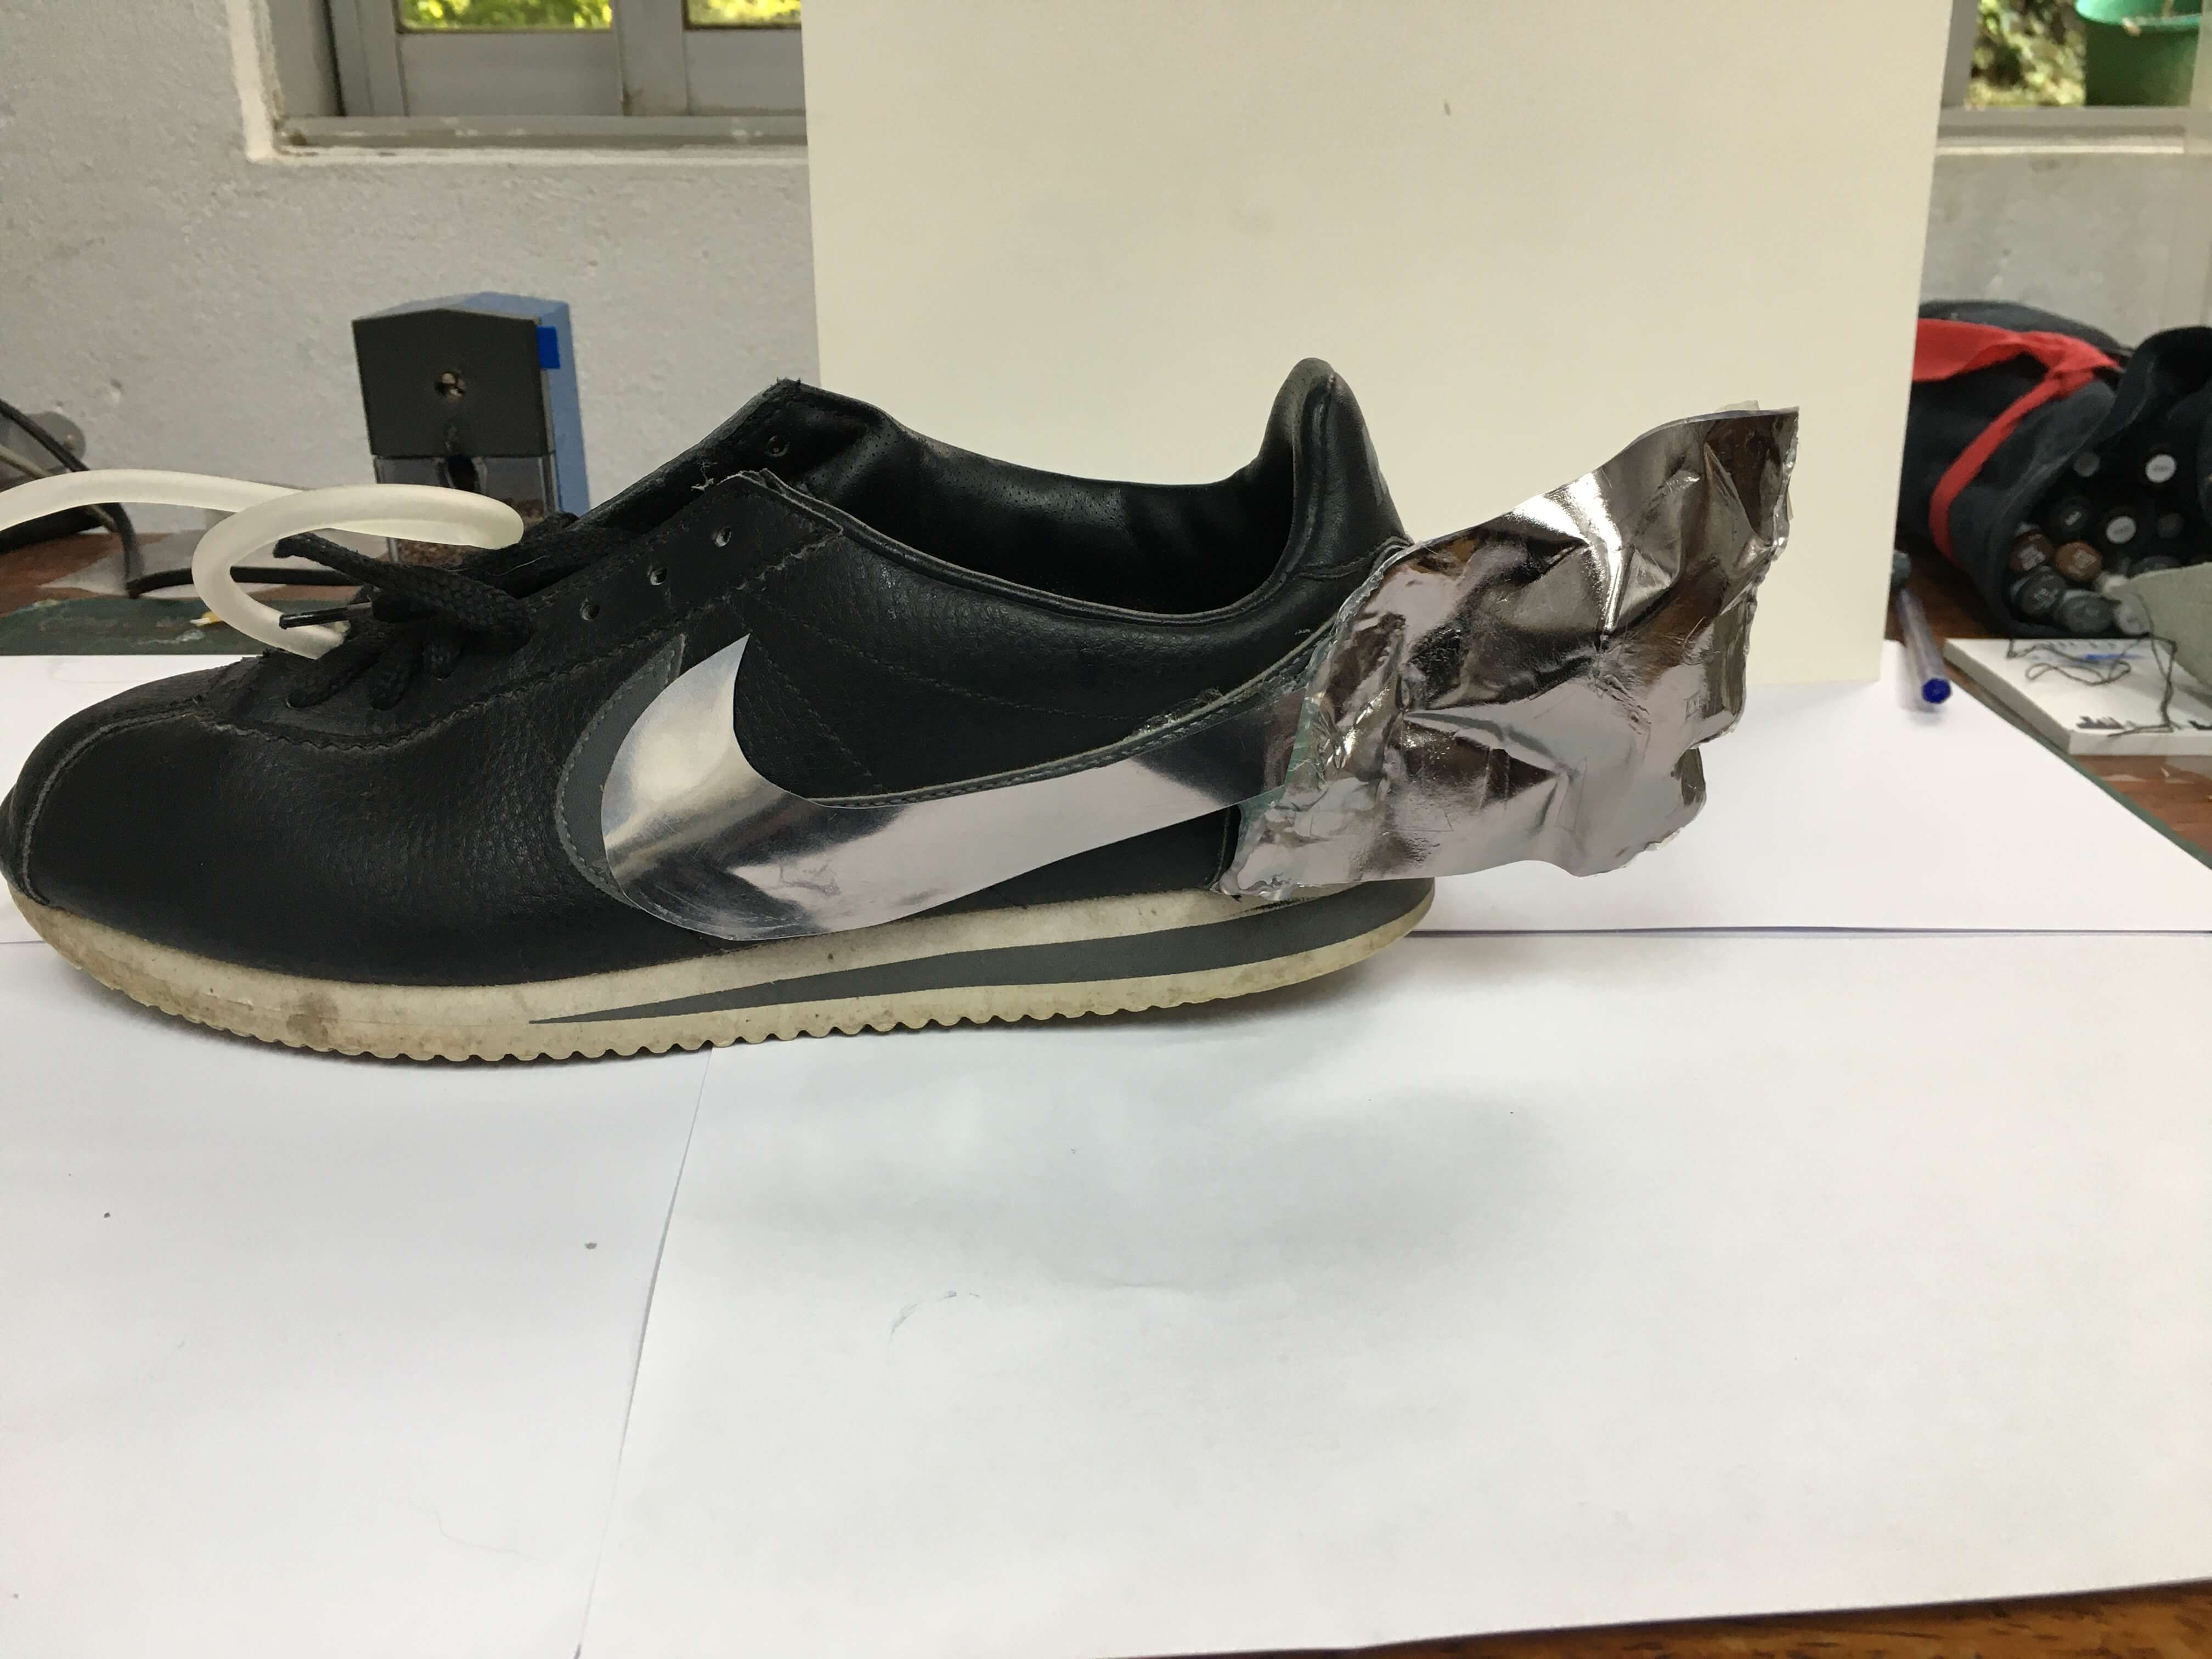
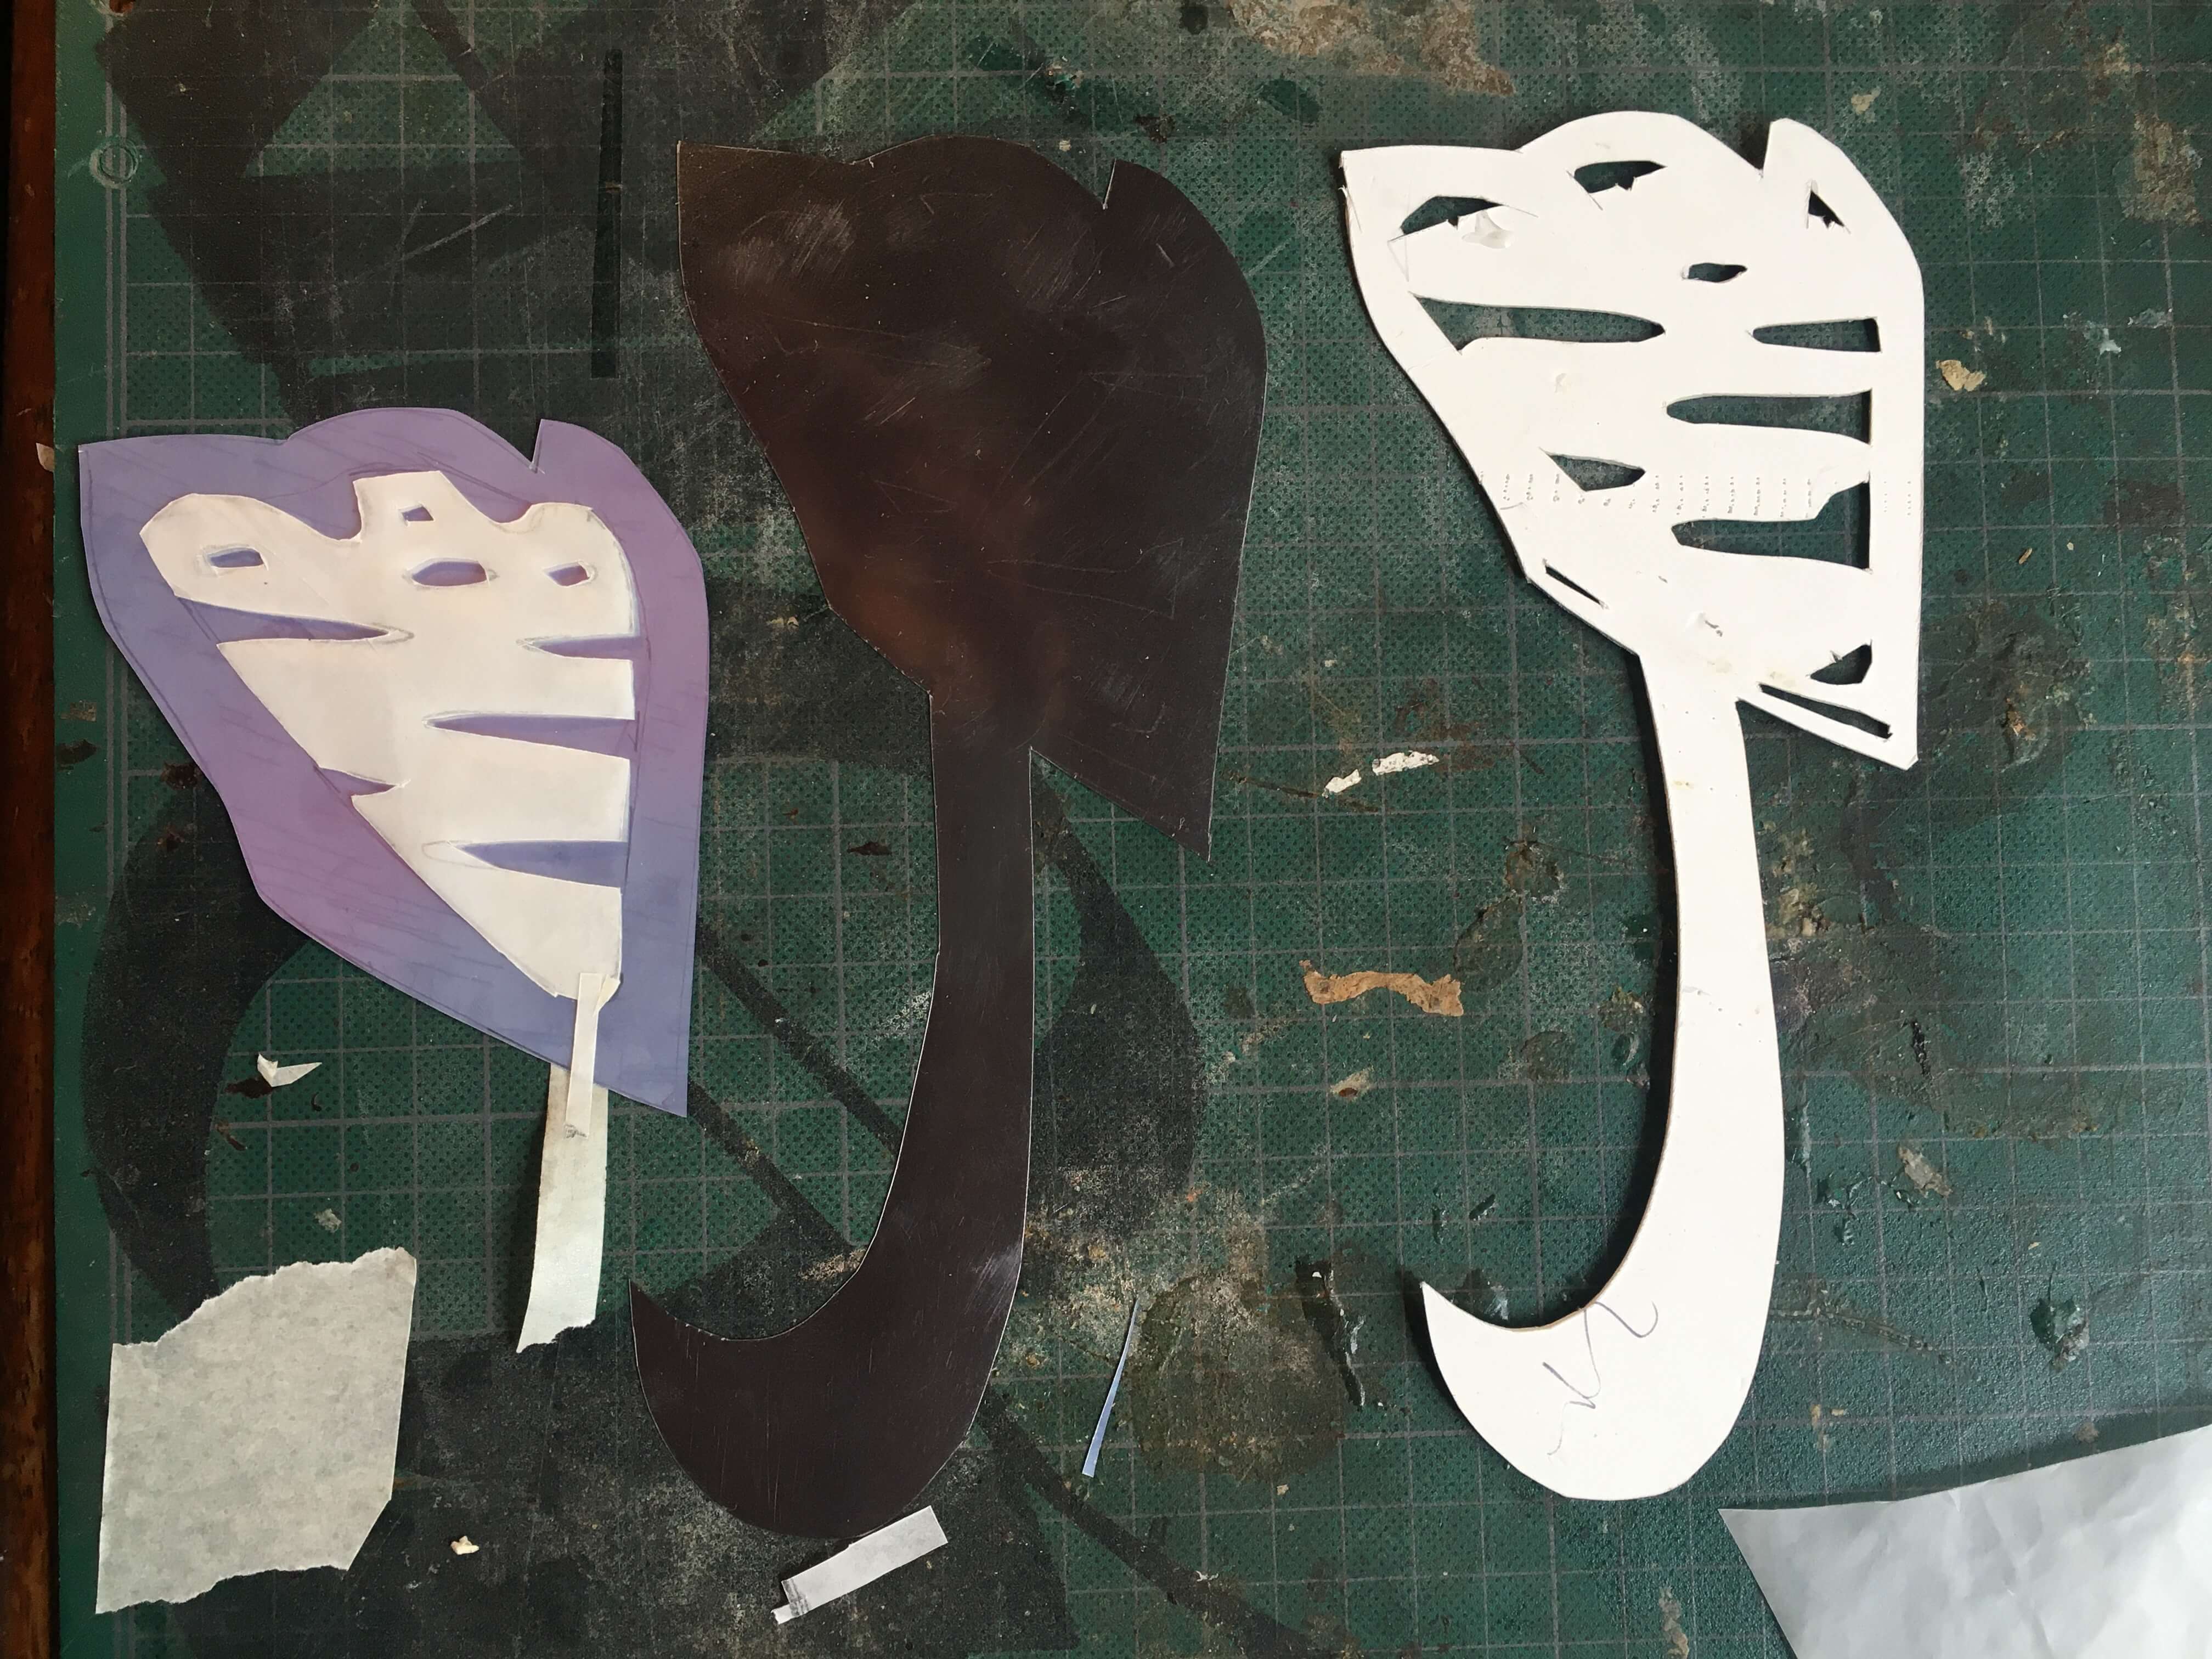
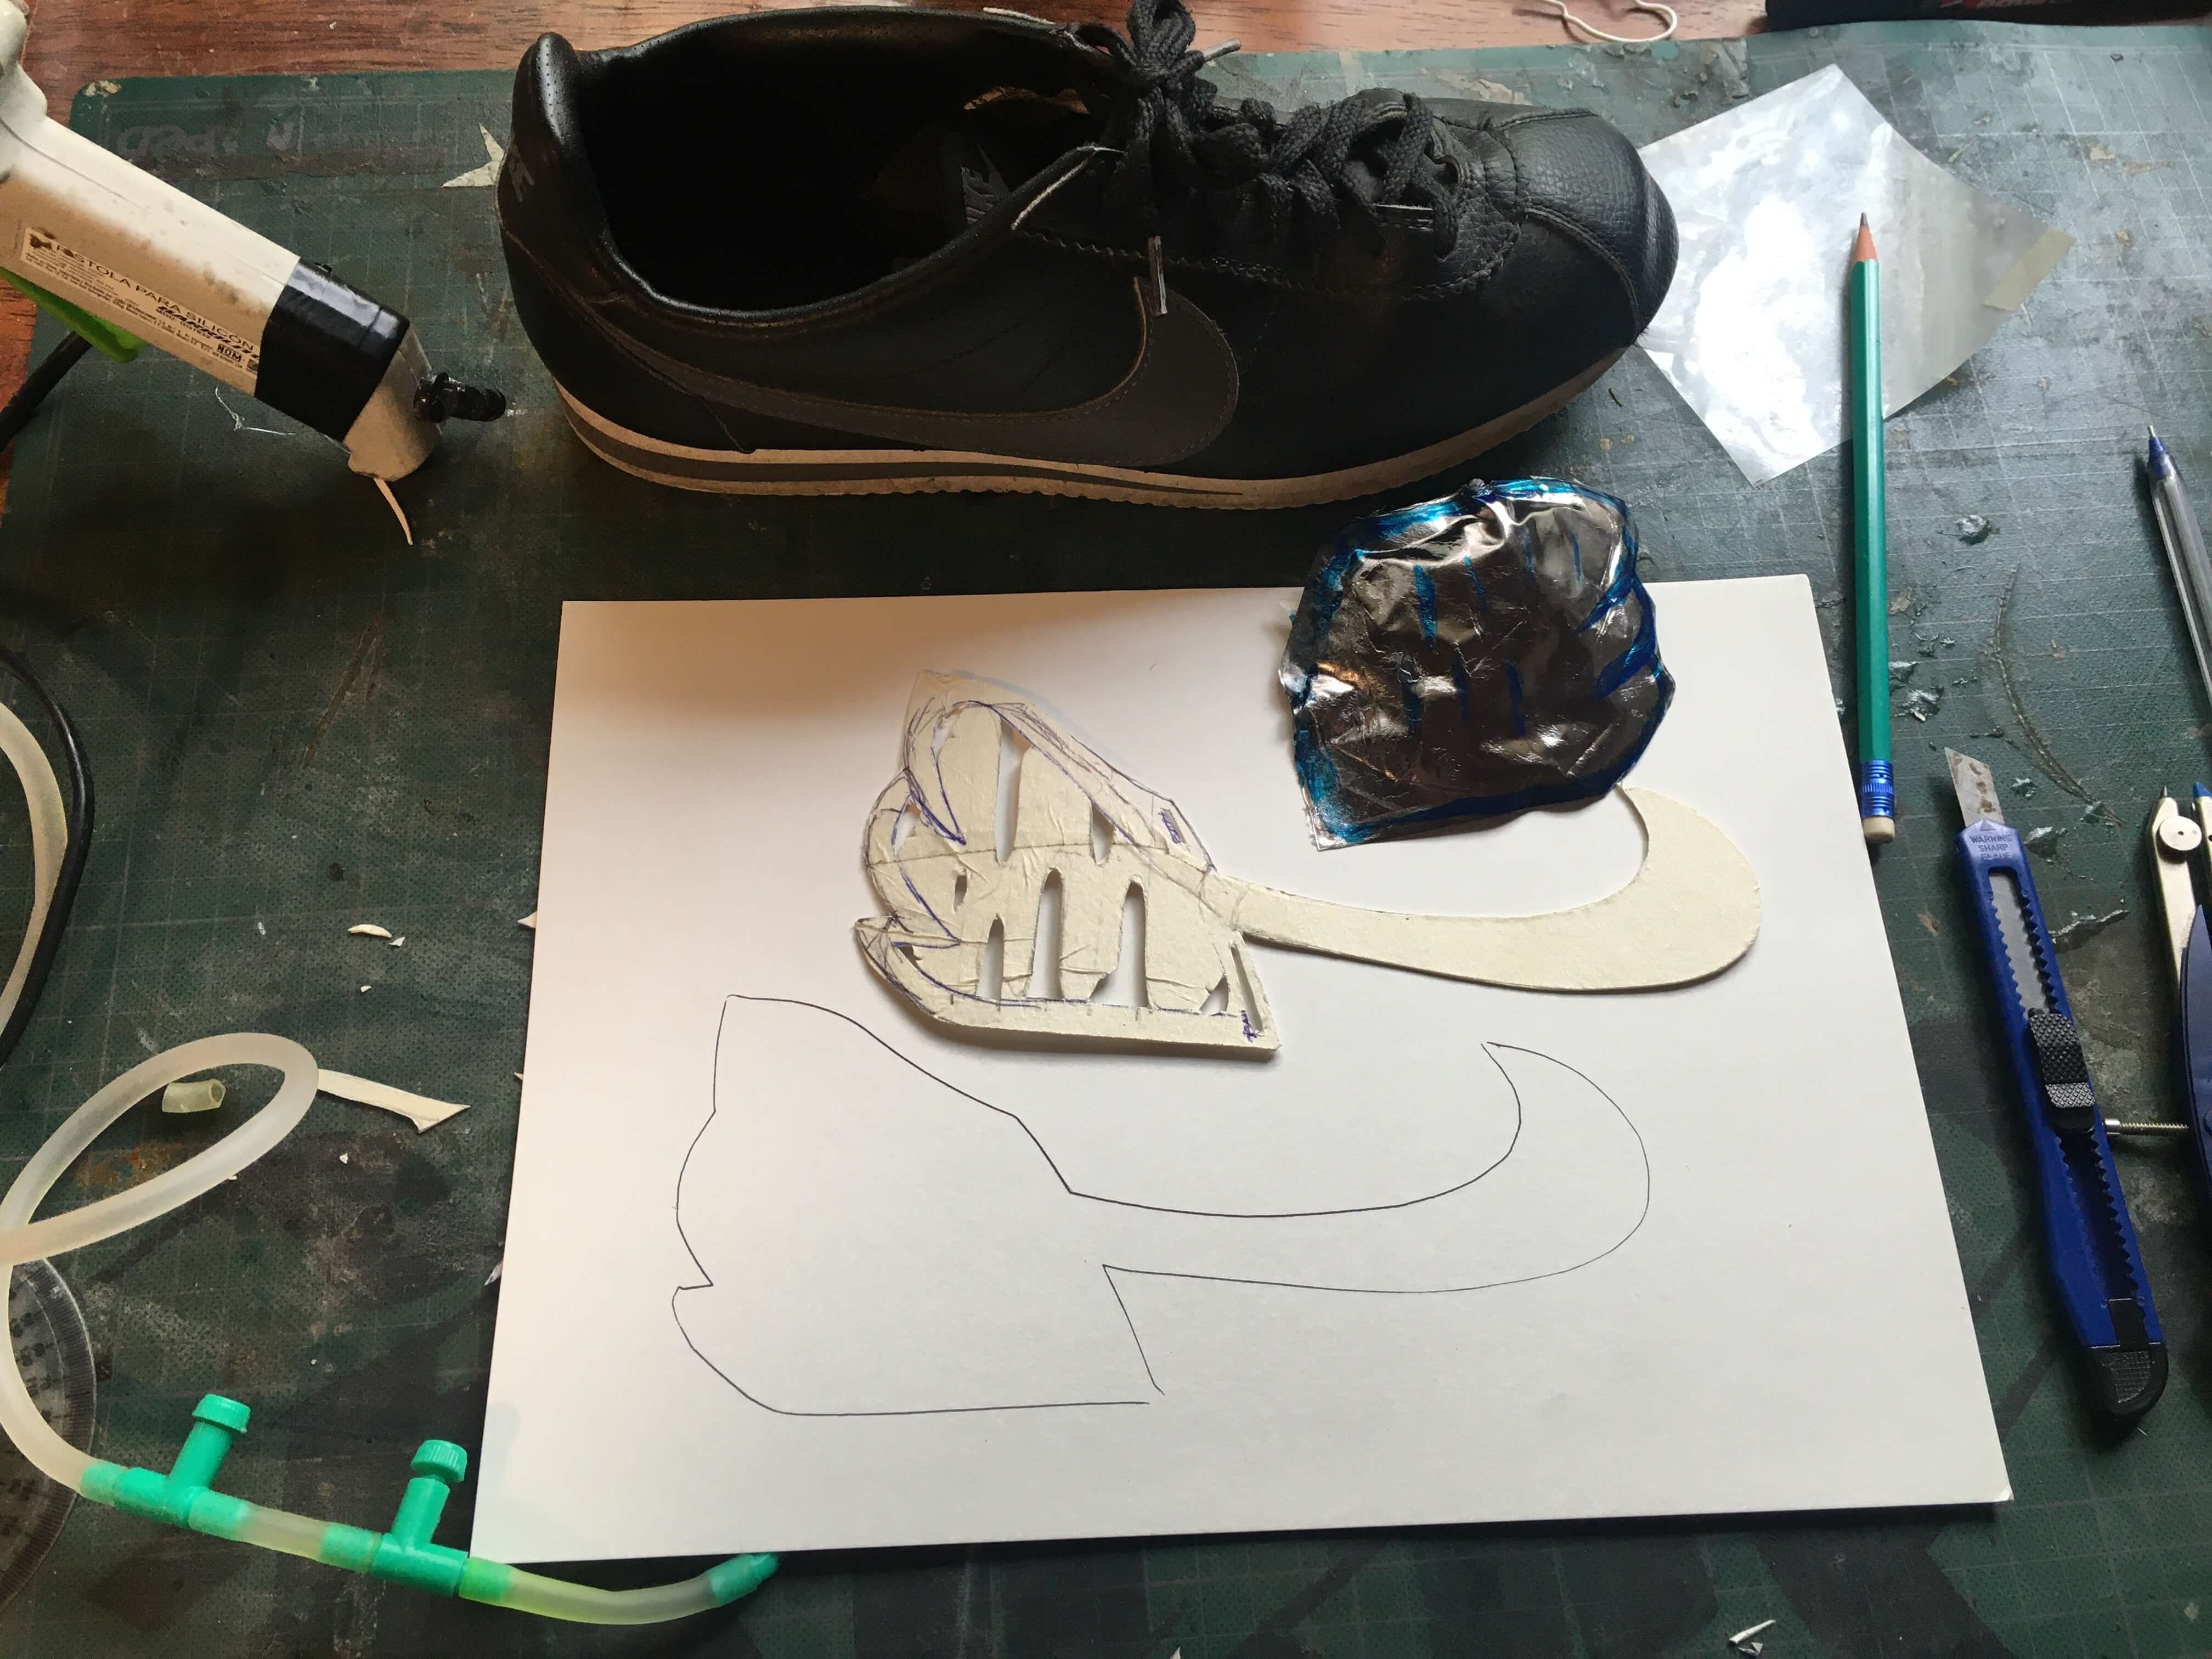
Concept In use: Add wings to a Nike Cortez
I thought it be cool if a sneaker had wings, back in the Athens, Hermes, the god of speed and messenger to all other gods was portrayed with winds in his feet. Its a concept that has resonated ever since, the speed, the dream of flight and recently Foot Locker's logo.
Setup
In order to make the test a bit more procedural, I used aquarium water pump. I had one laying around that I decided to use, but you can also get them for cheep. They use 110v standard outlet.
Airpump
Specifications:
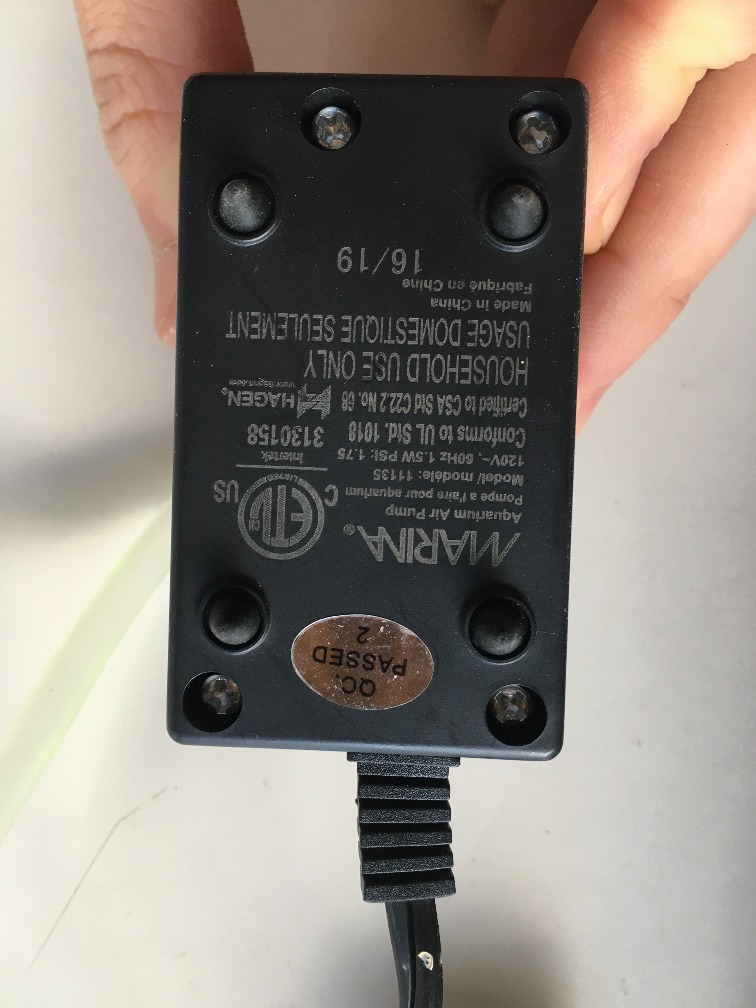
The reality is that the pump is not strong, it is estimated that this type of pump create just over 1 atm of pressure. You could find it in Amazon
All the plastic connections I found in a pet store, as accessories for aquarium worked for connections in my setup.
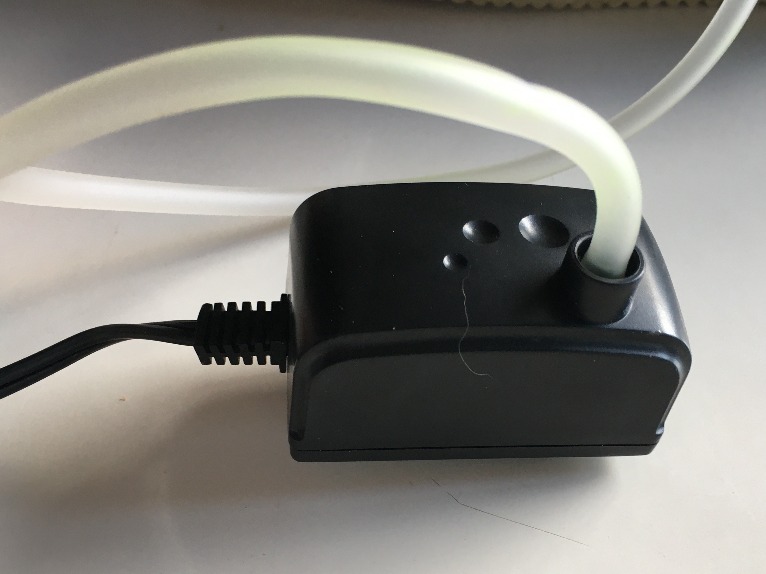
Setup pump in the shoe
In this case I was looking for proof that the pumping could actually move a pattern over the shoe, as a concept.
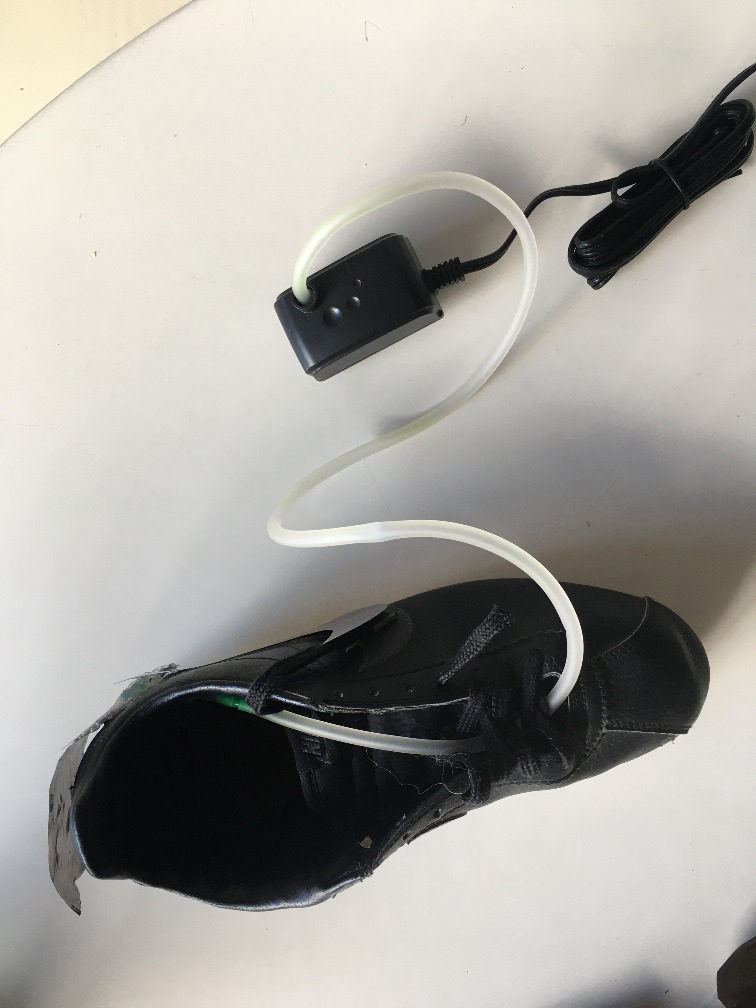
Test

The final test I manage to do was as follows:
As a reflection on my process, I ironed the pattern successfully in a curved fashion to maintain the curved shape when not inflated. When I inflate it, the middle patterns weren't as solidly bonded and the previous experiments. This would work but it might require custom shaped irons. The footwear is known for its custom machinery, but leaves places to improve in this specific case.