3. Circular Open Source Fashion
weekly assignment
Learning outcomes
- Research skills: the participant has acquired knowledge through references and concept development
- Design skills: the participant has learnt through sketches & prototypes, material choices, 2D vector design
- Fabrication skills: the participant acquired skills necessary for laser cutting, digital workflow, assemblying, material used and leftovers
- Process skills: Anyone can go through the workflow, understand it and reproduce it
- Final outcome: The assignment is assembled and either complete or tested
- Originality: Has the design been thought through and elaborated?
Student checklist
- Include some inspiration: research on artists or projects that work with modules and zero waste systems
- Document, Design and prototype with paper and scissors modular configurations and interlocking connections
- Document, Design and prototype digitally your modular configurations and interlocking connections in 2D
- Document the process of testing and laser cutting your designs, including the machine settings, material type and thickness
- Laser cut the modules. Create a modular or seamless garment, showing that the connection is well-designed and holds the pull/stretch. Document the assembly process and tests
- Upload the fabrication PDF file at oscircularfashion.com, in 1:1 scale accompanied by 1-5 pictures (preferably in white background)
- Submit some of the modules to the analog or digital material library of the lab. (Recommended size 20cm x 20cm) (extra credit)
Check out the weekly assignment here.
References and Inspiration
get inspired!
Check out and research alumni pages to betetr understand how to document and get inspired
-
0-waste modular dress - Stephanie Johnsons - TextileLab Amsterdam
-
Modular balaclava - Mina Mayo Smith - FabLab Kamakura
-
Modular jewellery - Shefali Desai - Somaya
-
0-waste garment - Ruby Lennox - FabLab Bcn
-
0-waste garment - Alve Lagercrantz - FabLab Bcn
-
Assembly instructions & embedded message - Jessica Stanley - TextileLab Amsterdam
M. C. Escher
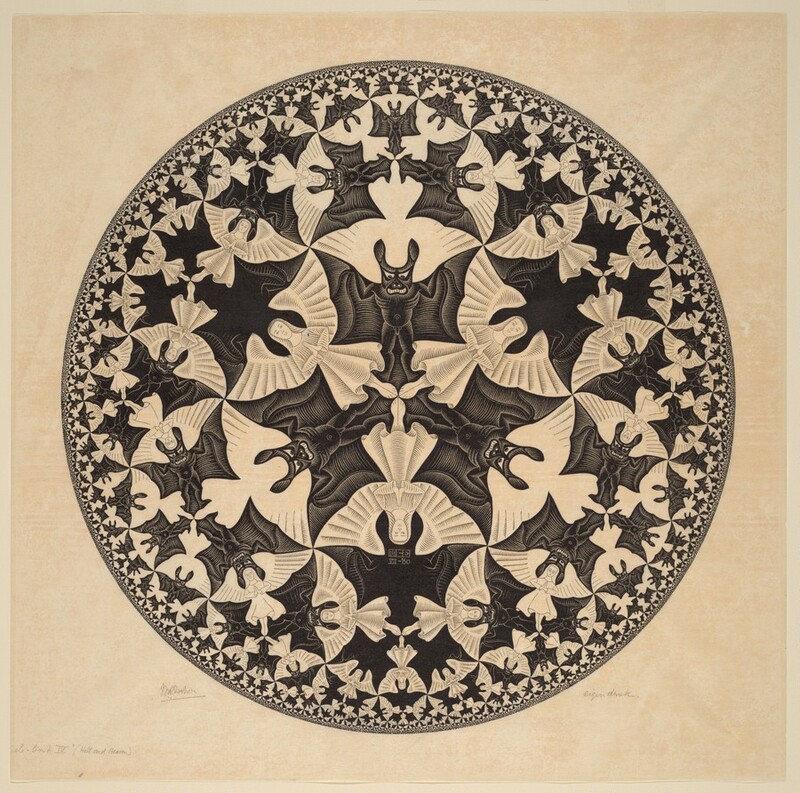
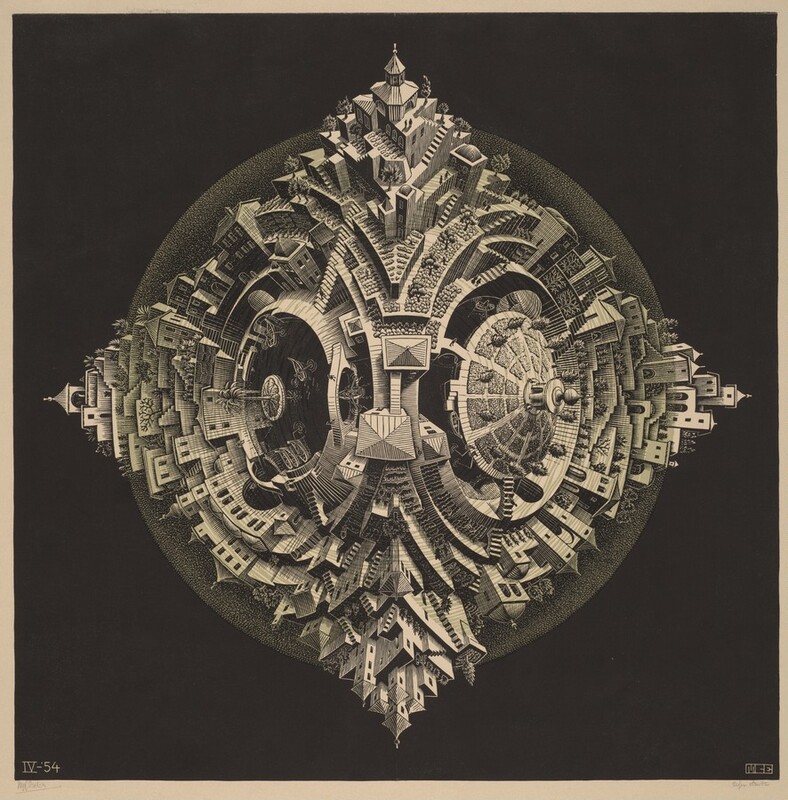
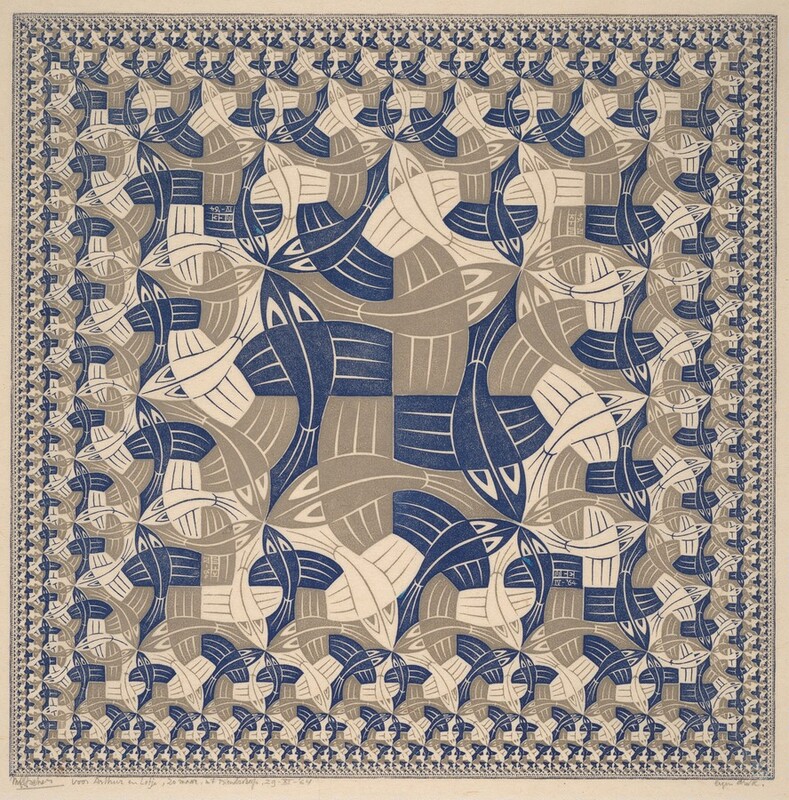

Image Credit: National Gallery of Art
Image Credit: National Gallery of Art
Image Credit: National Gallery of Art
Image Credit: Arthive
I’ve always been fascinated by Escher’s work even before I knew of him as an artist. The Metamorphosis series is a great favourite. What I like about those, as well as his other work on similar lines, is the tessellating objects and how they interact and metamorphose into another object, how the negative and positive spaces come to the fore or withdraw and bring different shapes to life. As someone who loves tessellating shapes, metamorphosing them is the obvious next step. Escher is unrivalled in his sheer variety and virtuosity at this, and will always be an inspiration.
Roger Penrose


Image Credit: Wikimedia Commons
Image Credit: Wikimedia Commons
.svg)
I’ve also for a long time been interested in the rabbit-hole maze that flows from tessellations to tilings and symmetries and leads to Islamic Geometry, Pentagonal tilings, and the work of Roger Penrose and Aperiodic tilings. .

Infact, for my Fabacademy CAD and Casting modules, I worked on the then newly discovered aperiodic monotile, the Ein-stein.
Find more info here.
George Hart
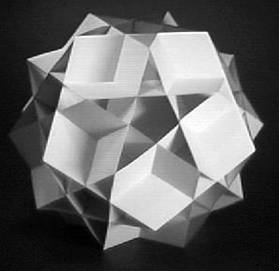
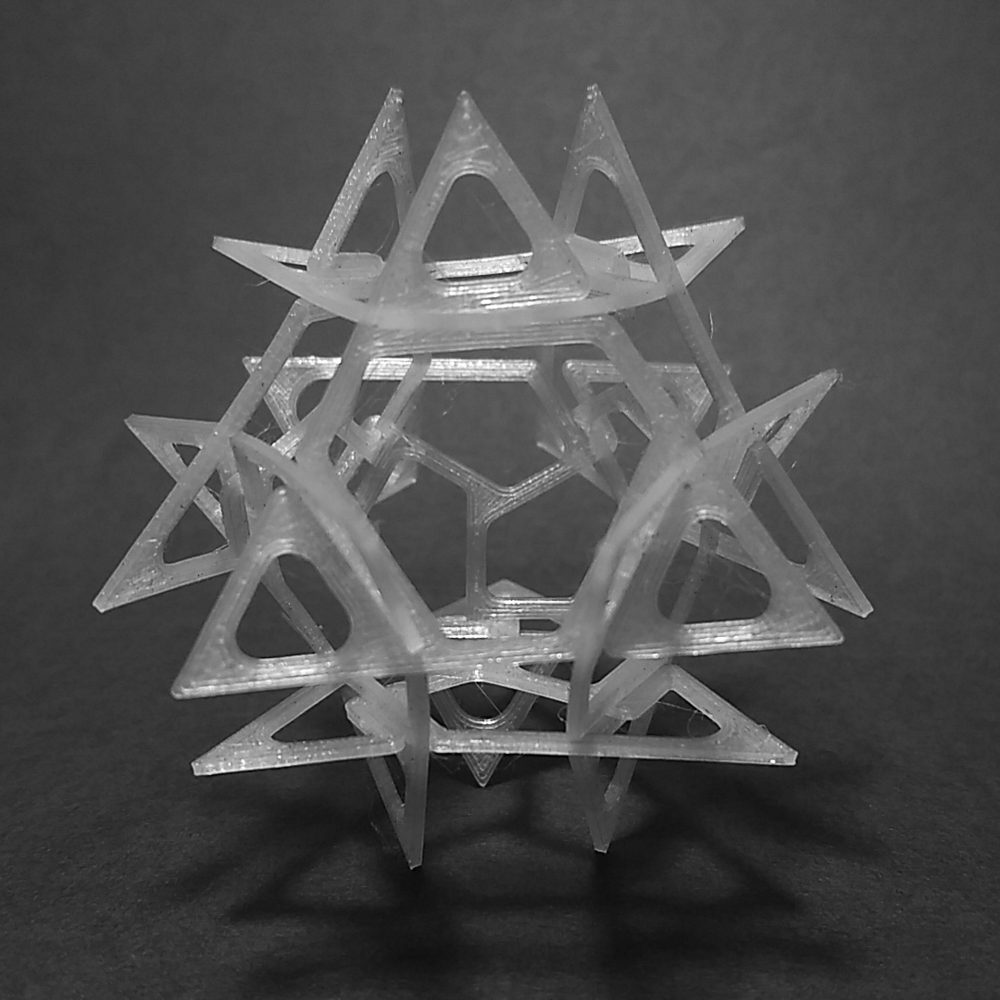
Image Credit: georgehart.com
Image Credit: jesalmehta.com
I have been following George Hart’s work for a while — especially his rich visual and mathematical explorations into structure, sculpture, and combinatorial geometry.
During the lockdown, not having access to a lasercutter, I tried to work out some pieces inspired by his slide-togethers series by 3D printing flat sections and slotting then together.
Ideation
Dragonscale / Scale Armour

Image Credit: Printables
I wanted to explore scale-armour as a starting point — I have some very cool 3D prints of something similar and I wanted to see if it could be replicated in fabric.
Archimedean Tessellations


Image Credit: Wikimedia Commons
Image Credit: Wikimedia Commons
Given the premise of using tessellations as a starting point, and having done a lot of regular tessellation exploration, I decided to switch to an Archimedean tessellation instead of sticking to triangle, square or hexagon based ones.
Geodesic Domes, Buckyballs and the Geometry of Footballs


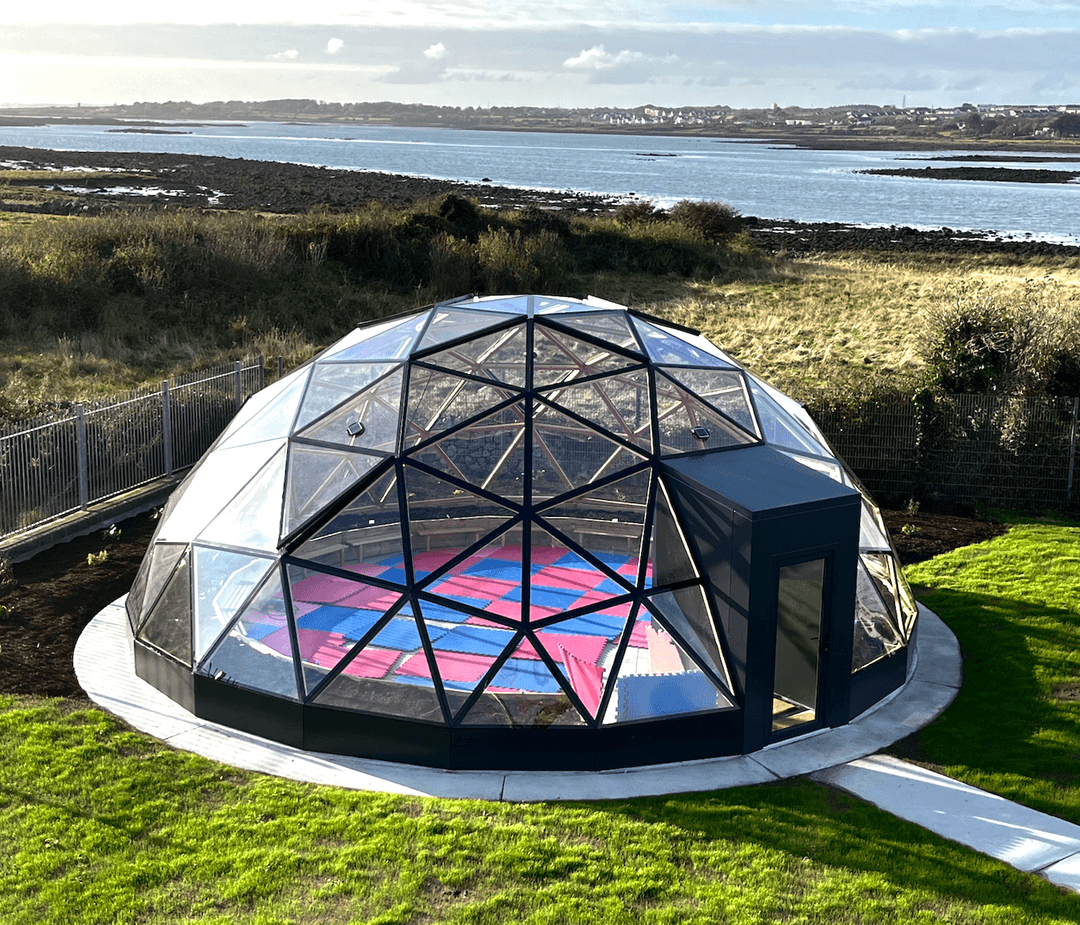
Image Credit: Wikimedia Commons
Image Credit: Wikimedia Commons
Image Credit: Wikimedia Commons
Reference: WIRED
Finally, I want to explore whether tessellating modules can build up a 3D form, enclosing a volume similar to geodesic domes, Buckyballs, footballs, and the Platonic and Archimedean polyhedra.
I would also like to work on the interplay of rigid and flexible units and how they could affect the resulting structure.
Tools
For the paper trials
Hand tools
- Cutter, blades, etc
- Cutting mat
- Geometry kit - set squares, compass, scale, etc
- Graph paper / grid paper
- Tracing paper
For Laser cutting
- SIL 110 W 3x4 bed lasercutter
-
RDWorks, the lasercutter operating software
-
Vector drawing software I used CorelDraw here instead of Inkscape since I am very used to it, and can work much faster in CorelDraw than Illustrator. Inkscape is a strong second choice, but here I wanted more speed.

This is what my primary file looked like by the end of the week !
- Forceps
Process and workflow
Exploring and designing modules

The Dragon Scale module
I was inspired by chain mail, armor scales and fantasy dragons, to try to create a scale module. I considered using that to make a bag. So I figured I could make the bag as an egg shaped stuff-bag, and being scaly textured like a dragon egg.
Later :
However, after assembling several rounds of the module and creating a long piece of it, I think it is better as a wrap. As a bag, it will be too heavy and thick (see Analysis) and may not be the best idea.
Sketches


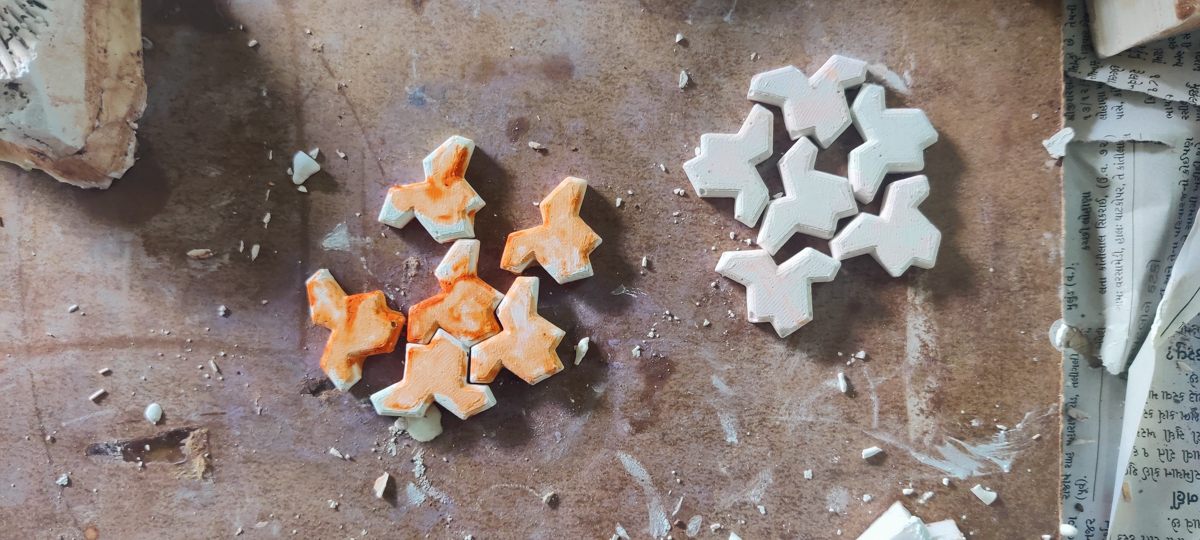
Paper Prototypes


Working on the paper versions, as diagrams then as pieces, gave me a sense of how things would bend and move, and what would overlap what, what kind of fits and interlocks were working or not working, based on how they would be pulled and pushed when fully assembled.
It also helped me deconstruct the tile into primary area vs tab extensions and made designing the unit easier. After a while, I simply attached strips as tabs and punched holes where I expected them to enter the module. So I ended up figuring the overall unit partly bottom up instead of designing the complete unit and isolating tabs top down.
Colouring the individual trial pieces helped show what tab travelled and connected with which area of other pieces.


Lasercutting paper variants to check different parameters
 Evolution of the module
 Refinement of the module
 Small Batch cuts for assembly trials

 Lasercutting trial modules in paper
 Trial assembly of final piece
Final piece


The piece is designed such that when assembled, the modules do not lie absolutely flat. I have reduced the distance between the corner slits G-H to be less than what would be required once the modules are assembled in arrays. This causes the maon square to curve up when fully assembled, to give an interesting dragon scale effect that I wanted.
The effect is far more prominent in paper than fabric, though it is certainly there in the fabric as well.
Square and Rhombus tessellation
This is based on the Archimedean tessellation. I added tabs and slots at alternating sides on both shapes.


Handcut version


Lasercut version
This results in a good flat construction, which is the goal considering it's based on an Archimedean tesselation that can tile a plane completely.
The tab and slot arrangment gives a very clean look on one side of the surface. The other side has visible tabs and slots that can be incorporated better in the form to look good if they are externally visible.
Pentagonal Dodecahedron
This is based on a simple pentagonal net which is obtained by the development of a regular Dodecahedron.
Since the Pentagon naturally has an odd number of sides, each side is divided into halves, and each half gets a tab or slot alternately, to ensure universal attachments.


This is an interesting way to construct polyhedra but I wasn't too keen on sticking to the basic polyhedra so I moved on.
Geodesic/Football

Moving on from polyhedra, I still wanted to create volumes instead of flat surfaces. The geodesic dome and hexagon-pentagon construction of footballs came to mind.
I also wanted to mix hard-soft materials in the primary shape vs a joiner module.
However, this is something I have left to try later.
Assembly in Fabric
I chose felt as an easily accessible and firm material. However, the material I got had quality issues. The trials were fine, but the cuts fusing and not separating well became more apparent in the final production cut.
Introducing the unit !
One of my first stop motions, please forgive the jankyness for the enthusiasm it comes from :P
Felt Trials


I did some trial cuts in the felt material, since I needed to verify the module design and how well it interlocked, etc.
Lasercutting Settings :
Speed : 20 mm/s
Power : 30%-35%
Production cut in Felt


The production cut ran easily enough.
Assembly sequence
Assembly

- Initially, lay two or more modules side by side
- Pass tab D of arm B through the hole C in arm A of the same module
- Adjust and settle this operation, repeat for all modules of the first row
- Use the tiny corner tabs and slits to chain pieces by connecting G2 to H1 and H2 to G3 in a row of pieces
- For the next row of modules, attach them by inserting the arm A tab A (the first slit) of the 1st row into the slit E of the module in the next row, and arm B tab B of the 1st row into the slit F of the next row
- Repeat step 2, tab-D-to-hole-C, for the next row and continue with the rest of the steps
- To close the cylinder, connect Hn to G1 of each row, and tab An of each upper row to slit E1 of the next row

Using forceps was a big help for the deeper arm inserts as well as the tiny side inserts. Fingers were fine for the for the upper arm inserts.
 Bad cuts - the material has not cut through or fused back in places.
Final assembly, front and back.
The dragon scale effect is successful.


Other Variants
I tried other variants for the Dragon scales - surface engravings as well as cuts that allow Kirigami-like openings that can be tucked up into the body to produce interesting visual nd textural effects.


However, in the interests of speedy production and assembly, I did not go ahead with these.
Analysis


Fabric Efficiency
- Good, minimal waste
- Only corner cuts and a few "star" shapes were left behind
- The stars can be used elsewhere while the corners were minimal, could be used in pulping or other work
The long edge of the production cut can be used as the "String" to cinch the bag top as well
Overlap efficiency
- Moderate, 3 layers overlap at most places
- This results in a lot of fabric layered over a smaller area, with a very thick result
Strength
The double interlocks make it a fairly strong assembly
Overall, while fabric isn't wasted, there is about 2.5x fabric used to produce 1x area of the assembled swatch, which is a lot of consumption. If the application demands it, it is not a waste.
Reflections
- Material choice - lots of time wasted in separating in the pieces since it did not cut cleanly. I suspect there is polymer content in the material, not 100% wool, because the cut edges are somewhat melted-and-re-fused at a lot of points.
- The side tabs GH were supposed to be non-loaded linkages but some load did transfer to them so they need to be larger/stronger. They are also weaker since they are tiny and the bad cutting frayed some of them.
- The slot-and-insert for the arms was a good choice insead of slits, in the paper trial this was fine but fabric would have slipped out
- 2 insert operations on the same arm at different locations was finicky to do. It worked, but labour and care is higher. Forceps helped.
- The assembly sequence has to follow a top to bottom order for easiest assembly. Other directions are possible but harder. Hence it also becomes a one-person job, you can't distribute to other people and join up subassemblies
- Some issues do not register during the trials - they don't seem a problem for the one off pieces. But when you need to deal with 200 pieces, the little issues scale up and become a larger problem.
- Better colour choices - I wanted to combine black and yellow, for the "dragon egg" effect, but the material wasn't available in black in the shops I went to, so went with blue. The blue is ok in person, but photographs very badly and looks extremely saturated.
- The material also smells quite bad when cutting. The fabric trials were cut using a card sheet as supporting base, but that resulted in the smoke not going down to the exhaust but coming upwards through the surrounding fabric, so the smell held on longer. For the production cut, I taped the fabric to the bed directly and allowed one side to hang off on it's own weight. This straightened the fabric and eliminated the need for the backing, allowing the smoke to be exhausted properly, and hence the smell was not noticeable.
Credits
All images mine unless mentioned below the image
Fabrication files and OSCF link
Upload at oscircularfashion.com
DragonScale reusable module
Files
Single Unit svg
Single Unit dxf
Single Unit dimension drawing dxf
Production Cut dxf