3. C I R C U L A R _ 0 P E N _ S O U R C E
I N S P I R A T I O N
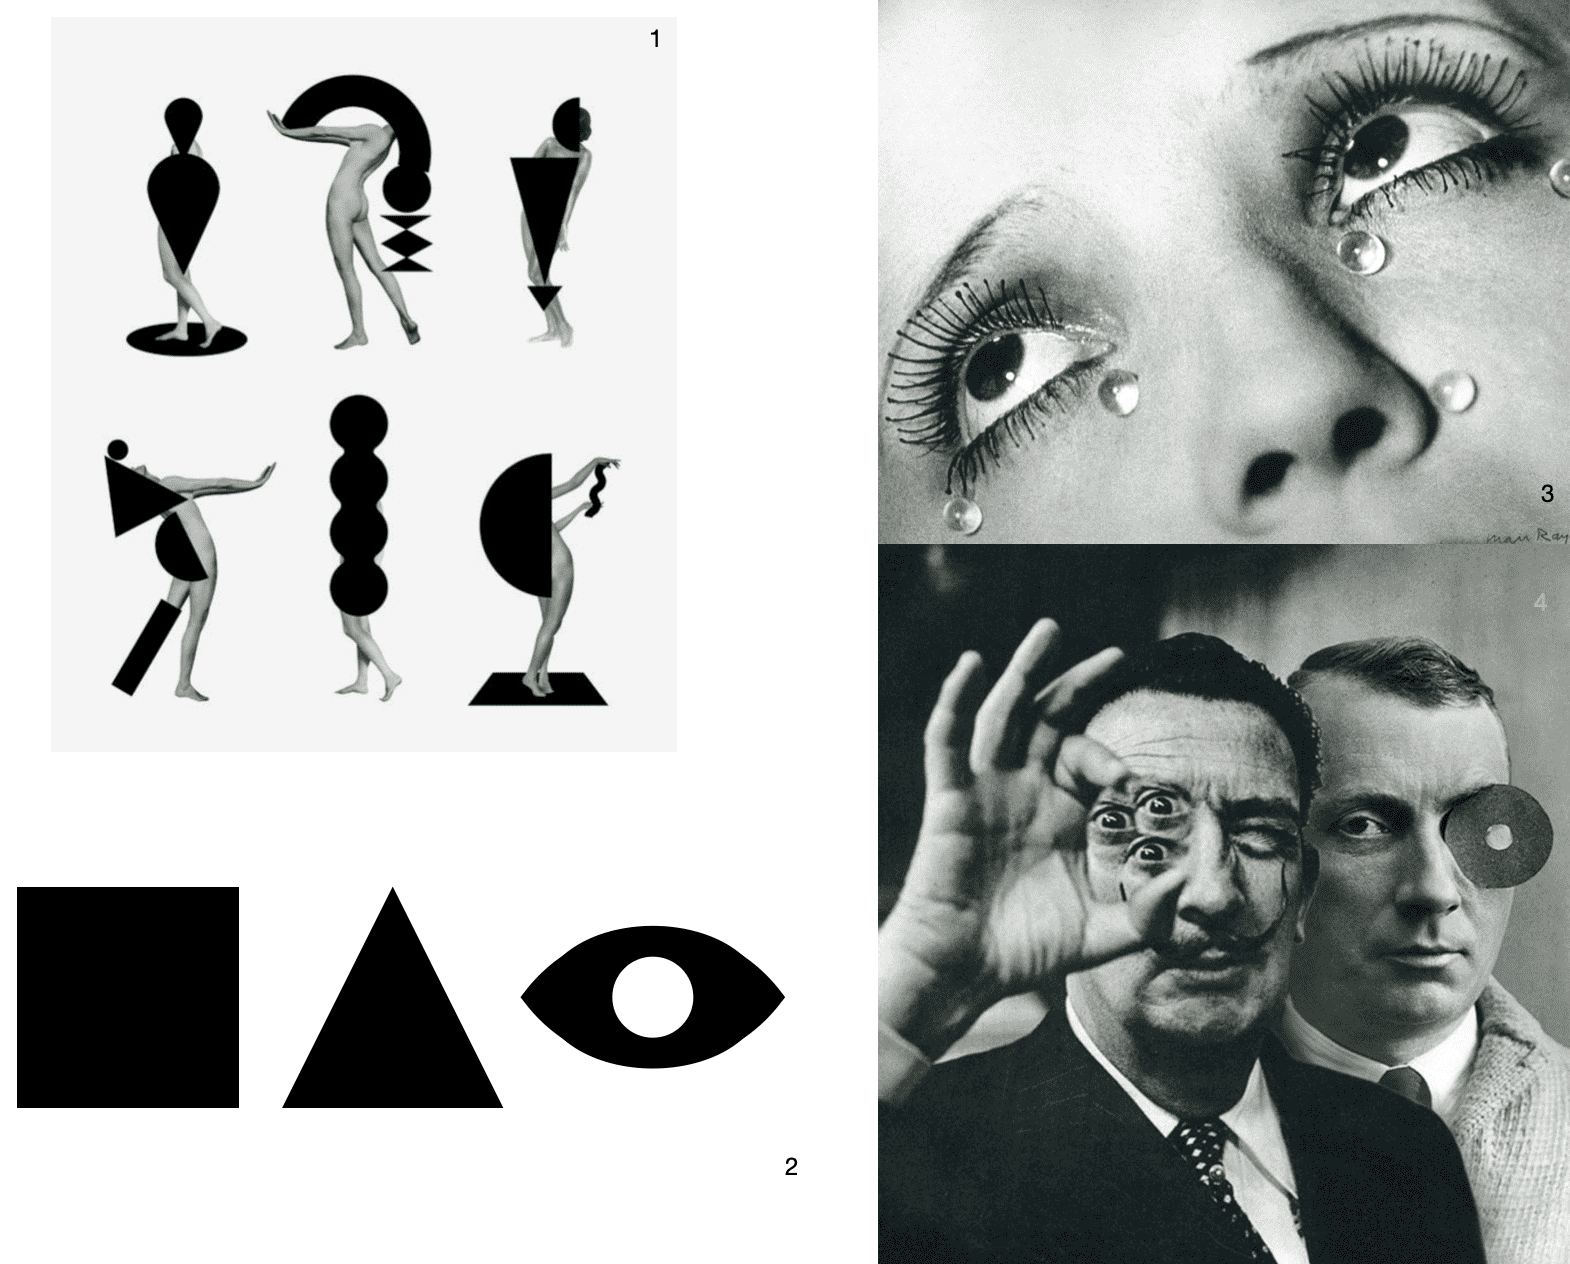
Credit - What interests me
_ 1. Emily Forgot Hear Me Roar - Play with shapes and figure.
__ 2. Square, Triangle, Eye - The shapes I was most interested in.
___ 3. Man Ray Glass Tears - Composition and focus on the eyes.
____ 4. Salvador Dalí, Philippe Halsmann Four Eyes - Surrealist play with eyes.
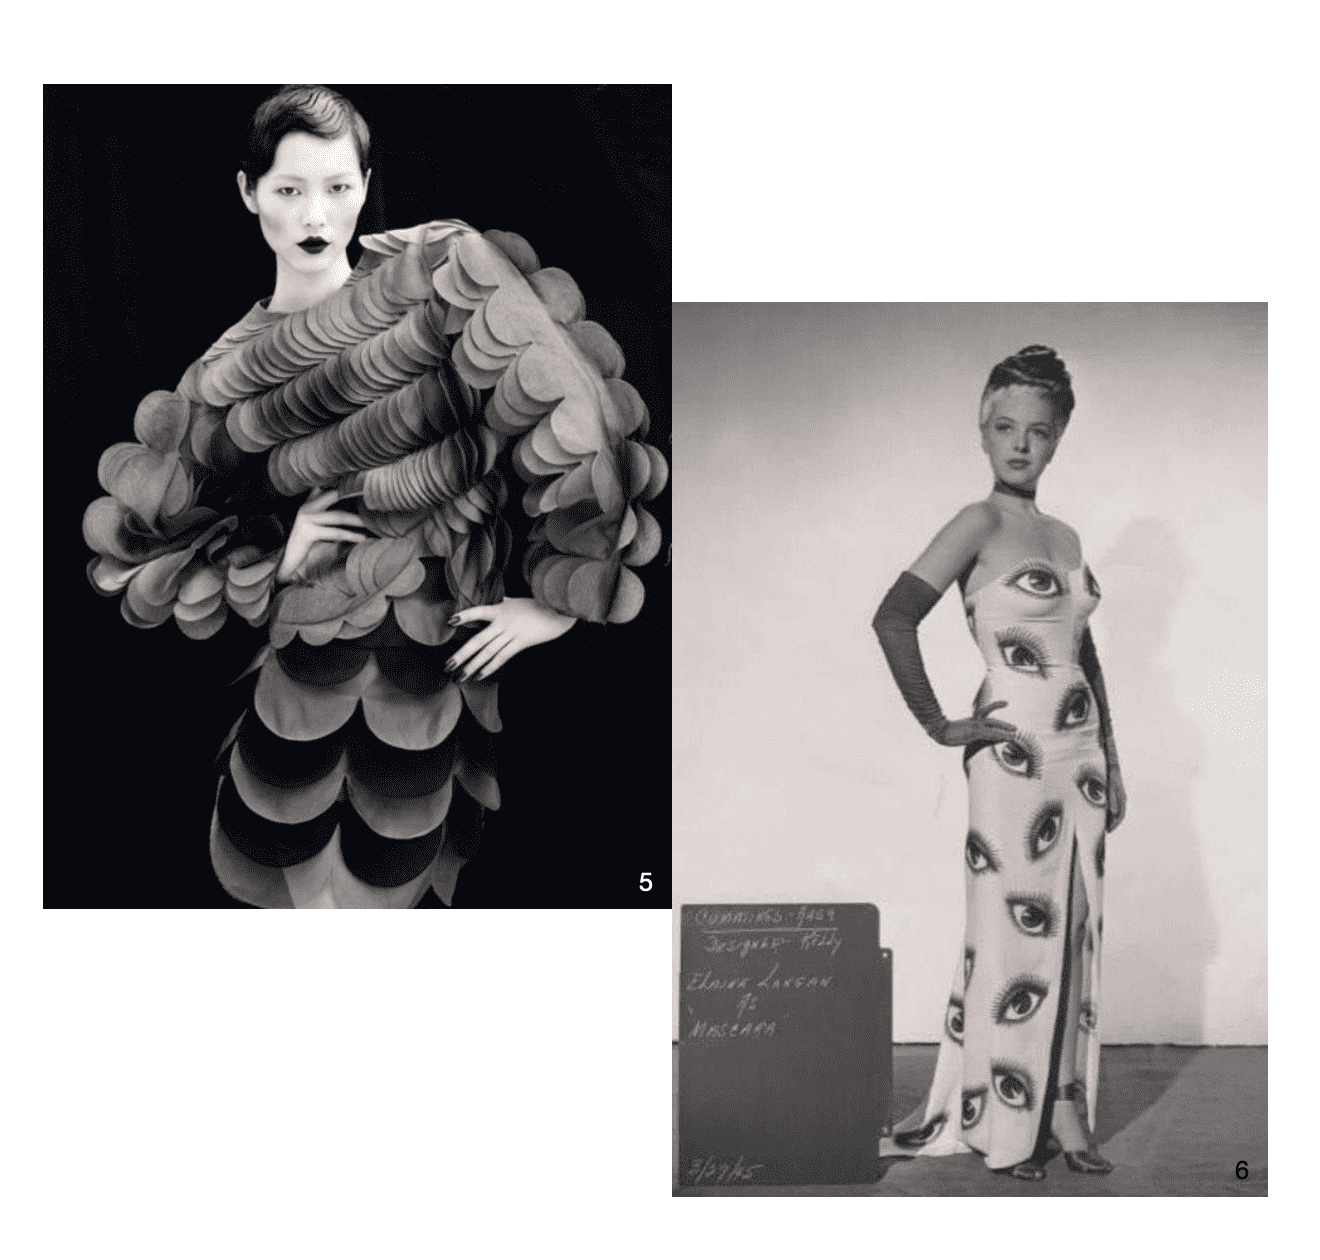
_____ 5. Christopher Kane - Elegant image, garment using only semi circles.
______ 6. Orry Kelly The Eyeball dress - Glamorous and fun!
R E S E A R C H
Paco Rabanne became popular in 1965 as a jewellery designer, and then moved into fashion. He mainly used plastic in his creations (especially Rhodoid) in geometric shapes and in a variety of colours.
Rabanne brought his training as an architect to his fashion design process.
In 1966 he released his debut collection: 12 Unwearable Dresses in Contemporary Materials.
This consisted of dresses assembled in simple shapes made of metal or Rhodoid, an organic plastic, linked flexibly by wire ties.
Rabanne made use of a more hands-on approach to fashion, instead of using the conventional clot or sewing.
Instead he taped, joined or sealed edges together ( opposed to seamed ) in new and modern materials.
Rabanne went on to experiment with more materials, moving from plastics and metal to leather, paper and fur, even though he remained known for his chain mail pieces.
 Work by Paco Rabanne.
Further research: Anwar Jalal Shemza - making Geometry into art.
I D E A T I O N
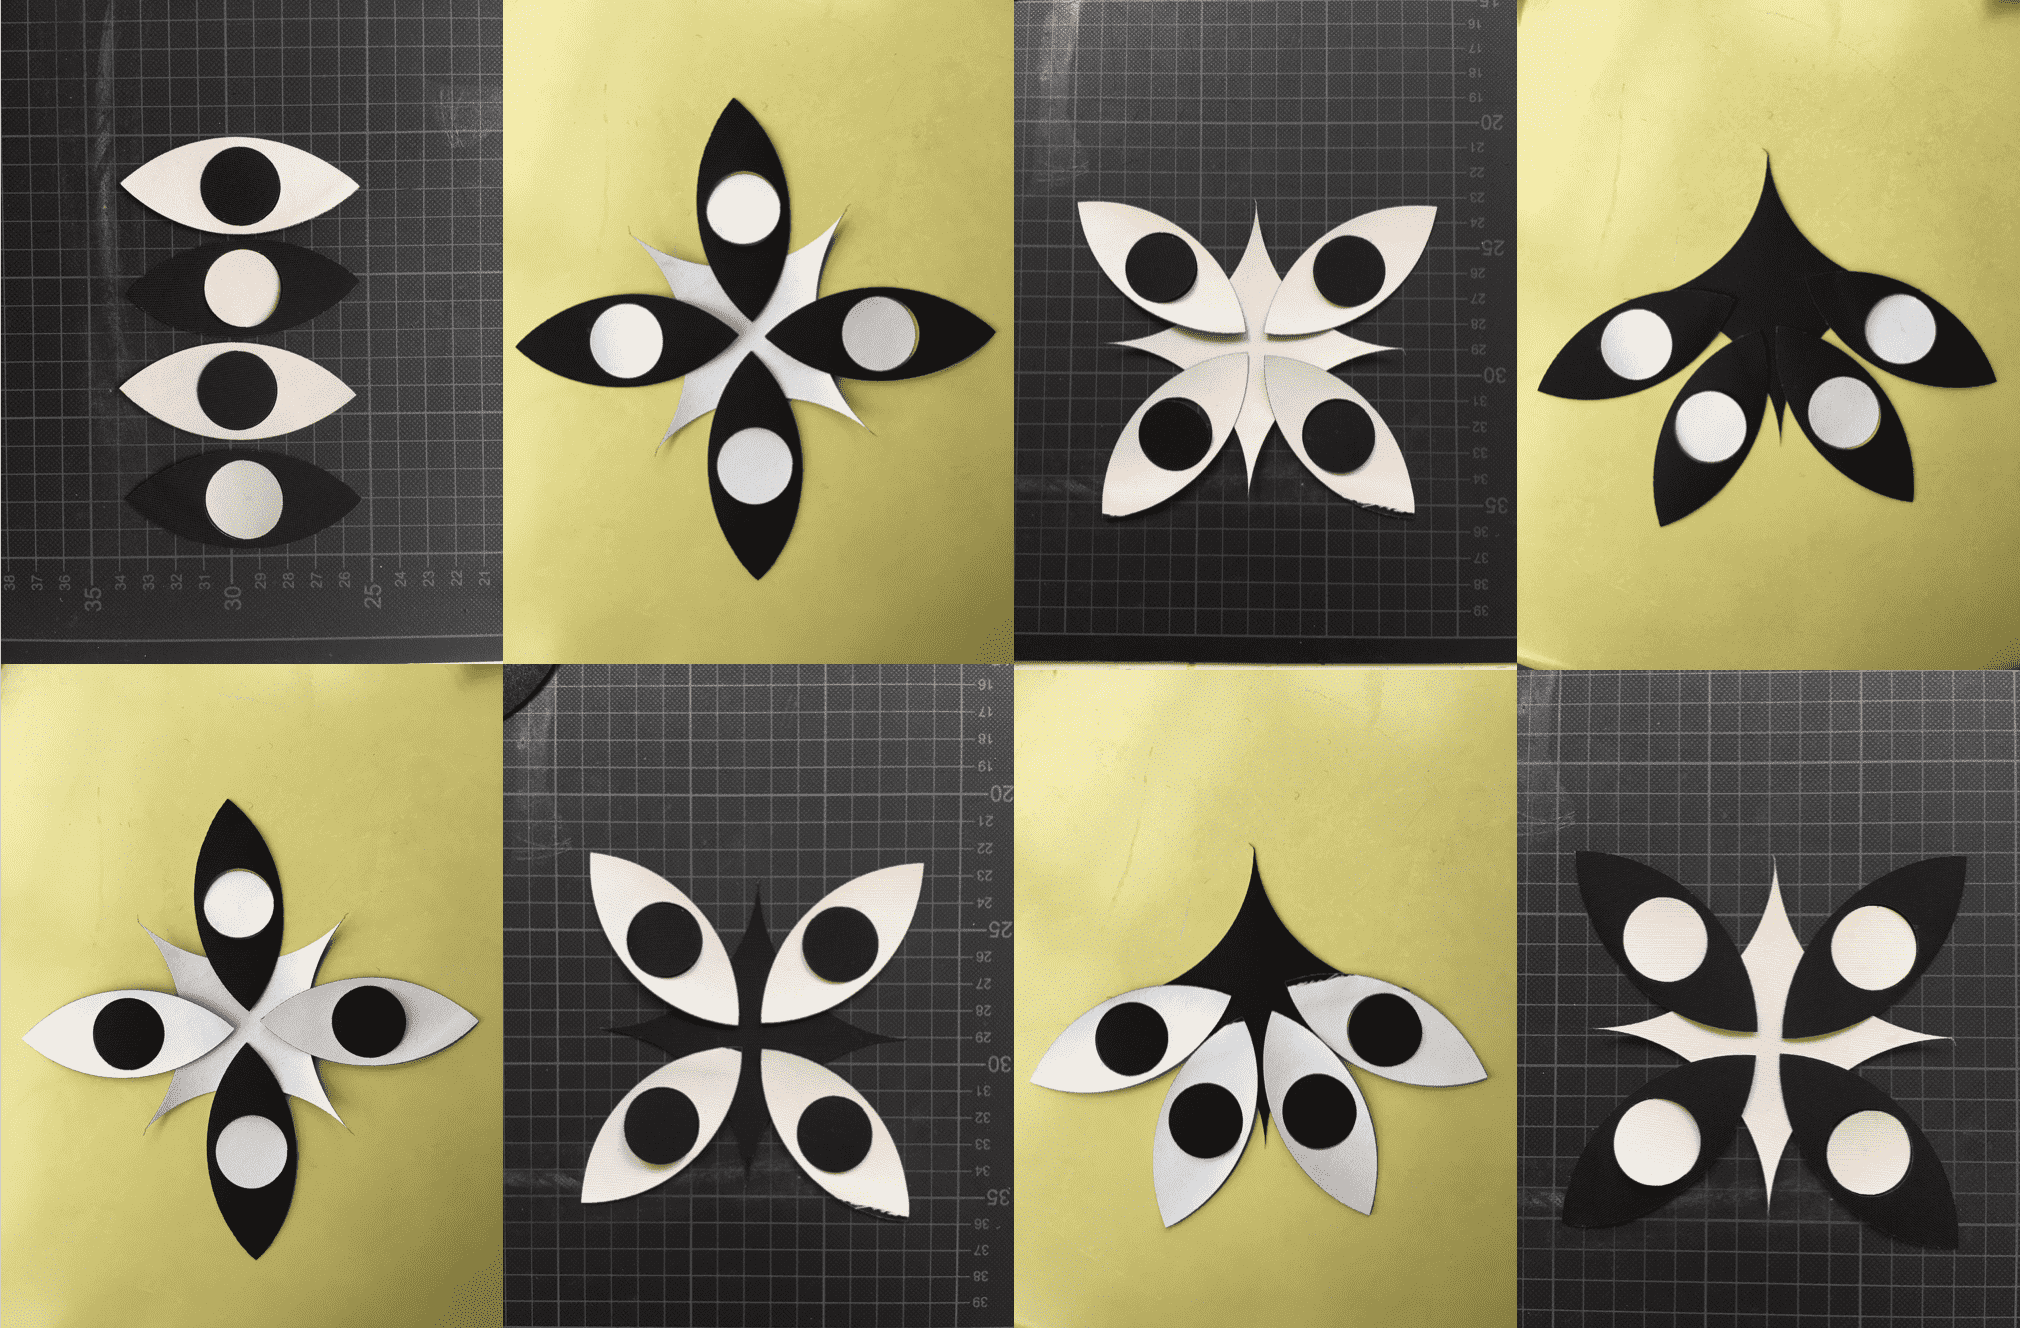
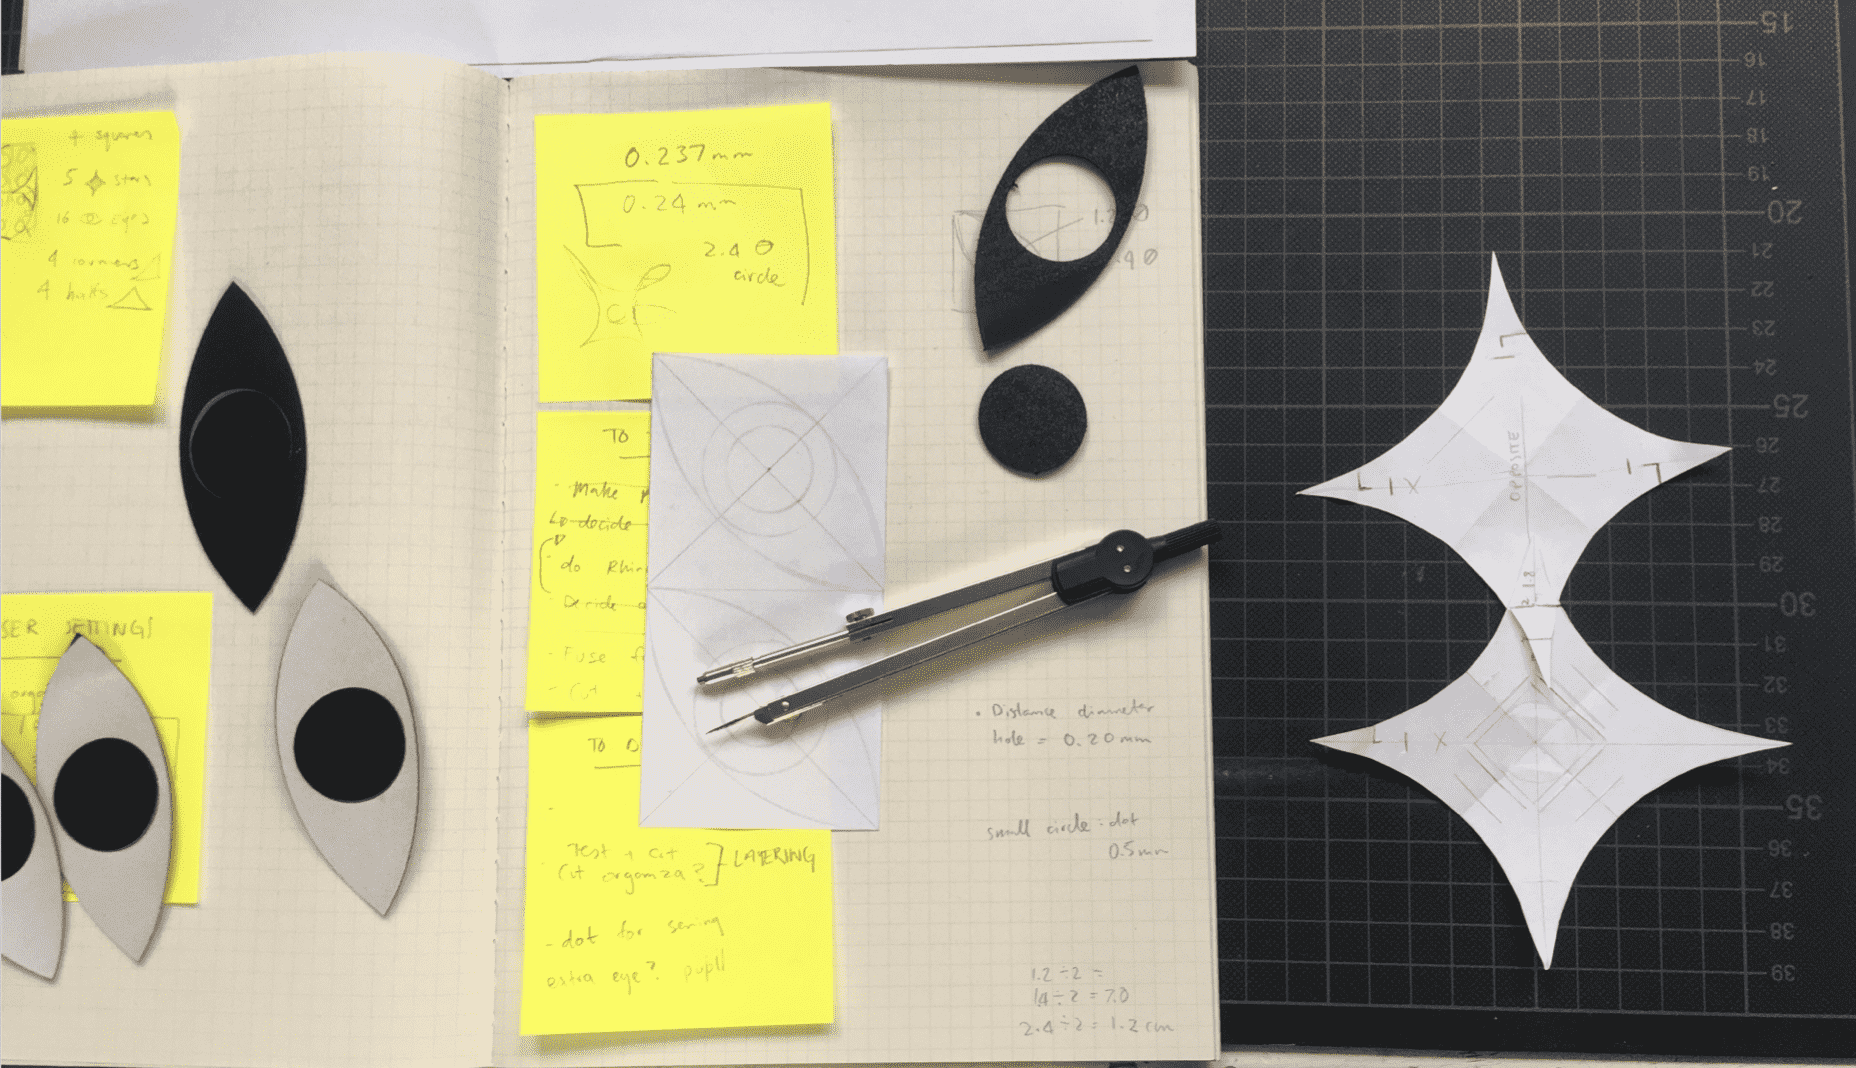
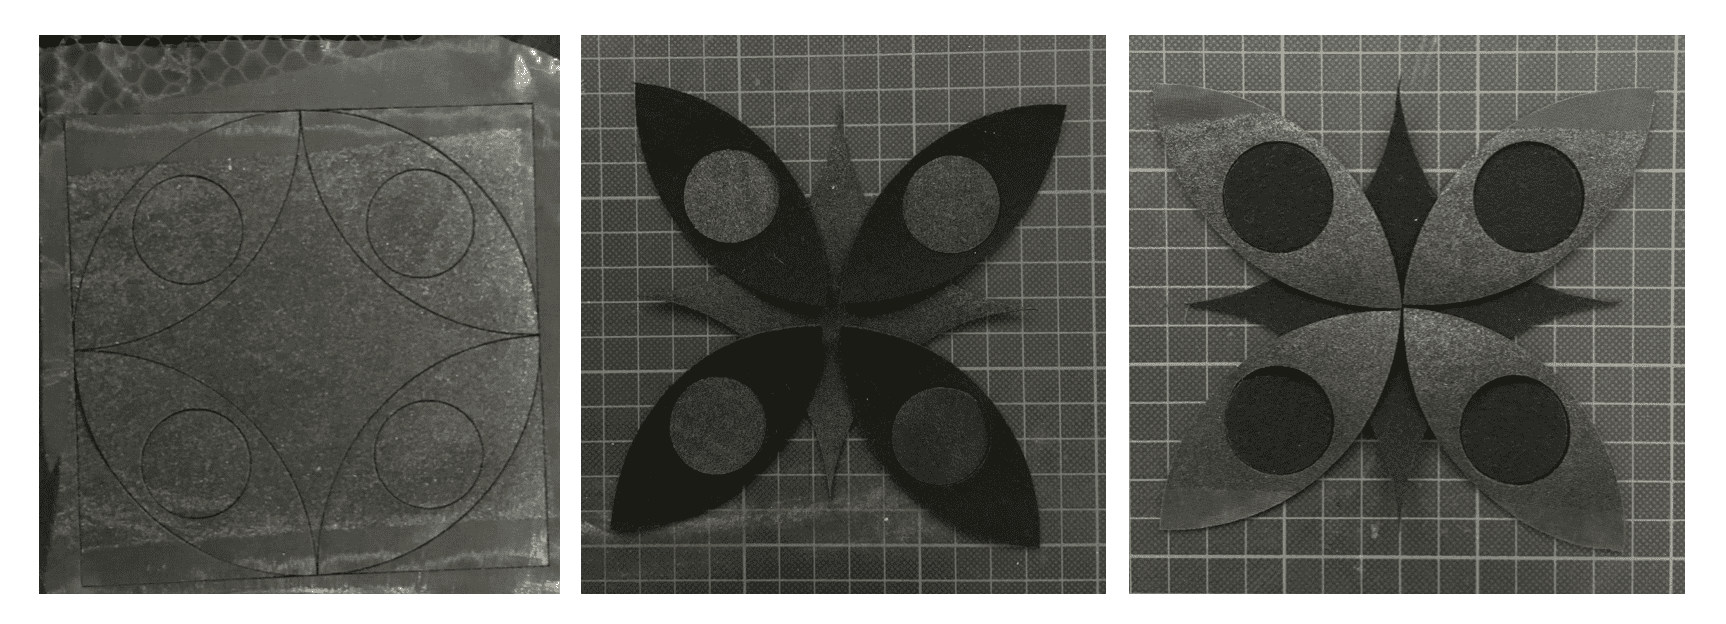
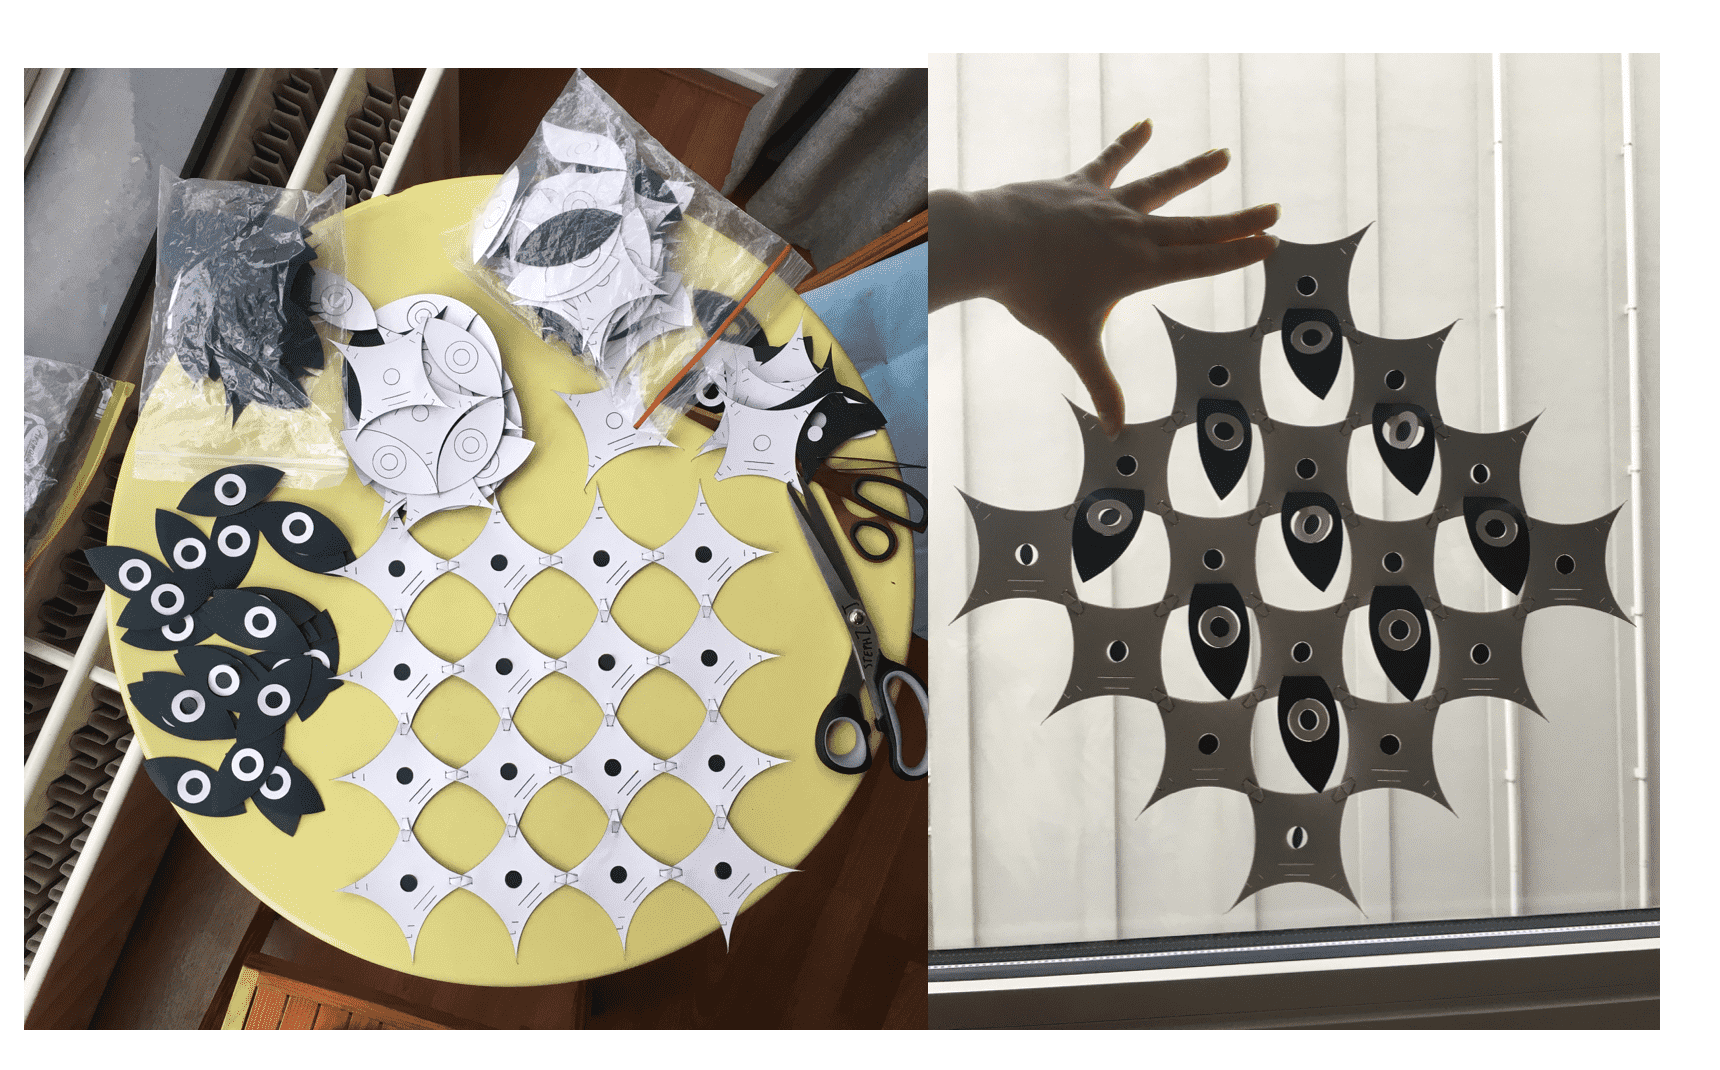
- I started by using some paper, a ruler, pencil and compass.
- I made a grid by hand, using measurements that I liked the sound of.
- Then I tested configurations of the eye shape within the grid, and I obsevered the negative space.
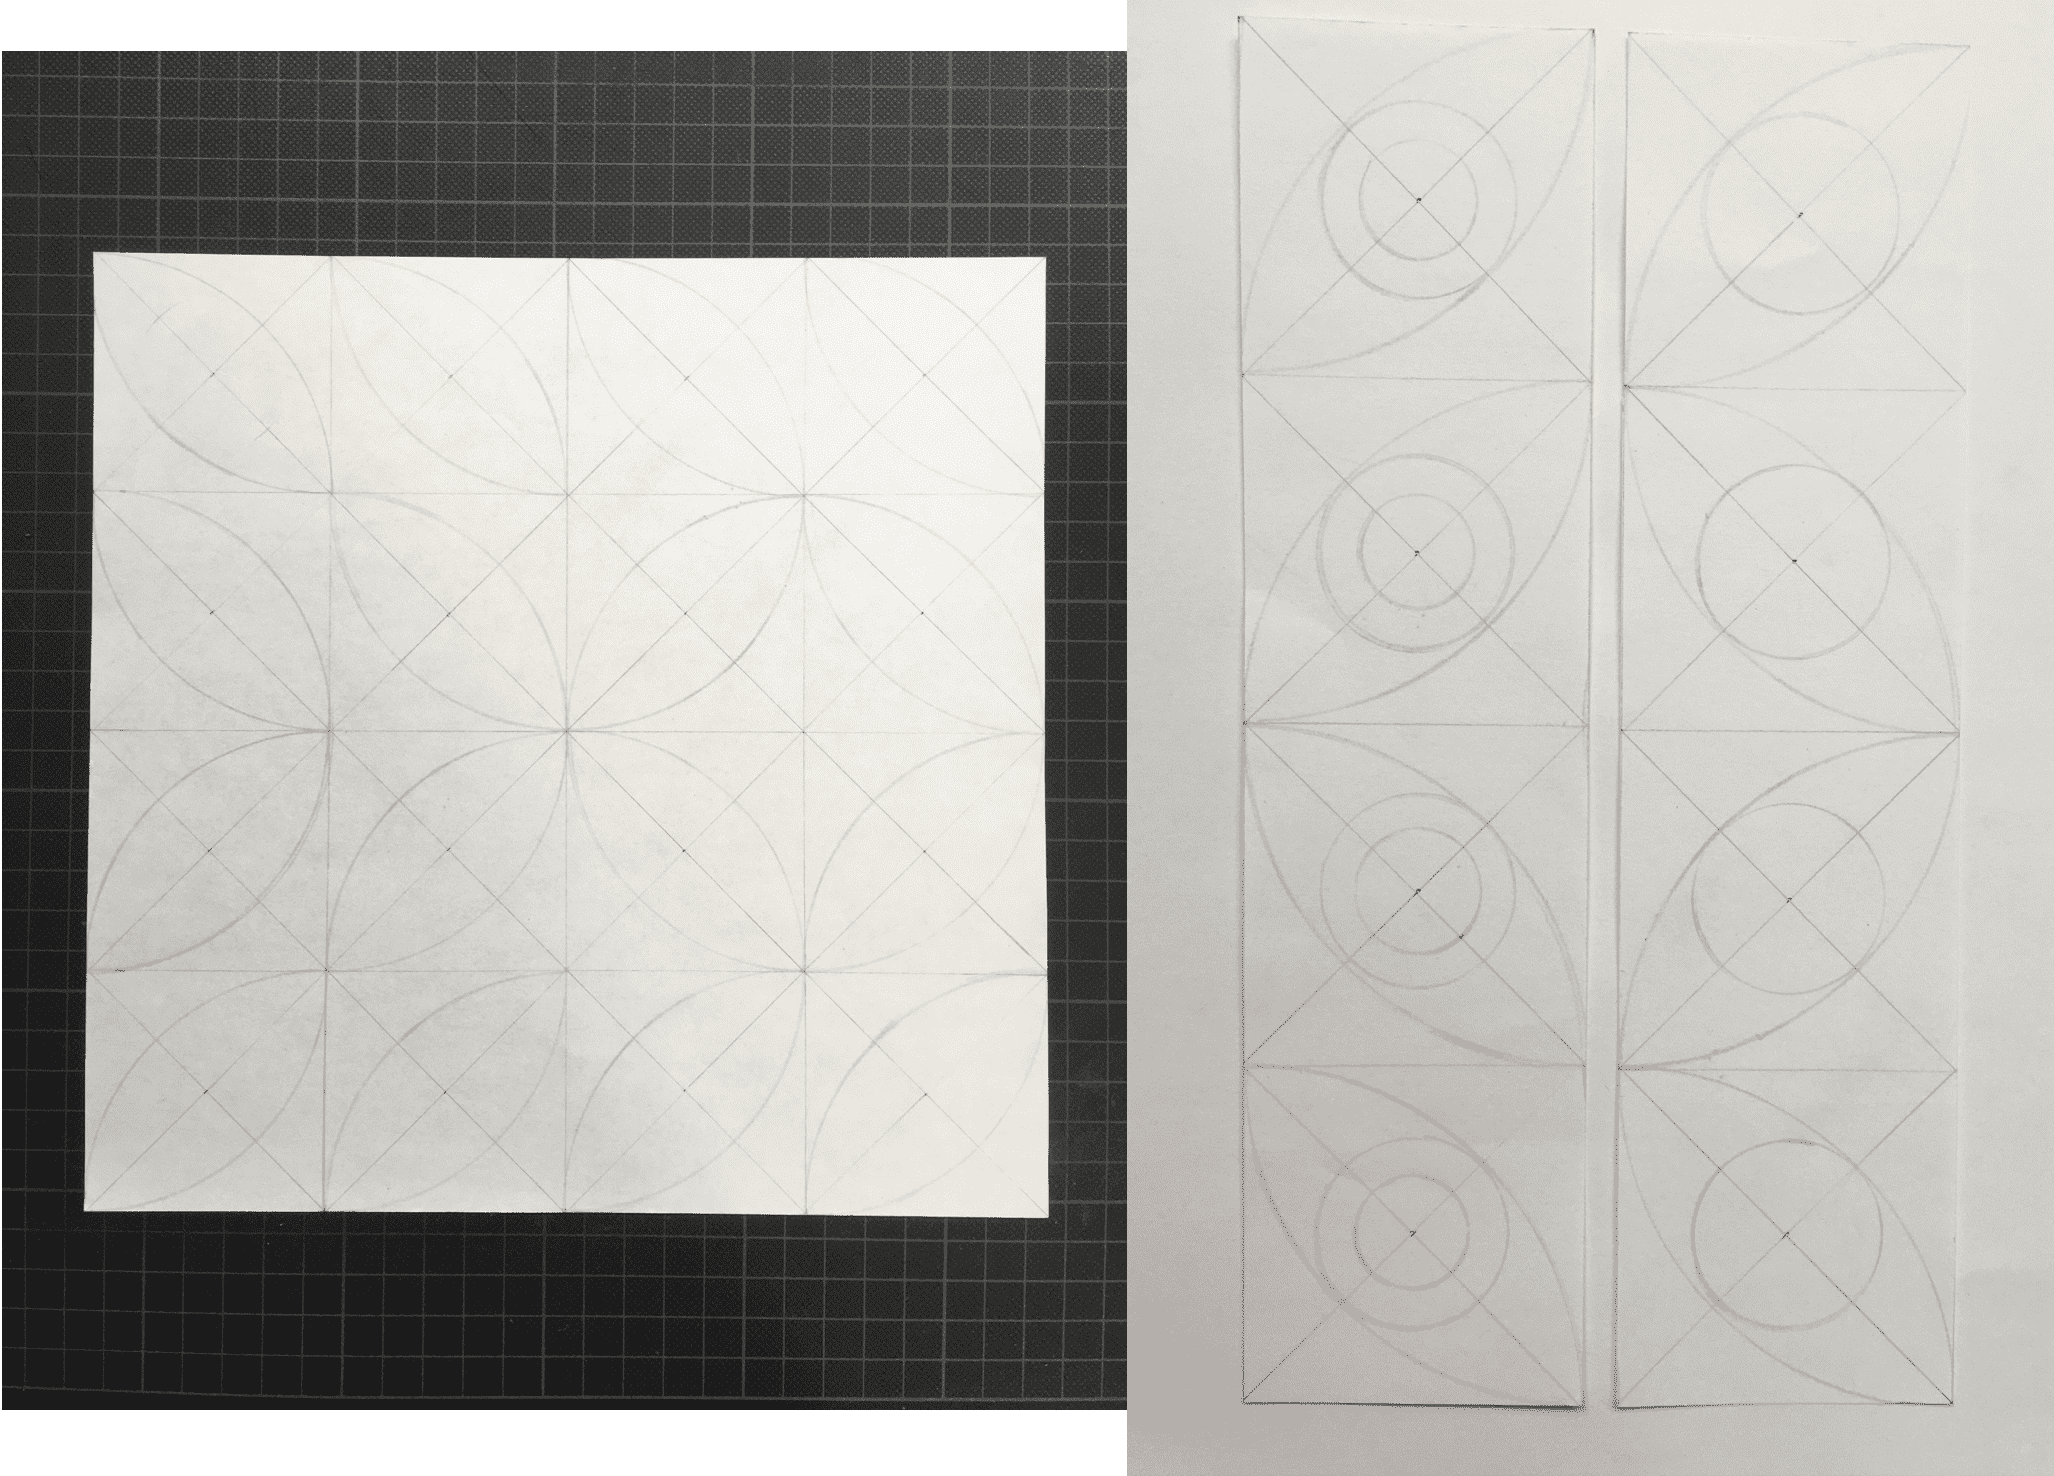
- Next, using a blade and scissors, I cut out these shapes.
- I then arragnged them in various ways to see what pattern would work.
- Observing all the time, how they would fit together as that was the main objective.
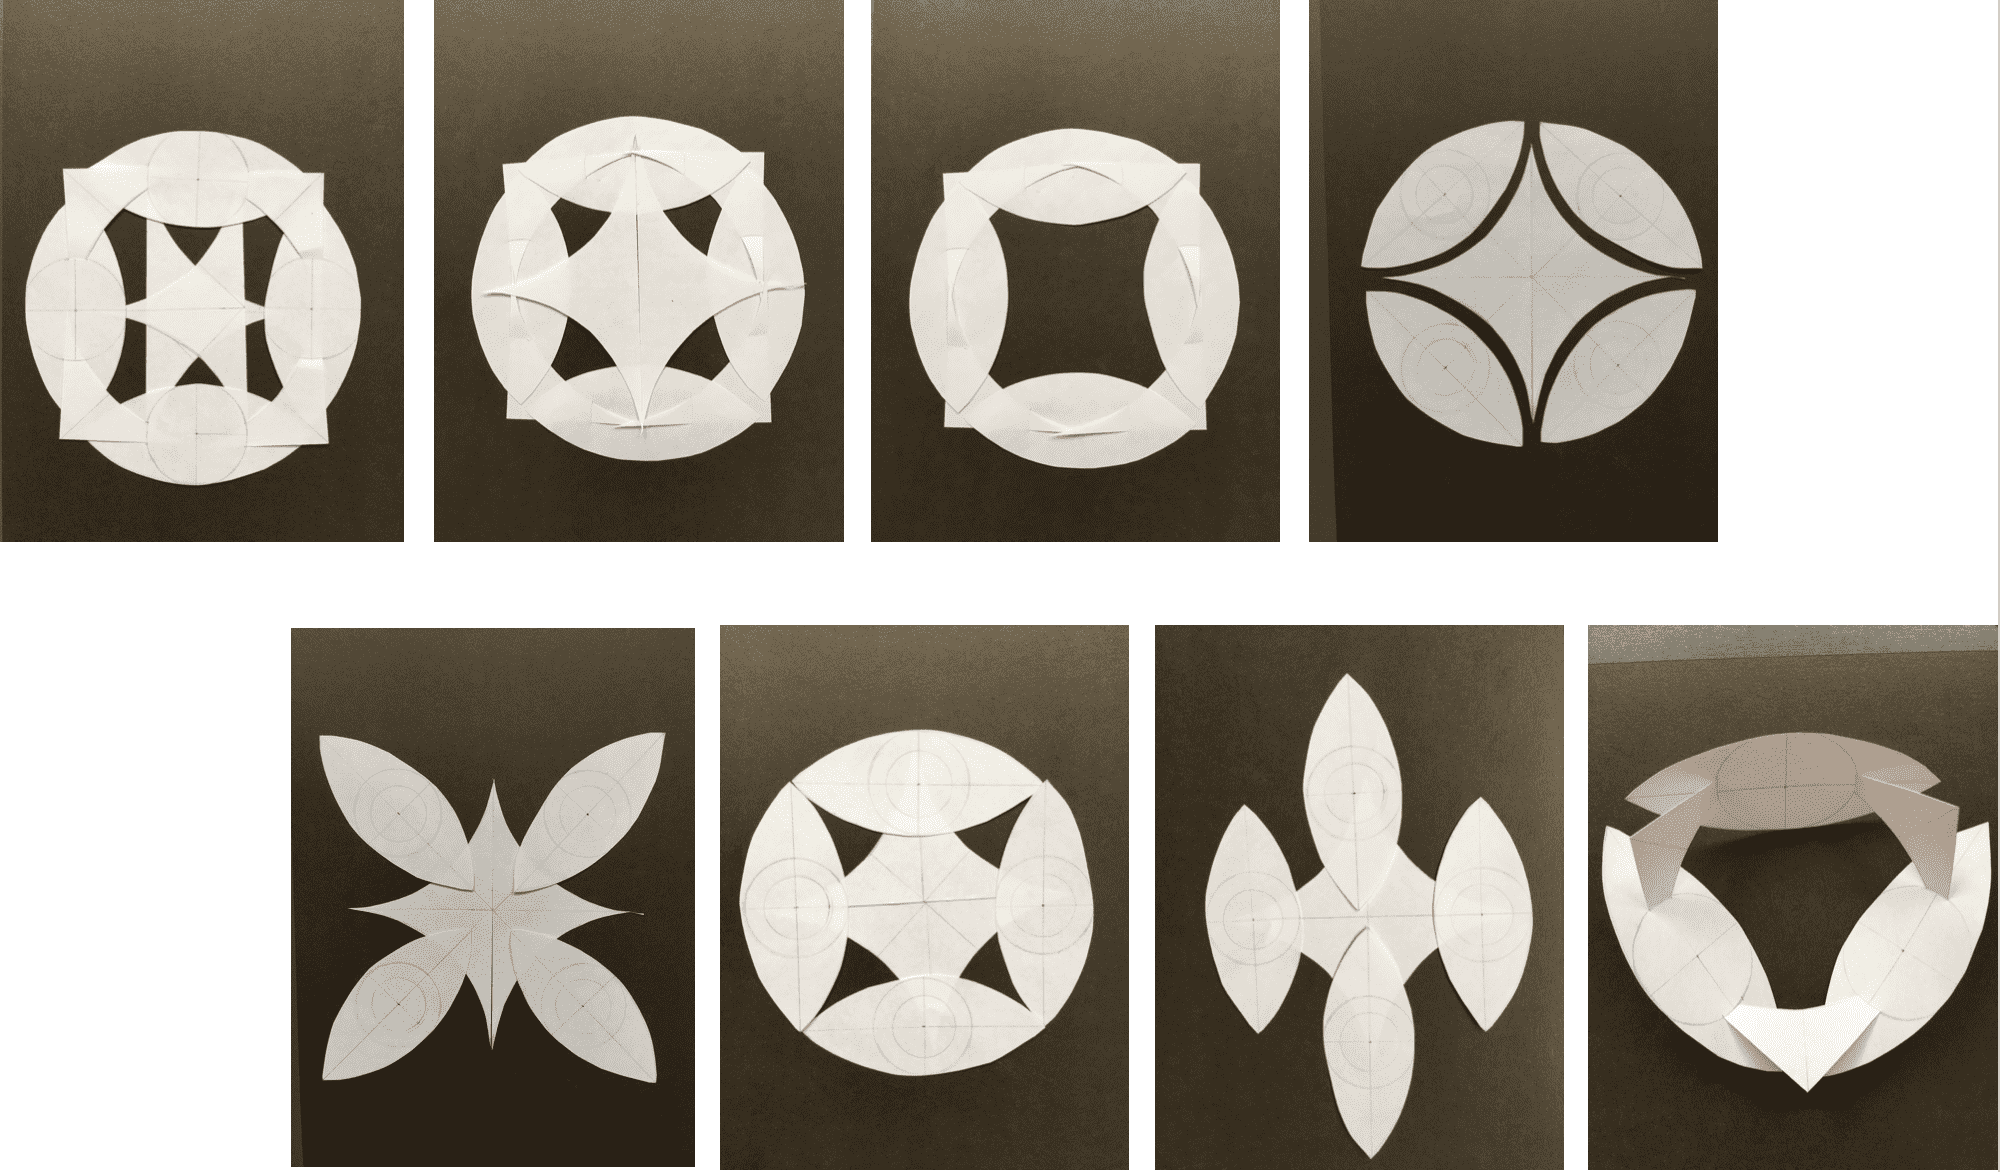
- These pieces came from Test 2.
- Looking at the different colour change and contrasting black and white.
- Further play with arrangment.
P R O T O T Y P E
Design and prototype with paper and scissors modular configurations and locking connections.
-
I decided that I wanted the pupils to rotate and 'blink' in some way.
I first tested this with paper and the rotation worked well, when you left a very small gap at either end of the pupil that you want to rotate. -
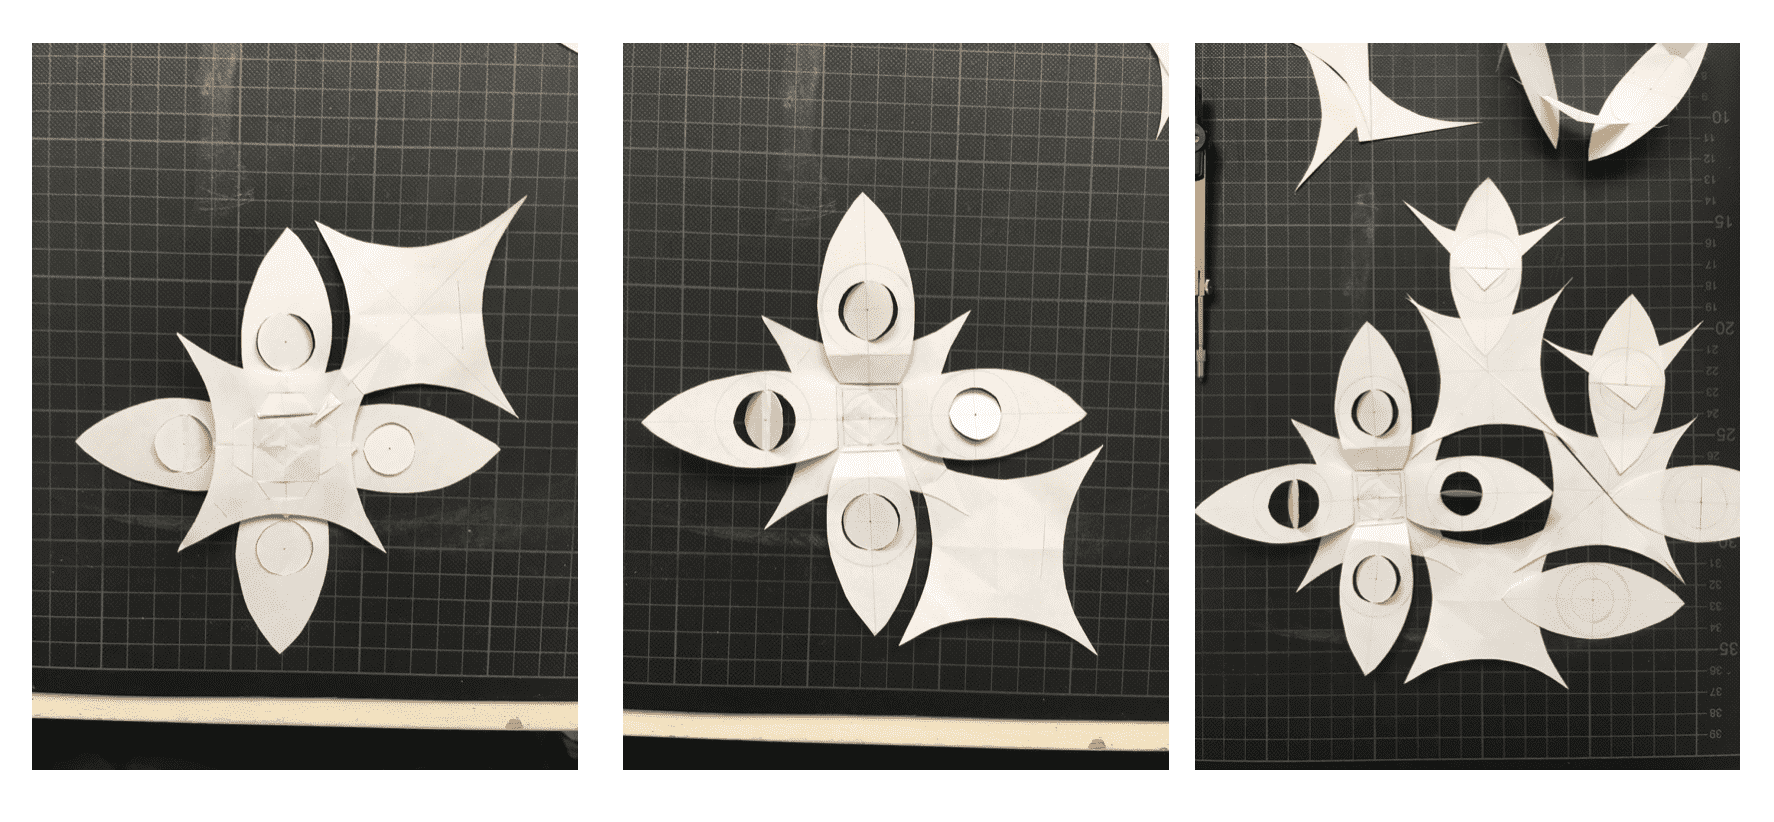
Then I looked at how multiple modules will connect and the distance / overall shape.
-
Next when I was happy with the idea / configuration, I experimented with the connections.
The aim was to make something that is strong, holds well and also makes aesthetic sense for the design.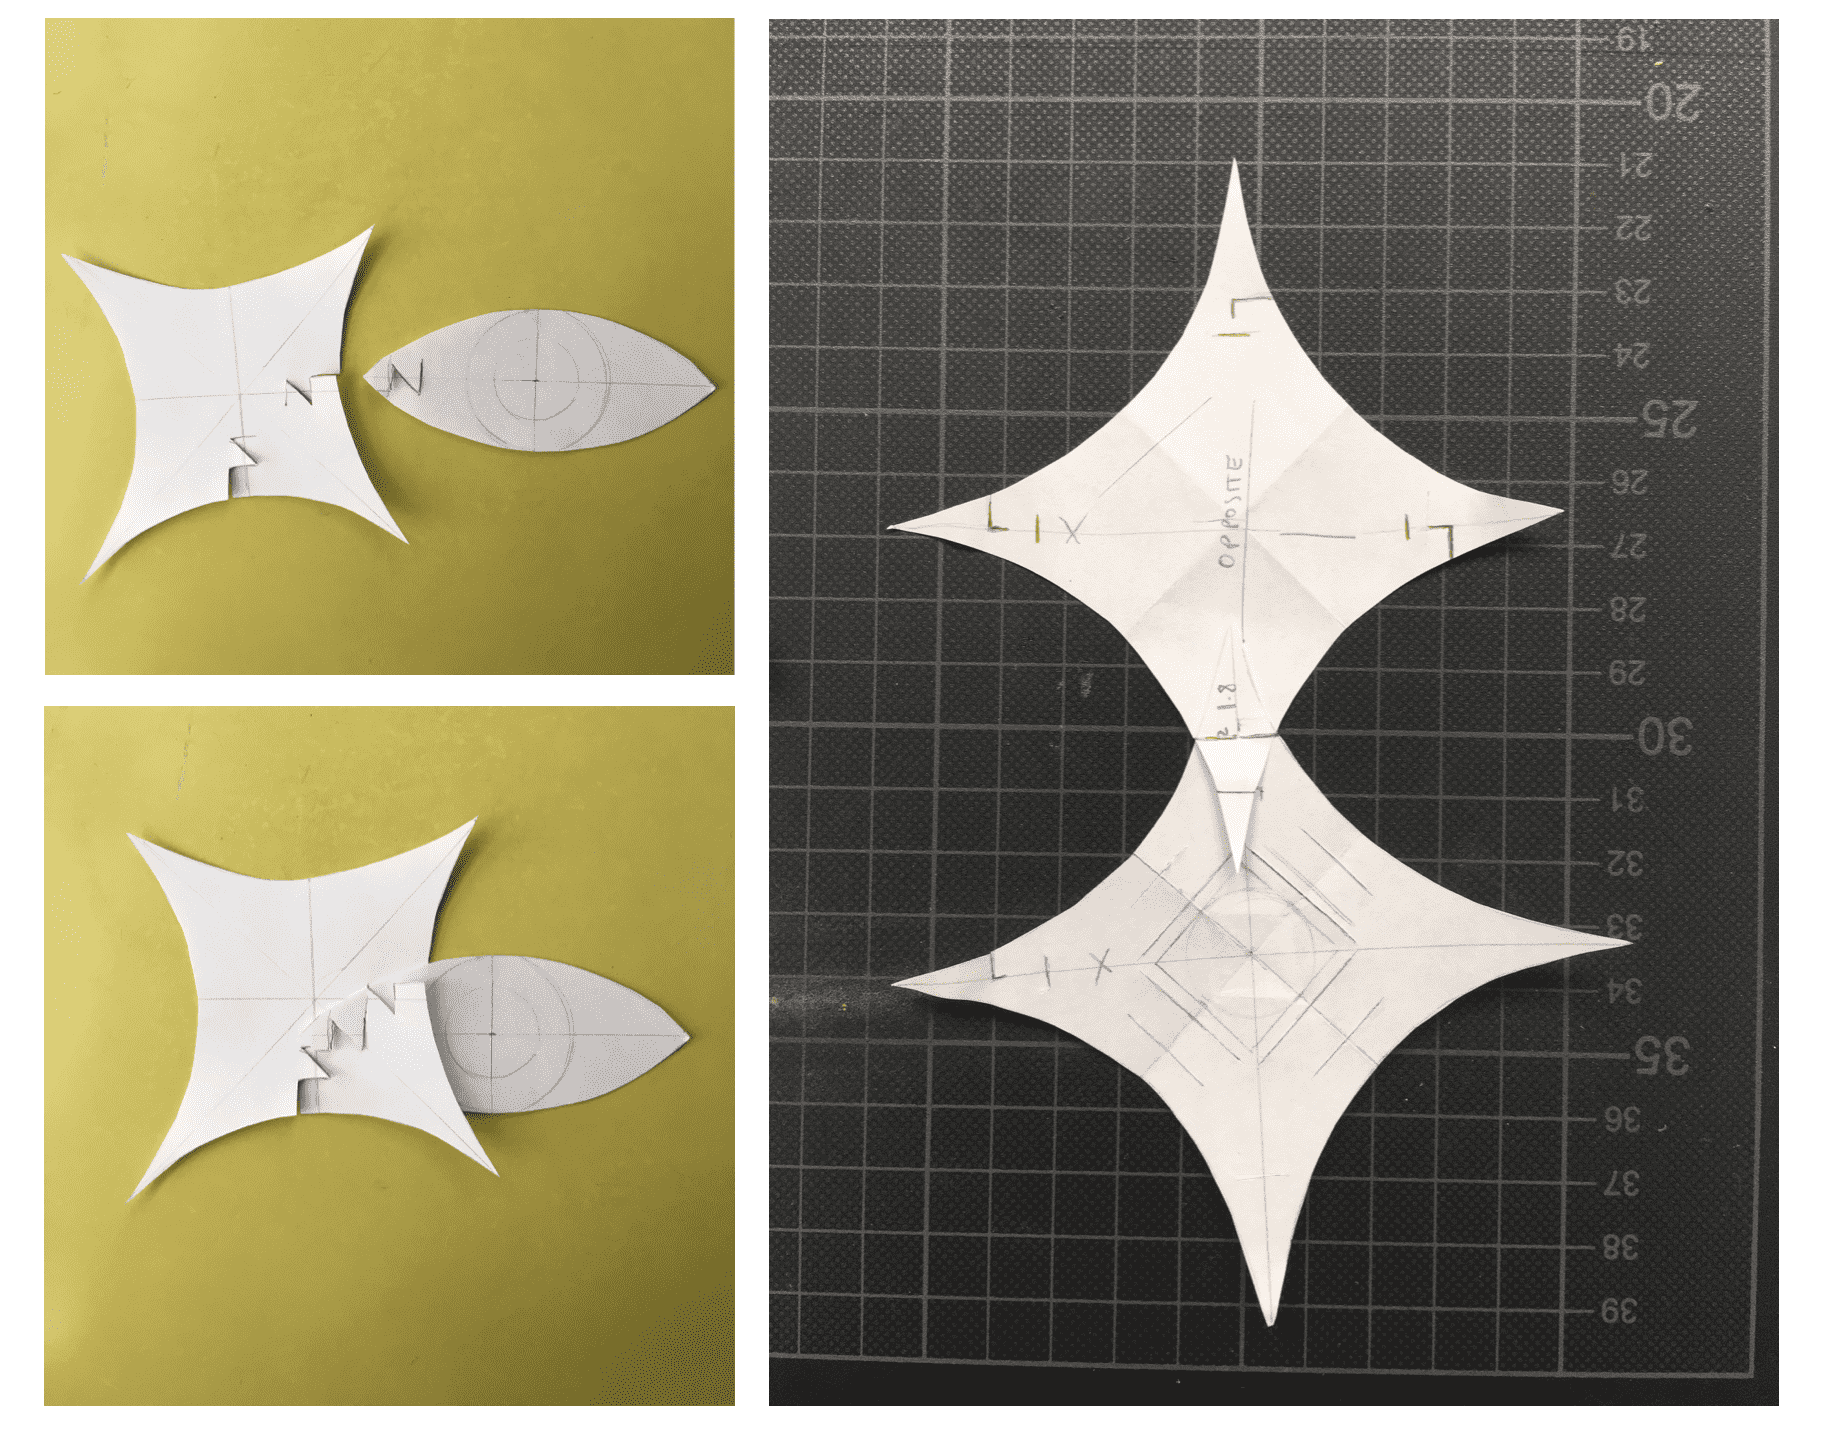
M A T E R I A L S
I decided that I wanted a material that was strong and had body to it, yet was not too thick / stiff and still had the quality of fabric, possessing flow and movment.
I also decided that I wanted something that had one colour on one side and different colour on the other.
With this, it can be reverable to change colour, and also play with the eye rotation.
I decided the best way to achieve this was to fuse two different fabrics together.
I got a few different fabrics in the sale bin from a local shop in Amsterdam A. Boeken Fabric.
Thankfully my background is in Textiles and I work with fabric a lot, so I felt confident in knowing which would work.
My selected fabrics:
- White Duchesse Satin Polyester Duchesse satin fabric is a high-sheen, heavyweight silk fabric known for its full-bodied drape and smooth finish. It stands out due to its lustrous surface and sturdy yet flexible structure.
- Black Polyester Couples the Duchesse Satin well. No stretch. Sythetic = the edges will seal.
- Black Felt Thinner then most felt, this fabric has a nice structure and weight to it.
- Blue/Gold two-tone Iridescent Organza Has a beautiful colour change to it. Hope to fuse it with the black felt or polyester.
- Bondaweb/ Vliesofix : Iron on fusing (45 mm wide) Note : not very wide. Will seal any edges.
 Blue/Gold two-tone Iridescent Organza (4)
P R O C E S S
T E S T
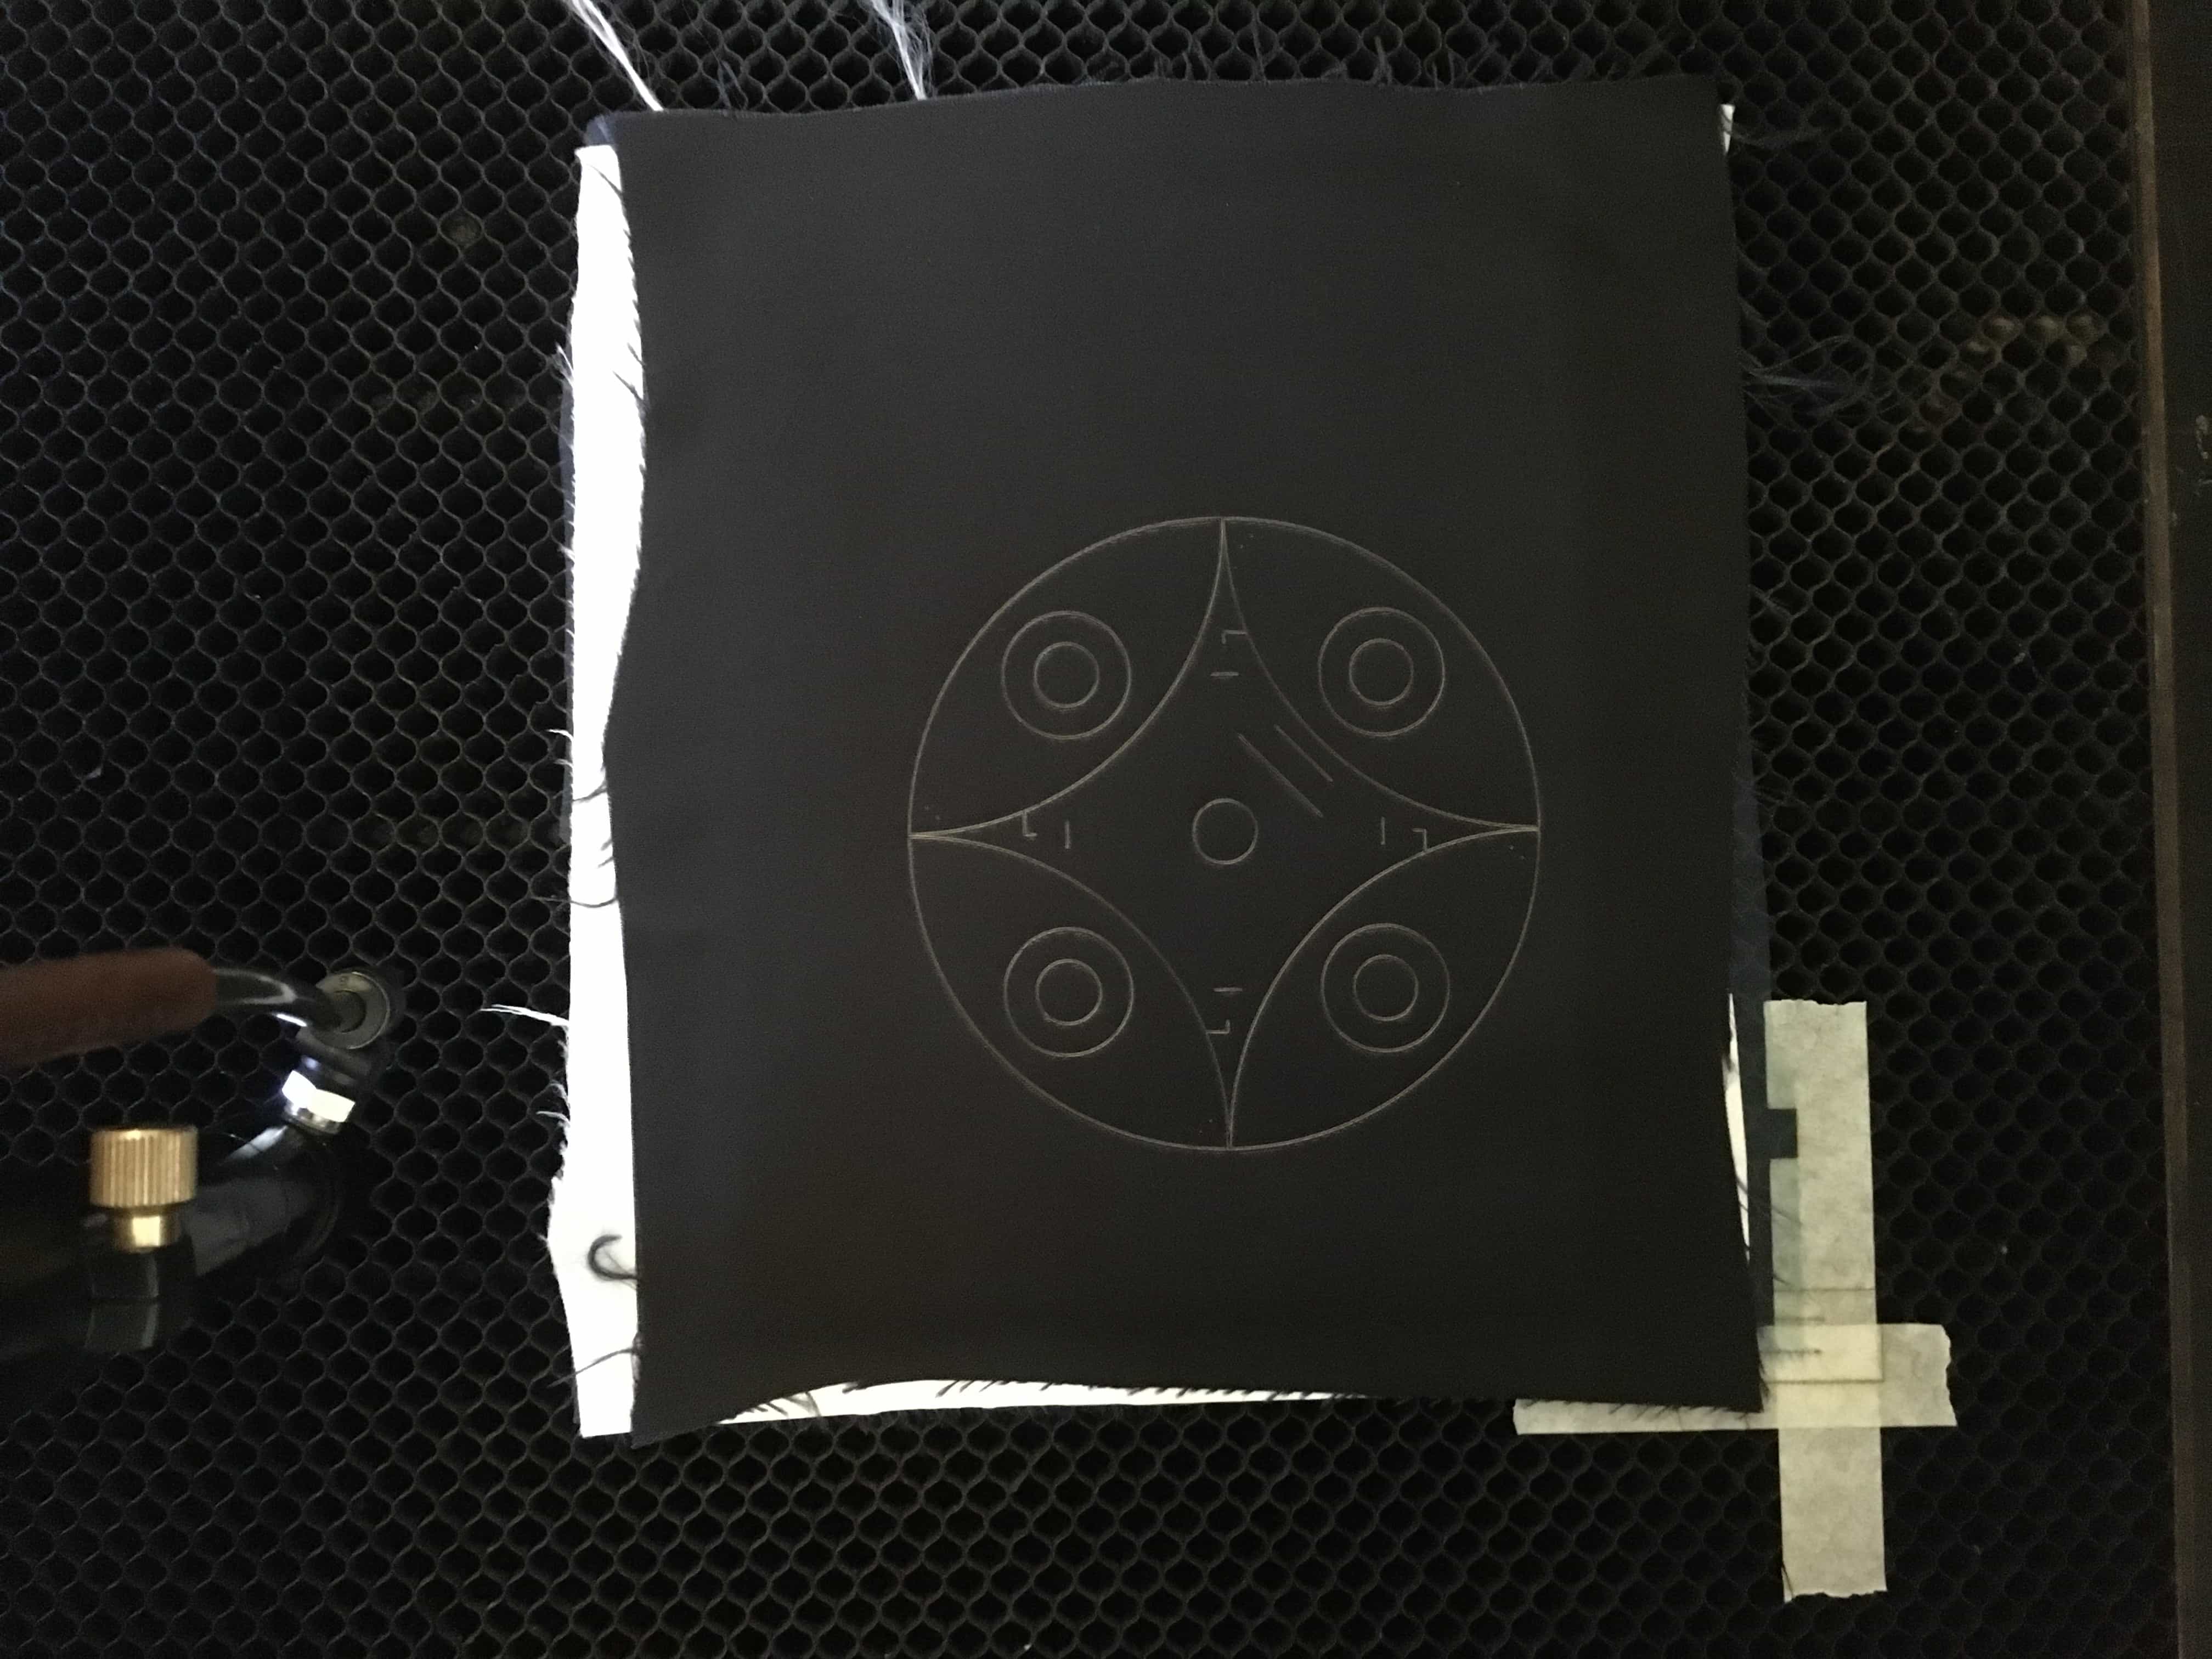
Test 1
Material =
Black felt fused with Bondaweb to iridescent organza
Laser Settings =
- Speed (mm/s) = 50,00.
- Power Max (%) = 35,00.
- Power Min (%) = 15,00.
Conclusion:
- Material cut well at these settings.
- When organza is fused with bondaweb onto black felt, it looses its iridescent quality and looks more subtle.
- This was not the look I wanted to achieve.
Test 2
Material =
Polyester duchesse satin white fused to black polyester
Laser Settings =
- Speed (mm/s) = 50,00.
- Power Max (%) = 33,00.
- Power Min (%) = 15,00.
Conclusion:
- Material cut well at these settings.
- As the polyester fabrics are thinner then the felt, there is less power for the laser settings.
- Black and white material is quite a contrast - maybe too much for this deaign.
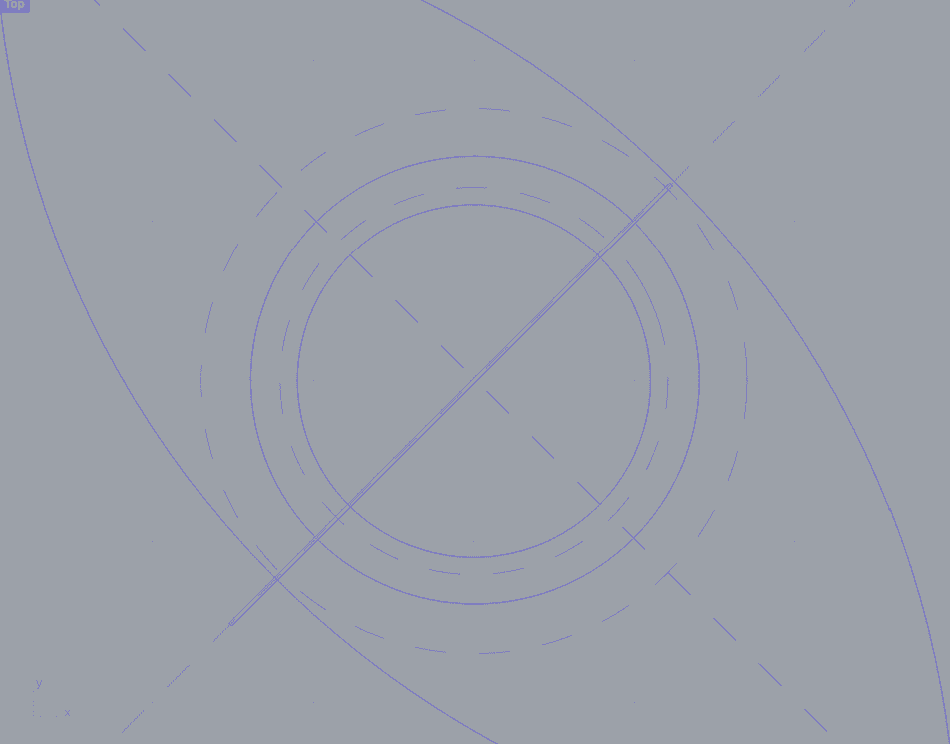
Test 3
Material =
Polyester duchesse satin white fused to black polyester with layer of iridescent organza
Laser Settings =
- Speed (mm/s) = 50,00.
- Power Max (%) = 33,00.
- Power Min (%) = 15,00.
Conclusion:
- I put a layer of organza down under the test to see if it would cut both fabrics. Happy accident: It cut both fabrics and also the laser fused the organza to the polyester fabric.
- I like the result of the organza layer with the black & white material. It is subtle yet stand out.
- I placed the white layer face down which resulted in burn marks from the laser. (Note: Place white fabric face up).
- Fabric cut well at dimentions and the slots / connections work well. (Small tweaking to the size of slots etc.)
D I M E N S I O N S
Laser bed (max work area) = 1537 mm x 1137 mm ( l x w )
Material = 1020 mm x 920 mm
File = 1000 mm x 920 mm
F I L E
While I am more comfortable using Illustrator, I decided to make the file in Rhino.
Since my design was very geometric and I had made it in a grid system earlier, it was not too difficult to translate to Rhino.
I felt the most importand thing to do was to continually measure and keep note of various distances.
The pivoting eye is very precise, and so calls for extreme measurement down to the last decimal of a millimeter.
In this case I made the gap 0.120 mm.
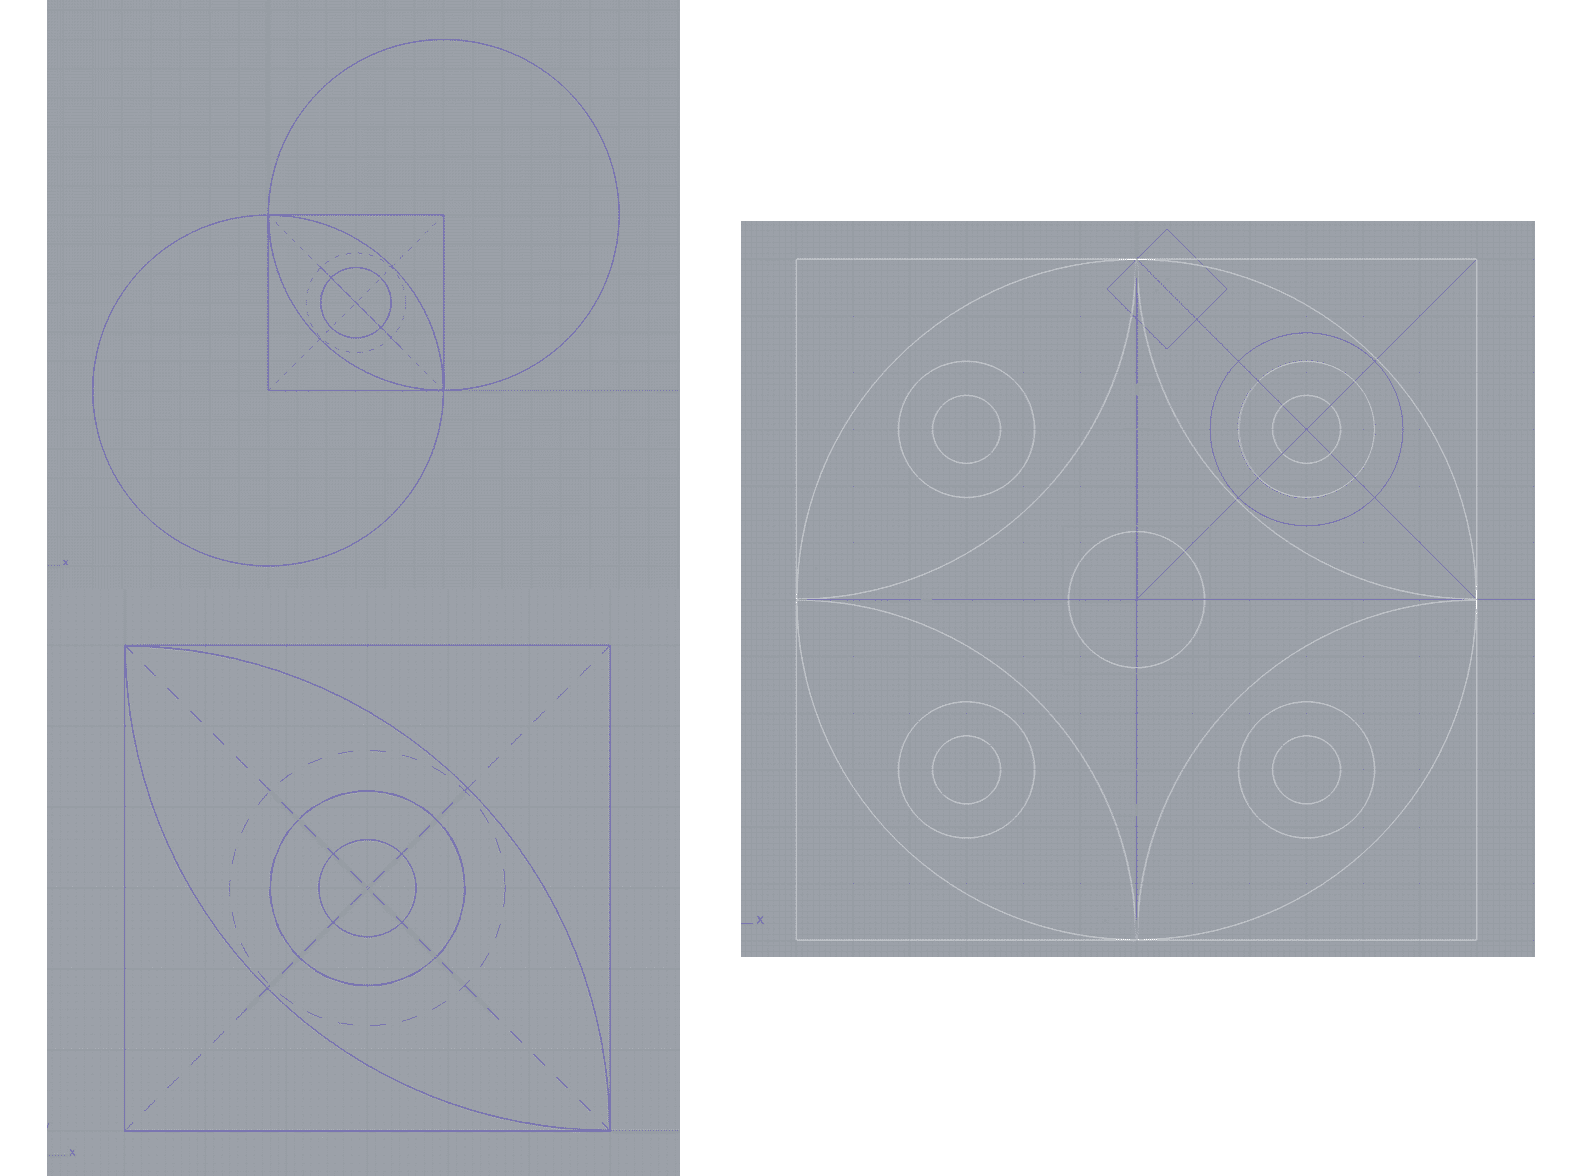
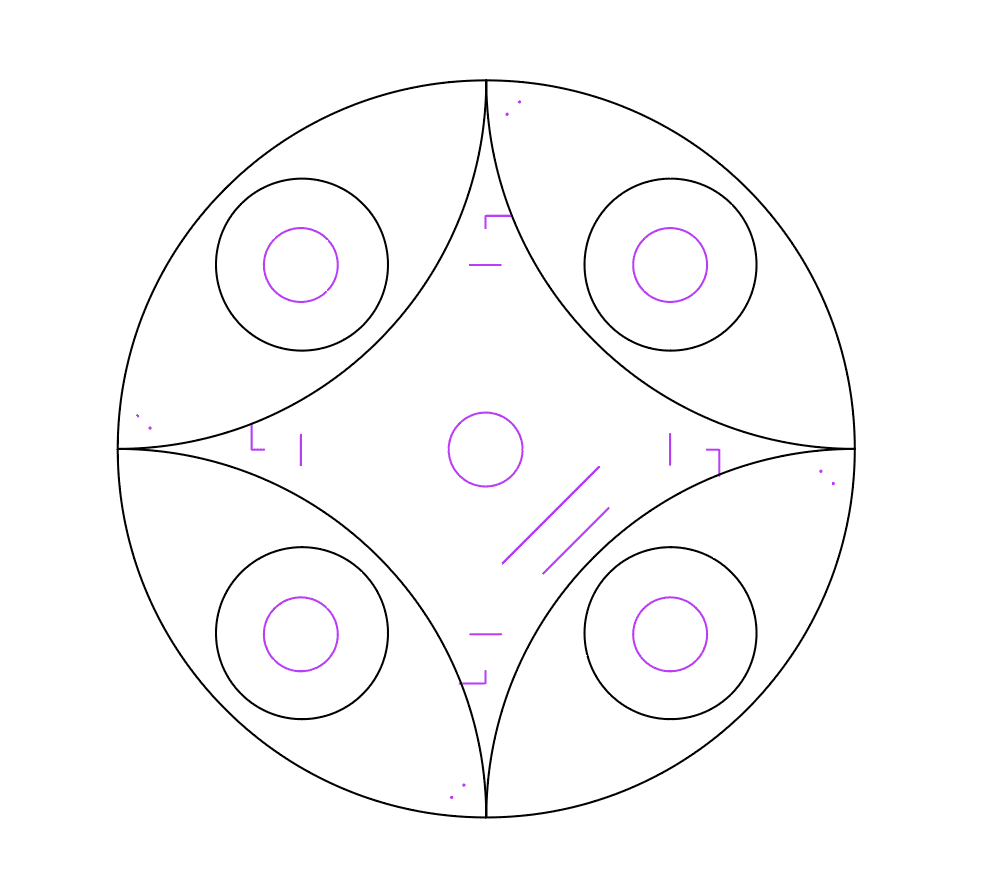
The design of the modulaes is zero waste.
The negative space between the eyes joins together in a strong connection and the eyes are then sloted at the side and ironed down.
As there will be more eyes then the space inbetween, I made two small holes at the top (that are hidden in original design) so that they can be connected with rings or sewn onto a garment as decoration in various ways.
Many possibilities + zero waste = !!!
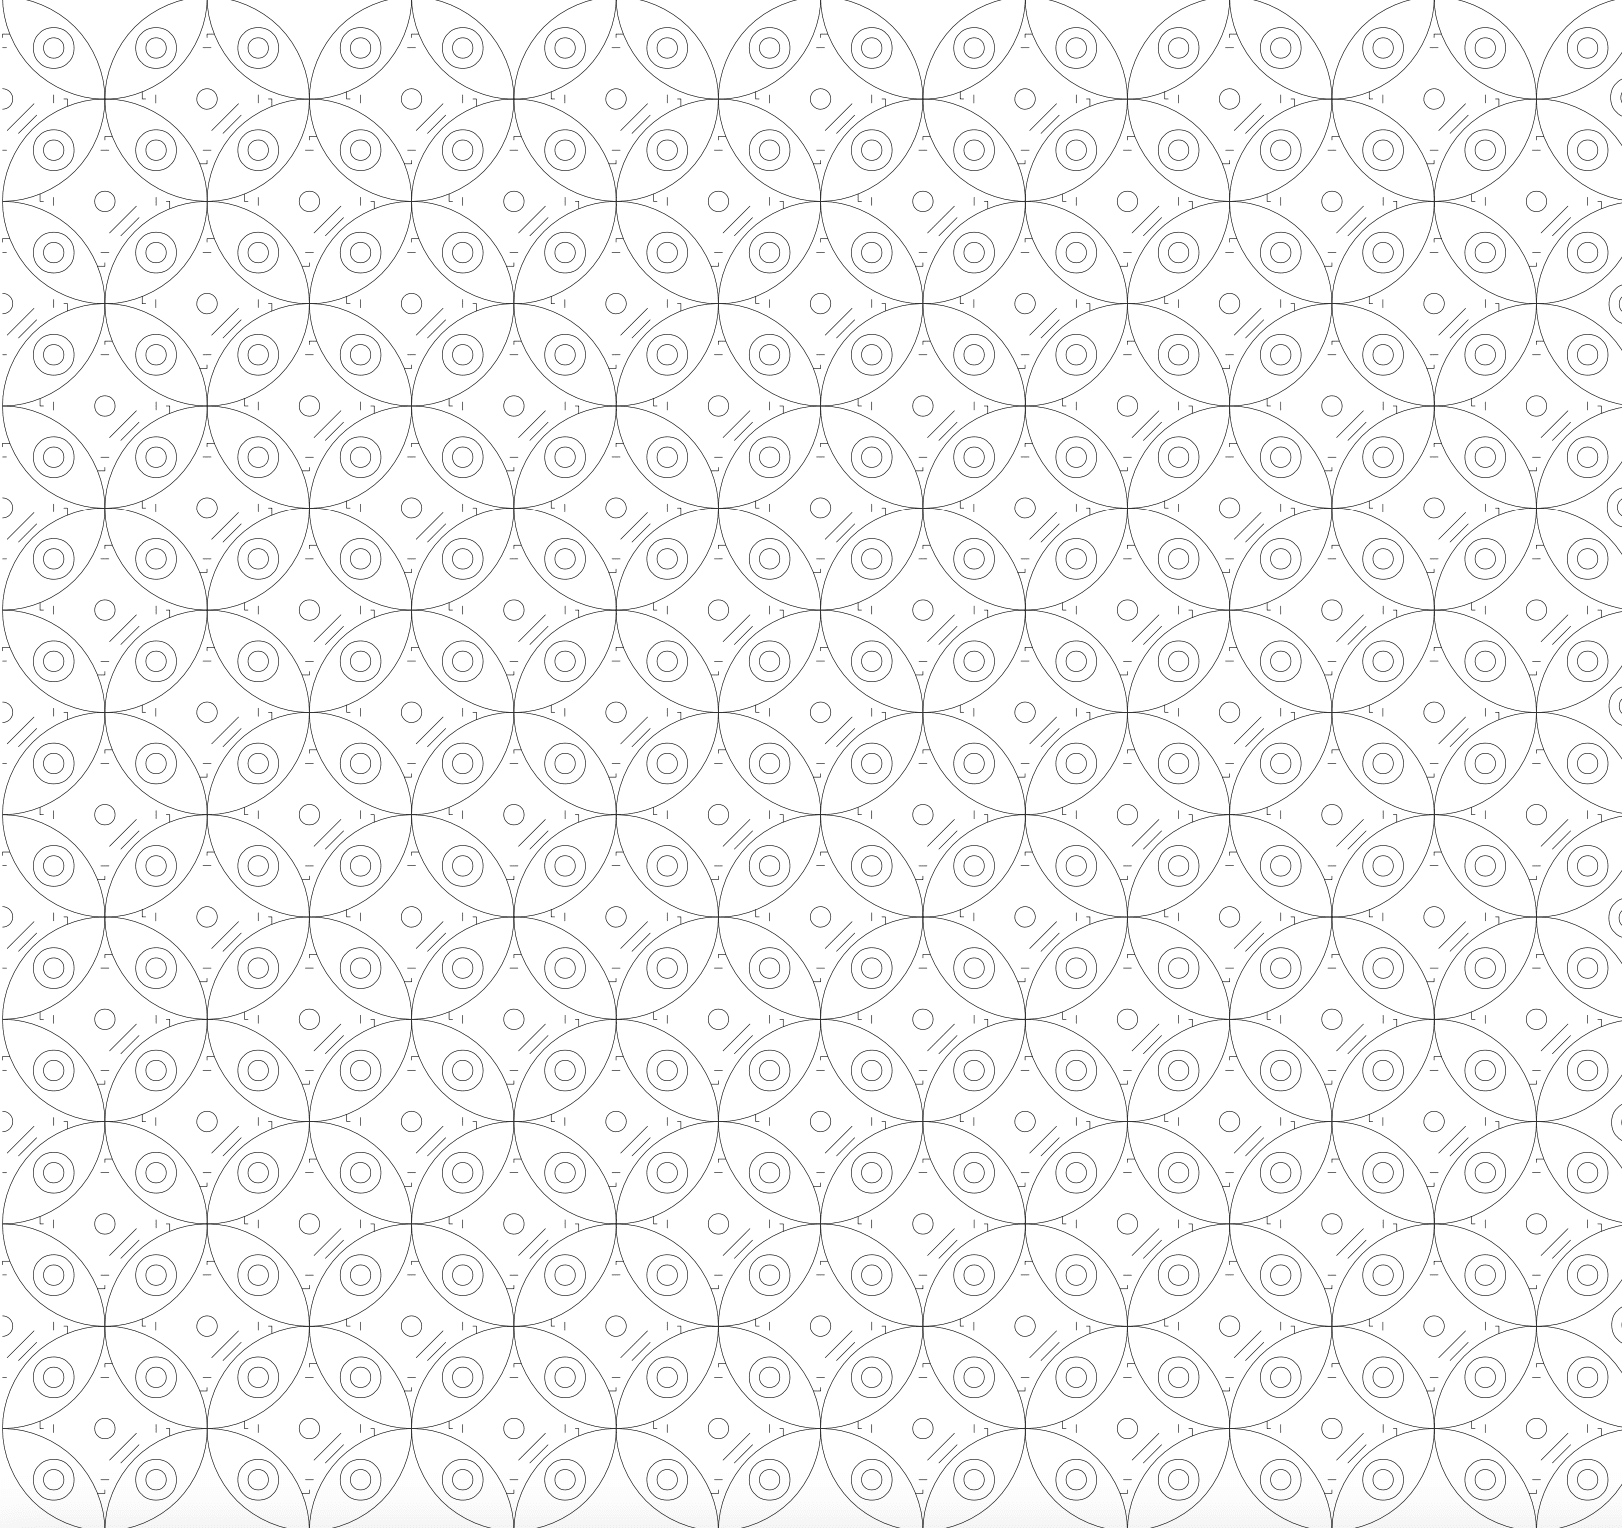
Finalised file 1 for laser cutter, exported as DXF file.
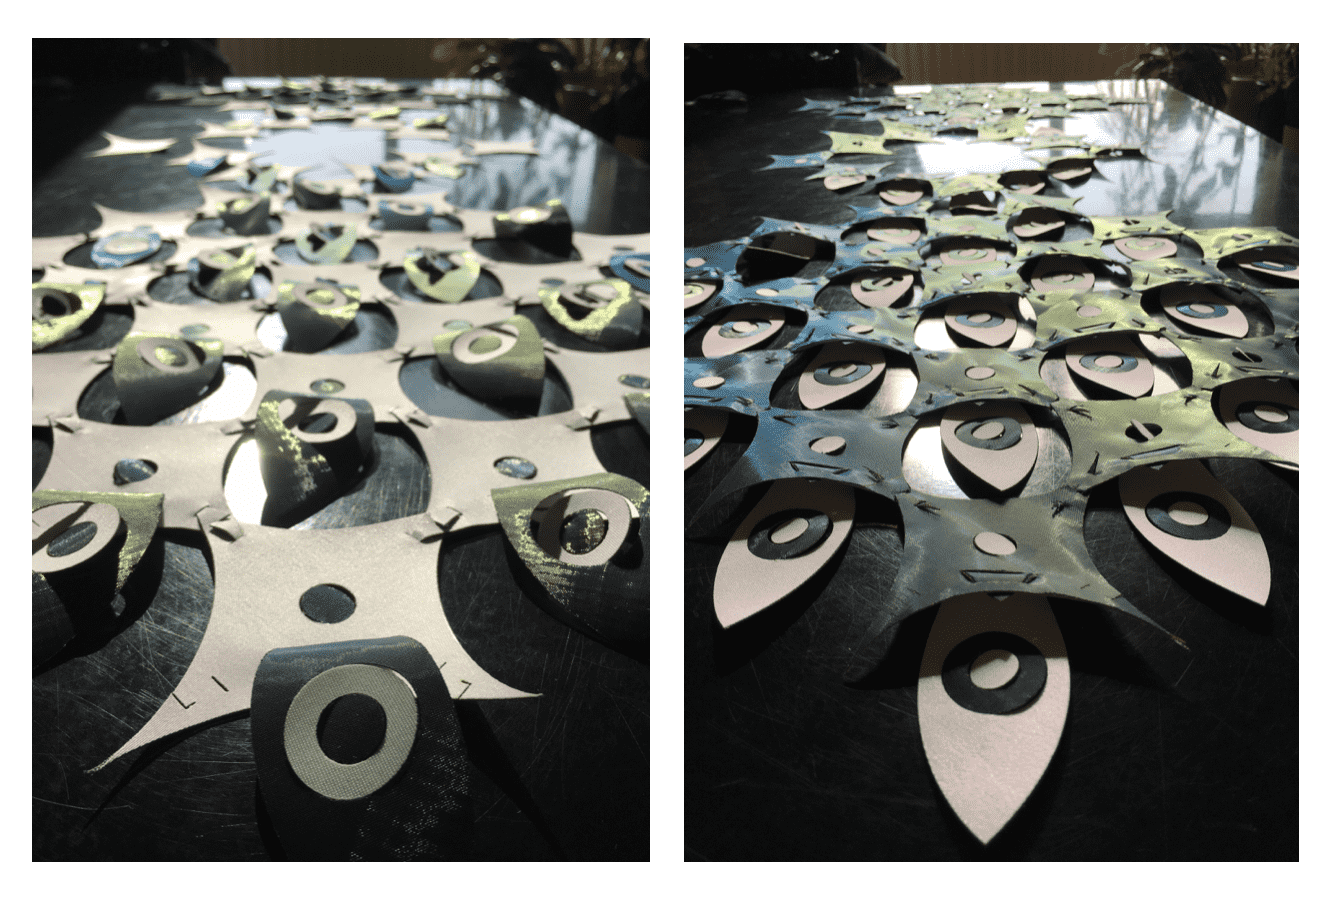
L A S E R _ C U T
Laser settings =
- Speed (mm/s) = 50,00.
- Power Max (%) = 33,00.
- Power Min (%) = 15,00.
Take care to get fabric tought (but not stretched) and flat as possible.
With this, I used masking tape.
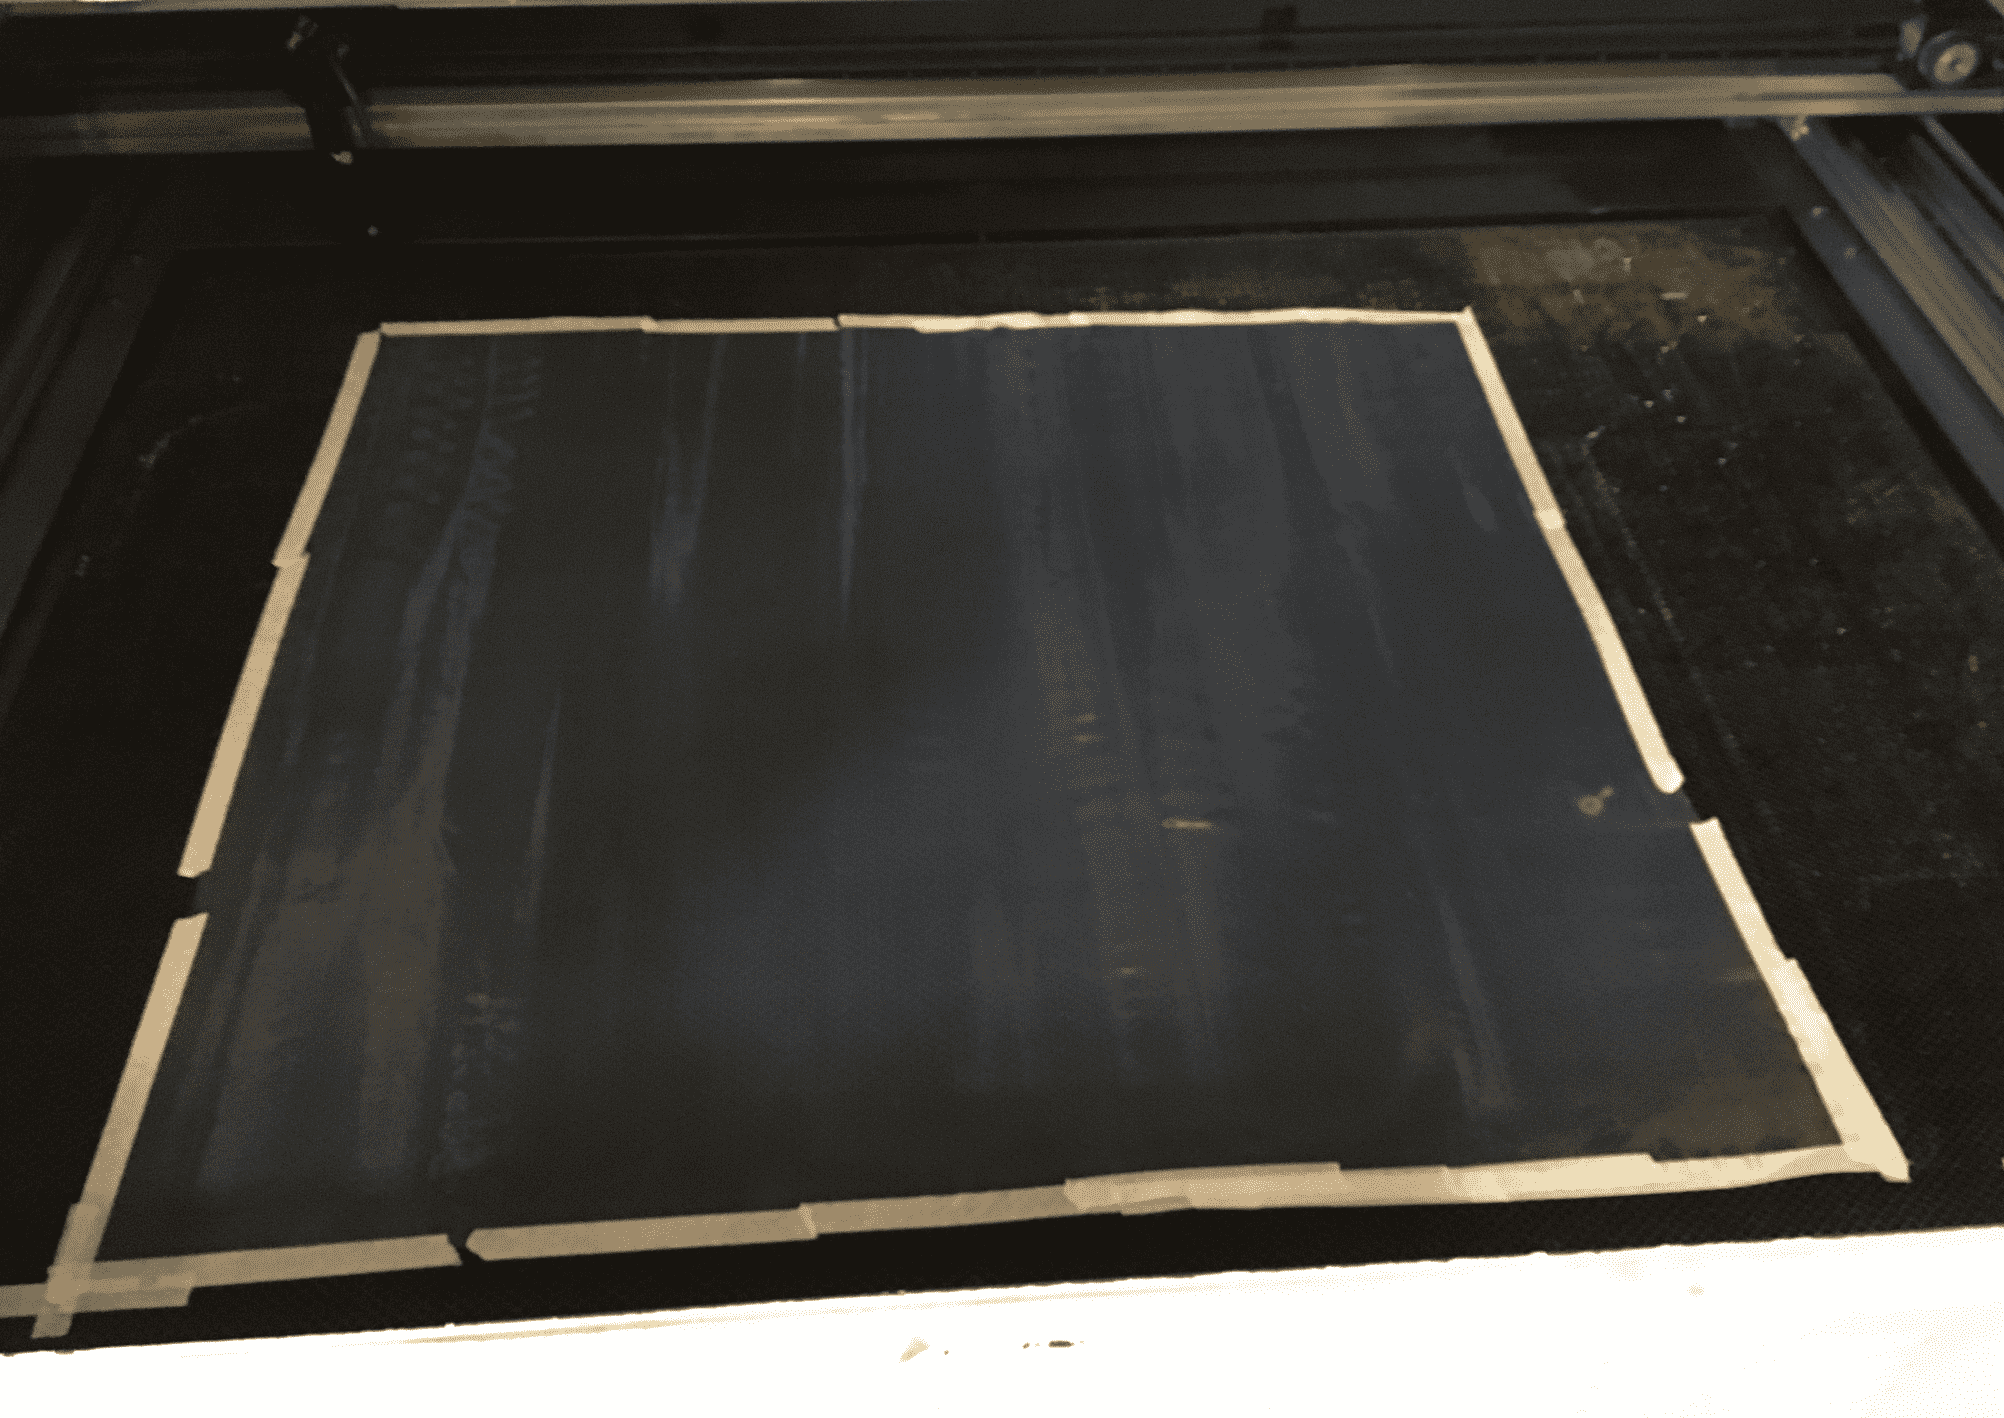
Organza layer taped down on bed of laser.
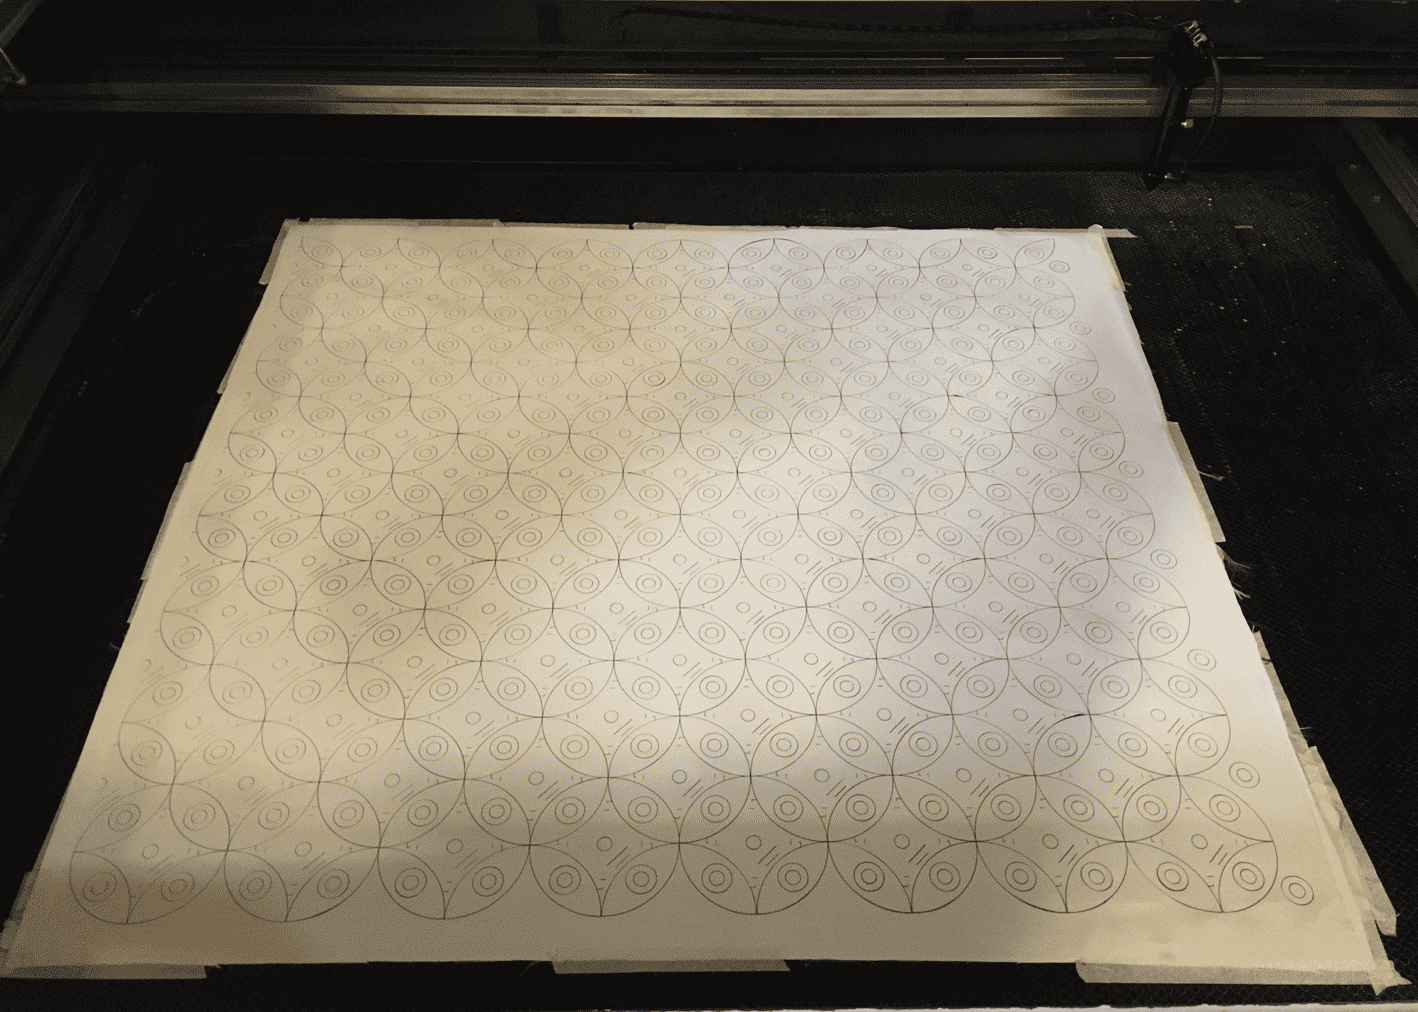
Black and white fabric on top of organza, laser cutting complete.
A S S E M B L Y
Many many pieces!
Step 1: Weaving the negative spaces together. Extra tools: I found a tweezers helpful to slot in the small pieces.
Step 2: Slotting in the eyes and rotating the pupils and iris.
Step 3: Iron down the eyes.
Testing the piece on a mannequin to see how it works on the form and testing possibilities.
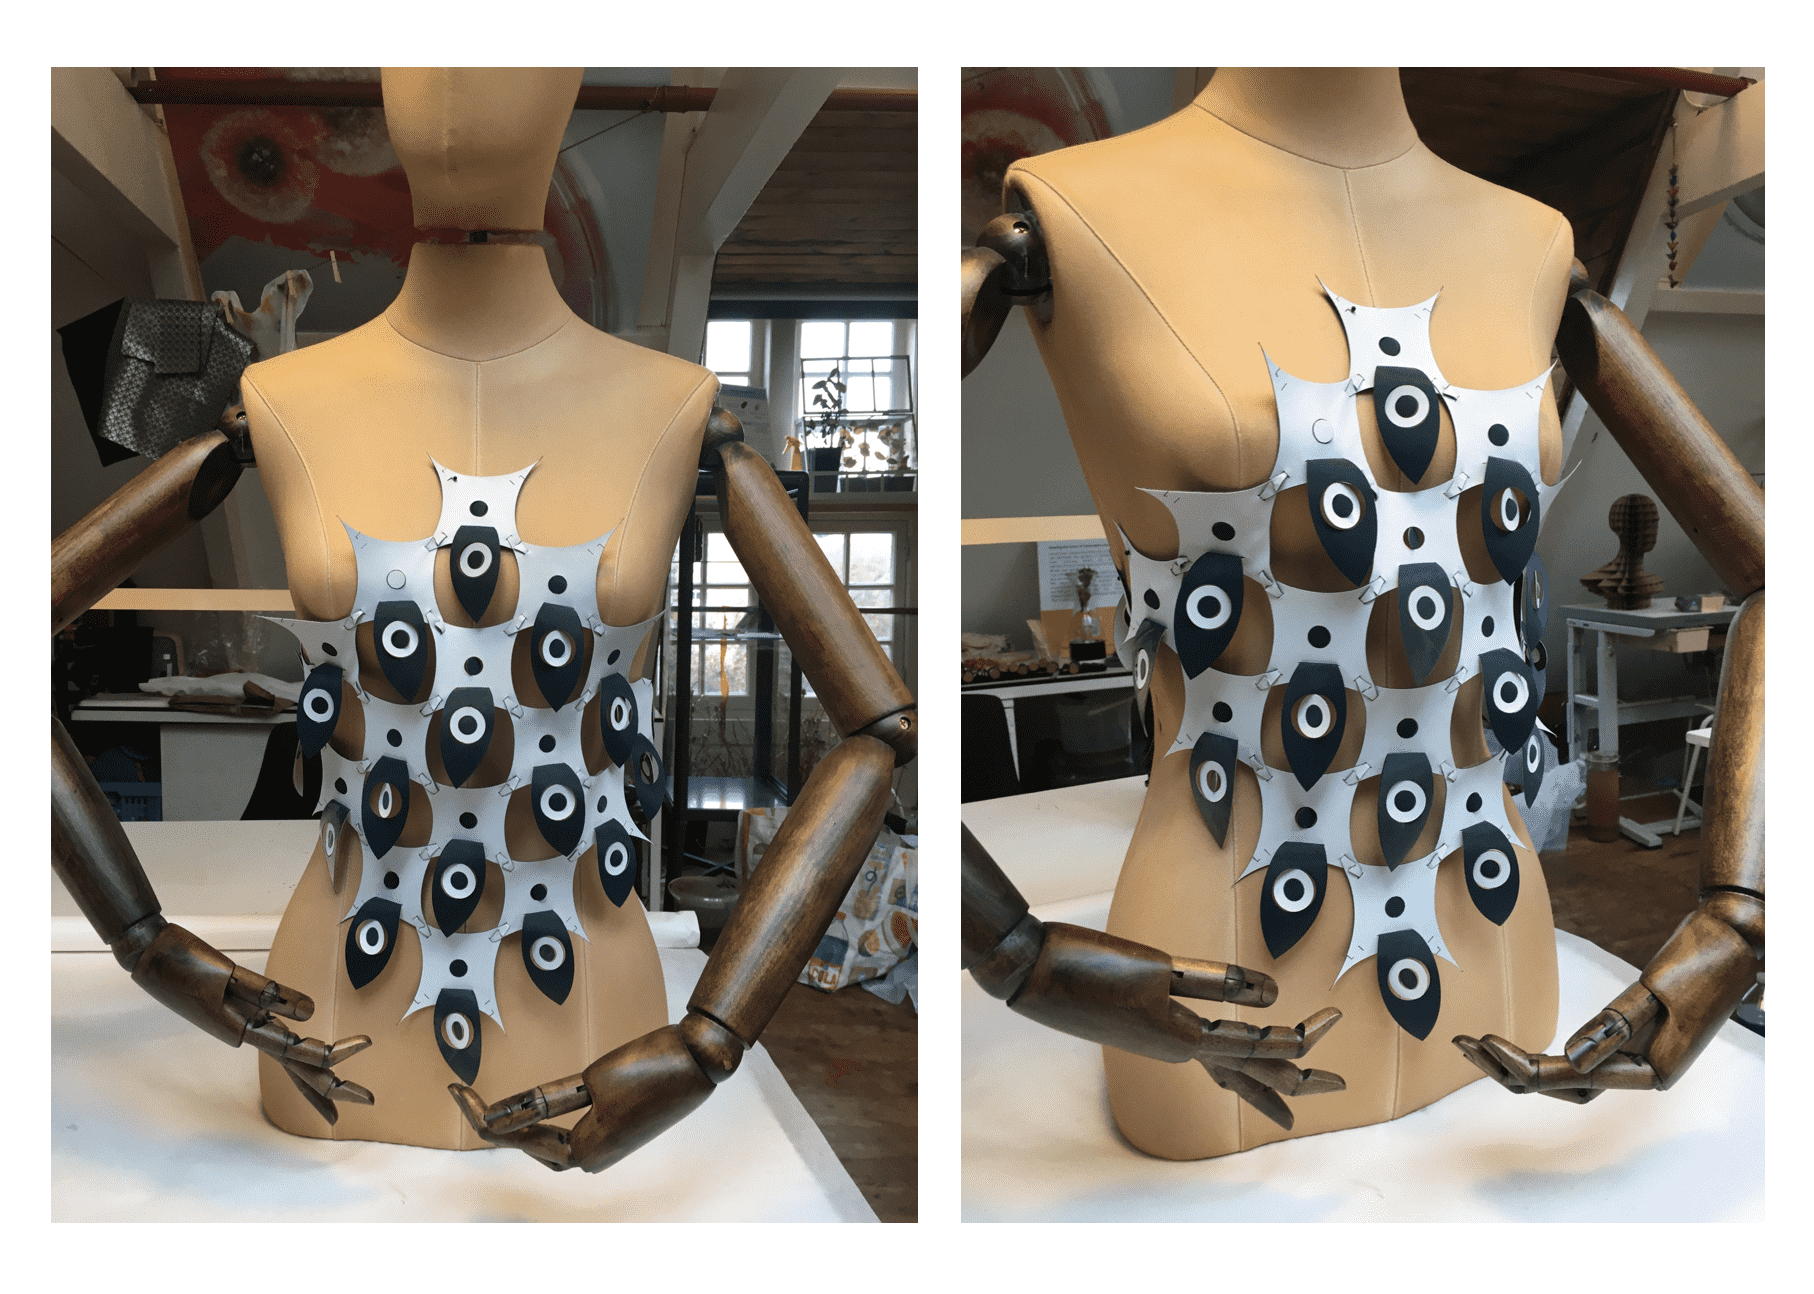
Assembly to make a top.
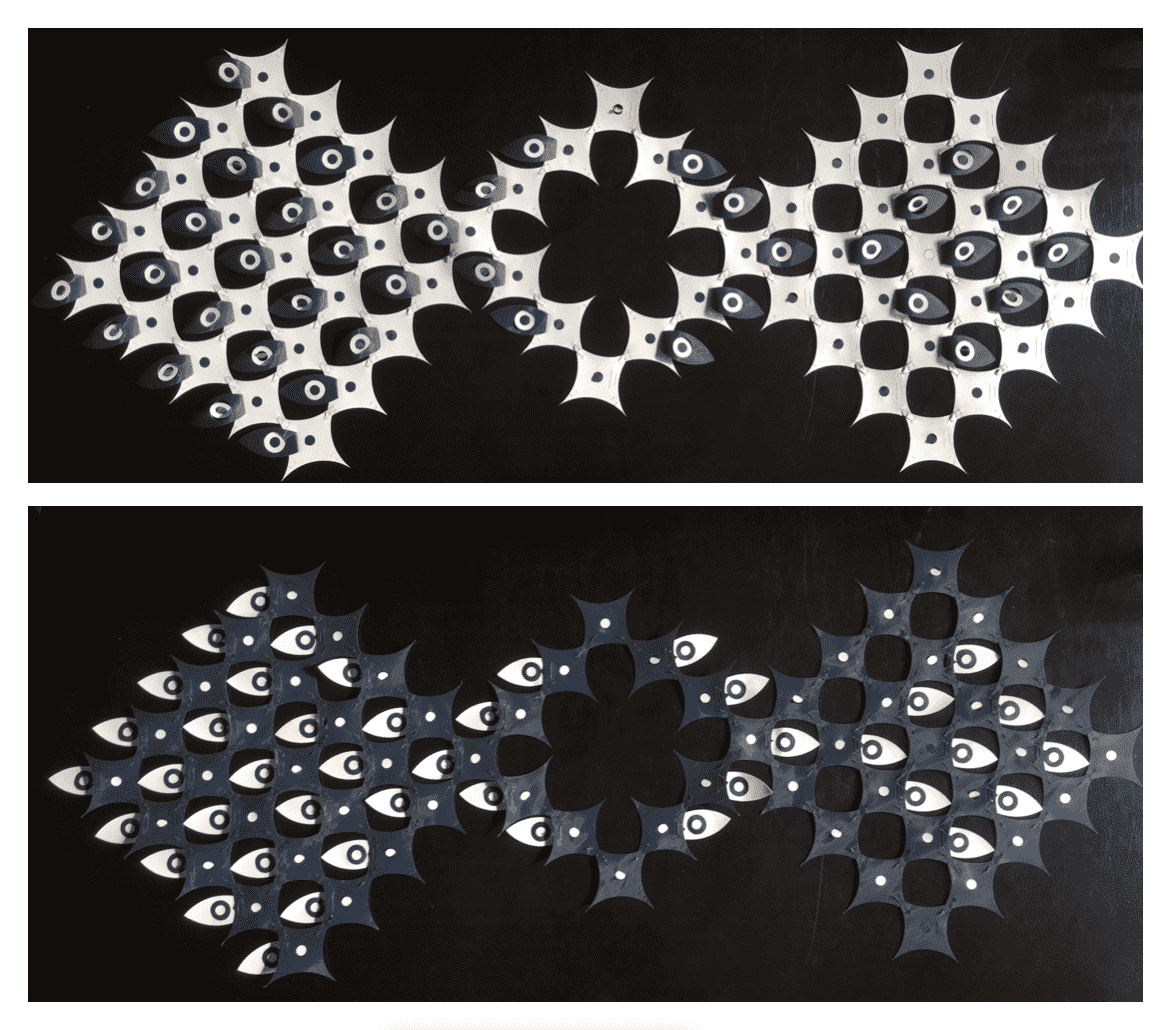
F I N A L
PEEK-A-BOO!

T H E _ D E S I G N
The design is:
- Versatile.
- Reversible (colour change).
- Zero Waste.
- Many possibilities.
- Playful.
Reminds me of an optical illusion peacock, which is very much my style.