4. BioChromes
weekly assignment
Learning outcomes
- Research skills: the participant has acquired knowledge through references and concept development
- Technical skills: Master techniques mordanting, dyeing (botanical or bacterial), pigments
- Process skills: Anyone can go through the workflow and recipes, understand them and reproduce it
- Final outcome: the participant understands various stages of color as: dye, inks and pigment
- Originality: Has the research been thought through and elaborated?
Student checklist
- Include some inspiration: research on artists or projects that on natural/bacterial dyeing, local ingedients and - resources
- Produce at least 1 natural dye with modifiers on fabric
- Produce 1 ink OR 1 pigment
- Document your recipes, the ingredients and process and if there have been changes, document your unexpected discoveries
- Submit some of your swatches to the analog material library of your lab (20cm x 20cm approx)
Check out the weekly assignment here.
References and Inspiration
alumni inspirations
-
Documentation formats - Julia Karas - FabLab Bcn
-
Artistic intervention - Kate Reed - Dassault Systems
-
Woven documentation matrix - Riley Cox - TextileLab Amsterdam
-
Inks & folds - Germarillis Ruiz - FabLab Bcn
-
Dye book - Isobel Leonard - TextileLab Amsterdam Waag FutureLab
-
Comparison inks - Stephanie Johnsons - TextileLab Amsterdam
From the Session


This week was a fascinating topic. It is beautiful in it's sheer essential simplicity, and yet, there is an infinite possibility of variations. During my school years, I've tried basic onion peel dyes during craft class, and I dunk tea leaves into the water when I boil eggs to differentiate the boiled from the raw in the fridge. But to consider the vast history and potential of playing with colour using commonly accessible materials is mind boggling in the best way.
I was particularly taken by Jason Logan's ink studies. They are beautiful, and inspire me to photograph all of these things in wonderful ways.
I was also especially taken by Julija Karas' Digital BioPantone work. (Little did I realise I would walk down a similar path in a few weeks)
I also loved Kate Reed's documentation, and especially her labels and tags.
The artisans in Kutch

Over the past 3 years, we've had multiple field trips to Kutch, meeting the artisans there and being utterly humbled and awed by their skill, craftsmanship, desire to innovate, and their absolute kindness. Our students volunteer for them when they are in the city, and we have followed their journeys ever since we have met them.
The artisans are all alumni of Somaiya Kala Vidya, a sister school based in Anjar and aimed at reviving traditional crafts and keeping them alive by having the craftsmen innovate within their craft by bringing in design and innovation, while also showing them how to setup their branding, social media, and so much more. This leads them to earn a better living, certainly, but also respect and recognition for their work which in the past they were denied. This has led to the younger generation not abandoning their craft but choosing to push forward instead.
Find them here !
Somaiya Kala Vidya Website
SKV on Instagram
Ashk by Khaled | Ajrakh Block Print | Khaledbhai Khatri
Vanat | Weaving
Neel Batik | Batik Block Print | Shakilbhai Ahmed
Elysians | Ajrakh Block Print | Mubasshira Khatri
Cecilia talking about Plant Blindness was also something that has stayed with me long after the session.
As someone who has grown up amongst a whole lot of plants and with my mom being a self-taught horticulturist with a plant nursery almost as old as me, I very often do not realise how much I have absorbed over the years while being in this general environment. Cecilia mentioning Plant Blindness made me realise I have seen it so often in people around me as well, but I had always assumed it was because I was used to dealing with plants, and seeing them individually.
Anyway, this a material for a longer thought elsewhere, but here's some Turmeric grown and harvested at our place a couple of hours outside the city of Mumbai. I was hoping to use this for the dye but it's arrival was delayed and I used regular market bought stuff, and this harvest was pickled or went to friends.


Ideation
I had several ideas and thought processes going on.
- Chase the rainbow - make atleast the 3 primary colours and mix them, or even upto 6 colours so all major hues are covered
- Chase a colour - try all the dyestuff that gave any version of Yellow - from turmeric, marigold, etc.
My instructors advised me against both of these, the former being too much work for one single person, and the latter being too limiting in it's scope.
So I decided that I'd just pick a few sources that I was interested in. My initial list was
- Henna - I had been curious about trying this since a while, given henna's rich cultural significance and equally rich colours
- Turmeric - While this had been tried by my instructors last year, I wanted to try it in it's alkaline avatar which I remembered to be significantly redder from high school chemistry sessions. I also wanted to use Turmeric's fugitiveness to try out an idea, which I will detail later.
- Pomegranate - Known to give a golden yellow colour, and pomegranates are in season right now.
- Turmeric + Pomegranate - Supposed to make bright yellows, with each ingredient contributing.
- Spinach - for the green
I was browsing Amazon.in and discovered a thriving dye supplies market and vendors.
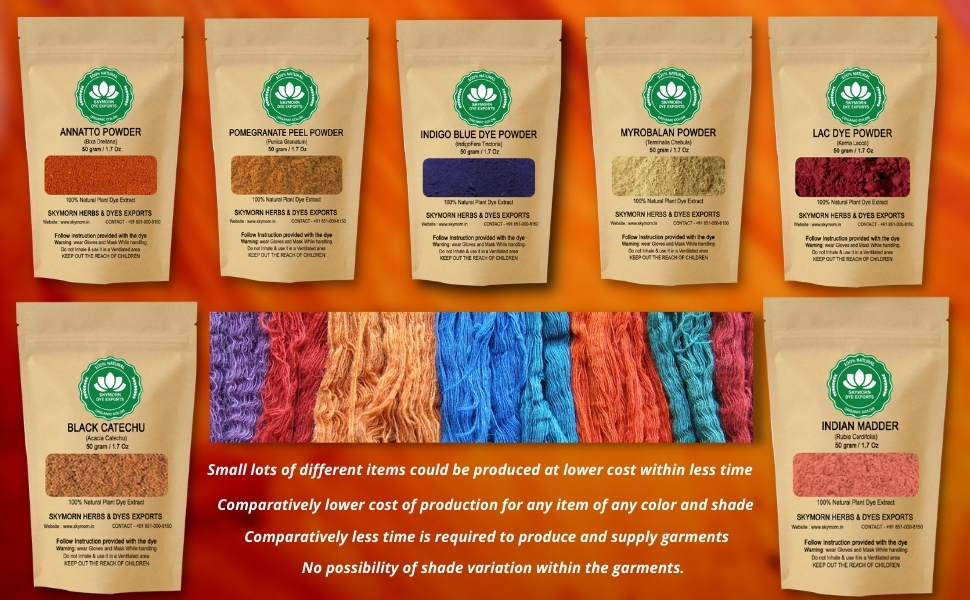
During my web search, I realised Madder was available at a retail level, and was called "Manjistha" here, and then I found it on my local Amazon. Since I had always heard everyone wax poetic on this OG dyestuff, which was supposed to be local to my country, I decided to try it if I could get my hands on it. Similarly, I realised that Myrobalan was nothing but Hurde, a common ayurvedic stomach aid. I had known of Hurde being used as a mordant from my Kutch visits, so I decided to quest for this as well.
We have a bustling market some distance away, and pre-Covid, we'd regularly be going there to pickup supplies. Post Covid, we have a slew of delivery apps catering to us. I have also become busier, and what little I used to help with the grocery shopping has gone away.
 Vegetable Market
However, as I went around the market and browsed the open air vendors and shops, I made some interesting discoveries.
- My sister had directed me to an ayurvedic (Indian traditional medicine philosophy) shop that sold various herbs and powders. I actually ended up at the wrong one, since both are in the same side street, but I discovered madder powder there.
- They had, unsurprisingly, myrobalan as well, in powder form.
- As I looked through their shelves and the arrays of jars labelled in a mix of English and Devnagari, filled with crushes and powders, a lot of interesting names popped up, but the one that really caught my eye was "Indigo" ! Apparently, it's used for hair colouring and conditioning.
 At the Ayurvedic Shop: Madder powder, Indigo, and the rest of their stock
As I went through the rest of the market, more interesting discoveries were made and I picked up a variety of things to dye with.
So my final list boiled down to :
Dyestuffs :
- Madder root (Manjistha) - from Amazon.in
- Madder powder (Manjistha)- from Ayurvedic shop
- Turmeric root (Haldi) - from vegetable market
- Henna (Mehndi) - from store, packaged
- Amaranth (Laal Maath) - from vegetable market
- Onion Peel (Kanda, Pyaaz) - from vegetable market
- Myrobalan (Hurde) - from Ayurvedic shop
Mordants :
- Myrobalan (Hurde) - from Ayurvedic shop
- Alum (Fatakdi, fitkari) - from Ayurvedic shop, but any provision store would have it
Fabric :
- Cotton fabric - basic white cotton fabric
- Watercolour paper - Canson water colour paper as well as some handmade paper I had lying around.
Abandoned :
- Indigo - the Indigo Vat would be it's own process which I found out on further research. I will chase that down some other time.
- Cotton string - abandoned, too much of a hassle to manage for just one person
- Wool - abandoned, all the wool at my local shops was acrylic, not actual animal wool
Since I had no wool or silk, I was working primarily with cellulose in the cotton fabric and the watercolour paper.
Research
Understanding South Asia’s Most Recognisable Dyes
Transforming the landscape into colour: India’s natural dyes
NaturalDyes.ca – Home Site
Basics
NaturalDyes.ca – Home Site
NaturalDyes.ca – General Instructions
NaturalDyes.ca – Maiwa Guide to Natural Dyes (PDF)
One Bath Acid Dyes – and “Textile Tattoos” | Natural Dye: Experiments and Results
Mordanting
Maiwa Handprints Blog – Mordants Part 1 (Overview)
Maiwa Handprints Blog – Mordants Part 1
Maiwa Handprints Blog – Mordants Part 3 (Cellulose Fibres)
Specific Dyestuff
Henna - NaturalDyes.ca
Henna Natural Dye ~ Getting Started
Henna Natural Dye ~ Results
Dyeing with Moroccan Henna Extract (Lawsonia Inermis) — Shepherd Textiles
Natural Dyeing With Amaranth - Rosemary And Pines Fiber Arts
Dyeing Pink with Hopi Red Dye Amaranth - KnittyVet
Natural Indigo - NaturalDyes.ca
Homegrown Indigo Pigment Extraction • Lovely Greens
Fresh leaf indigo dyeing - the salt rub method - Rebecca Desnos
Japanese Indigo Extraction | Wild Colours natural dyes
Madder - NaturalDyes.ca
Myrobalan - NaturalDyes.ca
Onion Skins - NaturalDyes.ca
Pomegranate - NaturalDyes.ca
Tools
For the Dye prep
- Induction top or stoves
- Large vessels - 3-5 liters - to soak and boil
- Blender/Mixie/Chopper - to pulp or pulverize dyestuff as needed
- Fine cloth/muslin/sieve - to filter organic matter from liquid dye
- Containers - dozens, for dye variations across pH, additives, etc
- Paper cups - for the final dyeing of the small swatches
- Icecream sticks or chopsticks - to stir and mix dyes and additives, one for each combination to avoid contamination
For Fabric prep
- Scissors
- Measuring tape (tailor's bendy tape not the metallic retractable one from the hardware/workshop)
- Pencil or tailors chalk
For the dyeing process
- Shelf space or containers to rest and protect the papercups with dye samples - I had Ikea's Samla series of clear boxes that were absolutely the best thing since I could close the lid and stack them, saving space and saving the samples from dirt and dust in the air
- Sticker labels for each papercup for the details
- Marker pen, waterproof
For the inks
- small containers to mix the gum and dyes
For the lake pigment
- large containers - I used 1 liter tubs for 500 ml dye liquid since it bubbles up and increases in volume
For the swatch library
- mounting sheets - ideally printed with positions so attachment and labeling becomes easy
- stapler
- sticker labels - preprinted for ease of use
Process details
The following is my understanding of the overall process, based on the session as well as additional reading and research. I found it useful to breakdown stages and work out what could be done in parallel, and what had to follow or be prepared in advance. The workflow section covers actual working, steps and details.
General Process

This table lists the various stages of the dyeing process as shown above, along with details of time and temperature.
| Stage | Action | Temp / Time | Purpose |
|---|---|---|---|
| 1. Scour | Boil cotton with 2 g/L soda ash + neutral soap | 90–95 °C × 1 h | Removes sizing & oils |
| 2. Tannin (Myrobalan) | Immerse in bath 8–15 % WOF | 50–60 °C × 1–2 h | Deposits tannin complex |
| 3. Rinse & Cool | Cool in bath → rinse clear | Room temp | Equalize uptake |
| 4. Alum / Al acetate | Immerse in bath | 70–80 °C × 1 h | Add metal ions for binding |
| 5. Rest Period | Keep damp or dry 12–24 h | Room temp | Improves bonding strength |
| 6. Rinse Before Dyeing | Cool water rinse | — | Remove loose mordant |
| 7. Dye Extraction | Prepare dyebath to extract dye from the biomass | see "Dye Extraction" table | — |
| 8. Dyeing | Add wet mordanted fibre gradually | 80–90 °C × 1 h | Even uptake |
| 9. Cool & Soak | Let cool in bath several hours or overnight | — | Deepens colour |
| 10. Rinse & Dry | Rinse clear → air-dry shade | — | Set colour |
Mordant details
A list of mordants I will be useing, alongwith their time, temperature and WOF for the mordanting process.
Since I have both Myrobalan, as a tannin, and Alum, as a mordant, I will be trying them both, and also trying the alum on the myrobalan treated fabric.
Working on cellulose, the tannin stage is quite essential, compared to protein fibres which bond with alum without need for a tannin.
| Mordant / Stage | % WOF | Temp (°C) | Time | Notes |
|---|---|---|---|---|
| Myrobalan (tannin) | 8 – 15 % (for mordant) | 50–60 °C | 1–2 h or overnight | good for cellulose |
| Alum (potassium alum) | 15% | 70–80 °C | 1 h + cool in bath | standard mordant |
| Both (Myrobalan → Alum) | Myrobalan 8–15 % then Alum 15 % | see above | ≈ 2–3 h + rest 12–24 h | myrobalan makes alum attachment easier |
Dyestuff details
The final list of dyestuff I will be using, with details of time, temperature and WOF for the dyeing process.
| Dyestuff | Recommended % WOF | Extraction Temp / Time | Dyeing Temp / Time | Colour |
|---|---|---|---|---|
| Madder (root / powder) | 35 – 100 % | Soak overnight → 80 °C × 1 h | 80–90 °C × 1 h + cool soak | reds |
| Turmeric (root / powder) | 100 % (± 200 %) | Simmer 80–90 °C × 30 min | 80–90 °C × 1 h | yellows |
| Blue pea flower (Clitoria ternatea) | 20 – 100 % | Warm steep ≤ 60 °C × 1 h | ≤ 90 °C × 1 h | blues |
| Henna powder | 20 – 50 % | Simmer 95–100 °C × 1 h | 90–95 °C × 1 h | green brown, red on protein |
| Myrobalan powder (as dye) | 20 – 30 % | Warm soak 60 °C × 1 h | 80–90 °C × 1 h | pale green |
| Amaranth leaves (fresh) | 100 – 200 % | Warm infusion ≤ 70 °C × 1 h | 80–90 °C × 1 h | pale pink |
| Onion skins | 20 – 30 % | Boil 80–90 °C × 1 h | 80–90 °C × 1 h + overnight soak | yellow gold |
Effect of pH on dye
My reading and research told me that certain dyestuff is affected by changes in pH, while others are not. I realised that the following materials have a marked difference in colour based on the pH while the rest of them are not particularly affected.
| Dyestuff | Acidic (pH 3–5) | Neutral (pH 6–7) | Alkaline (pH 8–10) | Notes |
|---|---|---|---|---|
| Turmeric (curcumin) | Bright lemon yellow | Warm yellow | Orange-red → brown | Highly pH-sensitive; fades in sun |
| Madder (alizarin) | Orange / apricot tones | Brick red | Pink–cherry red | Moderately pH-sensitive; alkali brightens |
| Blue pea (anthocyanin) | Violet / purple | Blue | Greenish / teal | Strong pH indicator behaviour |
pH Modifiers :
To modify the pH of the extracted dye, I will be using the following materials :
- Vinegar (Acetic Acid) - for acidity
-
Washing soda (Sodium Carbonate, Na2CO3) - for alkalinity
-
Slaked lime (Calcium Hydroxide Ca(OH)2 ) - for extreme alkalinity and reduction reaction, only for Indigo Vats
The safe range for cellulose - cotton, paper and other plant based fabric - is between >3 and <10.
Workflow
Parameters and their variations
My parameters with their variables, at their peak were :
Dyestuffs, 8
- Madder root
- Madder powder
- Turmeric root
- Henna
- Amaranth
- Onion peel
- Blue pea
- Myrobalan
Mordants, 3
- Alum
- Myrobalan
- Myrobalan → Alum
Additives, 3
- Alkaline (soda)
- Neutral
- Acidic (vinegar)
Fixers, 3
- Salt
- Alum
- Vinegar
Base, 2
- Fabric
- Paper
Time (hrs), 3
- 0.5
- 1
- 12
Thus, I had
- 8 dyestuffs for different colours,
- 3 mordanting variants,
- 3 ph variants,
- 3 fixers based on Gunjan and Shefali's documentation,
- 2 fibers to dye, and
- 3 lengths of time to dye for.
Total potential variables :
8 dyes x 3 mordants x 3 ph values x 3 fixers x 2 fibers x 3 time lengths = 1296 individual variants. This was crazy, but also it was only the theoretical upper limit of unique combinations.
I set about trying to eliminate a few of them, based on my readings and research.
- I decided to not use string as a medium to dye and also try watercolour paper towards the end based on the results with cloth.
- Paper also would take longer than fabric, so I decided to soak it longer, not the short stretches.
- Indigo was eliminated since it was a wholly different process anyway
- I had also thought of using Iron Oxide, I was pretty sure I had some lying around, but gave up since I already had too many options
- The references told me that
- Madder, Turmeric and Blue Pea gave differing results based on the pH,
- but Amaranth, Onion Peel, and Myrobalan stayed unaffected, and
- henna needed to be acidic.
So I eliminated pH variables where not needed.
- On the fabric side, I was using 3 mordanting combinations - only alum, only myrobalan, and myrobalan followed by alum. However, based on Gunjan and Shefali's documentation, I decided that the Alum and Myro-Alum mordanted fabrics would have alum as fixer, while the plain myrobalan mordanted ones could be tried with salt, vinegar and alum as well. This left me with 5 mordant-fixer combinations.

The image above shows what I had decided to go with at the beginning of the first round of dyeing.
The calculations showed how many individual combinations were going to be made, which was also the number of fabric swatches, paper cups, sticky labels, etc that I would need. About 384 ! This was a more workable number, although I would eliminate a few more the next day.
Round 0 : Prep
- I began by washing the entire fabric with Ezee washing liquid, which is pH neutral. I suspect using washing soda could have been more beneficial. I hung it out to dry on the line for a day.
- Next, I marked 3 inch marks on both edges of the fabric, and me and my sister cut it up into hundreds of little squares based on the numbers I had calculated then.
- We separated the fabric squares according to the 3 mordants and as many dye-pH and fixer combinations needed per mordant - so about 45 for only alum, 45 for myro+alum, and 189 for only myro.
- Since the myro+alum ones needed to be in the myro solution first, then alum, and we did not want to tediously count 45 wet squares of fabric, my sister had the brilliant idea of stitching them together. She skewered them on a needle and tied a single looping stitch so the whole bundle could be fished out when done. She also did that for another bundle of 9 that was going to be dyed in Myrobalan itself but at a higher WOF.
- We simmered the fabric in the respective mordants for an hour and then let it cool down to nearly room temperature.
Round 1 : Dyeing
- While the mordants were mordanting the mordantee fabrics on two of the stoves, we setup dyestuff to extract on the other stove and the induction top.
- We started with henna and amaranth, since those were already prepped and ready to go - the henna as a powder and the amaranth as leaves that I plucked off.
- While that was happening, I prepped the papercups with labels and kept the additives ready
- Taking one dyestuff at a time, 30 ml was poured into each papercup using a 15 ml tablespoon measure
- Appropriate additives were added and stirred - I chose salt, vinegar and alum based on my instructors pages
- Fabric swatches were dunked and stirred into each papercup as well, as quickly as possible to keep the time uniform, and timers were set for 30 mins, 60 mins and 12 hours for each set of swatches.
- As the timers started going off, I poured out the dye from the 30 minute cup to the 60 minute cup of the same combination.
- Eventually, the 12 hour cups were gathered up and kept overnight for safekeeping, while the rest were kept in their respective empty cups to dry properly. The labels were on the cups that helped me identify the combinations, so they could not be separated from the cups until mounting time.
We did Amaranth, Onion and Henna in round one, with Salt, Vinegar and Alum as additives and the 3 mordant combinations of Alum, Myrobalan, and Myrobalan followed by Alum. This resulted in each dye having 15 different combinations. We grouped them in 3s initially, 5 sets of 30-60-12 soak times for each combination and then regrouped them into 3 sets based on the soak time to organize and store them better.
 30 min, 60 min and 12 hour groups

Safekeeping
Round 2 : More Dyeing
For round 2, the next day, the process was quite the same. However, we had practice from the previous day, and I did more research and eliminated a few variables. On the other hand, Round 2 dyestuff was also material that was affected by pH, a factor left at Neutral in round 1 since no effect was expected.
- Since we were going to add pH changing additives in the dye itself, I eliminated Vinegar as an additive in the cup.
- I realised salt would have no effect since it's only mention was in the Inks section to preserve the ink, so that was eliminated as well from the additives list
- I also realised that since the Alum was acidic in nature, it would react with the Alkaline version and neutralise it, so I read up some more and eliminated adding that into the papercups as well
All in all, this resulted in having 3 pH values x 3 mordants x 3 times for each dye, i.e. 27 combinations per dyestuff. Eliminating the additives into the papercup, it simplified the assembly process as well. Although we did 15 x 3 = 45 swatches in Round 1 and 27 x 4 = 108 swatches in Round 2, between the streamlining of the process as well as being practiced in doing it, Round 2 took the same amount of time for 2x the work.
We followed a process similar to the previous day, with the added step of dividing the dye liquid into 3 containers and adding vinegar and washing soda solution to 2 individual containers while keeping a third neutral.
pH was tested using pH paper, to achieve acidity of 3-4 and alkalinity of 7-8
For the acidic solution, vinegar was added 1/4 teaspoon at a time, checking with paper every time. I needed ~4 tsps for the ~300 ml of dye liquid, but it's best to constantly test the pH by paper or a meter.
For the alkaline solution, I made a 20 gm Na2CO3 + 200 ml water solution, and used that drop by drop. Usually 3-4 drops per ~300 ml, but again, best checked actually.
In Round 2, we did Turmeric, Blue Pea, and Madder as Root extract as well as Madder Powder extract. Initially I was adding only alum as a final additive, and then realising it was messing up the alkaline versions, I eliminated even that for both Madder versions.


Images : Crushing alum, Temperature check of the Madder root soak, Filtering turmeric using coffee filters, Dividing the BluePea dye into 3, ph checks
Individual dyestuffs
Henna

Henna Recipe
Dyestuff: Henna Powder (Lawsonia inermis)
Fibre type: Cotton / paper / cellulose
Proportions & Conditions
Dyestuff: 20–50 % WOF
Extraction: Simmer 95–100 °C × 1 h
Dyeing Temperature: 90–95 °C × 1 h
pH: Neutral to slightly acidic (5.5–6.5)
Steps
1. Simmer henna powder in water for 1 h; strain.
2. Add mordanted fabric to the bath.
3. Maintain 90–95 °C for 1 h.
4. Cool and soak overnight for depth.
5. Rinse and dry in shade.
Amaranth
Red Amaranth is a popular leafy vegetable in our region. It typically grows during the monsoon, and the market had plenty of it. I got home a bundle of that as well.


Amaranth Recipe
Dyestuff: Fresh Amaranth Leaves (Amaranthus spp.)
Fibre type: Cotton / paper
Proportions & Conditions
- Dyestuff: 100–200 % WOF (fresh leaves)
- Extraction: Warm infusion ≤ 70 °C × 1 h
- Dyeing Temperature: 80–90 °C × 1 h
- pH: Neutral
Steps
1. Crush leaves; heat gently ≤ 70 °C for 1 h.
2. Strain bath and add mordanted fibre.
3. Heat 80–90 °C × 1 h; cool overnight.
4. Rinse and dry.
The Amaranth gave a lovely red-pink dye, but unfortunately, the fabric did not take it up. Its a beautiful colour,espcecially with vinegar added, and I'd like to try again before giving up.
The leaves left behind completely lost their red tones and turned green !


Onion peel
While in the vegetable market, I casually asked the onion-potato vendor if they had any onion peels left behind in the gunny-bags that the onions were shipped in. To my surprise. he said they collect the dry peels, and there's a person who comes by and collects them by the bagful from him, for about Rs 100 (~$1.10) ! So I asked if I could have a few fistfuls and got about 100 gms (measured at home) for Rs20 ($0.25) !


Onion Peel Recipe
Dyestuff: Onion Peel Fibre type: Cotton / paper
Proportions & Conditions
- Dyestuff: 20–30 % WOF
- Extraction: Boil 80–90 °C × 1 h; strain solids
- Dyeing Temperature: 80–90 °C × 1 h + cool soak
- pH: Neutral
Steps
1. Boil onion peels for 1 h; strain out solids.
2. Add mordanted fibre to the strained bath.
3. Dye at 80–90 °C × 1 h, then leave overnight in bath.
4. Rinse and dry in shade.
This gave beautiful amber gold colours, very rich hues.
Blue Pea


Blue Pea Recipe
Dyestuff: Blue Pea Flowers (Clitoria ternatea)
Fibre type: Cotton / paper
Proportions & Conditions
- Dyestuff: 20–100 % WOF
- Extraction: Steep ≤ 60 °C × 1 h (do not boil)
- Dyeing Temperature: ≤ 90 °C × 1 h
- Mordant: Optional; alum acidifies and dulls colour
- pH Variations:
- Acid (vinegar → violet)
- Neutral → blue
- Alkaline (Na₂CO₃ → greenish)
Steps
1. Steep flowers ≤ 60 °C for 1 h; strain.
2. Divide for pH variations.
3. Add scoured or tannin-mordanted fabric; dye ≤ 90 °C × 1 h.
4. Rinse gently and dry in shade.
I used 100% WOF, but only after soaking did I realise that that proportion was very likely for fresh flowers, while I was using dry ones, which would be far stronger. I took out about half, and the dye was still this lovely intense blue that is just gorgeous.
Turmeric

 Turmeric crush
 Turmeric ph variations

Turmeric Recipe
Dyestuff: Turmeric Root / Powder (Curcuma longa)
Fibre type: Cotton / paper
Proportions & Conditions
Dyestuff: 100 % WOF
Extraction: Simmer 80–90 °C × 30 min
Dyeing Temperature: 80–90 °C × 1 h
pH Range Tests:
- Acid (vinegar → yellow)
- Neutral → warm yellow
- Alkaline (Na₂CO₃ → orange-brown)
Steps
1. Simmer turmeric in water for 30 min; strain.
2. Divide bath for acid / neutral / alkaline variations.
3. Add scoured fabric; dye 1 h.
4. Cool and rinse gently.
Notes: Fugitive dye
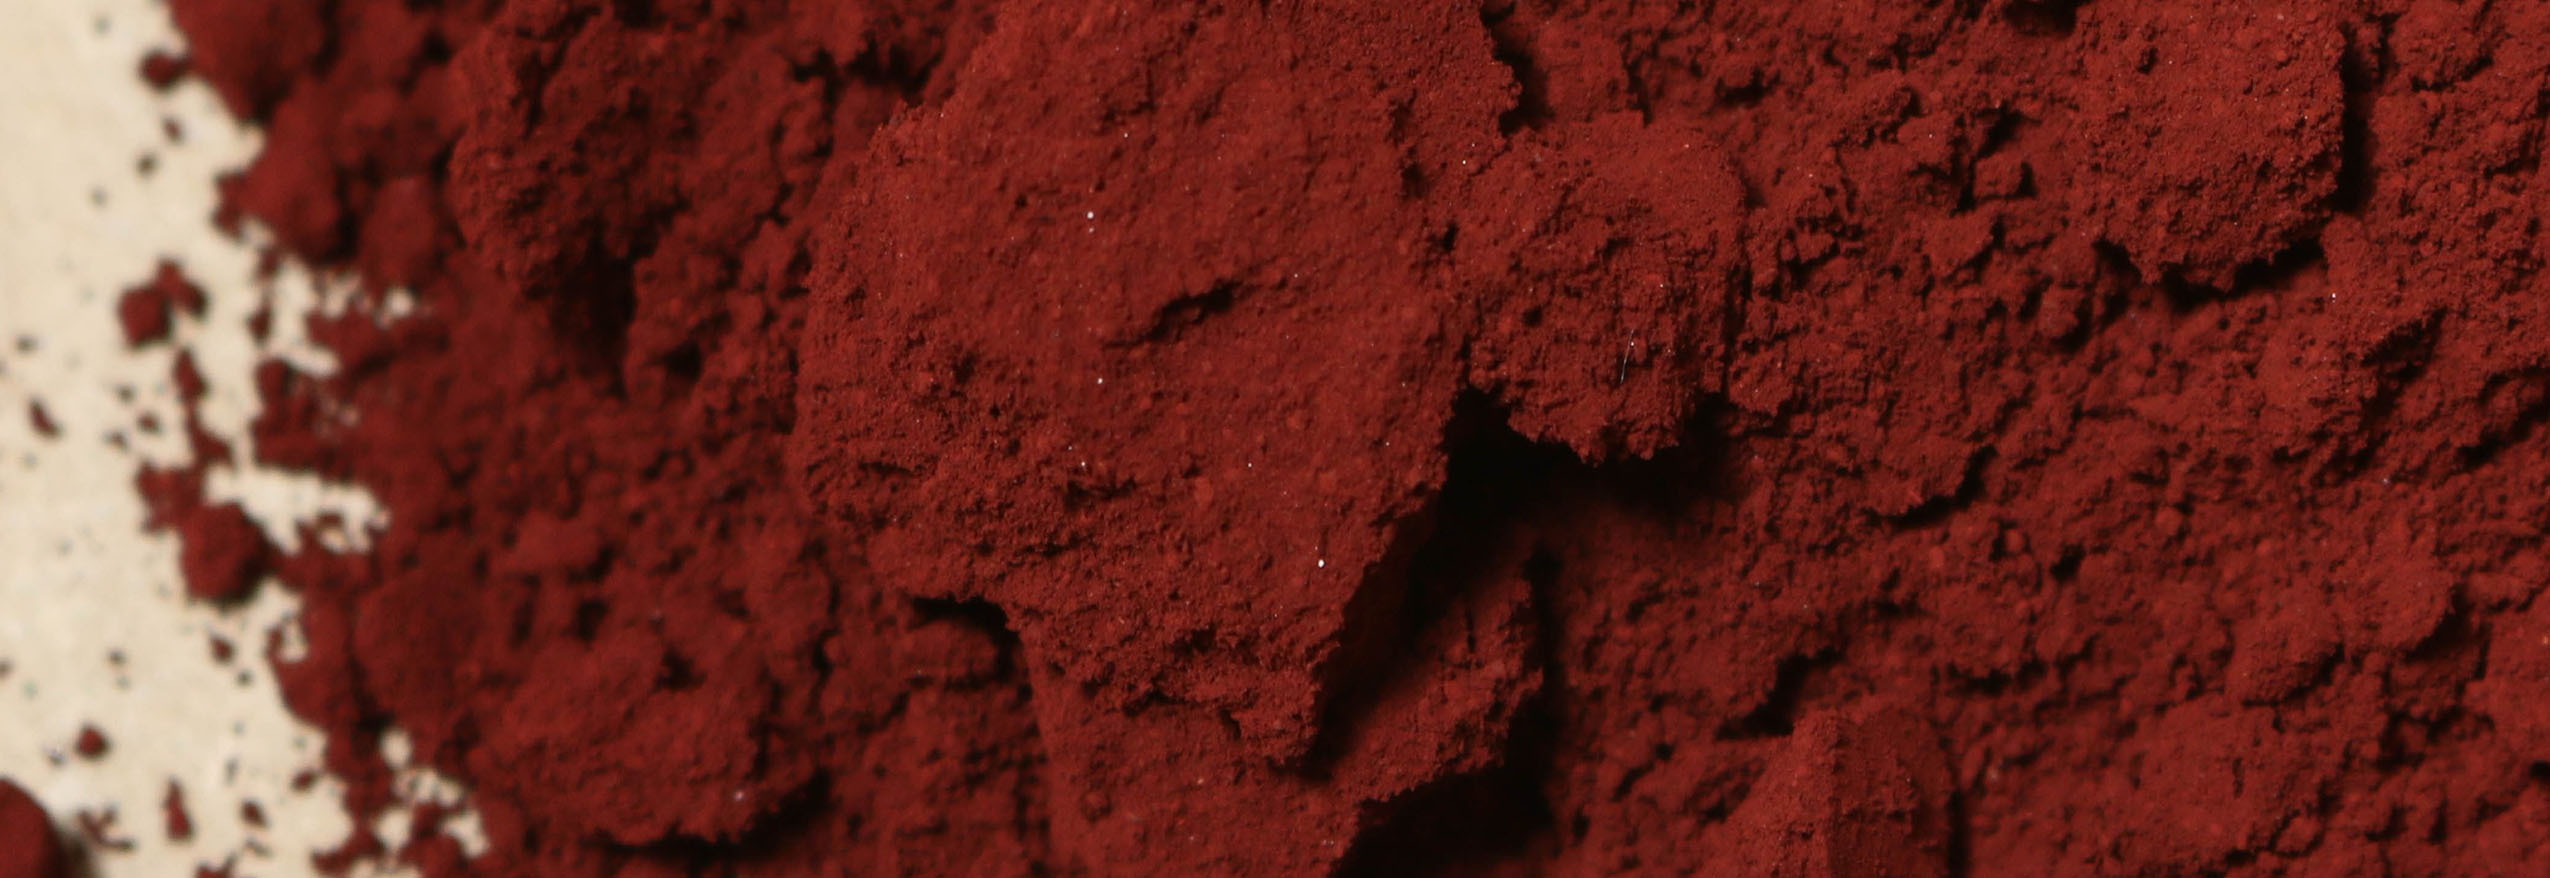
Madder
 Madder root and powder, dry
Madder Root

Madder powder

Madder Recipe
Dyestuff: Madder Root or Powder (Rubia cordifolia / R. tinctorum)
Fibre type: Cotton / paper
Proportions & Conditions
- Dyestuff: 35–100 % WOF
- Extraction: Soak overnight → heat 80 °C × 1 h
- Dyeing Temperature: 80–90 °C × 1 h
- pH Variants:
- Acid (vinegar → apricot/orange)
- Neutral → brick red
- Alkaline (Na₂CO₃ → pink/cherry red)
Steps
1. Soak madder overnight; heat gently to 80 °C × 1 h.
2. Strain and divide for acid / neutral / alkaline trials.
3. Add mordanted fibre; maintain temp × 1 h.
4. Cool, soak overnight, rinse, and dry.
Notes: Do not exceed 90 °C — high heat browns the colour. Calcium (limewater) enhances reds.
Resting, Drying, Rinsing
- The 30 and 60 minute swatches were drained and set to dry while working since their time would be up
- The 12 hour ones were left to soak resting safely
The large Ikea Samla boxes were extremely useful for both of these.

- Once all the swatches had been drained and dried, we rinsed them in cold water
- Care was taken to maintain the swatch-cup relationshp since the cup labels contained all the combination data


Ink making
I was fascinated with turning the dye to ink, especially following Jason Logan's work linked above.
 This is an image of an open market in Mapusa, Goa, with locally harvested gums and resins - some used to make "dhoop" incense to burn, others in edible sweets made for the winter. I had seen these on a 2021 trip, and knew that locally we had a range of gums and tree resins used traditionally.
So when gums came up when making inks, I decided this was a great opportunity to try and explore some more.


Gum Arabic and Gum Katira/Gum Tragacanth in crystal form
I used the powder forms of these in hopes that I would not have to reduce the dye liquid by simmering it and hence save time and effort. However, the measurements become tricky unless you have a good scale to weigh out 1-5 gms accurately, which is difficult with regular kitchen scales. I did an approximation using teaspoons instead of grams, but that is potentially risky since the gums are lumps in crystal form, not powder that can be evenly divided.

Resting to dissolve gum arabic crystals

Gum Katira Ink swatches

Gum Arabic Ink swatches
Since all the recipes called for using liquid versions of the gum with dry pigments, I had to come up with my own proportions. Based on various reading and references, and some ChatGPT data dumping and calculations, I used the following recipe :
Gum Arabic
Ratio : Water to gum ratio to make the liquid gum binder - 5 gms per 100 ml
Steps :
- Filter dye liquid through a sieve to remove debris
- Warm up 50 ml of dye liquid
- Add 2.5-3 g of gum arabic powder
- Stir till dissolved
- Rest overnight
Gum Tragacanth
Unlike Gum Arabic which forms a viscous binder, Gum Tragacanth forms a moist mucilage by absorbing the water. Tragacanth must be added to cold water, not hot, since it will clump badly in heat.
Ratio : 2 gms Tragacanth powder/crystals to 100 ml water
Steps :
- Filter dye liquid through a sieve to remove debris
- Measure out 50 ml
- Add Tragacanth crystals
- Let sit overnight
- Stir, crush and mix up
- Rest for a few hours
Egg Tempera
Egg Tempera has also fascinated me. I used to spend time reading about mythology, and the European masters' paintings often illustrated these myths. These paintings would either be oil paint, or very often tempera.
A stellar example is Botticelli's Birth of Venus

Tempera also seemed more accessible while the gums were still in transit, so I tried out egg tempera with the dyes first.
I used this Instructable on making Egg Tempera as a reference.
When painting the faces of young persons... use the yolk of the egg of a city hen, because they have lighter yolks than those of country hens.
- Cennino Cennini
Ingredients :
- Pigments or dye
- Egg yolk
- White Vinegar - 4x the yolk
- Citric acid crystals - 1/2 tsp
Since I wanted to use the dye liquid instead of pigment here as well, I used the egg yolk but instead of vinegar, I used citric acid crystals to compensate for the dye water content.
Steps :
- Heat up the dye to reduce it - I reduced it to about 60% of the original qty but it was still not as dense as I'd have liked
- Separate the yolk from the white of an egg - I used 1 egg
- Add Citric acid powder
- Add dye liquid
- Stir until mixed

Dyestuff, reduction, eggs and tempera mixes


Final paints and Paper swatches with tempera
Watercolour

I used the raw dye liquid as water colour on watercolour paper.
Timeline - Planned vs Executed
| Day | Planned | Actual |
|---|---|---|
| Wednesday | Short List Recipes Go Shopping Start Documenting Prep Fabric Set Up Space Label System Cut Paper for Archive Plan Process |
Short List Recipes – overall choice of dyestuffs and availability Go Shopping Start Documenting Prep Fabric – Scouring Set Up Space – checked |
| Thursday | Cooking + Dunking Documenting Make Instant Swatches |
Finalise Recipes Round 2 of Shopping Documentation Updates |
| Friday | Make Instant Swatches Make Pigment Reveal Make Archive Presentation Documenting |
Final Plan of Execution Number of Swatches & Combinations of Variables Label System Mordanting Dye Extraction (Cooking) Dunking Documenting |
| Saturday | Full Documentation (Website) | Round 2 of Dye Extraction pH Variations Rework Variables and System Soak Papers in Turmeric Dye Sort and Store Various Versions |
| Sunday | Full Documentation (Website) | Rinse and Dry All Swatches Documentation |
| Monday | Beautification & Catch-up for Old Documentation | Ink and Pigment Cut Paper for Archive Make Archive Presentation Documentation Additions and Final Touches |
Swatch assembly
Once the swatches were rested, dried, rinsed and dried again, I started mounting each on a page to assemble the swatch book.


I soon realised that, given 150+ swatches, I would have to scale things up and be efficient about the operation, so I did the following prep
- got a stack of cardtridge papers cut to A5 size at my local photocopier, since they had a paper guillotine that would do the job very well instead of me trimming sheets by hand
- made a basic template to locate mounting points, swatch details, etc in faint grey lines, and ran the A5 sheets through the printer to get the guideline onto the sheets
- used a spreadsheet to combine the various parameters into each unique combination, and generated labels for each swatch with their unique combination of parameters
- got these labels printed and lightly precut on sticker sheets
Once all these were ready (though some of them I realised later) I started stapling each swatch to a card sheet at the right location, as well as sticking the right label onto the sheet. After several episodes of Star Trek Discovery, one season finale, and a couple of episodes after that over the next few days, I was done !


I was dreading having to shoot pictures of all of them to digitize them, and was trying to figure a jig to easily and quickly get that done. I also needed a jig so each sheet would be in exactly the same position in the picture frame consistently, so I could apply the same cropping settings to all the images instead of manually editing each.
However, I gave up on that winding road and just handed my stack of sheets to Mr Kumar, who helps around the school, and asked him to scan them all on the scanner. I showed him the first couple to ensure what I needed, that all the frames be consistent so image edits and crops could be batch processed.
In a few hours, he was done and I was very very glad.
Digital Library
Find the Interactive Tool here
Once the swatches were all scanned in, I decided to have some fun. I already needed a grid to compare the colours and effects on the swatches. I decided to use my p5.js skills and try to write some code that would display the swatches and help in comparing them.

I used keyword classification and sorting the files into folders to add each of the 5 parameters to the filename itself to encode and enable searching and grouping.
Since I knew that each of these 150+ images would need to be loaded into whatever page or sketch I came up with, I decided to create a set of copies that was a low-res copy of these, which would save time and memory when loaded as webpages. These were cropped to leave a white border around the swatch but crop out the label.

Given that I wanted to extract the colour values from the image, I created another set of the low-res images and cropped them to exclude the white paper from being visible at all, just a swatch of the interior area.

Having an idea of what I wanted it to look like, I describe the requirements to ChatGPT to create and iterate over the next few hours.
First off, to prevent having to process the image set everytime the script ran, I asked chatGPT to write me a script that processed each image and wrote the data into a .JSON file that included the dyeing parameters as well as the Hue-Saturation-Brightness values that the code analysed of the swatches.
Then I used it to write me another script that would read the .JSON lookup file and arrange the swatches in a colour wheel. I had it add UI controls, filters and other data-visualisation controls.


Lastly, I got it to create a tool that could arrange the swatches in a grid, based on selected parameters to group, filter and sort by.


I used these tools to analyse my current set of swatches, and it is easy enough to add any more that are made in the future.
Lastly, since I could not really resist it, I used ChatGPT to generate code that would use the swatches as an image filter to apply over any image I fed the tool. It divided the sample image into smaller tiles, and matched each tile to the closest swatch piece, and then rendered a new image using the swatches as individual tiles in a mosaic.


I have used this technique often in my Creative Coding work, but usually I mapped only one parameter, the brightness of the image. Having multidimensional - atleast 3, hue, saturation and brightness - data to match was 2 orders of complexity higher than usual. However, given that I could instruct chatGPT to code in the sorting and matching algorithms, this was short work that would otherwise have taken me days.

Finally, I have launched and hosted the tool as a repo on my personal Github page. Since the page also loads 2 sets of swatches, the storage required is about 20-25 mb. This isn't much for a Github page, but would absolutely mess with the Fabricademy Gitlab website sizes, so I thought it best to host it separately.
Analysis, Learnings and Reflections


- Madder root is slightly lighter and more variable than madder root powder, which is darker and less variable
- 30 min and 60 mins don't show significant difference between the two, while the 12 h ones do
- Adding salt, vinegar or alum into the sample papercup was not necessary
Later Projects and Leftovers
Curcumotype
Using the Fugitive property of turmeric to make sunprints.


Turmeric sunprints will be a lot safer than the chemicals used for cyanotypes.
Currently a WIP. I've made the sensitised papers, but couldn't get good sunshine due to the rains, and I am no longer sure the paper has remained viable or not. I guess I will find out.
Paper making

Potential future project.
Onion peel prints

Something I did with leftover onion peels.
Credits and Acknowledgements
All images are mine unless mentioned specifically or linked to source.
I would, beyond my instructors, owe a total and absolute thanks to my sister who constantly helped me three nights in a row, and more. We worked in her kitchen, borrowing a lot of her equipment from her bakery and fermentary. Doing this module alone would have been impossible. Only with her help, I could do as much as I have.