4. BioChromes
Research
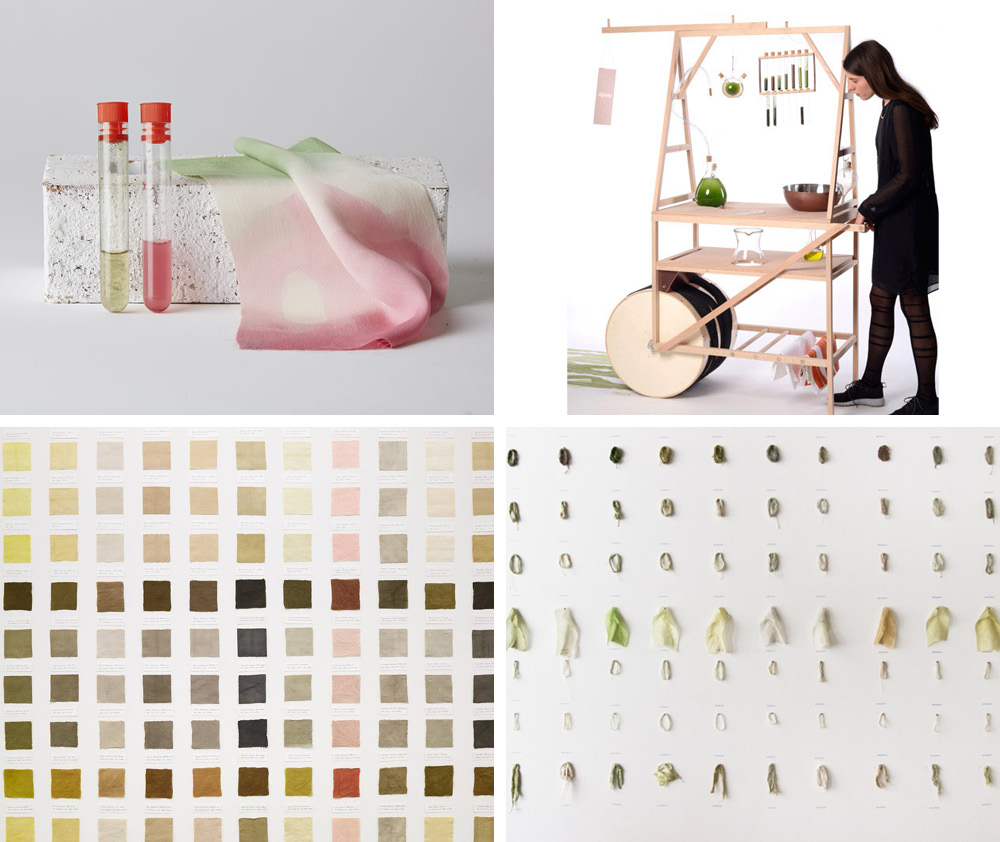
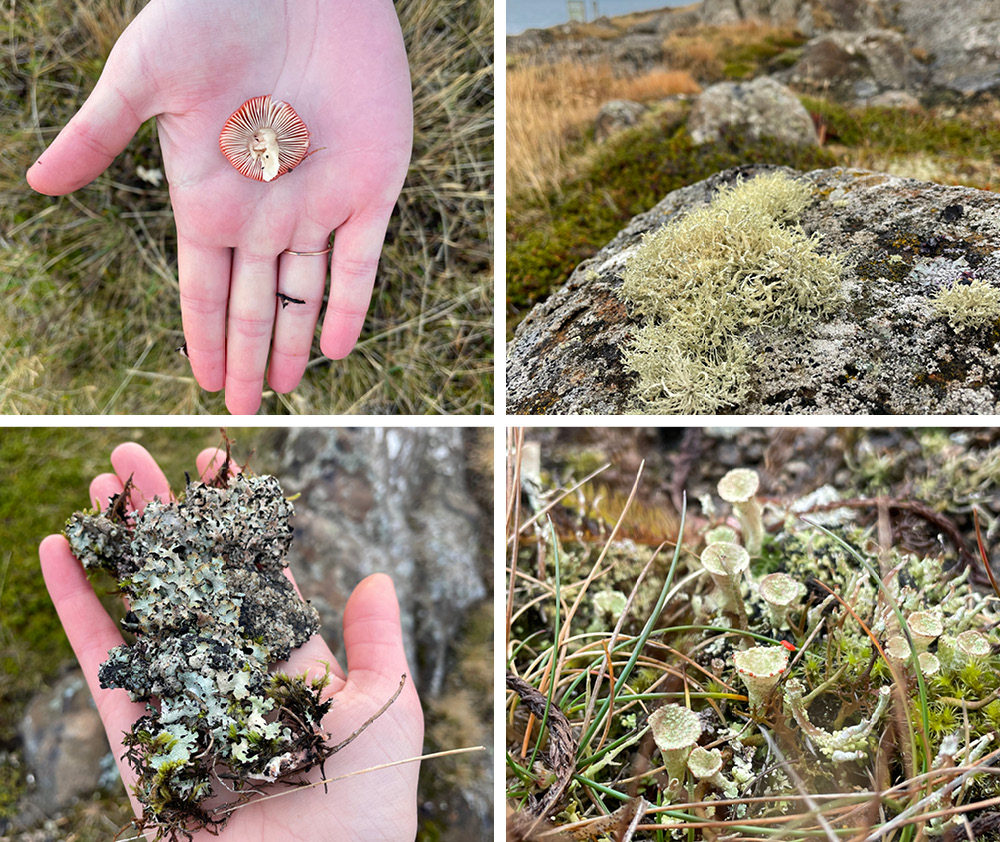
I am very interested in dyeing with algie since I Matís contected me to do some tests with a blue microalgie that they are working on developing for natural food coloring. I found Studio Blond and Bieber's project facinating as they work with many different coloured algie. That is something I woul like to explore more with the algie around Blönduós or in Iceland in general. Sigmundur Páll's project is a nice overview of the natural colours found in Iceland and he even made a very beautiful book with all of his findings. Seaweed is something that surrounds us and is close by so I did some research around dyeing with seaweed since I have never explored that before.
Studio Blond & Bieber Studio Blond & Bieber
References & Inspiration
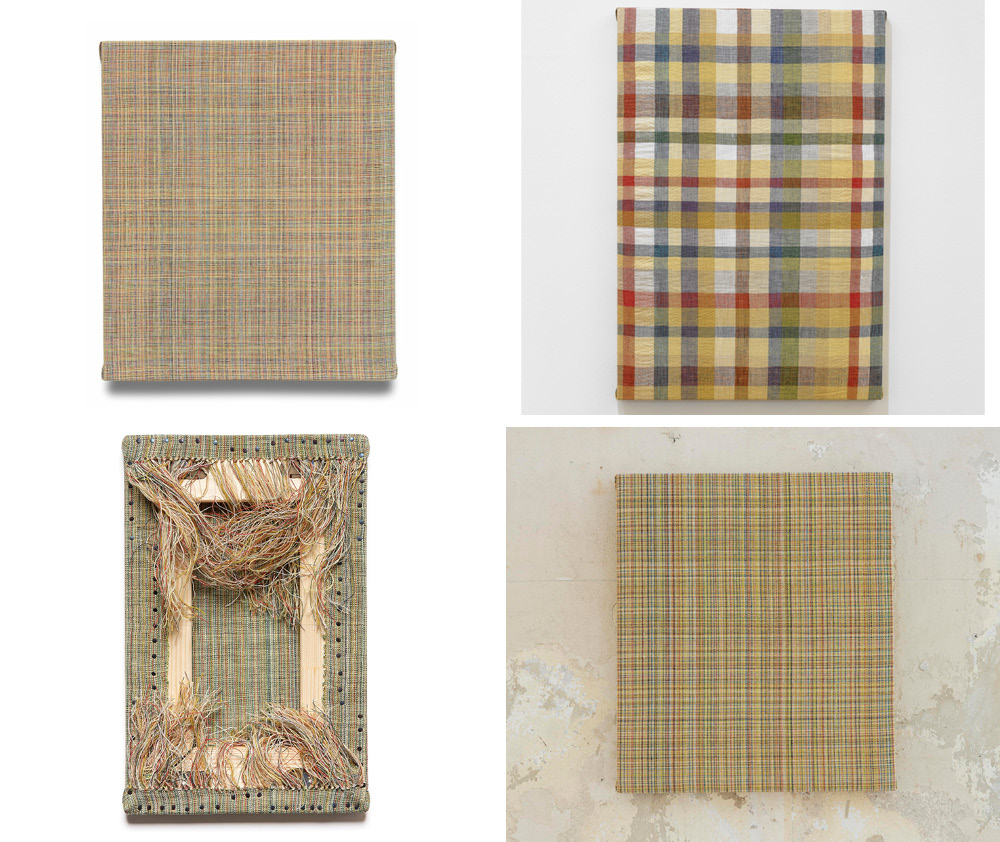
Hildur Bjarnadóttir is an Icelandic artist working with natural dyes in her work. In her Docotors project , Ecosystem of Colors 2016, she looks at the land she owns and the colors it has to offer. The weaving pieces each have one tread of each color she found and dyed with acrilyc thread intertwining with the natural dyed thread is a symbol for her being on the land.

 Catherine Euale gave a lecture about her amazing work that was very inspiring. Working with biomaterials and mycelium only made me more excited to biomaterial week! She also guided us through the bacteria dye process and saved us by bringing healthy, beautiful, purple bacteria from spain to Iceland.
- Hildur Bjarnadóttir
- Guðrún Bjarnadóttir
- Sigmundur Páll Freysteinsson - 40 variations
- Bioshades TextileLab Amsterdam
- Nienke and Xandra van der Eijk / seaweed dye
- coastal colour -Bogolan or mud cloth dyeing process
Tools
- slides from fabricademy
- pots, jars: slide 50 on Biochromes - color & dyes lecture
- music for good vibes
- Good camera to document
- good space to work in
- plastic to put on table for protection
Process and workflow
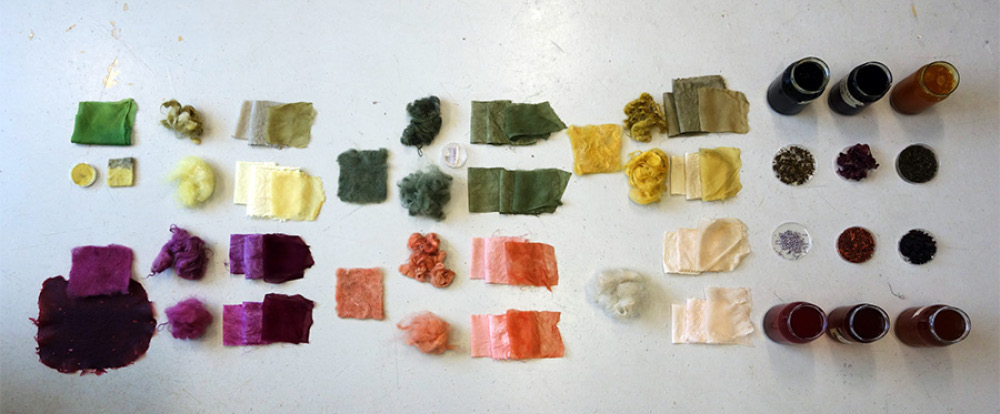
 This week we all worked together making natural dyes, pigments and inks. It was nice since we all hand some knowledge to share and learned a lot from each other. We started of by deciding what dye baths we wanted to do and calculating how much material we should cut for each bath and so on. It was clear from the beginning that wool was the most popular fiber to dye and work with, also because we are so close to it in Blönduós.
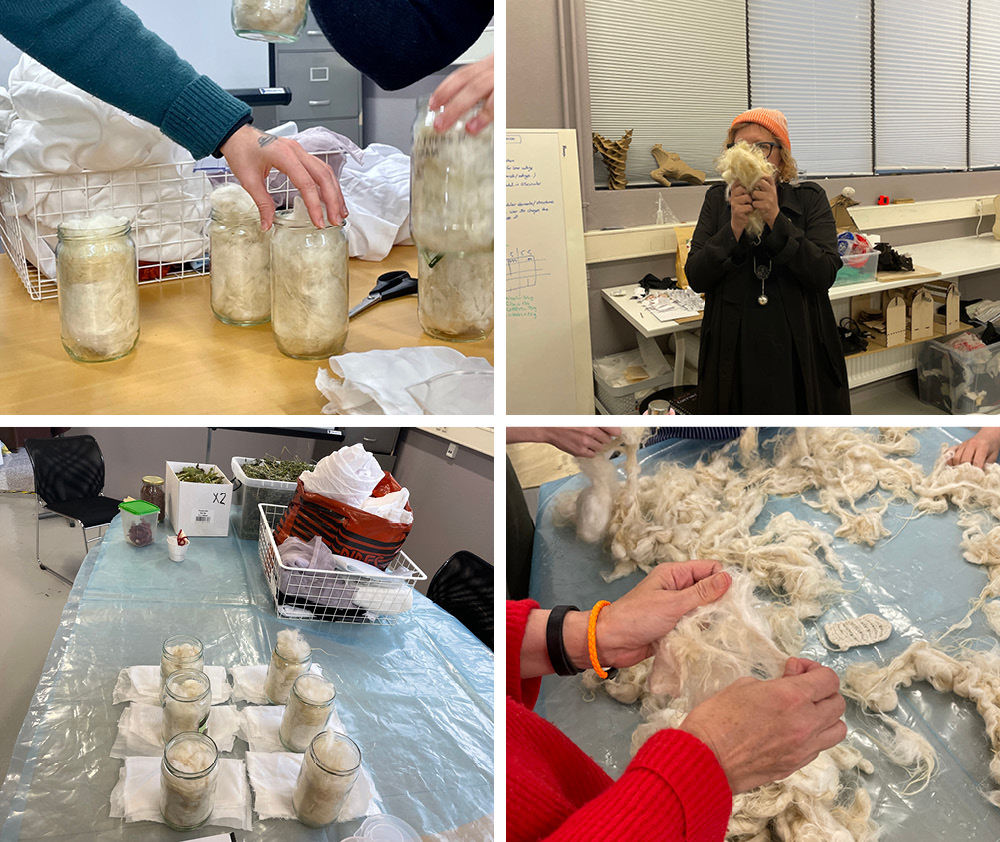
Scouring material
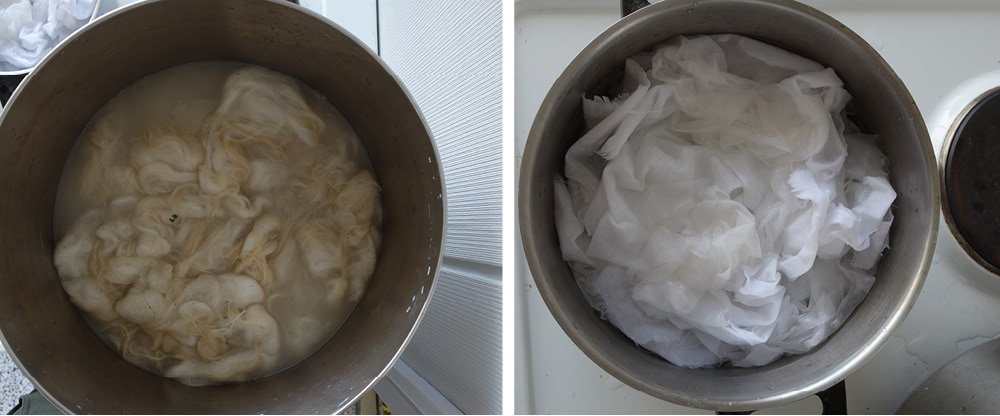
- 810 gr wool
- 2% Sodium carbonate of fabric weight = 16.2 gr
-
water to cover material
-
84 gr Silk/cotton/linen
- 2% Sodium carbonate of fabric weight = 1,68 gr
- water to cover material
Simmer for about 1 hour and rinse
Mordant material
- 810 gr wool
- 12% alum of fabric weight = 97,2 gr
-
water to cover material
-
84 gr Silk/cotton/linen
- 12% alum of fabric weight = 10.08 gr
- water to cover material
Simmer for about 1 hour and rinse
Iron modifying
100% Iron solution 200 ml vinegar 20 gr iron *10 gr sodium carbonate
- mix vinegar and iron together
-
slowly add sodium carbonate to the solution
-
10 ml iron solution
- 90 ml water
Recipe for natural dyeing
Getting fiber ready for dyeing
- Weigh your fiber material
- Scoure the fiber
- Mordant the fiber
Getting dye bath ready for dyeing
- measure plant weight
- add to the pot and cover the plant with water
- simmer for at least an hour, the cool down
Dyeing fibers in dye bath
- strain plant from the dyebath
- mix fibers to the dyebath and simmer for at least and hour
- remove fiber from the dyebath and rinse in water
- hand up fibers to dry
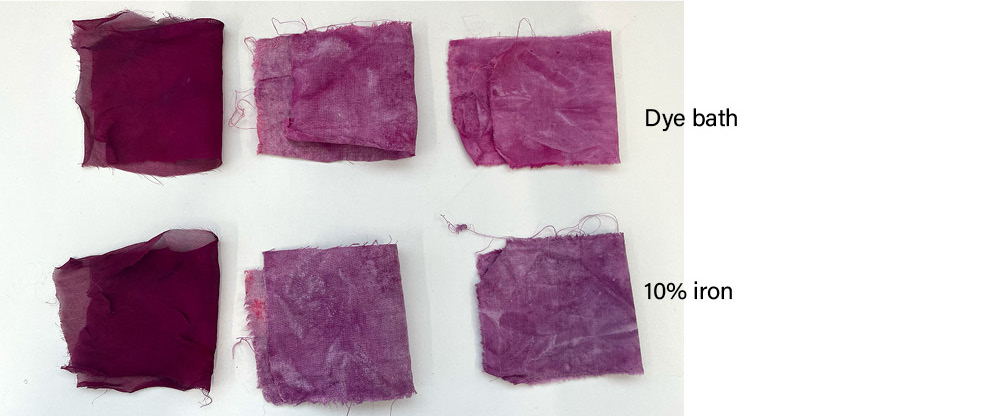
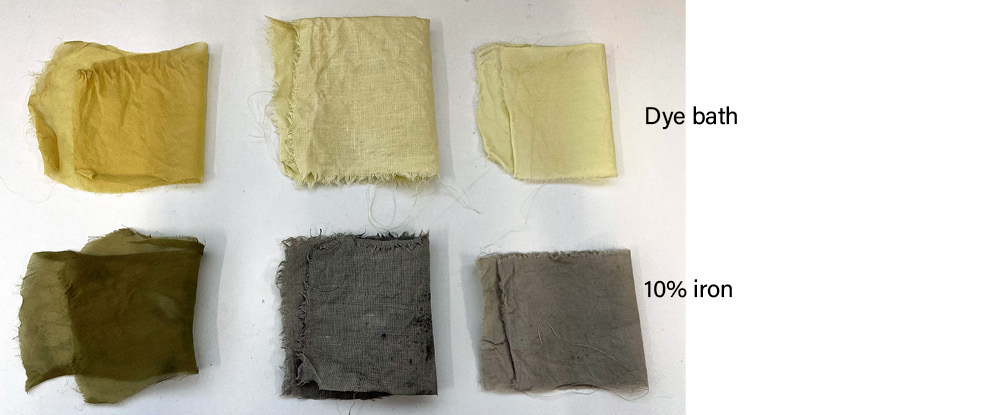
Iron Modifying
* decide what fabric should be modifyed
* make a 10% iron solution with this[3] recipie
* dip the fiber materil into the iron solution - the longer you keep it in the solution the more the colour changes
* rinse in clean water
* hang to dry
* compare fabric before and after modifying
Imported colour dyes
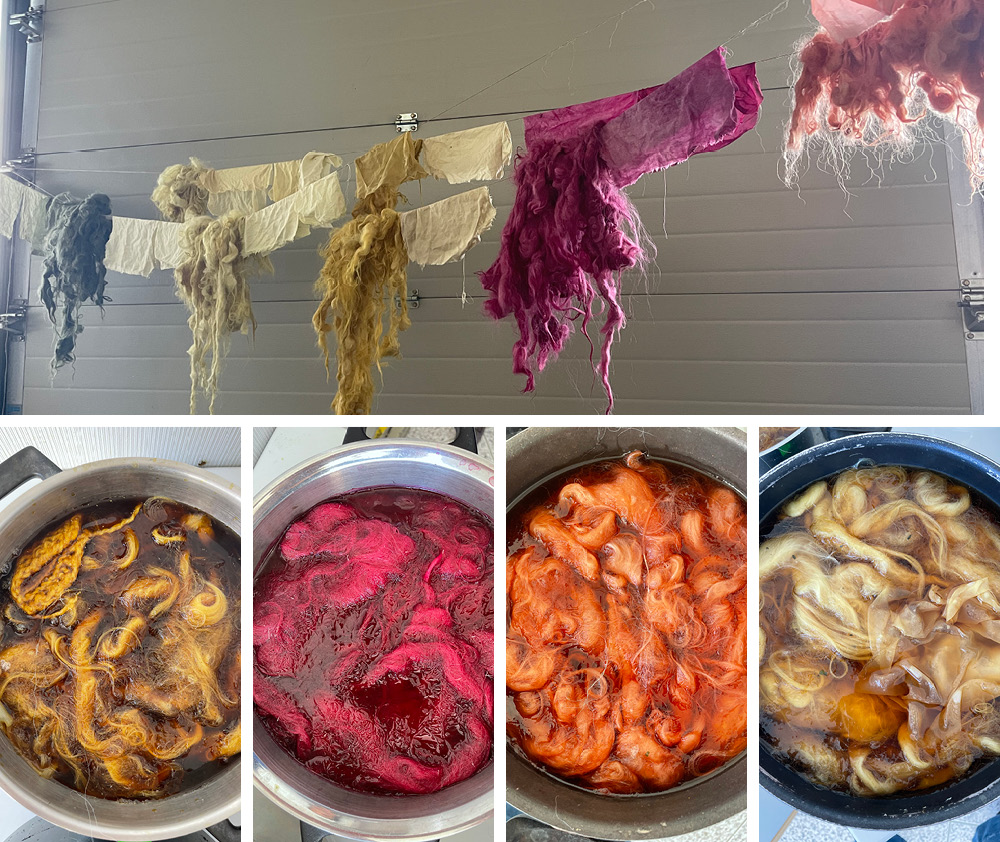
Madder
ingredients
| madder root | water | silk | linen | wool | cotton |
|---|---|---|---|---|---|
| 50 gr | to cover plants | 4 gr | 10 gr | 35 gr | 3 gr |
- Put coocking stove on simmer and dyebath with fiber for about an hour
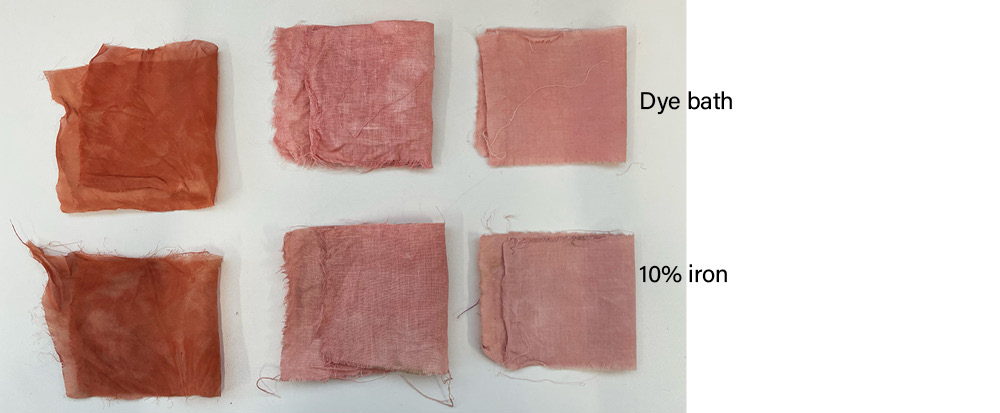
Cochineal
ingredients
| Cochineal | water | silk | linen | wool | cotton |
|---|---|---|---|---|---|
| 10 gr | to cover plant | 4 gr | 10 gr | 35 gr | 3 gr |
- Put coocking stove on simmer and dyebath with fiber for about an hour
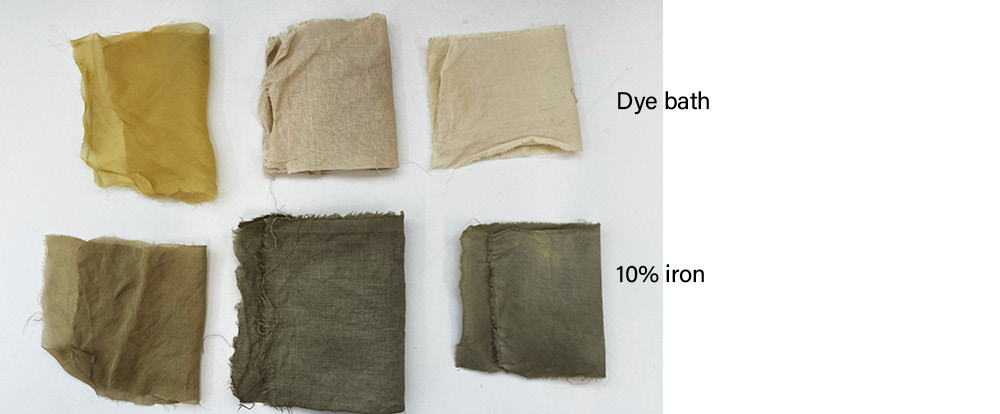
Local colours
Lupine
ingredients
| Lupine dried leafs | water | silk | linen | wool | cotton |
|---|---|---|---|---|---|
| 320 gr | to cover plant | 4 gr | 10 gr | 35 gr | 3 gr |
- Put coocking stove on simmer and dyebath with fiber for about an hour
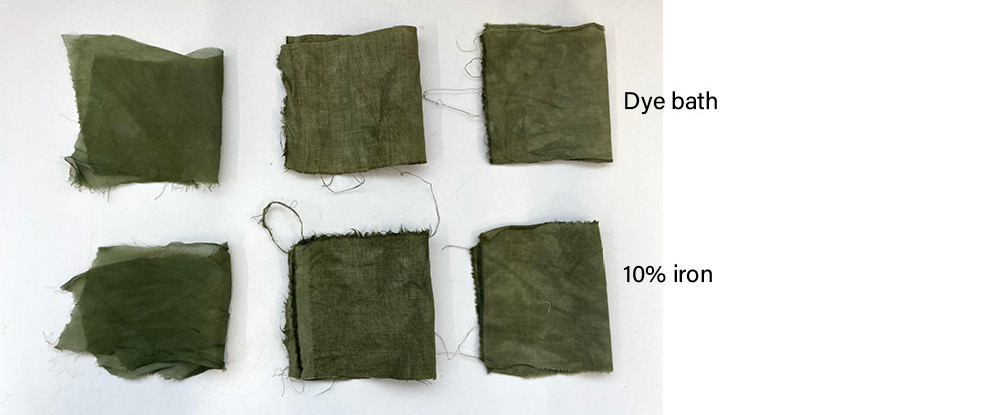
Rhubarb Leafs
ingredients
| Rhubarb | water | silk | linen | wool | cotton |
|---|---|---|---|---|---|
| 160 gr | to cover plant | 4 gr | 10 gr | 35 gr | 3 gr |
- Put coocking stove on simmer and dyebath with fiber for about an hour
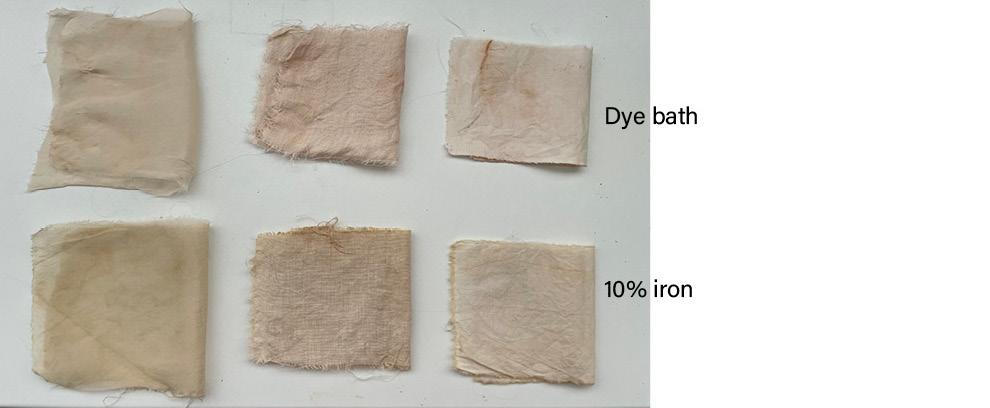
Onion peel
ingredients
| reb onion peel | water | silk | linen | wool | cotton |
|---|---|---|---|---|---|
| 75 gr | to cover plant | 4 gr | 10 gr | 35 gr | 3 gr |
- We let the fibers in at the end of our workday and let is sit in cold dyebath over night
Seaweed
ingredients
| Seaweed dried | water | fabric | wool | wool | cotton |
|---|---|---|---|---|---|
| 310 gr | to cover plant | 4 gr | 10 gr | 35 gr | 3 gr |
First seaweed try did not work well and gave very little colour so again we tried with a different type of seaweed, a more red one and that gave more colour! We let the fibers sit in cold dyebath over two nights, but still it gave little colour but a nice one.
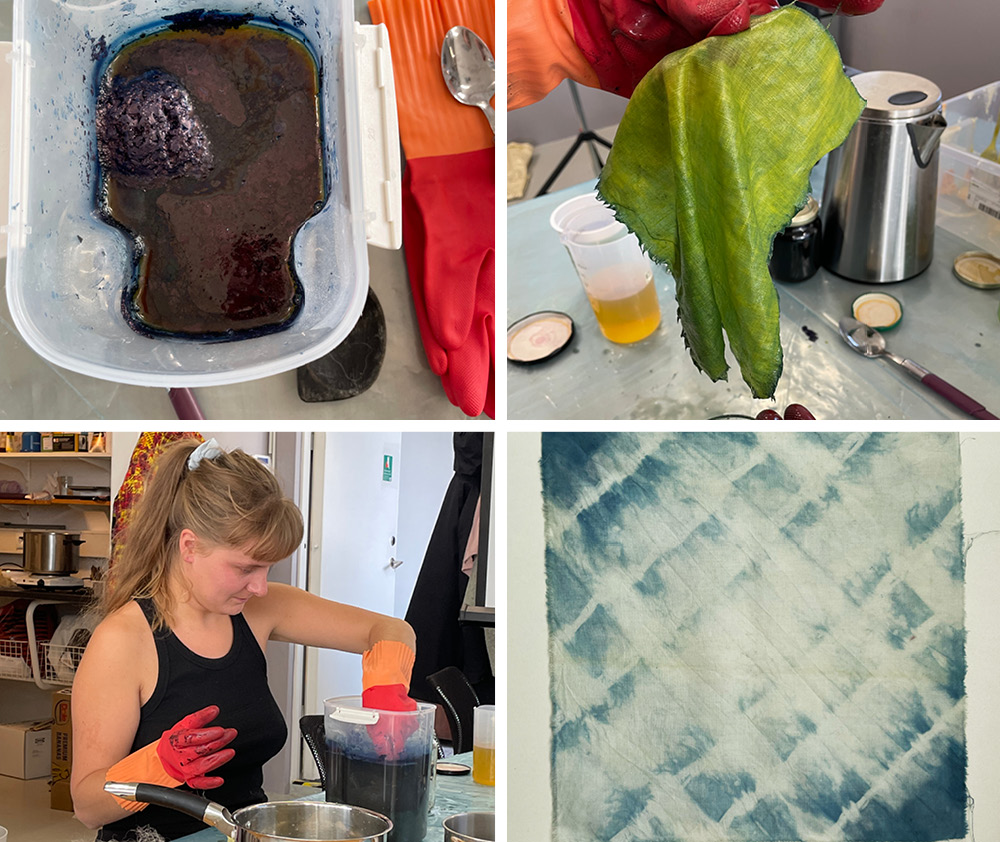
Indigo 123 vat
ingredients
| 1 Indigo | 2 Calcium Hydroxide | 3 Fructose | water | Ph level |
|---|---|---|---|---|
| 15 gr | 30 gr | 45 gr | 1.5 L | 10 |
ratio 1 liter water for 10 gr of indigo 1:10
Tools
- big pot or plastic bucket
- all ingredients
- wooden spoon
- protection gloves
Recipe
- Boil water and put in the indigo vat container
- measure indigo, calcium hydroxide and fructose
- first add the lime and fructose to the water
- make a indigo paste with water and carefully add the indgo to the solution
- stir all together carfully to not add any air bubbles to the vat
- Let indigo vat rest over night
- big pot or plastic bucket
Dyeing
- Soak fibers in water before dyeing with indigo
- squeeze water out of fibers
- slowly lower the fiber into the indigo vat and try not to add any bubbles
- The longer you you have the fiber in the vat the stonger colour it will gain, but it is also possible to dip the fibers more then once into the indigo vat for stronger colour
- Once you pull the fibers out make sure there is no dripping into the indigo vat but rather take the fiber to the site and let is oxidice
- You will see the colout changing from yellow to blue with the indigo vat meeting oxigen
- To stop the oxidation put the indigo into water with a splash of vinegar
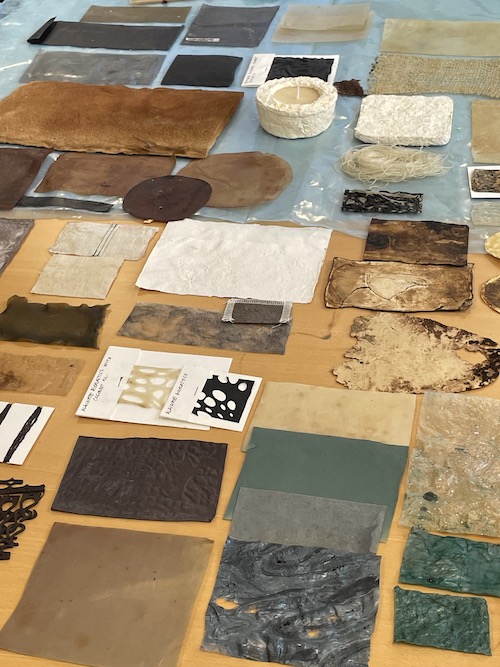
RESULTS
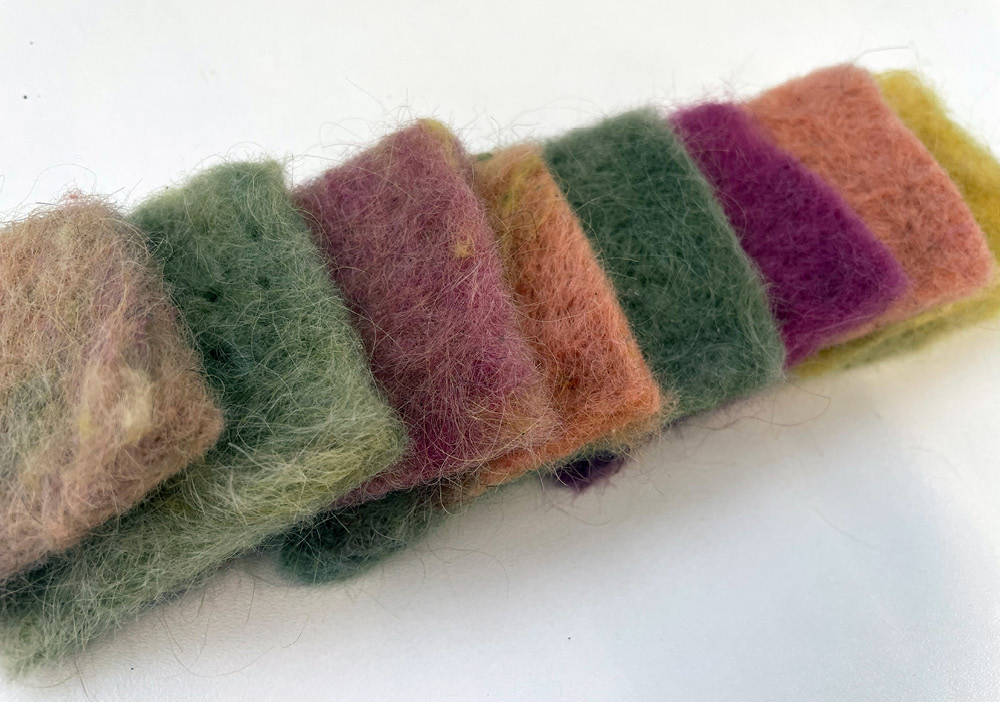
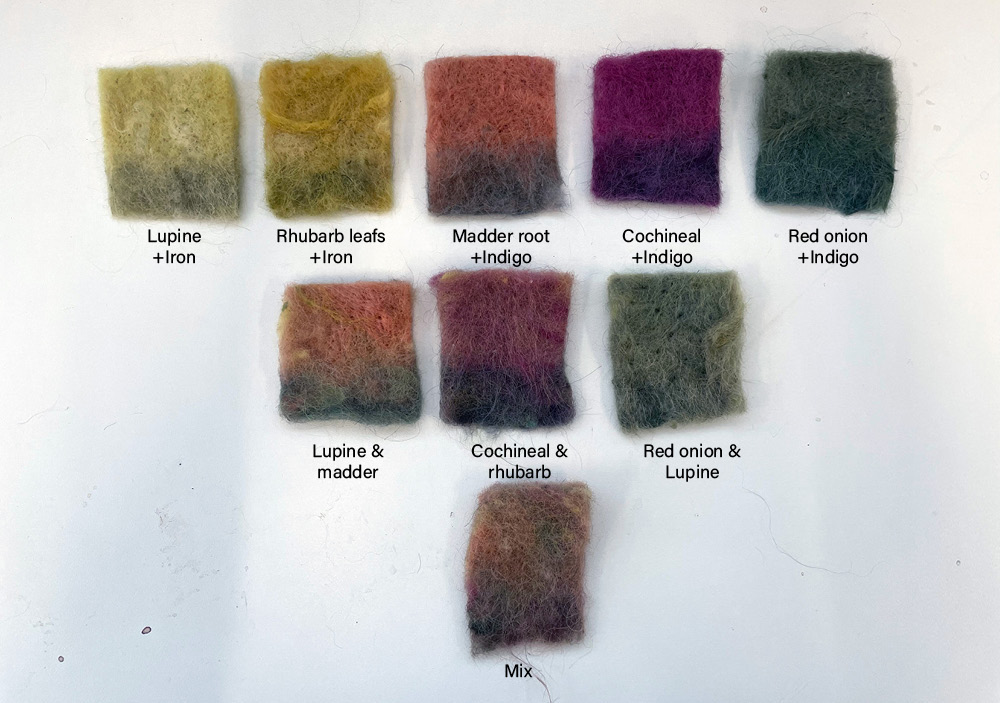
{ width=300 align=right } I made smal felted samples on the feltloom and then i diped half of the samples into either indigo or 10% iron solution. The result are nice and colourful
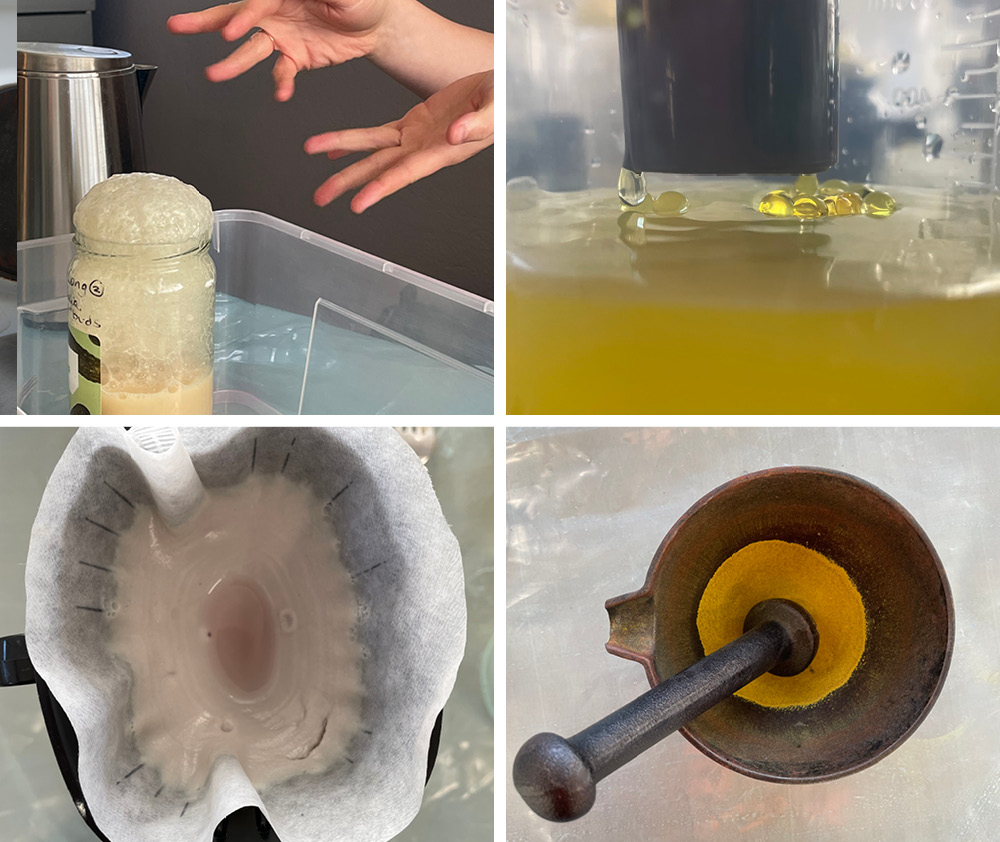
Recycling the dye into pigments
pigment
Pigment consentrades the dyebath to preserve it and ables it to be recycled. you are left with only the pigments from your dye. It can be remade into dyebath, watercolour, paint & screen printing paste. compound?
ingredients
| Dyebath | Alum | sodium carbonate |
|---|---|---|
| 200 ml | 10% | 2.5% |
Recipie
- Dissolve alum in hot water
- add it to dye bath
- dissolve sodium carbonate in hot water
- add it slowly to the dye bath
- filter the solution
- dry it, if it is spread out evenly on baking paper it dries quicker
- grind and preserve in a class jar or other forms
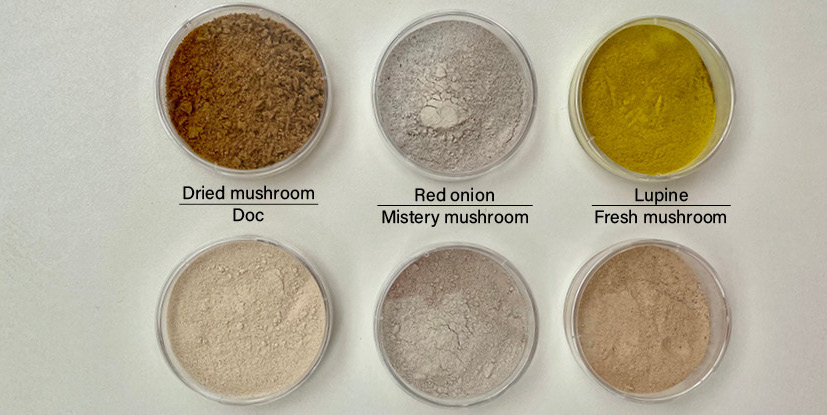
Pigments we made
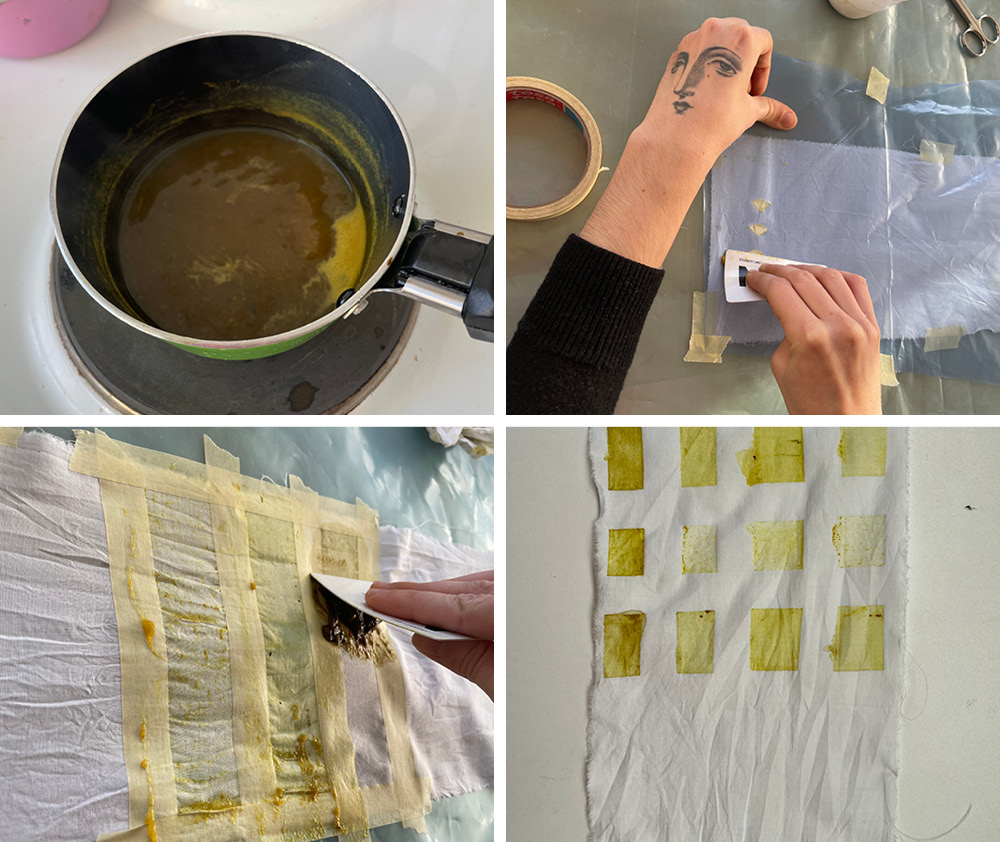
Silk screen paste
| pigment | xantham gum | hot water |
|---|---|---|
| 1 tspn | 1/4 tspn | 100 ml |
| Dyebath | xantham gum |
|---|---|
| 100 ml | 20% |
Recipie * Boil dyebath down to a dense paste by stiring regularly * add guargum or substitude with xantham gum to turn into paste * screen print on mordanted fabric / if not mordanted you can add alum to the paste * hang fabric to dry * steam fabric to about 30 minutes to finalise process.
Inks
Bacterial Dye

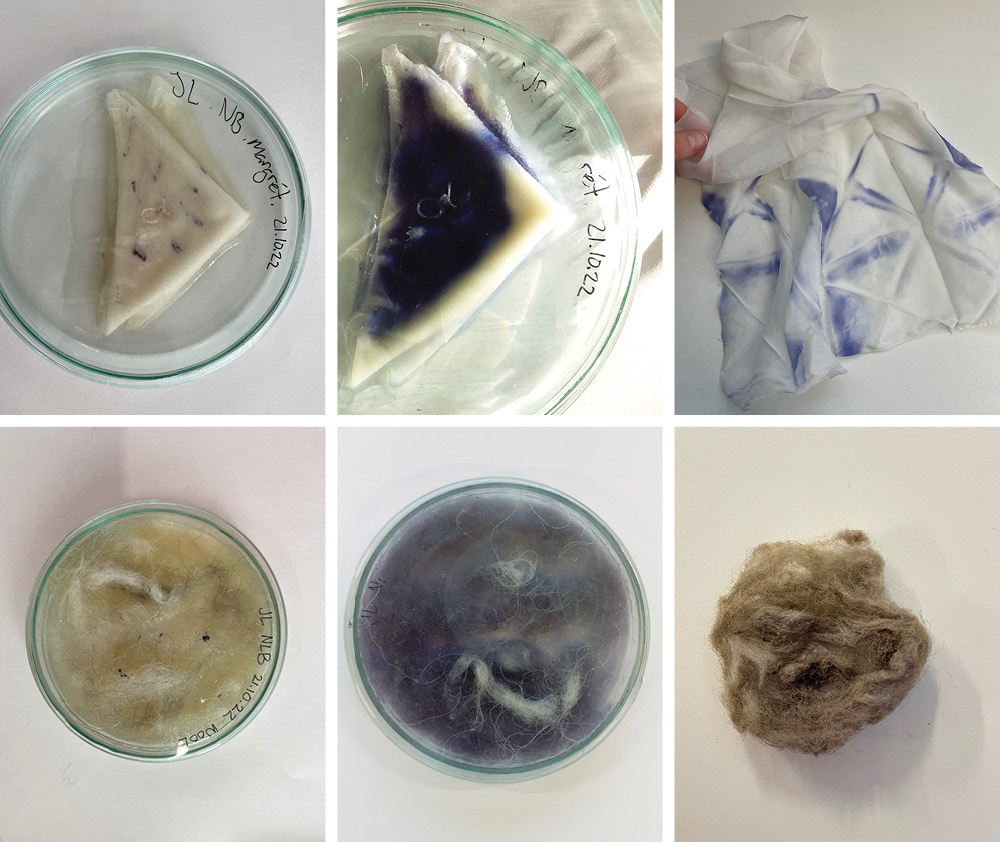
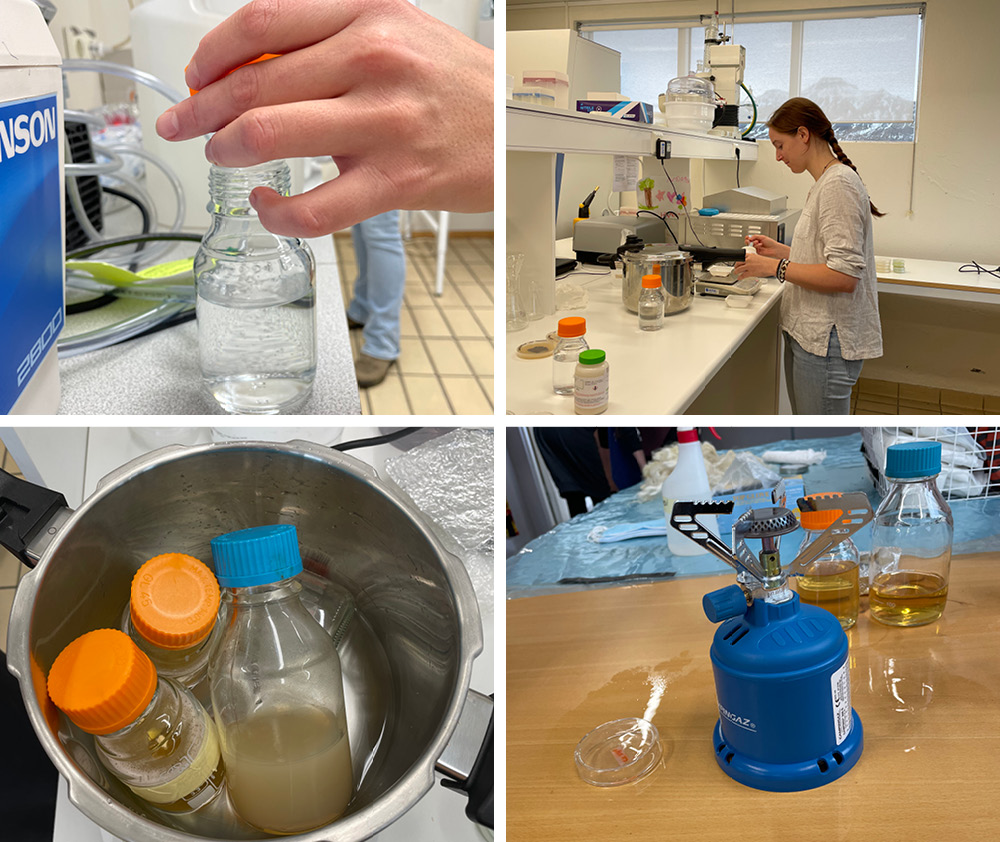
Visiting and working at Biopol BioPol is a marine biotechnology company established on Sept. 1st 2007. It is located in Skagaströnd in Northwest Iceland. There we got a small introduction from Jens, a marine biologise and researcher, about the lab. Next Cathrine Euale showed us how to prepare both nutrient agar solution for bacteria growth and an LB broth solution for bacteria growing on textiles. Unfortunatley we did not have long time there and like everything this week it took patients to wait for the pressure cooker to finnish. Because time ran out we shipped everything with us back to the textileLab and finnished both preparing the petridishes to inoculate pacteria growth and inoculate the LB broth solution with bacteria. We have not yet finished the bacteria dye since we only had short time at the Biopol and newly got healthy bacteria to work with. Excited for next steps!
Tools
- 250 ml glass bottle with cap
- nutrient broth (lb broth)
- nutrient agar
- pipette
- glycerine
- water
- pressure cooker
- petri dishes (glass is reusable)
- inoculation loop
- camping gass + lighter
- parafilm tape
- ethanol
- autoclave bag
- incubator
- fabric
- facemask
Agar plate for bacteria growth**
for goood instructions to follow
| Bacteria | nutrient agar | water |
|---|---|---|
| Janthinobacterium lividum | 5 gr | 200 ml |
- take the 250 ml bottle and fill it up to 200 ml with water
- Dissolve 5 gr of nutrient agar
- Close the bottle with the cap and gently mix a little bit
- Unscrew the cap a little bit so that it’s not sealed
Lb broth for textiles
| Bacteria | LB broth | water |
|---|---|---|
| Janthinobacterium lividum | 5 gr | 200 ml |
- take the 250 ml bottle and fill it up to 200 ml with water
- Dissolve 5 gr of nutrient broth
- Close the bottle with the cap and gently mix a little bit
- Unscrew the cap a little bit so that it’s not sealed
Sterilize
- Set the pressure cooker to high pressure
- put the cooker’s temperature to low heat for ±20 minutes
- turn heat off and wait until the pressure cooker’s pin is down and there is no more steam (pressure is off)
Prepare
- Prepare the petri dishes by writing all the information on the back (medium, bacteria name, date and person)
- Poor alcohol on the table and sterilize the area
- Place the camping fire next to the sterile area and turn it on
- Unscrew the bottle’s cap but try to hold it close to the bottle opening for less contamination
- Quickly open the petri dish and poor in a layer (a couple of mm) of nutrient agar
- Let it rest until firm
Inoculating
- Place the camping fire next to the sterile area and turn it on
- Take the metal inoculation loop and sterilize it by passing it onto the flame
- With quick and carefull movements: open slightly the cap of the dish with the bacteria towards the flame
- Dip the still warm inoculation loop in the medium next to the bacteria (not on bacteria)
- Now swipe gently over the bacteria
- Trasfer bacteria on the new petri dish (or on the textile)
- Seal the petridish with some Parafilm tape
Inoculating
- Poor some alcohol on the table and sterilize the area
- Place the camping fire next to the sterile area and turn it on
- Take the metal inoculation loop and sterilize it by passing it onto the flame
- With quick and carefull movements: open slightly the cap of the dish with the bacteria towards the flame
- Dip the still warm inoculation loop in the medium next to the bacteria (not on bacteria)
- Now swipe gently over the bacteria
- Unscrew the bottle’s cap and try to hold it close to the bottle opening for less contamination
- Trasfer bacteria into the nutrient agar solution
- Seal the petridish with some Parafilm tape
Growing store petridishes at around 22-25 degrees celsius in an incubator or similar. In Iceland we still do not have an incubator(but in hardware week things will change) so we dound a nice cosy place first next to the radiator and then they moved into Lousie's house for even better conditions! The materials I used was silk and Icelandic sheep wool. The silk turned out really well but the wool turned more greyish out, but a good comment from Petra Garajóva is to dye the wool 2-3 more times to have the wool really take in the pigment!
| 1 stage | 2 stage | 3 stage |
|---|---|---|
| material right after bacteria transfer | after 1 week of growing | en result after killing the bacteria |
| The materials I used was silk and Icelandic sheep wool. |