2. Digital bodies
Your body is your temple and the canvas for every designer, sculptor or artist
We learned how to create a manequin with different programs digitaly
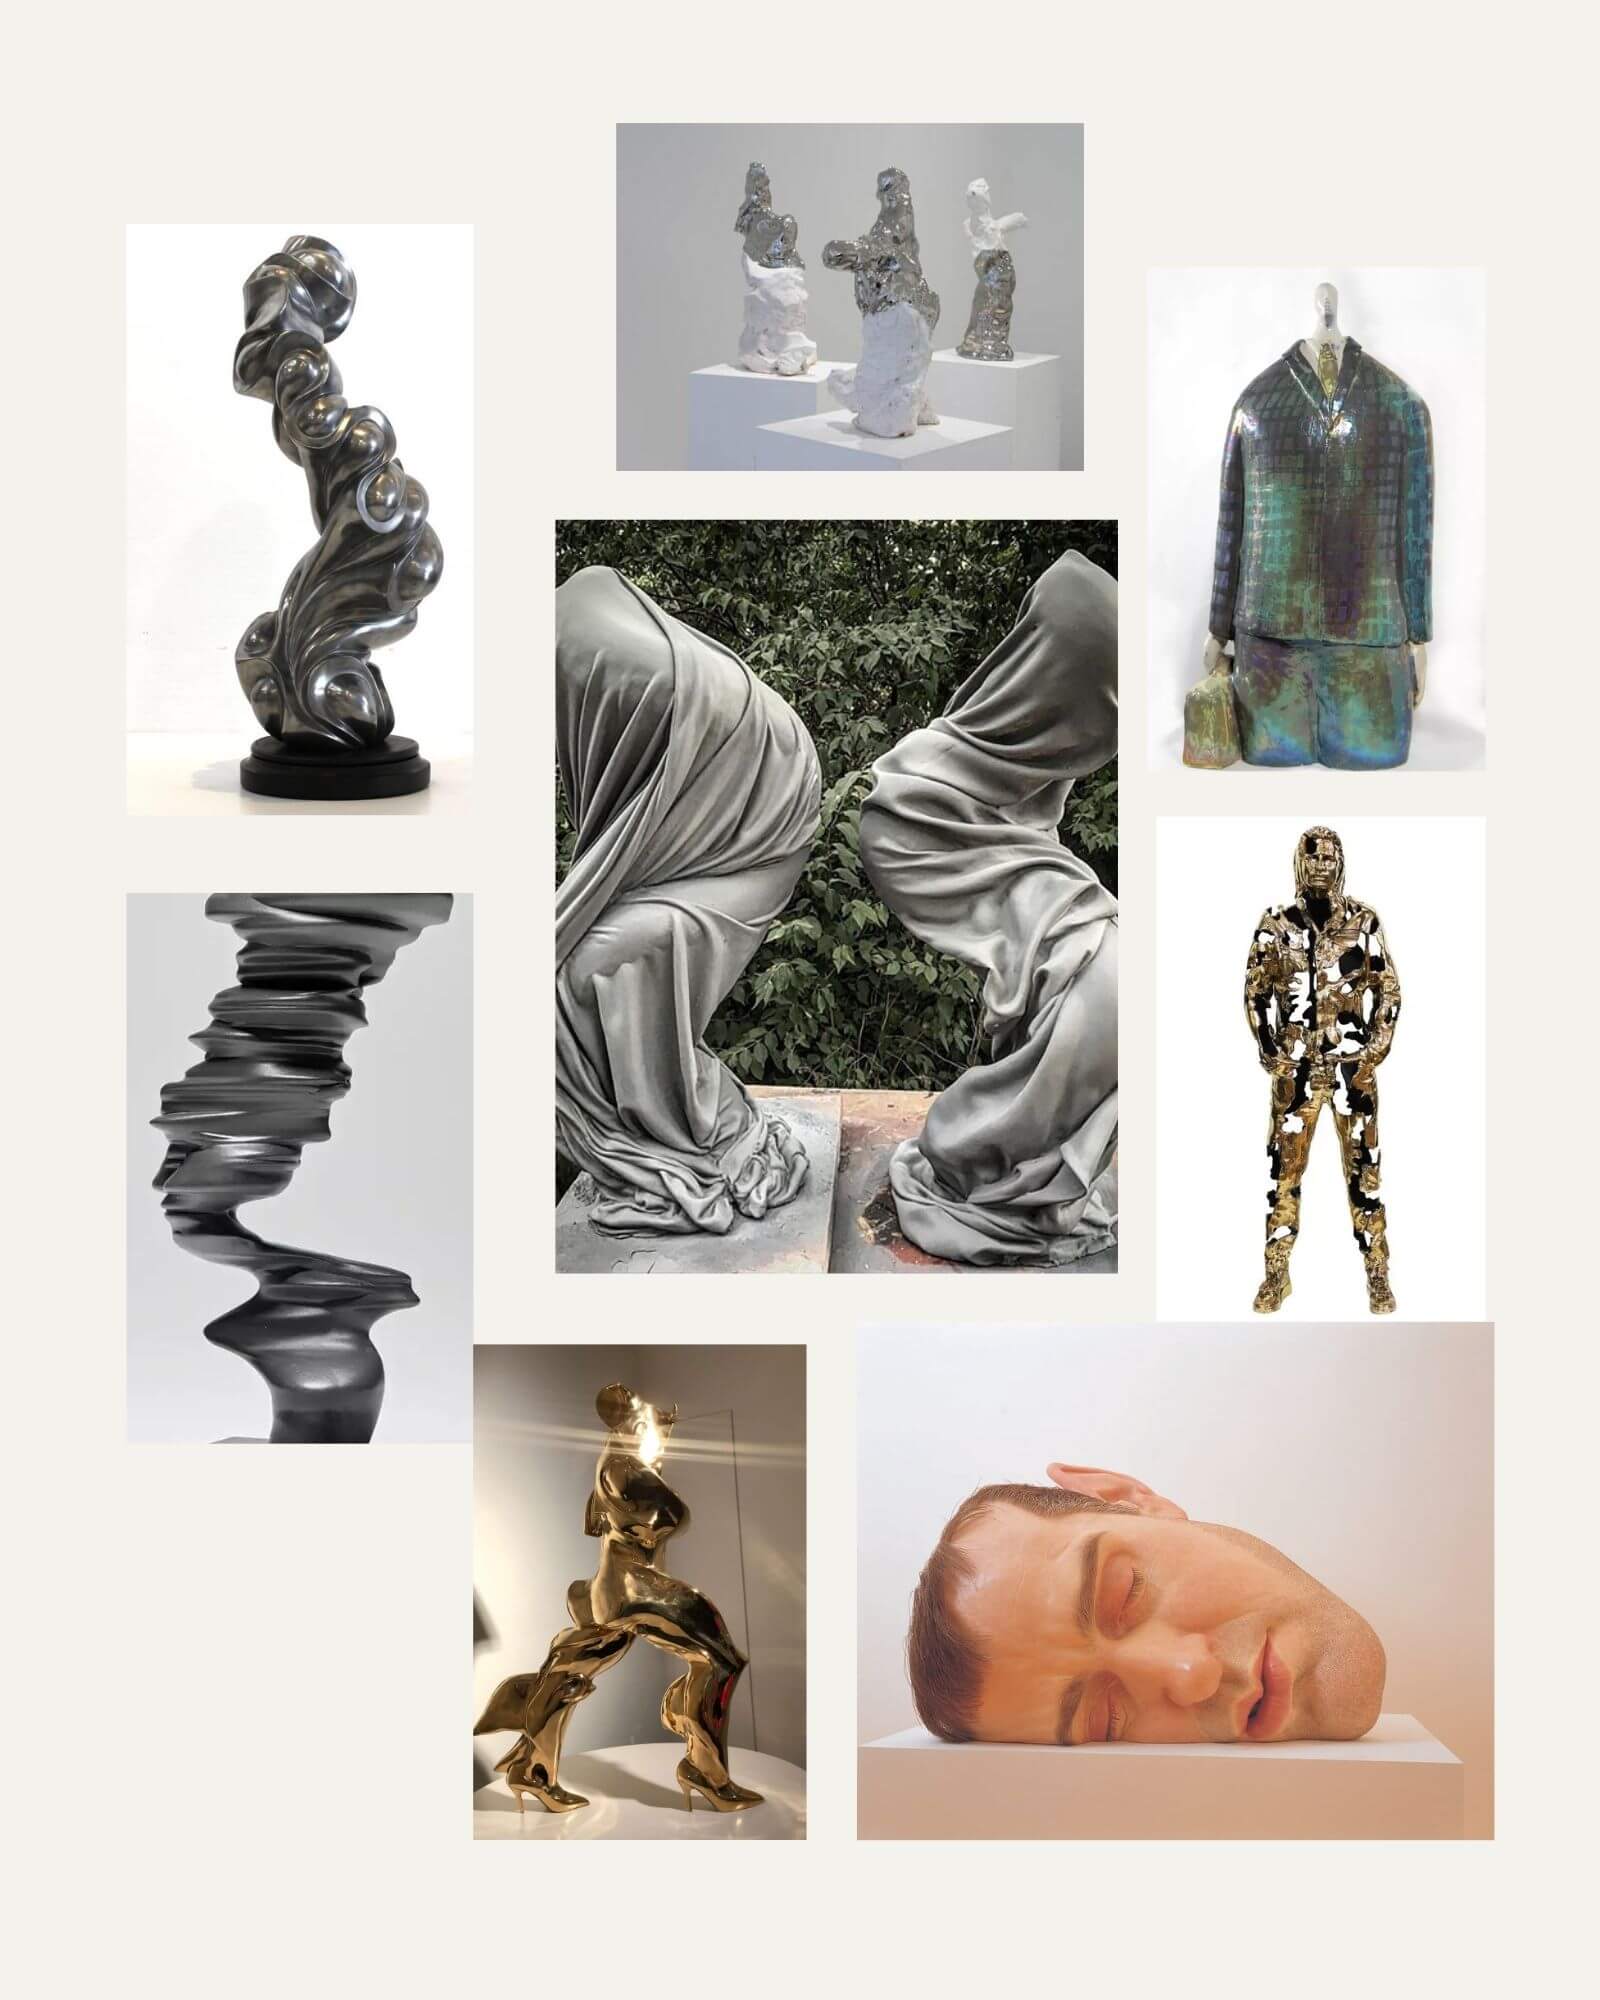
References & Inspiration
Sculpture and art was a great source of inspiration for this project as the can express different emotions.
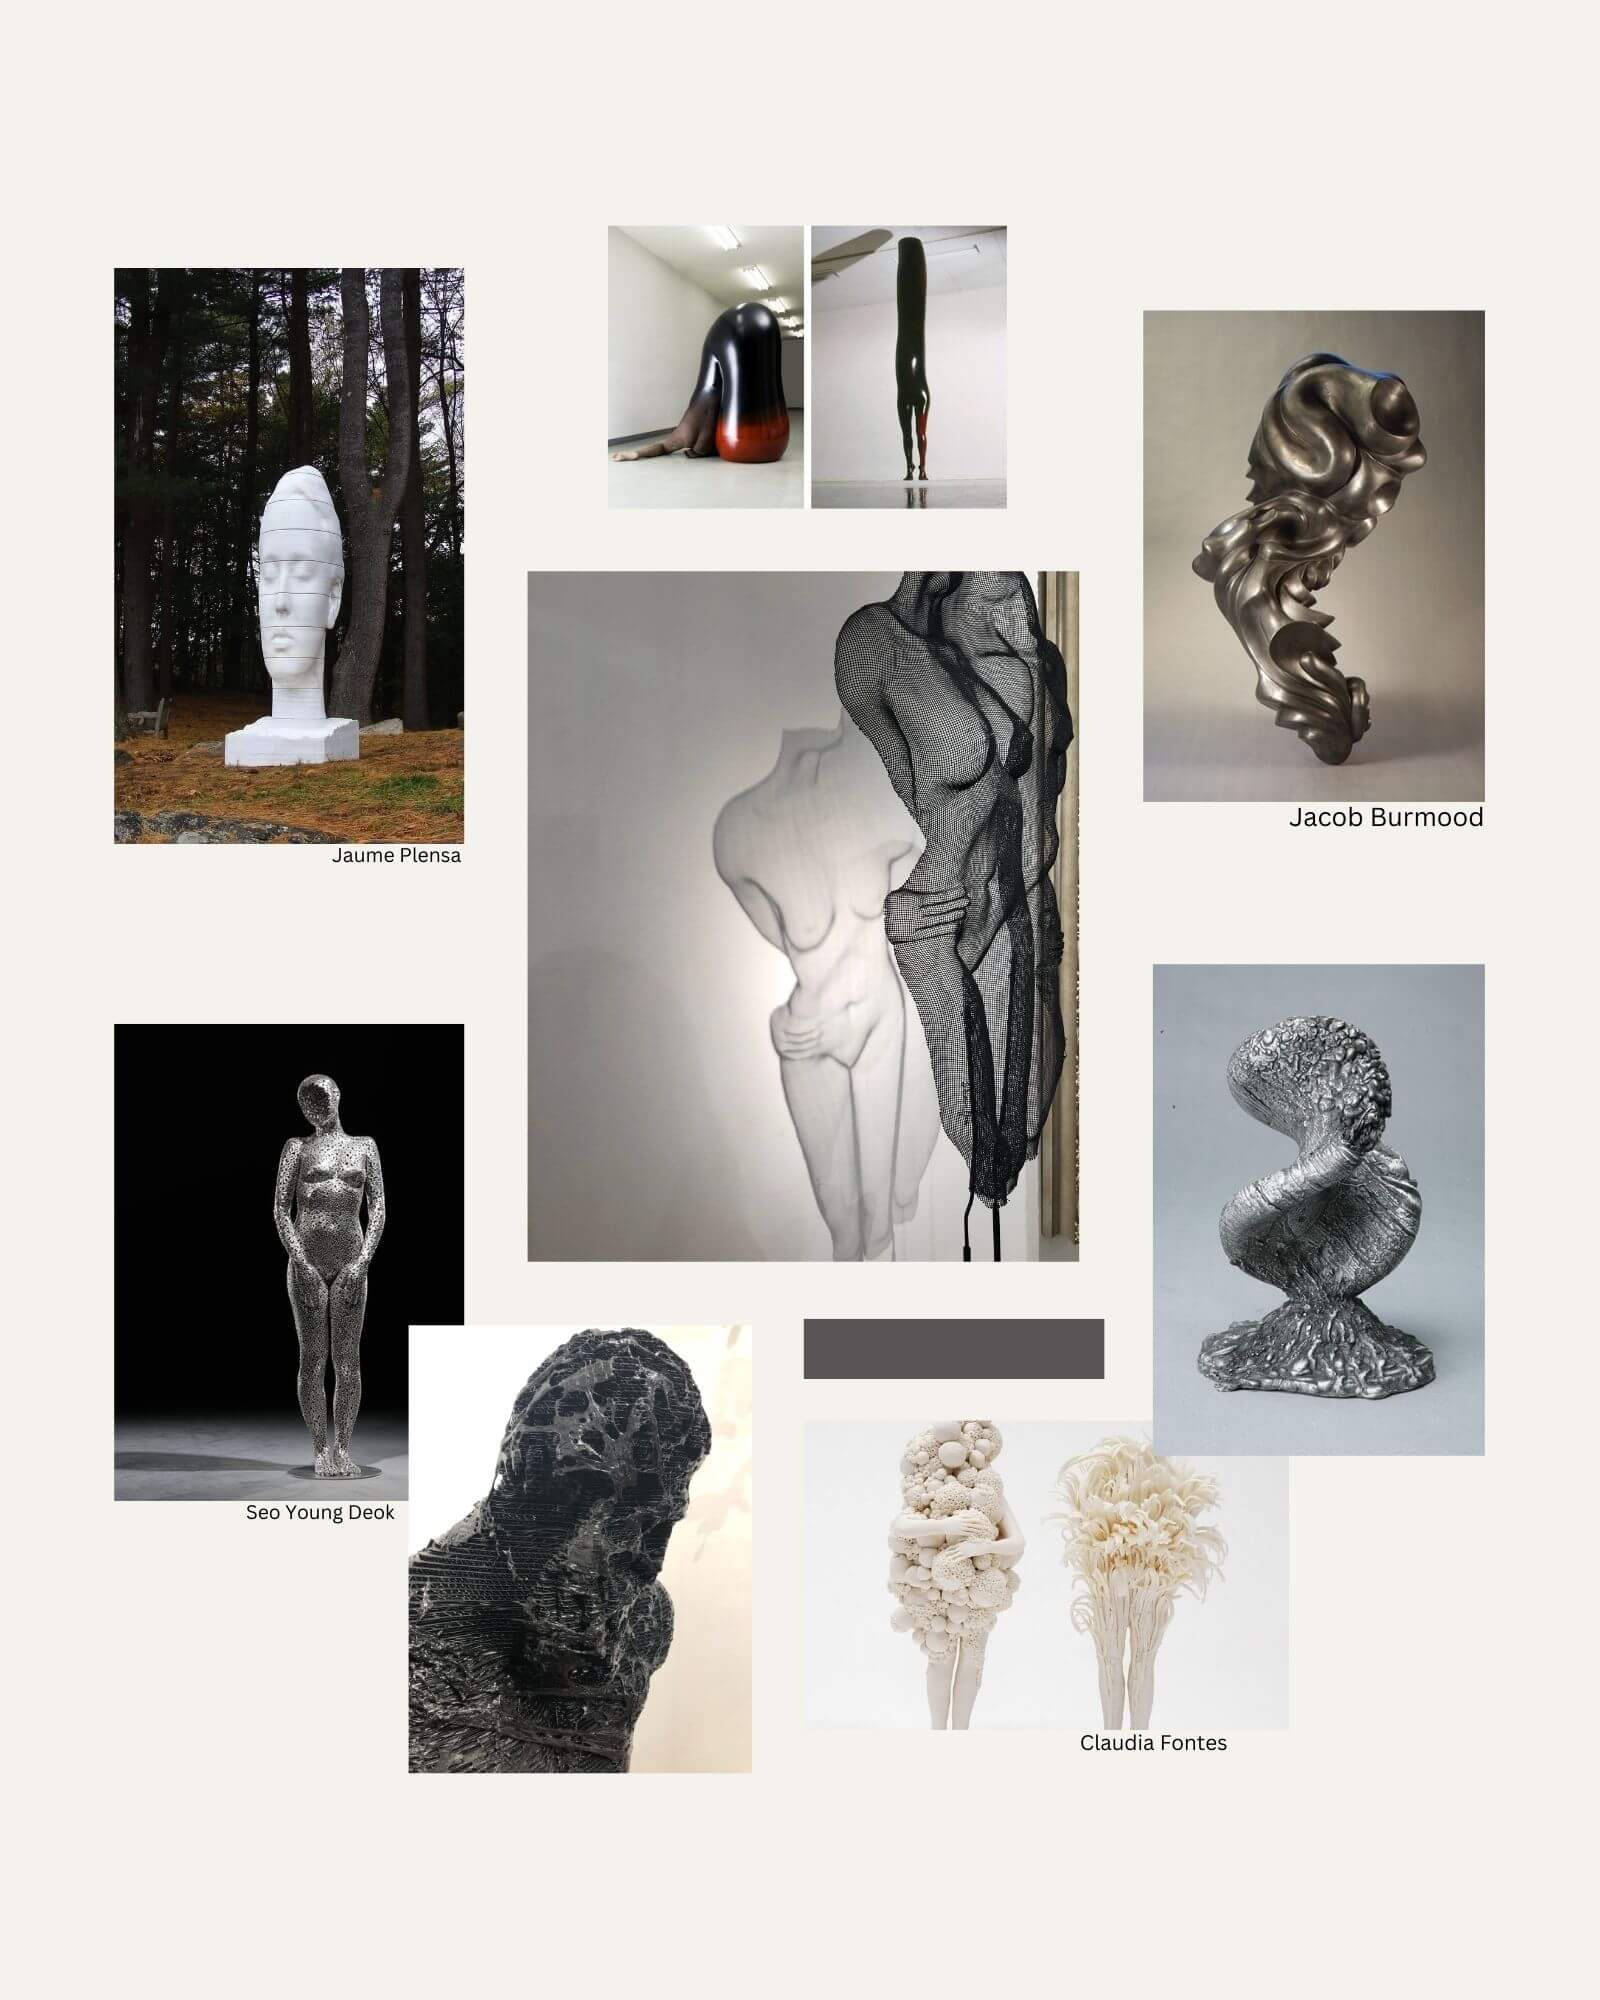
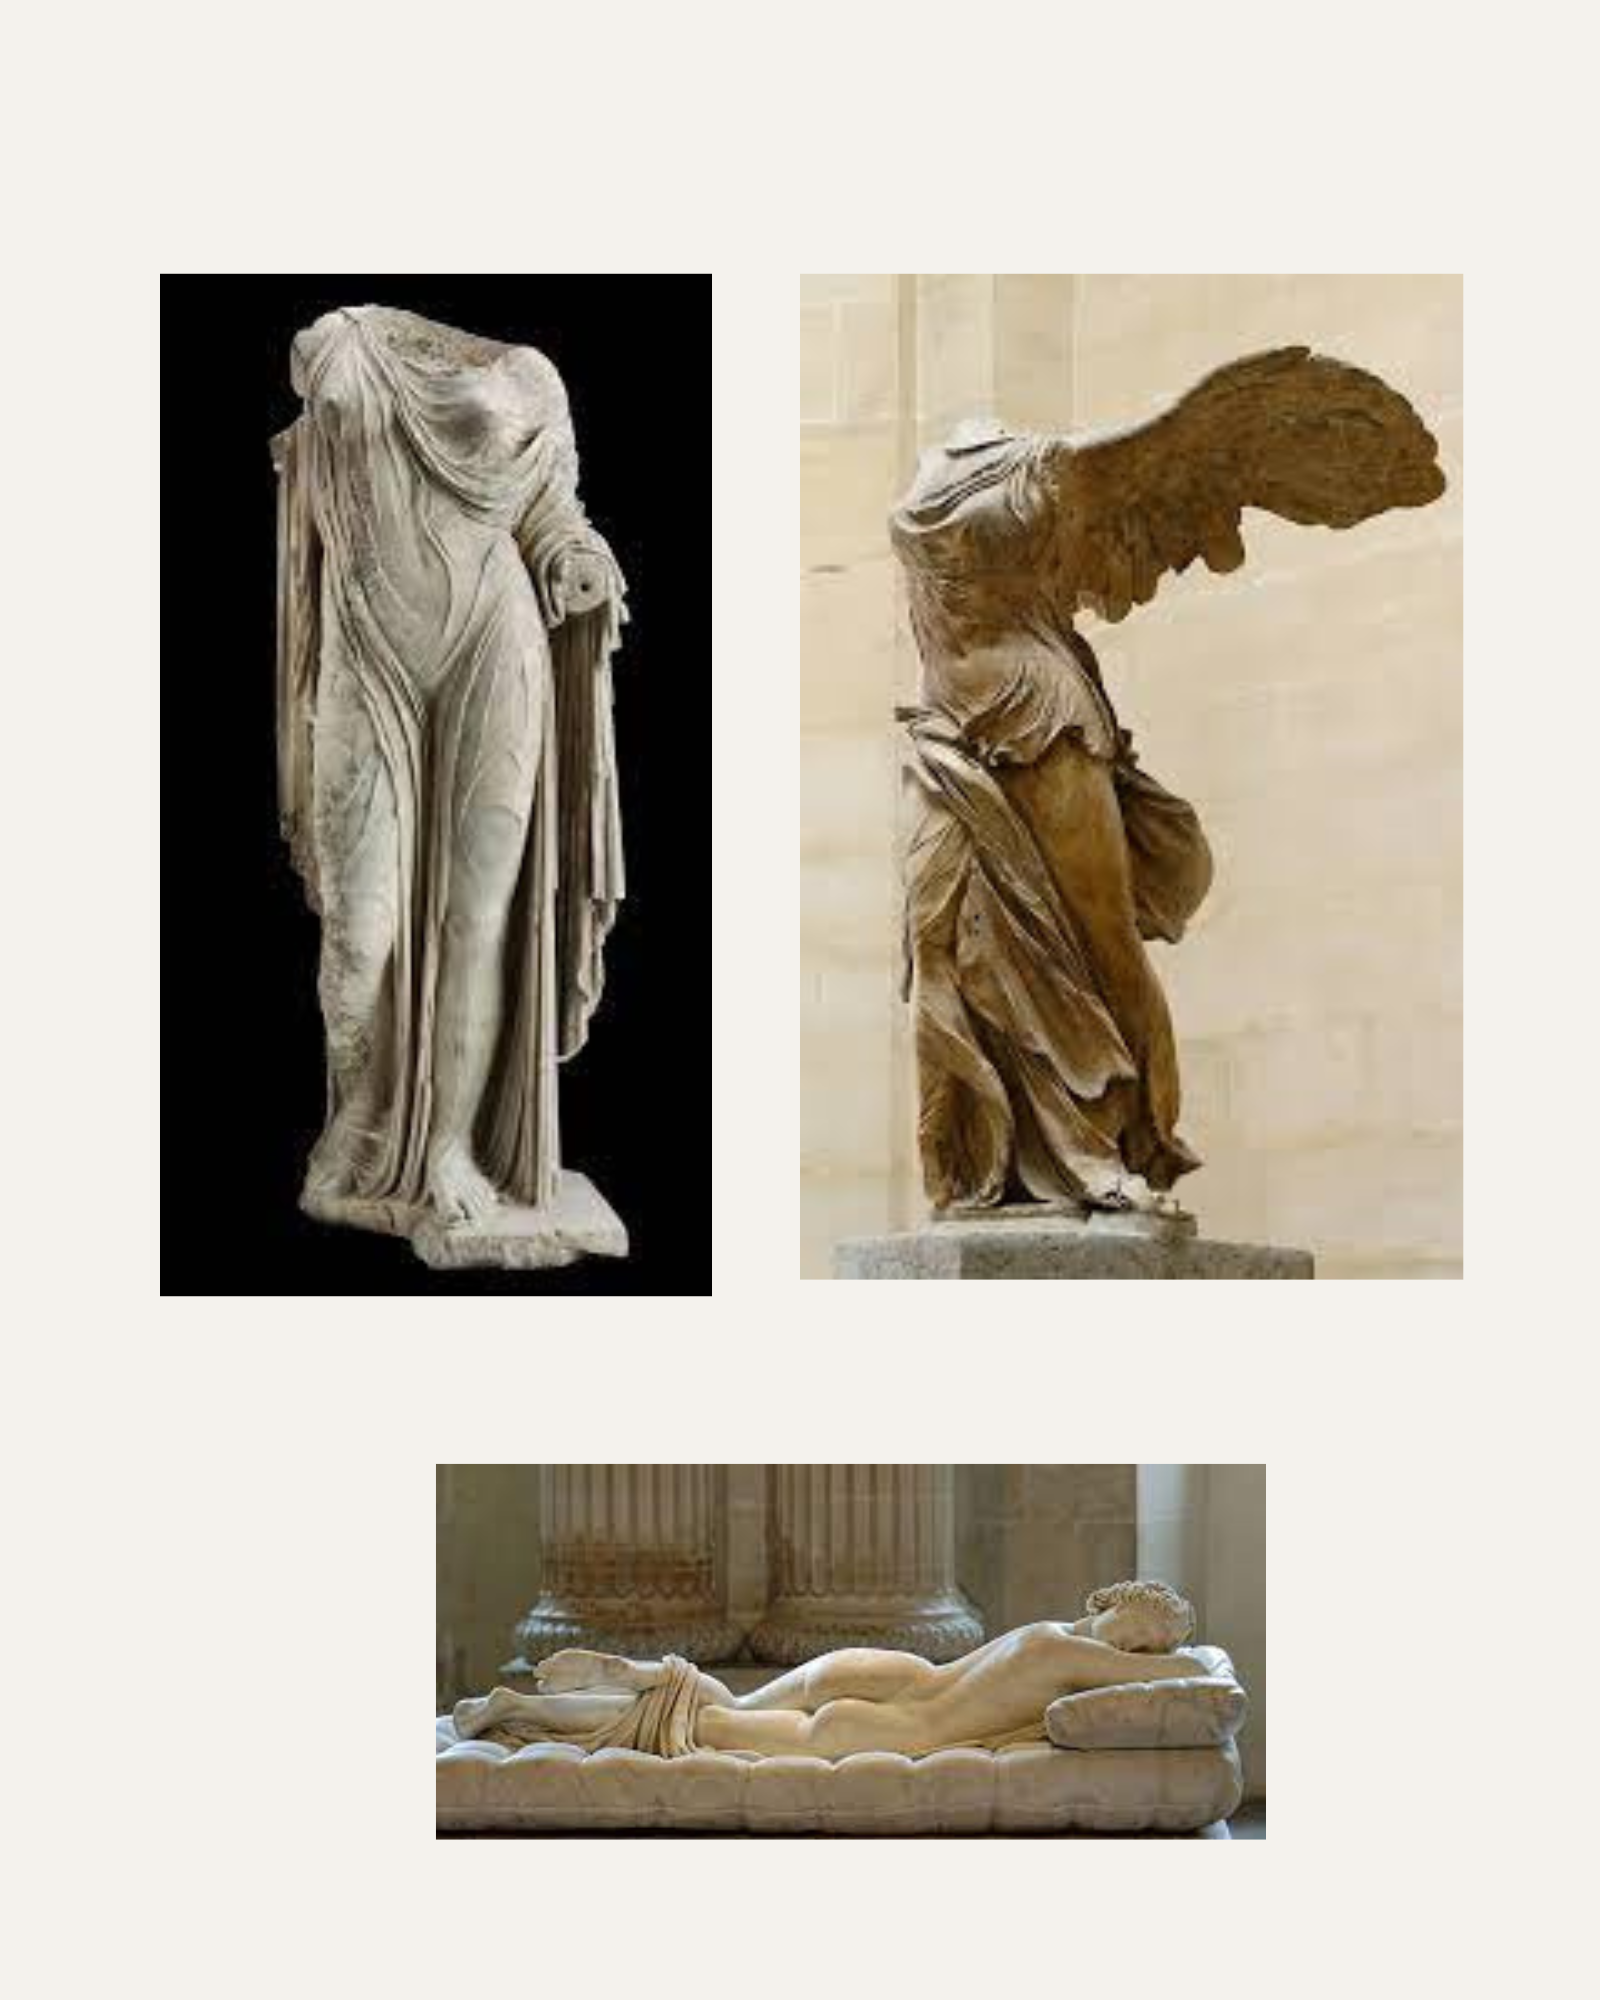
Being Greek, I wanted to include Greek sculpture as a reference such as the Winged Victory of Samothrace up to the right,
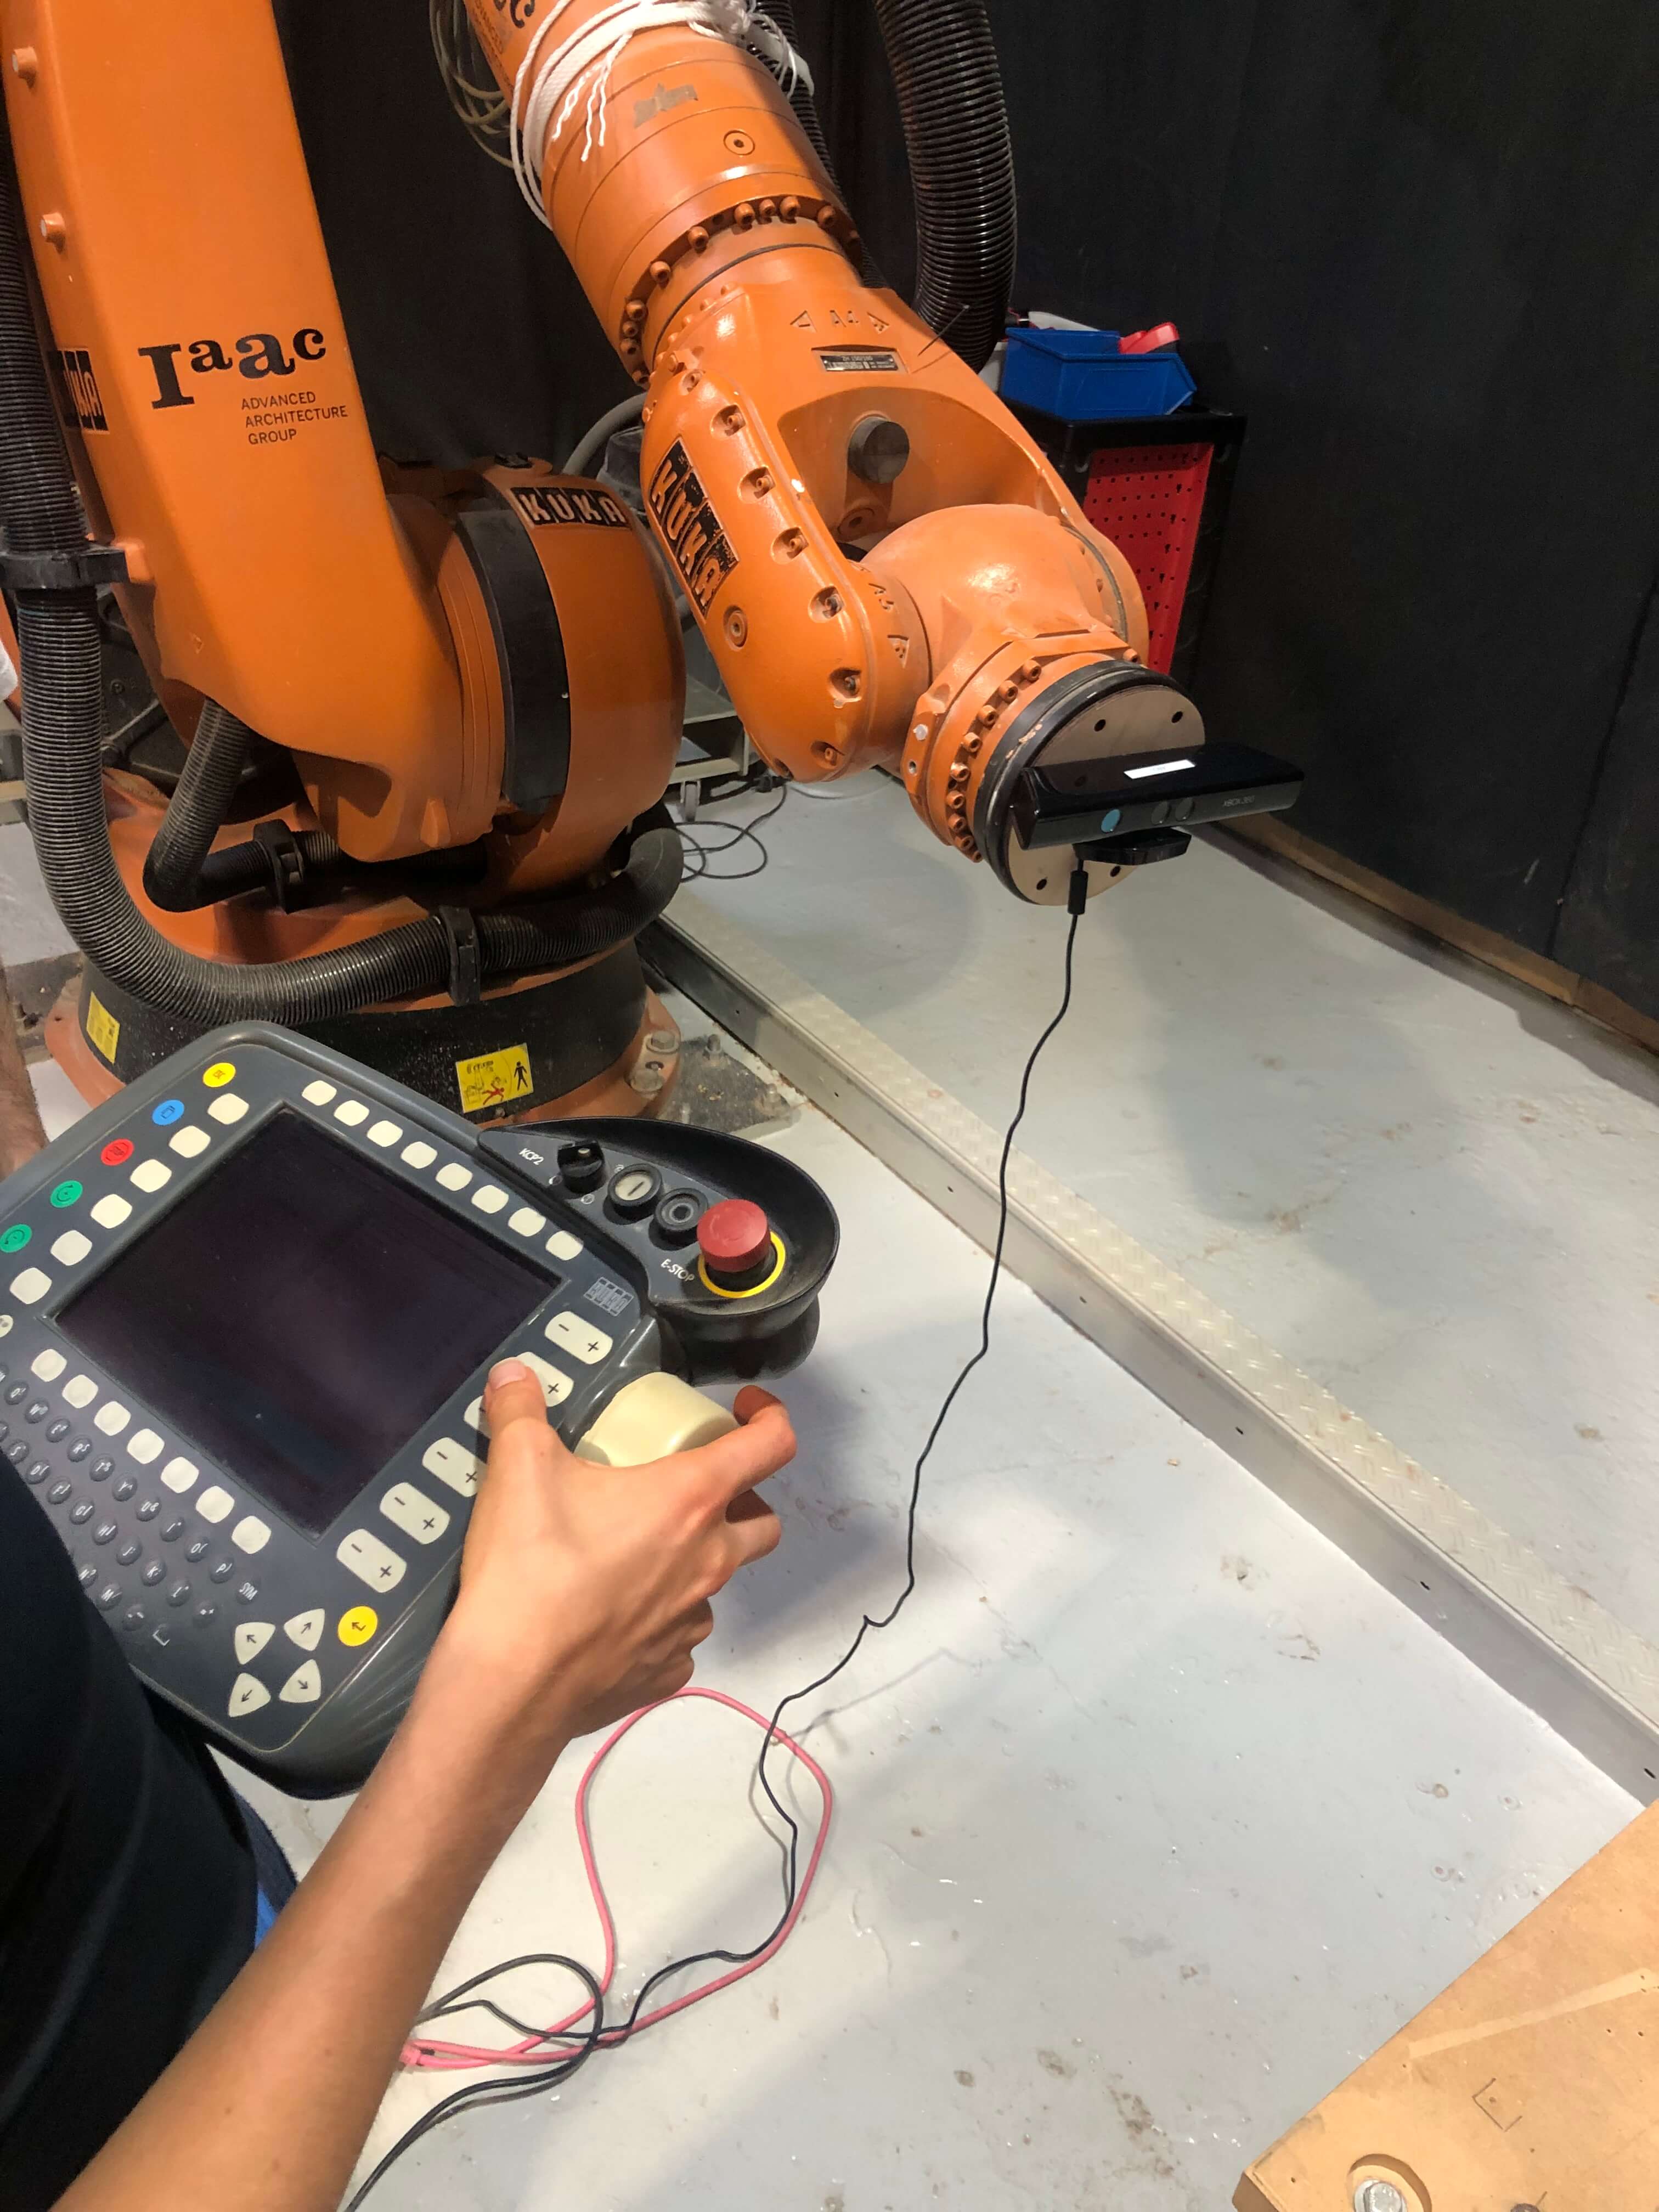
3D SCANNING
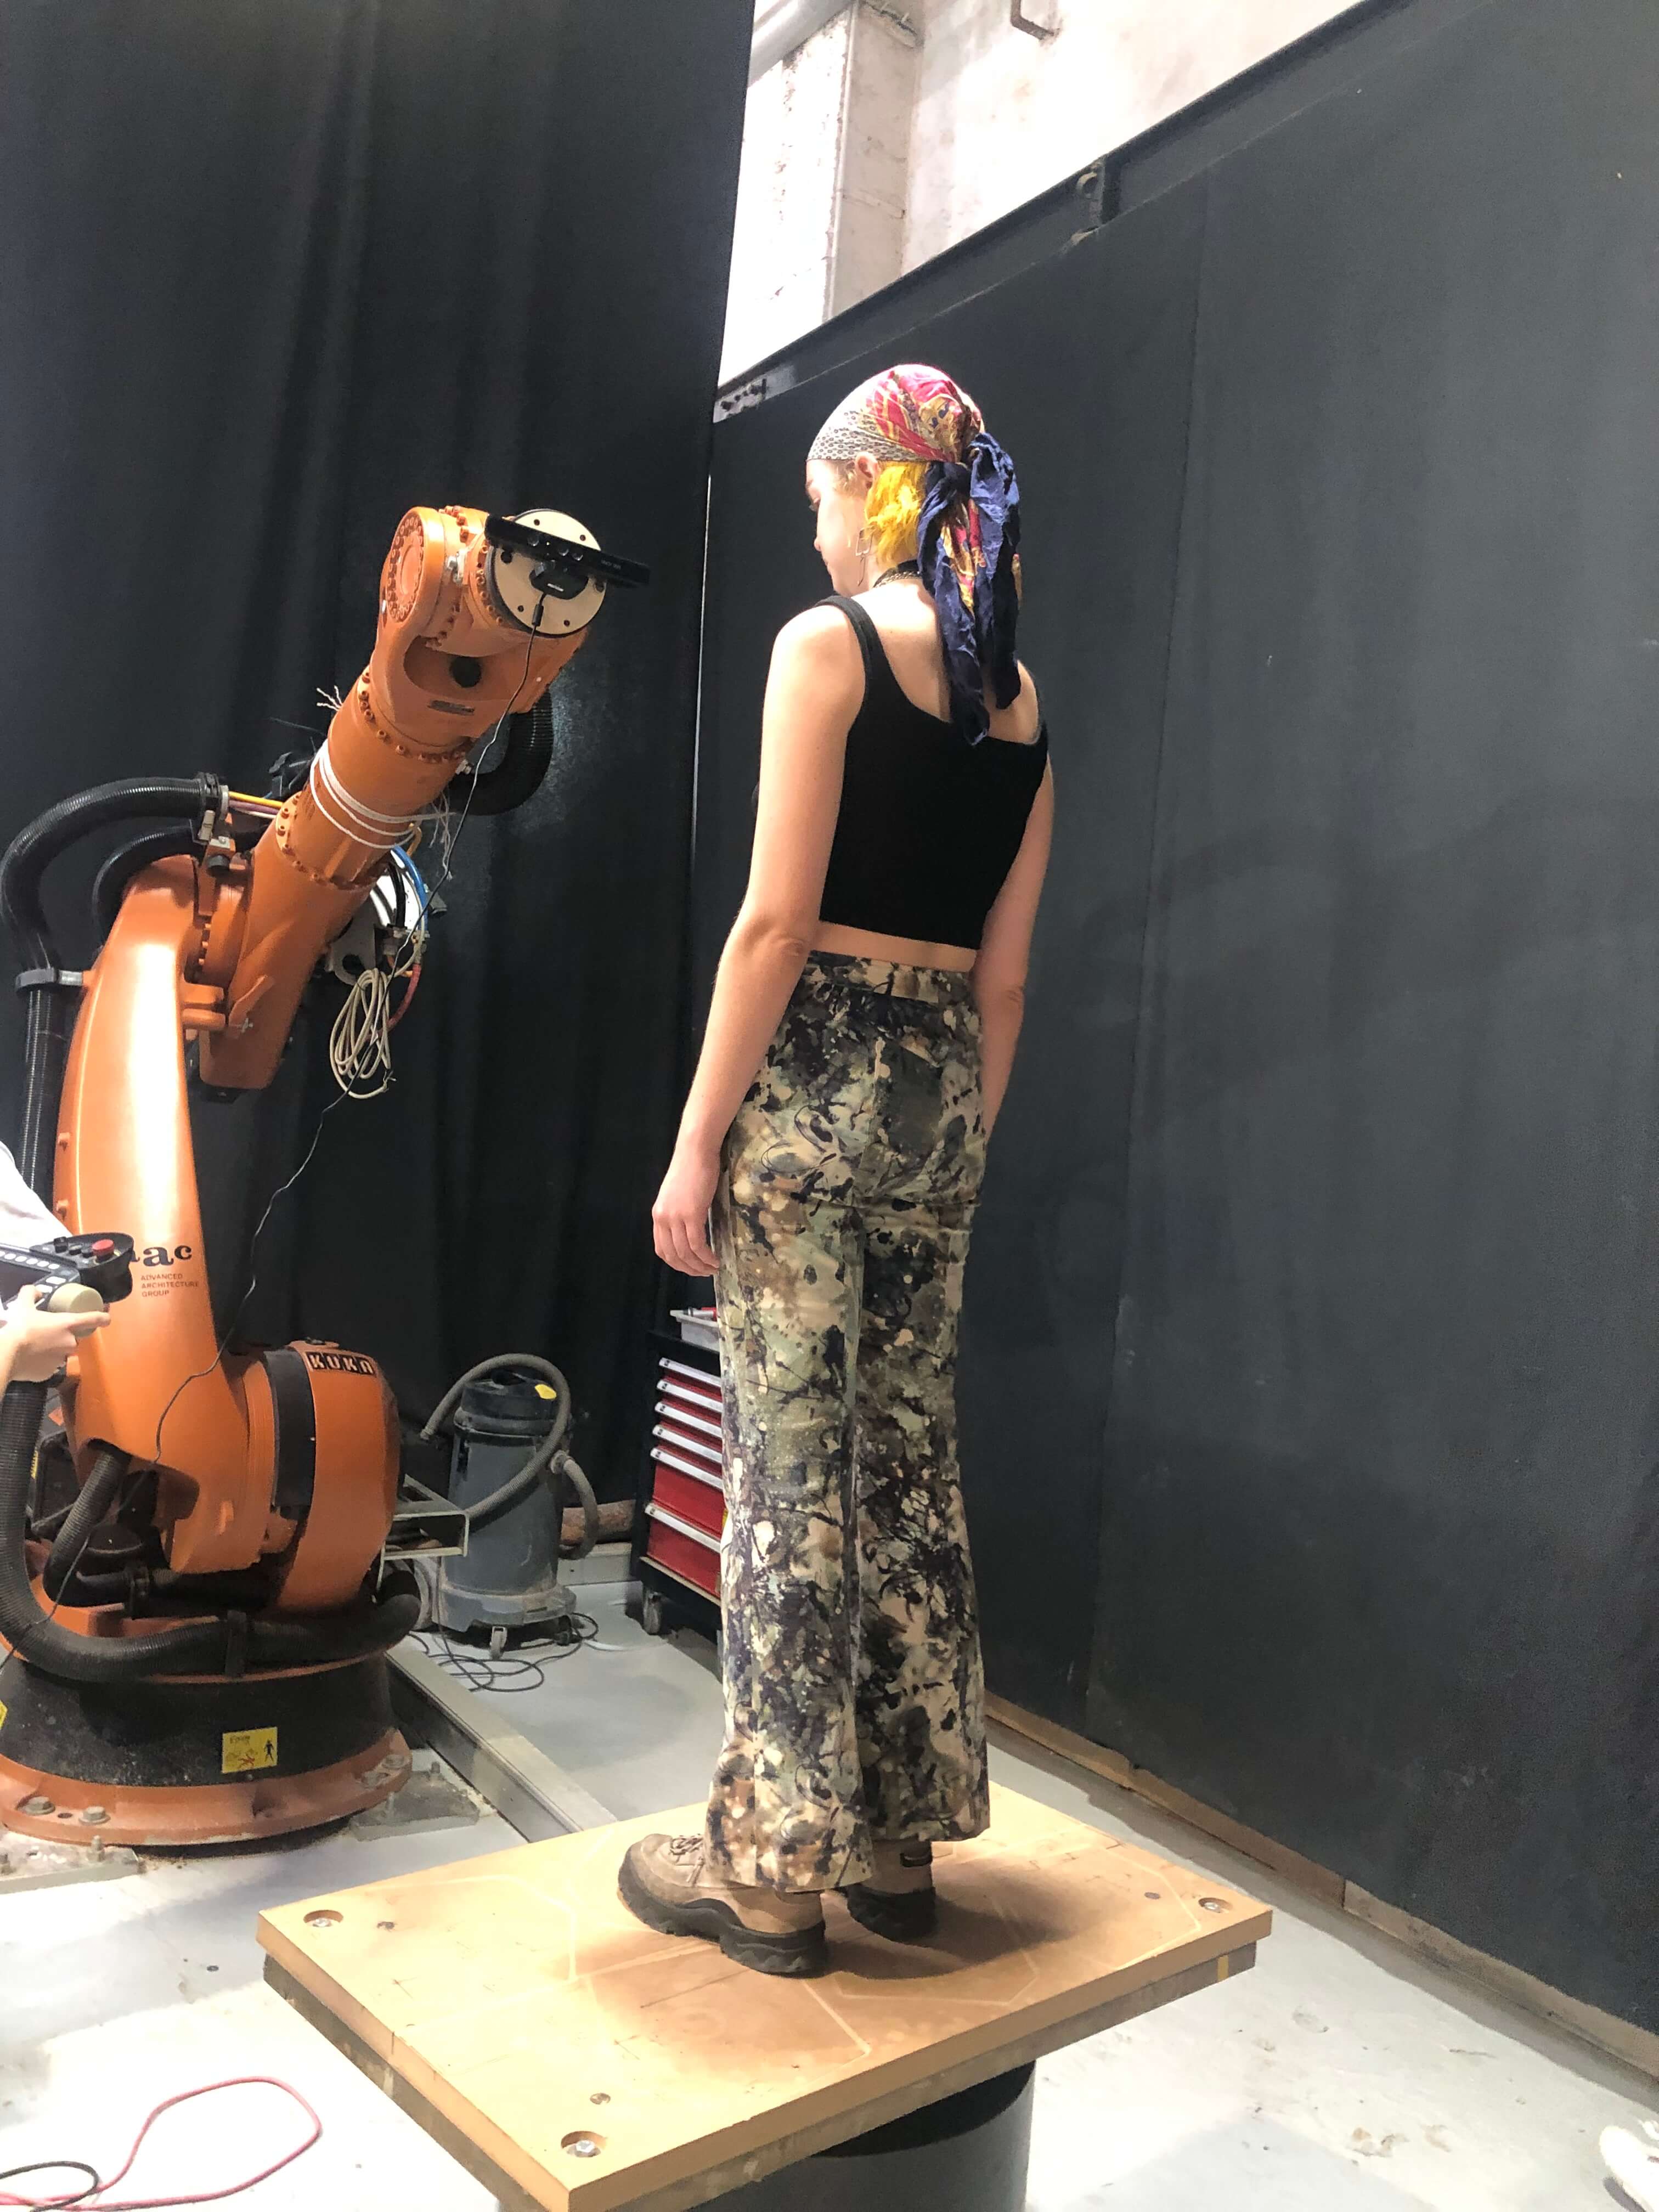
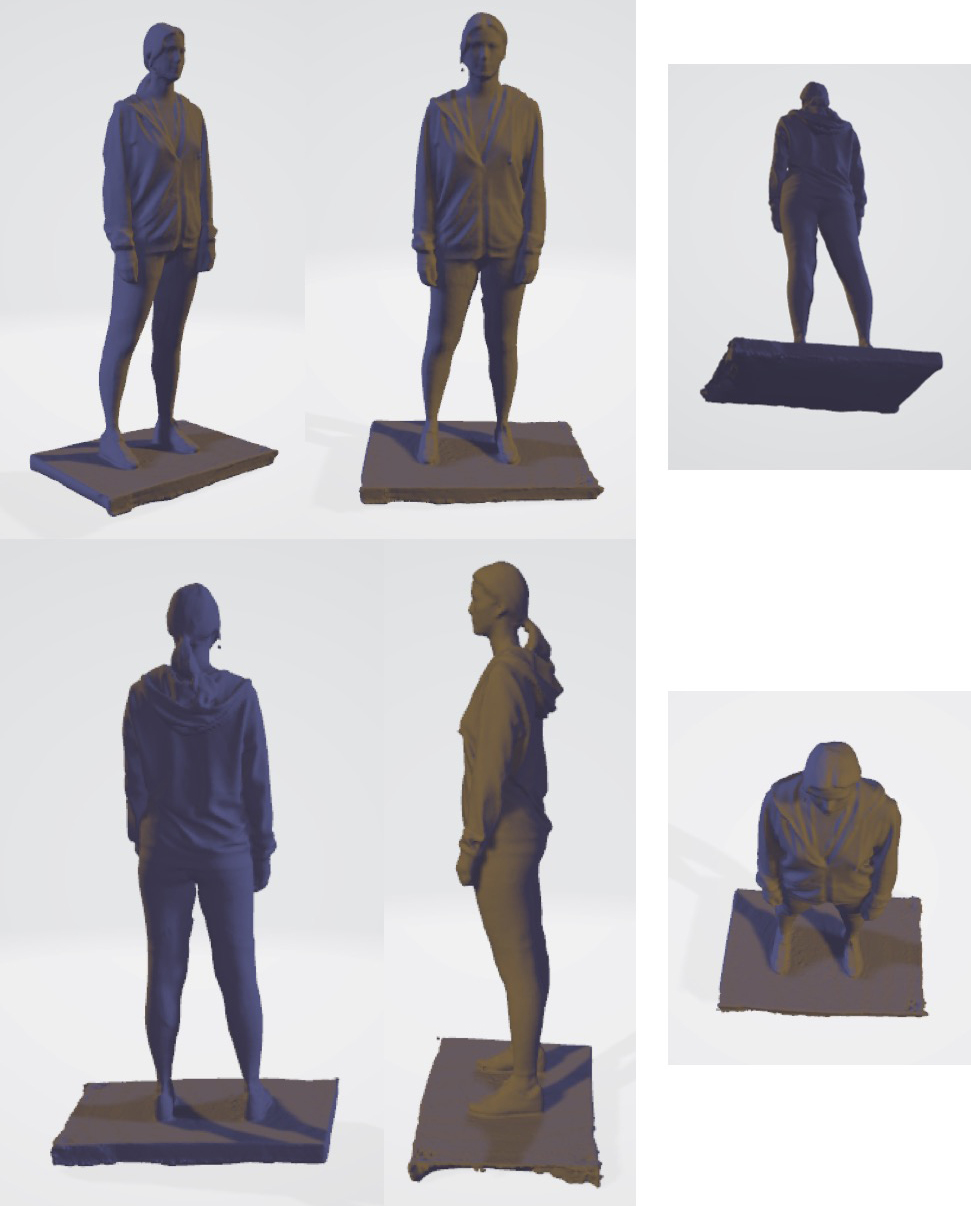
we learned how to use the KUKA robot in order to scan our own full body figure. We stood on a platform that rotates 360 degrees while the Kinect, moved by the Kuka.
The arm starts scanning in the middle of the object/person. A really easy and useful tool. I decided to use my own scan
PROCCESS AND WORKFLOW
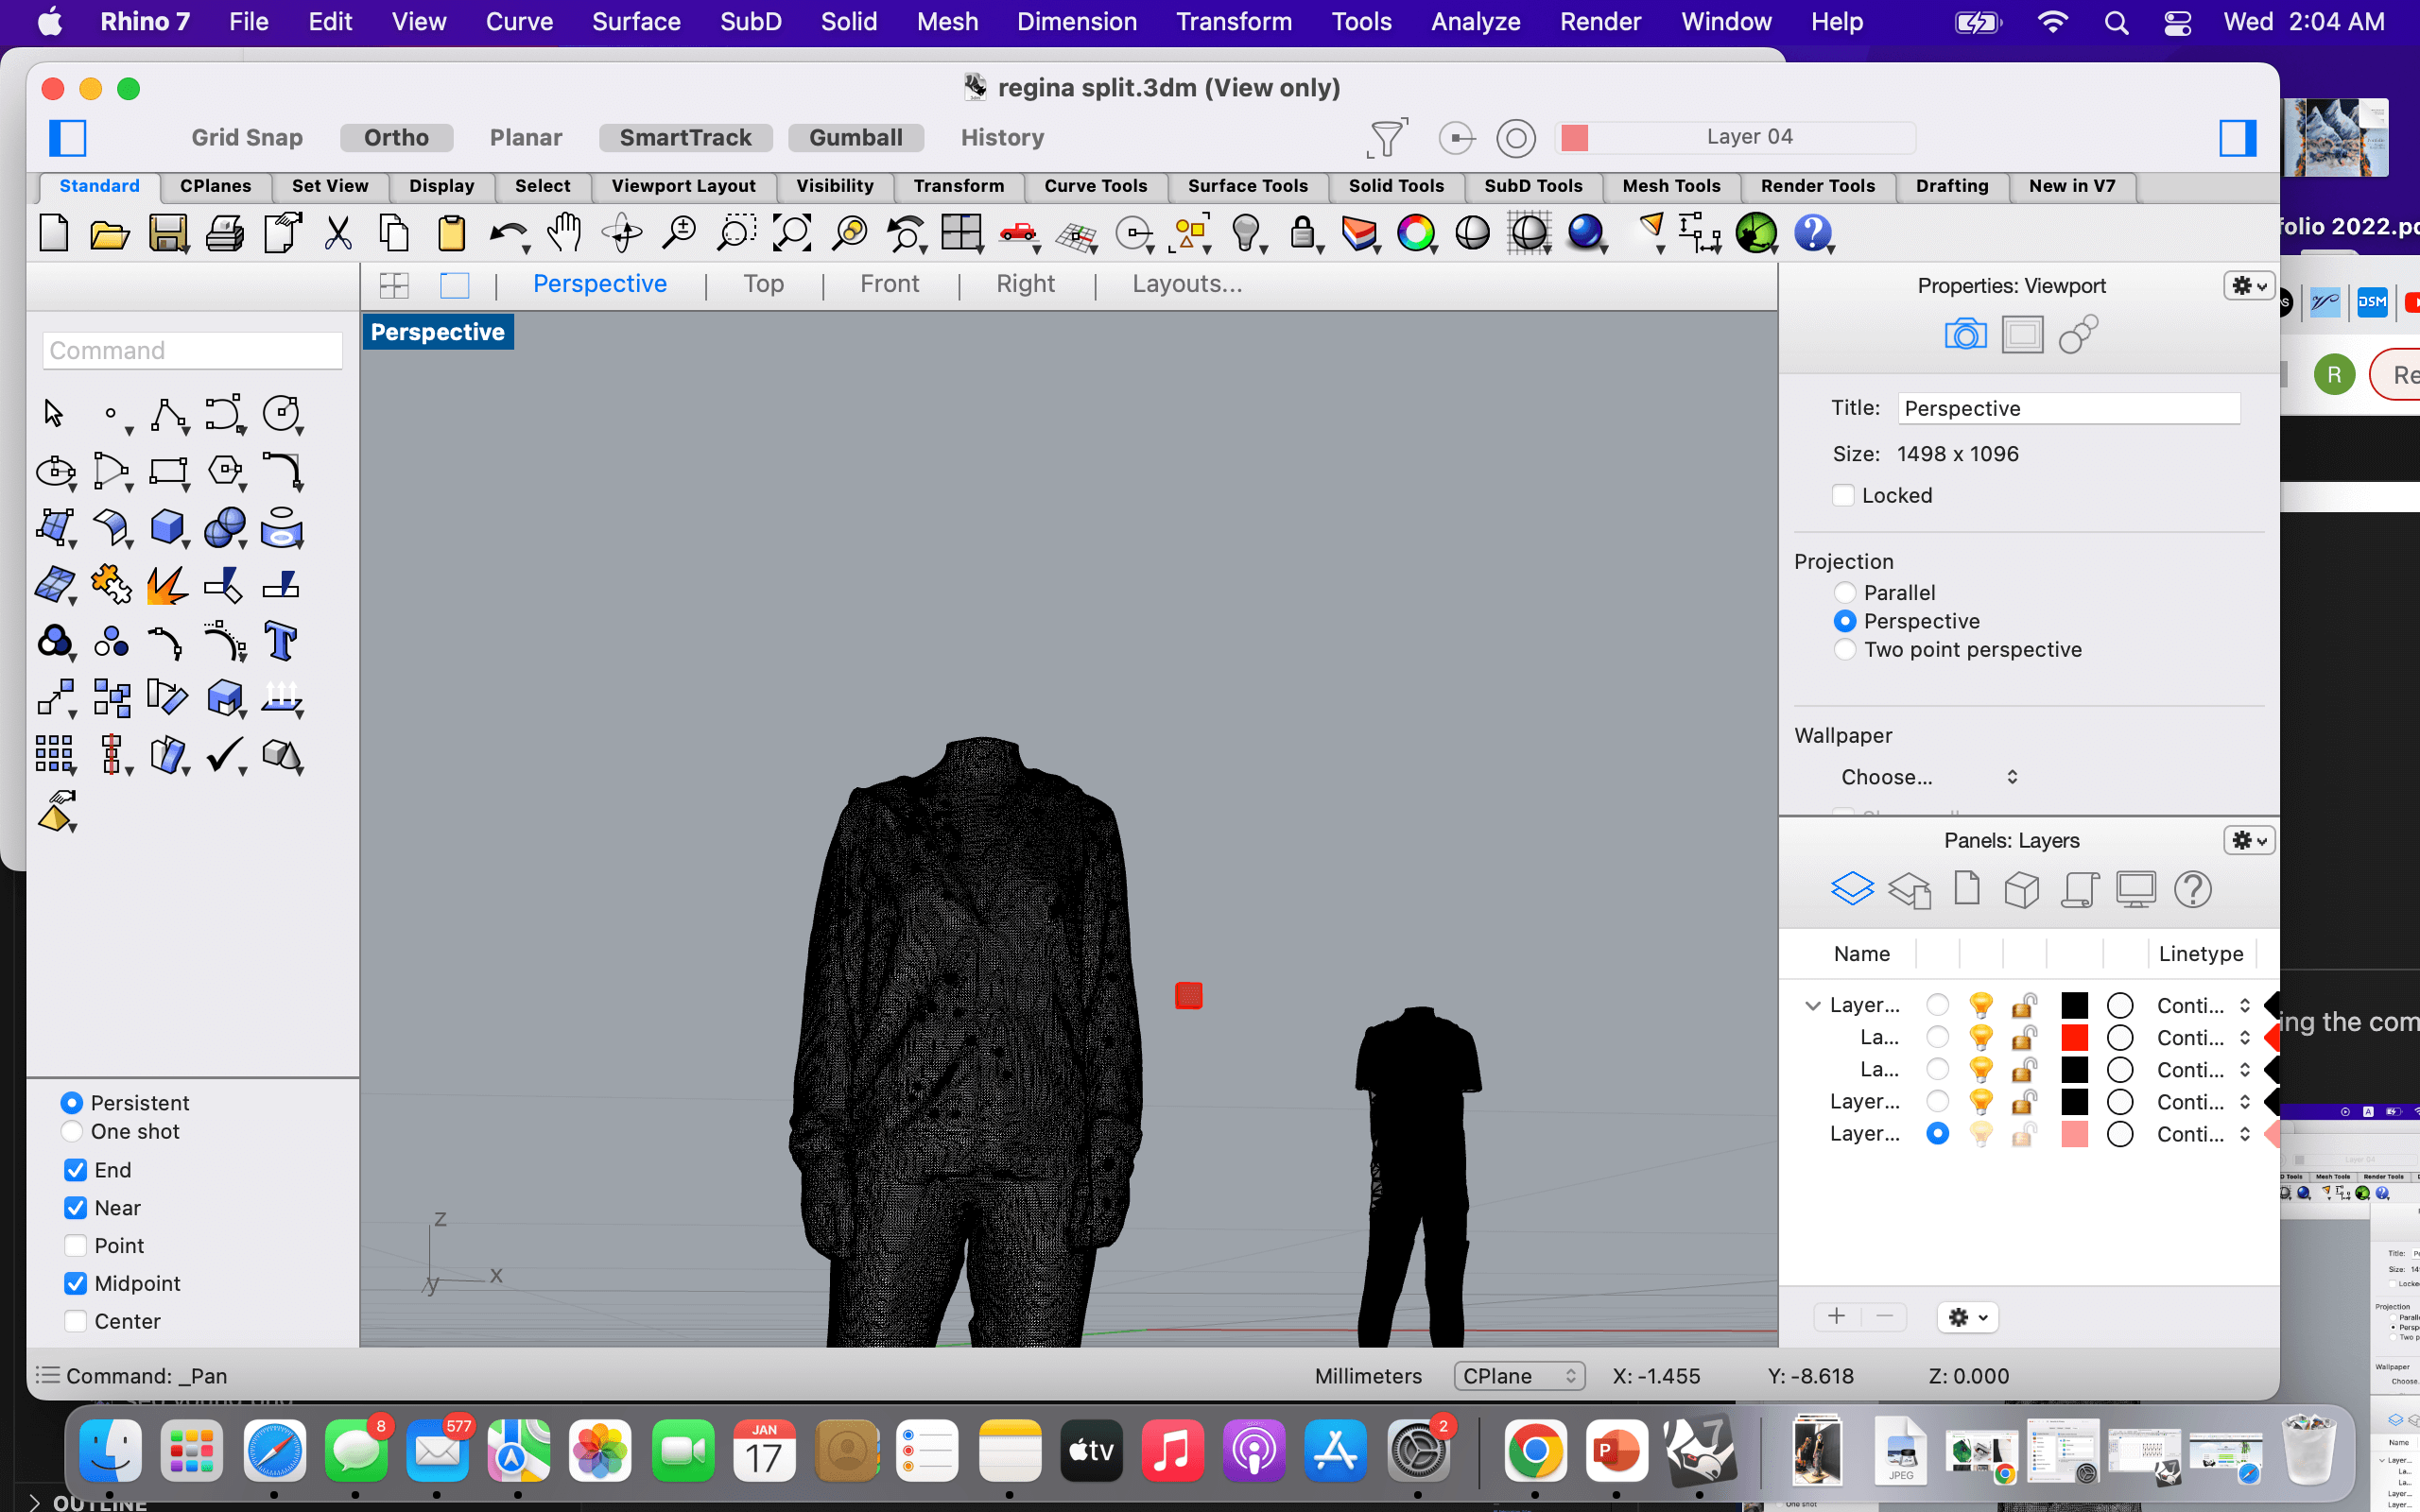
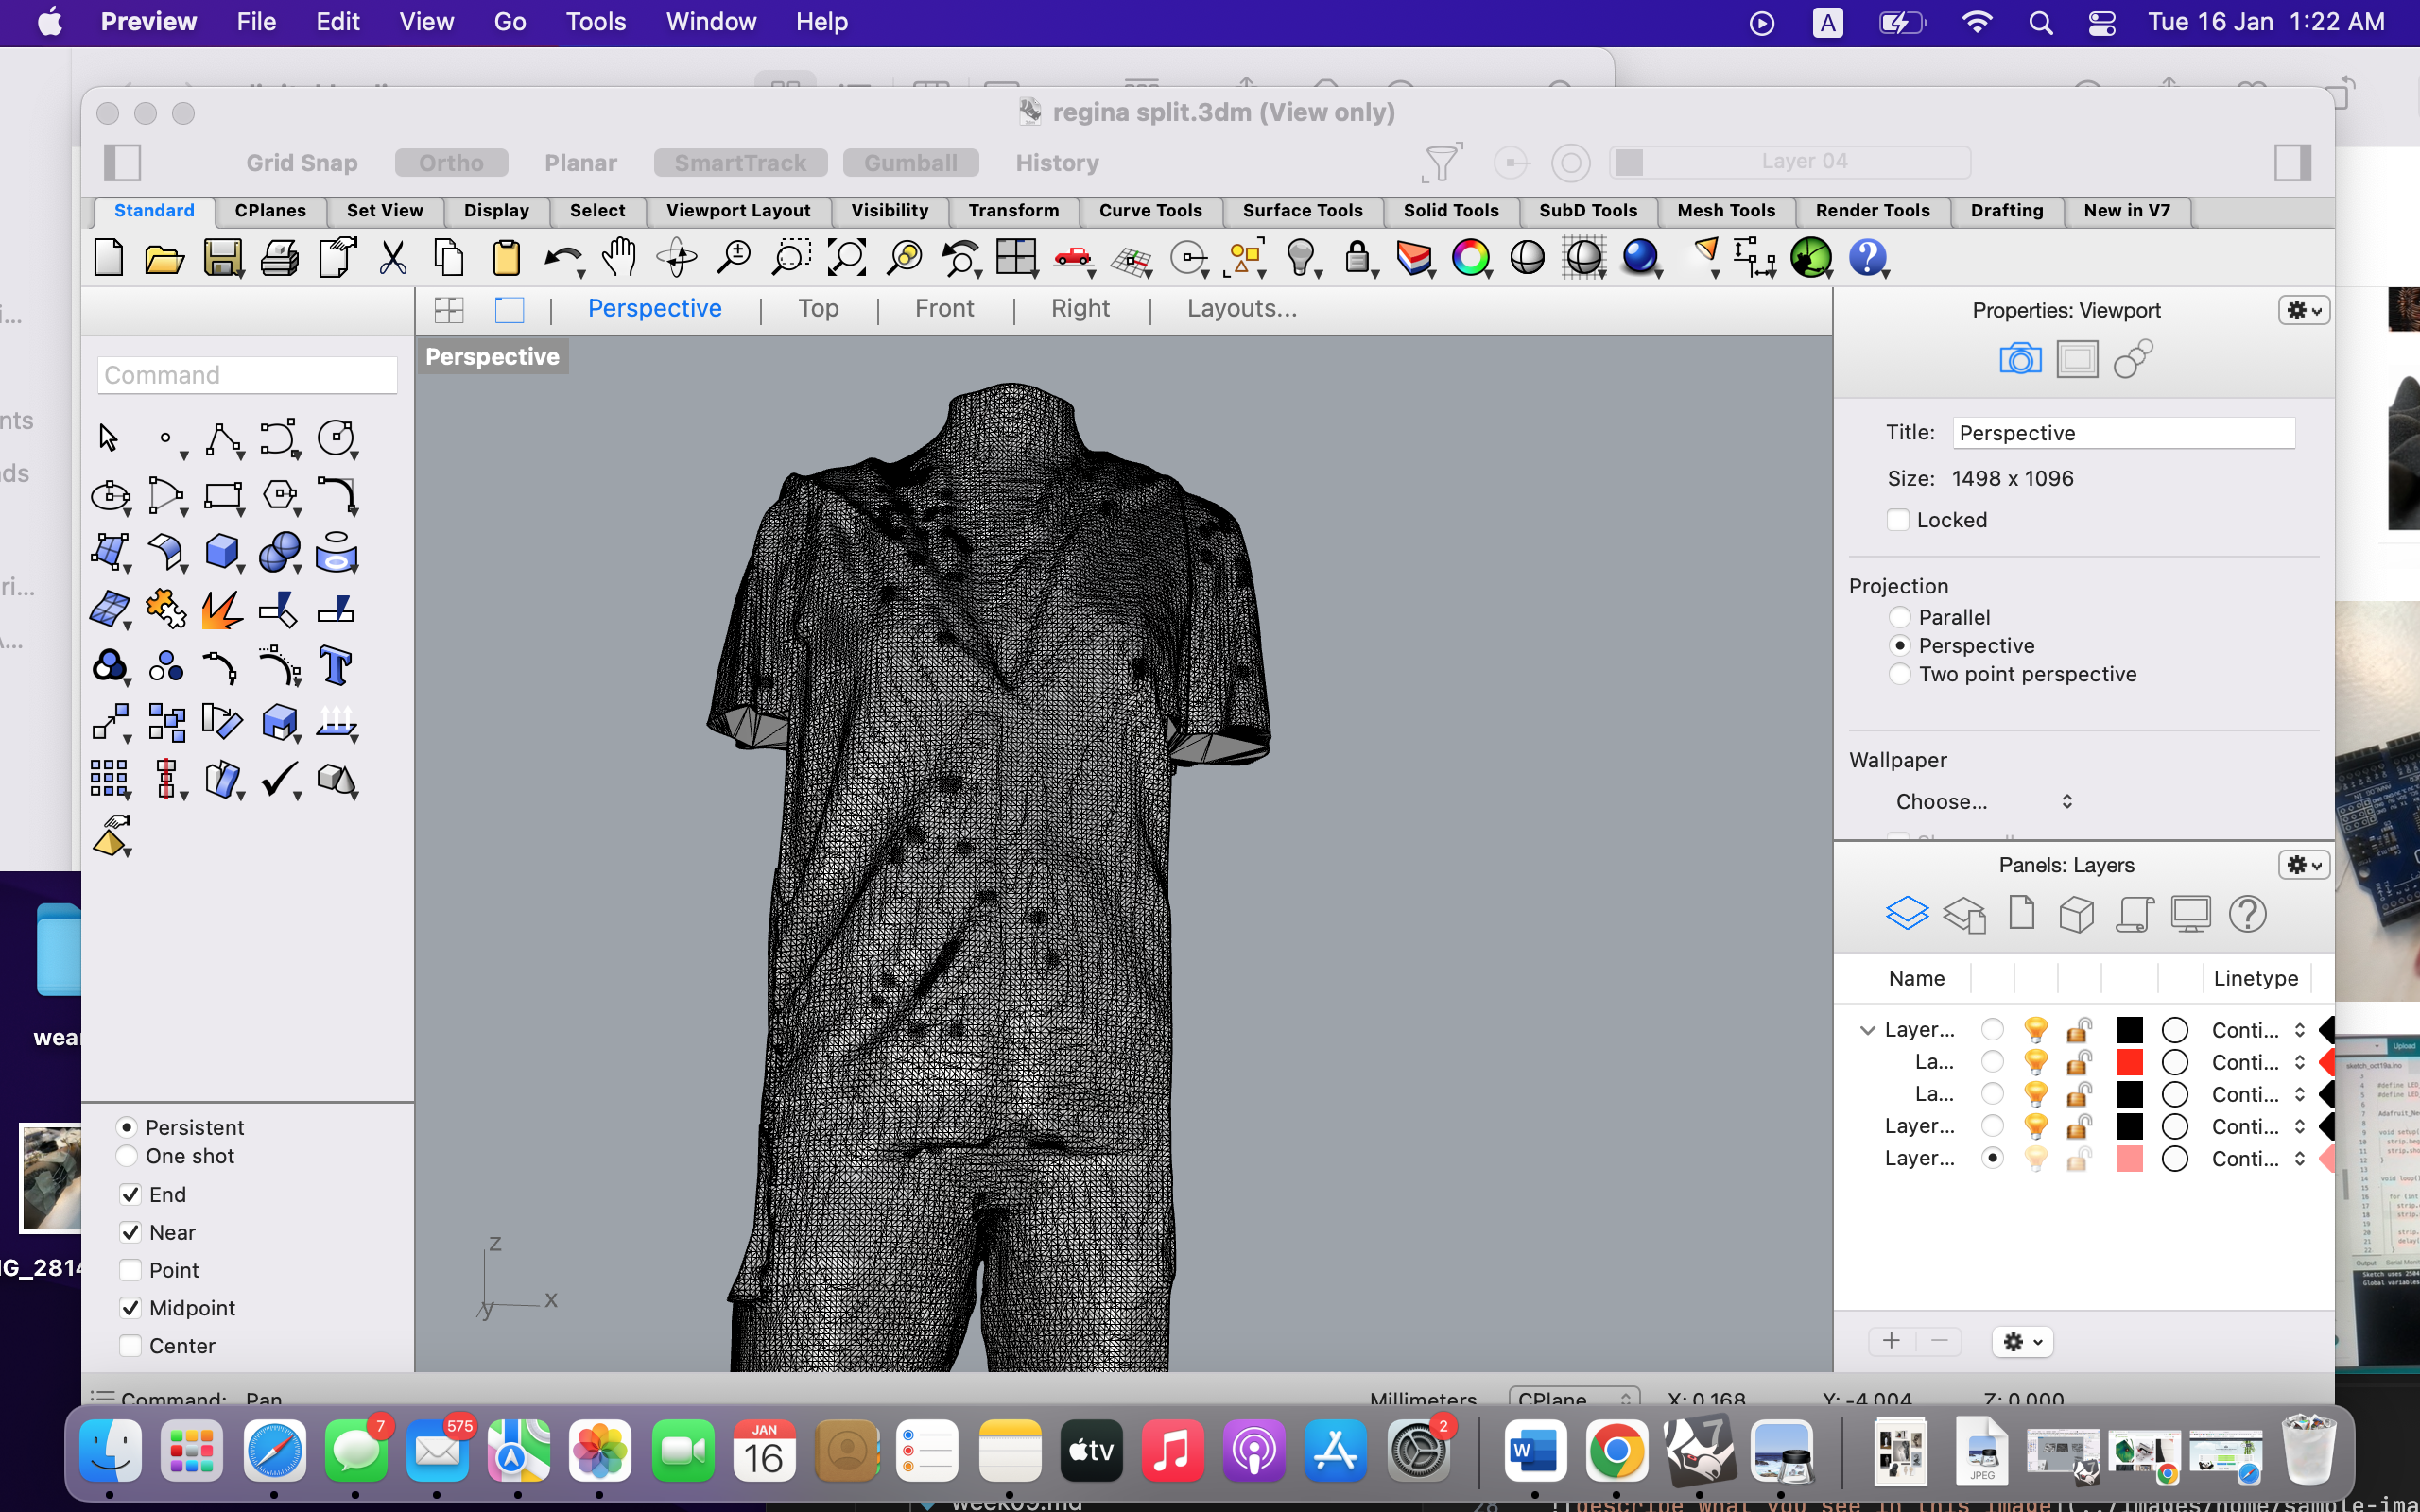
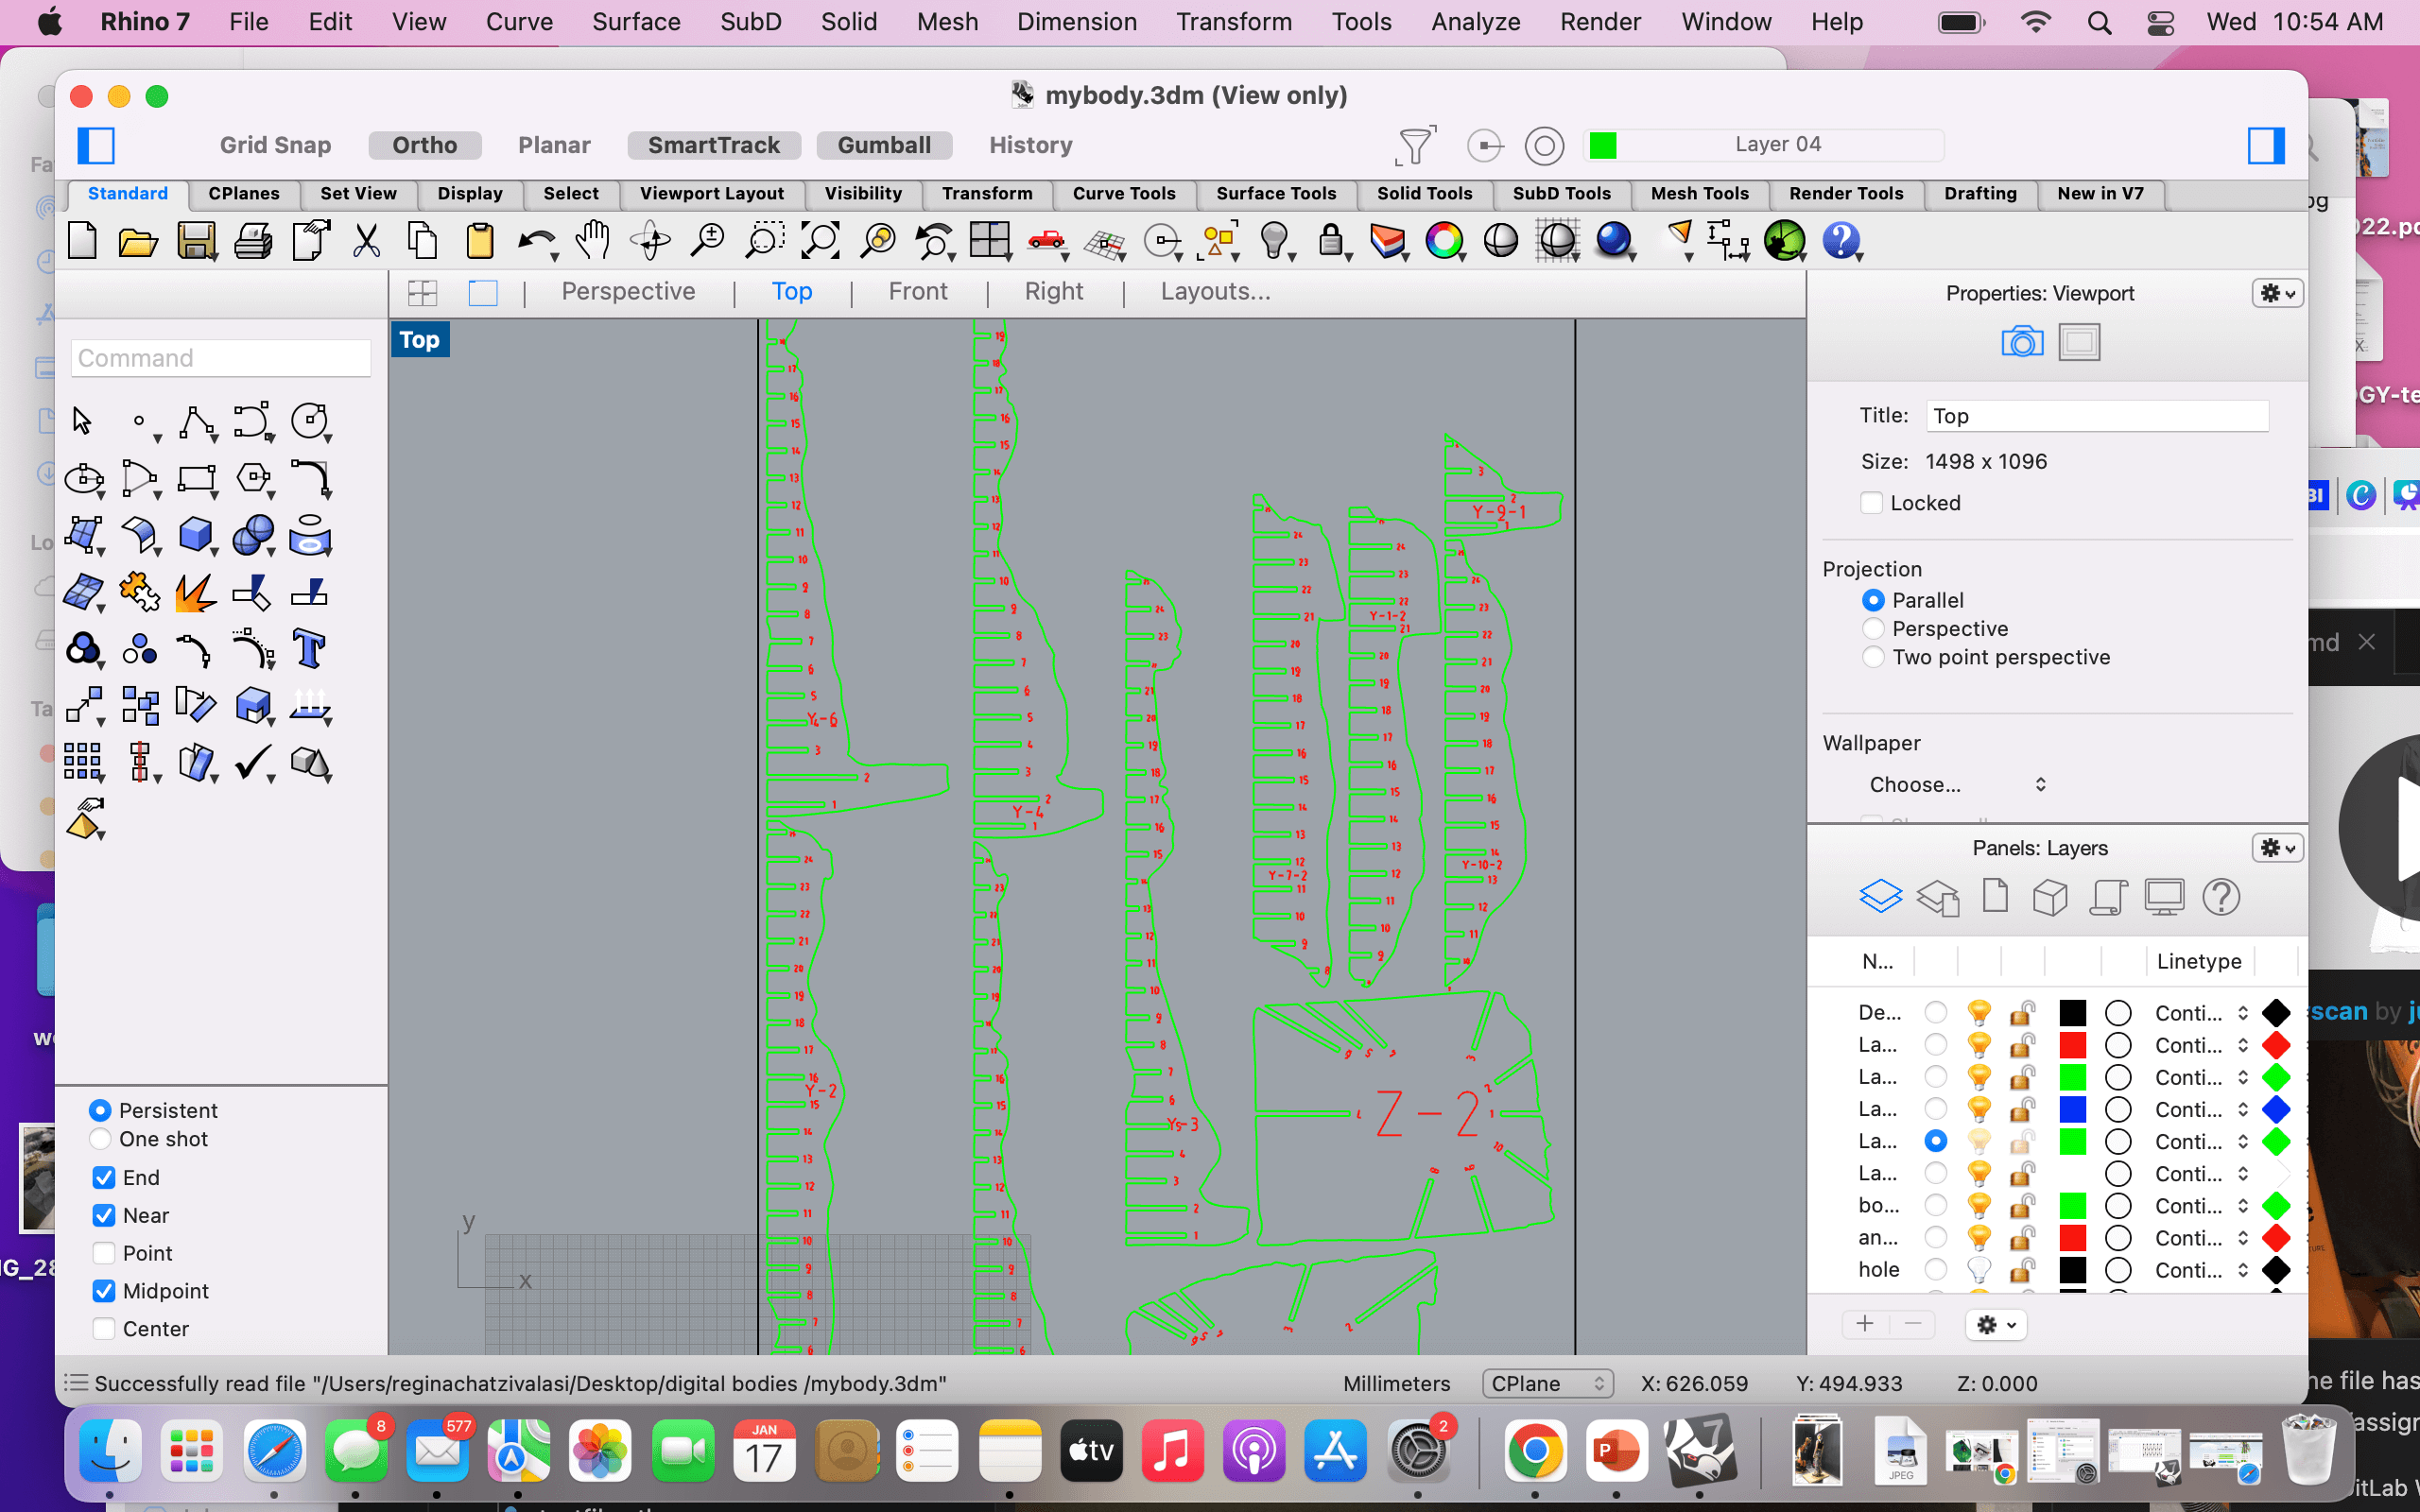
- Working with my own scan on rhino using the command trim or split to seperate the pieces
MESHMIXER
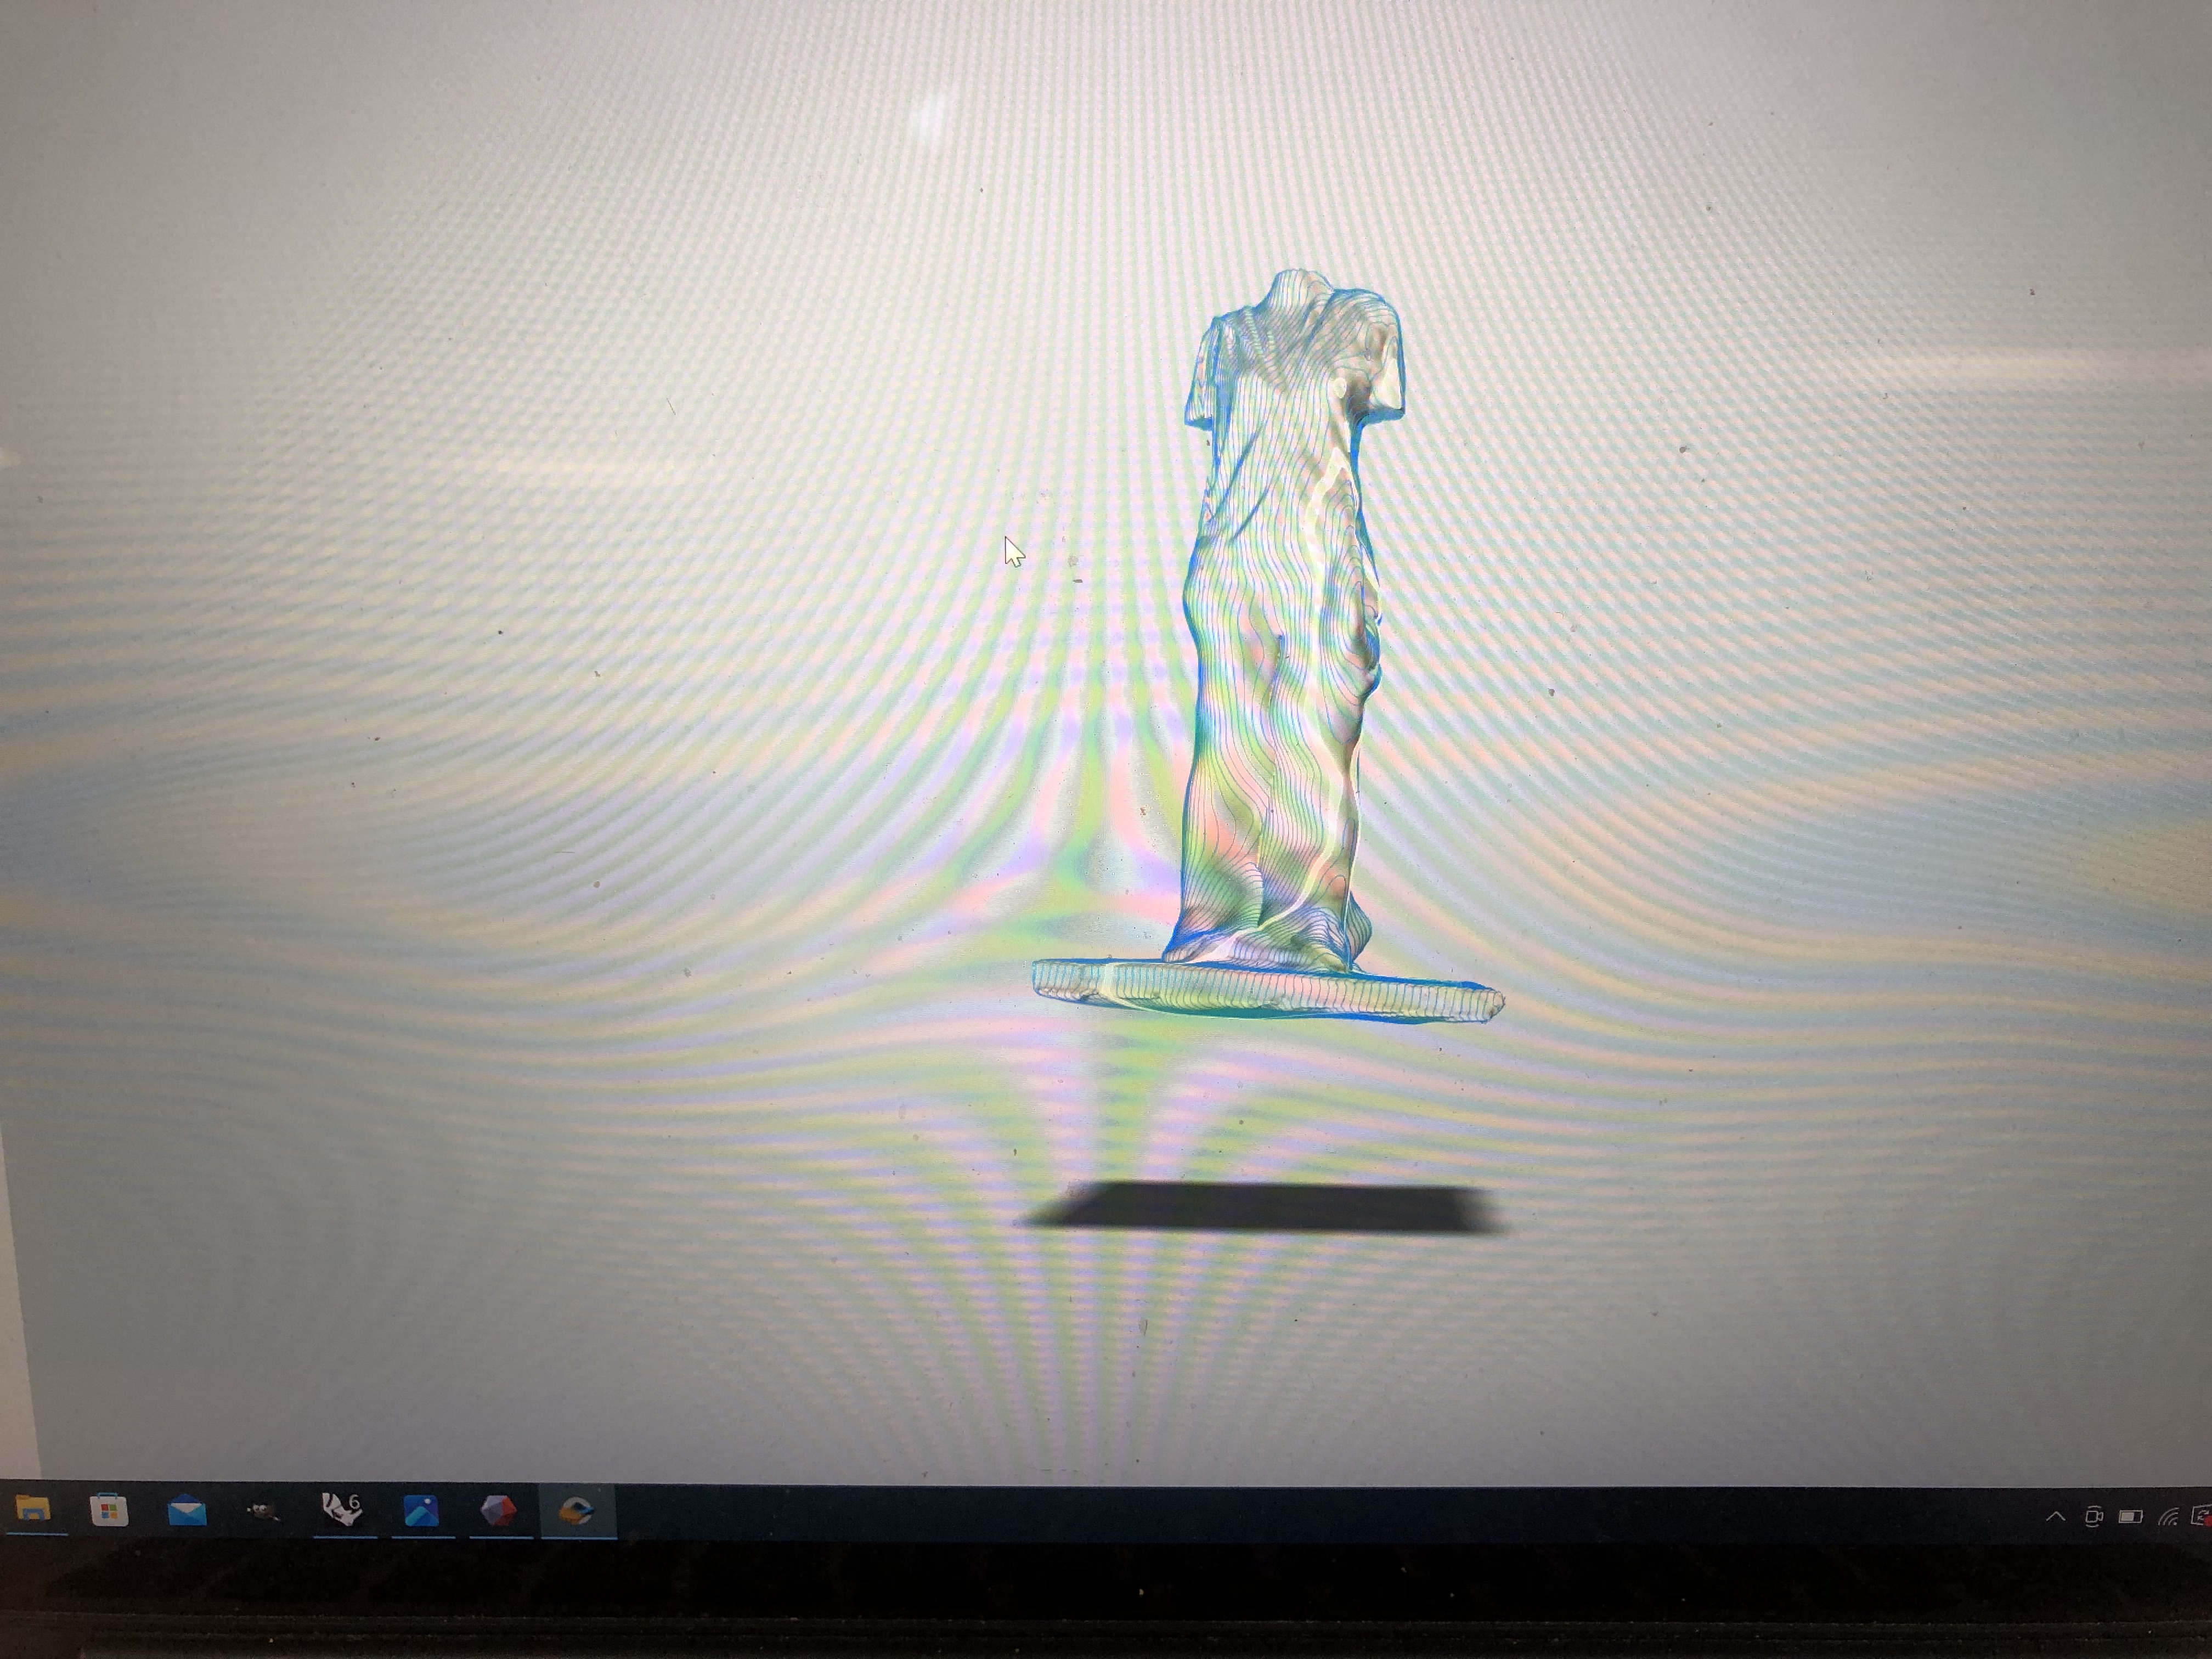
The programm has different tools that helps you sculpt, correct some edges and make them smooth, add volume etc. I worked with meshmixer to modify the shape and make it look like a sculpture
LASER CUTTING
-
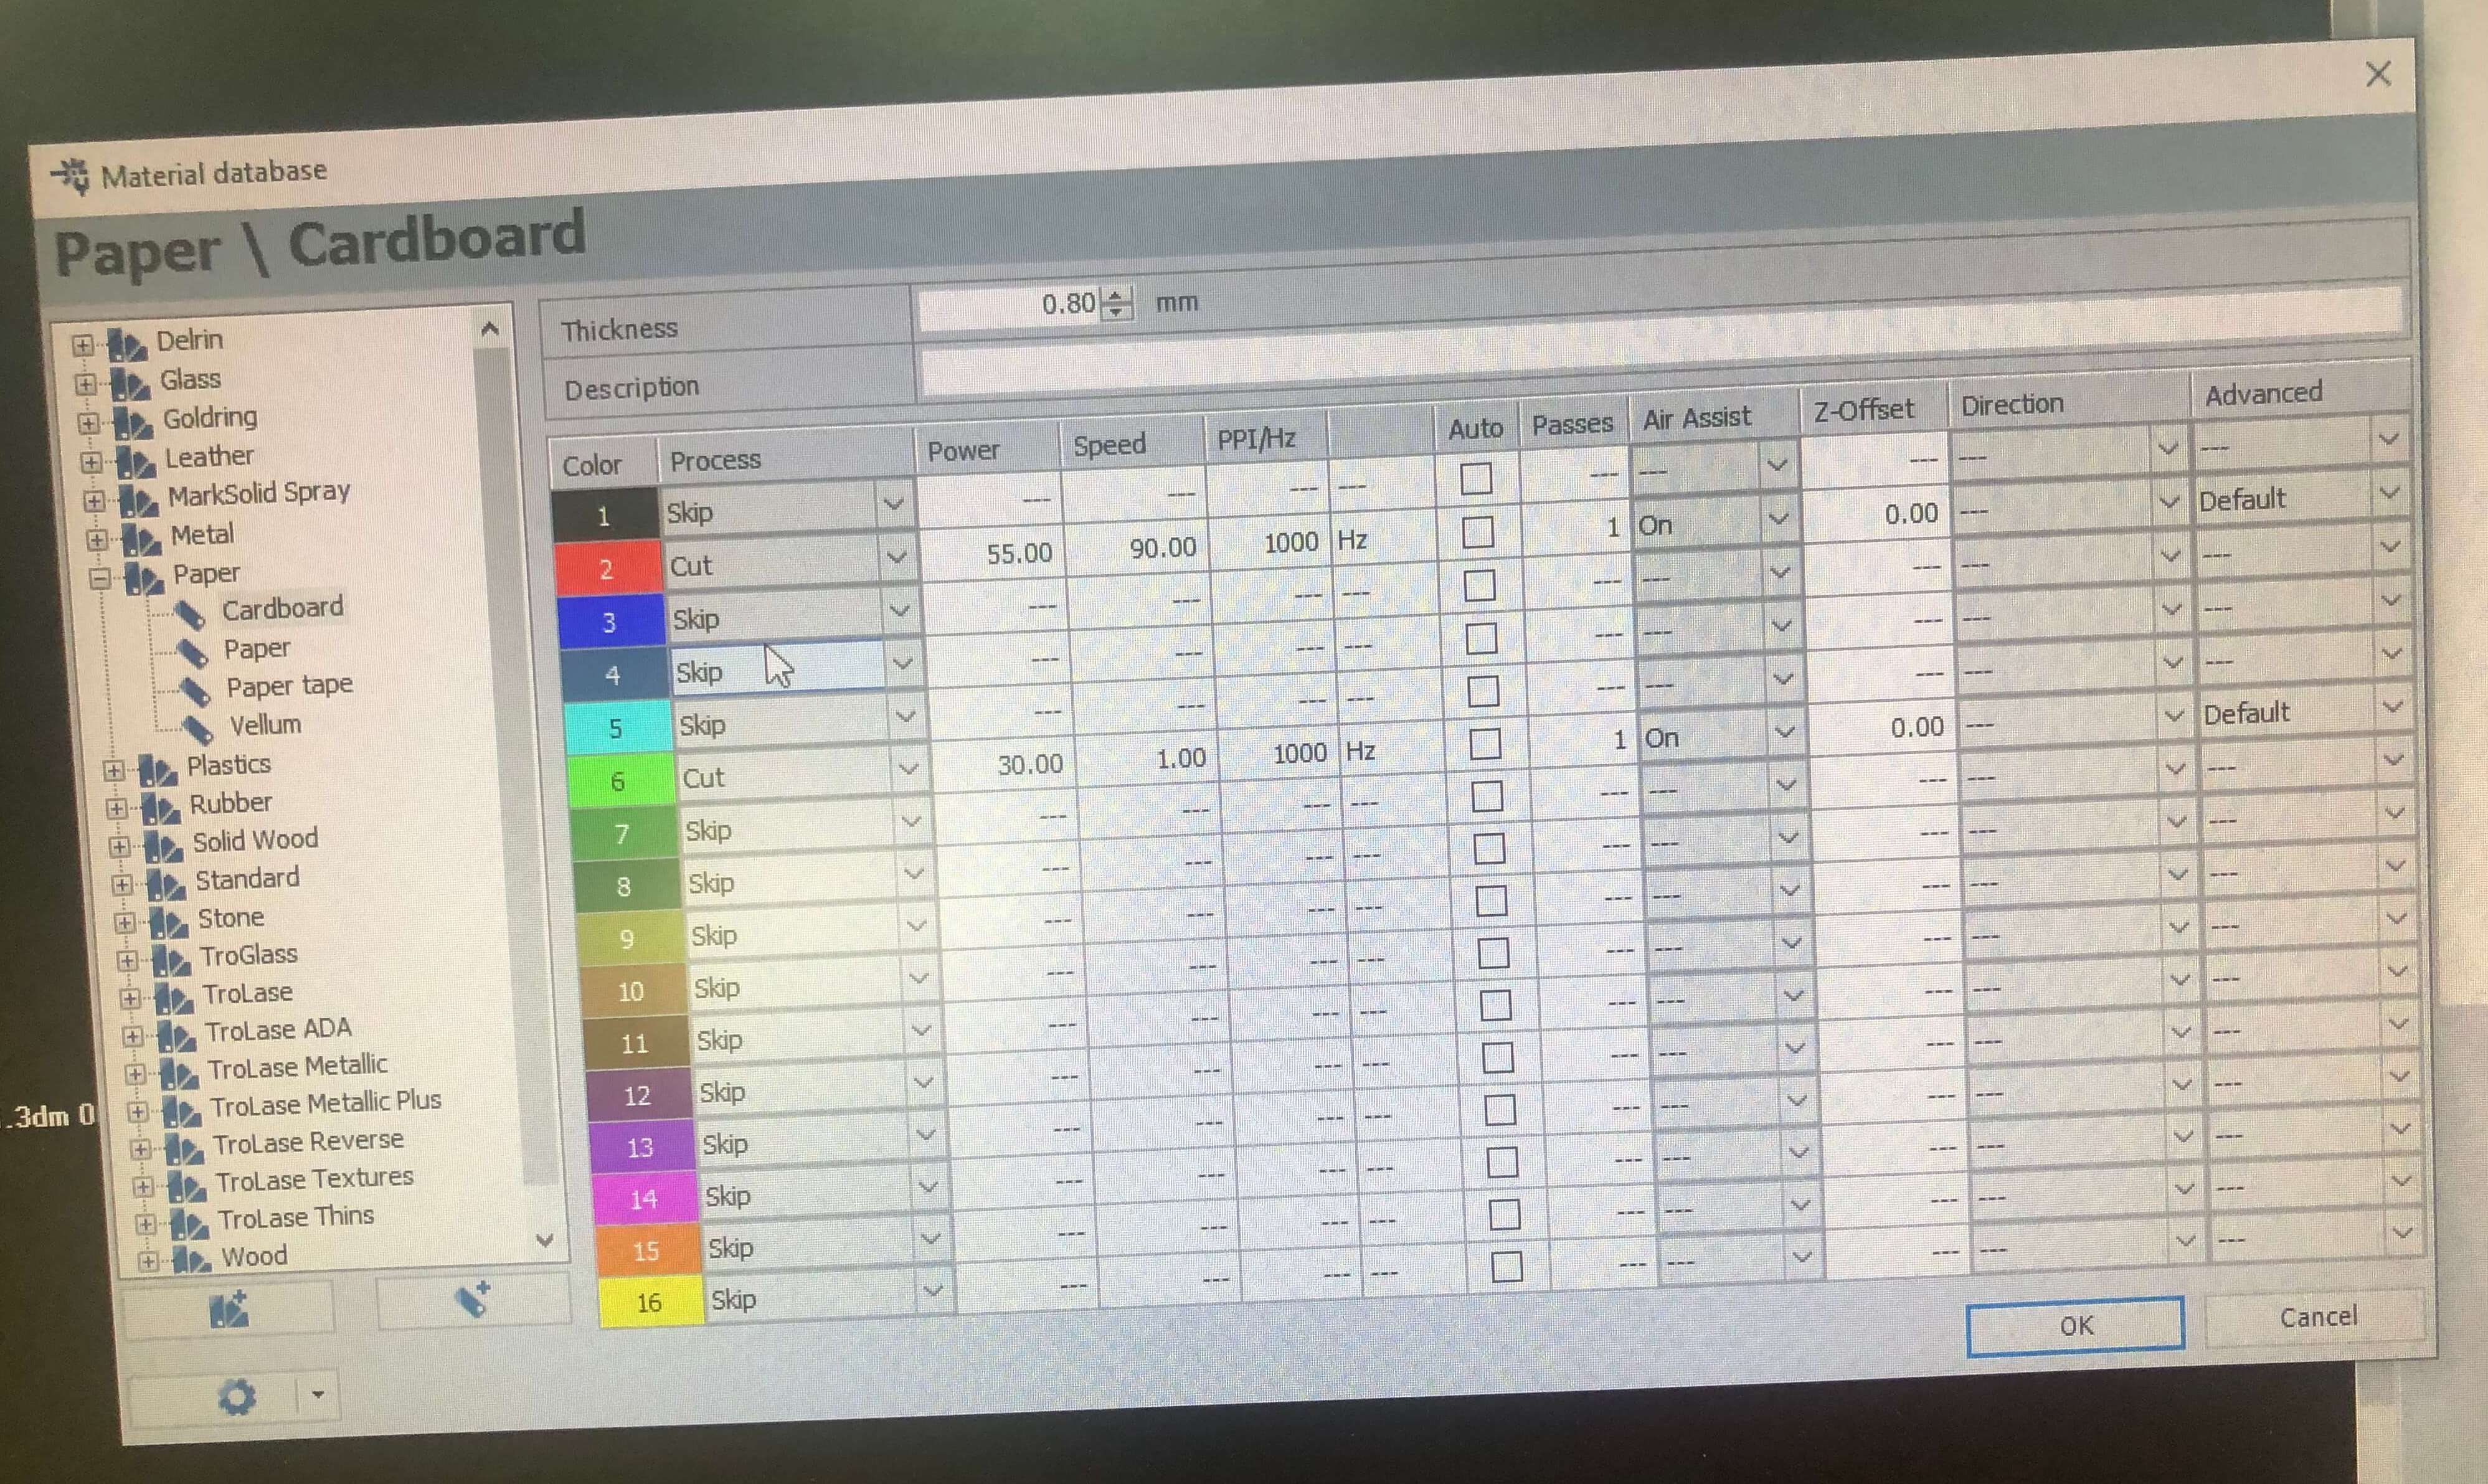
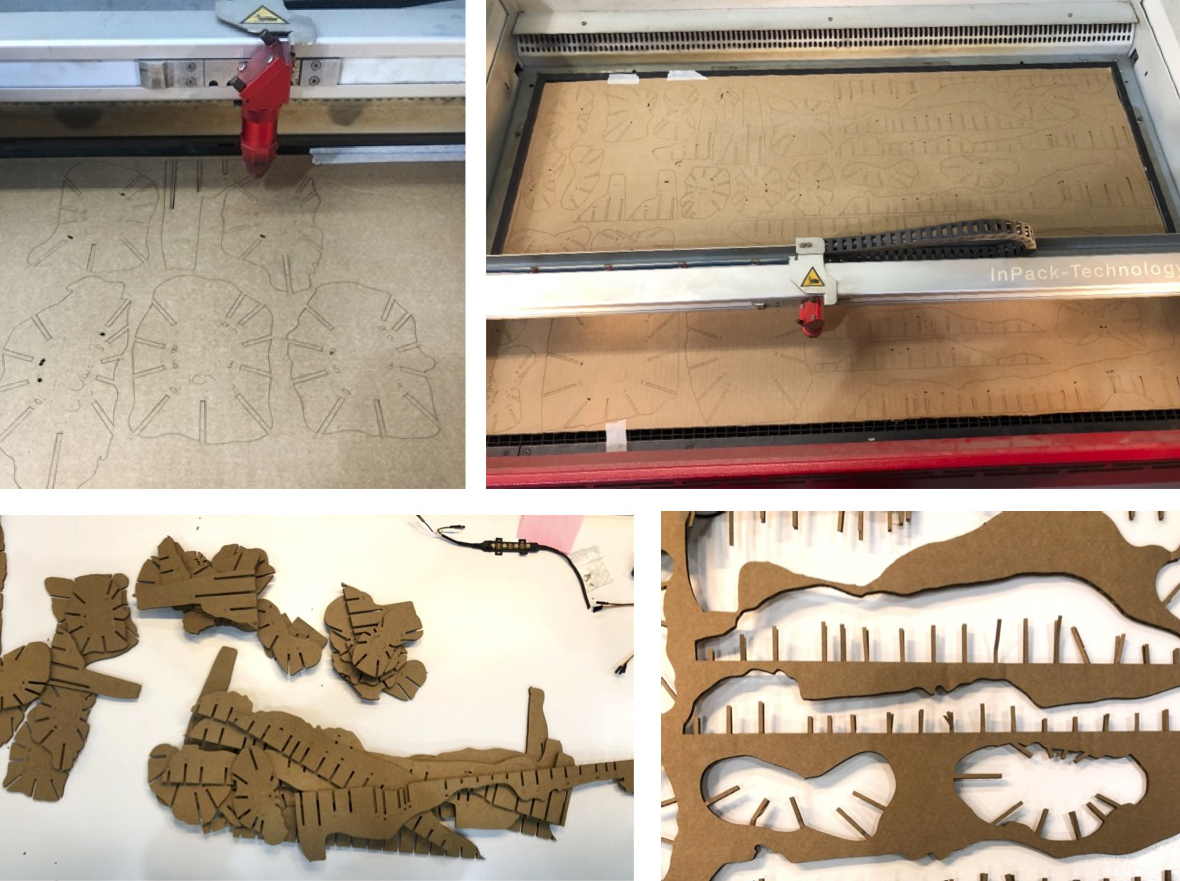
Get to know how the lasercut machine works. Basic buttons to turn on/off, move the bed and place it at the correct position when starting to lasercut.
-
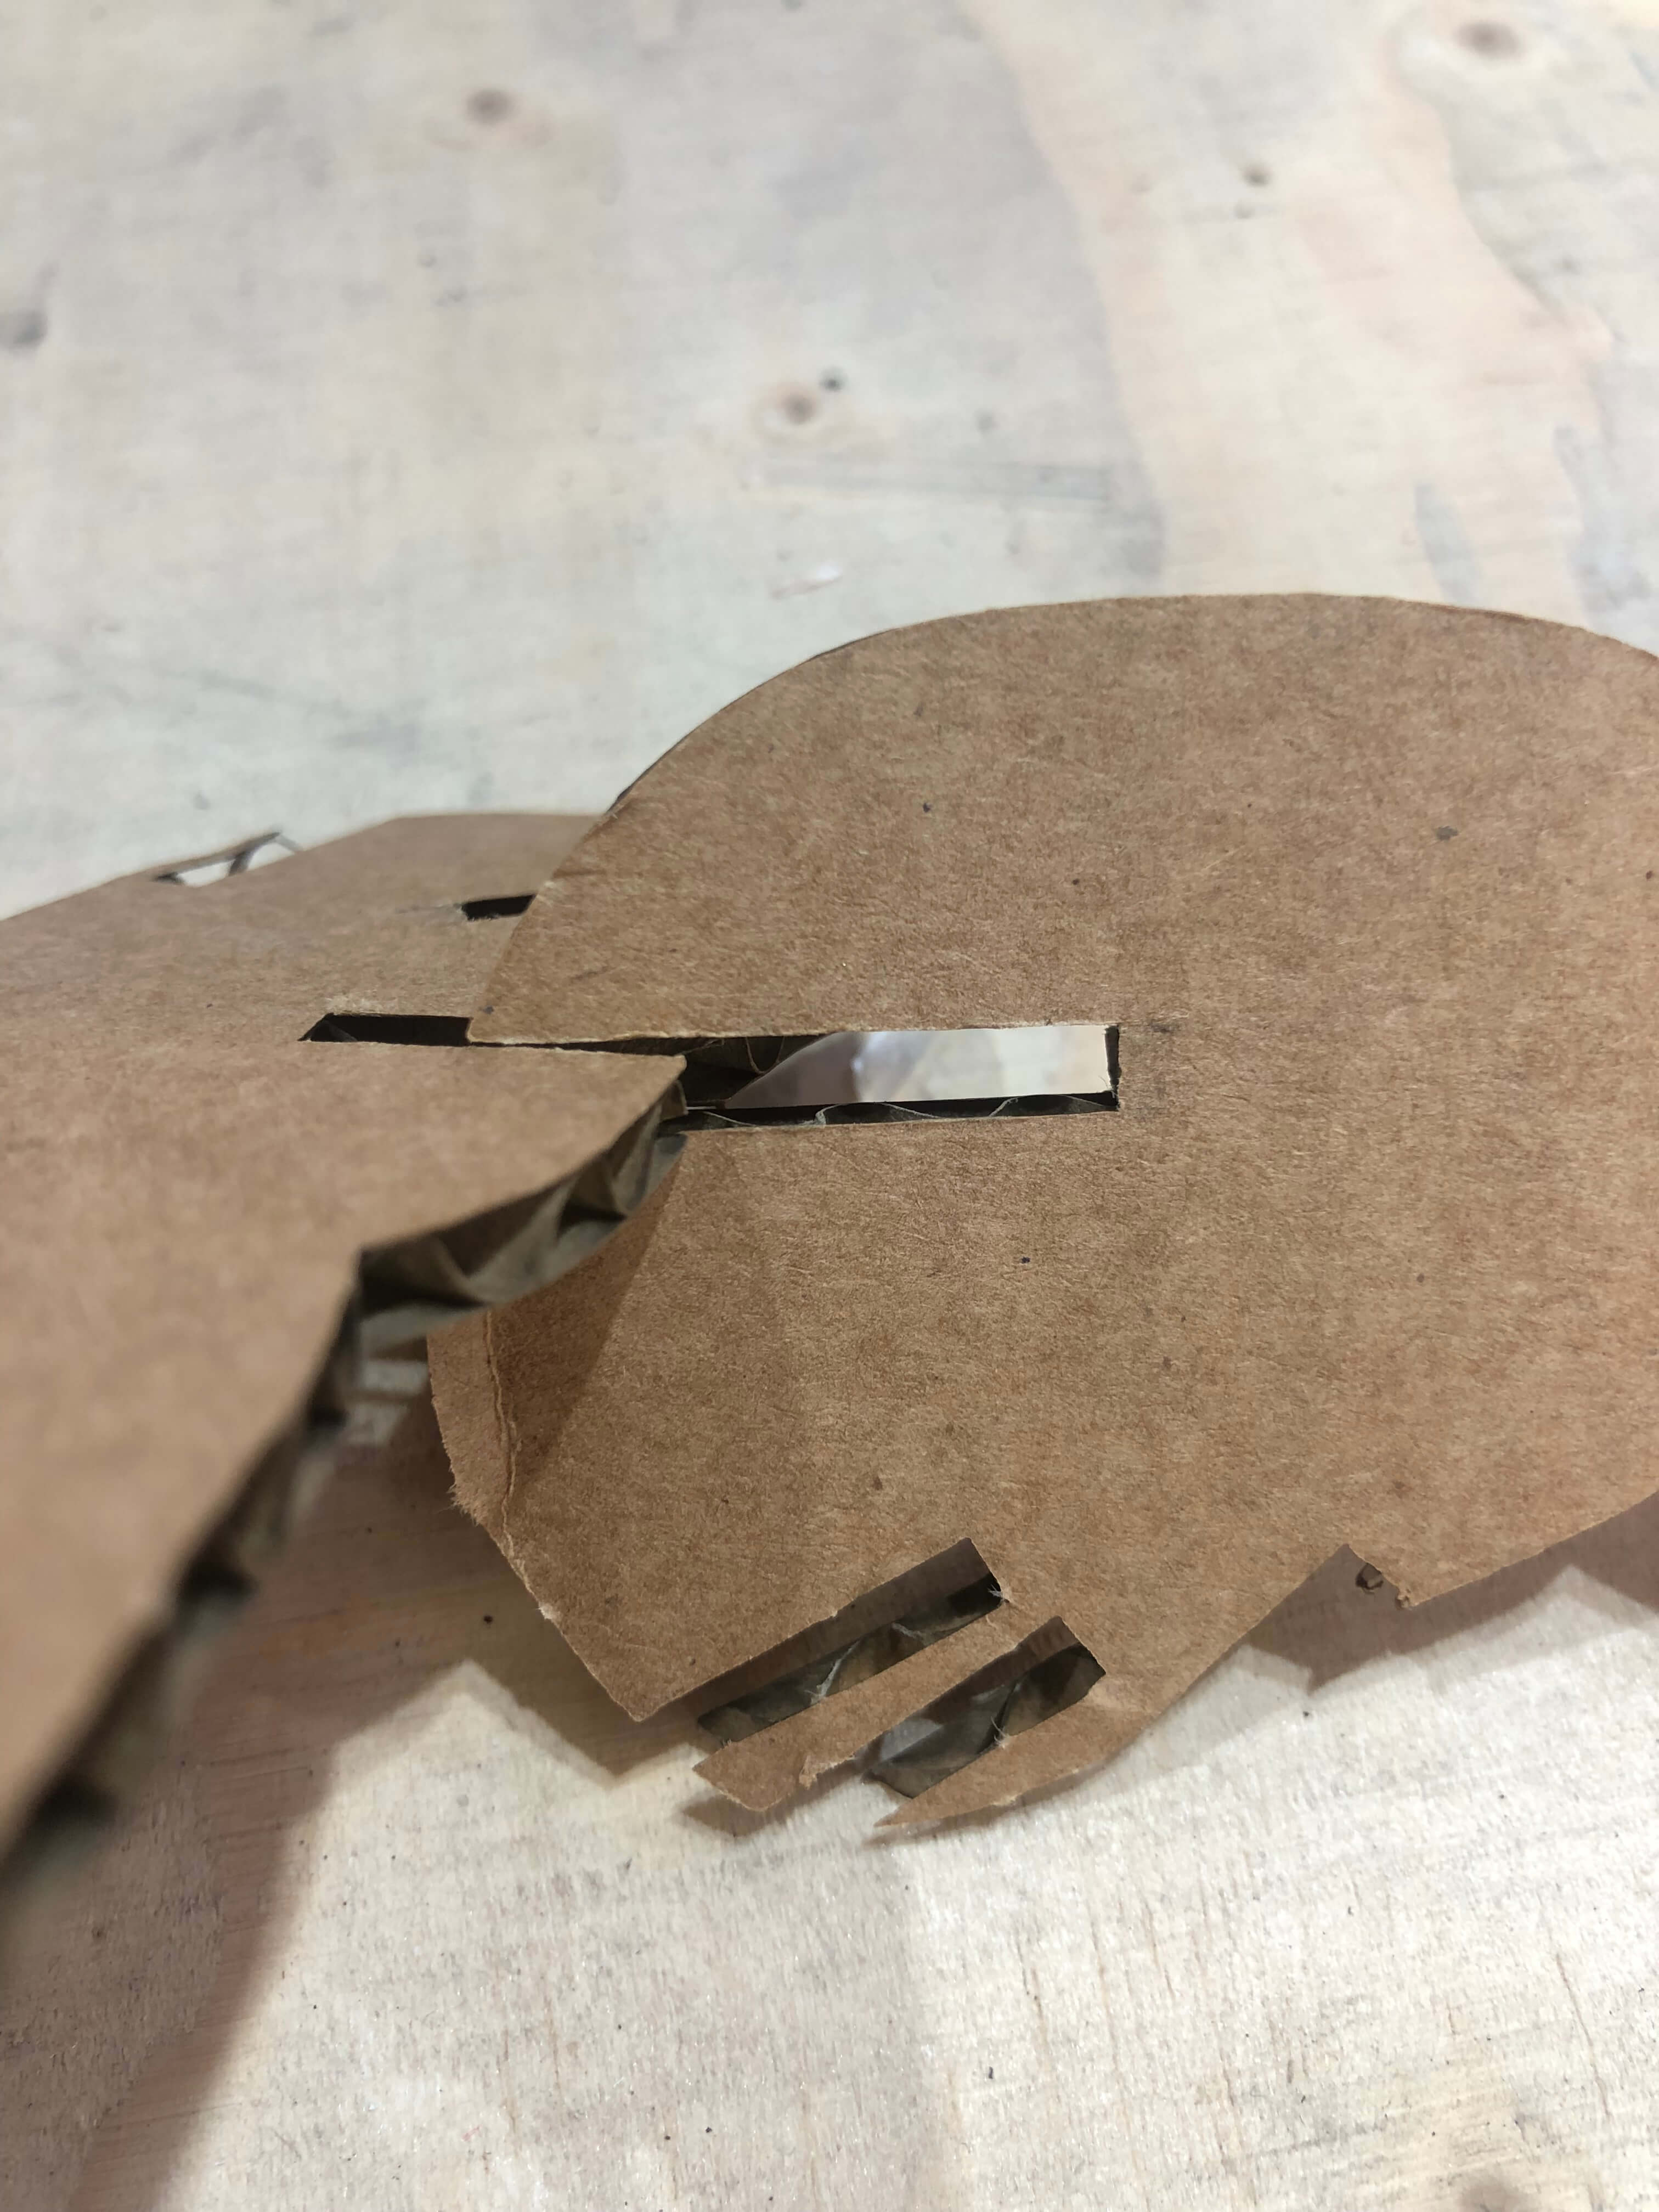
Important: laser focus, the material must be set at the correct height for the laser lens to be in focus. . There's a small component that falls off when the material is focused.
-
adjust the color of layers in rhino in green for the outline and red for the number according to the lasercut settings(the numbers help in assemblying the pieces)
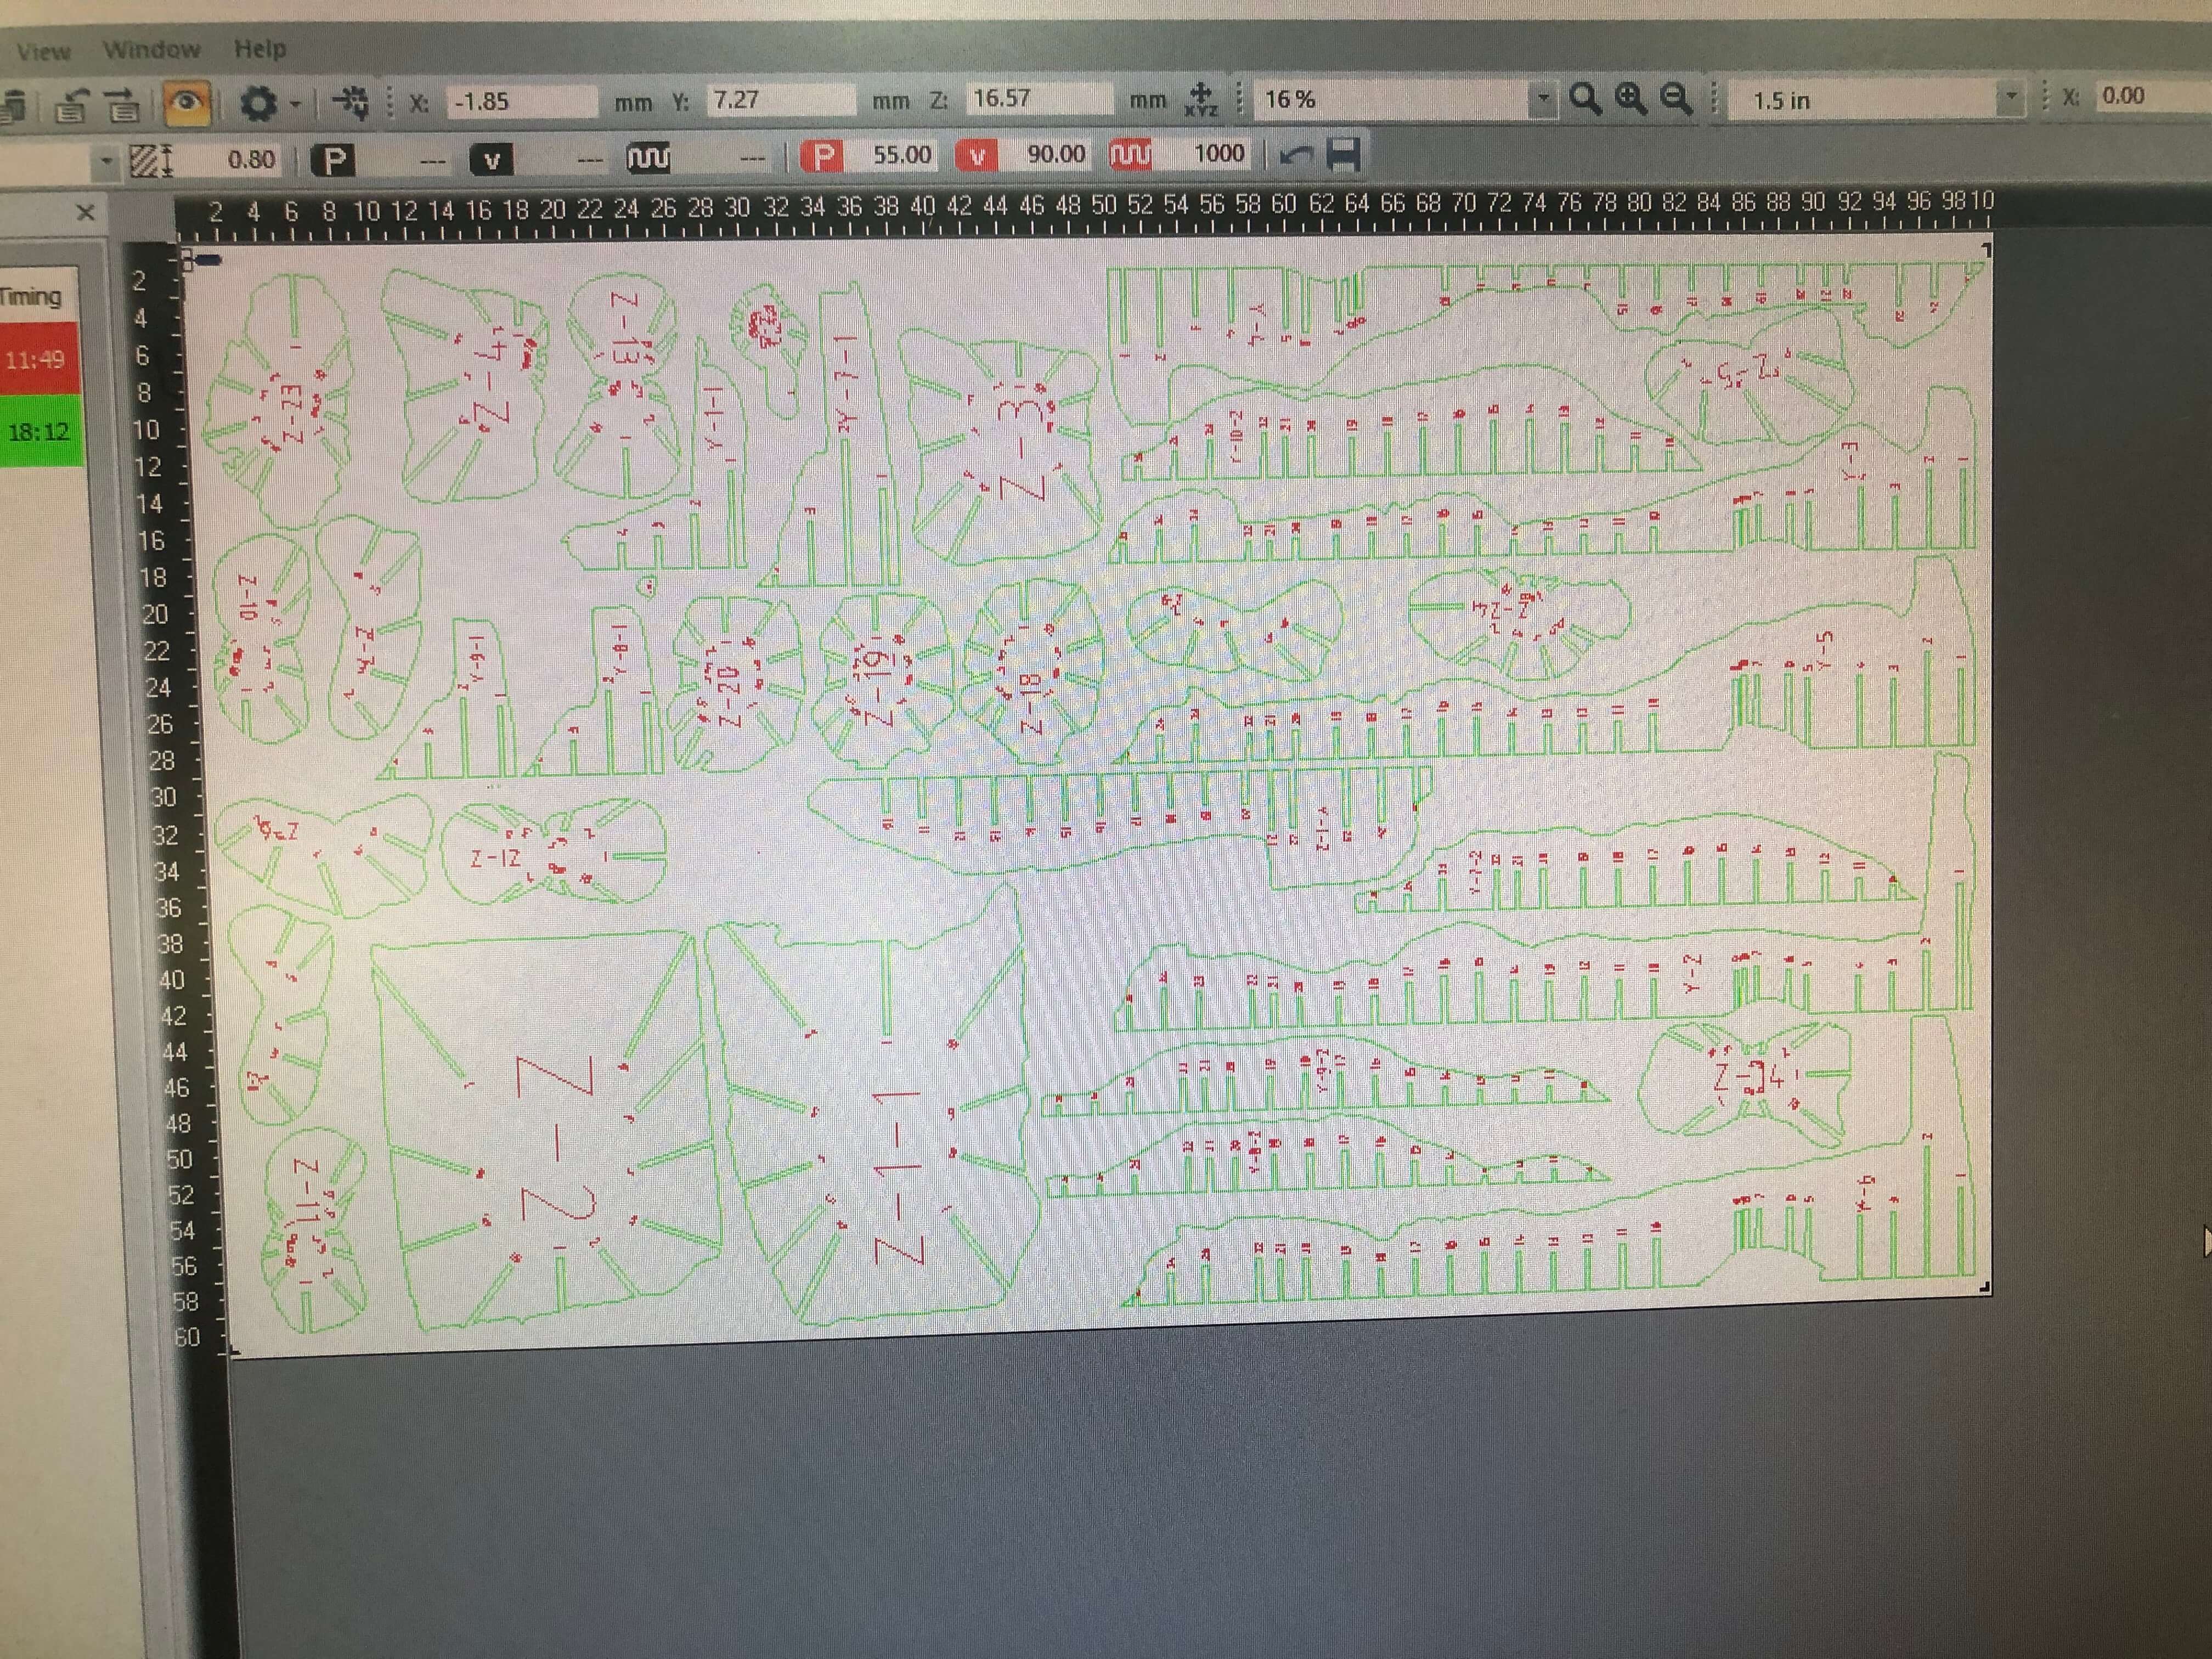
- tried to fit all the pieces in one board in order not to waste the material
SLICER FOR FUSION 360
The program stimulates how to assembly pieces precisely.It shows the exact sheets and pieces, numbers needed to connect all the pieces for the final object. You can also change the offset and check if there is an issue in connecting the pieces
- Tried out different slicing techniques
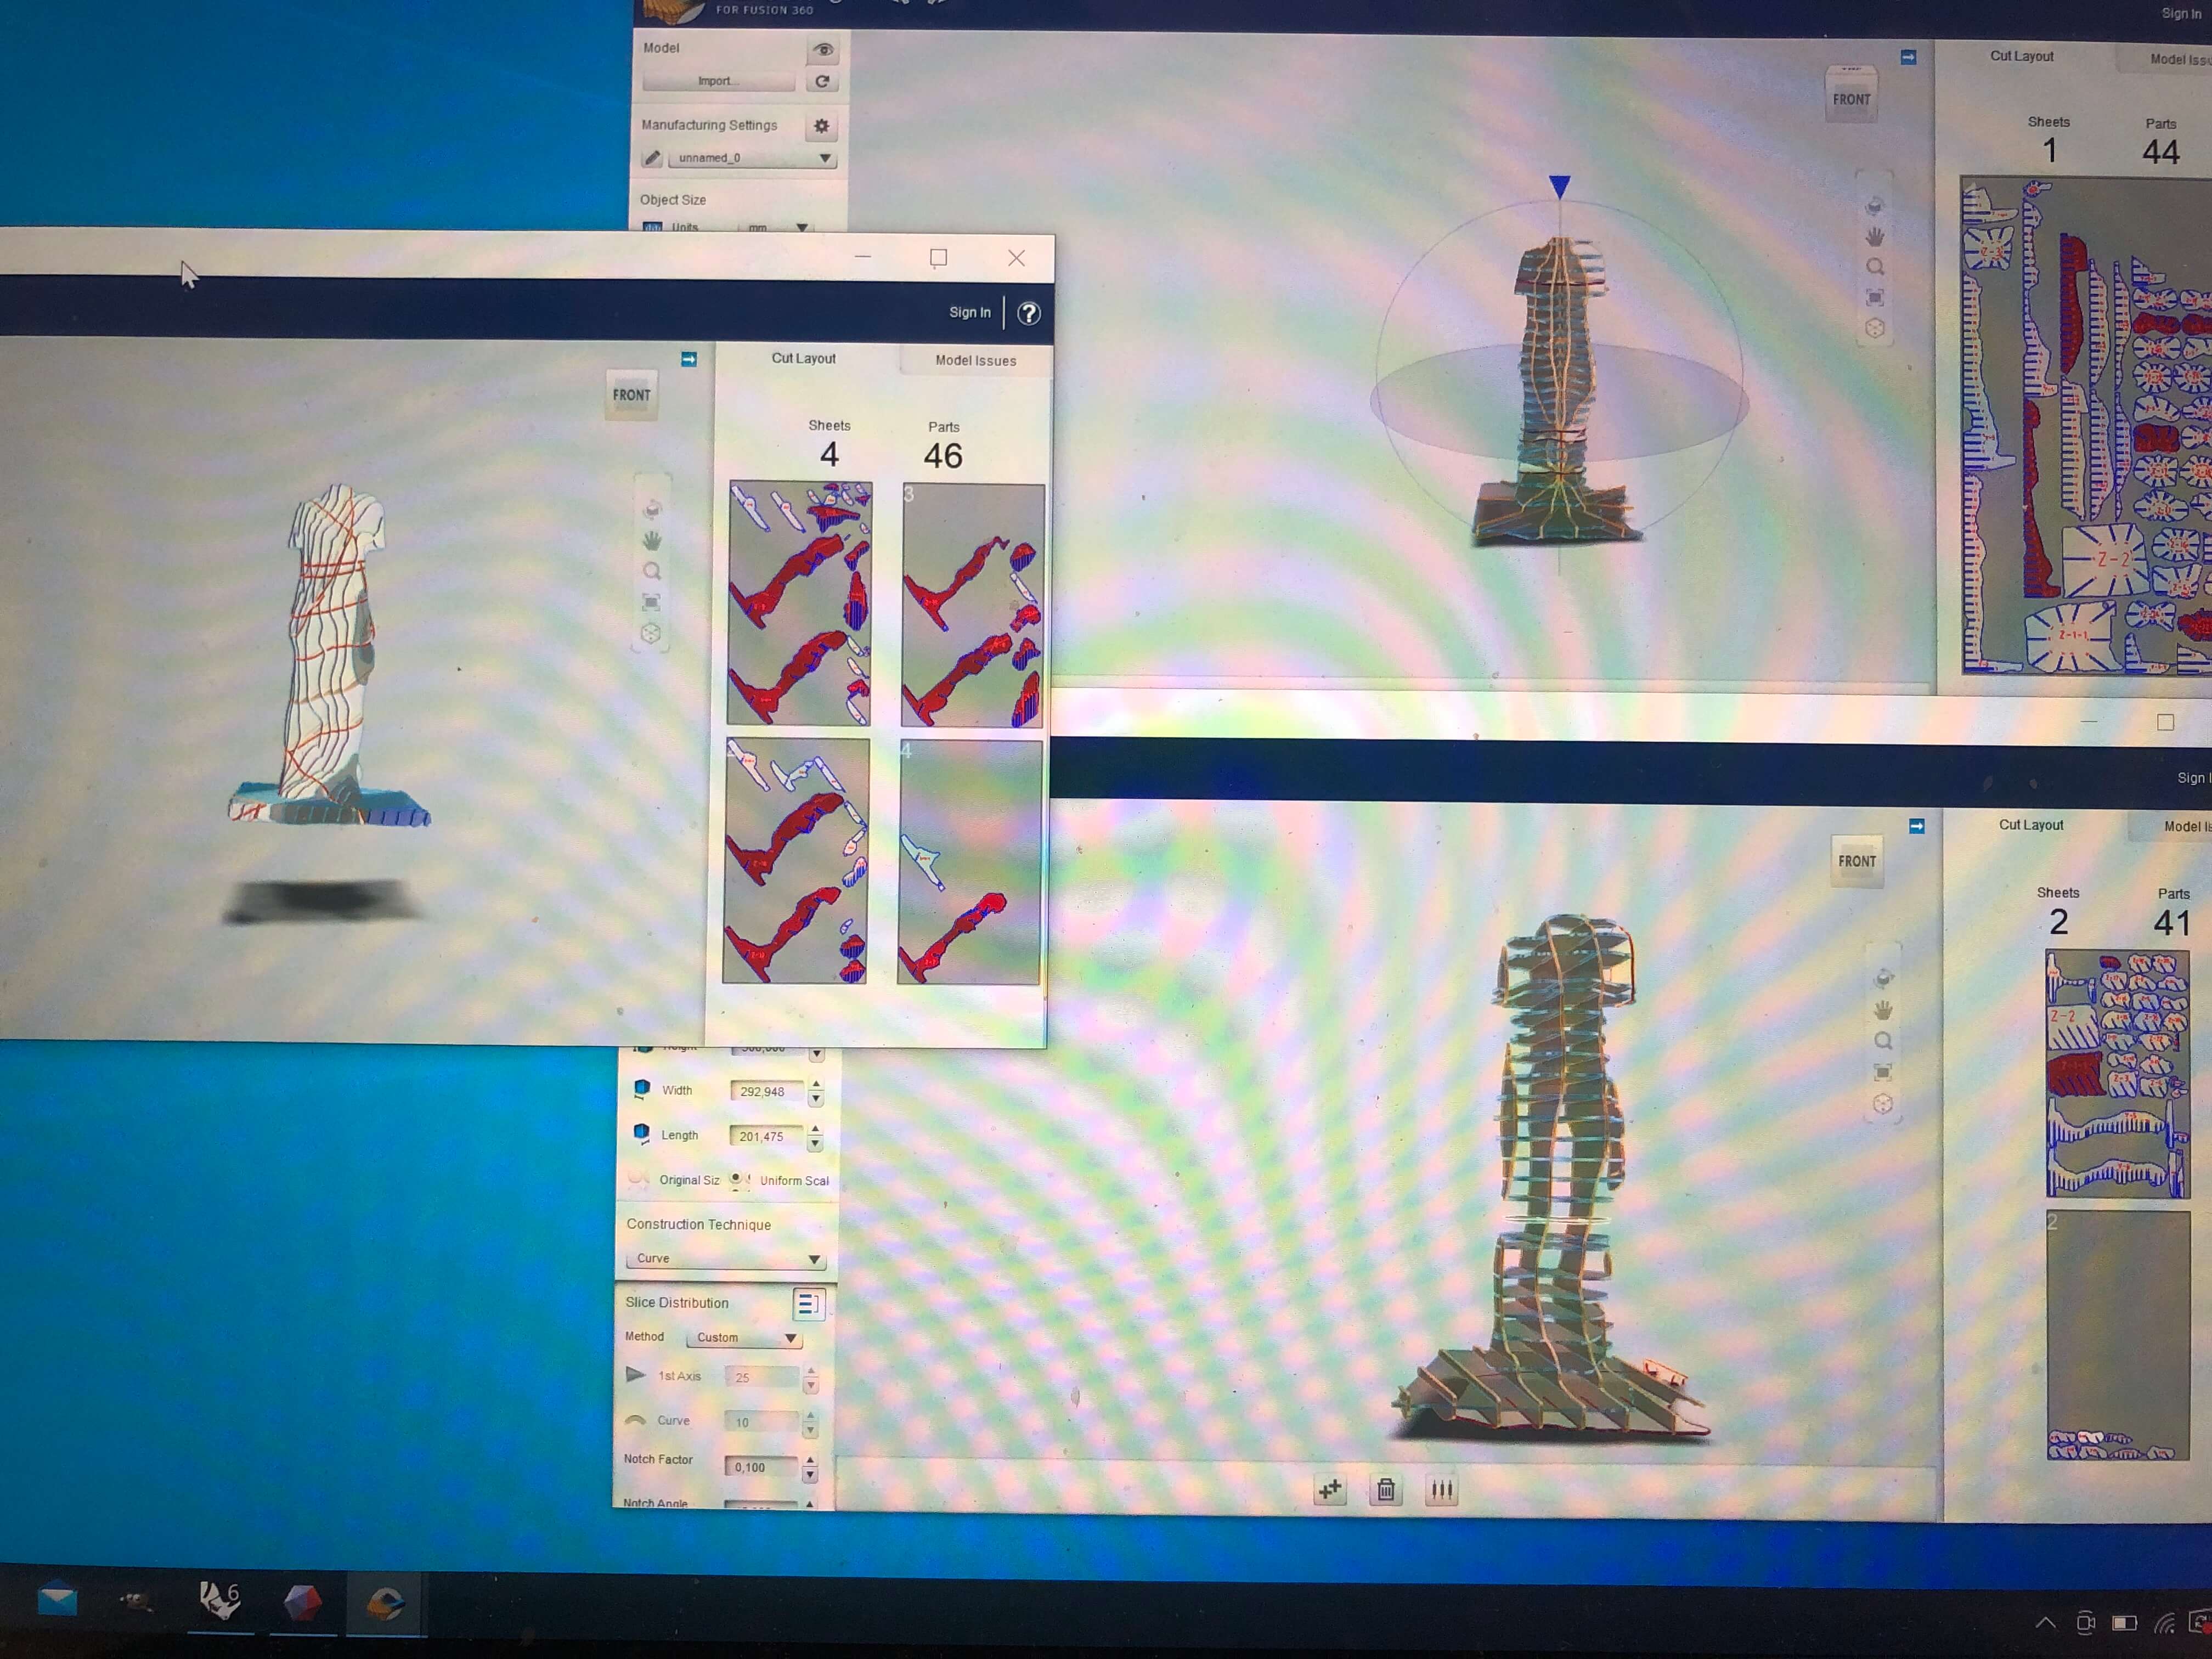
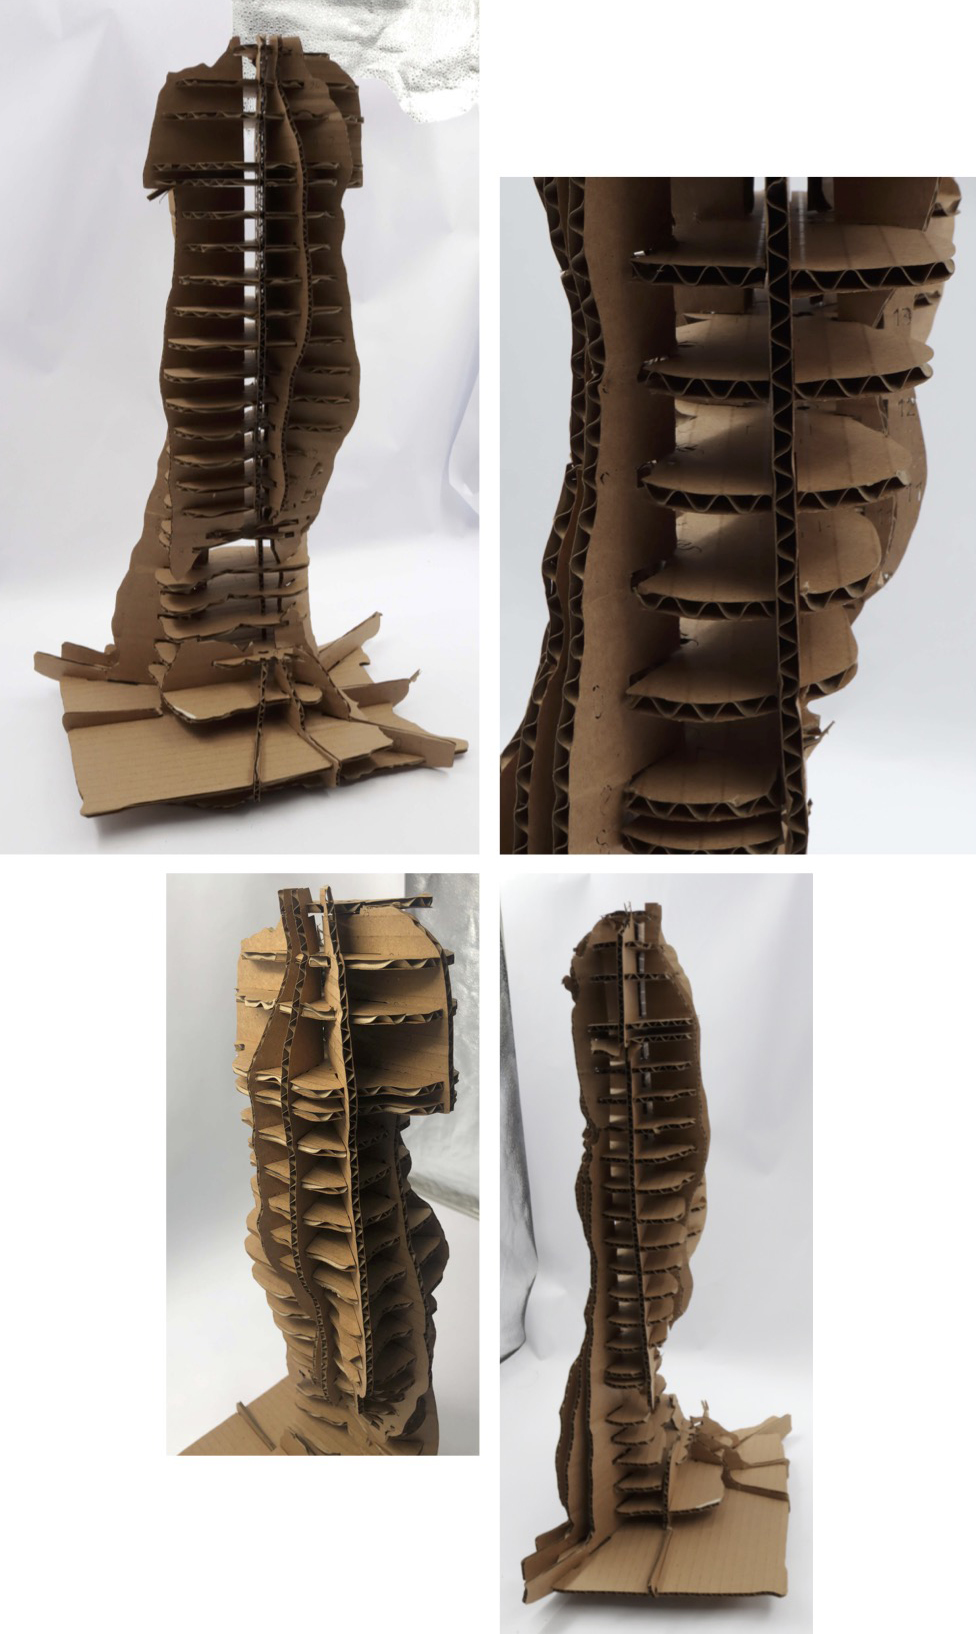
- I used the interlocked construction technique for the final model which was a bit challenging
Tools
- TinyPNG
- Meshmixer
- Rhino 6
- Slicer For Fusion 360
- Lasercut
FAIL TRIAL
-
The offset of the connecting pieces didn't fit properly, so it was hard to assemble the mannequin and the final result didn't look like the design I created.
-
The cardboard could easily break
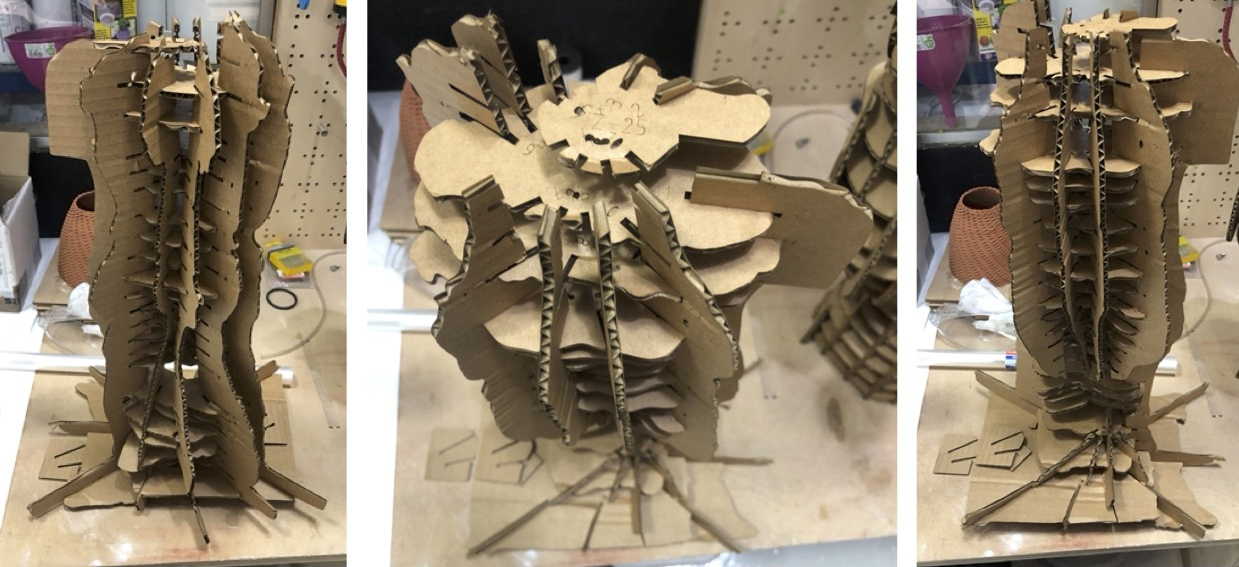
Tried out different slicing techniques
Step 2
- I then changed the offset to 4mm, tested it and I couls easily connect the pieces.
This model [^1] was obtained by..
Step 3
Lasercut and connect the correct pieces. The engraved numbers helped me join the pieces together in the proper
FINAL MODEL
 ...
...