Diary
DIARY
Let's try to share this journey with you! During the holidays I had to rest, since apparantly my body doesn't like too much pressure, therefore first week after the end of holidays was focused on taking better pictures and adding missing information.
Ideas along the way will be stored on my Pinterest board
The Real Journey begins here...
Week 01
- January 18 - January 24
This week was still very much focused on documenting the assignment weeks and recovering from my migraines.
What I did: - Gannt Chart - Imade a stop-motion video of the first 3D prototype of the installation:
Week 02
January 25 - January 31
Schedule for this week - Work with streatchable fabrics - Research kerf patters - Make 2 layer vynil inflatable with laser or vynil cut kerf patterns. - Sketches for kerf patterns - Lasercut kerf pattern on a lamp shade which will be used as a shape to hold the prototype
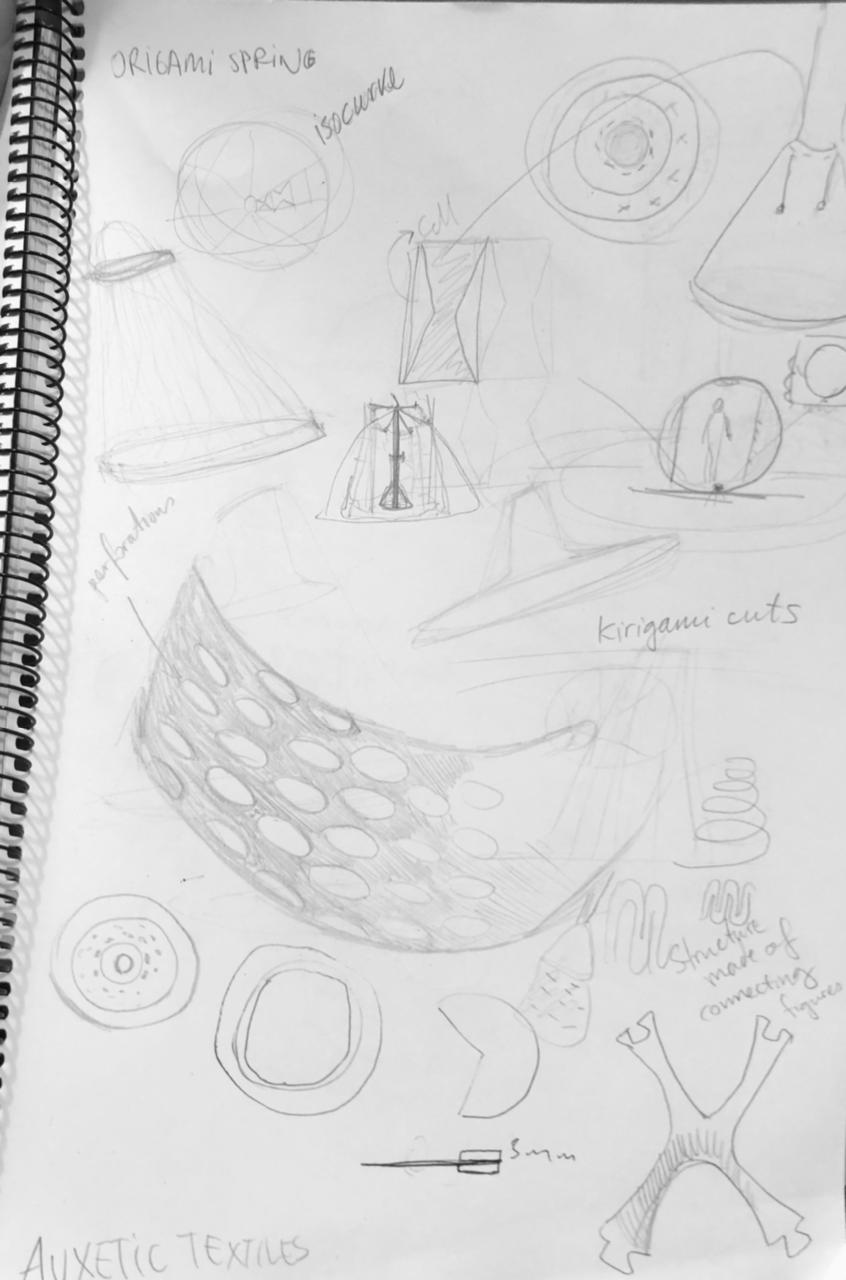
What I did 1. Researching inflatables led me to bilayer hydrogel. Complex hydrogel structures 2. Afterwards to Auxetics and Miura Fold. 3. Got help from Arman in creating kerf patterns on Grasshopper. 4. Edited the patterns on Rhino for tesselations. 5. Made deployable prototypes by designing sticks with holes and lasercut and later assembled with strings. 5. Made some vinyl iflatables but they weren't good enough because of the baking paper.
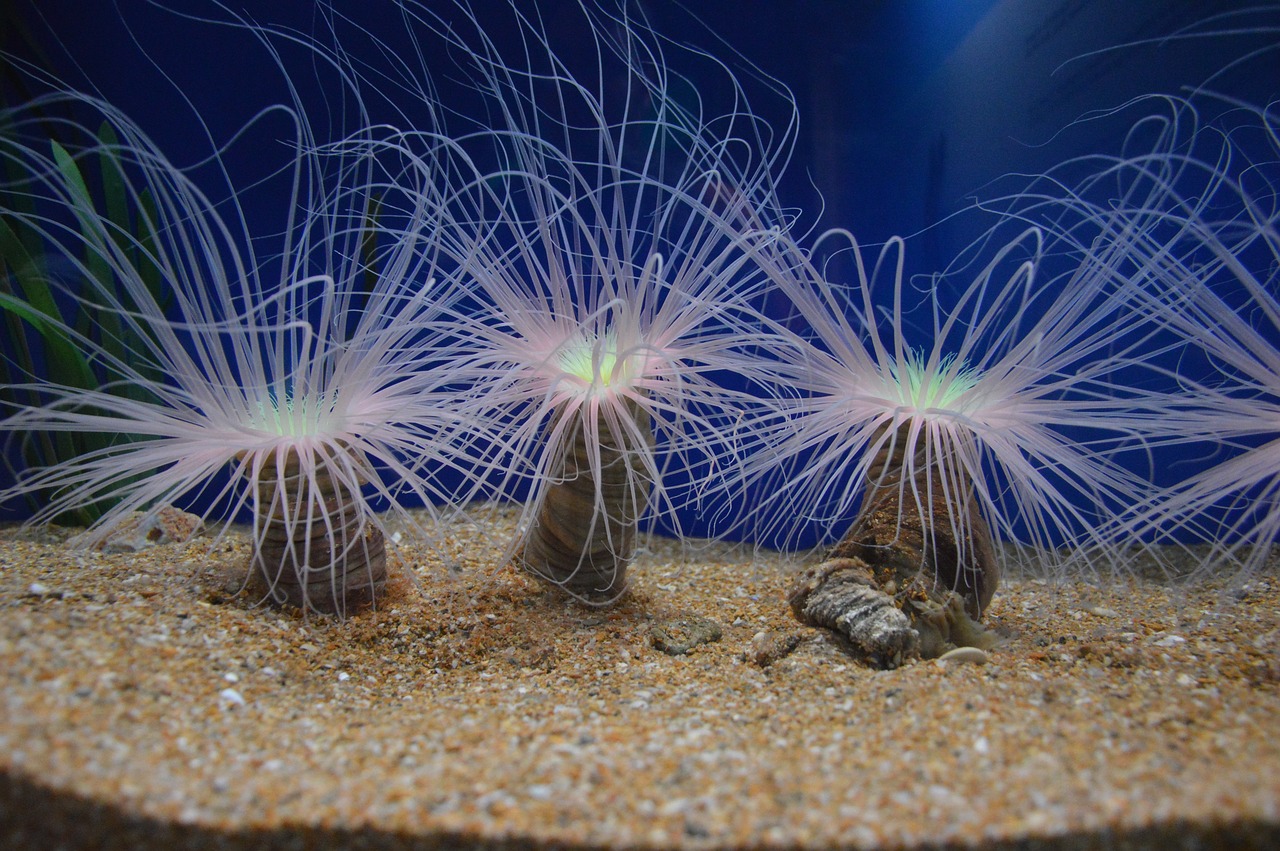
Inspirations
Week 03
February 1 - February 7
Schedule for this week
- Sticks glued on inflatable fabrics
- Lasercut Origami
- Lasercut Miura on fabric
- Inflatable machine design
- Using airpump to test movement of materials
- 3D print valves
Week 04
February 8 - February 14
 !
Inspiration:
!
Inspiration:
https://archinect.com/people/project/68194212/lightweight-fabric-plastic-composite-structures/68329046
http://3.bp.blogspot.com/-ahBPWCJ7o5E/Tr1tF1TZFRI/AAAAAAAAA3w/RL3Ed1dE22c/s320/LL_Diagram03.jpg
https://www.instructables.com/DIY-Soft-Robotic-Tentacle/
https://piecedpastimes.blogspot.com/2011/04/texturized-spring-wreath-tutorial.html
https://www.instructables.com/Origami-Pump-homemade/
https://ars.electronica.art/keplersgardens/de/artificial-intelligence/
https://tiffanyloy.com/The-Emboss-Machine
Week 05
February 15 - February 21
Schedule for this week - Define project idea - Check proximity sensors (PIR) - Finish test fiber optics - Main structure of part A - SMALL SCALE TEST OF PART A - Bake pleared origami - Test footpump - Plastic algae - Test fans
What I did: - Fans did not work the way I wanted
Slightly edited version of the presentation
Inspiration:

 https://www.sensoree.com/artifacts/goosebump-poof/
https://www.arch2o.com/weaved-3d-fabric-structures-dana-zelig/
https://roboticarts.wordpress.com/2013/03/23/bellows/
https://www.instructables.com/Origami-Pump-homemade/
https://www.pinterest.com/pin/438045501238106034/
https://www.compliantmechanisms.byu.edu/maker-resources
https://www.instructables.com/Origami-Ballistic-Barrier/
https://content.instructables.com/ORIG/FNK/ZUYI/K76GSO3C/FNKZUYIK76GSO3C.gif?auto=webp&fit=bounds&md=4e3b5a88b1594182d5748e32e3a07e17
https://www.thingiverse.com/thing:2070475
https://softcircuits2012.wordpress.com/category/students/weijing-xu/
https://www.instructables.com/Airtight-Self-Sealing-Inflatable/
https://www.sensoree.com/artifacts/goosebump-poof/
https://www.arch2o.com/weaved-3d-fabric-structures-dana-zelig/
https://roboticarts.wordpress.com/2013/03/23/bellows/
https://www.instructables.com/Origami-Pump-homemade/
https://www.pinterest.com/pin/438045501238106034/
https://www.compliantmechanisms.byu.edu/maker-resources
https://www.instructables.com/Origami-Ballistic-Barrier/
https://content.instructables.com/ORIG/FNK/ZUYI/K76GSO3C/FNKZUYIK76GSO3C.gif?auto=webp&fit=bounds&md=4e3b5a88b1594182d5748e32e3a07e17
https://www.thingiverse.com/thing:2070475
https://softcircuits2012.wordpress.com/category/students/weijing-xu/
https://www.instructables.com/Airtight-Self-Sealing-Inflatable/

Week 06 February 22 - February 28
This week flew by! Perhaps because I was moving and it was also my birthday, so 6 hours of sleep did not give me a migraine this time. ;)
What I did: - Bought - Found a case on Thingiverse to put the Circuit Playground in.
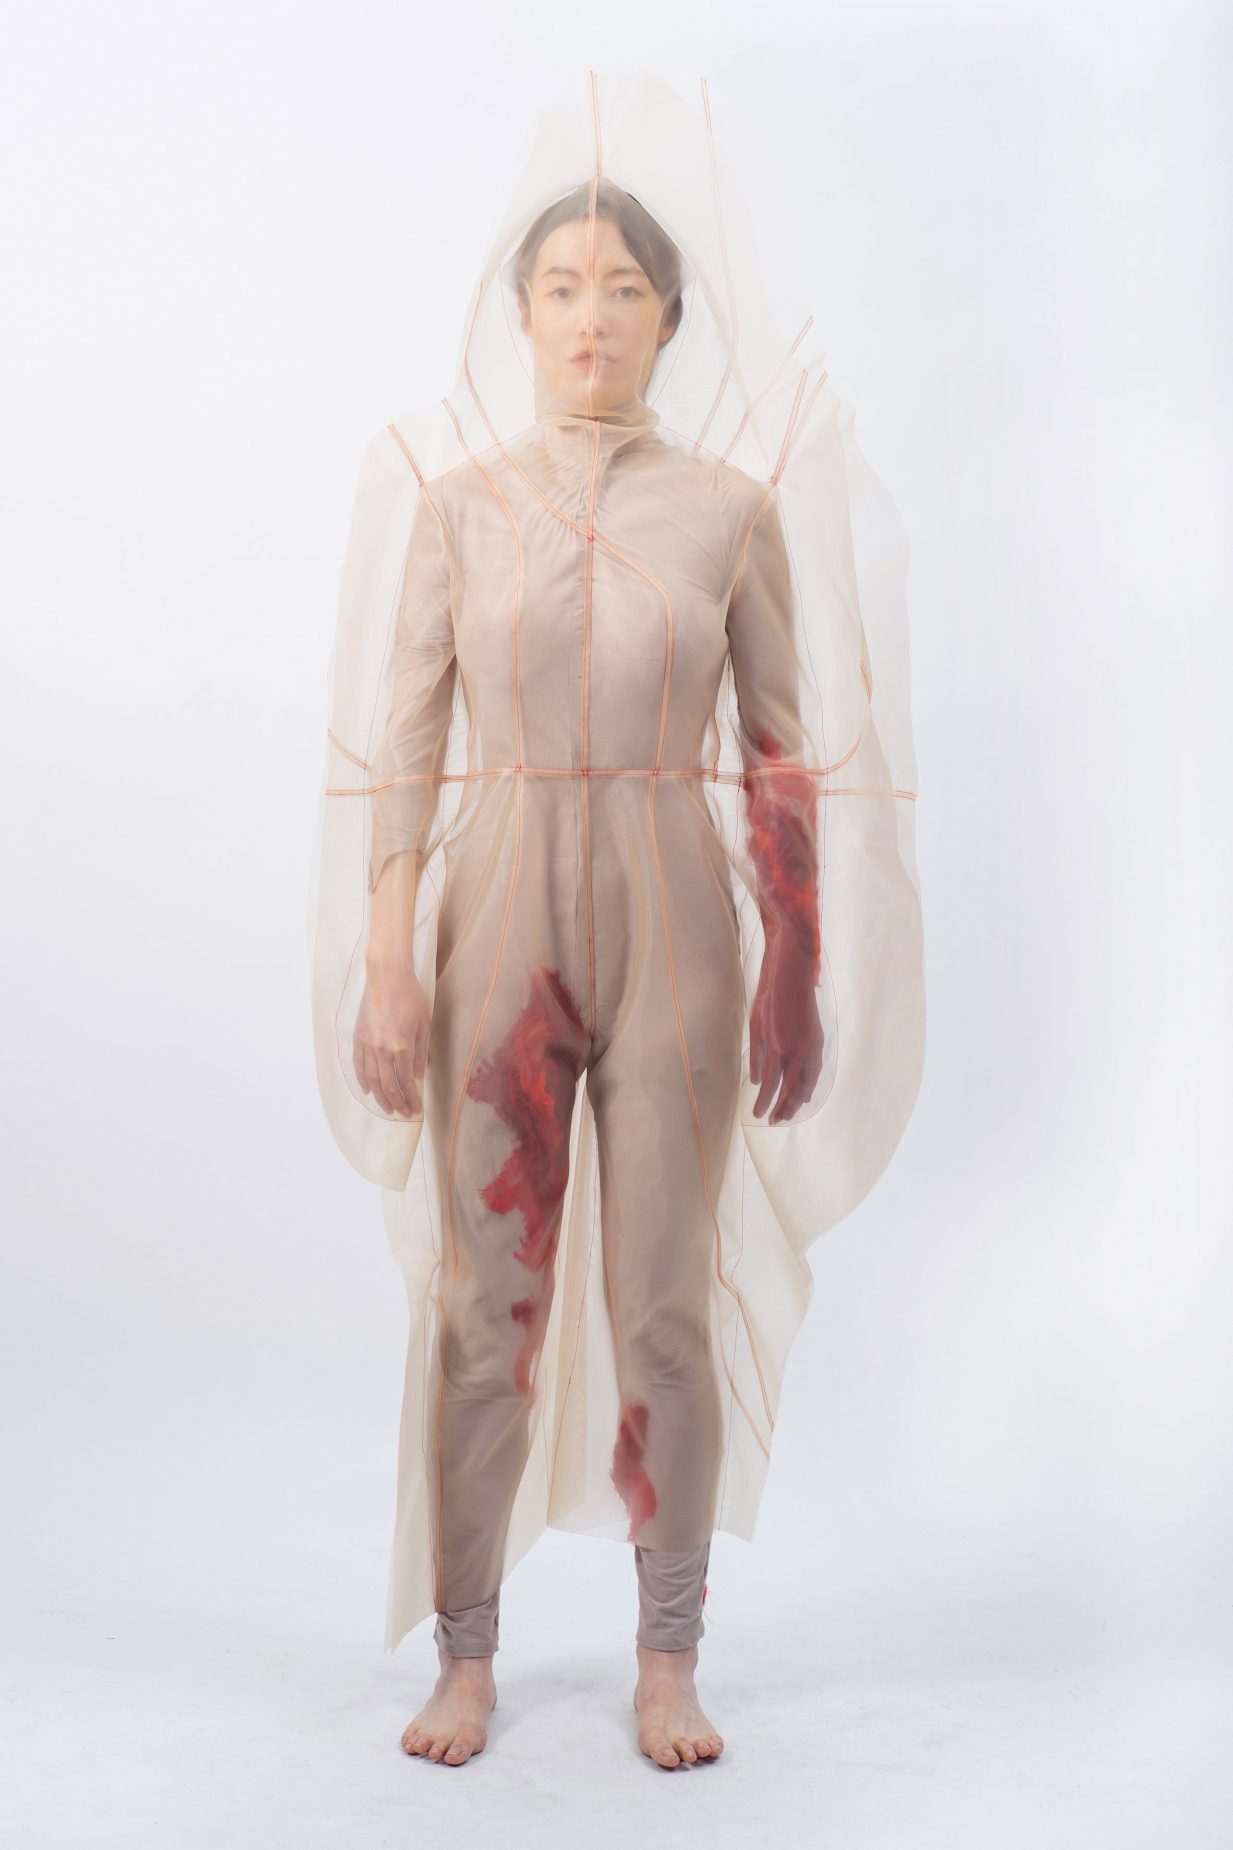
[Violet Zhou's Mental state clothing]https://www.dezeen.com/2020/07/27/risd-graduate-violet-zhou-fashion-collection/?li_source=LI&li_medium=rhs_block_3
Week 07 March 1 - March 7
Schedule for this week - 3D Printing a case for Circuit Playground - 3D Printing all the accesories for the performance -
Week 08 March 8 - March 14
Week 09 March 15 - March 21
Week 10 March 22 - March 28
Ultrasonic Sensor:
Components: * Ultrasonic Sensor * 12V Battery * N-Channel Mosfet (FQP30N) * Diode * Resistor * Voltage Regulator (anything to 5V) * ATtiny 85 * Arduino Programmer * Perforated Board * Fan * Power Supply * Pinheader
Instead of using many wires, a perforated board is used.
Gate pin of mosfet goes to Arduino Pin. When ATtiny powers gate of the mosfet, Drain and Source connect and connects to the Ground wire of the fan, thus turning it on.
Tested the fan with < 30cm threshold and it worked fine.
Next step ->
ATTiny programming: Using the same code, but adding // before the "Serial" = no serial communication on ATtiny. Change the pins according to ATtiny Pinout . once the code is changed, change the Board and Processors on Arduino for the Arduino Programmer
Test with 3.3V did not work until the power was connected to 5V. Test with LED and US-sensor - LED turned on when the fan was off.
Soldering the Board: Note: Check with Multimeter after each step. 1. ATtiny soldered flat 2. Pinheader cut on 4th pin to get 3 pins and soldered on the bottom left ATtiny. 3. Voltage regulator soldered below the ATTtiny Ground. 4. Red wire from V-R middle pin to ATtiny 3.3V pin on the top right 5. Mosfet solderedfacing back to back with V-R and side with bottom of ATtiny. 6. Connect grounds between Mosfet and V-R with white wire or by bending them. 7. Using yellow wire connect Gate pin (left side) of Mosfet to second from right pin on ATtiny. 8. Cut one pin from pinhead and solder next to 3.3V of ATtiny on top right. 9. Cut 2 pins from pinhead and solder next mosfet. Used for the Fan. 10. Cut 2 pins from pinhead and solder next the previous pinheads. Used for the Battery. 11.