Week06
BIOFABRICATING MATERIALS
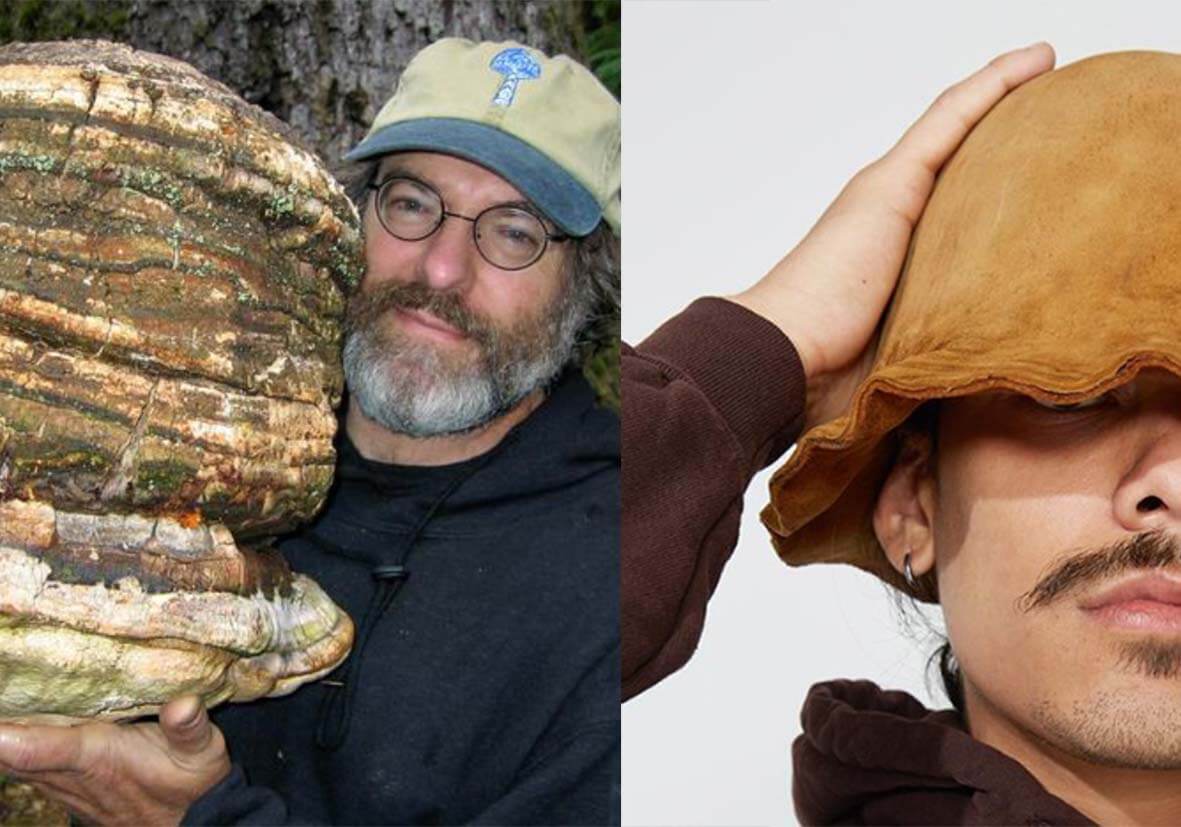
This was an exceptionally exciting week for me, and the one I was looking forward most to on the course. I believe strongly that biomaterials are the future for our planet! In my own practice, I have been on a journey, transitioning from using only waste materials in production, to only using natural waste and natural fibres. I made this decision due to the harmful affects of chemicals like EDC's found in plastics and other unatural fibres, also the toxic chemicals found in all shop bought dyes. Before enrolling I had already a basic knowledge in natural dyeing, but for me it was imperative that I go a step further in my sustainable practice, researching ways to create biodegradable, wearable fashion garments from food and plant waste, along with plants that have wellbeing properties for the wearer, and we have in abundance on our earth. These are mushrooms and algae. Fascinated by mycology, and the work of Paul Stamets, a couple of seasons ago I made an entire collection based on the patterns and colours in specific mushrooms.
MUSHROOMS
Their are over 50, 000 species of mushrooms in the world, some still yet to be discovered. Mushrooms are the closest living things to aliens, and the Fungi Kingdom is an entire kingdom on its own, not belonging in either the plant or the animal kingdom. Mycellium roots go deeper than 300 miles underground, releasing enzymes in their search for nutrients, infusing matter together, and in forests sending those nutrients to all the surrounding ecosystem, keeping everything in balance. Mushrooms grow when the ground is moist, and there is rain and humidity in the air.
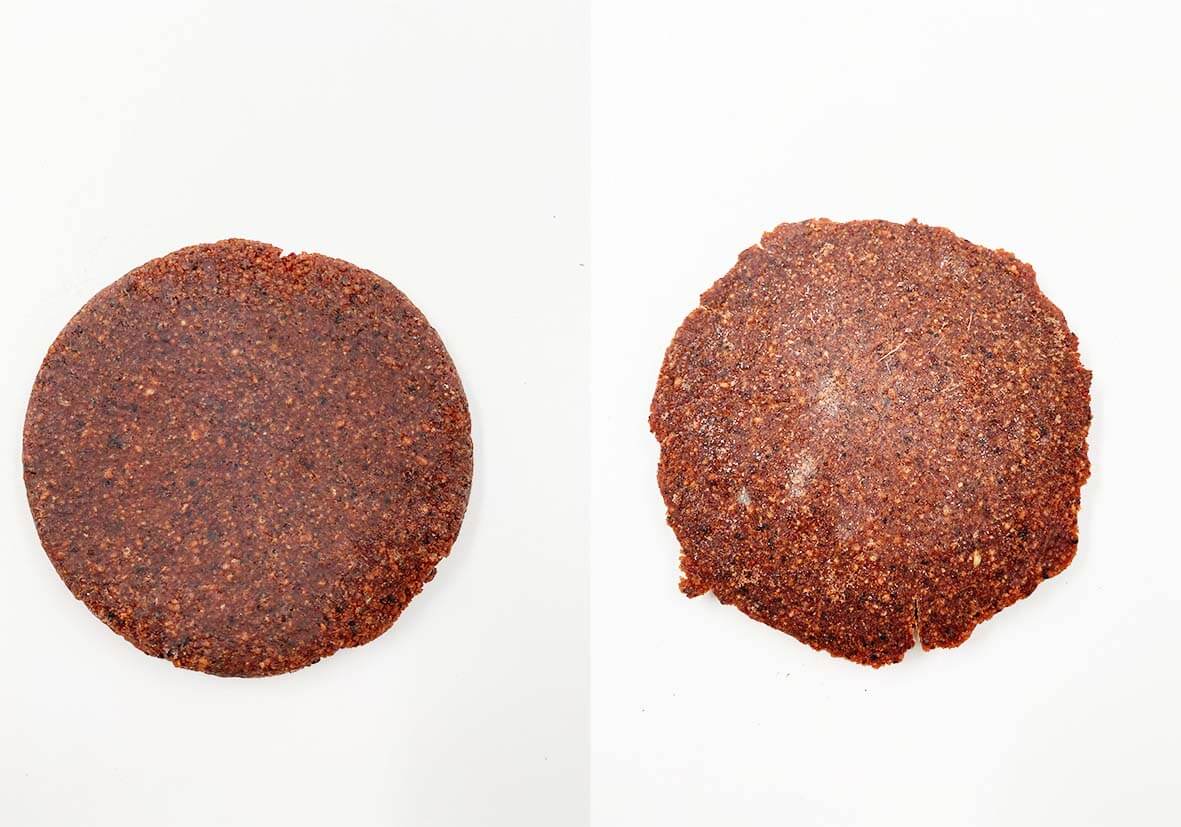
We had Jessica Dias of @bio.babes and @formalisedcuriosities, come help us work with mycellium. She is amazing! She told us that the best strains of mushrooms to work with are those from the reishi strand, and the horsehoof fungus. We began by working with mycellium. The key to working with mycellium, is to keep the mycellium at a stage before it makes a fruiting body. The horsehoof fungus, or amadae mushroom, comes in different strands across the world. It is very difficult to find, but mainly grows on polypore trees and birch trees. Once you find it, it has to be the correct age for you to be able to get a fibre from it. I was lucky enough to find one back in england, but unfortunatley the mushroom was too old and to hard for me to be able to get the material from it. The mushroom, makes a beautiful soft leather like fibre that you can just scrape off and stretch to obtain a larger size. Mylo leather is made from the reishi strain, and is now available on the market! I tried to work with them on my Magic Mushrooms collection, but they are only working with huge brands like Stella Mcartney and hermes.
Our first task this week, was to create our own mycellium substrate bag using the reishi strain. The reason we chose reishi is that it is really tough, the same as the horse hoof mycellium, and this affects how the mycellium grow. The great thing about using mycellium in design is that they are highly resistant to moisture and steam, as well as mould resistant. They are fireproof, biodegradabnle and light weight. They can also be returned to the earth as a nutrient. Reishi in particular is known as 'the elixior of life.'
MAKING THE SUBSTRATE
here are a list of ingredients you need for making the substrate.
- hemp husks
- sawdust
- straw
- woodchips
- coffee grains (crumbly results)
- cow manure
- wheat husks
- outdoor matter
- fabric
-
hemp fibres
-
mushroom grow bag
- distilled water
- pressure cooker
- incubator
- reishi spawn
- cling film ( not an ideal sustianble thing to use, but it helps prevent bacteria getting in and if working with a mould, it makes lifting the mould easier.)
I made my substrate bag using 4 handfuls of hemp 1 handful of cotton fabric (finely chopped) 2 handfuls of flaked cork 1 handful of hemp fibres
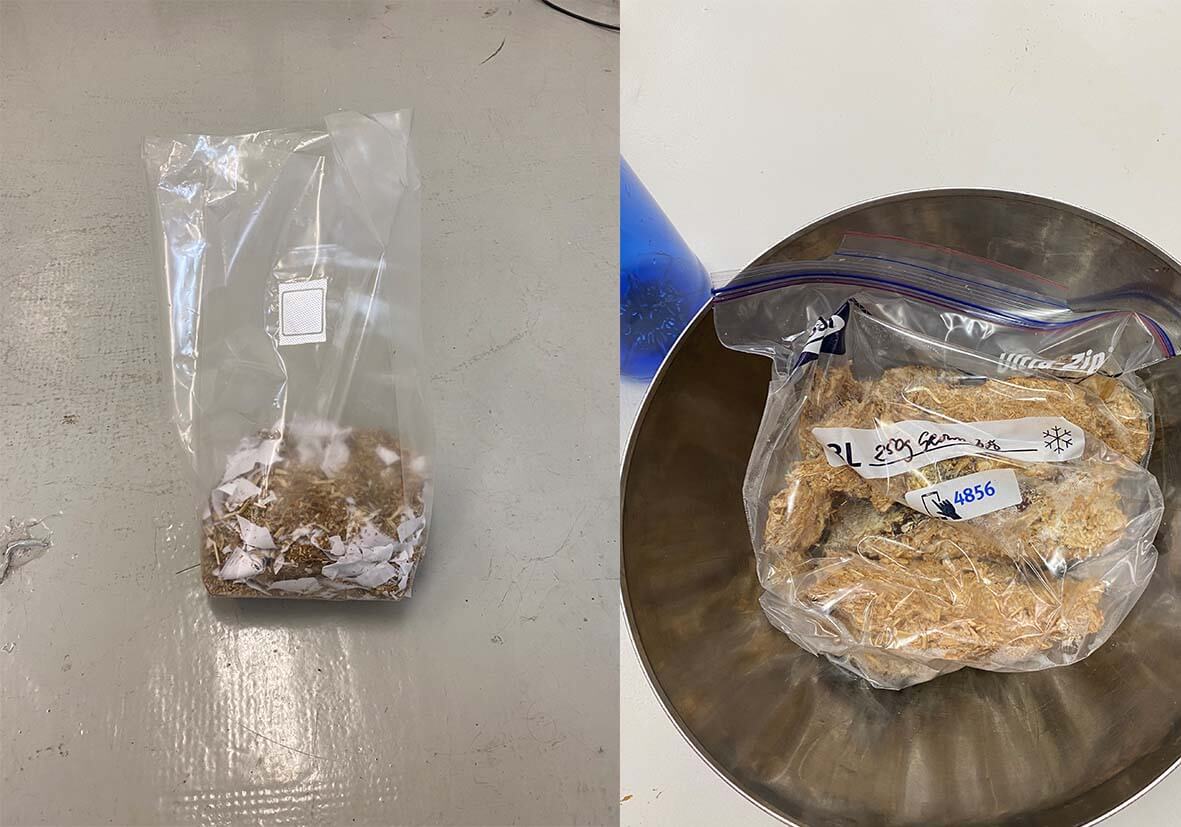
You then fill the grow bag with your substrate, making sure that your space and your hands are completley sterile from alchohol. You mix the material carefully, adding distilled water until it felt nice and moist, but not too moist. Once it is ready, we placed it in the pressure cooker and steralised for 40 minutes.
Once its sterile, and our hands have been steralised with alchohol, we set up a safe space with the bunsen burner, making sure the environment is completley sterile, then using gloves (steralised) we break off a couple of chunks of reishi mushroom substrate, then we put it in the grow bag. We close it in the sterile environment, folding twice and adding a clip. We then break apart the chunks within the growbag, spreading it across the whole bag. Once this has been one evenly we put it in the incubator to grow. This process will take some time.
3D FORMING AND MOULD DESIGN
- mould
- reishi substrate
- distilled water
- mixing bowl
-
flour
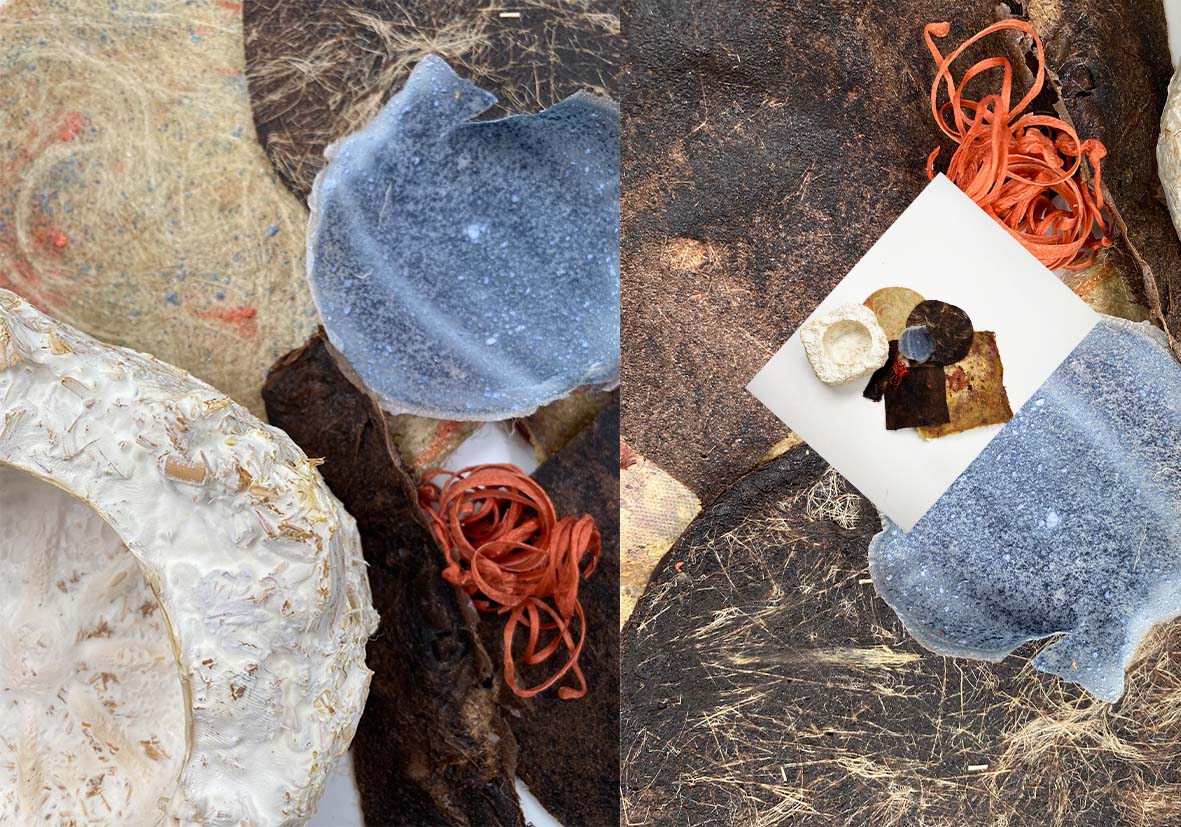
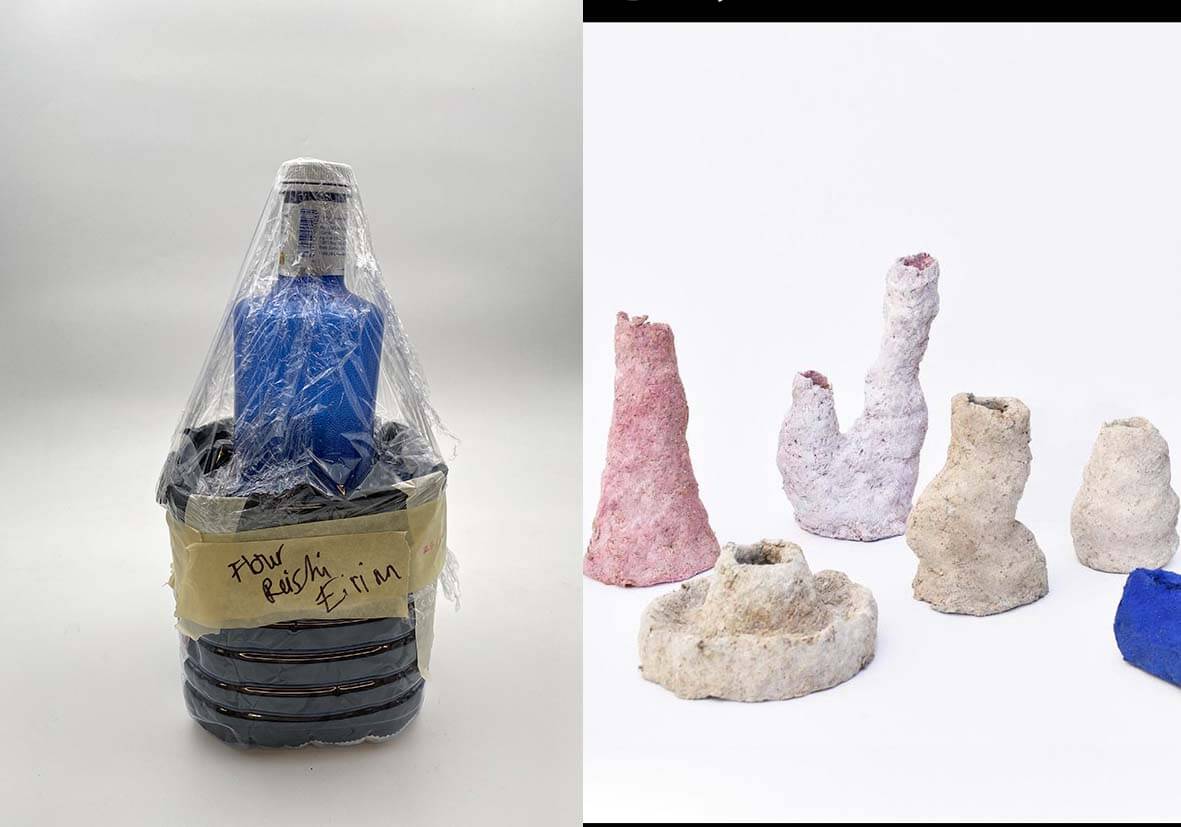
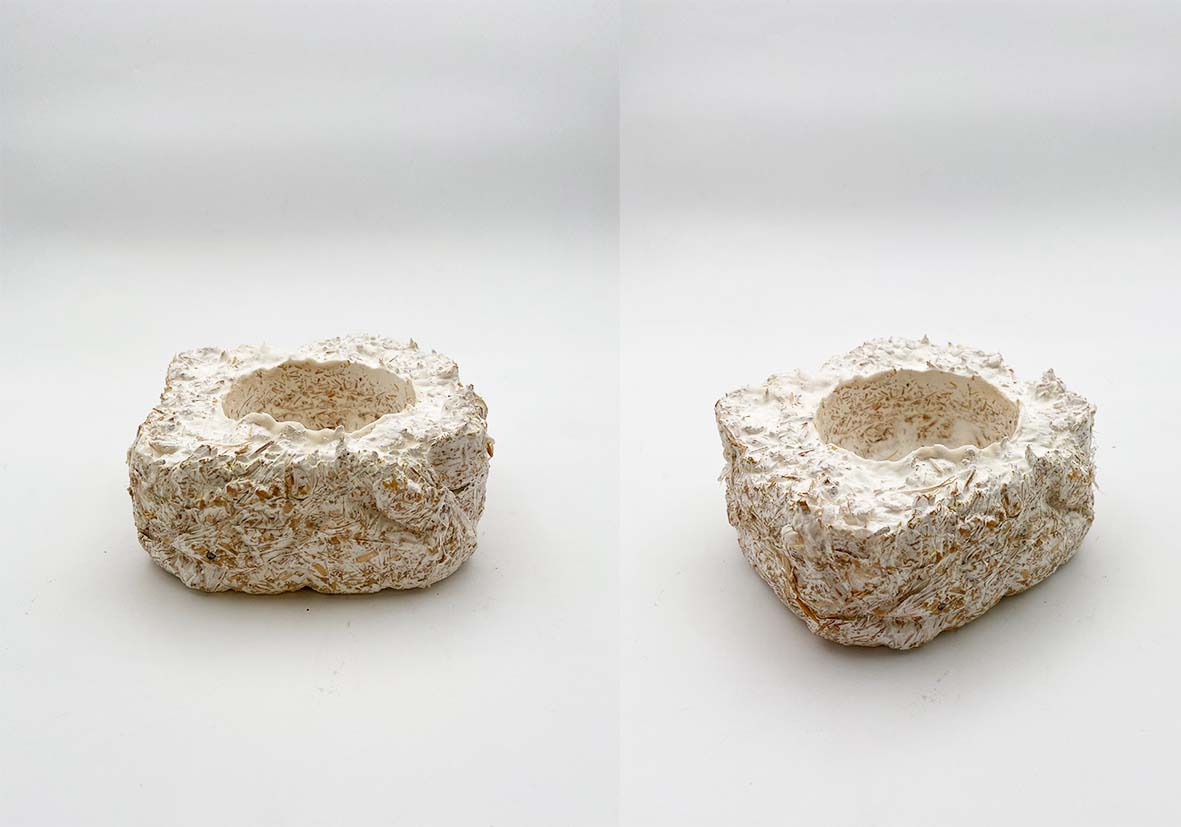
we had to find a container of our choice, to create a mould that mycellium would grow in. You can buy reishi mushroom in different stages, so on this occasion, the substrate was much more developed so that we could see the results grow in our mould withion a week. I cut a large 8l bottle so that I could use the base for the outer of my mould, and used a circular drinking bottle for the centre, as I wanted to make a candle holder. I lined the centre with plastic fruit packaging, to try and give it an even more distorted texuture on the outside. We created a sterile surface, and wearing gloves steralised our hands. We broke our substrate into tiny tiny pieces into a mixing bowl. We spent almost 45 minutes doing this, listening to classical music and making sure that everythign was broken down propely. We then added enough flour to make it sort of sticky and crumbly. We then added the distilled water, creating a sort of dough with our mixture. Checking it regularly to make sure it had the correct consistency. Sticky and moist. Then using the cling film, we lined our moulds, before adding the mixture gradually, pressing it down. Once its ready, I covered the mould completely with cling film, and made 9 air holds with a pin. It took about a week to get the results, but im super happy with the outcome!
MYCELLIUM PLATES AGAR
we create the agar plate the way we usually do, pouring into the petri dish in a biosafe area with alchohol. Cleaning our hands etc. When the jelly is firm, and cooled, we add a small chunk of mycellium, using a reishi strain again. By adding it to the petri, we can observe how it grows, and use the results to decide what strains are good to work with on our future projects, we can also use it as a substrate by putting it straight into the grow bags once its developed. This process allows us to see wether it is a strong strain.
BIOMATERIALS
biomaterials are an incredible material to work with as they are biobased, biodegradable and biocompostible. They can be handcrafted in a bioplastic form, or and they can be made into leathers.
CRAFTED bioplastic/silicone/resin fruit algae coconut
LEATHERS microbial fungal tempeh algae labgrown
they can either be made from raw and natural ingredients or they can be made from manmade ingredients.
bioplastics are so imnportant, as plastics are a substance the earth can't digest, like we cant digest certain things, but bioplastics are biodegradable.
We started by recieving different recipes for the different types of bioplastics and seeing samples of how they came out. We did alginate, agar, and gelatine. For me alginate was the most interesting option, and I chose to explore and develop this, rather than practicing with the others. I did not want to work with gelatine, as I am a vegan, and my brand is vegan. When doing my research, I was not able to find many examples of agar being waterproof, and I wanted to explore creating wearable waterproof fabrics from these biomaterials. I live in Margate, a seaside town in the south east of england, where seaweed grows in abundance. I want to be able to devolop garments for next seasons collection, using algae from the sea, and using food and plant waste as a filler. To use fresh seaweed, rather than alginate, I would have to rinse the salt out of the seaweed compleltley, and then dry it out. Once it is dried, I can blend it like a powder, and use it in the same way I would the alginate, but I would also have to add a plasticiser. I will be doing more research into this.
ALGINATE RECIPE - mixing jug - hand blender - cold water - 4g sodium alginate - 8gr gylcerine (can add olive oil half and half) - calcium chloride 10gr in 100 ml in water. - frame - heavy fabric - clips - hemp fibres
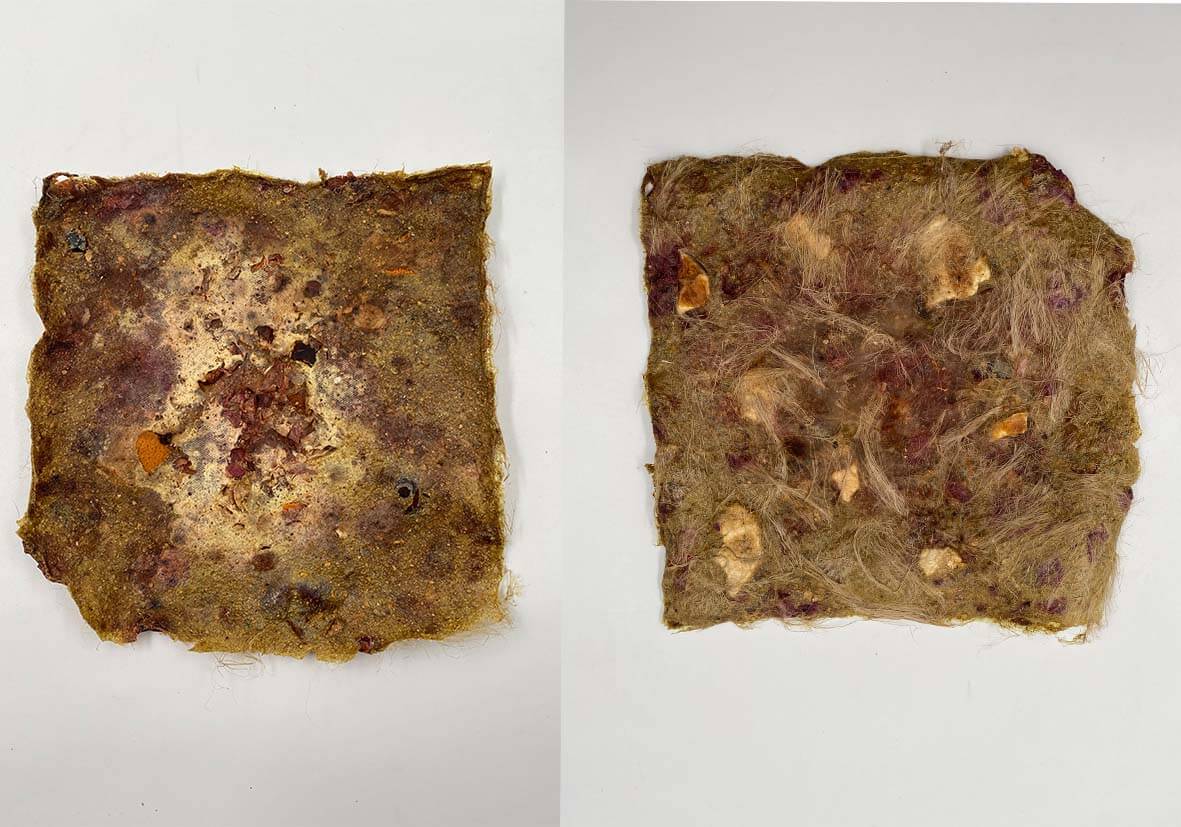
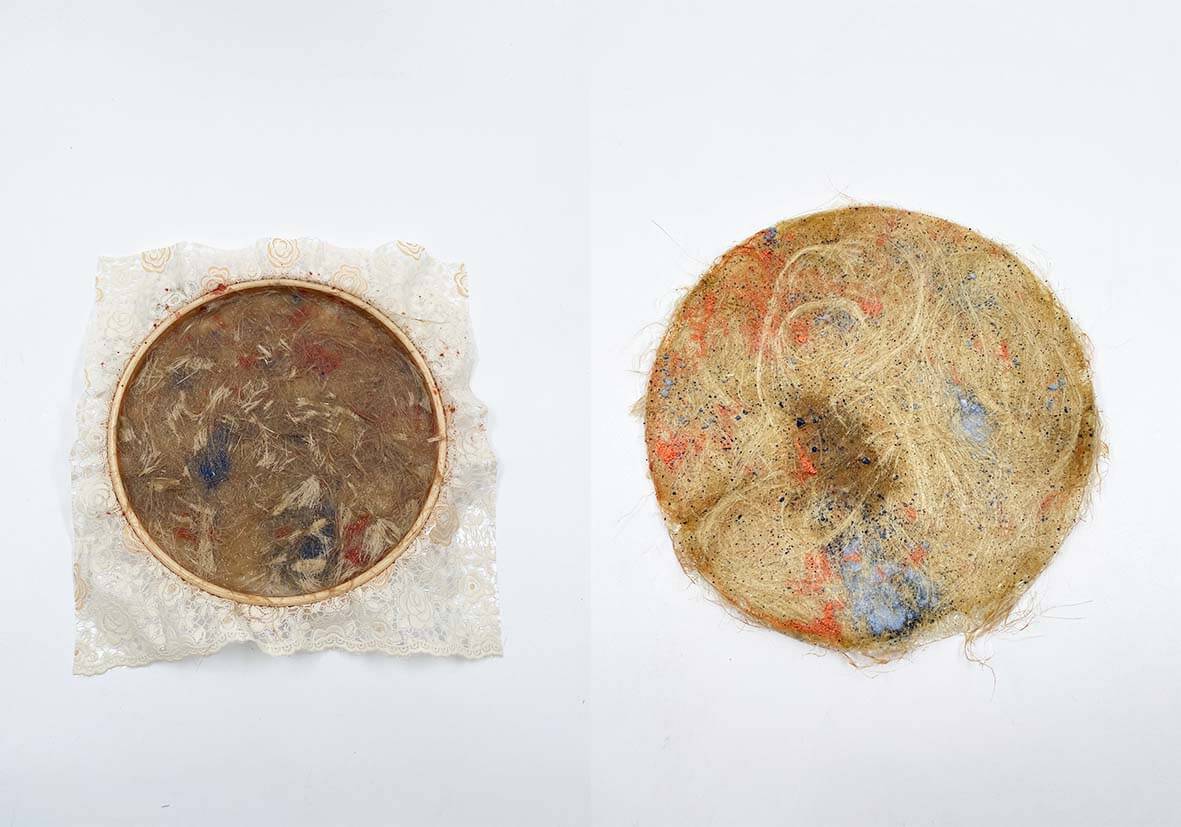
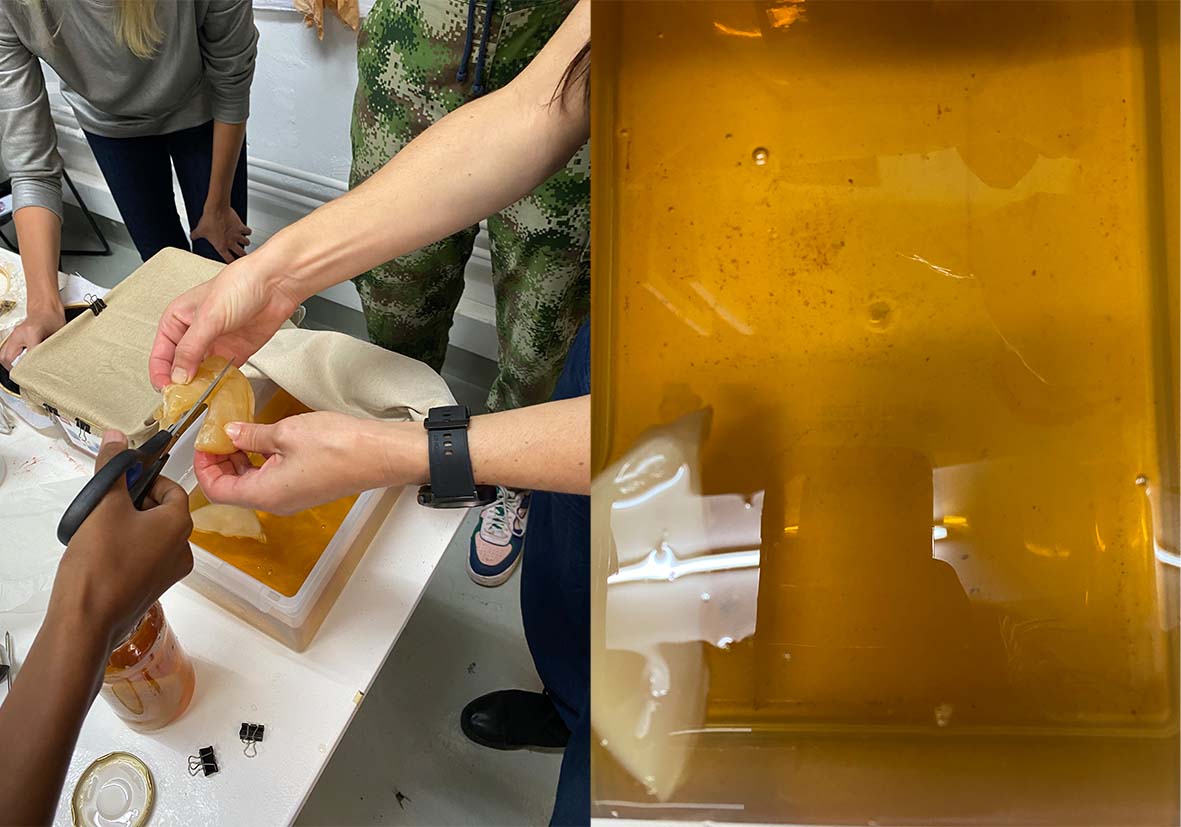
For the alginate recipe, you weigh out the alginate and the glycerine and then blend it in a hand blender, avoiding bubbles to the correct consistency. You can add the natural pigemnts from the biochromes week to change the colour as a filler, or you can do the same with food and plant waste. I had previously prepared by drying out my fruit waste in the dehydrator. I then used the grinder for some of it, to play around with different consistencys. Once your mixture is ready, you leave it to stand for a short while. whilst its standing, create the calcium chloride solution, and spray the frame with it, dabbing it with tissue after so that there is not too much. We then pour the solution into the mould and then spray it again with the calcium chloride solution, dabbing it with a tissue before taking it to the dehydrator to dry out. I played around with using different fillers, and using different fibres to see the different results. My end goal is to create a large fabric, using a frame I found on the street, and preparing for my materials development when I get back to england.
Here are some examples of my results. I did not ever change the quantities in the mixture, but I changed the size of the frame I was working with and the amount of mixture I poured into it. The main things I changed were the placement of the fibres and the filler within the material.
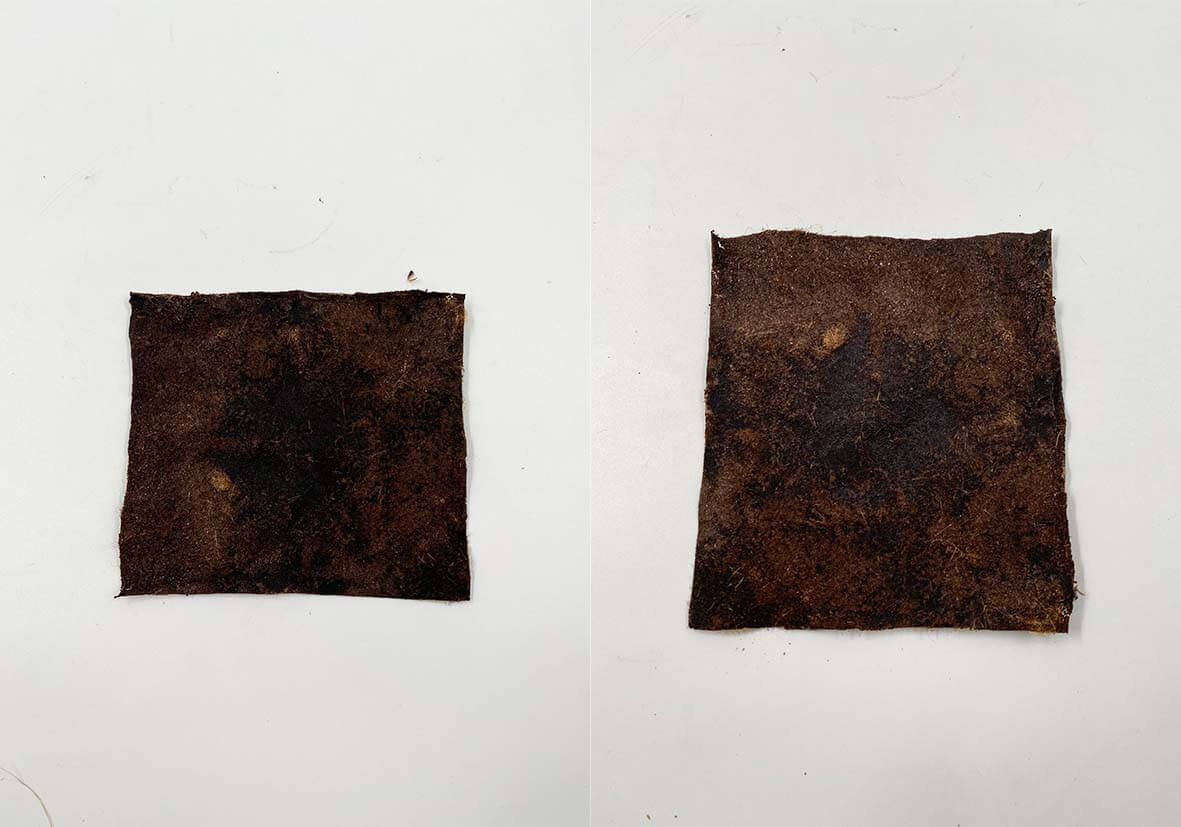
For the first sample, I went a bit crazy with the filler. I put three different types of orange filler into the mixture, and then added a large amount of fibres, but put them after the mixture had filled the mould. I also put some large pieces of oranges and rose petails. The alginate mixture was quite thin, and the centre did not dry properly. If I was to do it again I would use the fine orange peal filler and not add the big chunks of orange for a more consitent result.
The next one I made quite thin, and added loads and loads of hemp fibres onto the back of the solution once it was in the mould. Before placing the fibres I added mica powder and black beans powder to create a sort of cosmic appearance. I was really happy with the ouctome but I think it needed less fibres, and to be slightly thicker to be a comfortable wearable.
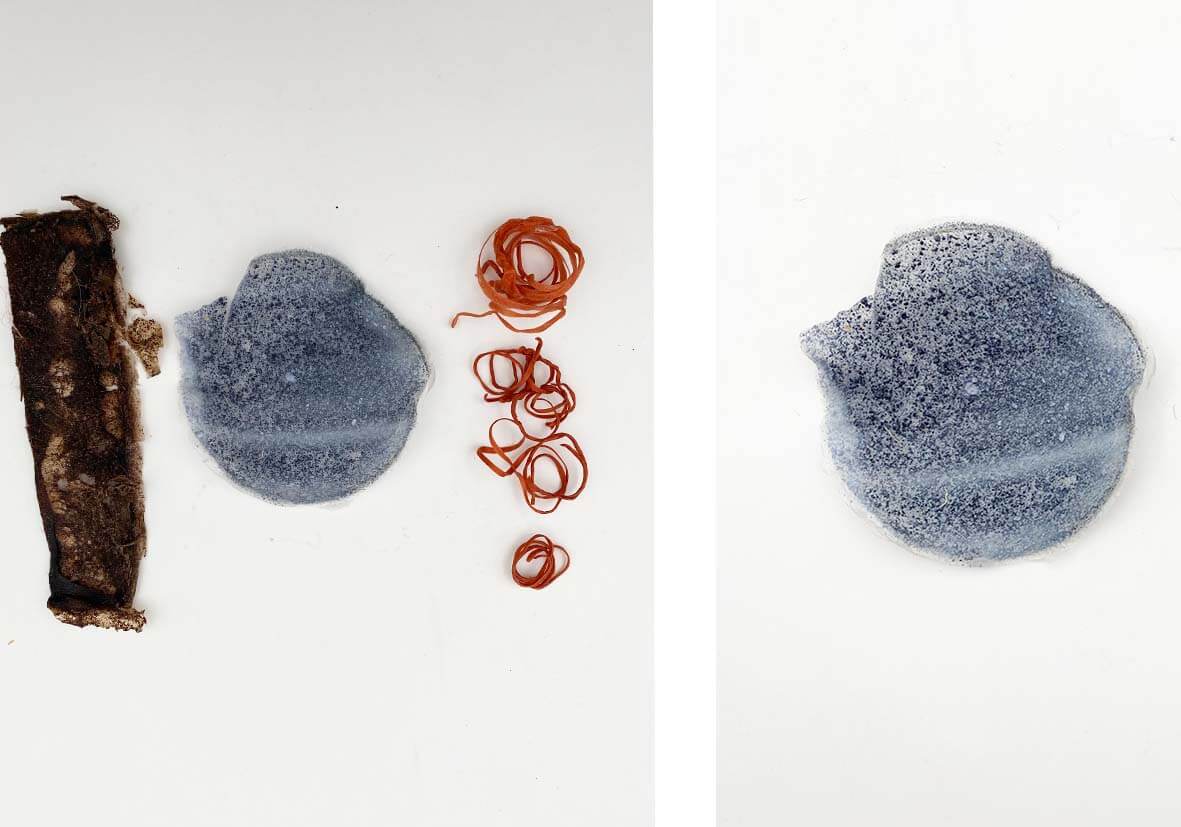
I then tried a small sample using black bean dye powder, using a very fine amount of alginate into the mould, and with no fibres. I love the result of this, I just think it needed to be a little thicker next time, and I would have to test if it was strong enough without fibres. I think it could be!
Next I decided to work with coffee granuales, as it is possible to get coffee waste in abundance from coffeshops at home! I also love the colour and think it creates a really sophisticated outcome. I wanted to try and make the hemp fibres not visible when I make the fabric, but at the same time I wanted to make it strong enough to be a wearable. I also wanted to make it thicker to see the results of this. The first one is the thickest example, where I placed minimal fibres and put them in the frame before the alginate solution. This is taking a lot longer to dry as it is a lot thicker, and you can still see the fibres. So I then wanted to make a slightly thinner mould, placing the fibres this time in the centre of the mix.
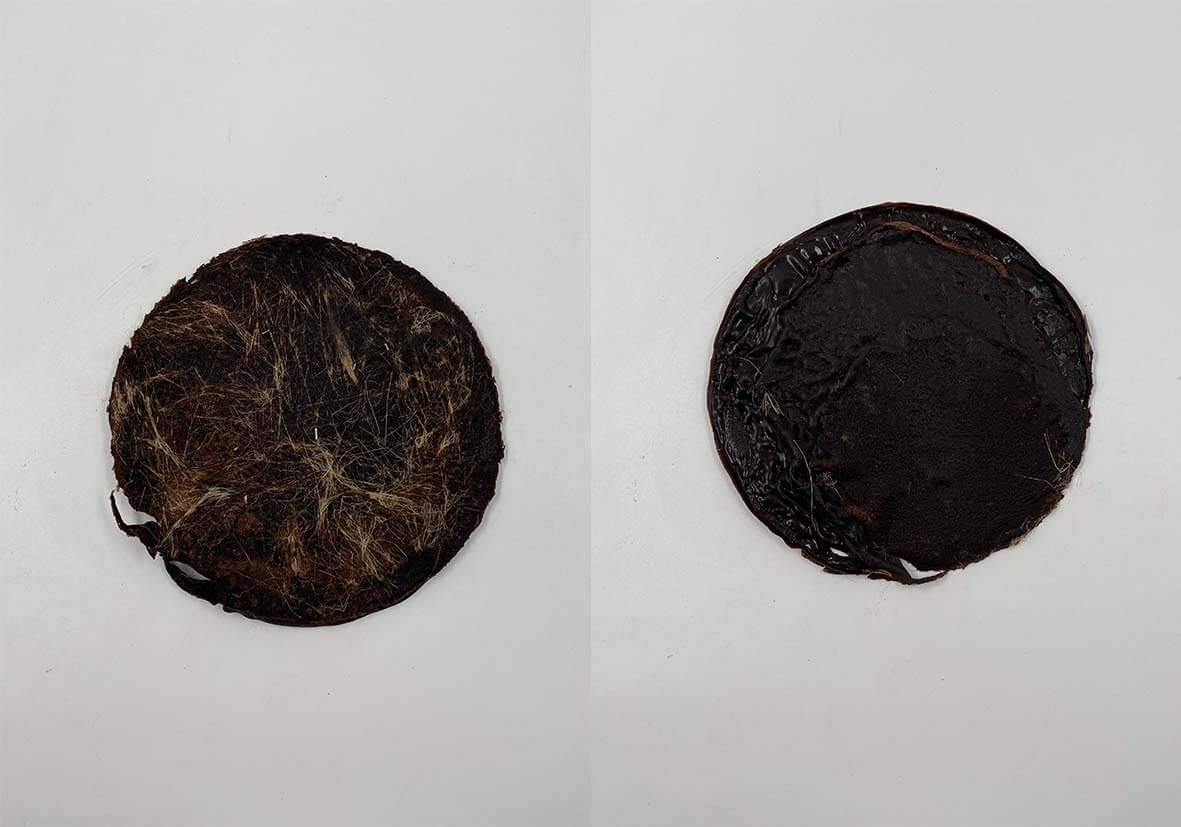
So this is my favourite sample, I lined the frame with the agar mix first, and then placed the fibres in the middle, a small amount and cut them really fine this time. I then poured the rest of the mix over the fibres so they would not be visible. I am very happy with this outcome and want to make the large fabric from it. I also want to experiment more with adding different essential oils for wellbeing properties for the wearer, and to also explore with scent more as this is so powerful. I will be developing this further as I develop biomaterials more back home. I also want to experiment with wether fibres are neccessary to make the fabric a wearable fibre. I also use a large amount of natural dyes at home mainly from foraging locally. I want to try and make a really exciting colour pallete using the waste dye water from each my next collection. I also want to experiment with different fillers.
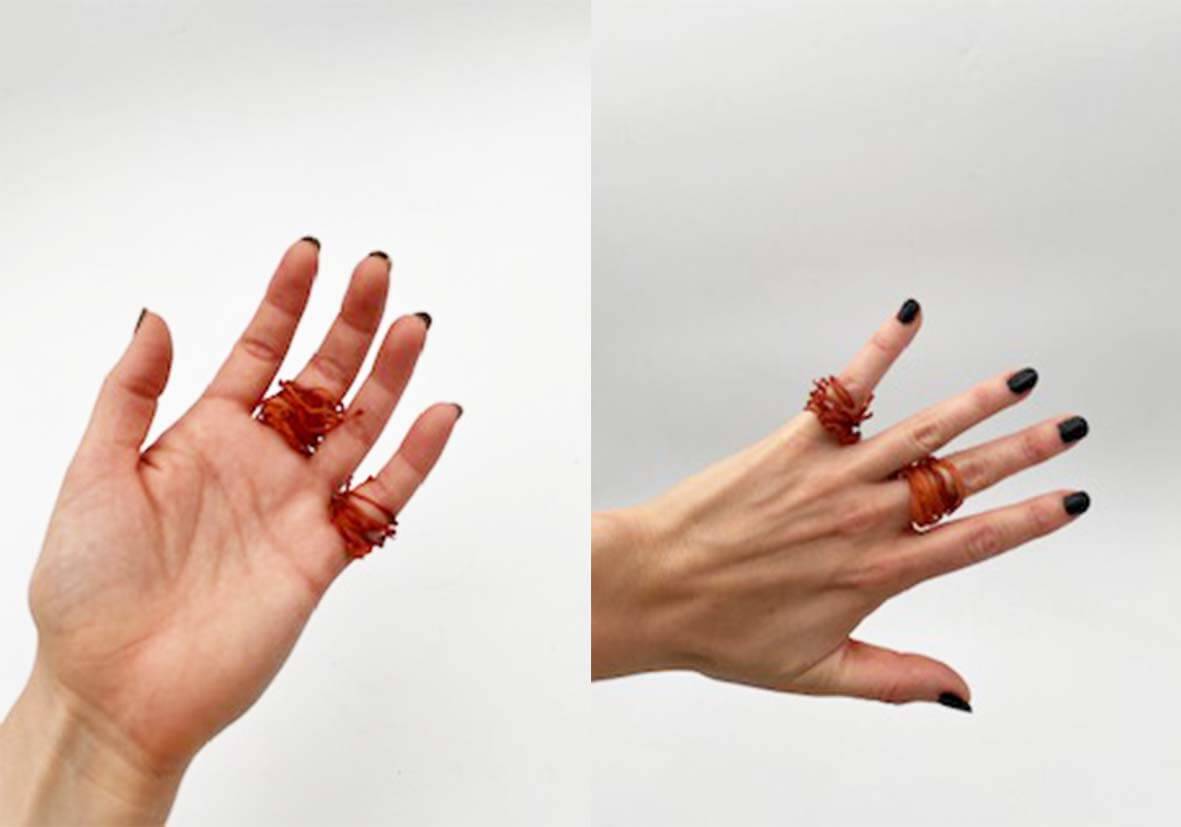
I also played around with the mixture, using a syringe to take the rest of the solution, pouring it into a calcium chloride jug. It creates a wiggly worm type thing. These strings can be stetched out and used for crochet when wet, something I want to experiment with back at home. In the dehydrator I found they dried out really quickly, so I think I would dry them out naturally next time to get better results. However I managed to make some rings out of them!
KOMBUCHA
PINE RESIN
Research
LOTS MORE RESEARCH TO ADD