02. Digital bodies
For me, as a fashion designer, studying human body is a part of it, it acts as a canvas to pour my imagination on. This week is about exploring human body and representing it as an art form, learning and exploring new tools and digital softwares needed for that. Digital bodies explores new digital tools that complement hand tools in order to design, represent, make and modify the human figure that can then be used as a canvas for creation, it gives a lot of space for customisation and supports making necessary tools locally.
Research
For this week's assignment I wanted to explore and celebrate feminity, to depict the delicate details of human facial features. The inspiration from the same comes from the mythical female characters who posses power and strength, so I decided to make a female head model with headgear.
3D Scanning
So, we started with 3D scanning,
What is 3D Scanning?
3D Laser Scanning is a non-contact, non-destructive technology that digitally captures the shape of physical objects using a line of laser light. 3D laser scanners create “point clouds” of data from the surface of an object. In other words, 3D laser scanning is a way to capture a physical object’s exact size and shape into the computer world as a digital 3-dimensional representation.
3D laser scanners measure fine details and capture free-form shapes to quickly generate highly accurate point clouds. 3D laser scanning is ideally suited to the measurement and inspection of contoured surfaces and complex geometries which require massive amounts of data for their accurate description and where doing this is impractical with the use of traditional measurement methods or a touch probe - [www.laserdesign.com]
We were supposed to scan ourselves and then edit the model on rhino, but unfortunately I was not at the FabLab yet so I completed my assignment after, to understand how it works we used a handy 3D scanner and tried scanning a bottle. For this we used a software called Skanect. For smaller objects like a bottle, we just rotate the scanner around the object at a steady pace, but for scanning bigger objects or human body, we can use Kuka (A robotic arm at IAAC) as it would move at a more regular pace and would be more steady.
How to use 3D scanner?
Step 1: Setup What you will need:
-
computer
-
(Skanect software)[http://skanect.manctl.com/]
-
Microsoft Kinect This device reads color with its camera and reads depth with the infrared sensor.
-
Lights Lighting is very important in order to get an even colored scan.
-
Spinning platform (optional) This allows the subject to rotate making scanning much easier, Here at Fabricademy,Barcelona we used a robotic arm called kuka but as we were not there we did it later on by our hands keeping it steady as much as possible.
Step 2: Software Settings Open Skanect / Go to NEW / Make sure your settings match those in the picture (You can also make a bounding box) Press START
Step 3: Workspace A screen will come up showing the bounding box in the middle. The infrared and video images are on the right.
Step 4: Place your object Have your object onto the platform. Make sure the lighting is consistent on your subject.
Step 5: Record Hold your Kinect up level with the subject's height and a few steps back from the platform. Press RECORD. The Kinect will begin recorded the depth (red) and the color (green).
Step 6: Spin Around Once you have done one full sweep of your subject head to toe, You can walk around your model or use any manual spinning base of your choice.
Step 7: Lining It Up As you are scanning be sure that you are getting a high frame rate around 18-24 frames. If you get below 18 you have to move your Kinect faster.
Step 8: Exporting Model To export it to your computer go to SHARE and the export menu will open with a LOCAL option. Under LOCAL go to EXPORT MODEL and use the setting seen in the picture to export for printing.
Inspiration
 My inspiration comes from the strong female mythological characters, I wanted to showcase strength and power alongside delicate female facial features through the model.
State of the art
Creating Digital model
Rhinoceros3D
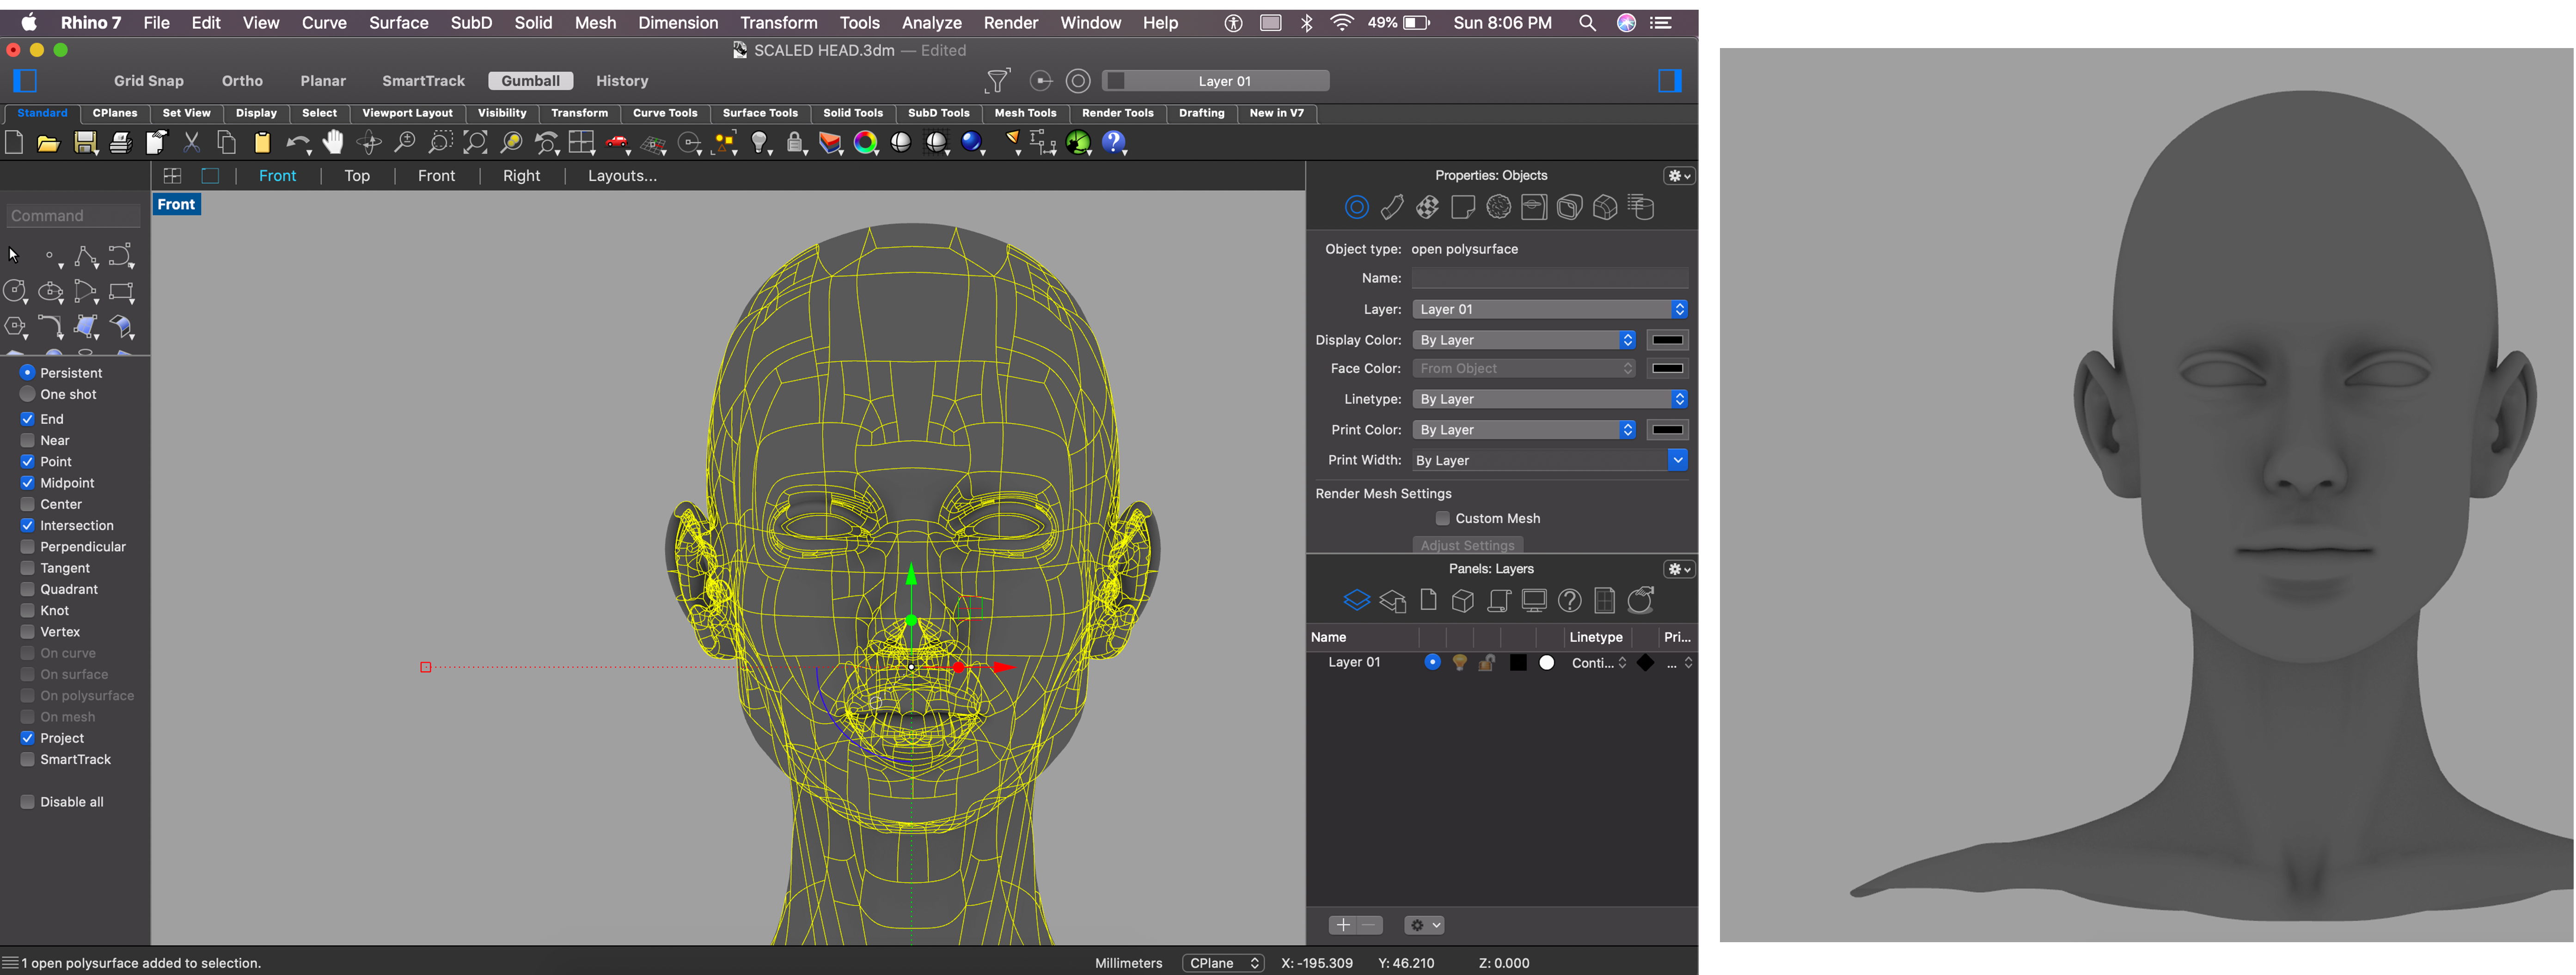
I downloaded a similar kind of 3D model from GrabCad or we can also find plenty of human figues or heads on MakeHuman Once I found a human model with the features I wanted on GrabCad, I exported it as a .stl file into Rhinoceros3D. The result in Rhinoceros3D is a mesh structure, which does not exactly work like a solid object. Thus, it must be specified to the software by mentioning "Mesh" in the command.
BooleanDifference    -->    MeshBooleanDifference
Trim                 -->    MeshTrim
This was the first 3d software I was using, we learnt how to draw shapes in the different views (front, side, top and perspective)the difference between lines, closed lines, 2D surfaces, 3D objects and meshes and how to change from one to another. We also learnt how to switch from one to another (3D objects from a 2D plan surface or a closed line, mesh to a solid) and how to modify these objects by trimming them, capping them or merging them together.
Slicer for fusion 360
Slicer for Fusion is a software turning 3D models into patterns cuttable in a laser cutter. The different patterns available are stacked slices, interlocked slices, radial slices or folded pannels.
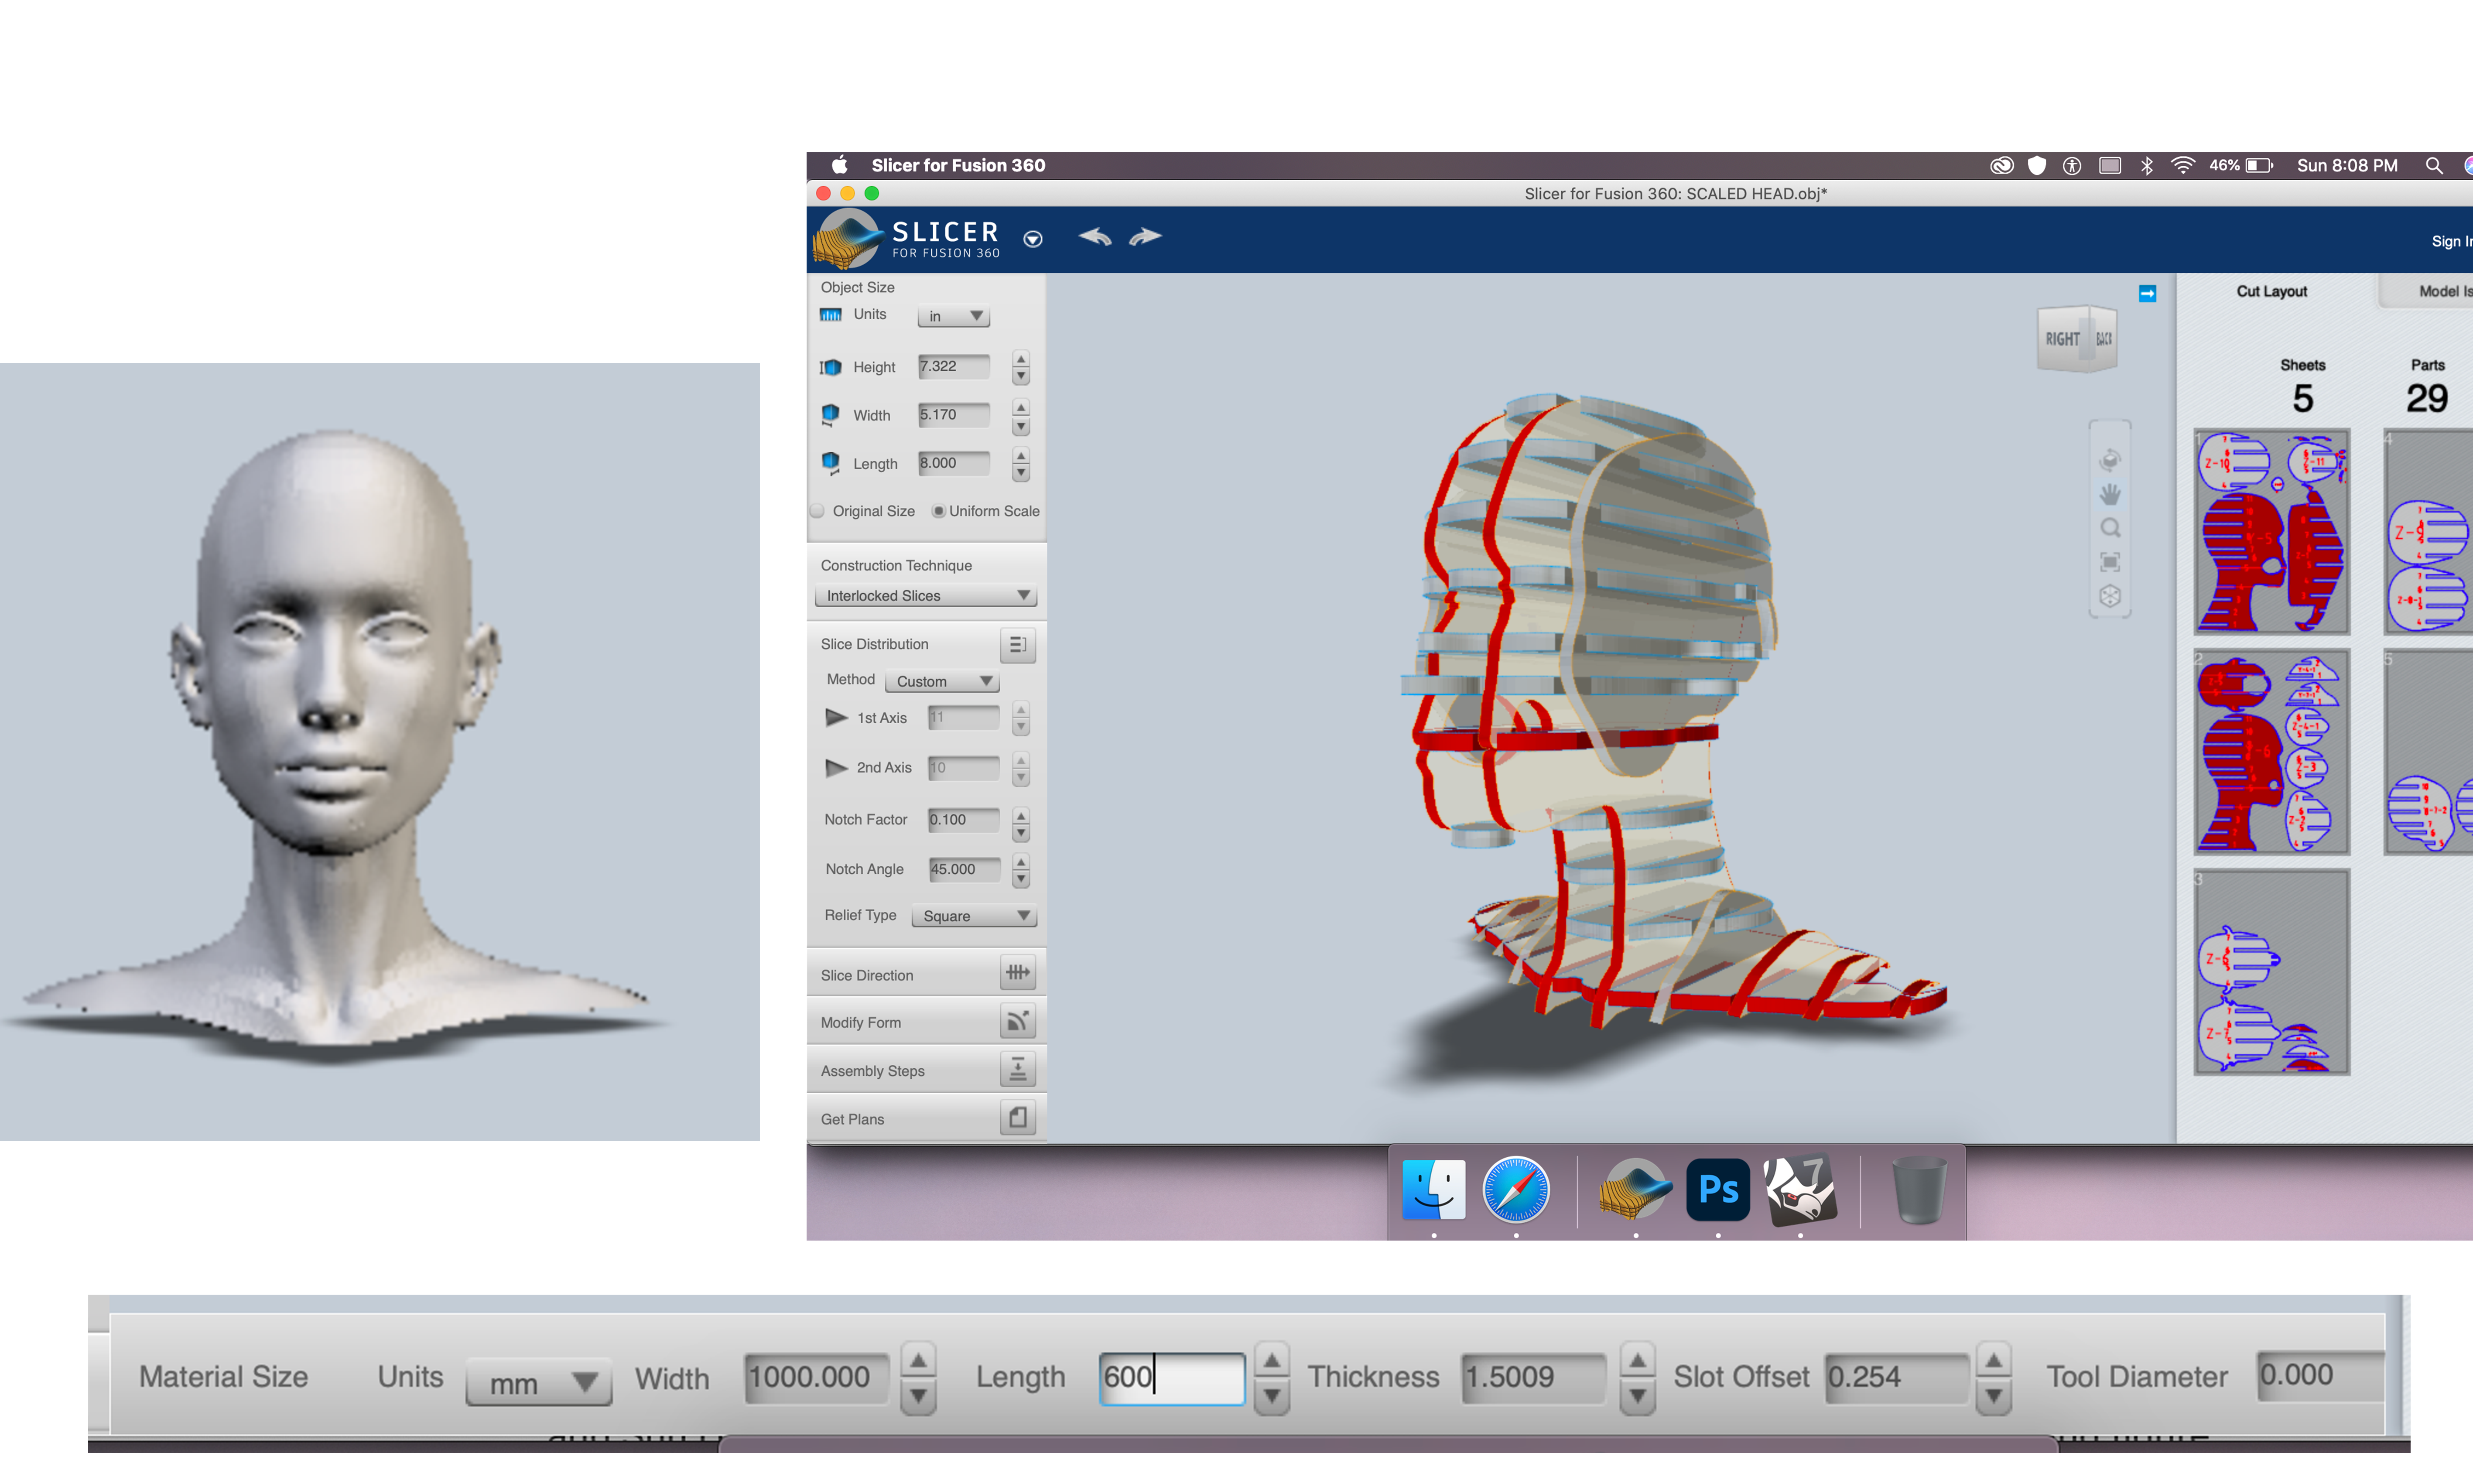 Before using it, I made sure to put the information of the laser cutter - size and thickness of the material, Dimensions of the laser cutting bed(See the dialogue box in the bottom of the picture above),verify the scale applied was the same as the one I chose on Rhinoceros3D and only then could apply the desired pattern to the model.
 Under the 'construction technique' dialogue box we can change the pattern of mannequinn, I wanted to have a waffle pattern (interlocked pattern).
Under the 'slice distribution' dialogue box we can change the number of pieces in each axis, type of relief and number and factor of notches.
Under the 'slice direction' dialogue box we can change the direction of slices by rotating the axis around the model, here I kept it as it is.
Under the 'construction technique' dialogue box we can change the pattern of mannequinn, I wanted to have a waffle pattern (interlocked pattern).
Under the 'slice distribution' dialogue box we can change the number of pieces in each axis, type of relief and number and factor of notches.
Under the 'slice direction' dialogue box we can change the direction of slices by rotating the axis around the model, here I kept it as it is.
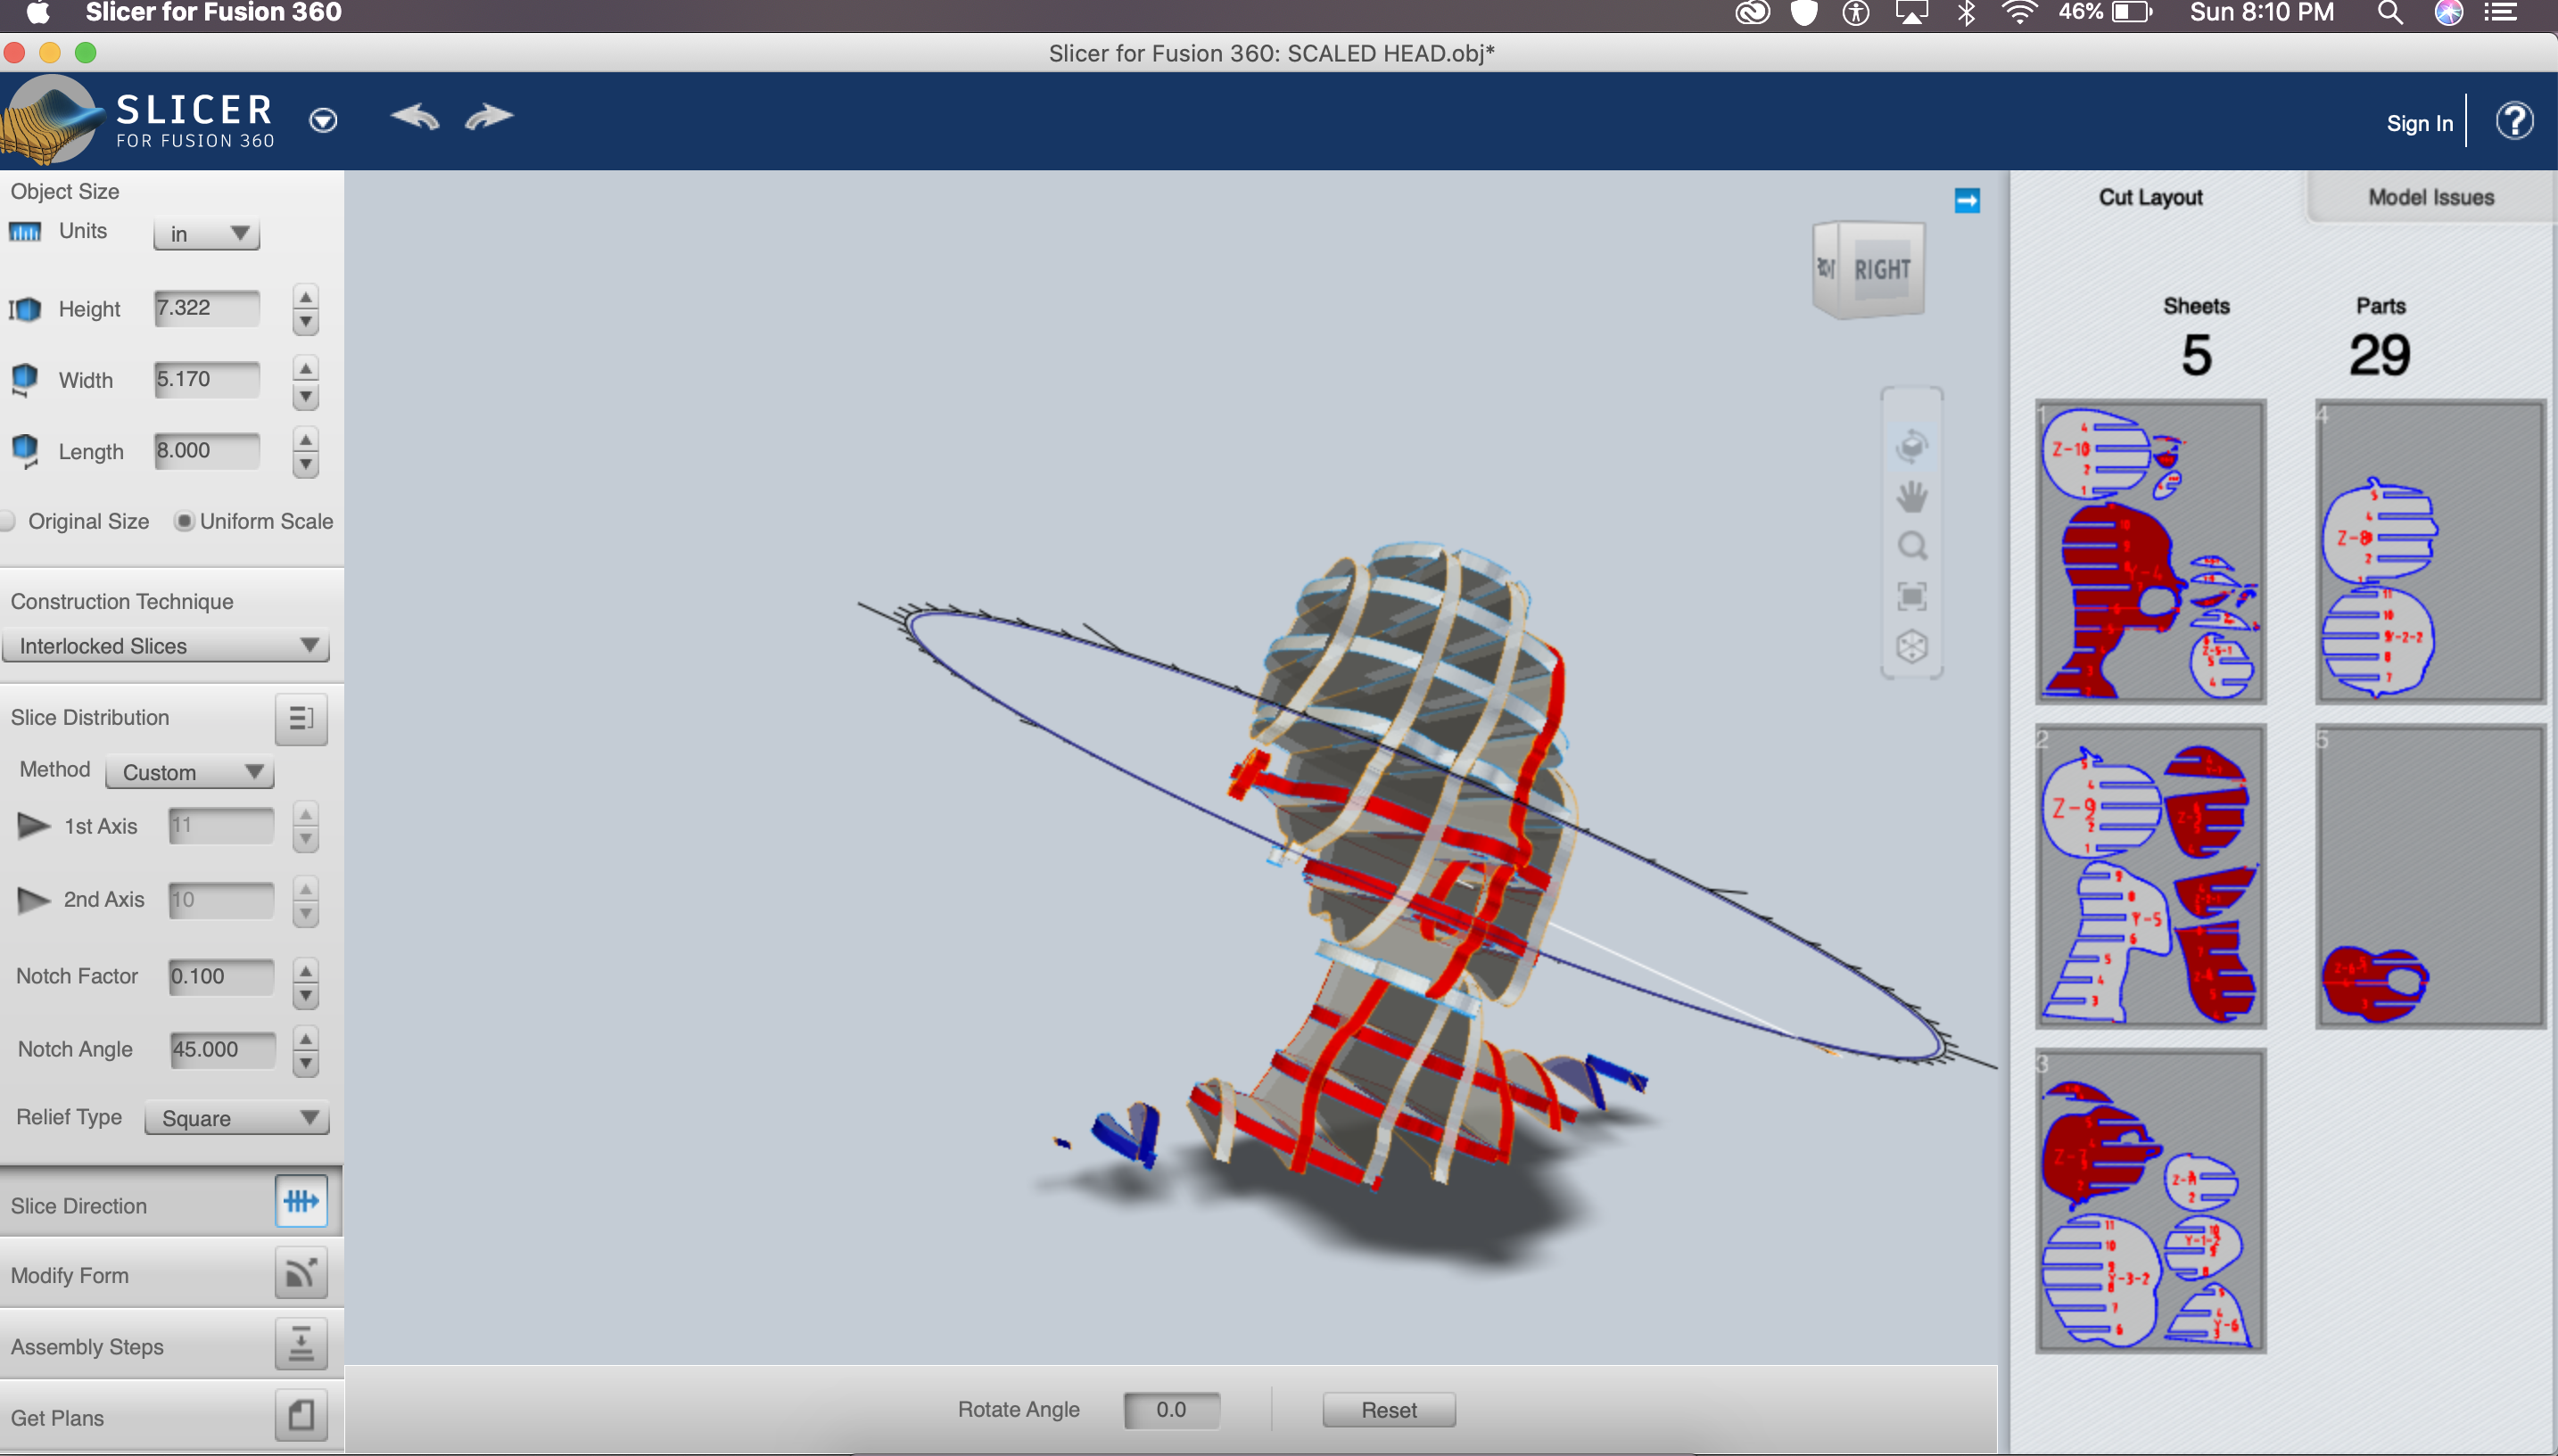
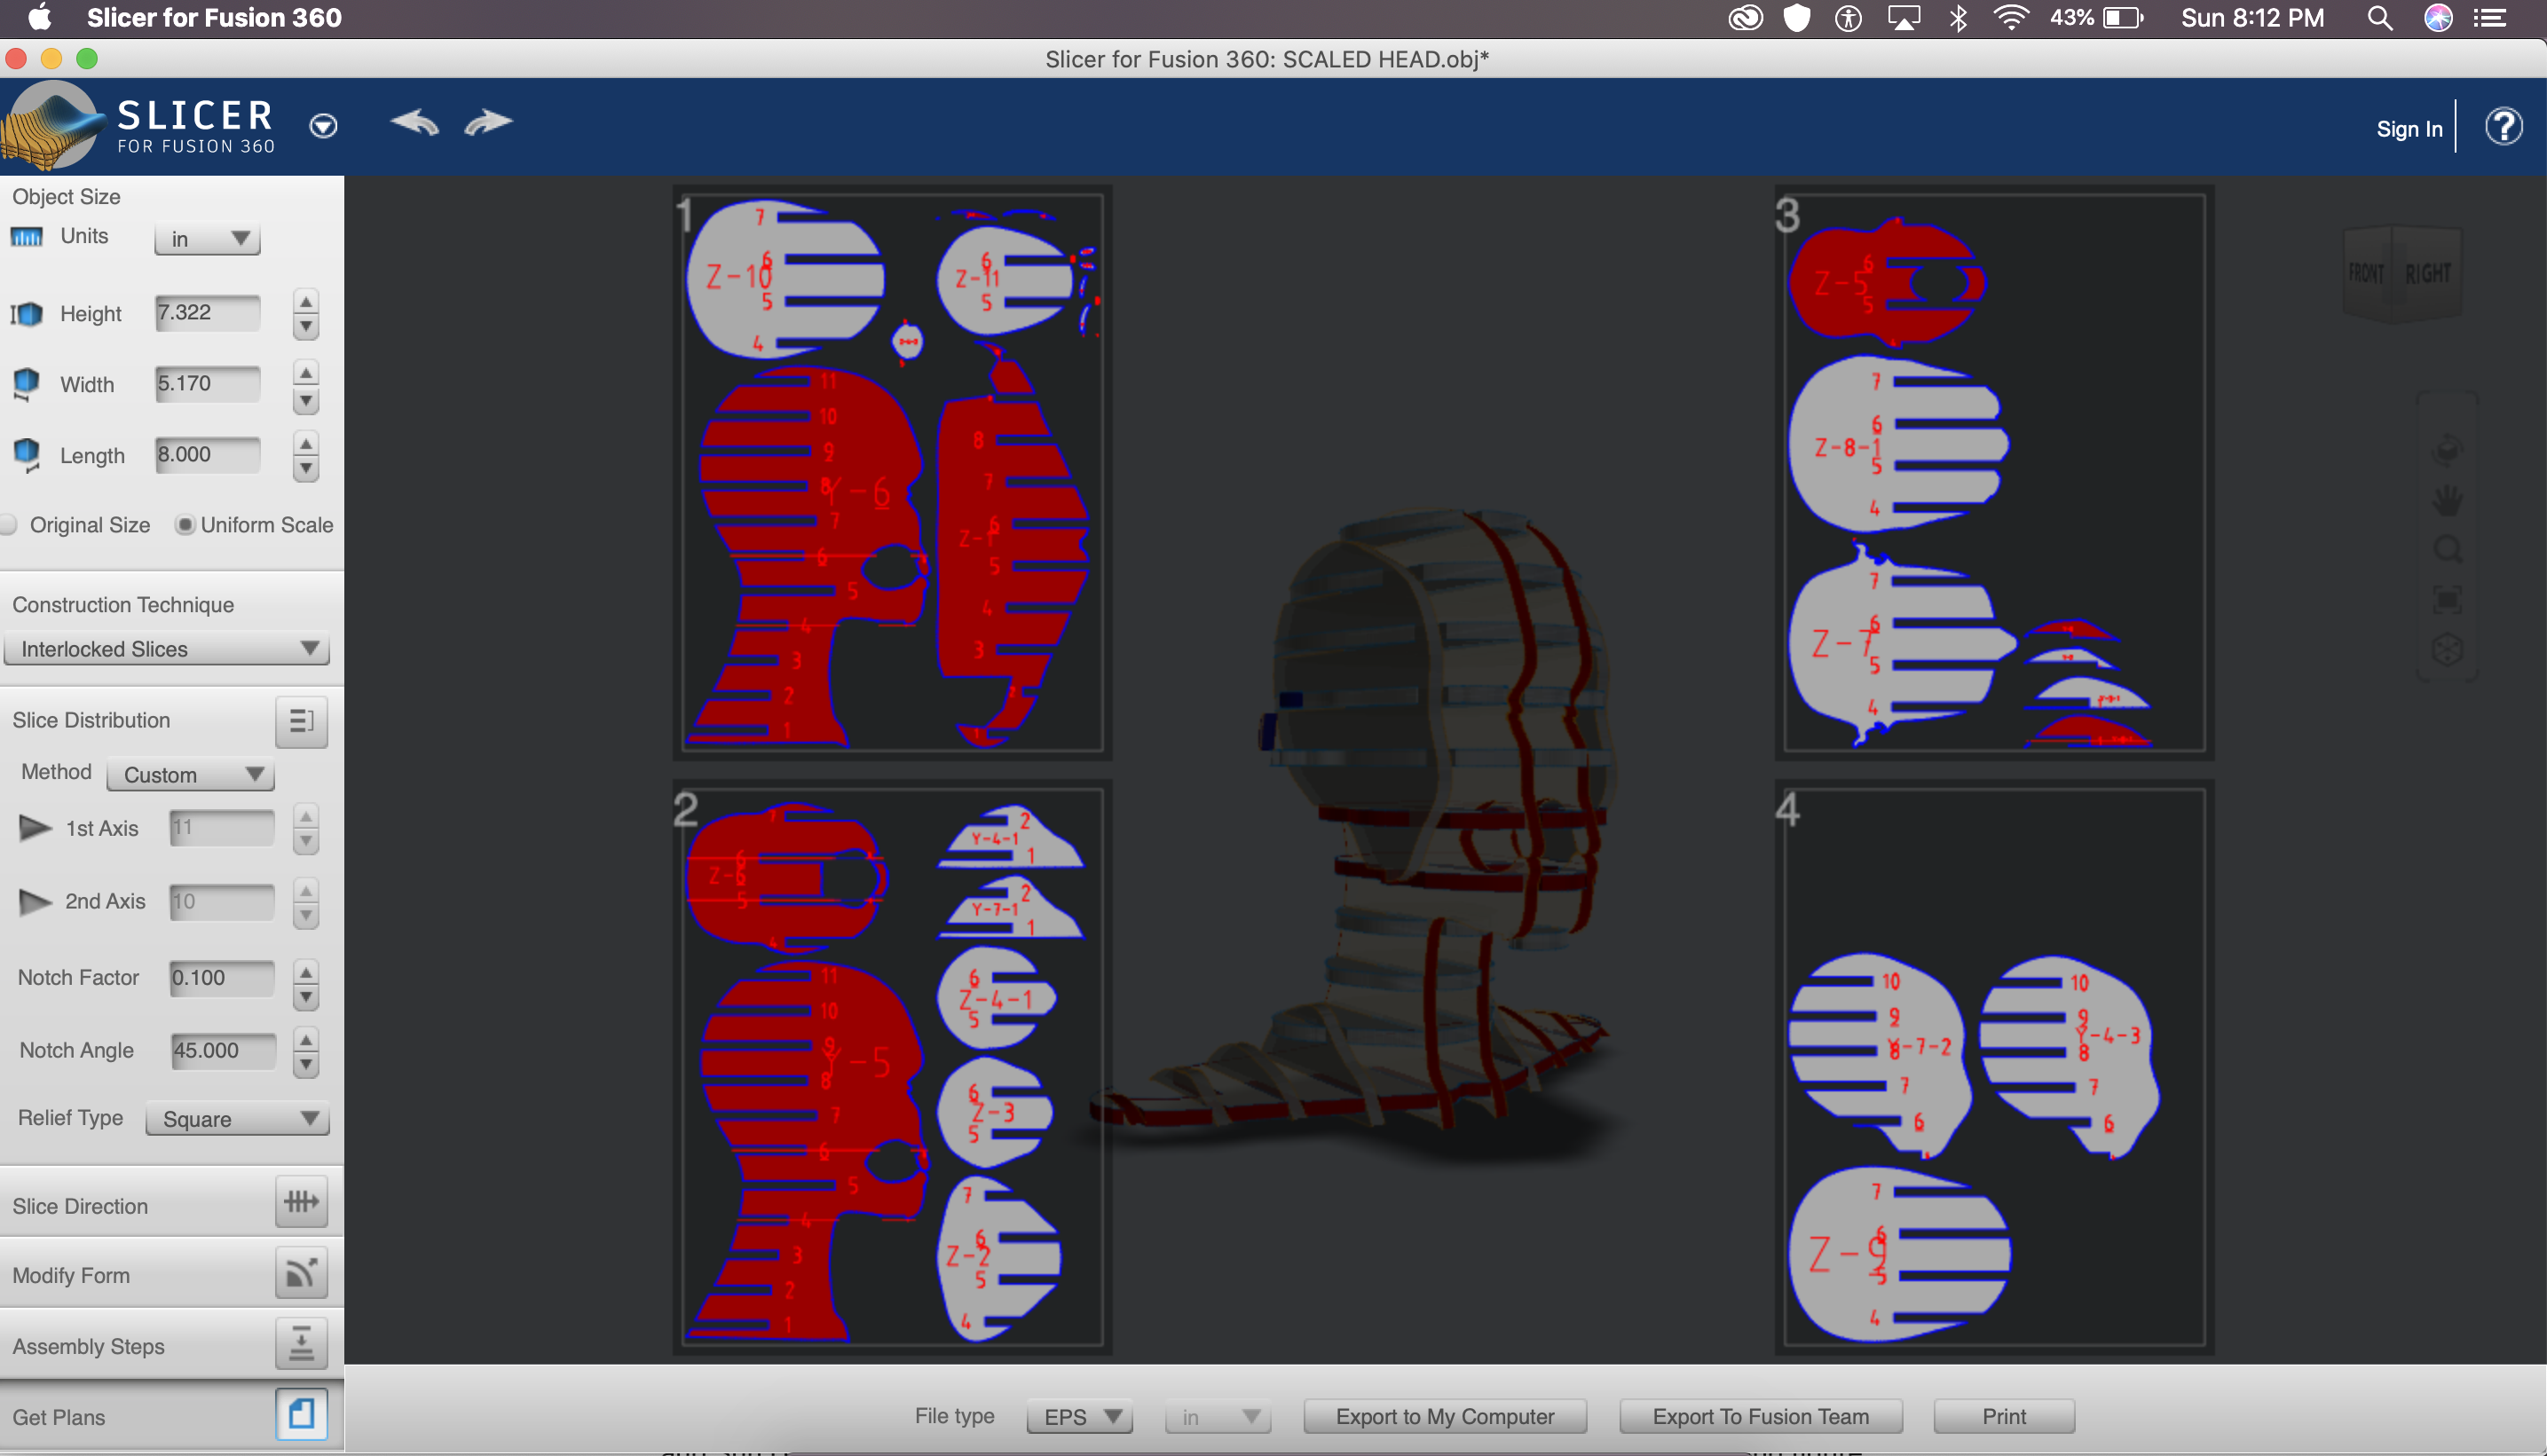 Under the 'Get Plans' dialogue box you can get 2D plan of how it will cut the slices on laser cutter, each piece with assembly number on it.
In the plan for this model, there are many red errors showing, these are the faulty parts which needs to. be fixed before laser cutting otherwise the model would not get assembled properly.
We can adjust this on slicer by changing the number of sheets or adjusting the sheet placement manually. Unfortunately, I did try all of it and still I had some faulty parts, which then I changed manually on Rhinoceros3D.
Under the 'Get Plans' dialogue box you can get 2D plan of how it will cut the slices on laser cutter, each piece with assembly number on it.
In the plan for this model, there are many red errors showing, these are the faulty parts which needs to. be fixed before laser cutting otherwise the model would not get assembled properly.
We can adjust this on slicer by changing the number of sheets or adjusting the sheet placement manually. Unfortunately, I did try all of it and still I had some faulty parts, which then I changed manually on Rhinoceros3D.
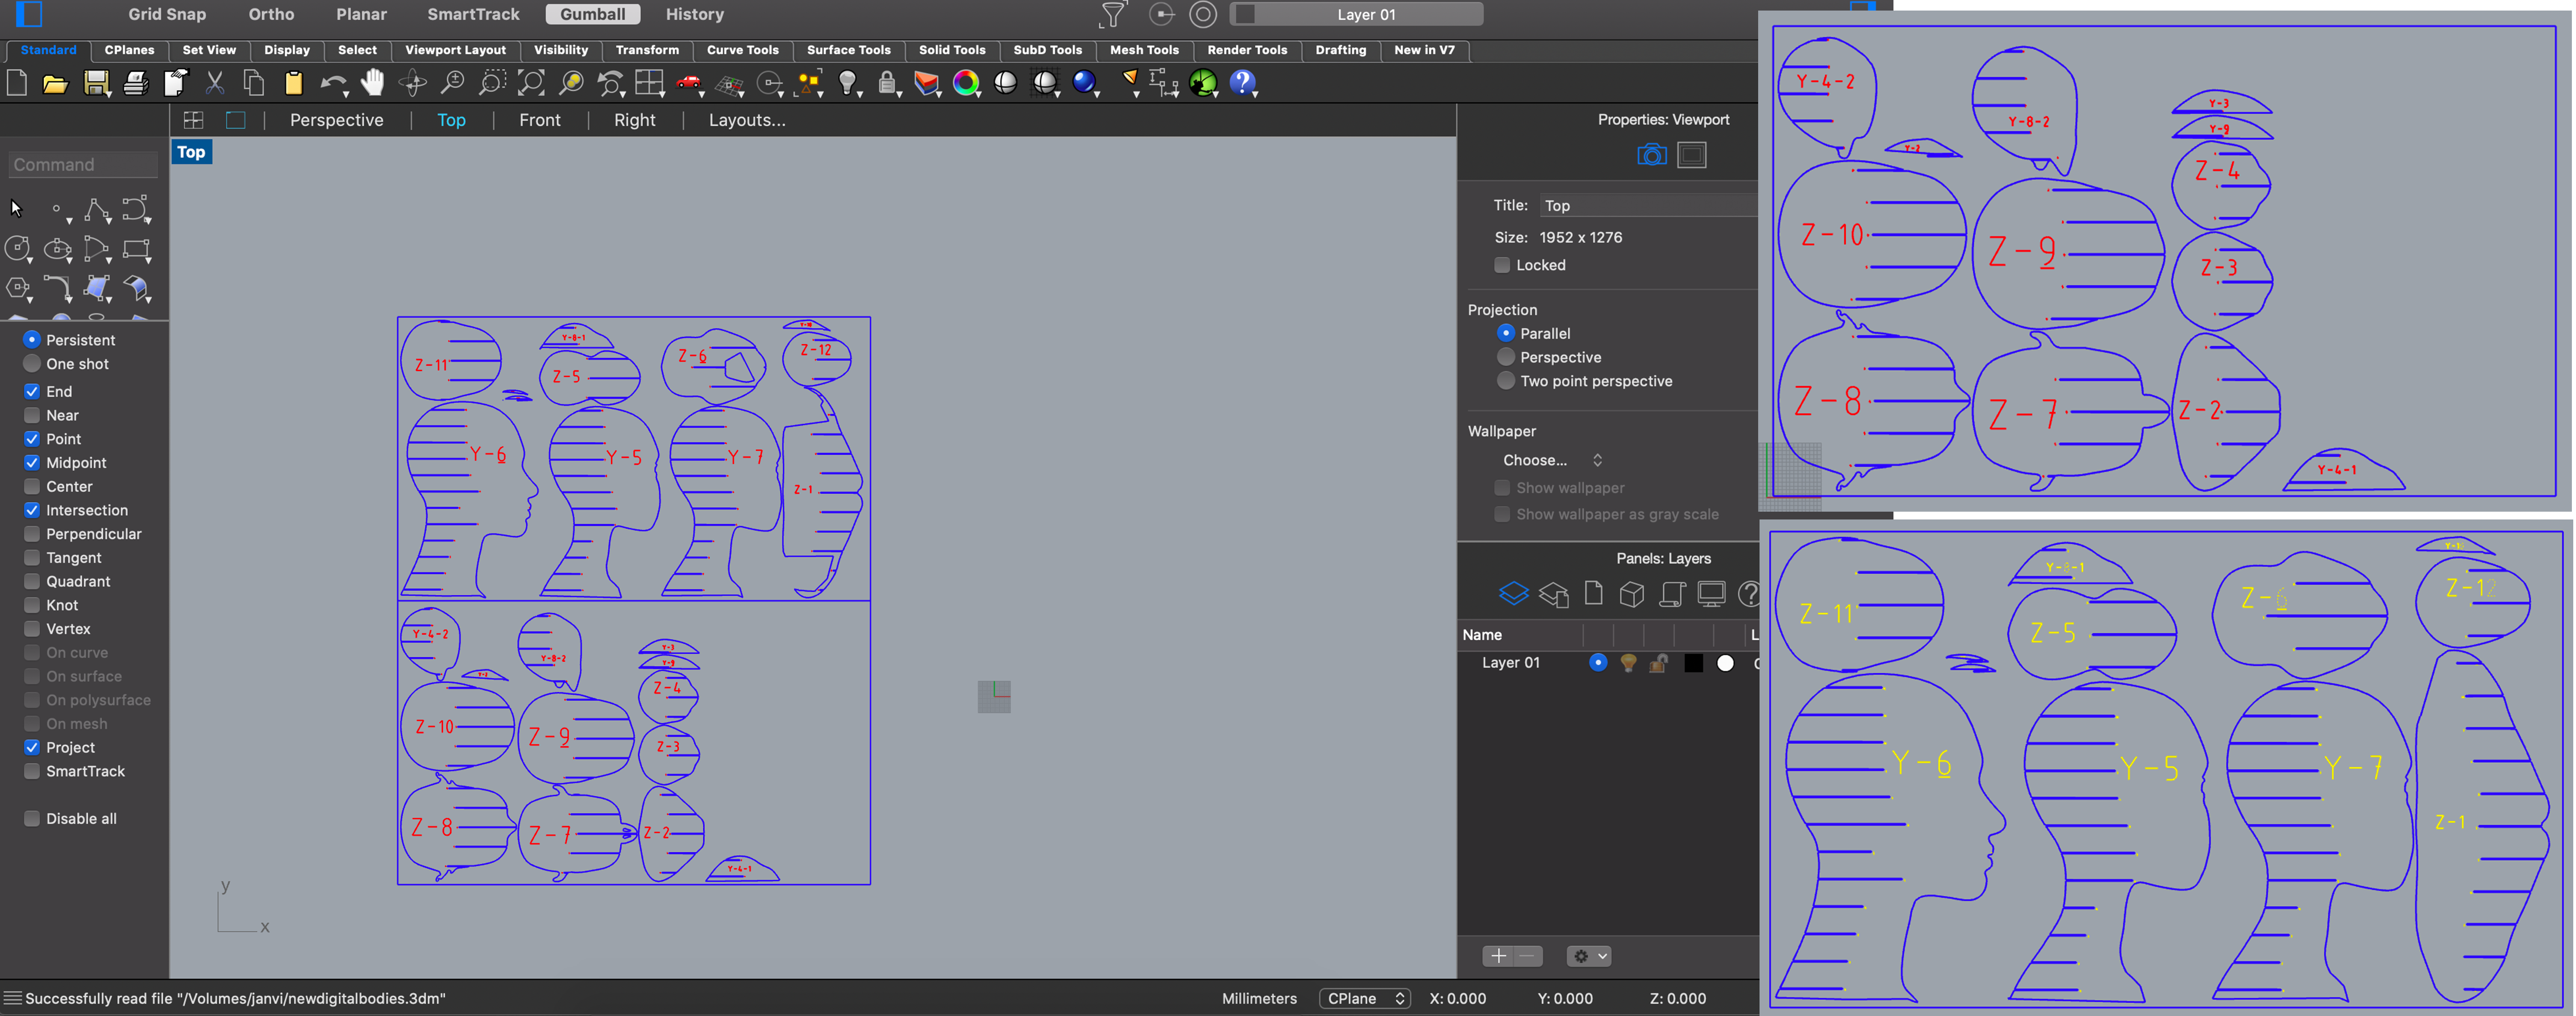 In the picture above, left side is the assembly plan imported from slicer, right side is the manually fixed assembly plan.
Laser cutting
How to use a laser cutting machine -
- Focus the laser manually with the little plastic tool
- Make sure the air extraction is on
- Make sure the board you are cutting is flat and not curved. If it is, make sure it is curved on the edges and not in the middle and fix it with paper tape (no fumes).
- Save files to be cut as Rhino5 files.
- 3 different operations: cutting (make sure you first cut the inner parts), engrave (same operation as cutting, just with different power), raster (pixel burnt 1 by 1, can be used to do grayscales, drawings etc).
- Hatch command: fills in black (for raster)
- Make sure your folder only has joined lines and no double lines (_SelDupl allows to identify double lines), if not the laser cutting is going to take some extra time.
- Refer to the color code to set the order of the operations.
- Command _print to send the job to the printer
- If you have vector and raster elements in your document, use “vector”.
- Make sure to use the following parameters : display color, scale 1:1, top view
On how to use a laser cutting machine, please refer to my circular fashion week's documentation.
- Plan sheets getting laser cut.
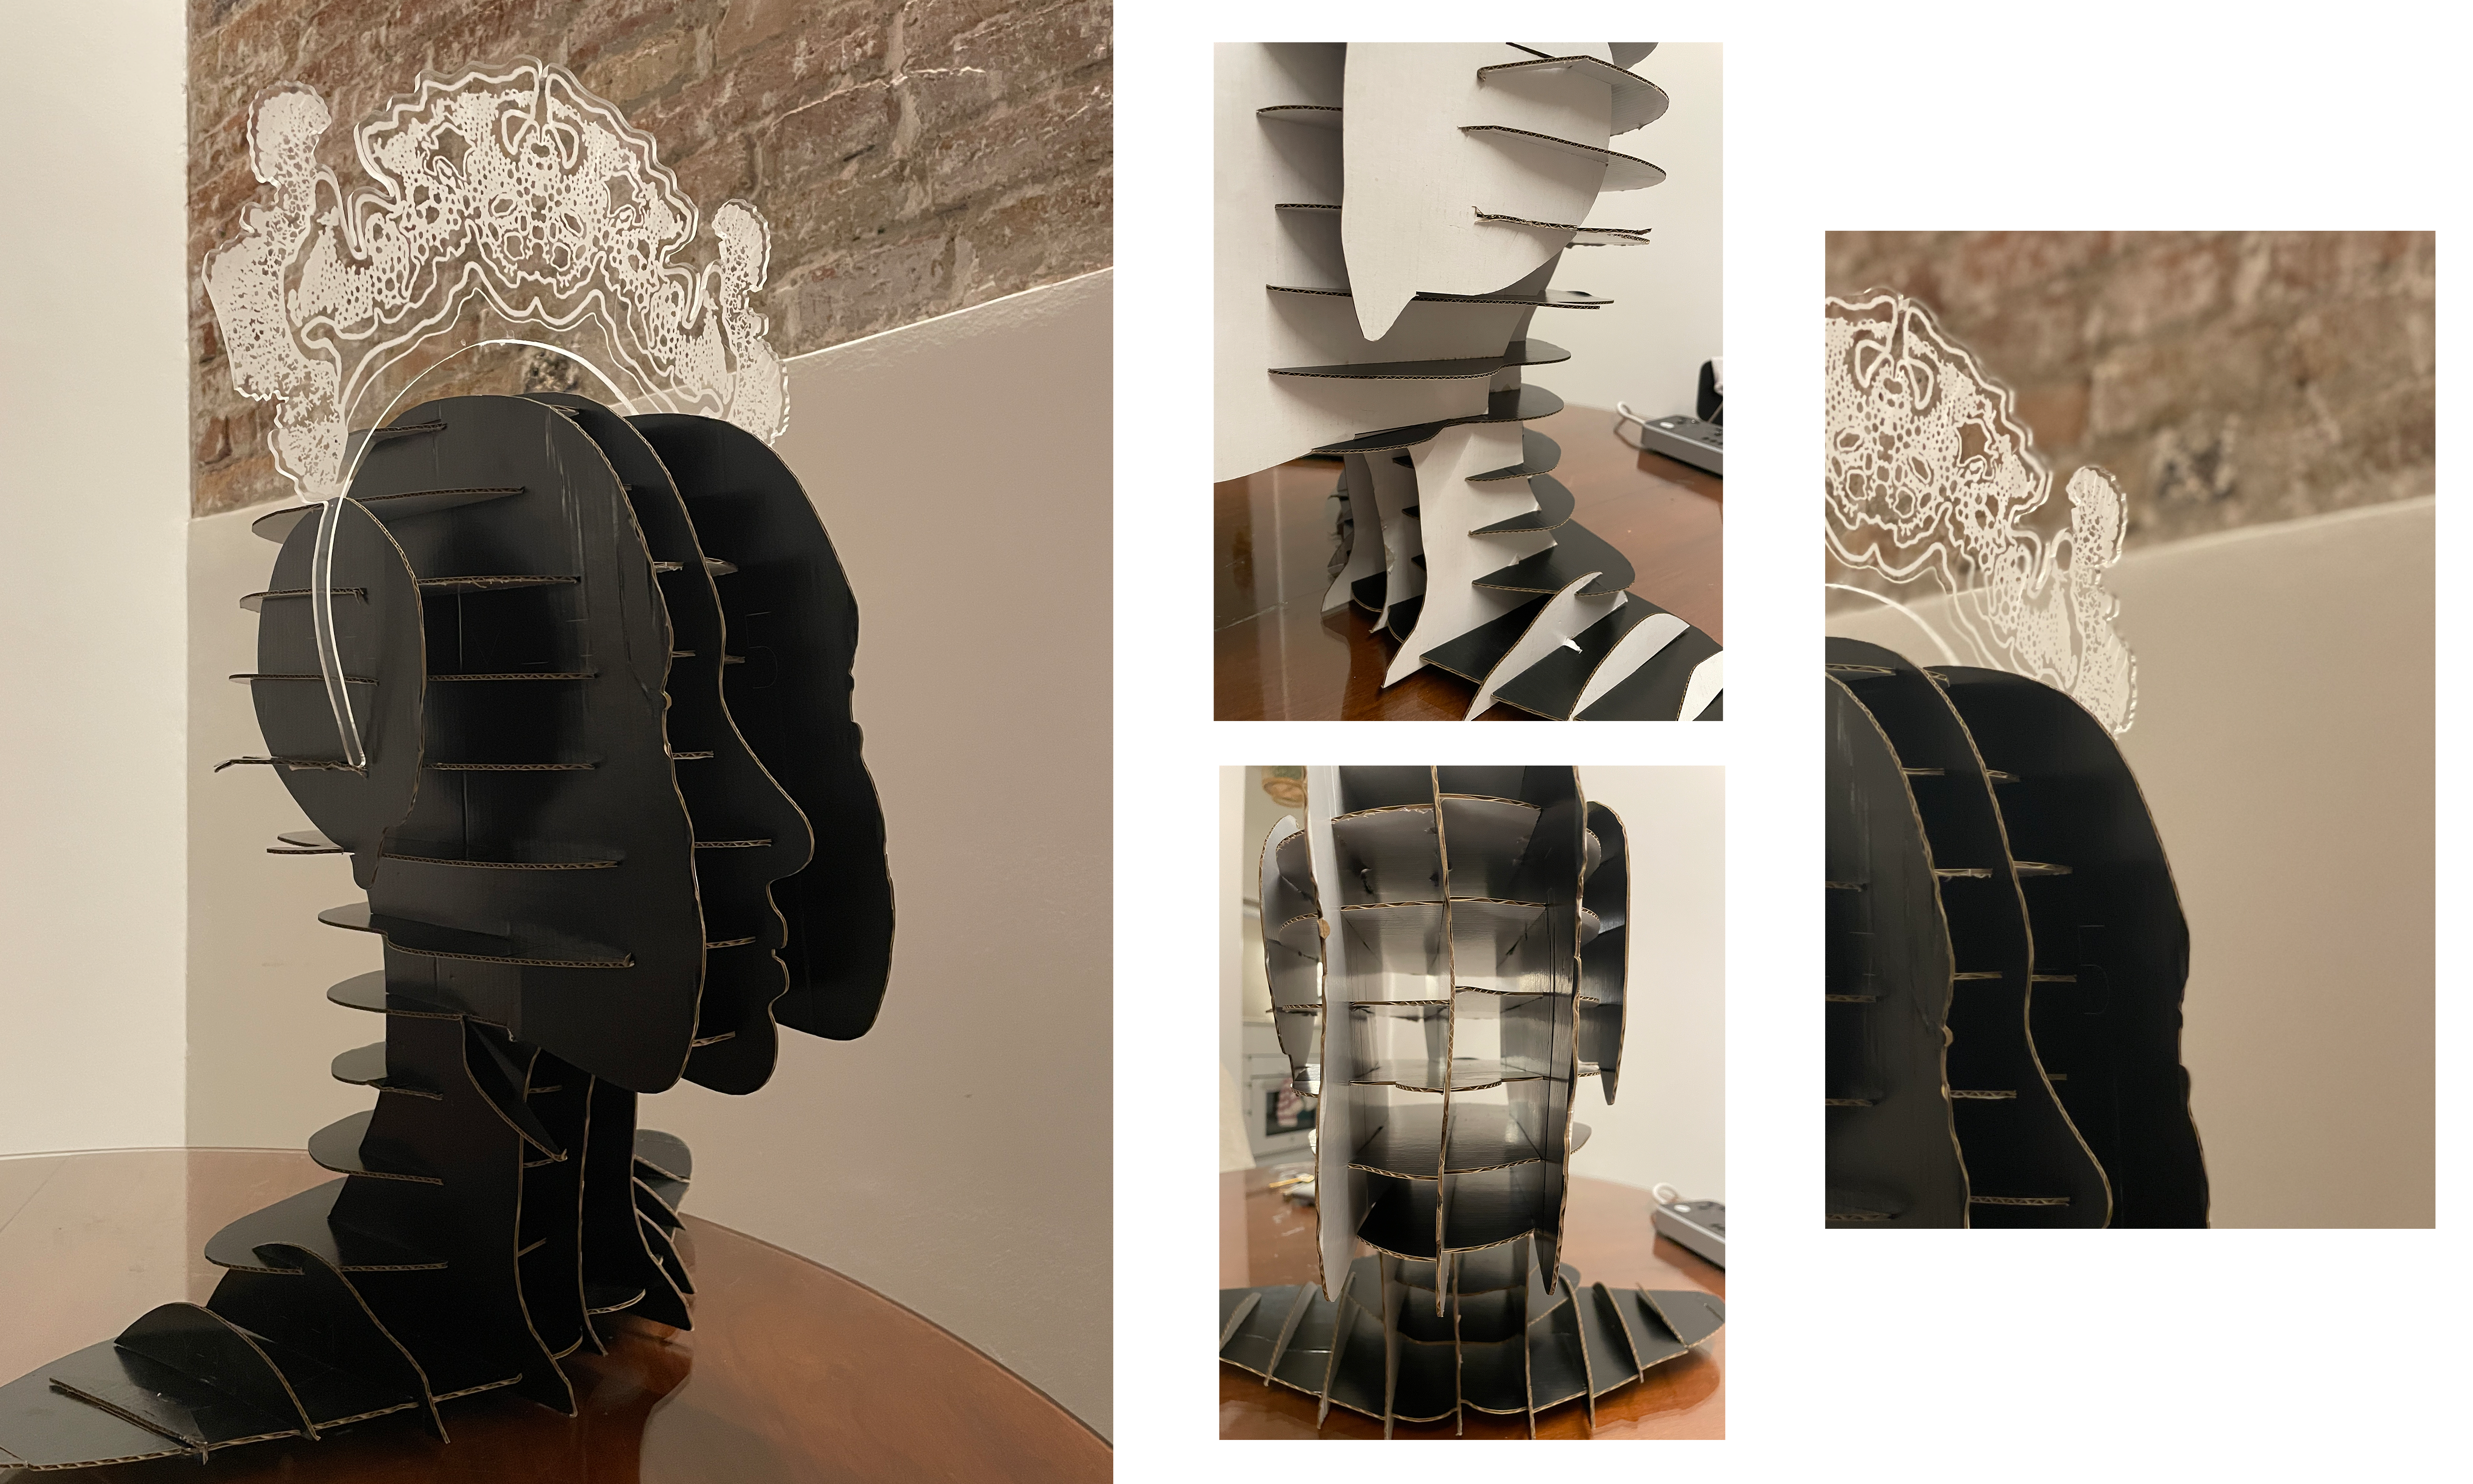
- Time lapse of me assembling the model
- The assembly steps option on slicer is like a user manuel which I refered to while assembling my model.
Final Product
Here is a downloadable file for the model